


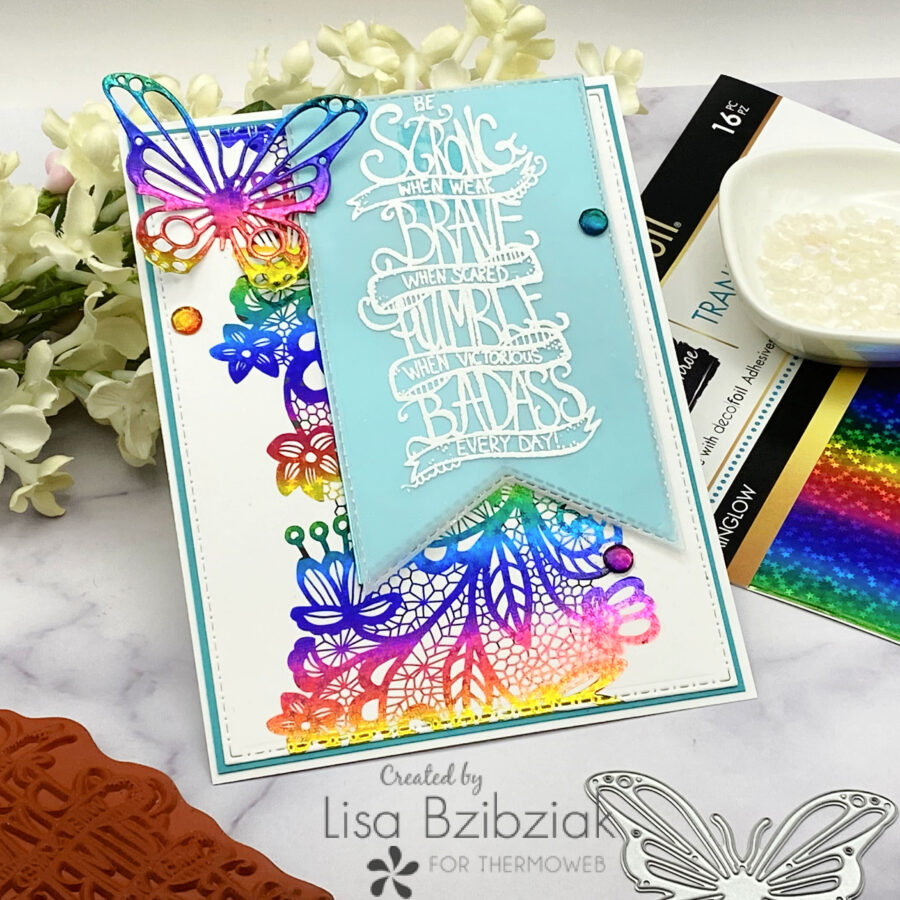
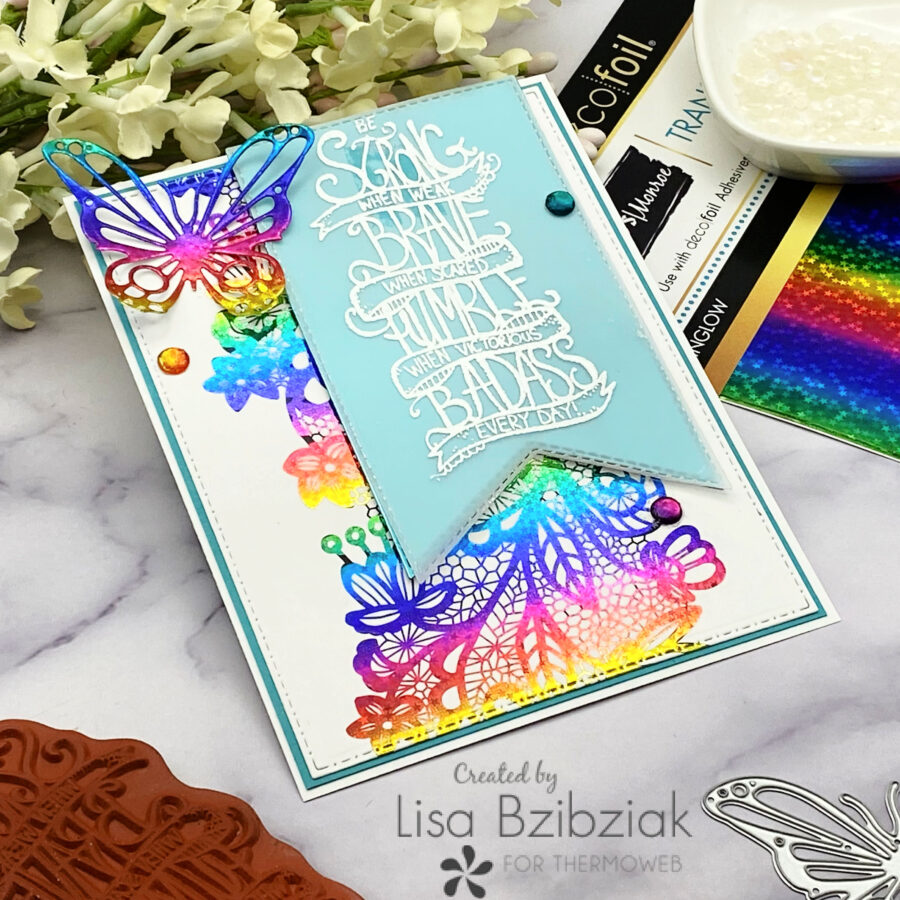
Hello! There’s a new Toner Card Front release and we’ve got some inspiration for you this week! I’ve used three different ones today and used them all with lots of gorgeous Brutus Monroe Rainglow Deco Foil! This one uses one of the new Lavish Lace card fronts!
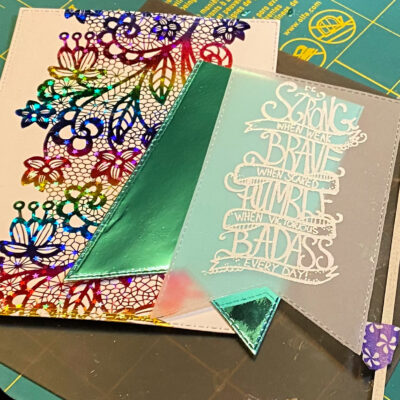
I deco foiled the card front and then cut two banners… one from heat resistant vellum and one from a solid black toner card front foiled in Turquoise Sea. I stamped that fab sentiment from Unity Stamps in Embossing Ink and heat embossed it with white embossing powder. I layered the vellum onto the foiled banner with just a little adhesive at the top and then popped them both up onto the card front.

I die cut one of the butterflies from the Brutus Monroe Magical Monarch Die Set out of a Black Toner Card Front foiled in Rainglow Foil and then added it to the front.
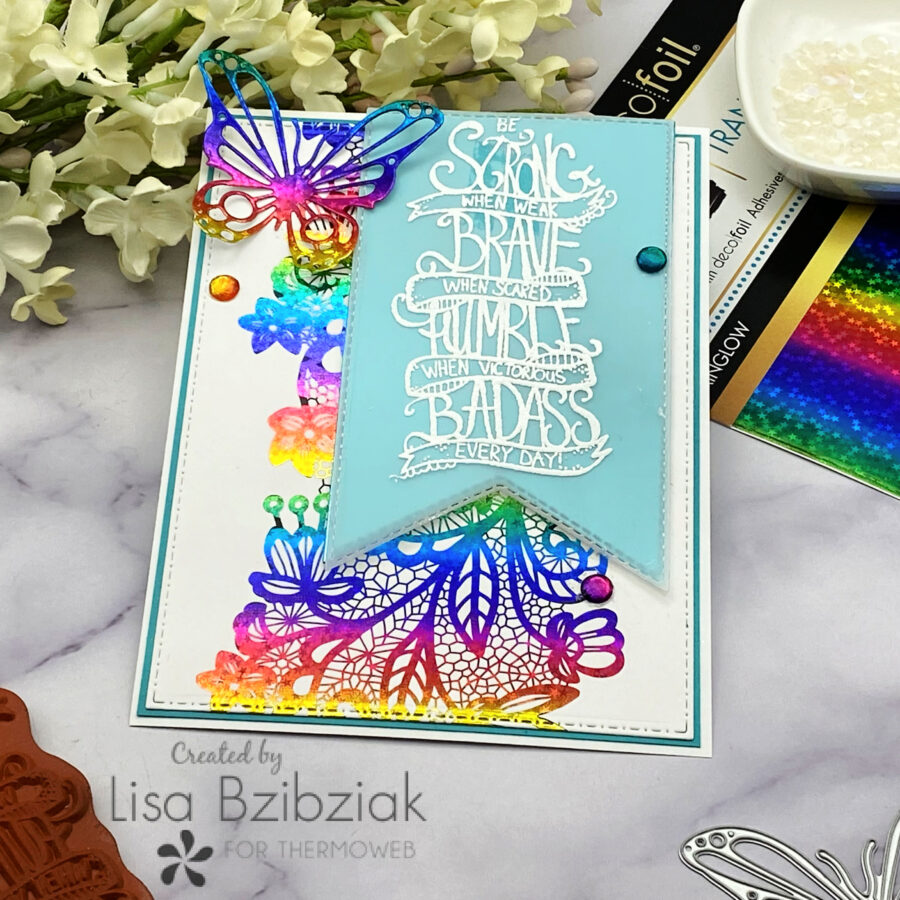
I just love these Lavish Lace card fronts! They are so beautiful and extra love it in the rainbow colors. AND did you notice, I used a hole punch to cut some holes from leftover scraps of the rainbow foiled Solid Black Toner Card Front, adhered them to the card and then added clear liquid glue over the top to use as gems!
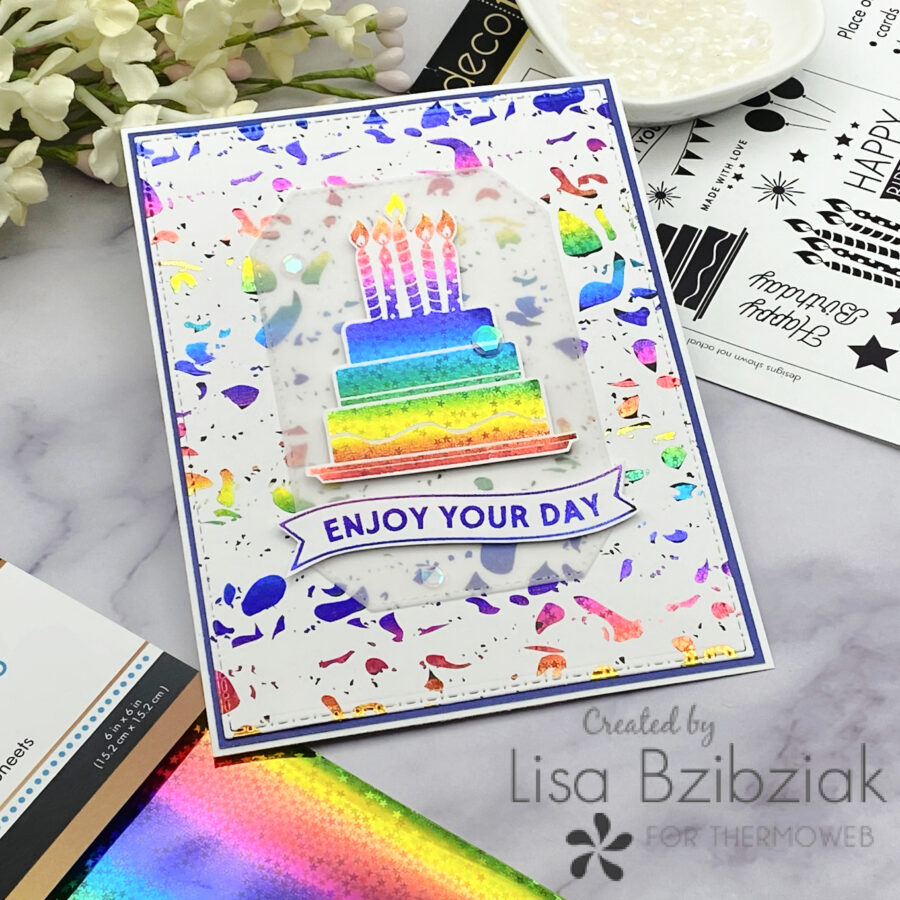
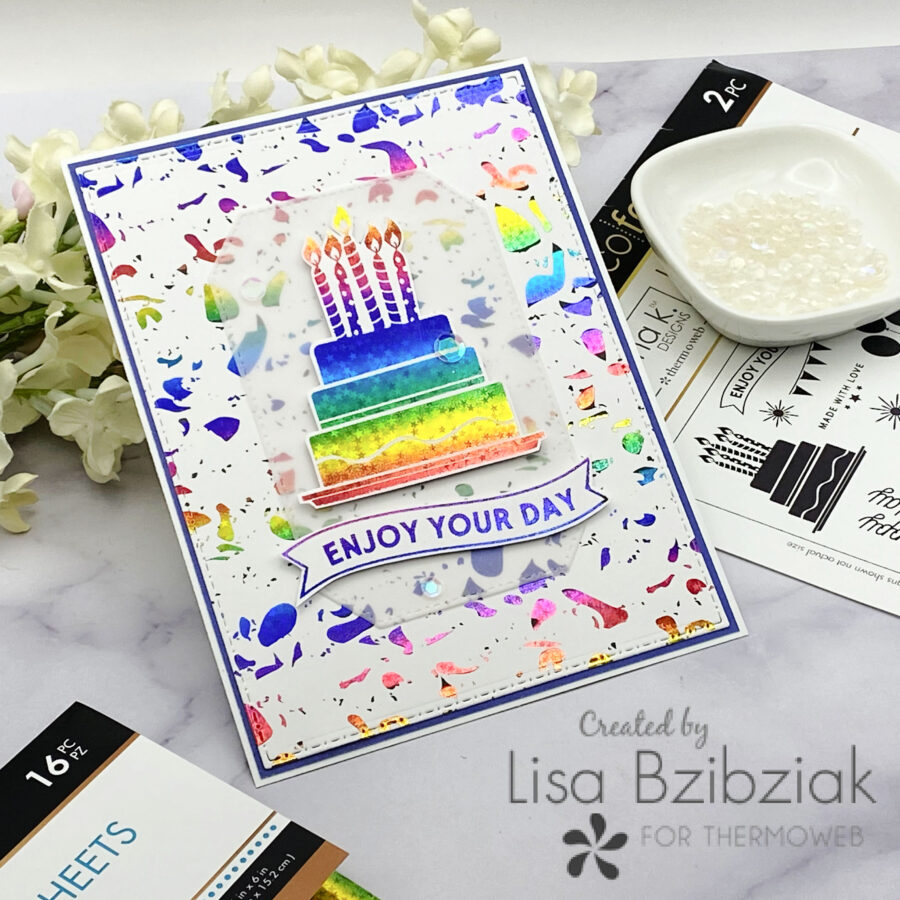
Next I used this one from the Design Haven pack! I thought this design looked a little like confetti so I thought it would make a fun birthday card or any celebration really!
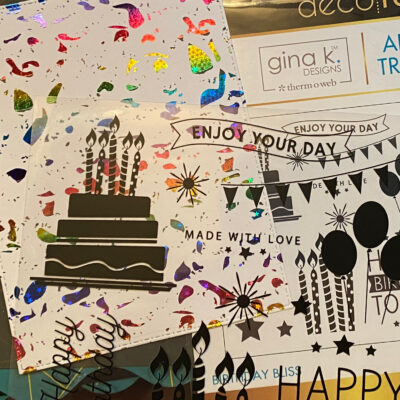
The Gina K Designs Birthday Bliss Adhesive Transfers were perfect for this one!

The Adhesive Transfers are so easy to use and no heat is required! I grabbed a piece of white card stock, peeled the backing from the transfer and laid it onto the cardstock. I added a cardstock shim over the top and ran it through my die cutting machine and then slowly peeled back the second layer leaving the adhesive on the cardstock.
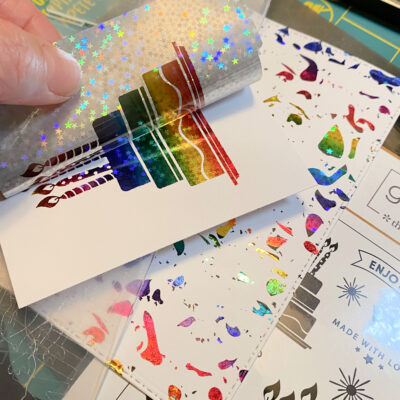
Then I ran it through one more time after adding some of the Rainglow Deco Foil over the top of the adhesive. I lined up the colors of the rainbow so that the yellow was over the candle flames. I fussy cut the cake out. I also ran the banner sentiment through and lined the letters up with the blue/purple strip on the foil because I knew it would be darker and easy to read.

I cut a vellum panel for underneath my other elements to give just a slight cover and to separate them from the background. I love using vellum so that more of that beautiful rainbow background shows through. I popped the image and sentiment up over the vellum.
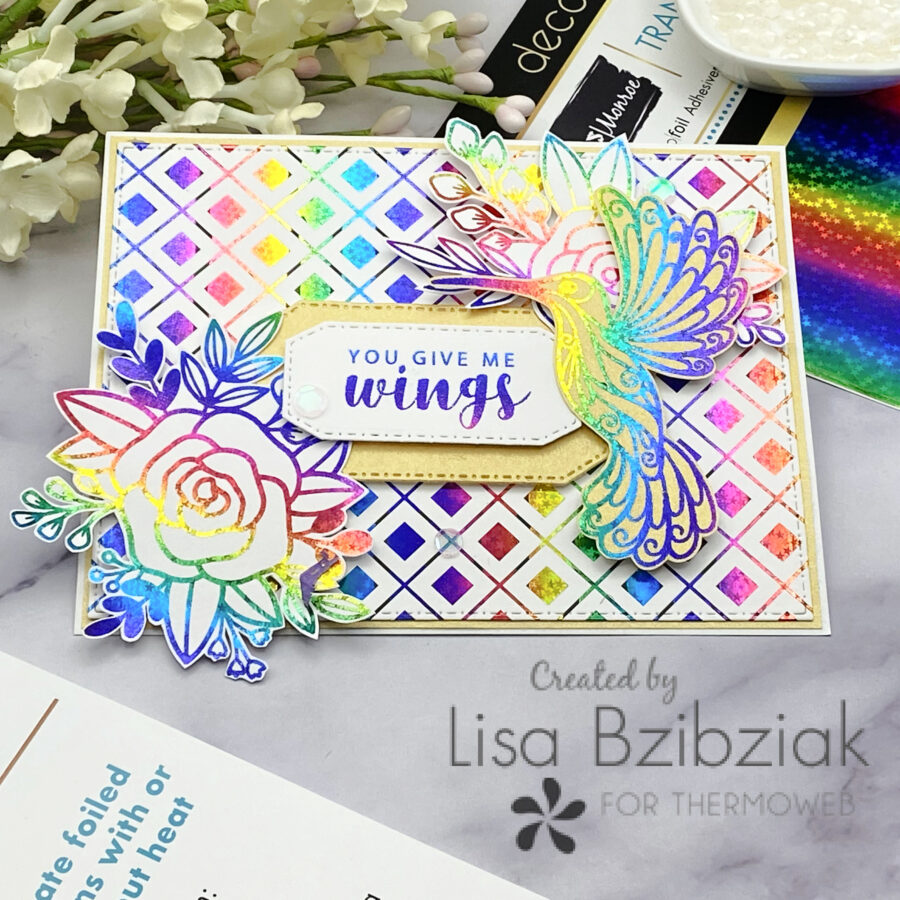
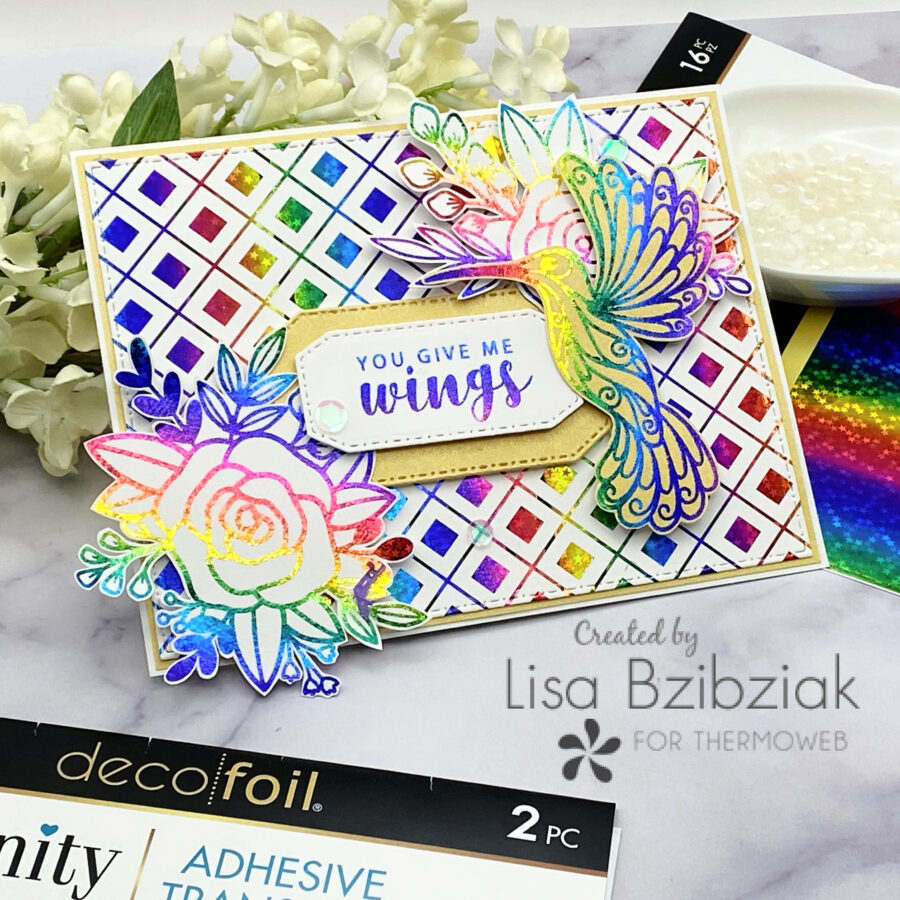
Finally, I really went wild with the rainbow. I used a card front from the new Off the Grid pack!
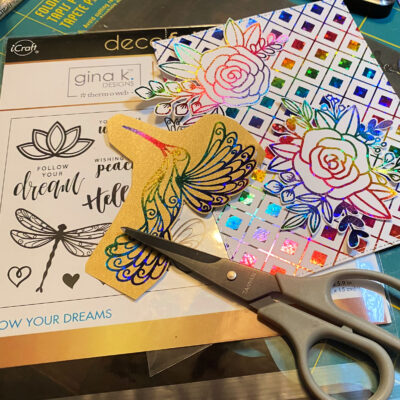
I used two sets of Adhesive Transfers for this one. The flowers are from Unity Stamps Blooming Friendship transfers and the hummingbird is from the Gina K. Designs Follow Your Dreams transfers. I added the florals to white cardstock and the hummingbird to a beautiful gold. I fussy cut all of my images.
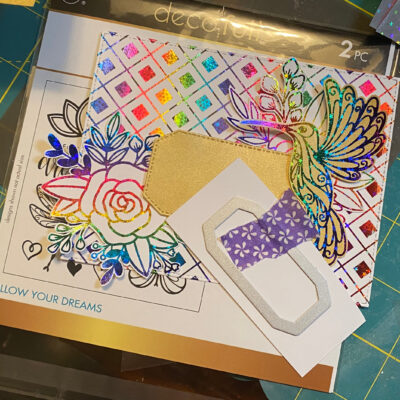
I matted the card base with gold and then cut two diecuts for my sentiment… a larger one in gold and the smaller in white. I used one of the sentiments from Follow Your Dreams and applied it to the white panel and then popped both up onto the background. I layered the flowers over the gold layer and popped the sentiment up over them. Finally using the thicker foam tape, I added the hummingbird over the top of all of it.
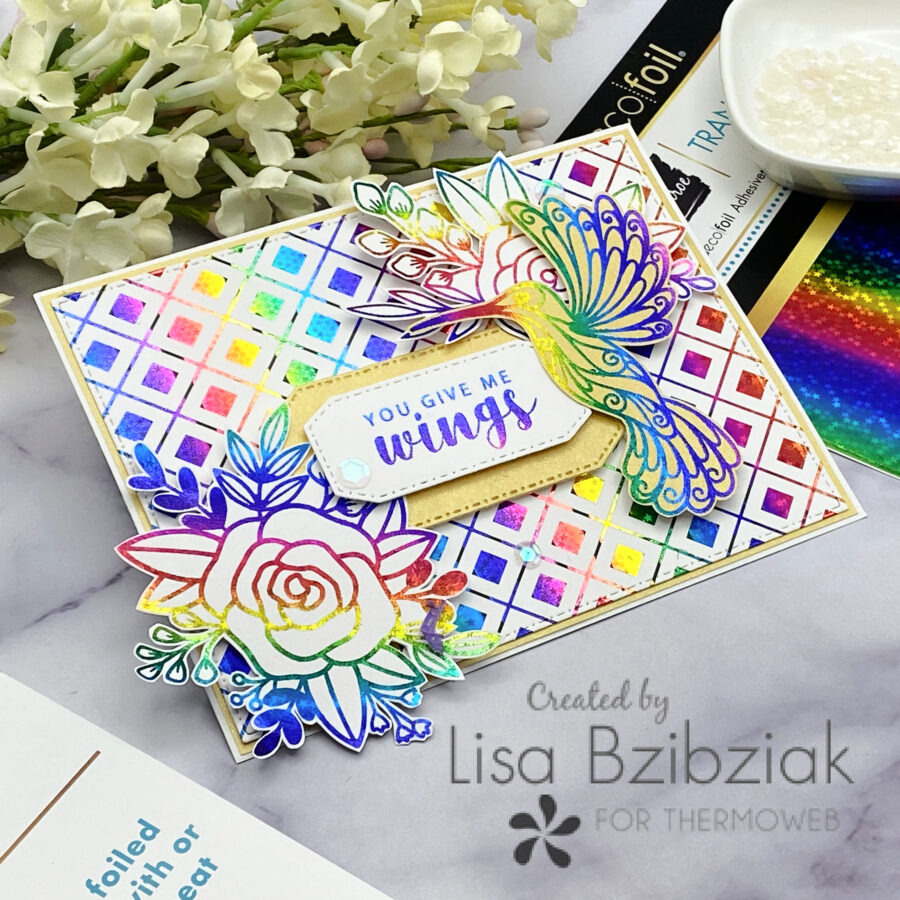
I just love it! Too much rainbow? Never!
I’ve foiled bunches of the new card fronts and I can’t wait to use all of them! And no they are not all in rainbow… but… if I’m honest I’m sure at least one of each will eventually be foiled in rainbow!
Be sure you come back all week to see what fantastic new stuff everyone will be sharing and don’t forget to head on over to Instagram!
Thank you so much for stopping! See you around the interwebs!
https://linkdeli.com/widget.js?id=f5e8378456858c916708