


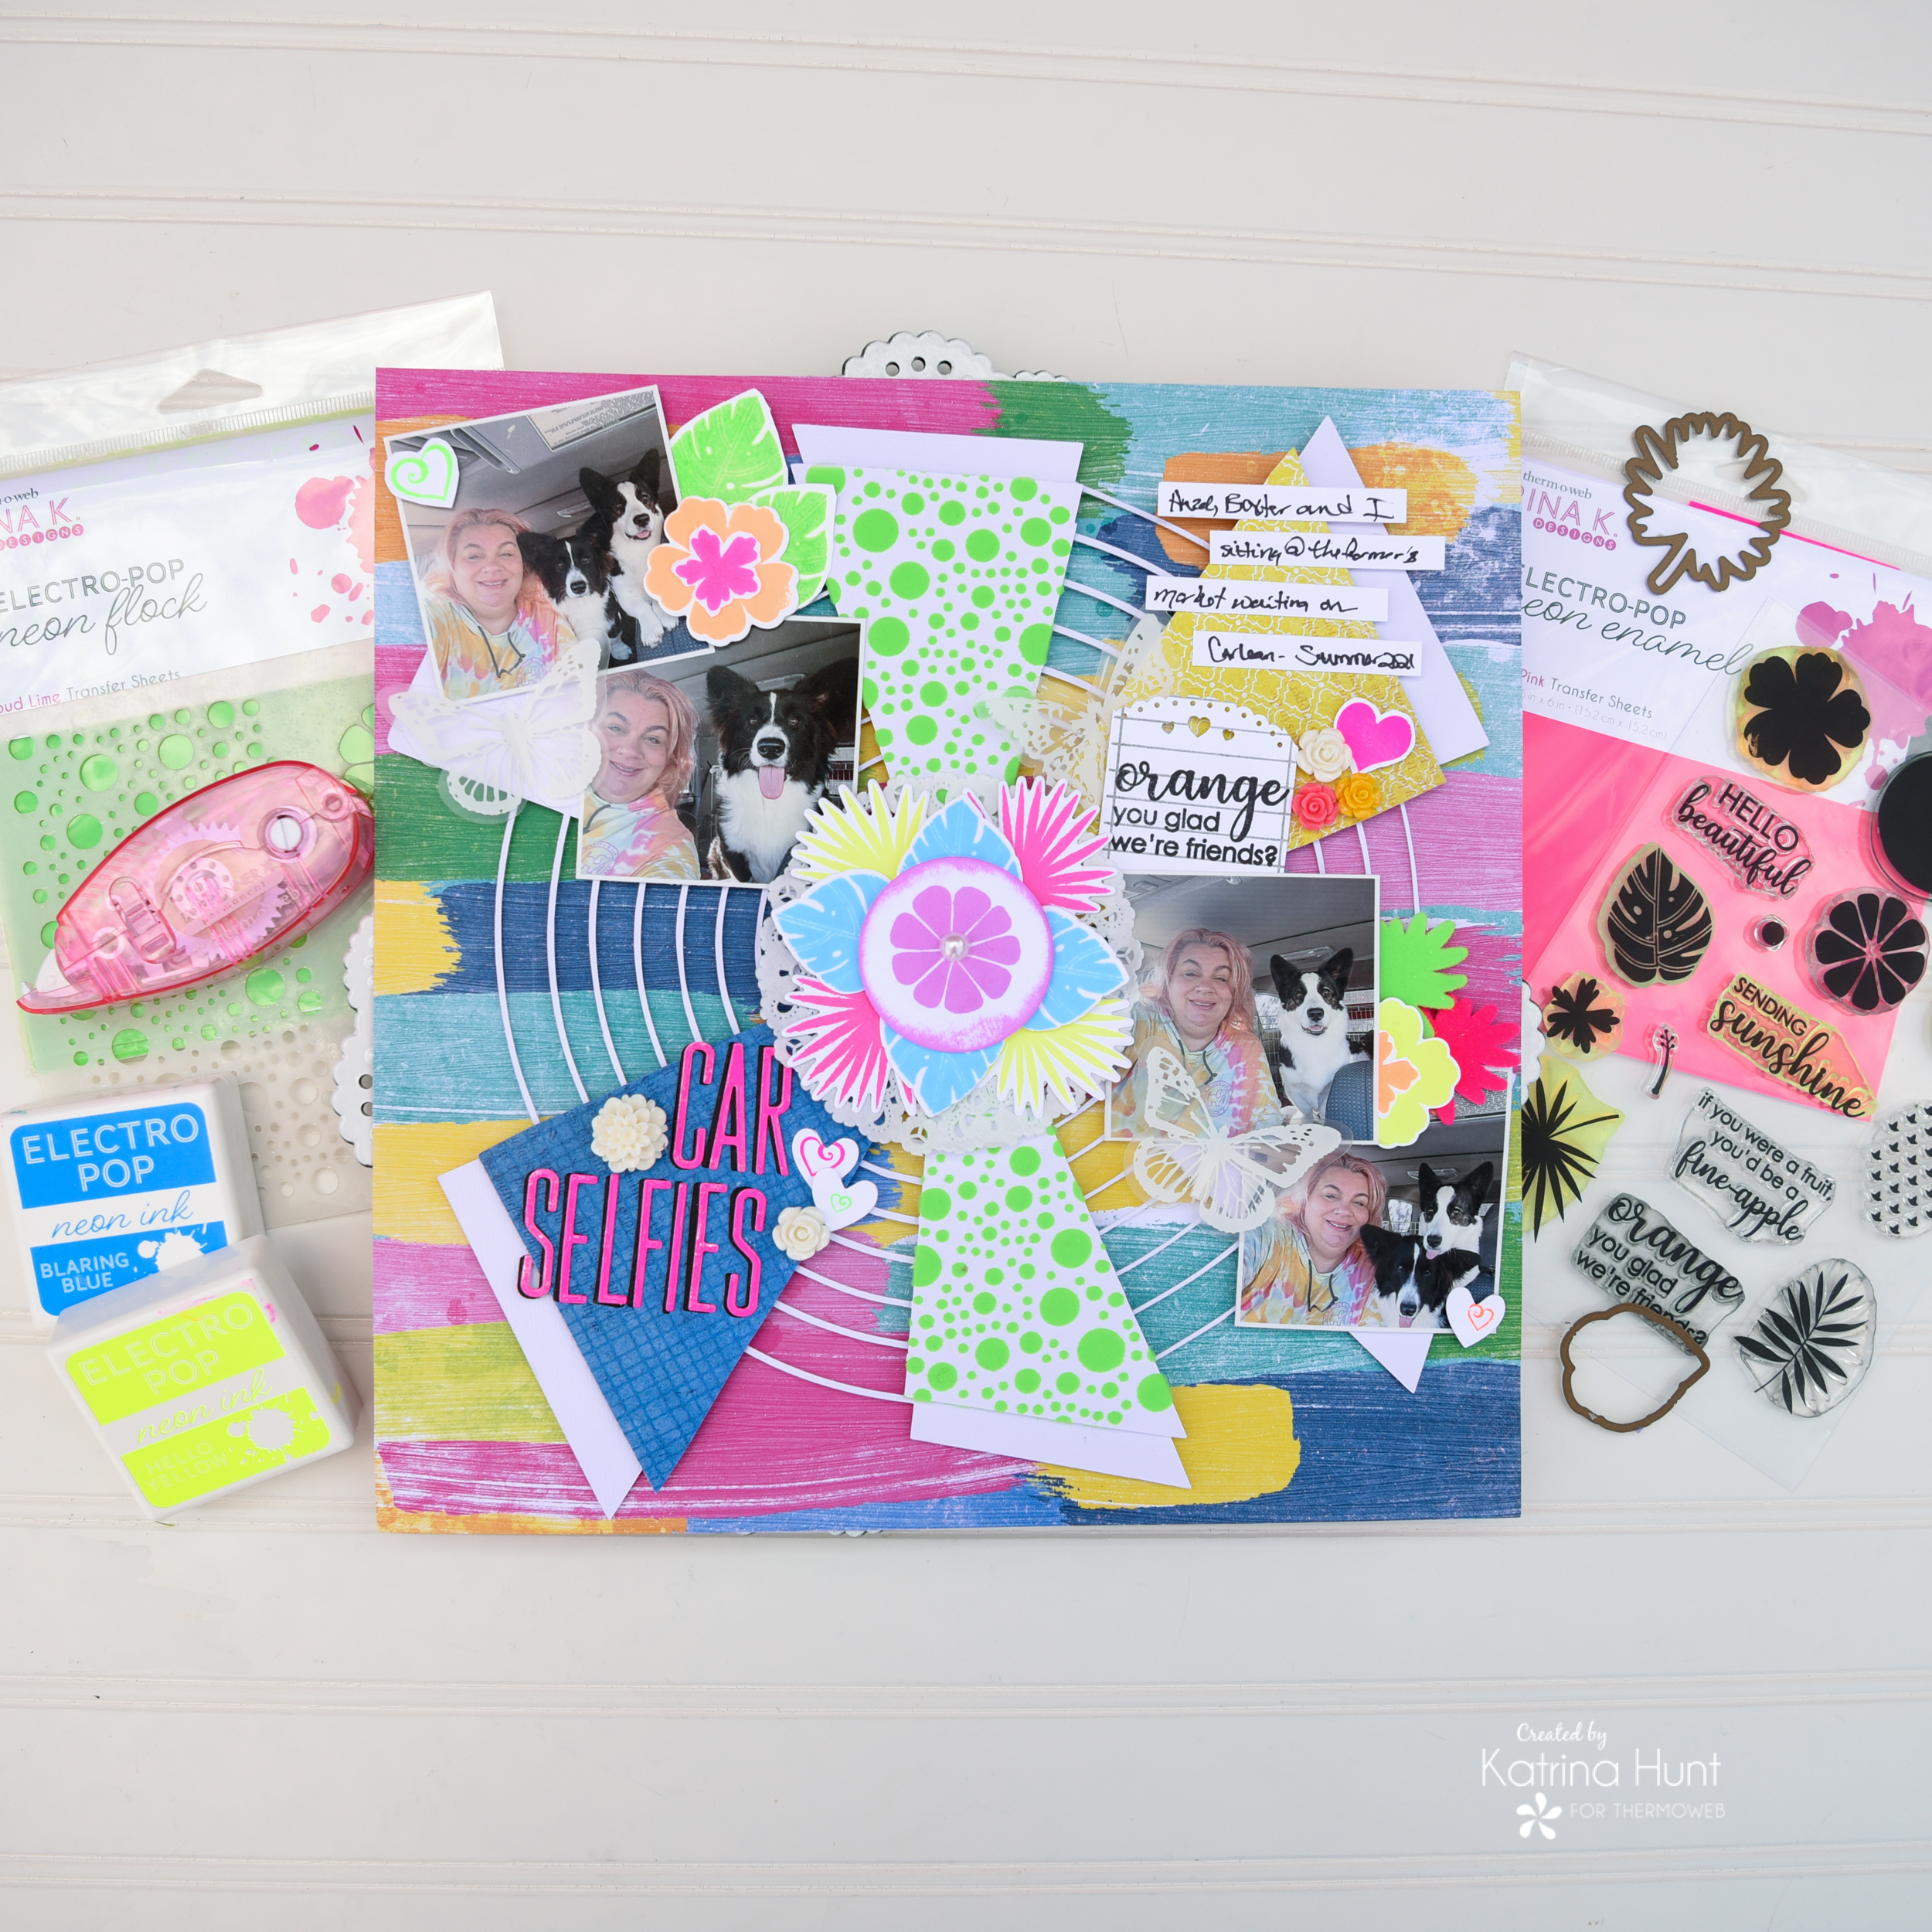
 Hey there!! It’s Friday and we are going to rock the neon products on the blog today with some car selfies! And what isn’t unconventional about using card products for a layout?!!
It’s Katrina from Paper, Scissors, Glue and Hybrid to sharing a layout with all the neon goodness of Rina K Designs! And the stamp/die/stencil set is used is 30% off right now!
Therm O Web Supplies Used
Gina K Designs Deco Foil Adhesive Transfer-Love Is – NEW
Rina K Designs Sending Sunshine Stencil
Memory Runner XL
Memory Runner XL Refill
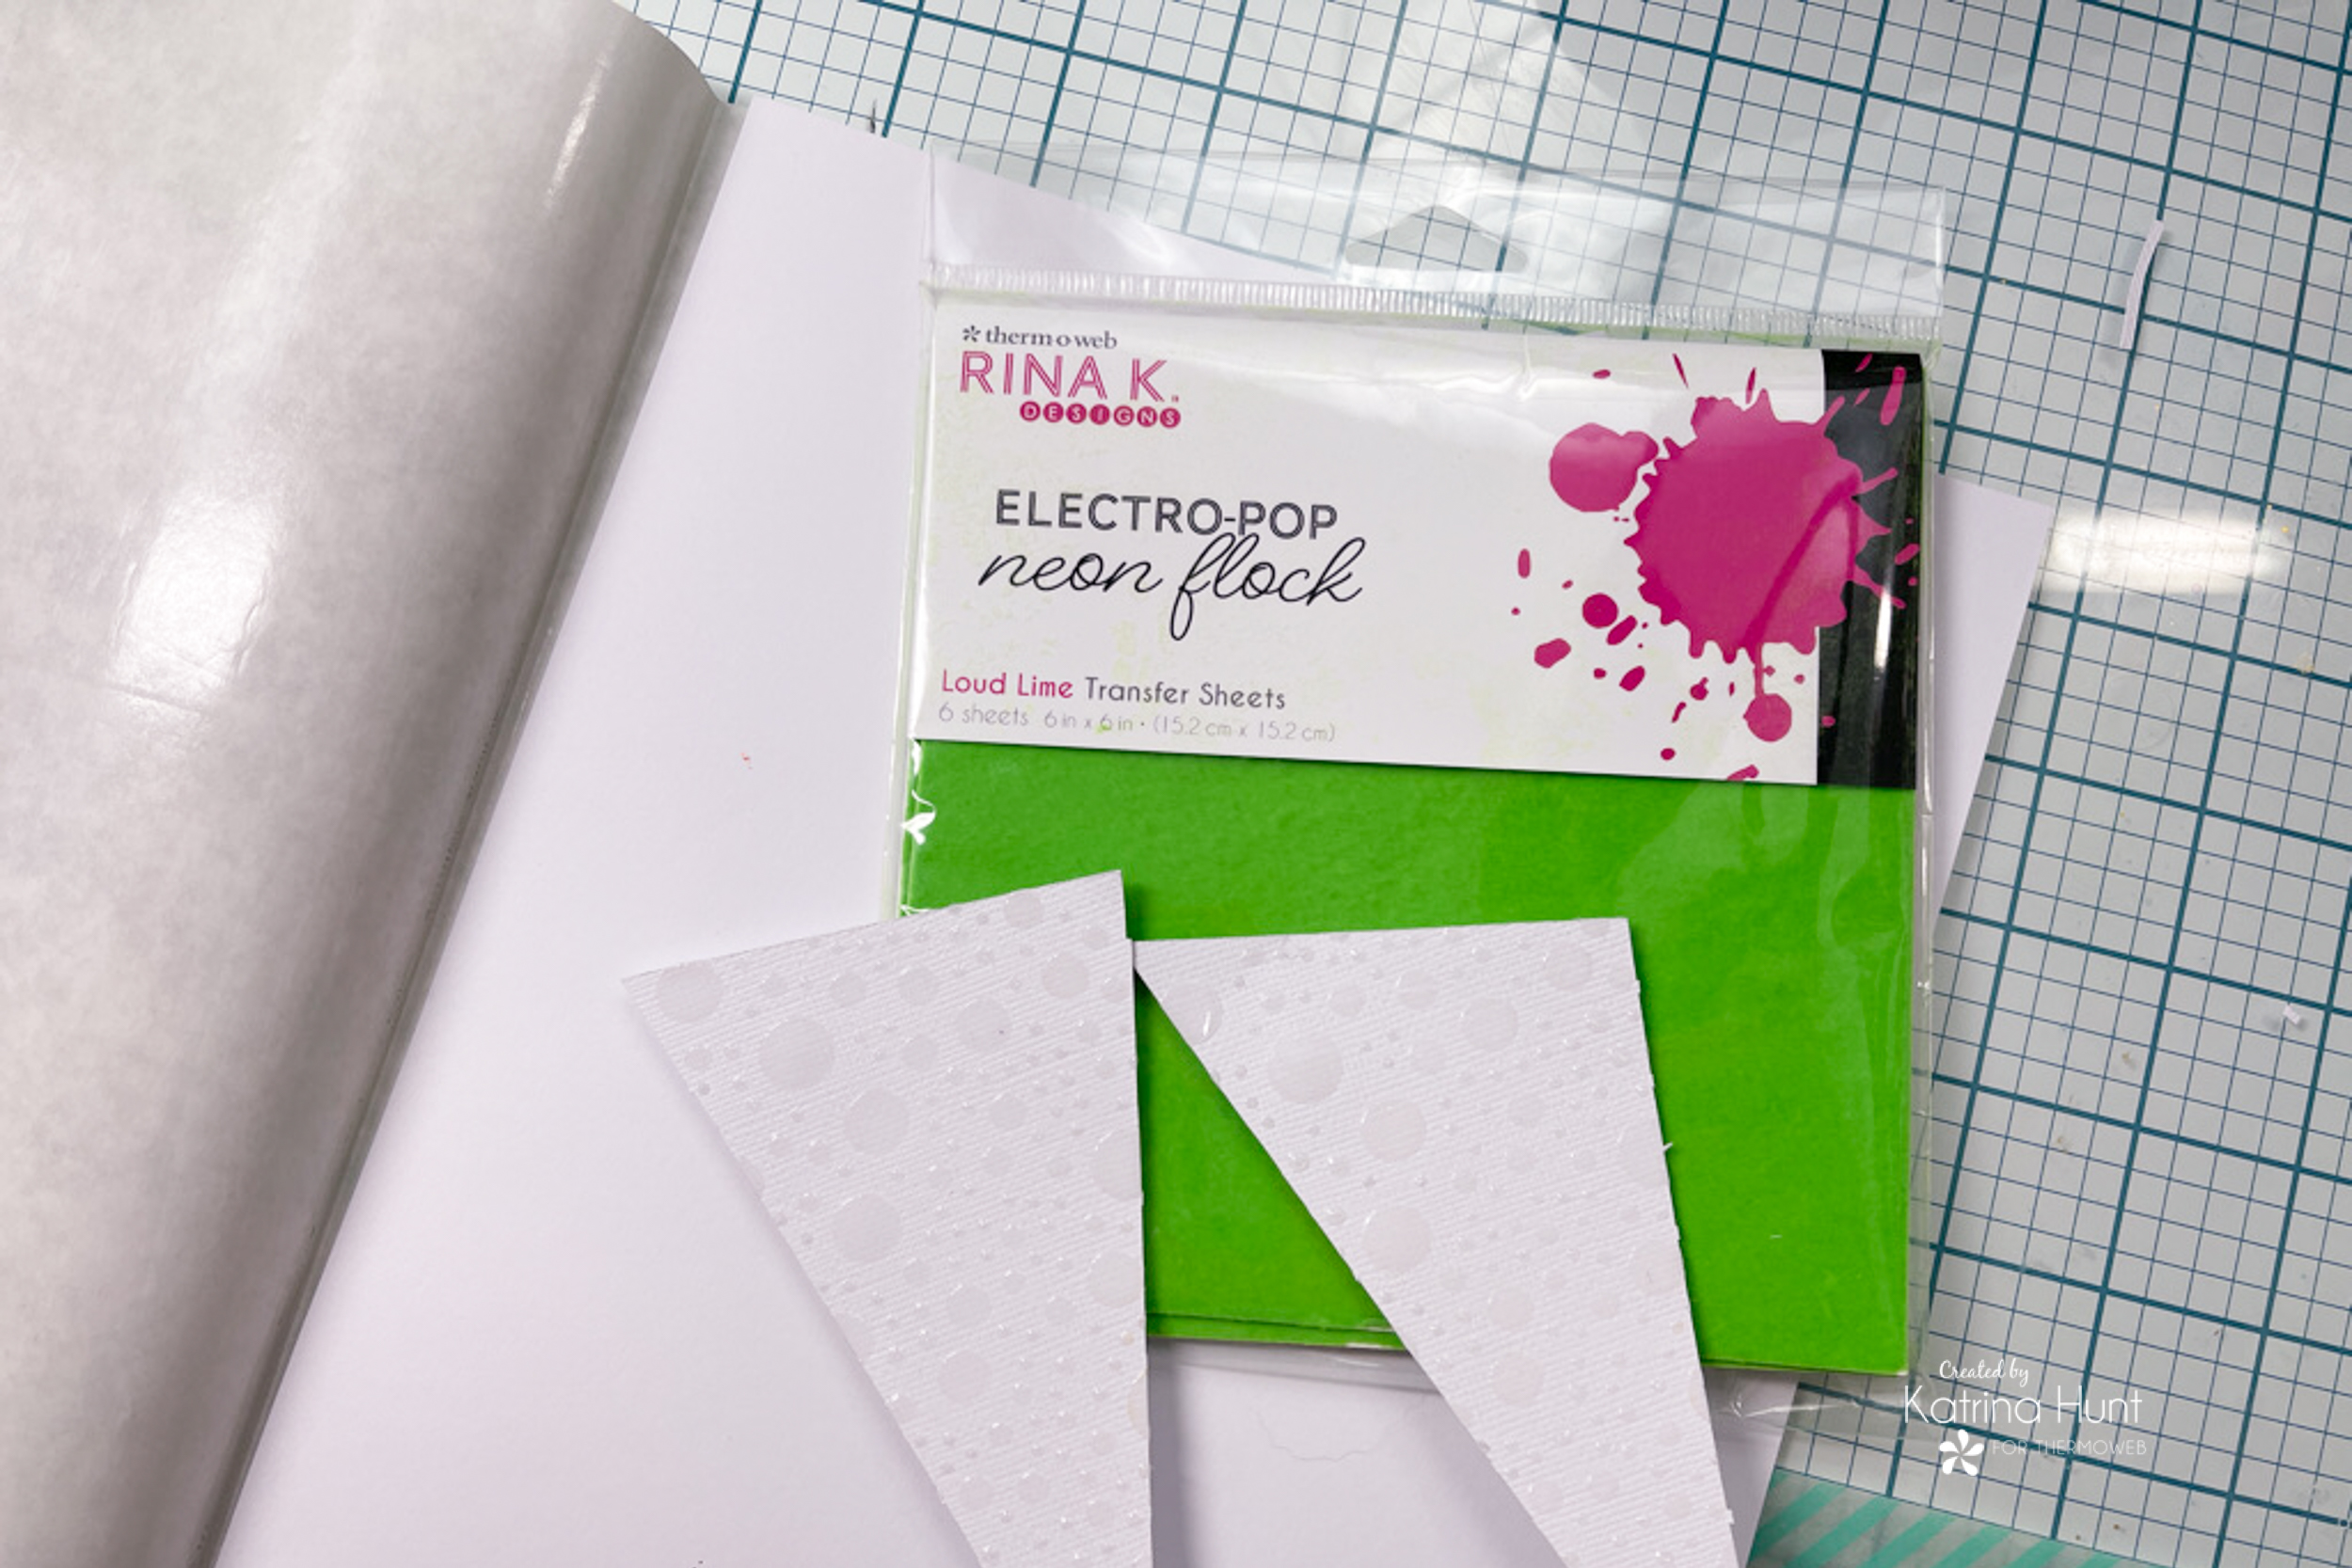
Rina K Designs Electro Pop Flock-Screamin’ Green
Rina K Designs Electro Pop Flock-Poppin’ Pink
3D Foam Squares – Combo Pack
3D FOAM SQUARES BOX
NEW 3D FOAM TAPE ROLL 1/16
NEW 3D FOAM TAPE ROLL 1/8
Rina K Designs Sending Sunshine Stamp Set
Rina K Designs Sending Sunshine Die Set
Deco Foil Craft Carrier Sheets-NEW
Ultra Bond Liquid Adhesive
Rina K Designs Electro Pop Enamel Sheets-Poppin’ Pink
Rina K Designs Electro Pop Enamel Sheets-Orange Glow
Pixie Tape
NEW Pixie Dots
Rina K Designs Electro Pop Enamel Sheets-Screamin’ Green
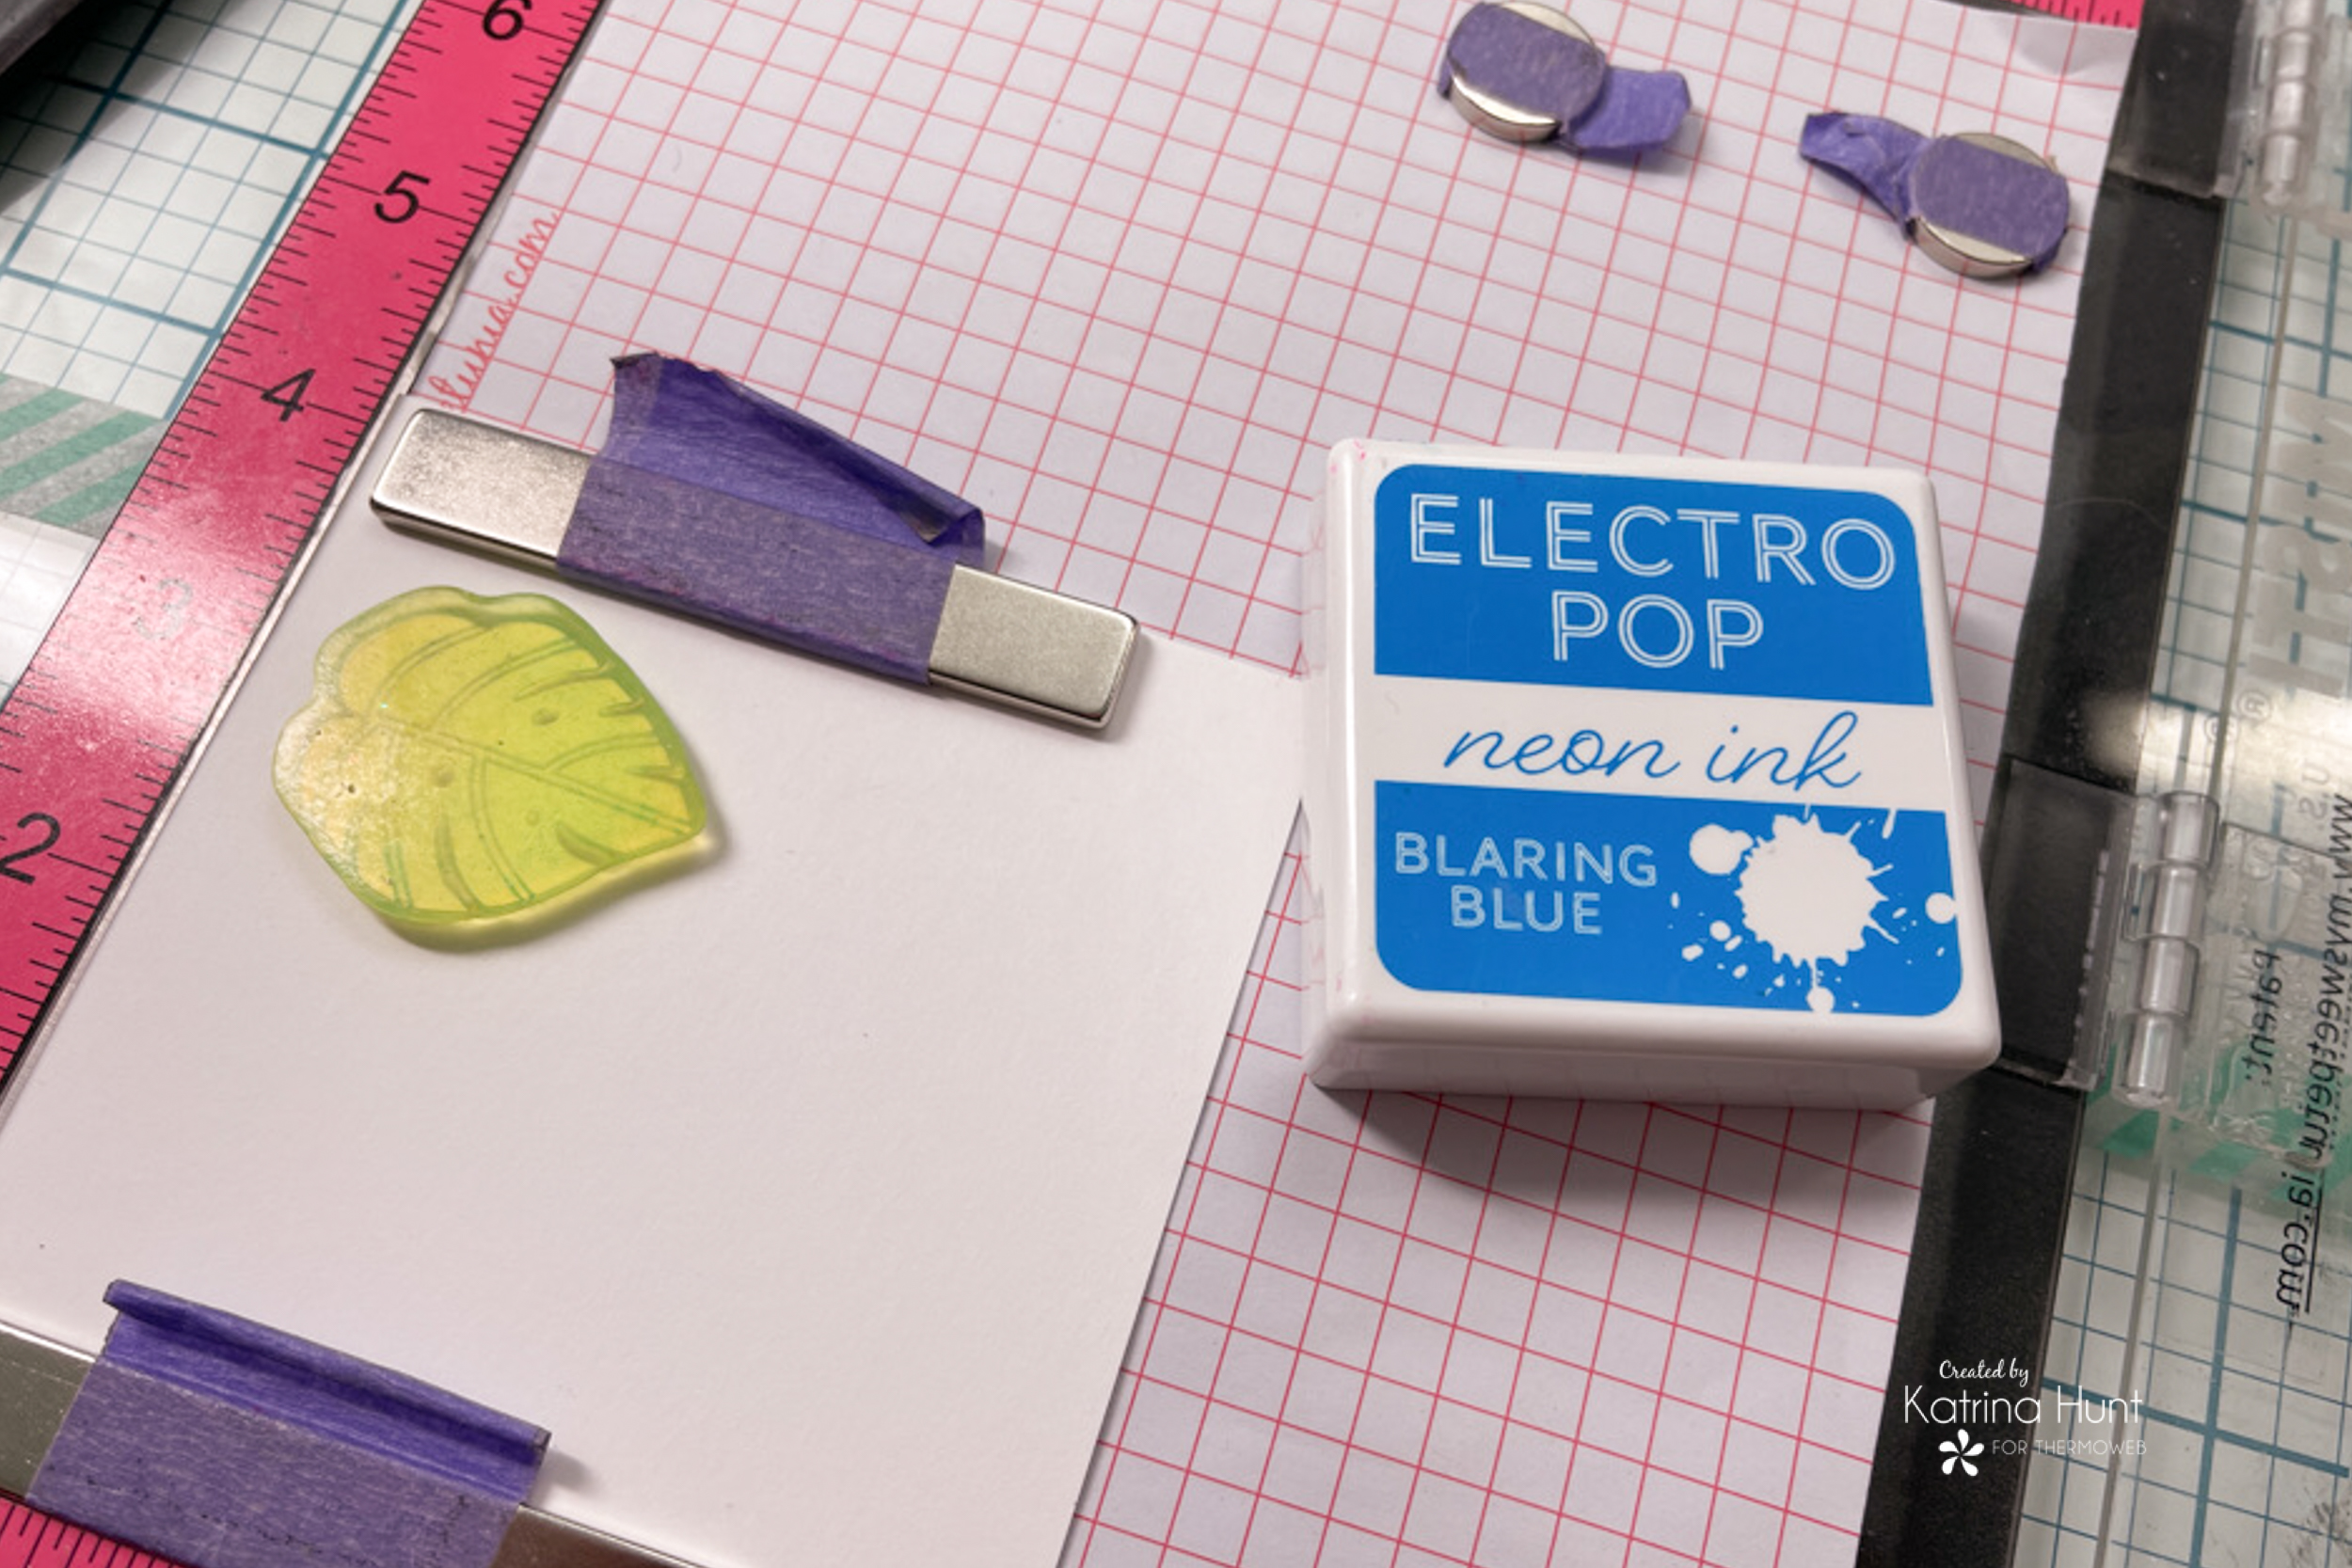
Rina K Designs Electro Pop Inks
Deco Foil Transfer Gel Duo
Easy Cut Adhesive Sheets
Other Supplies Used
Vicki Boutin Sweet Rush Collection – At Paper Issues (Use code Katrina for 20% off)
White and Black Cardstock
Circle Burst Cut File By Paper Issues-FREE
Tips On Working With Neon Colors
I am not going to lie, neon colors can be hard to work with! But I am going to give you some tips and hopefully get you to try them!
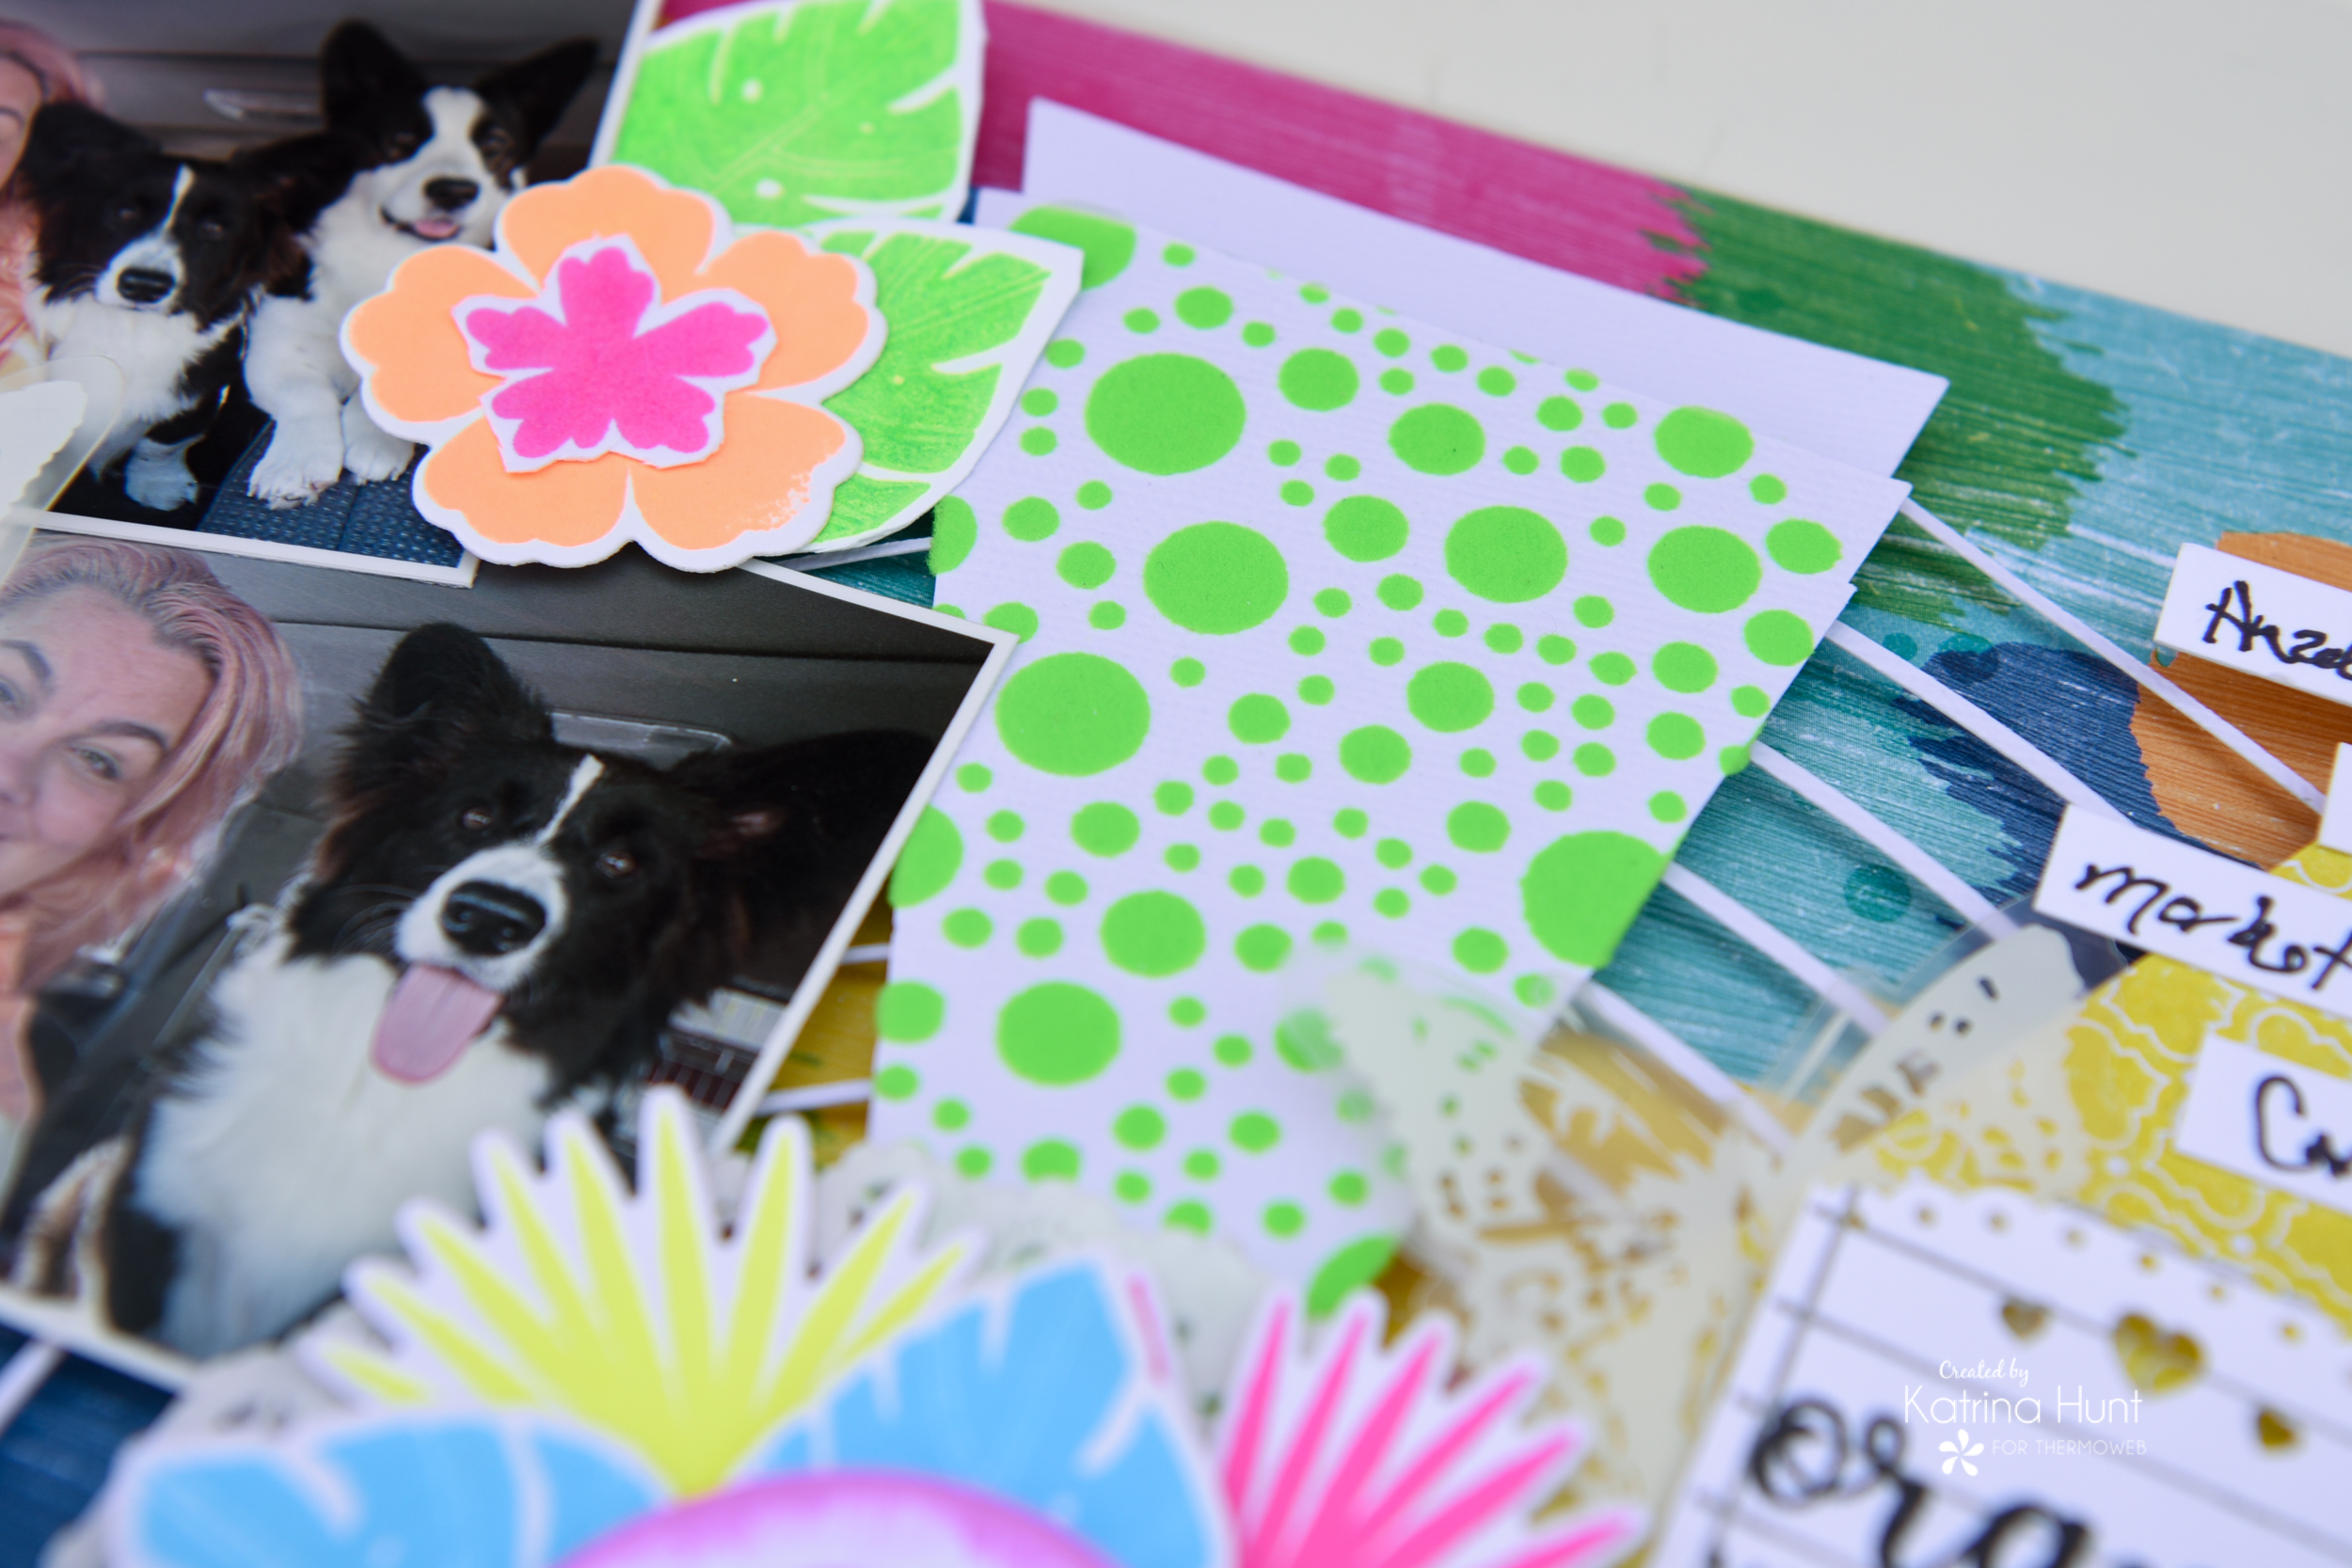
- I left my pictures in color because I had on a shirt that went with the colors and the dogs are dark, so it all works together. If I hadn’t used these pictures, I would have just made my pictures black and white!
- Use a lot of neutral colors with neon-white, black, and grey are all good choices and will work!
- Use the neon color in small areas, like I did with the stencil and flock above.
- Find a paper collection with bright colors! Vicki Boutin’s Sweet Rush Collection was a perfect choice to go with the neon!
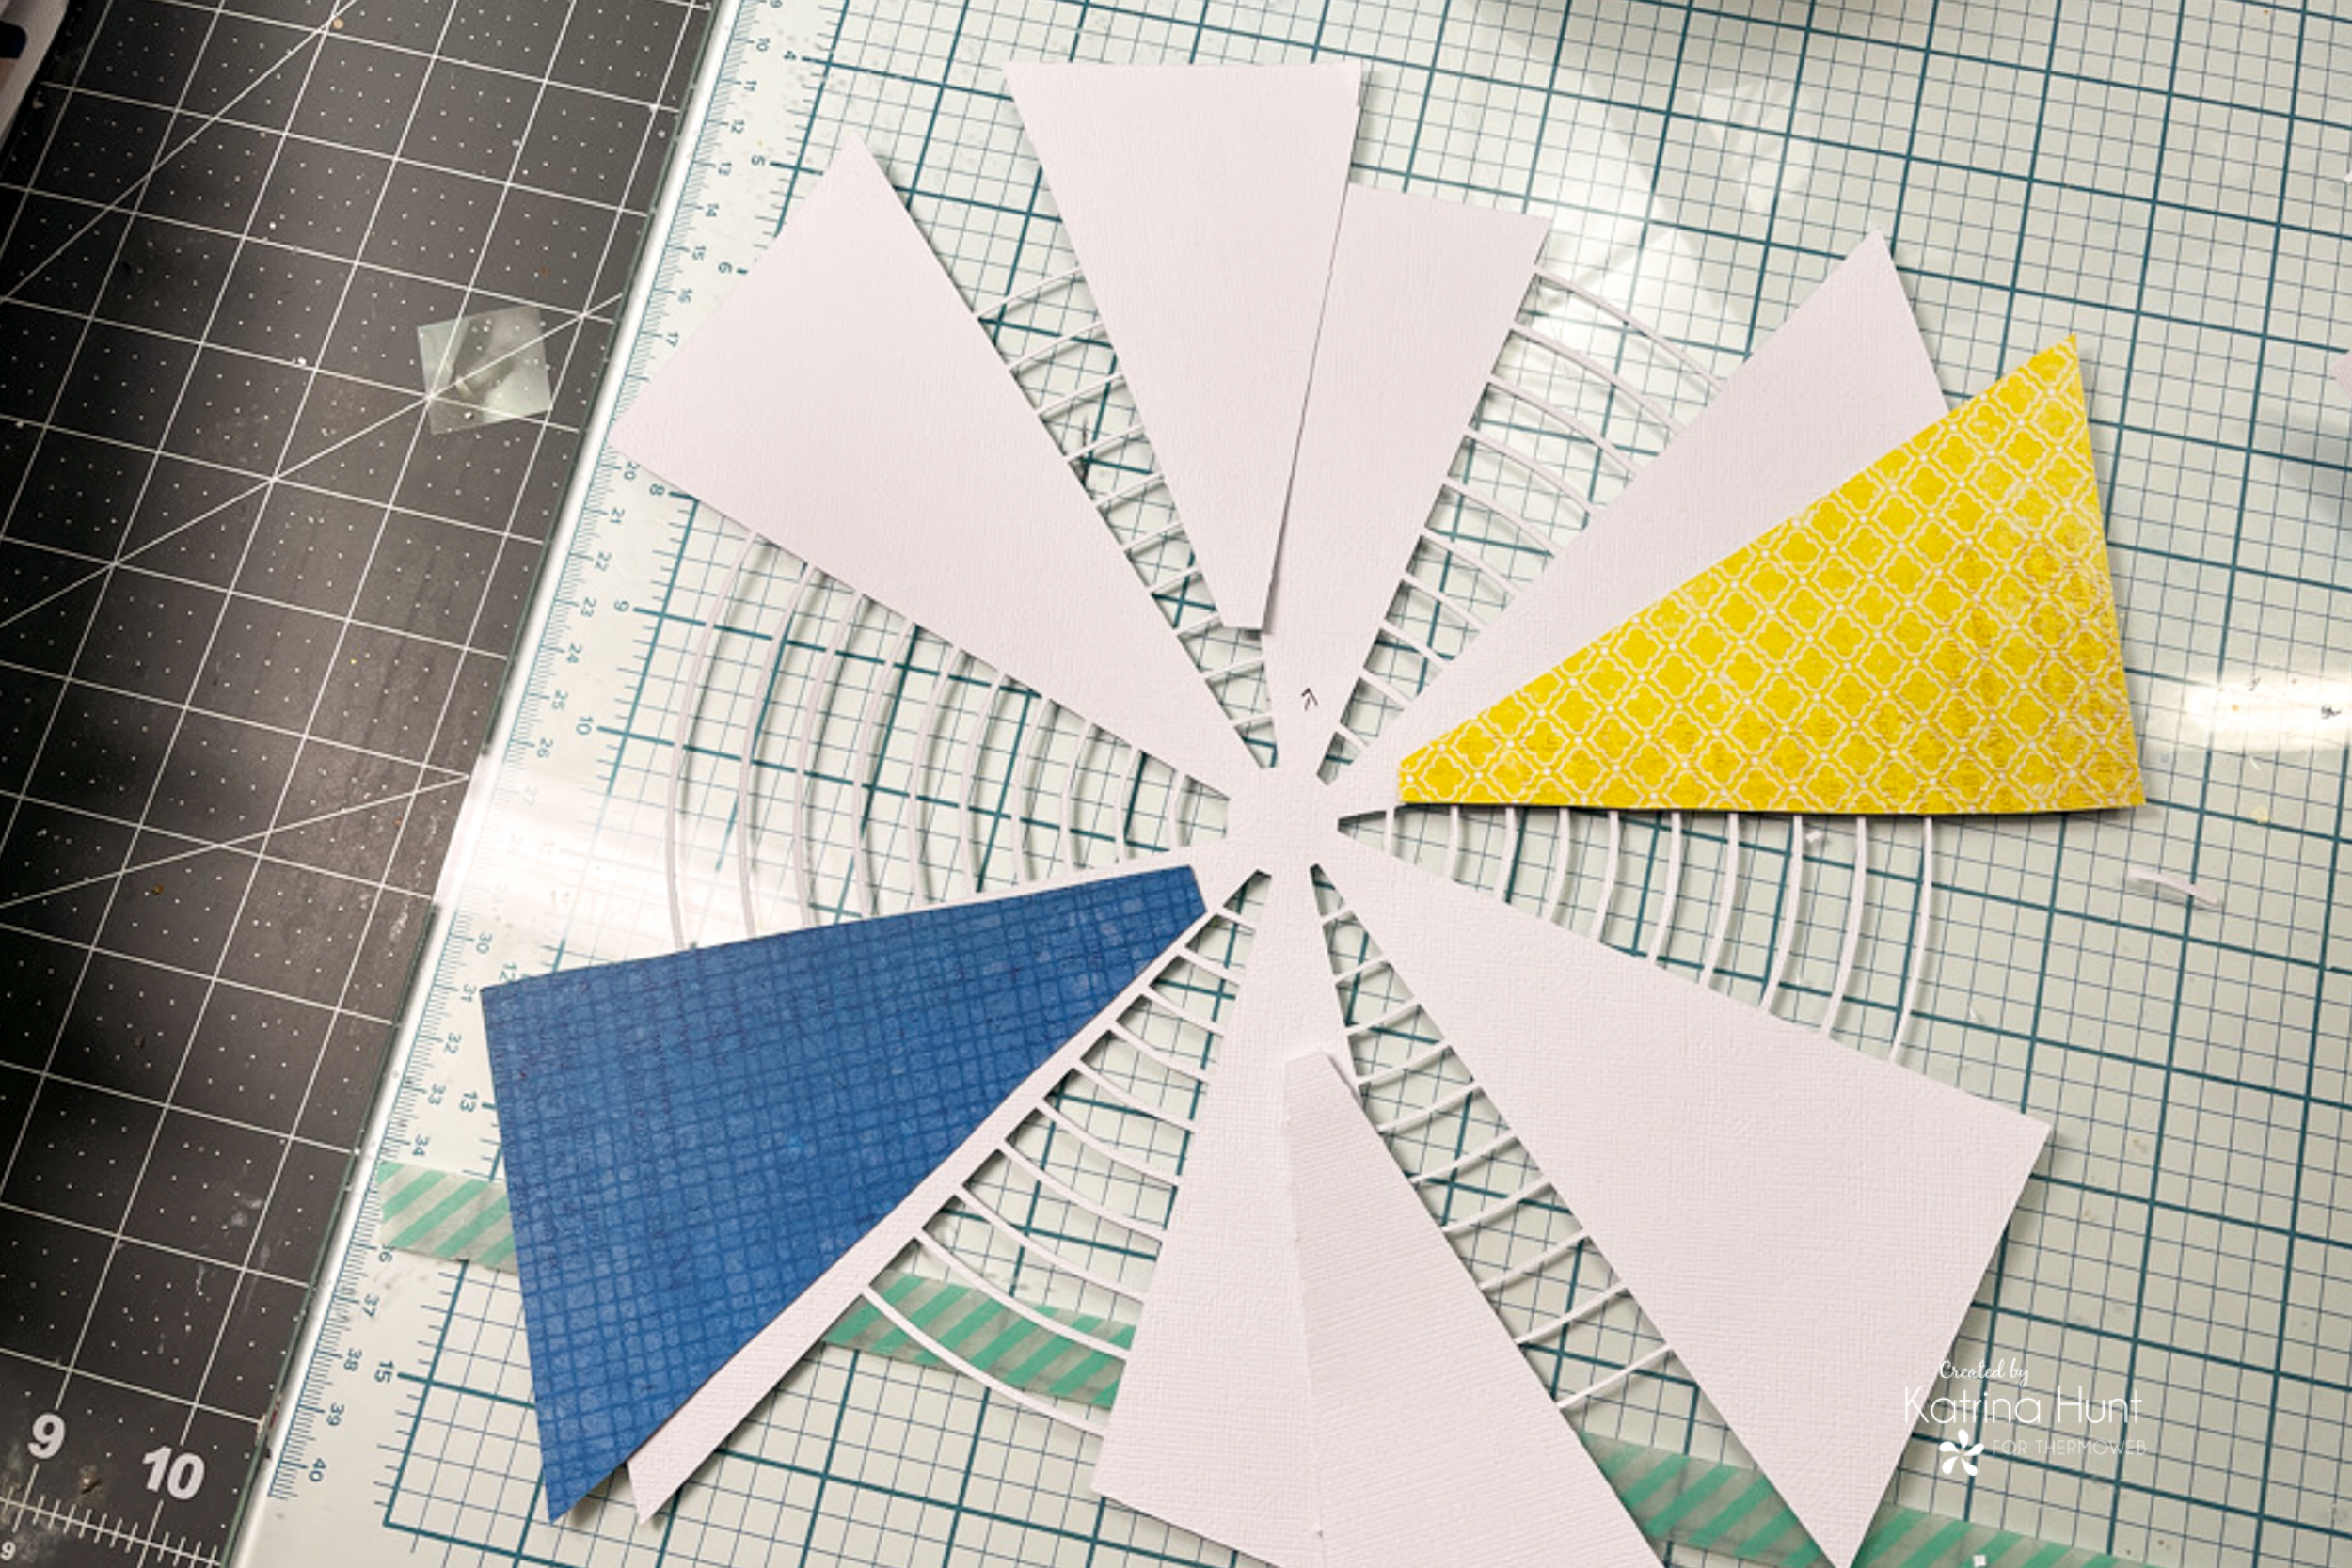
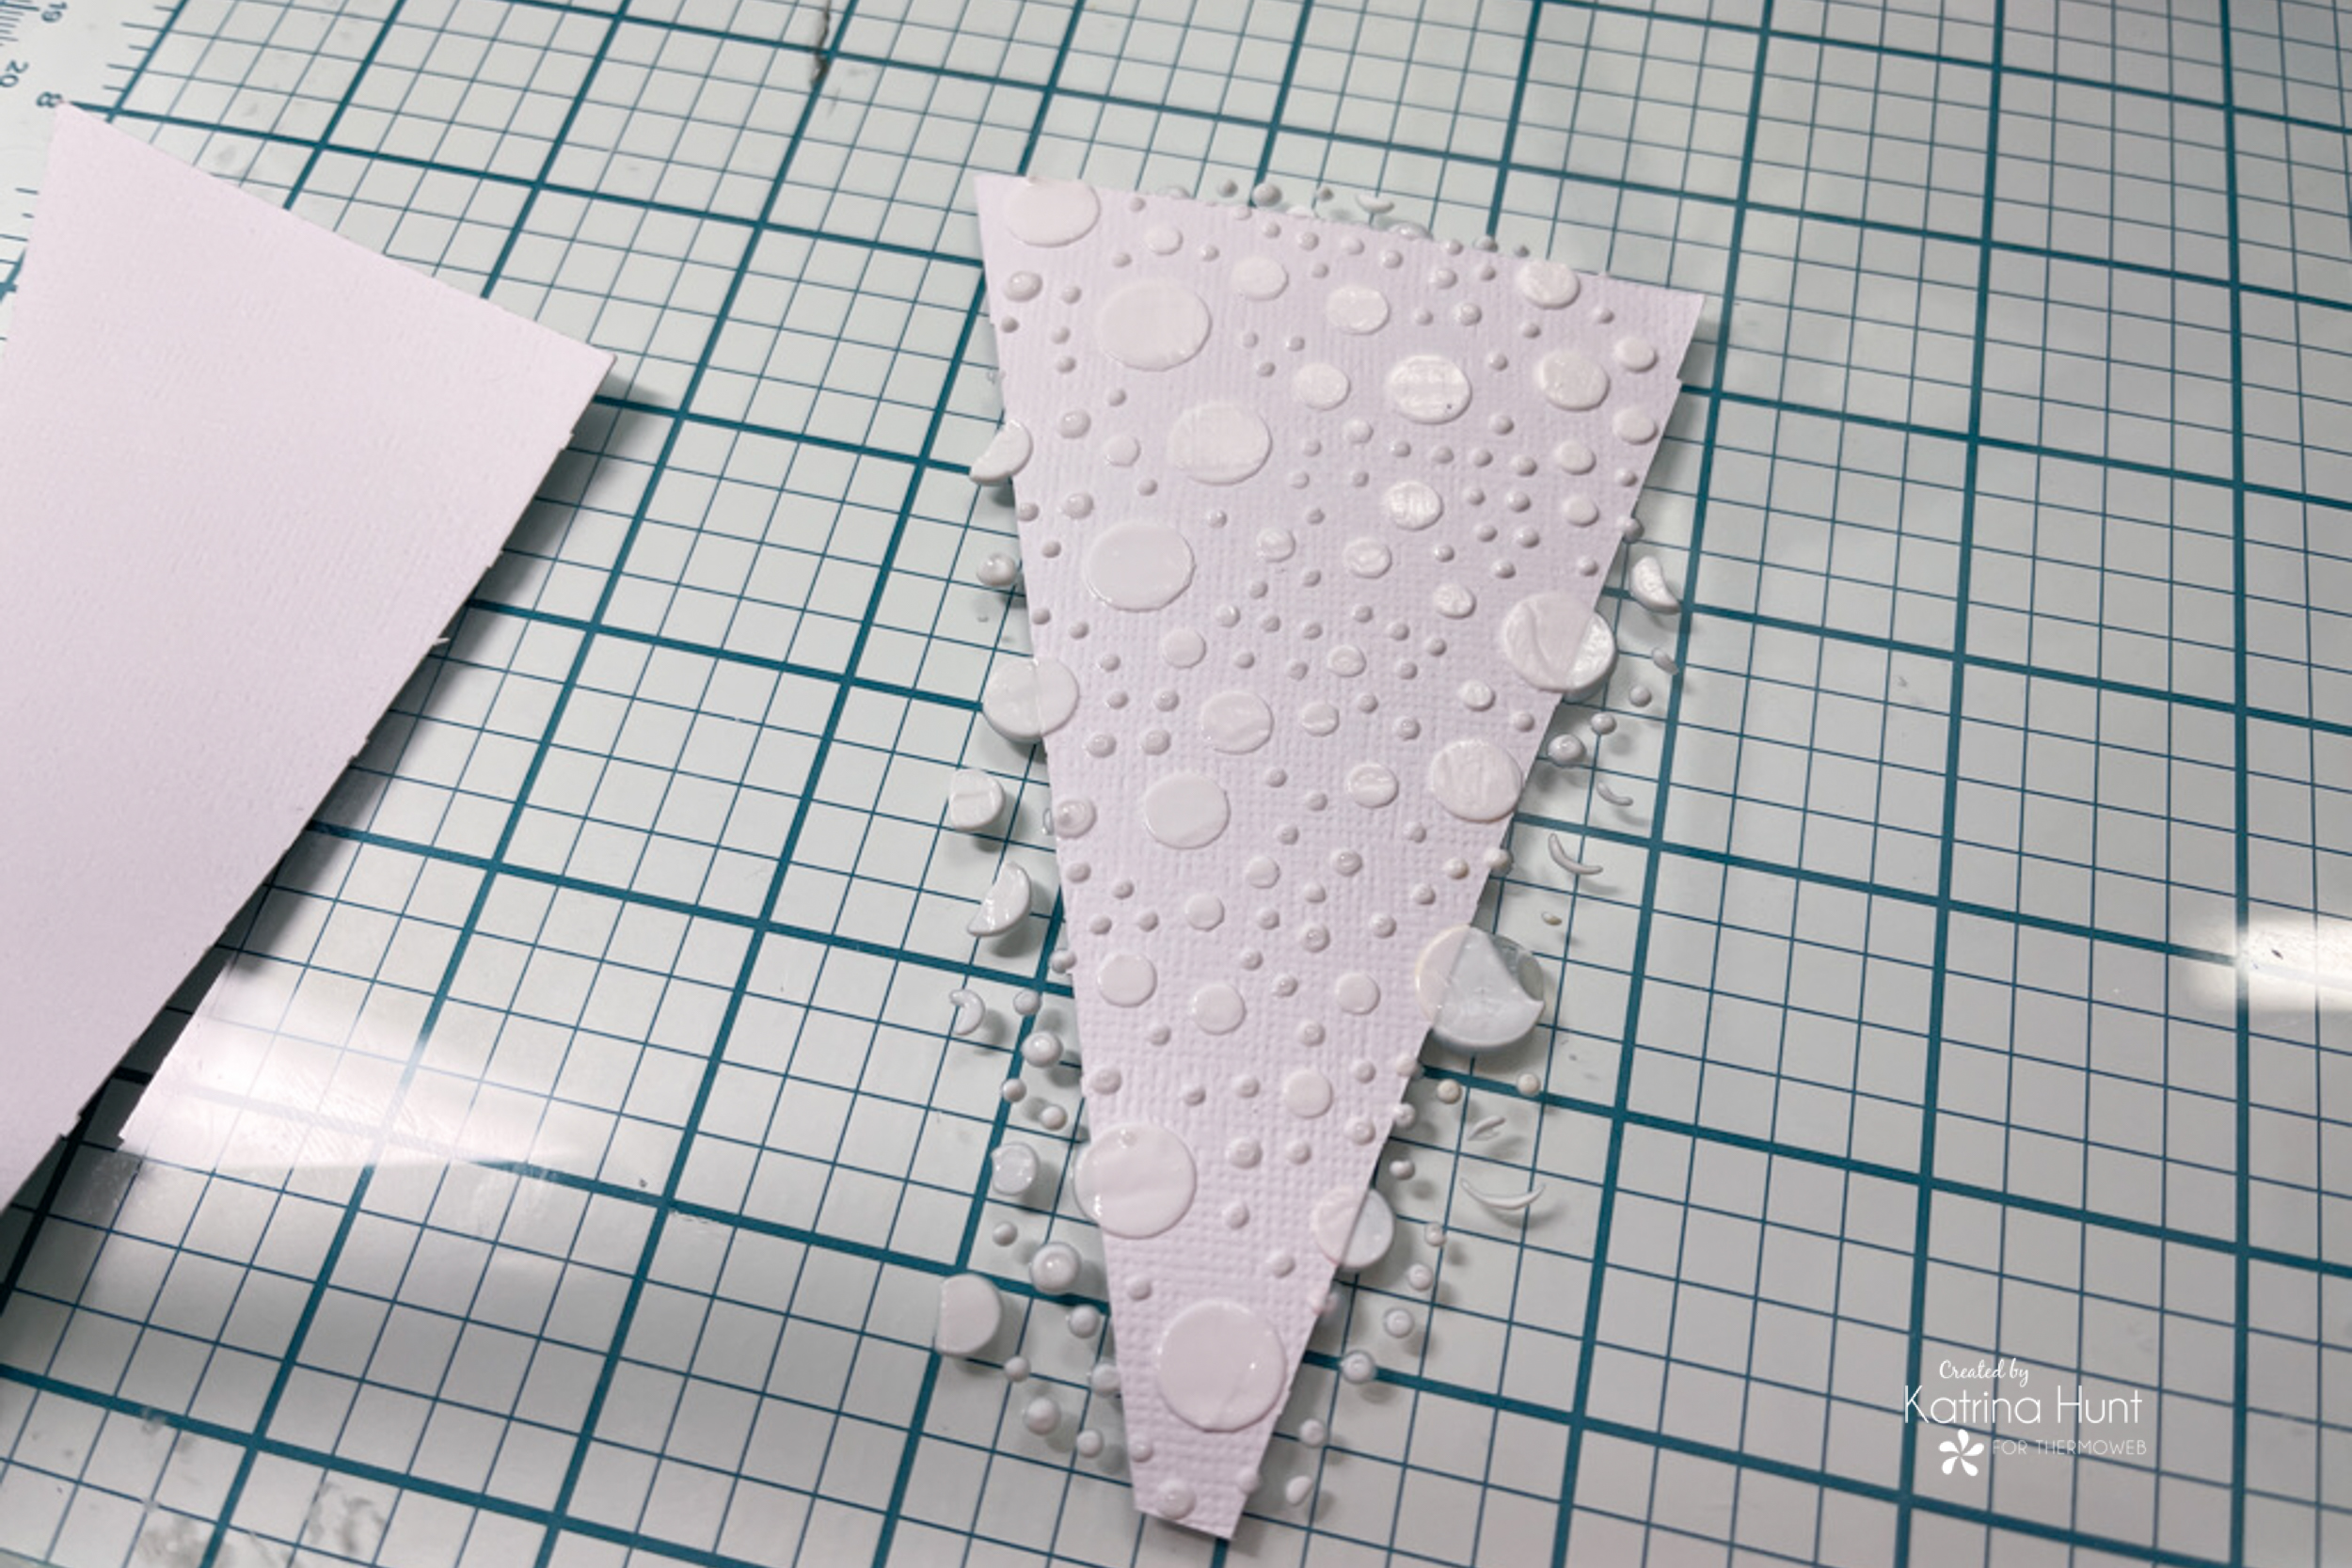
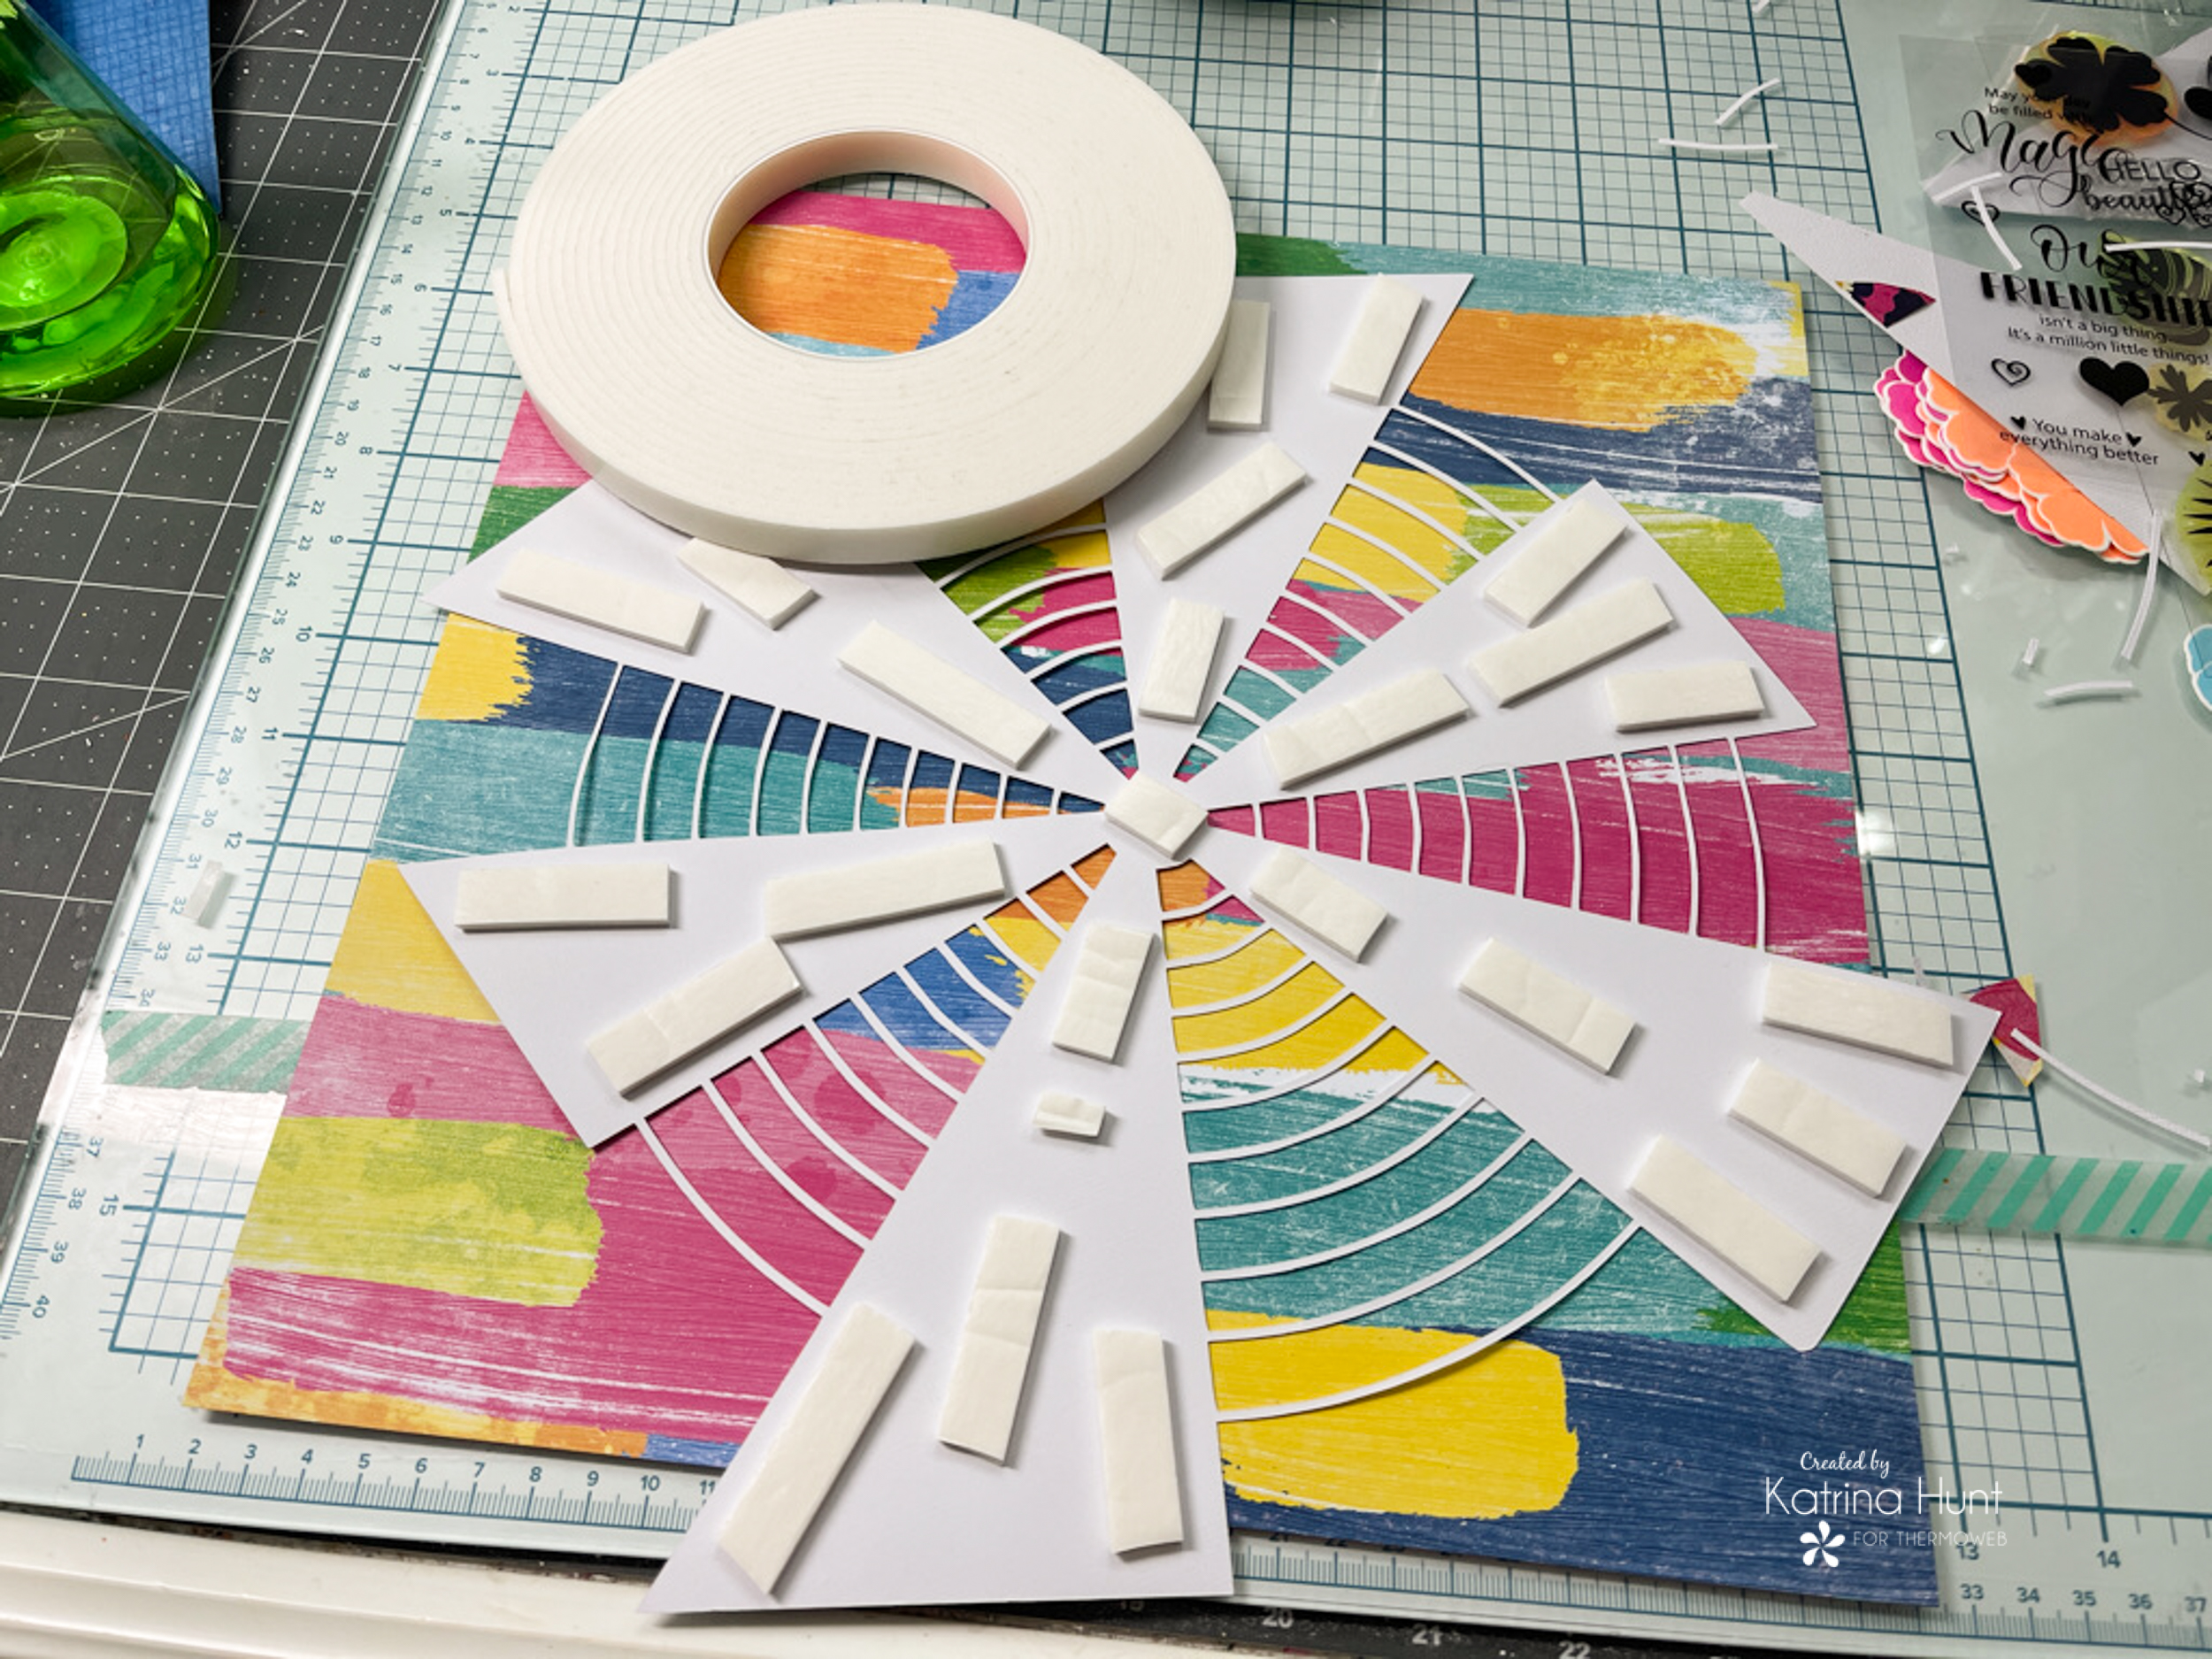
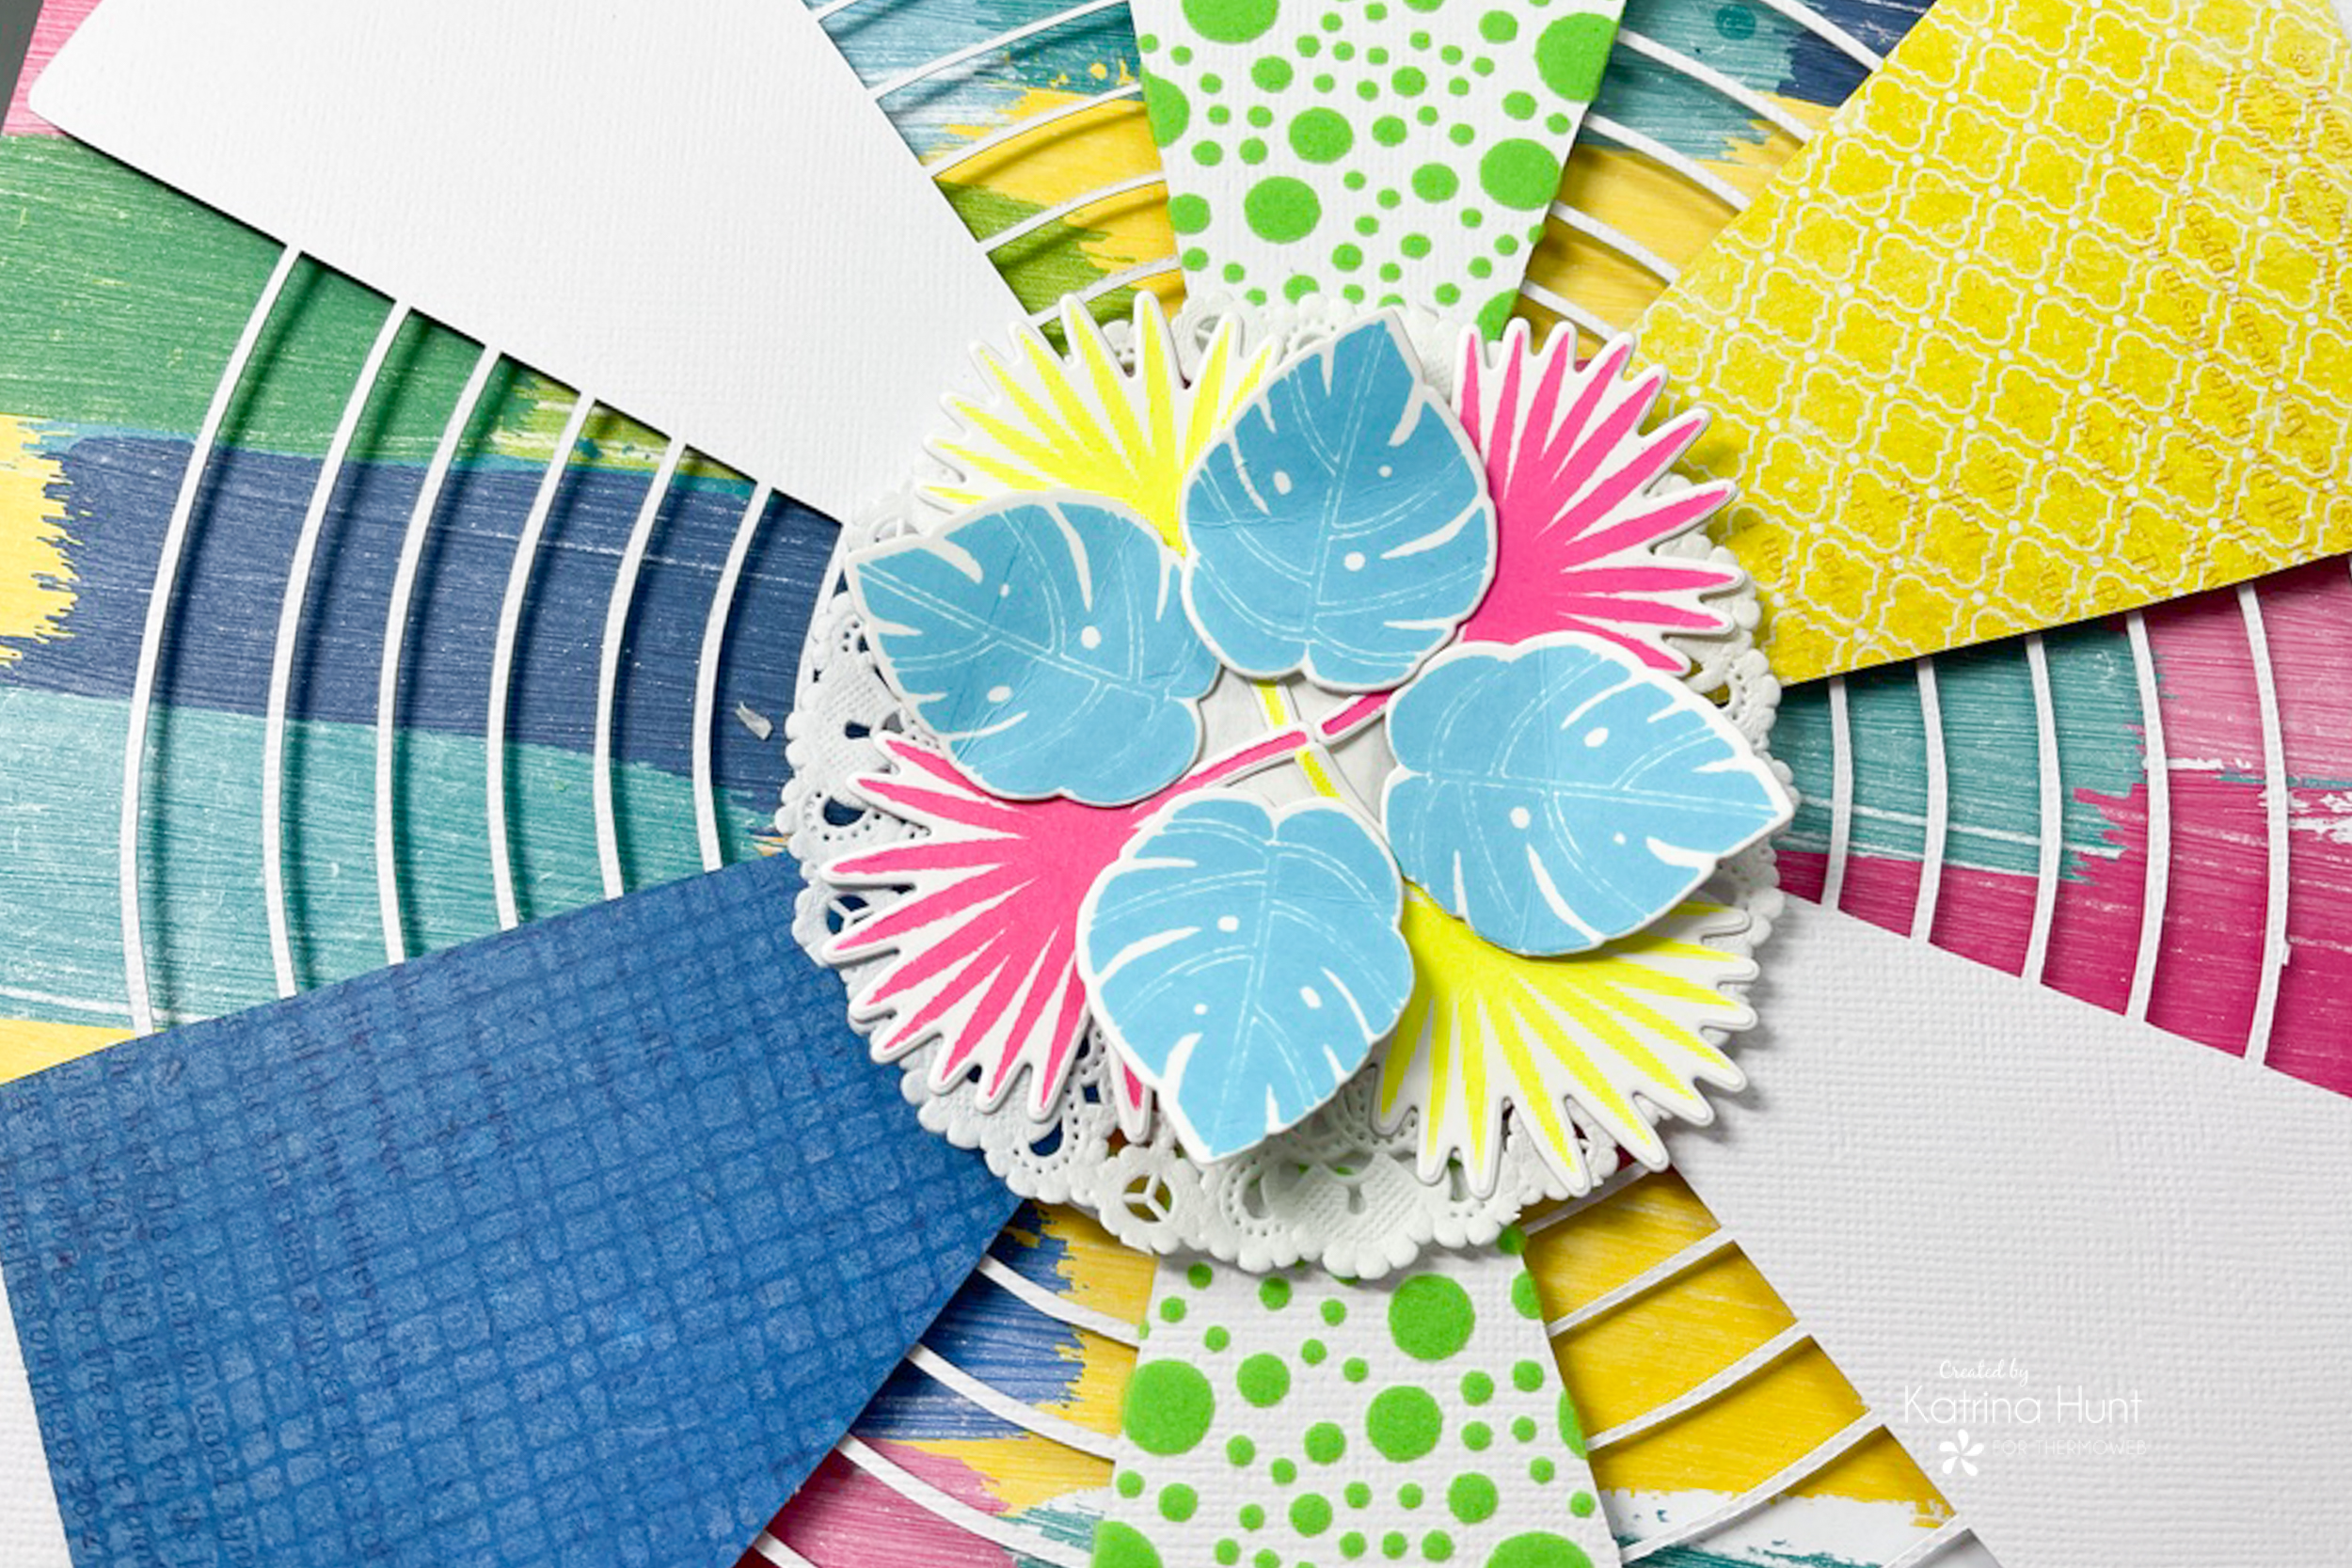
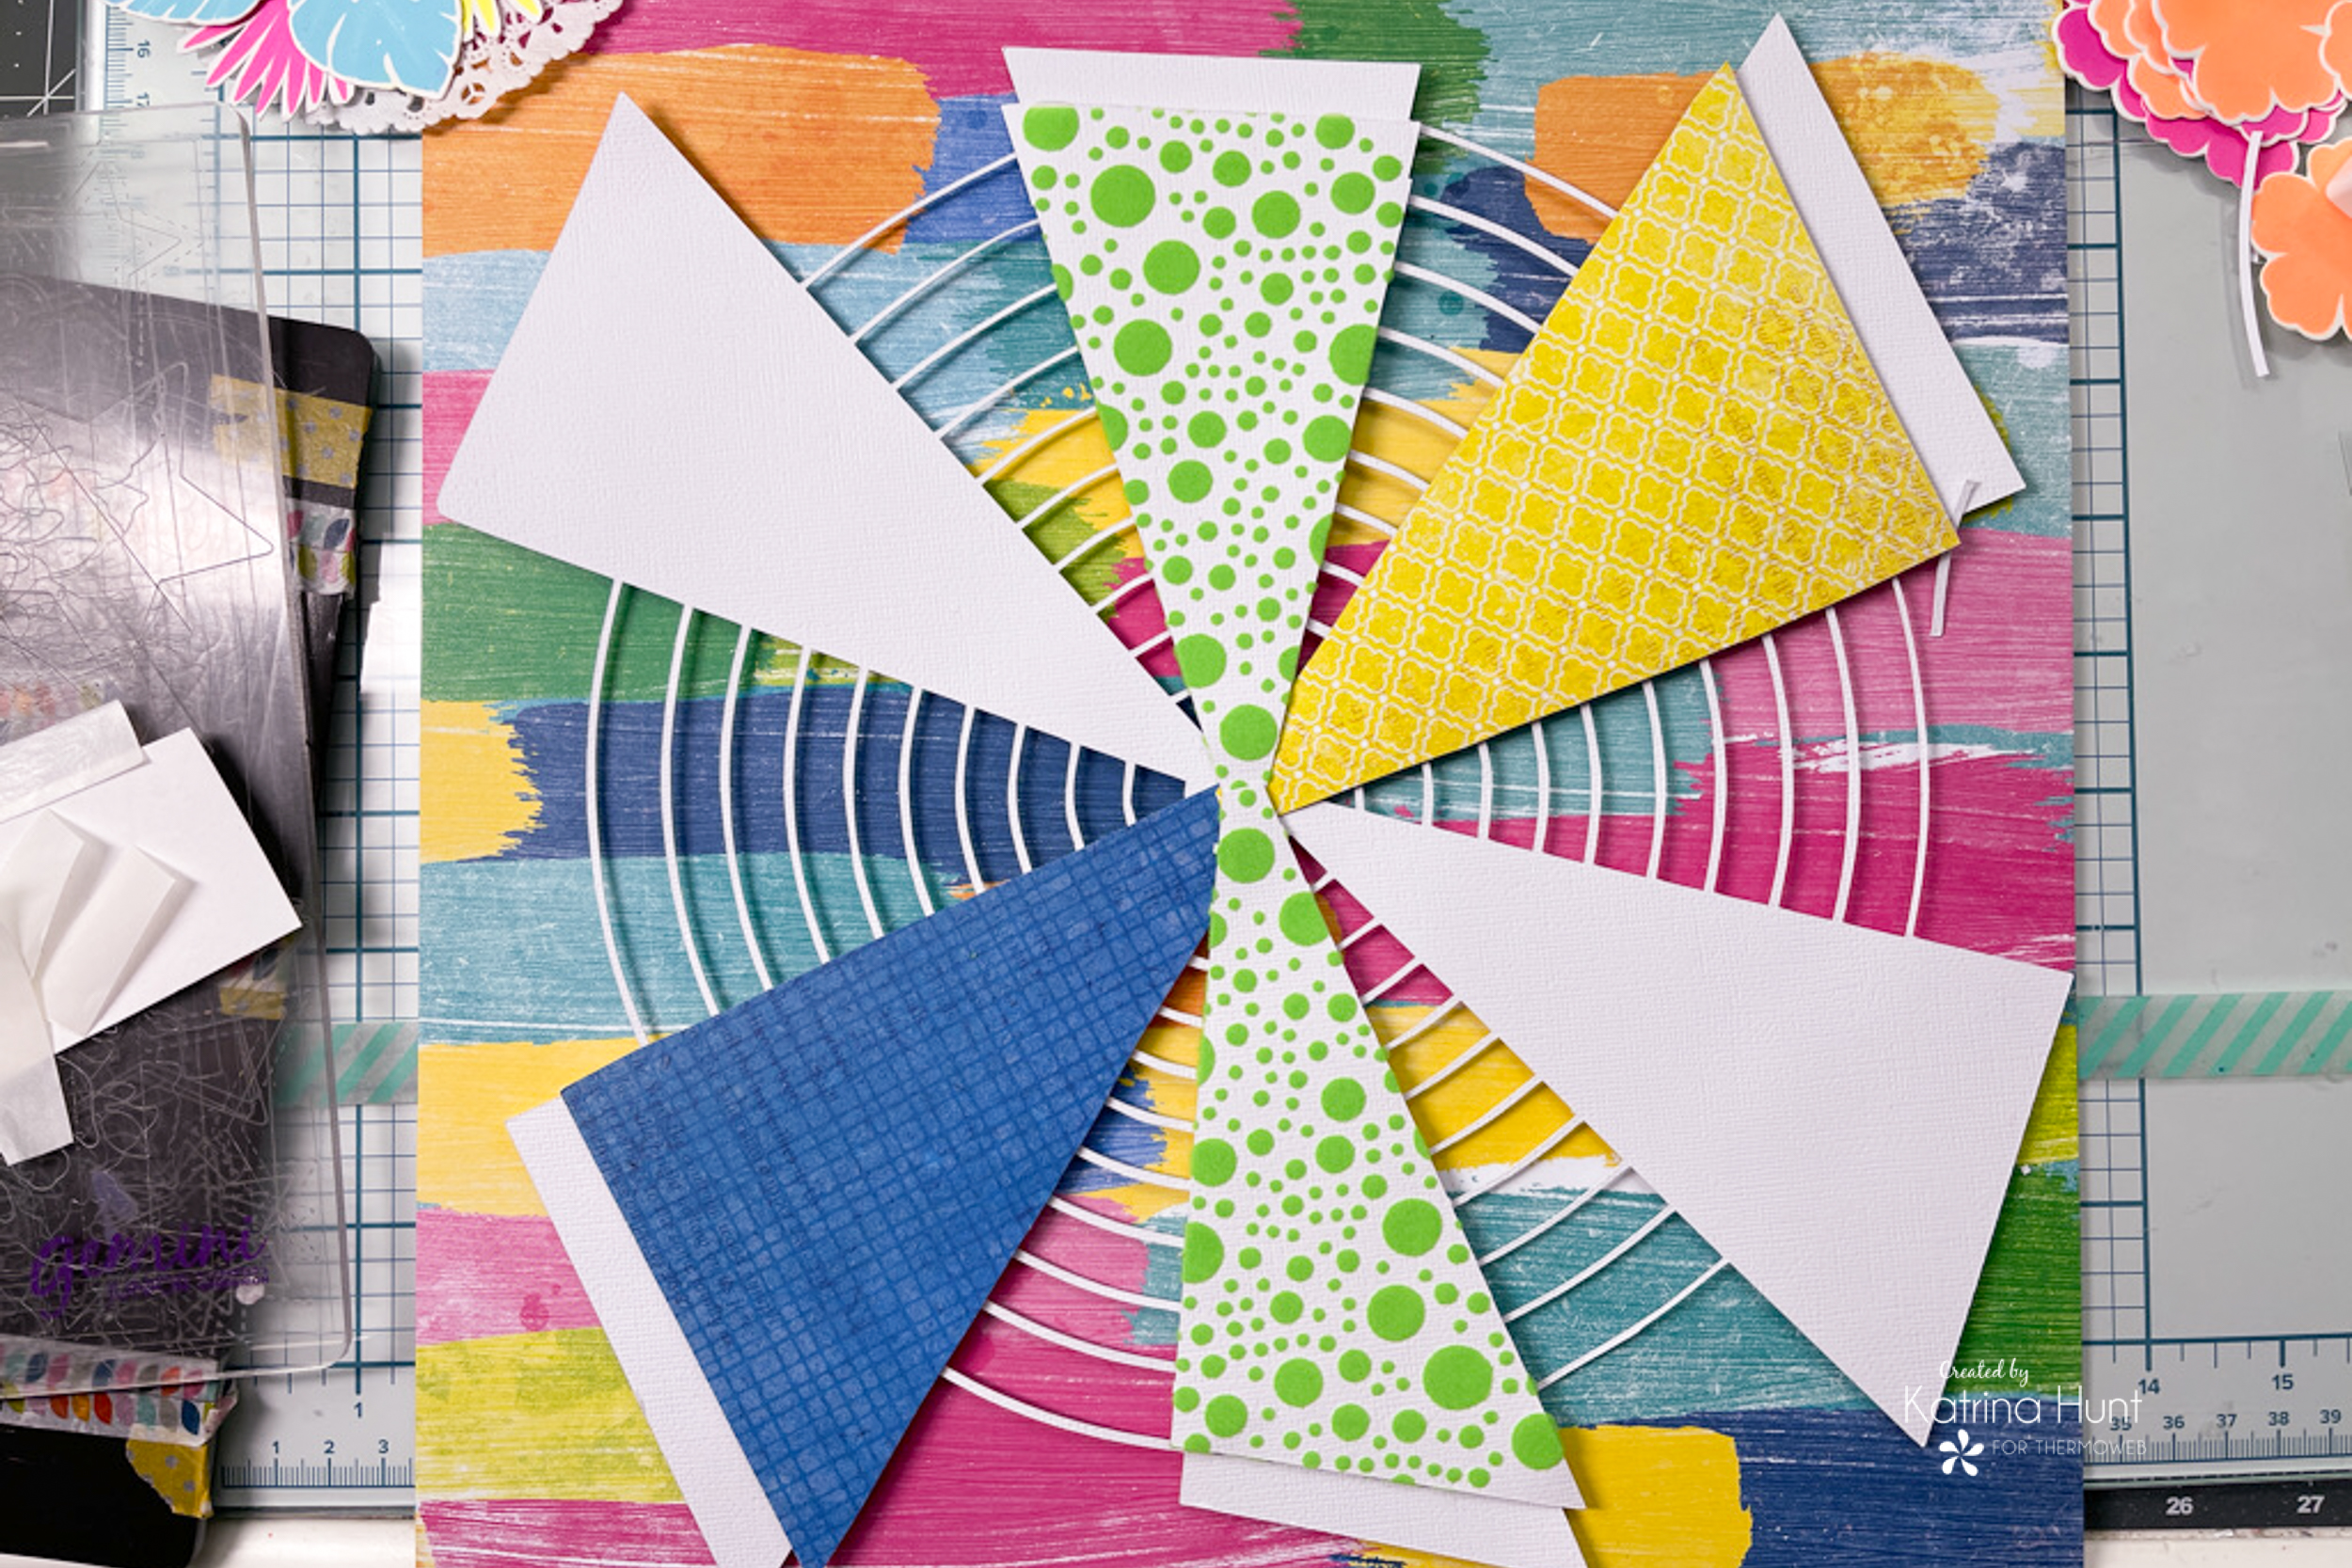
Now that we have some tips, let’s move on to constructing the layout! I started with a free cut file from Paper Issues-Circle Burst. I actually cut it twice, because I wanted to use some of it as a template for my pattern paper and also to stencil on two pieces using flock.
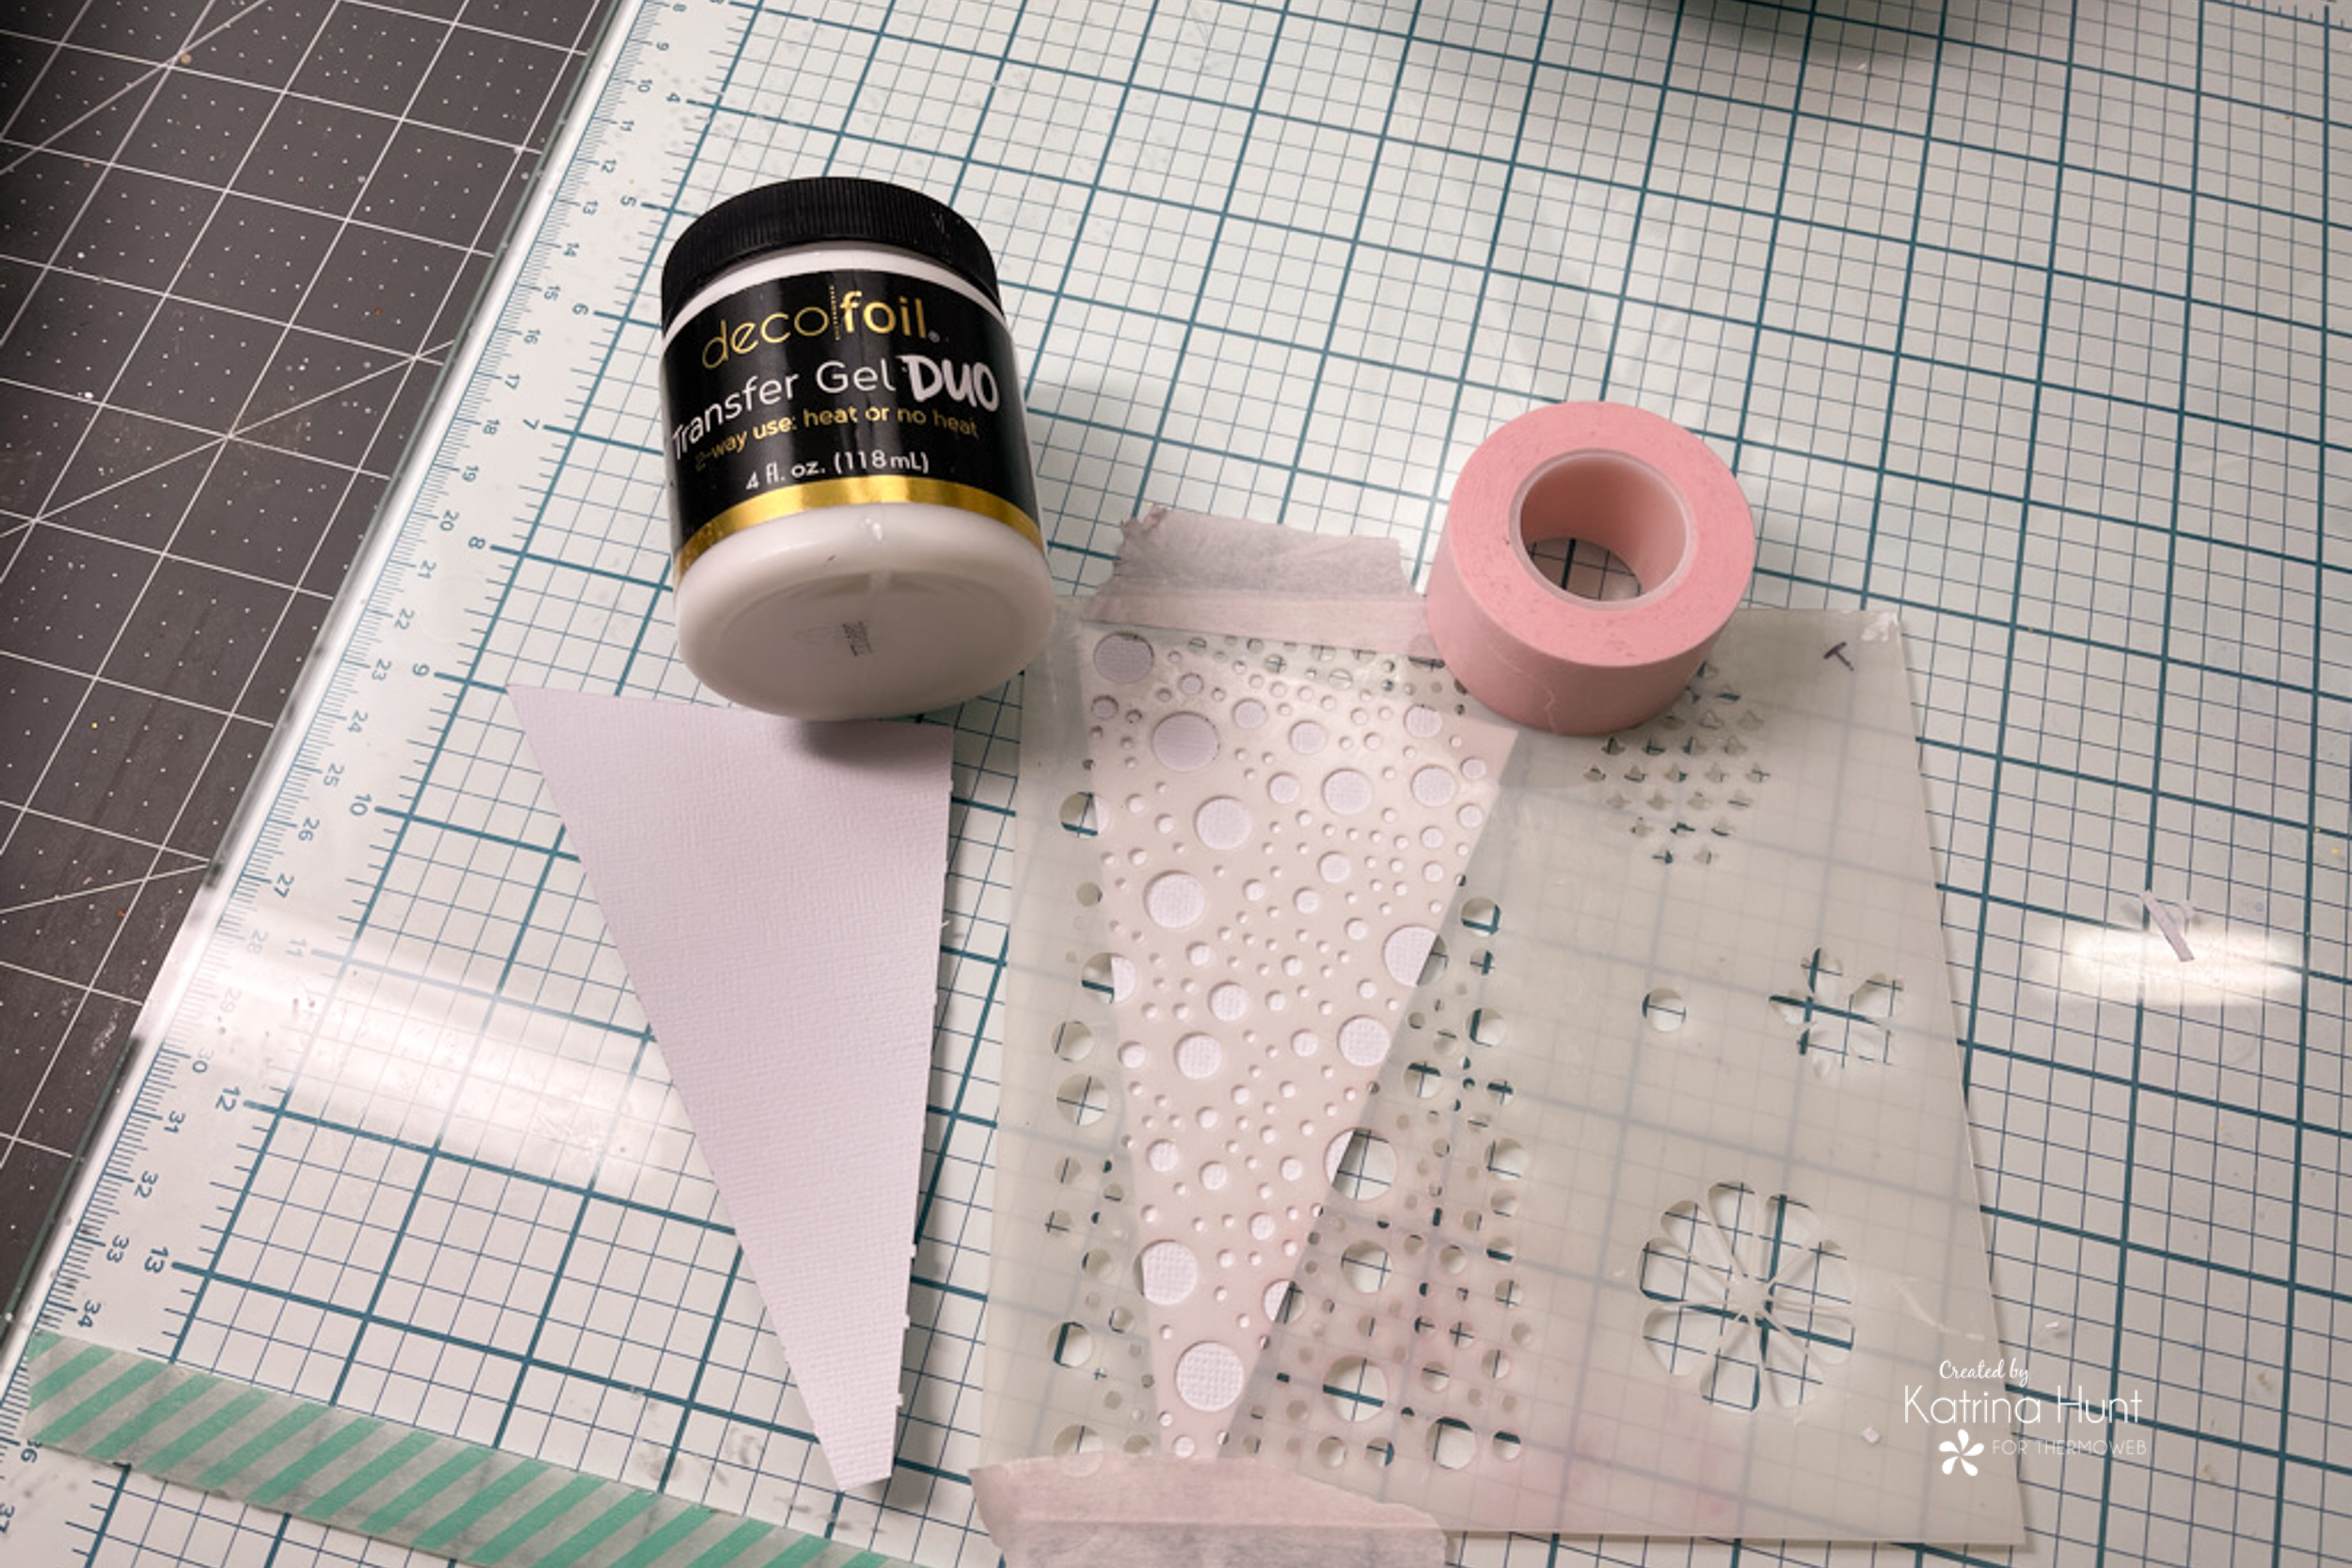
To begin stenciling my two pieces, I taped my stencil over each piece, using Pixie Tape to hold it in place on my glass mat. After securing to my surface, I used the Deco Foil Transfer Gel Duo as my preferred medium for my adhesive. I set the pieces aside after applying the transfer gel and actually let them sit overnight.
While my stenciled pieces were drying, I started working on the rest of the layout. I popped the cut file up with the 3D Foam Tape1/8th.
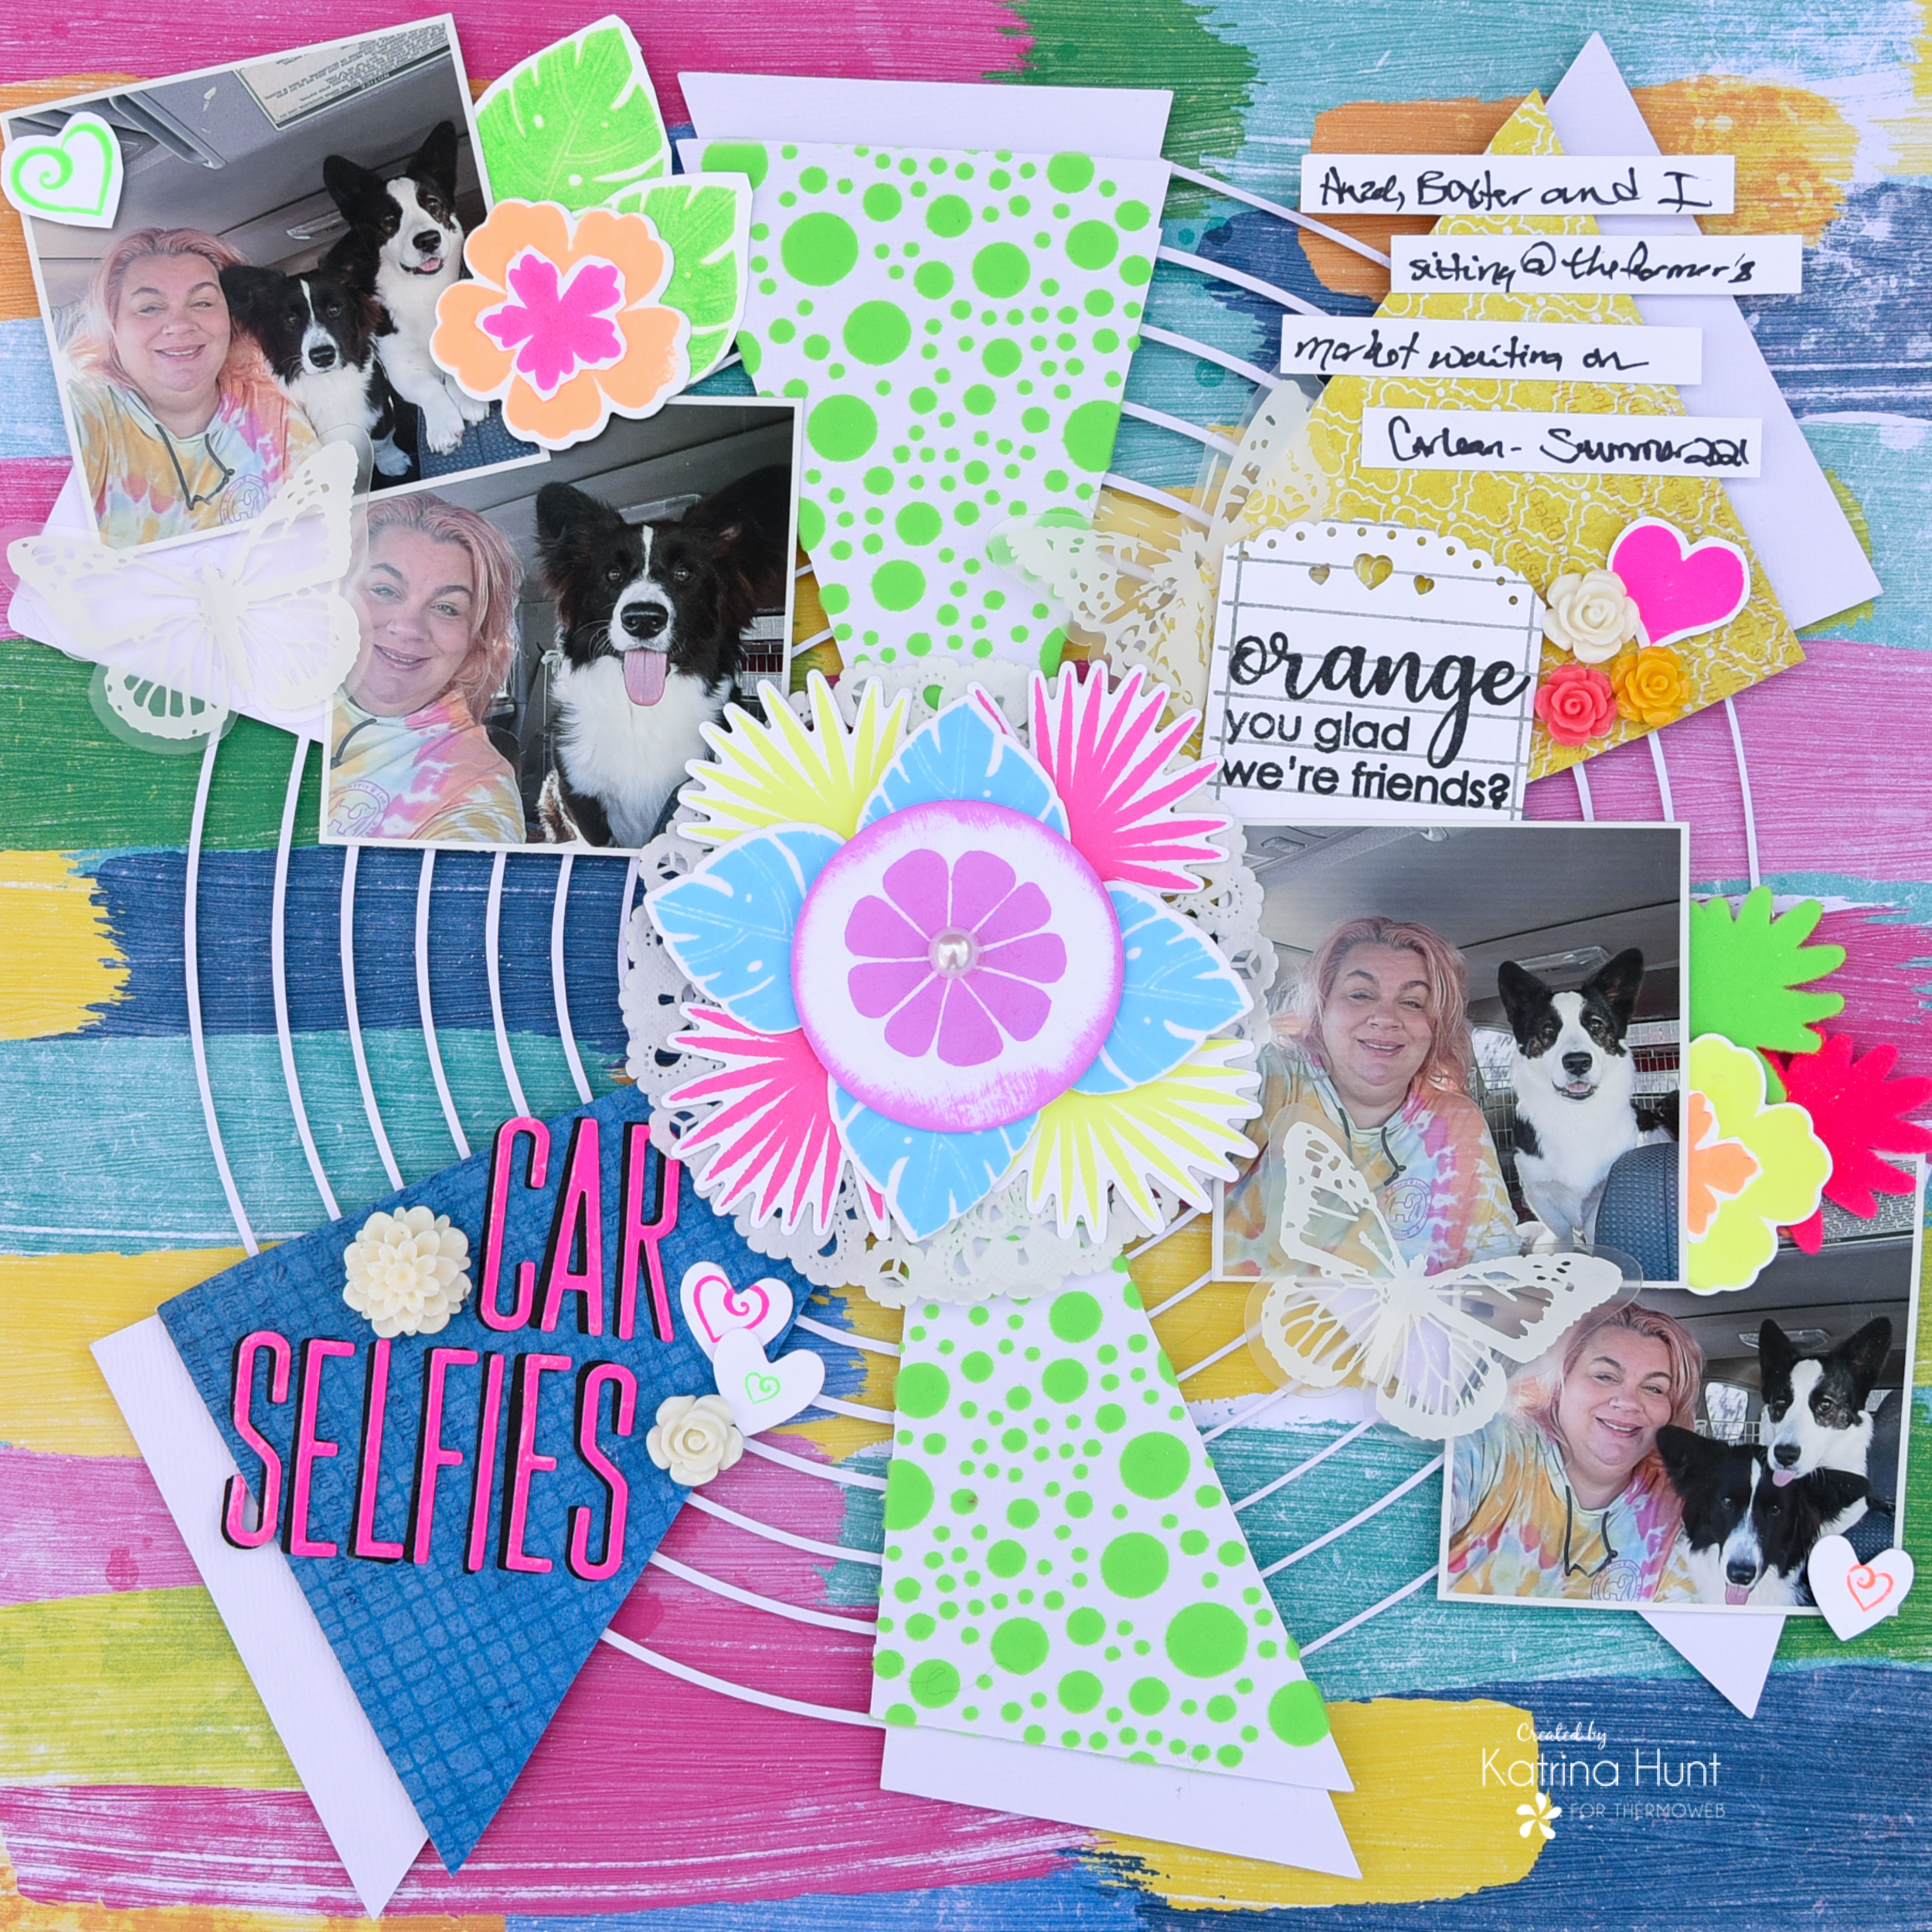
Decorating the Circle Cut File
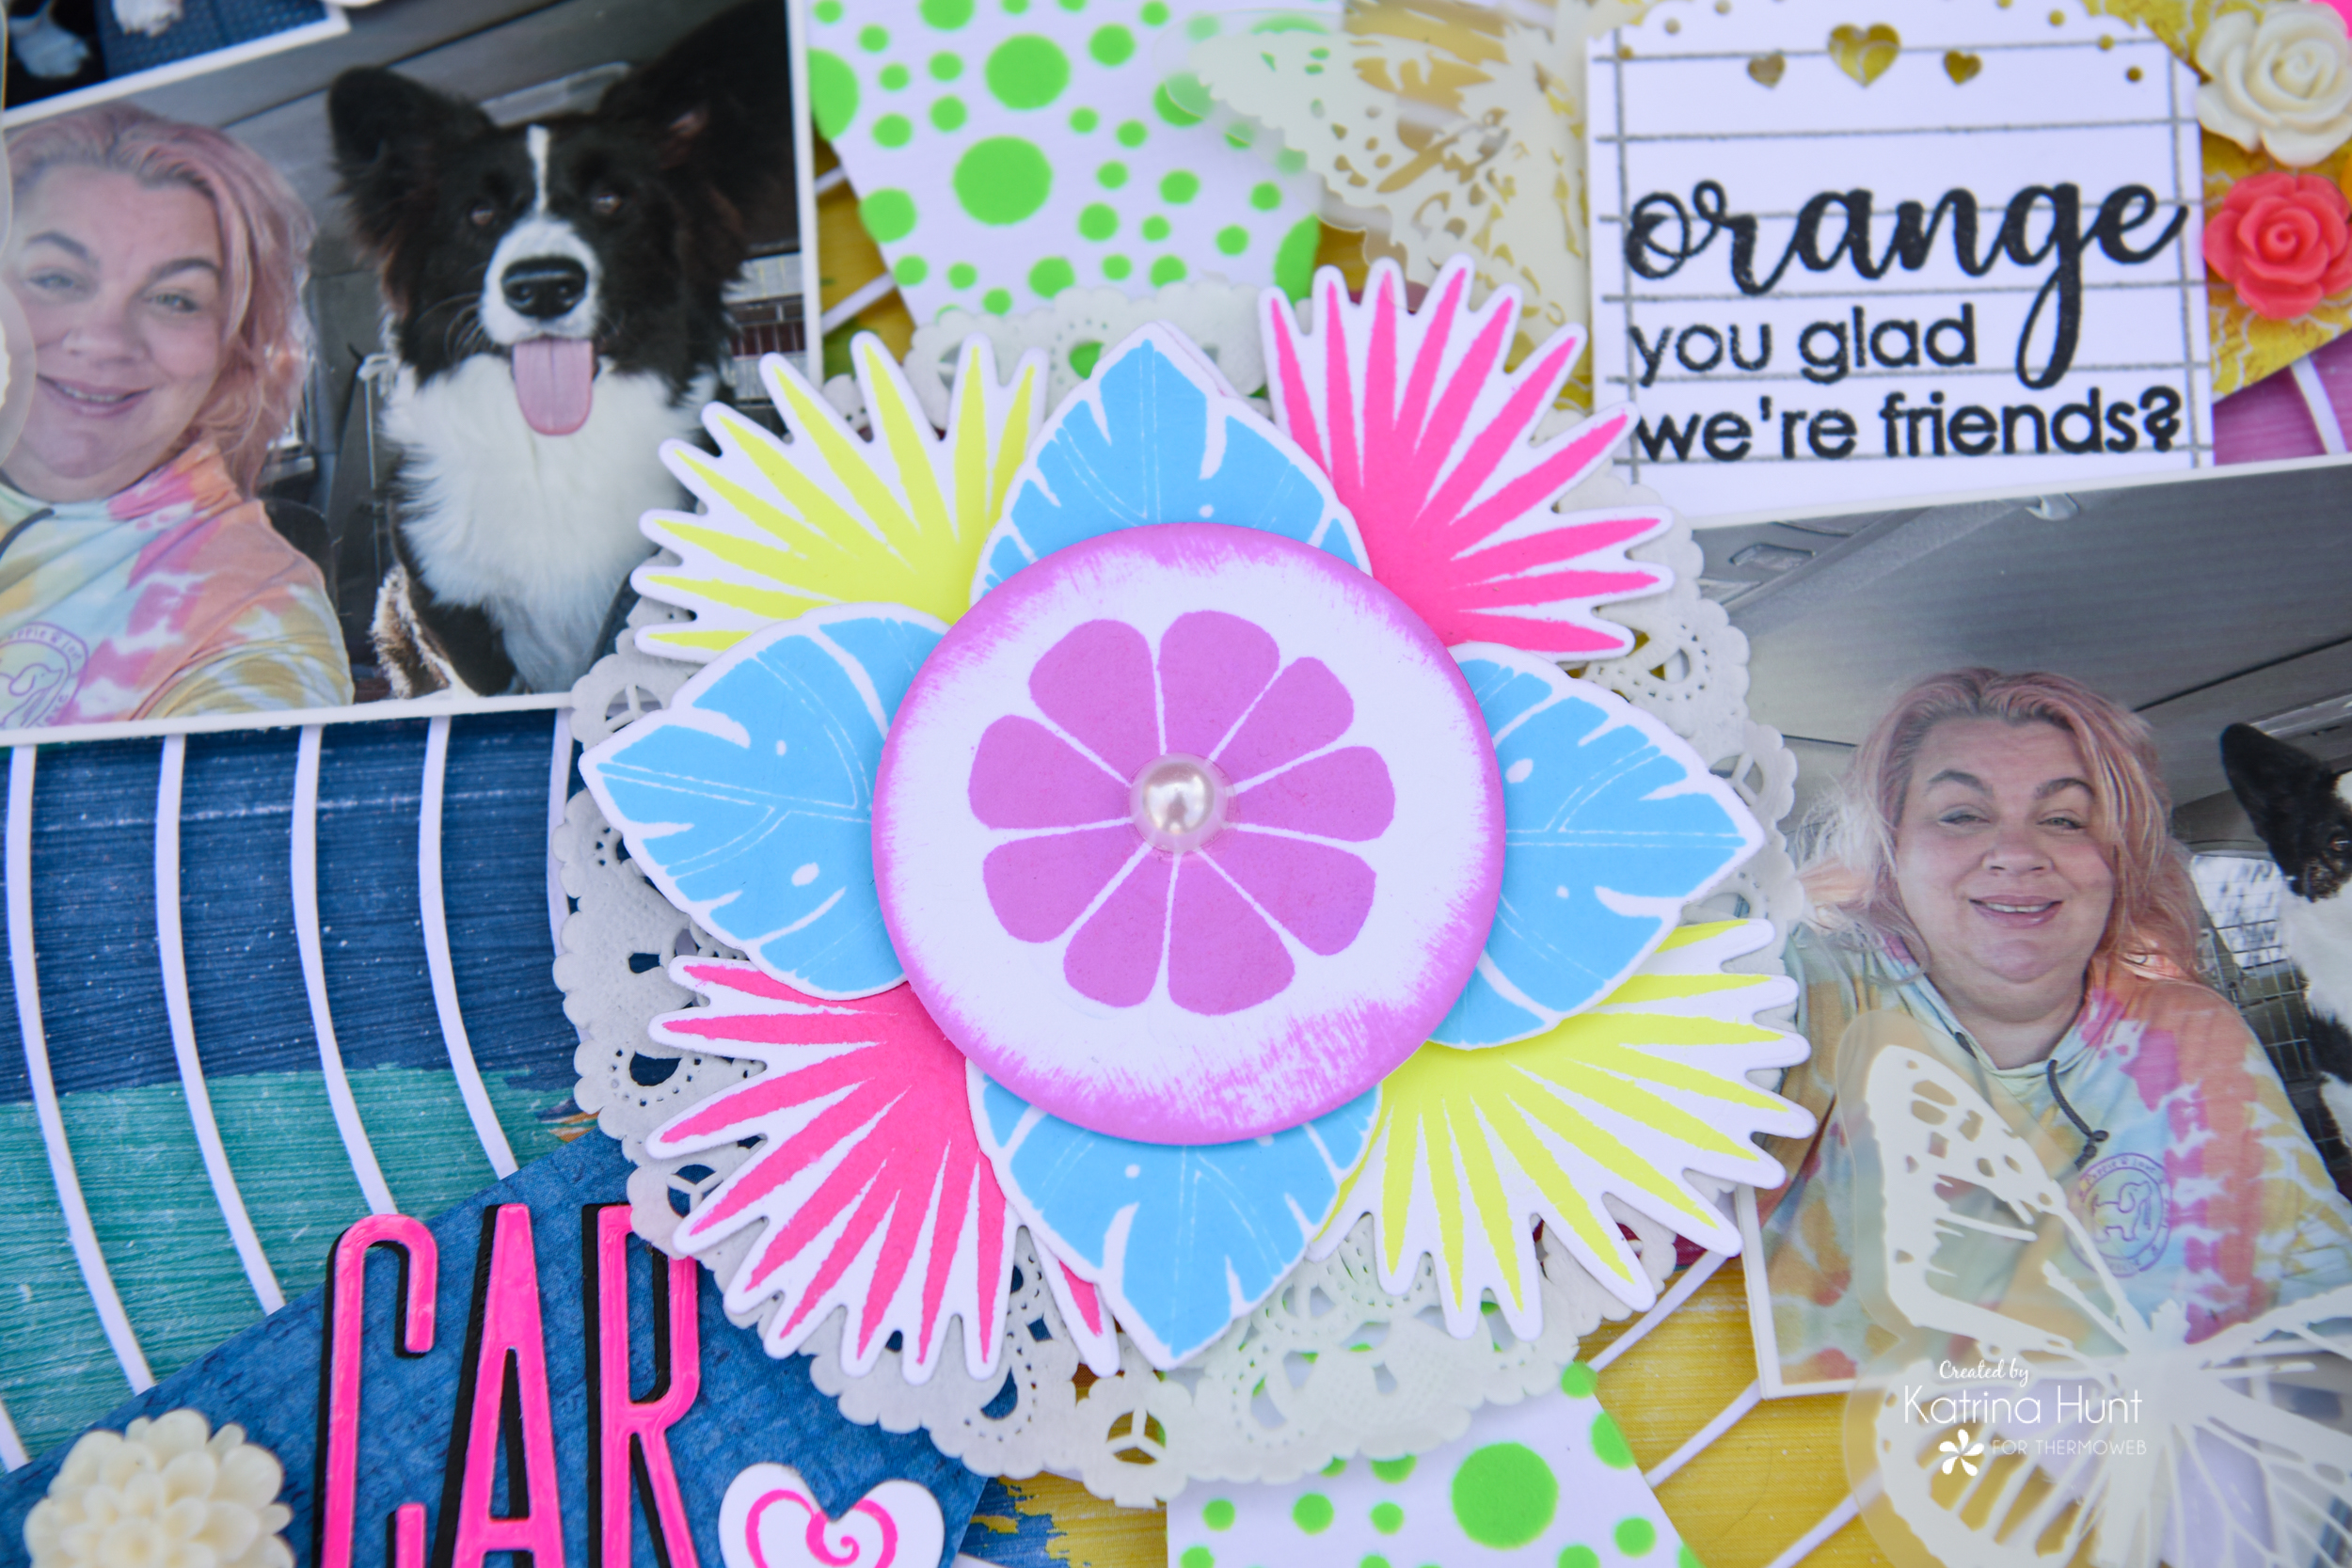
In order to make my idea I had work, I needed to cover the center area where the points met. I stamped several leaves in the Rina K Neon Inks, die cut them with the matching dies and then layered them in a circle on top of a doily.
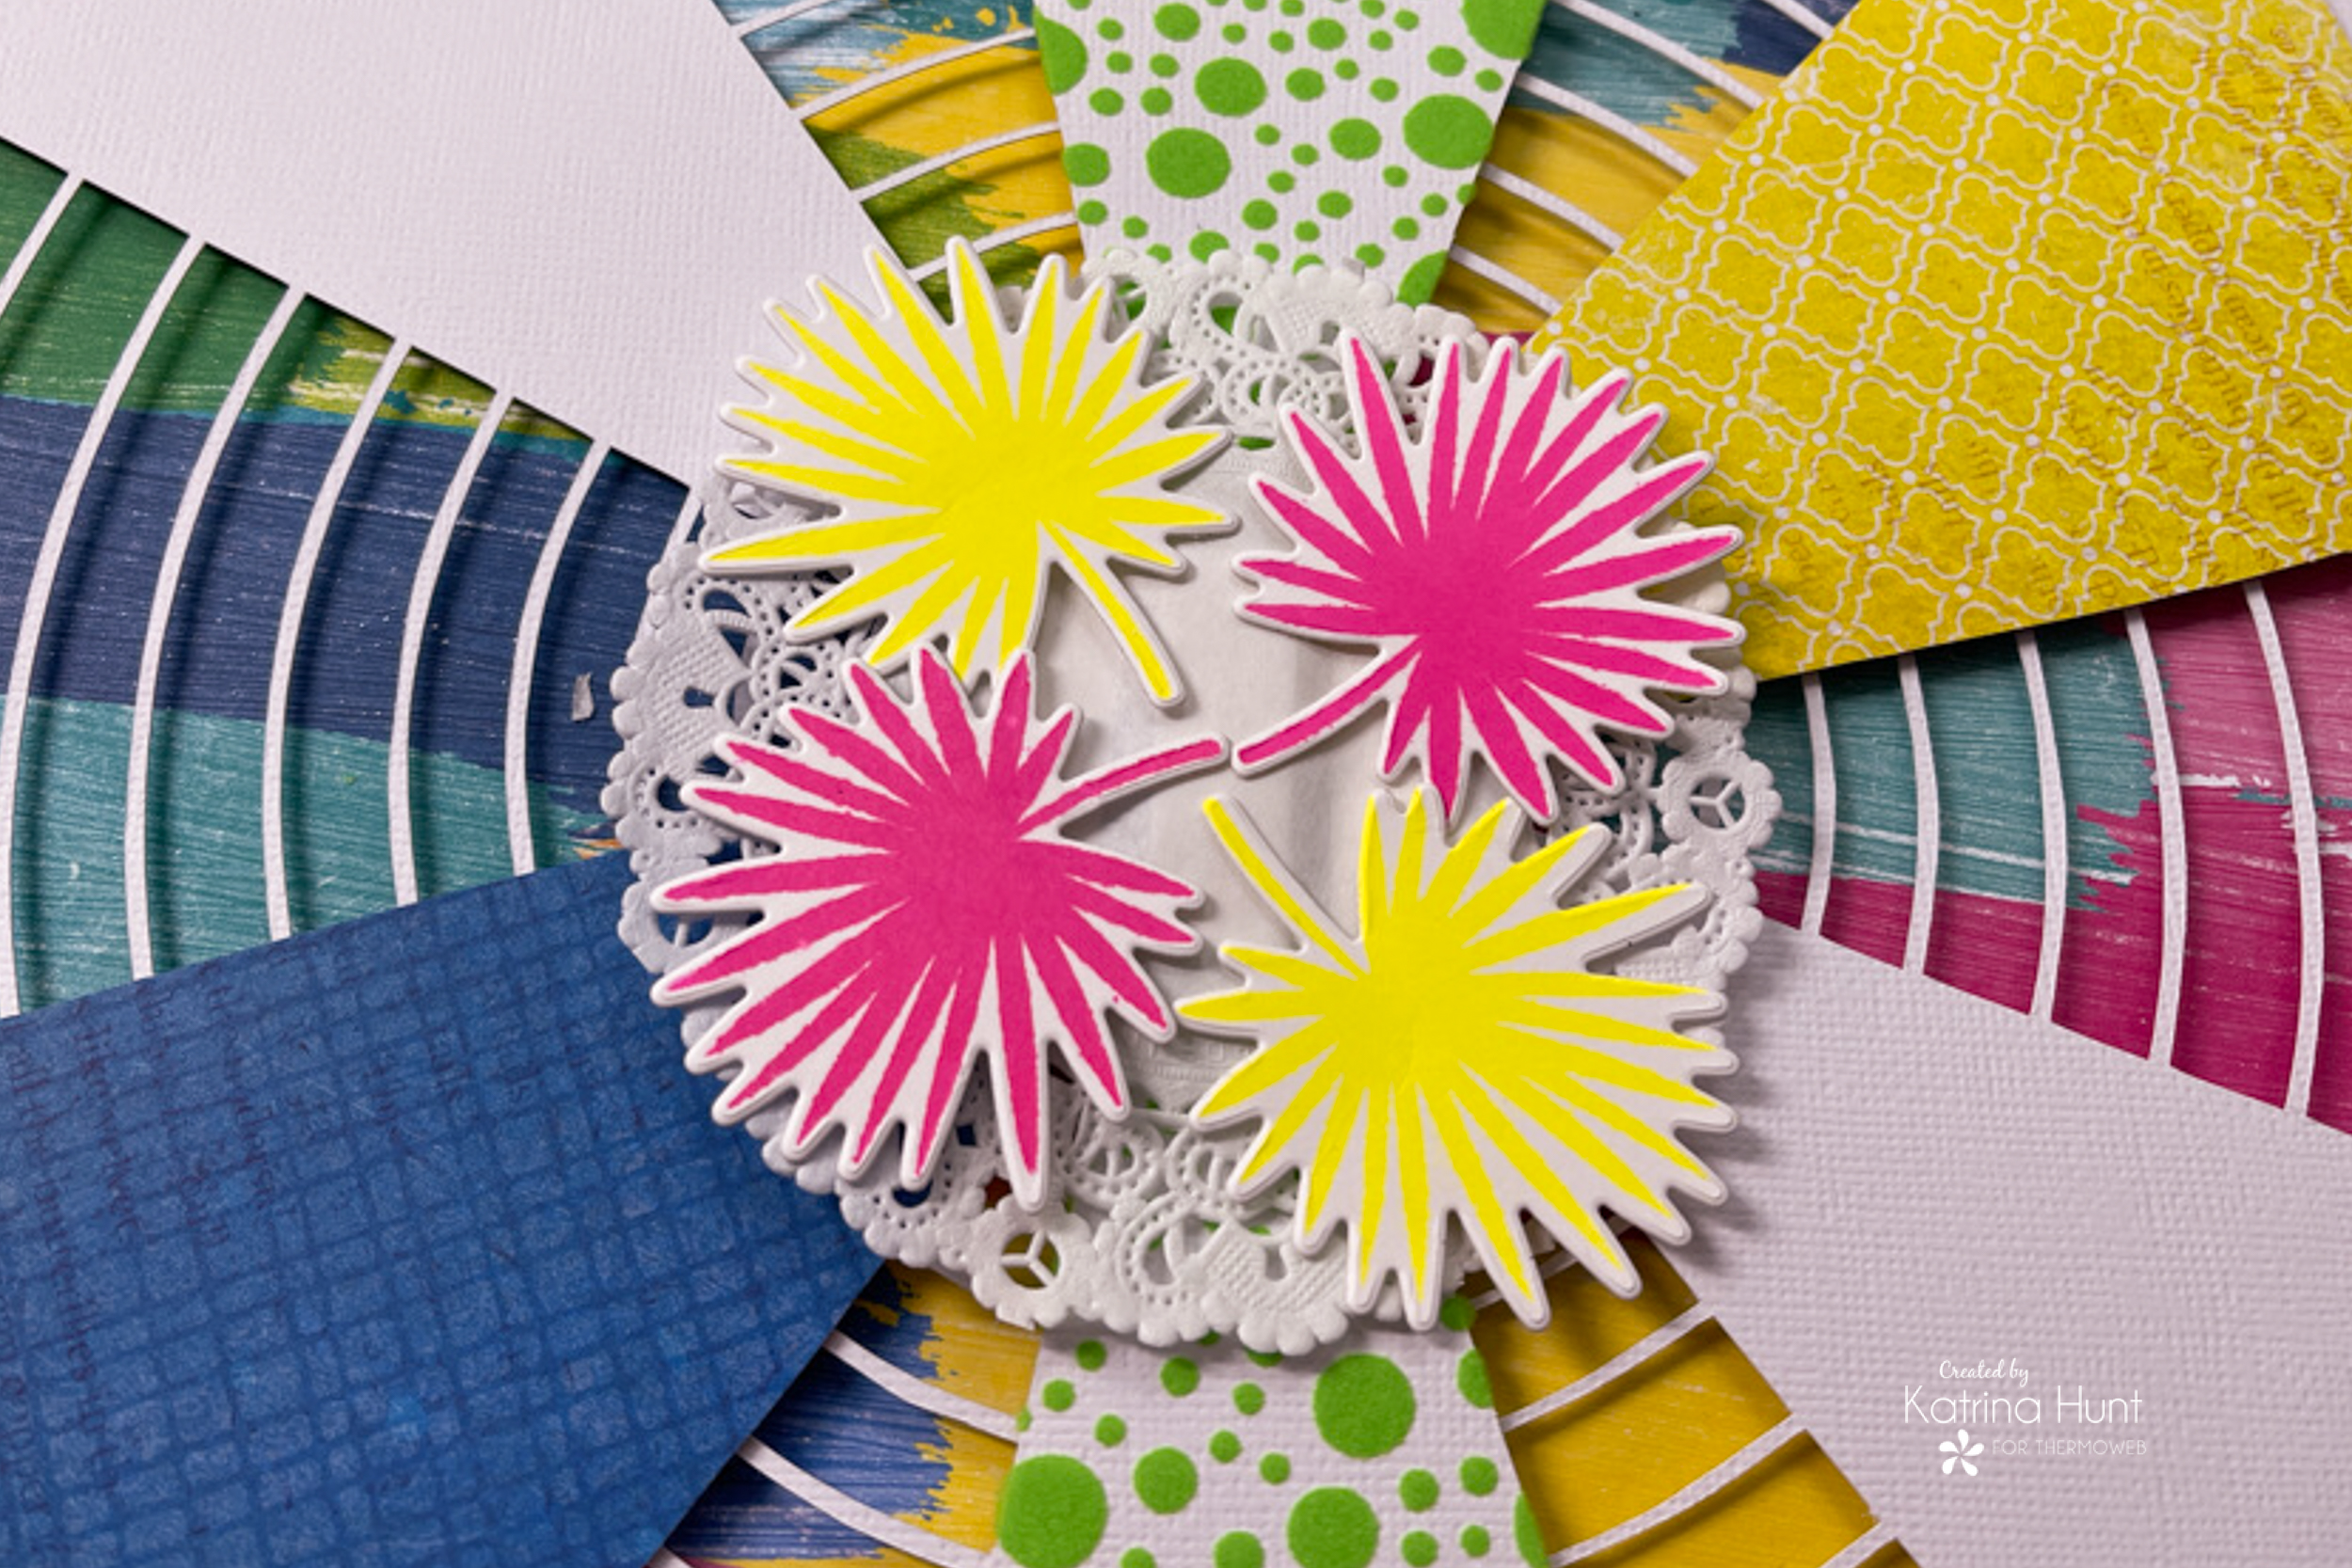
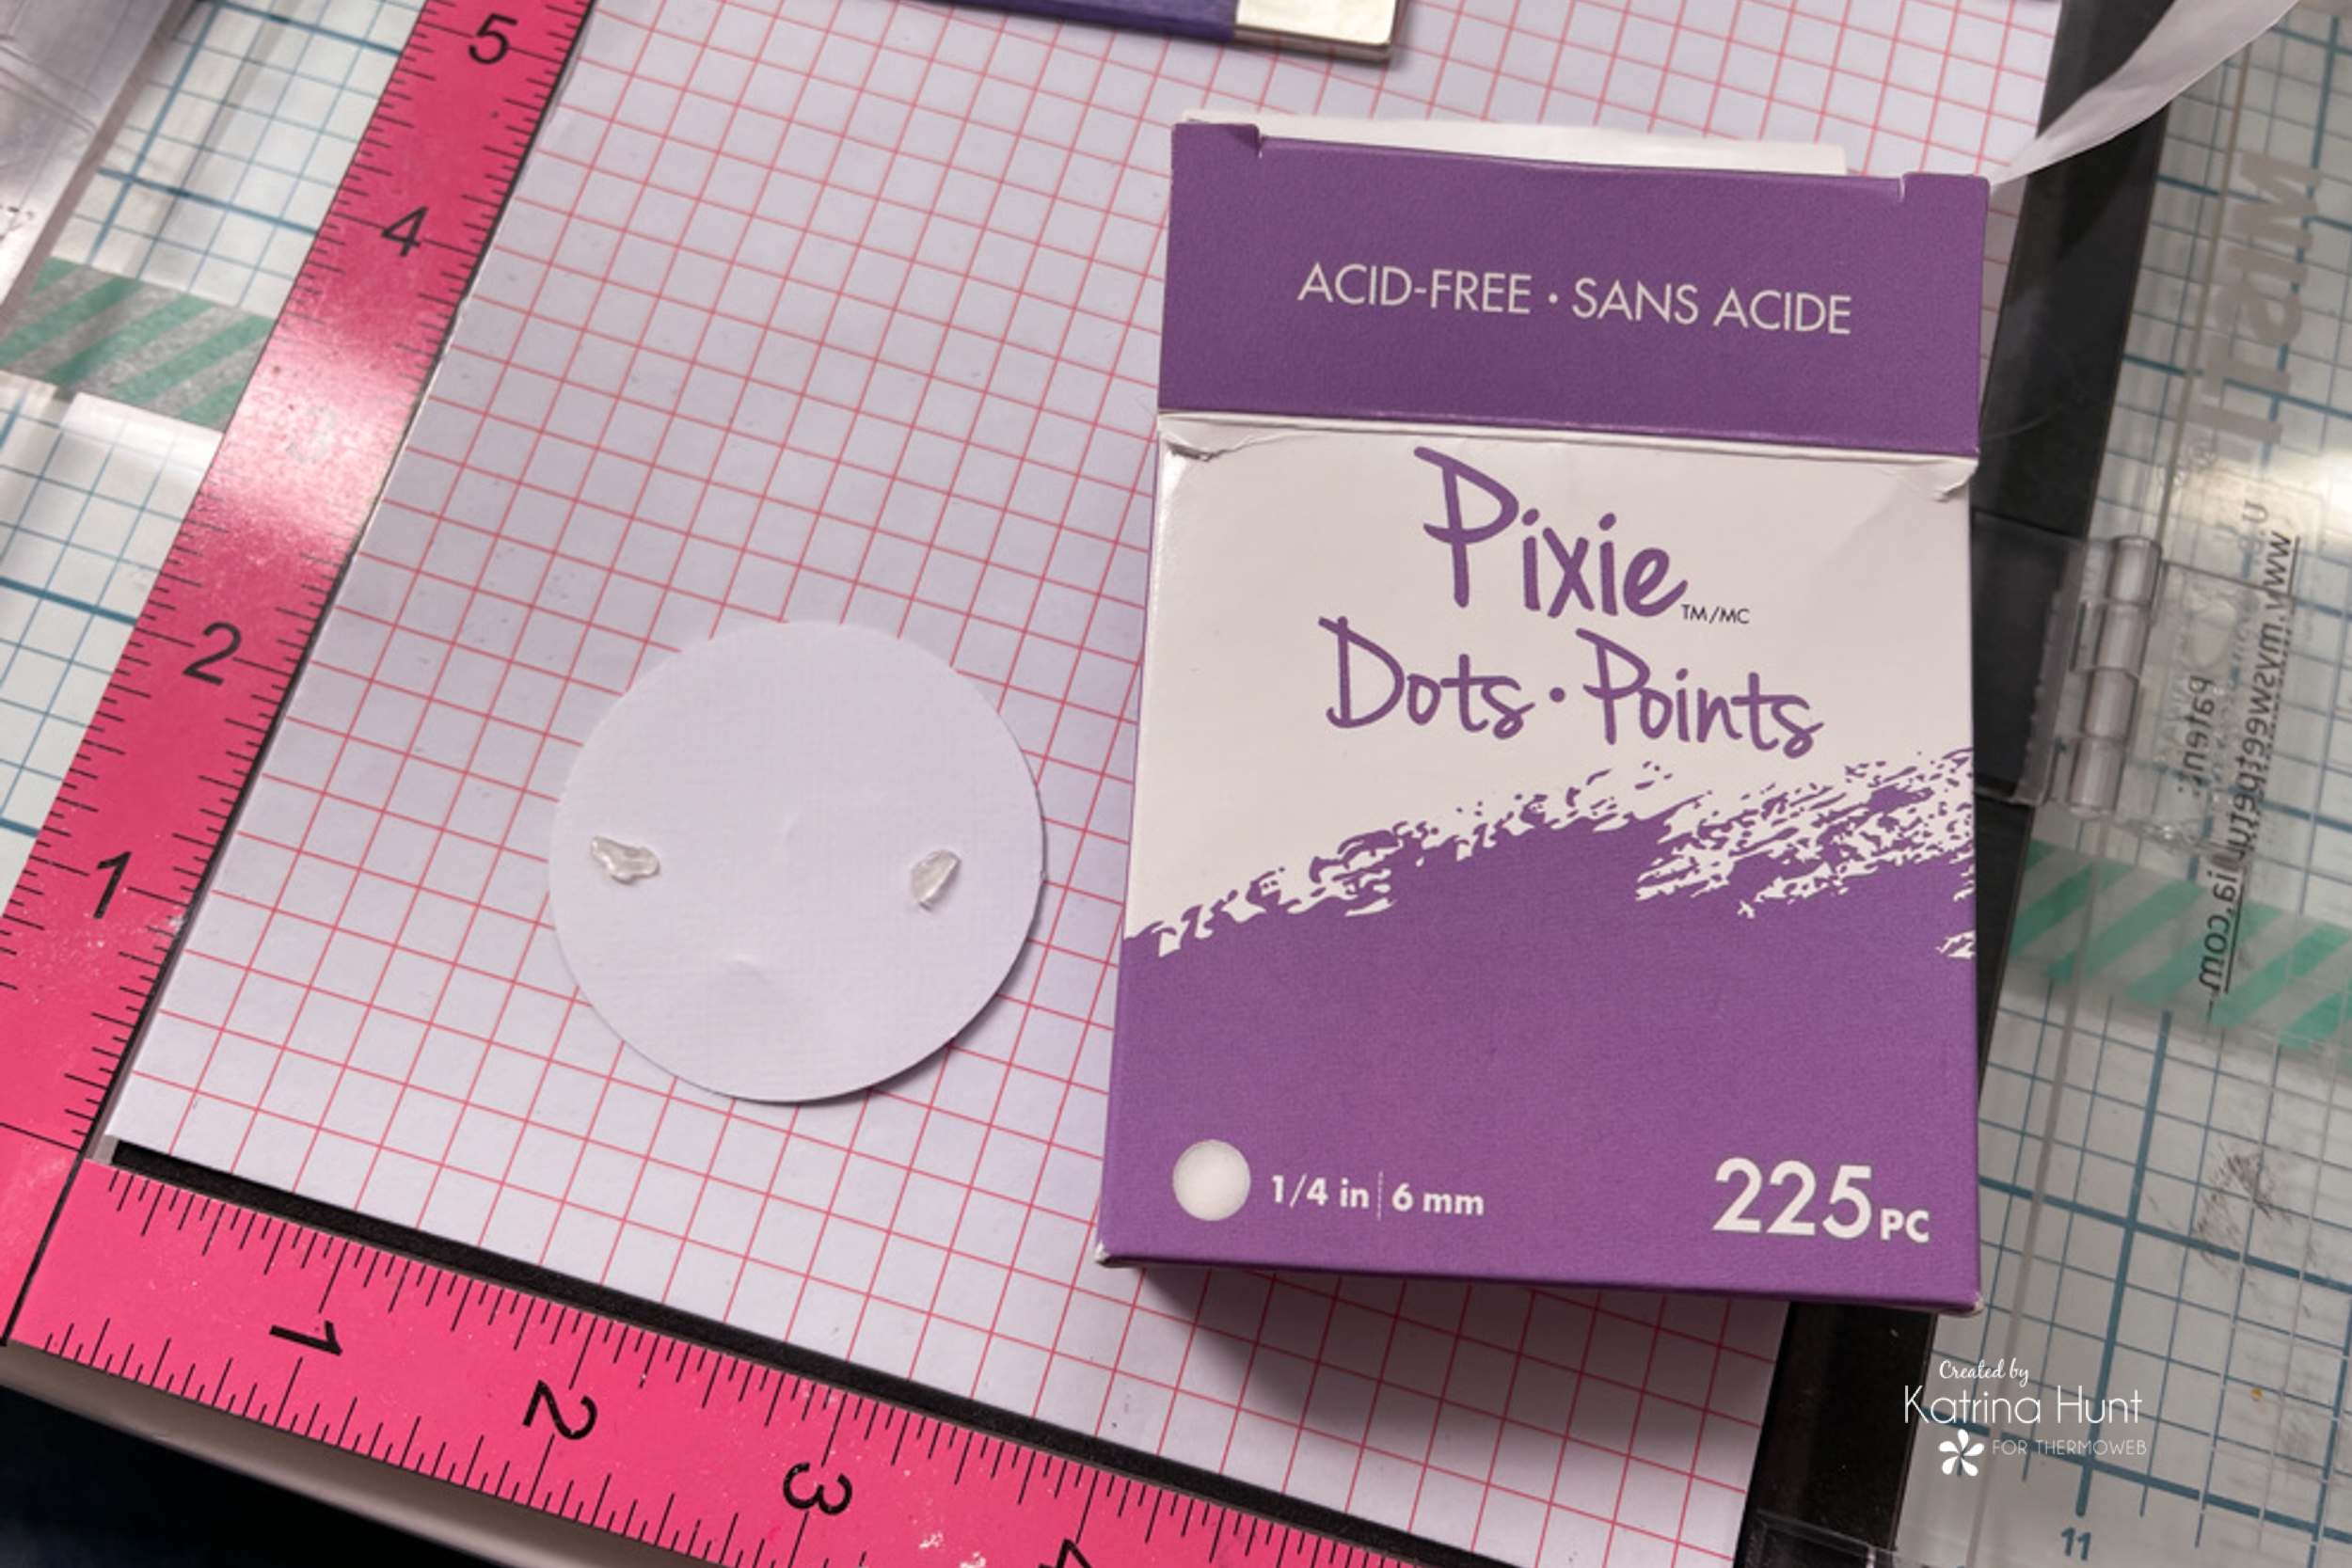
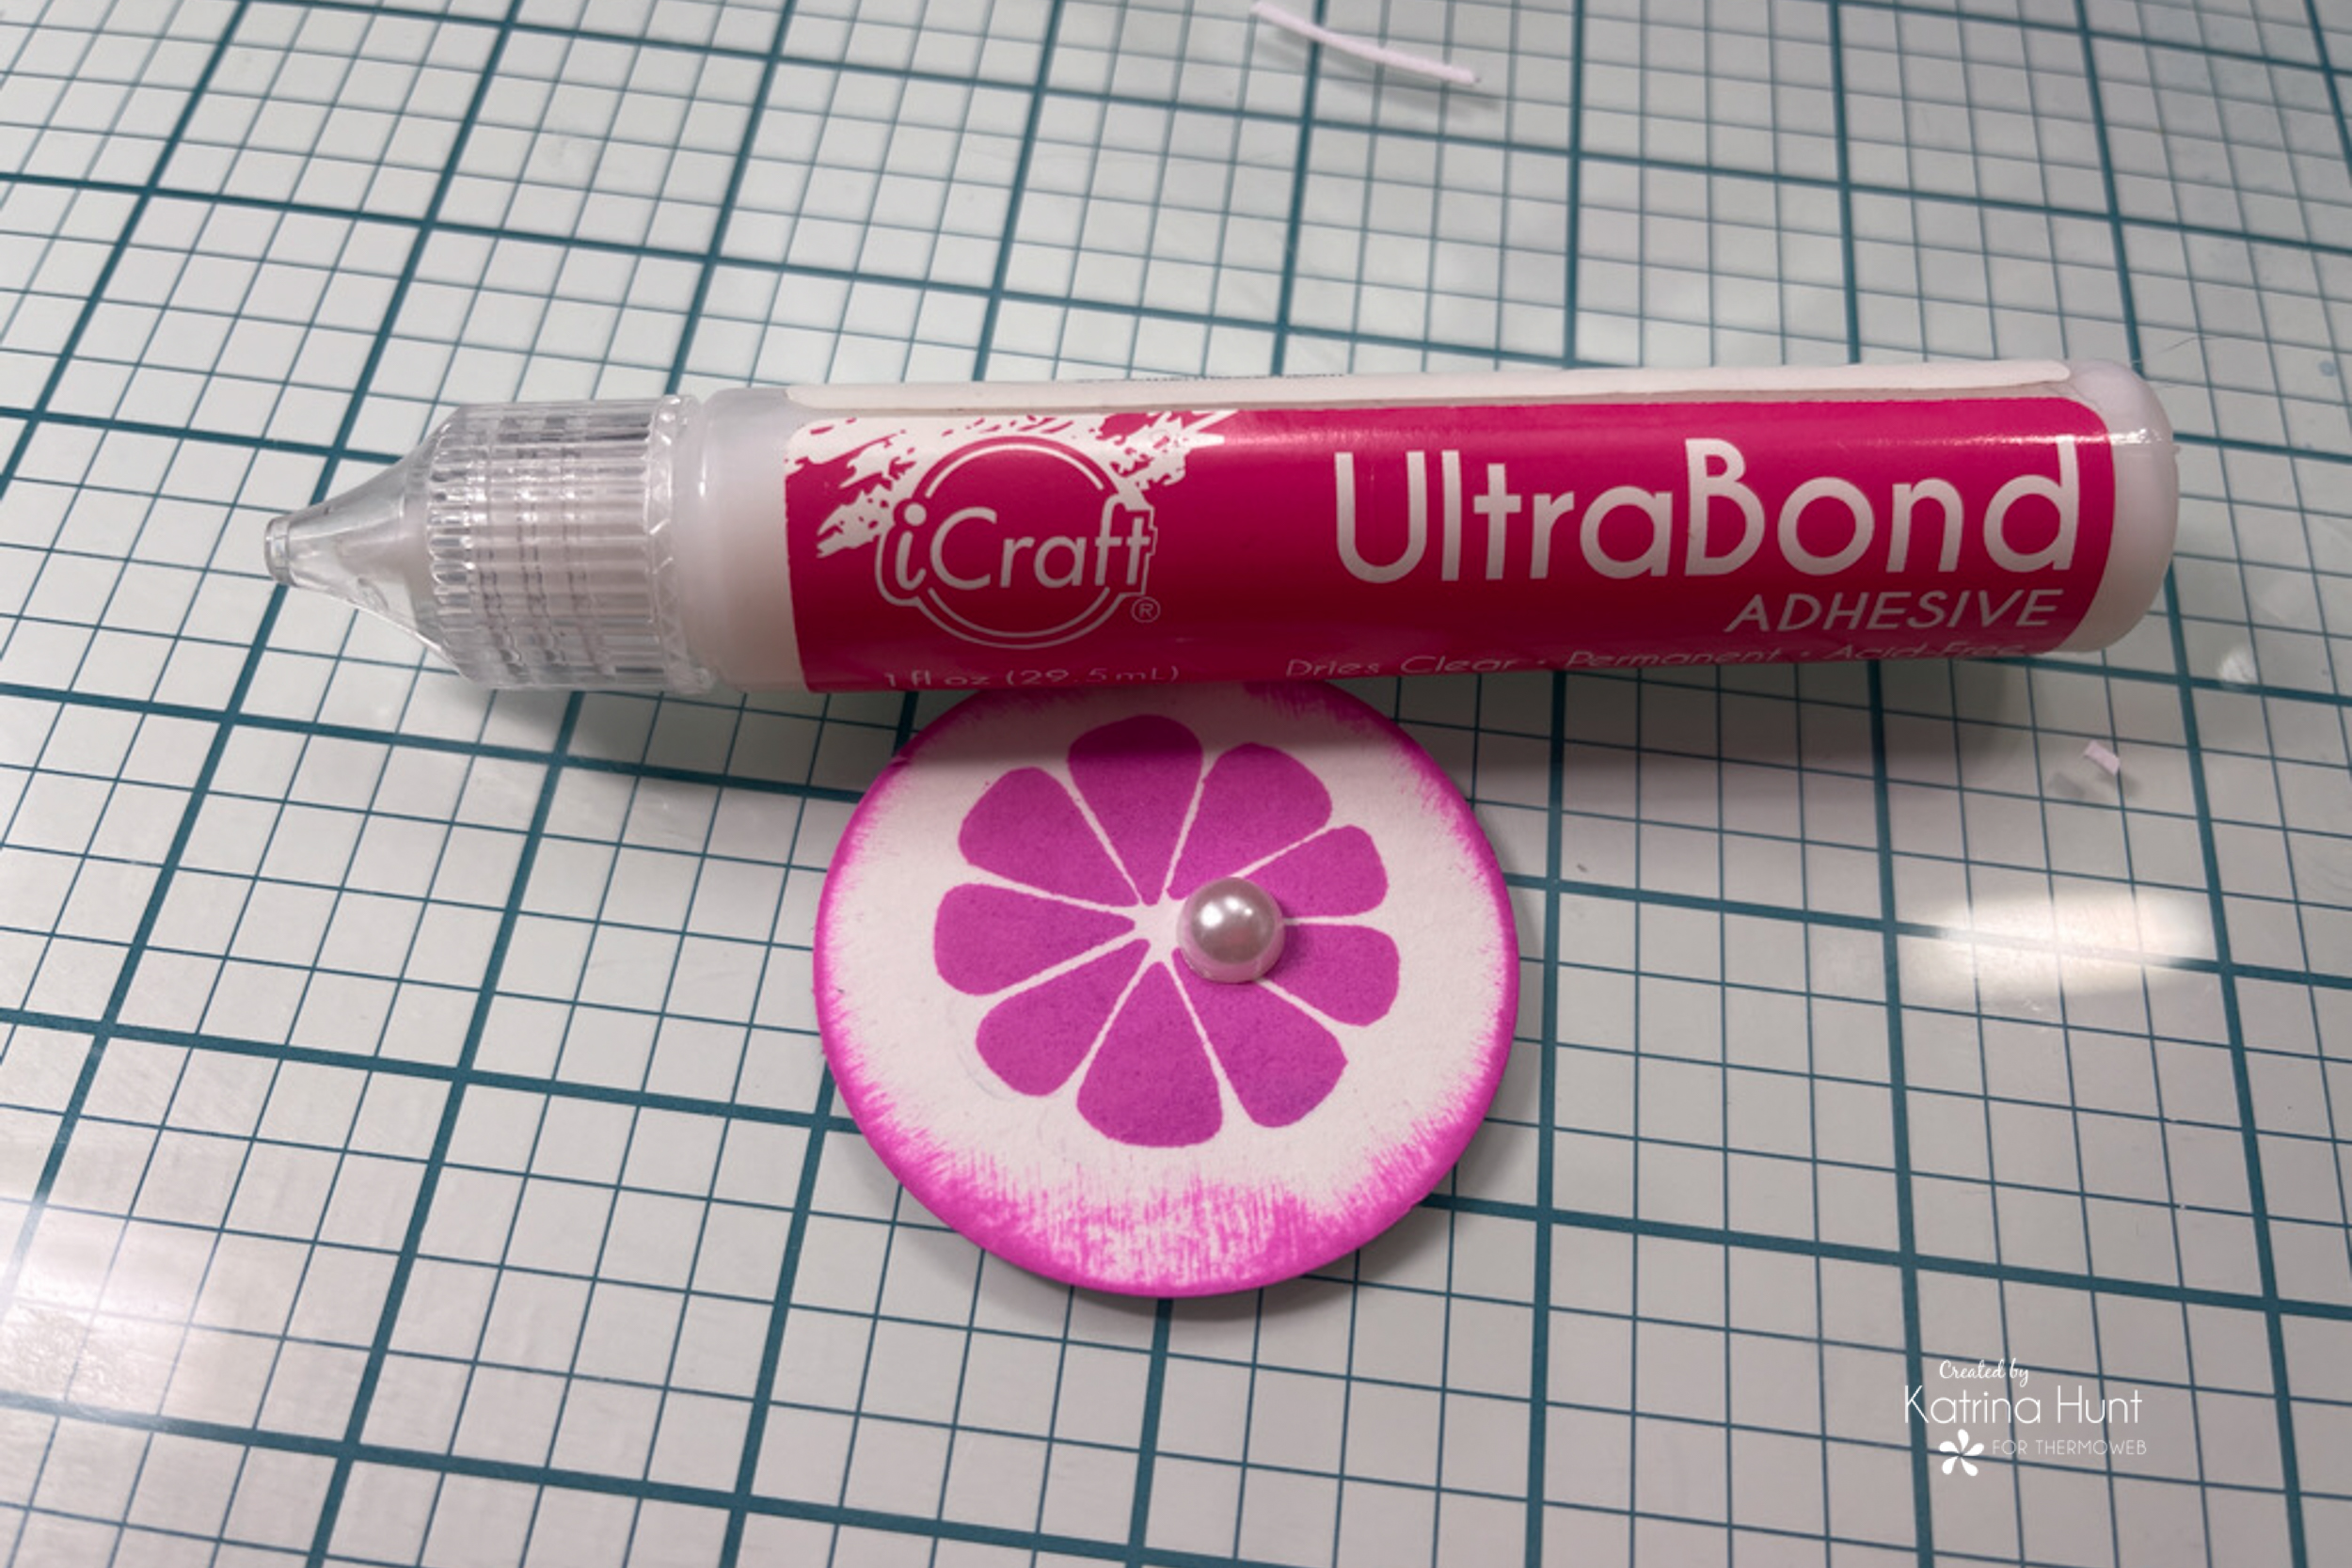
After that, I punched a circle out of cardstock and stamped it with the Neon Ink again. This time with the center of the citrus fruit in the stamp collection. I held the punched circle in place with some Pixie Dots. After stamping, I adhered a gem in the middle with some Ultra Bond Liquid Adhesive. I love how the center section turned out!
Now it’s time to flock my stenciled pieces that have dried. I used Electro Pop Screamin’ Green Flock as my color choice. I wavered between the pink and green, but there was already more pink going on than green, so green won out!
Have you seen the NEW Deco Foil Carrier Sheets? They work amazingly with transfer gels or adhesives. The inside is a nonstick surface, which was perfect for this since I got a little gel hanging over on the sides that I didn’t wipe off. I ran my sandwich thru my laminator and then carefully peeled the flock transfer sheet away from the cardstock. After my pieces were flocked, I layered everything together on the cut file where it was supposed to go. 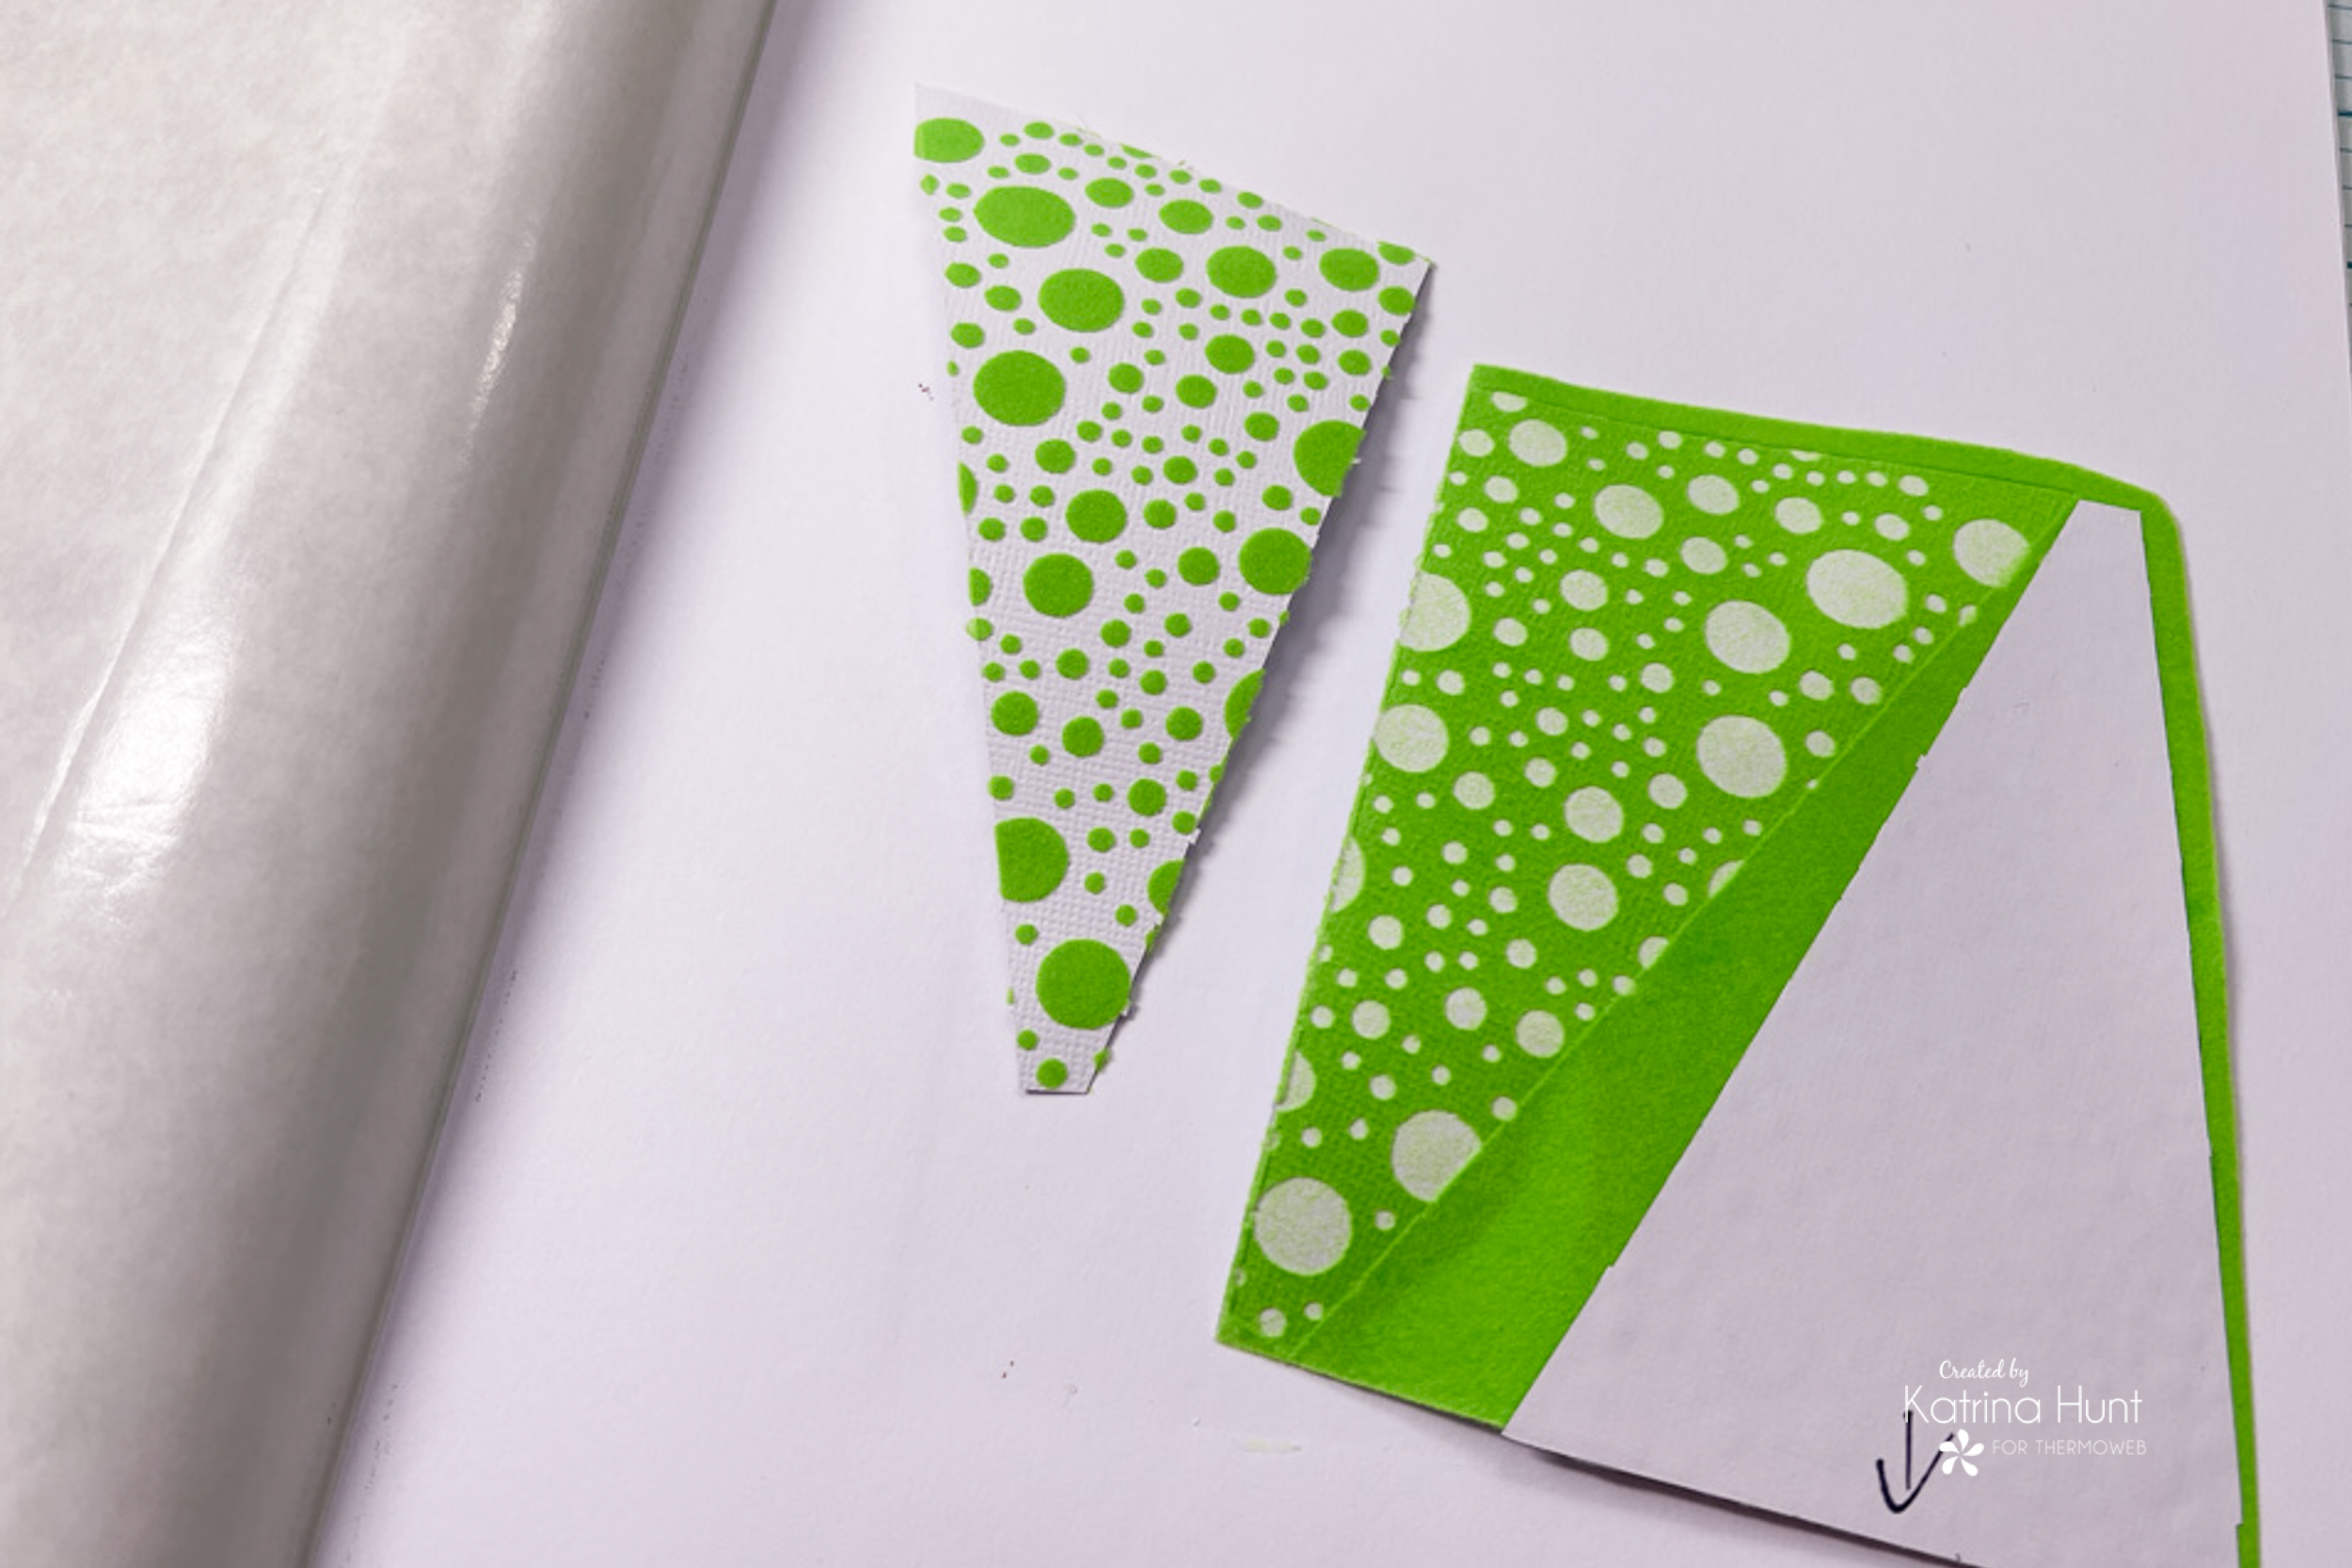
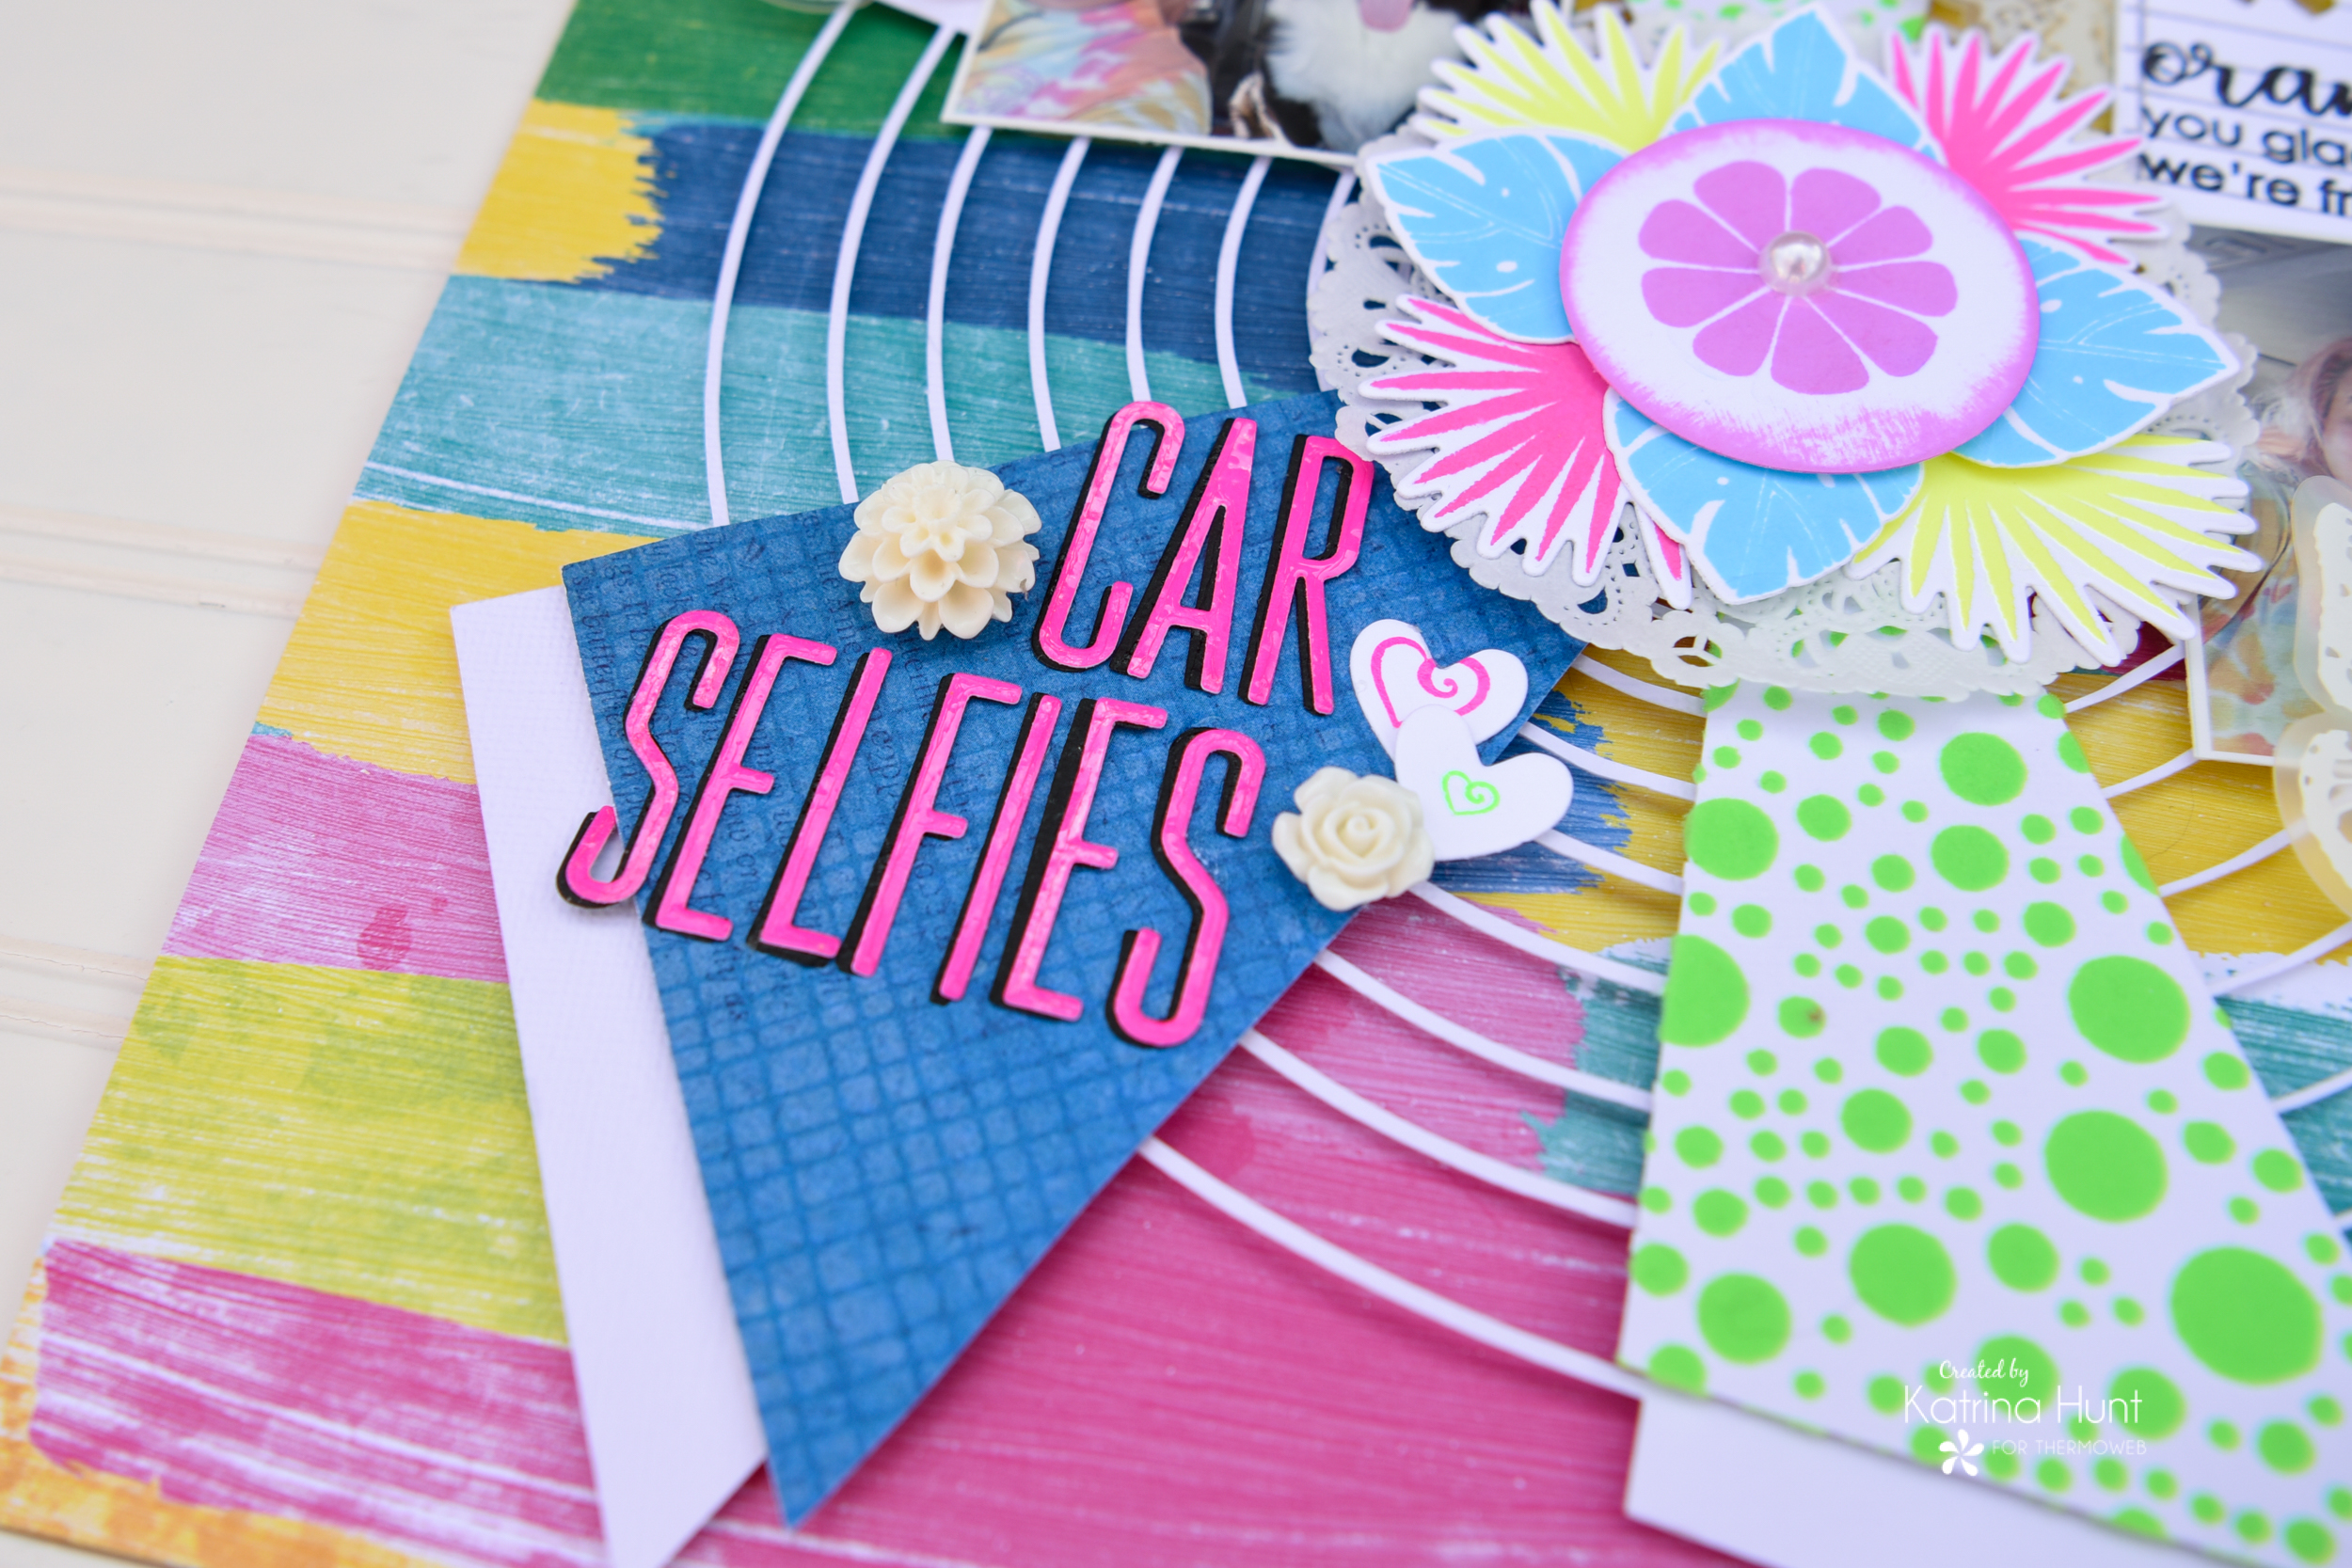
 THE LITTLE DETAILS
Now it was time for my title work. The winner for color was the Enamel Transfer Sheets in Poppin’ Pink for this! I die cut my alphas three times, two times out of black cardstock and then one time out of my Enamel Sheet I made. I adhered the two black letters together with the Ultra Bond Liquid Adhesive and placed them aside to dry with an acrylic block on top of them. To make the enamel sheet, cut a piece of the Easy Cut Adhesive the size you need, along with a piece of white cardstock the same size.
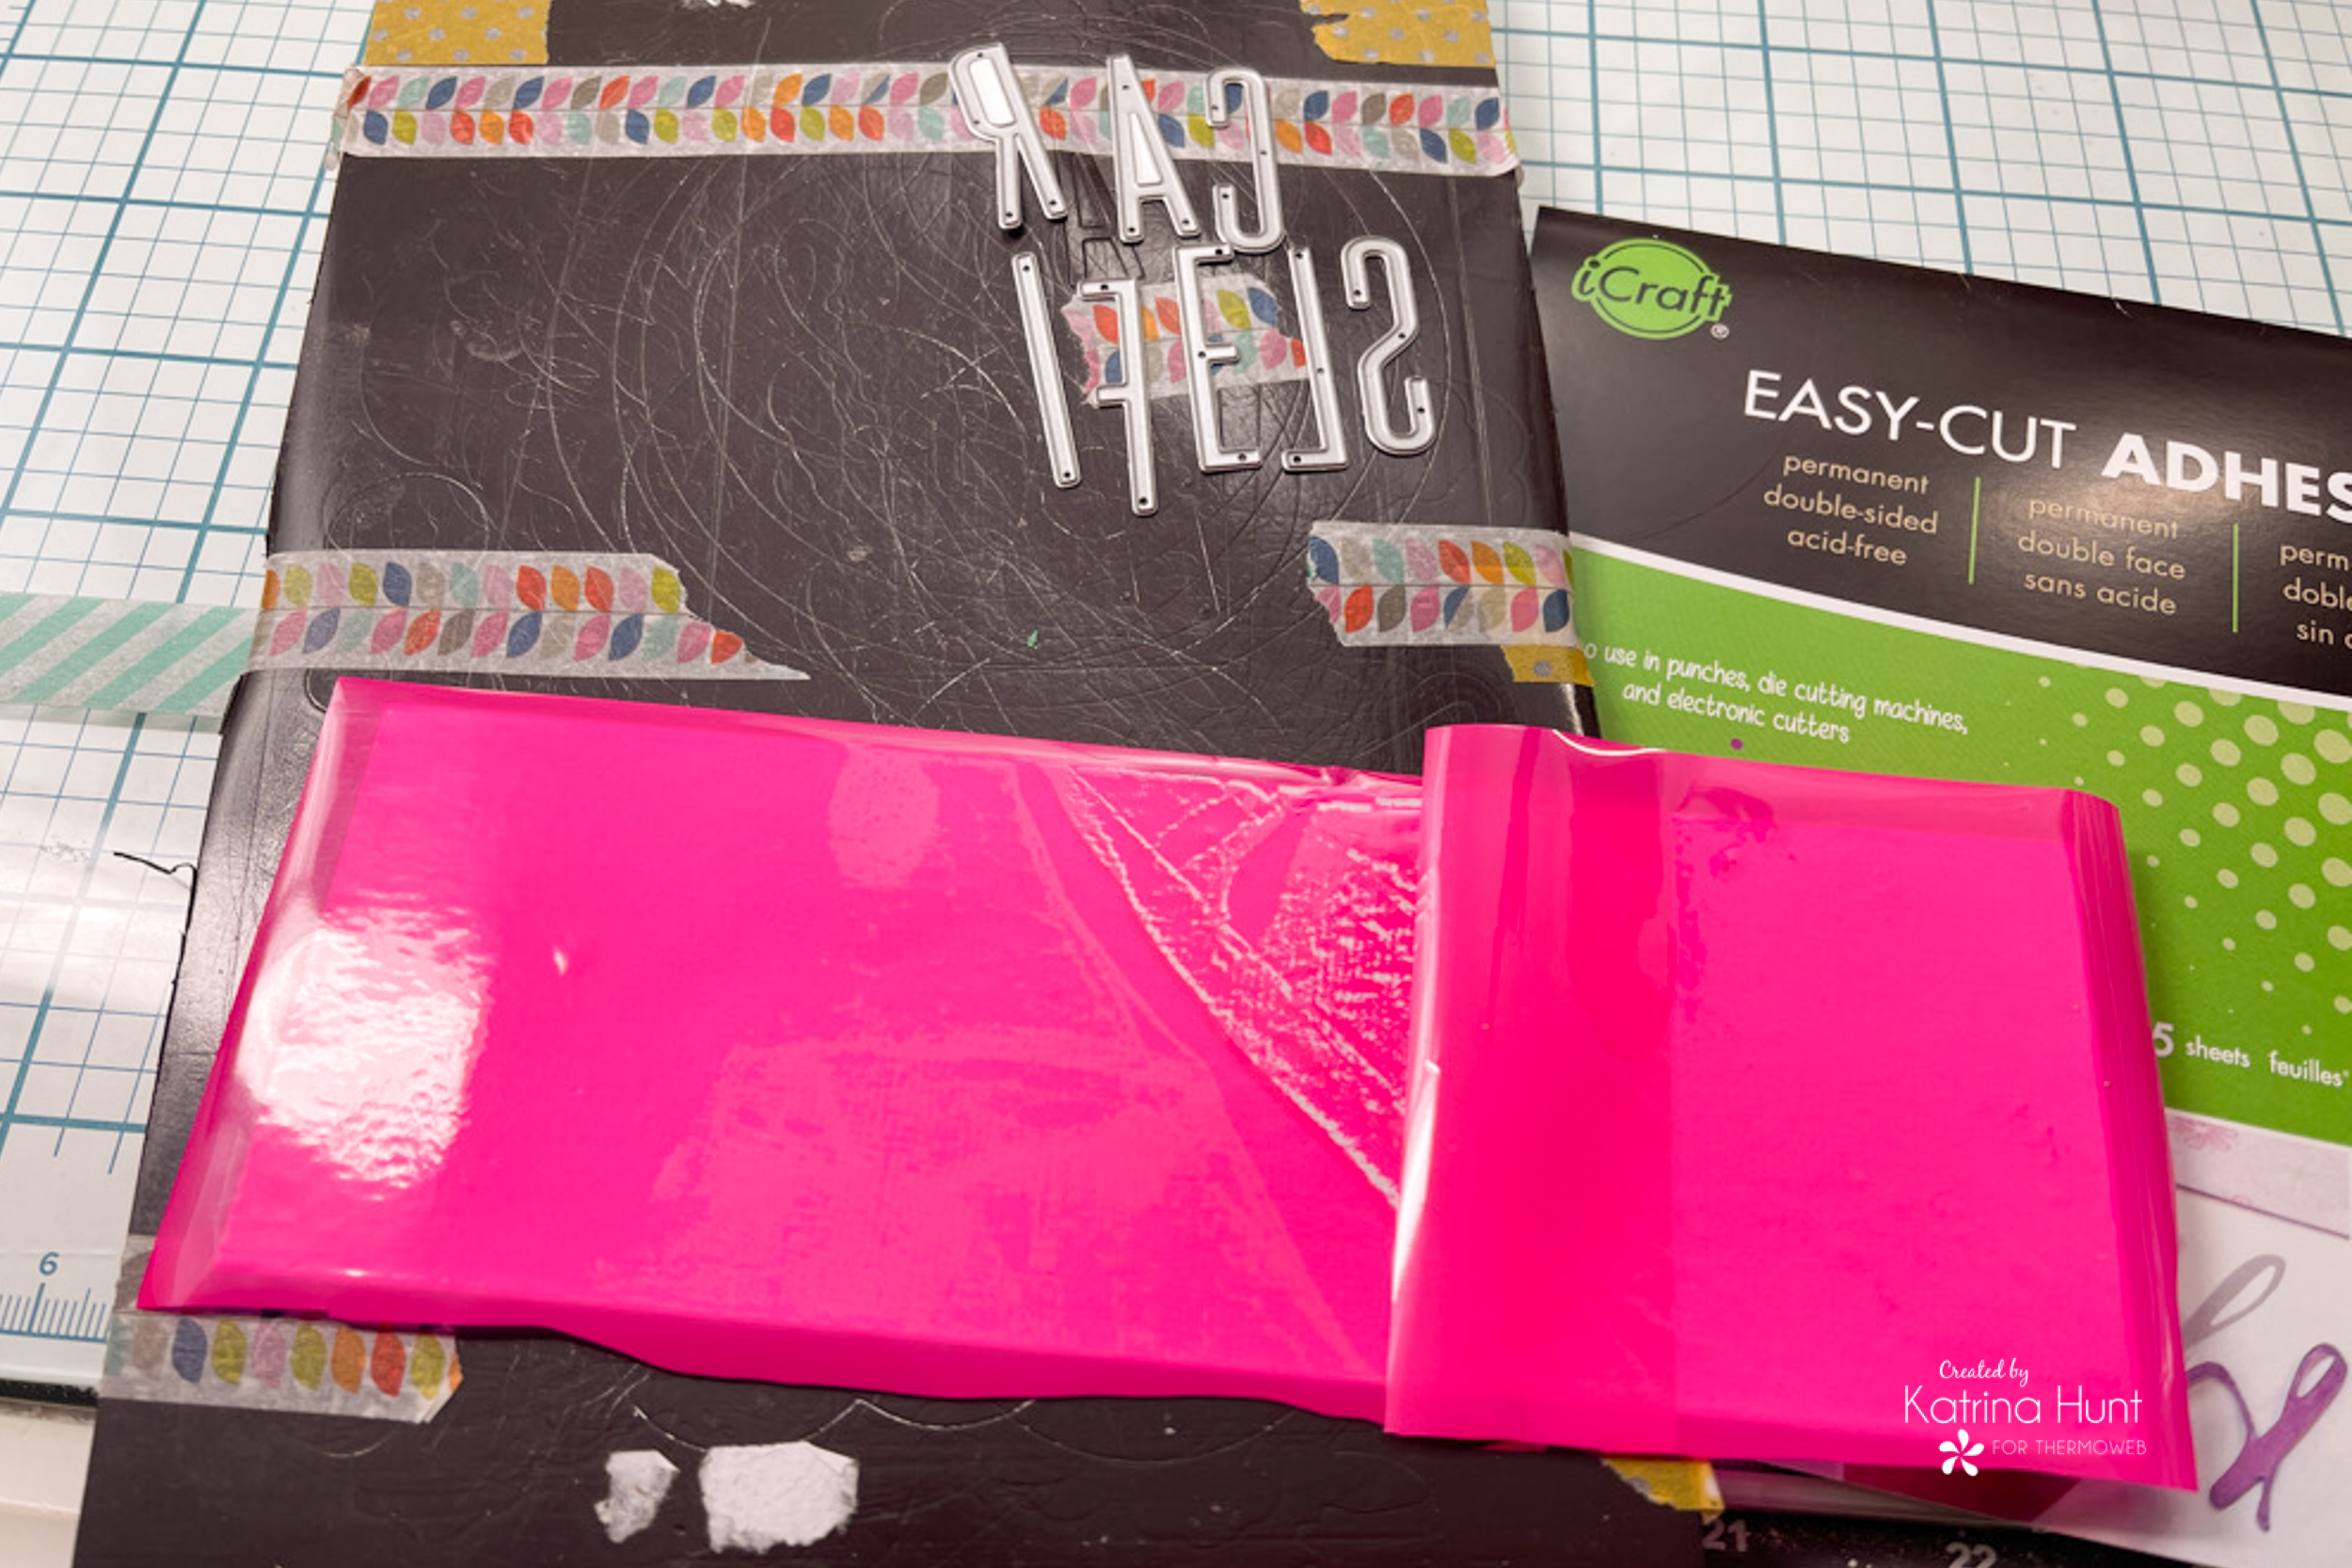
You can see in the picture above, I tried to adjust my sheet! But I had enough area covered for my die-cut letters. Now you will die cut your letters as normal, making sure that the letter is faced to the enamel sheet and not the back of the sheet you made. After die cutting adhere your enamel-covered letters to your black double layered letters above using Ultra Bond Liquid Adhesive. If you want, you can slightly offset the black by adhering the pink letters a little to the right. I also used the Ultra Bond Liquid to adhere the letters to my layout.
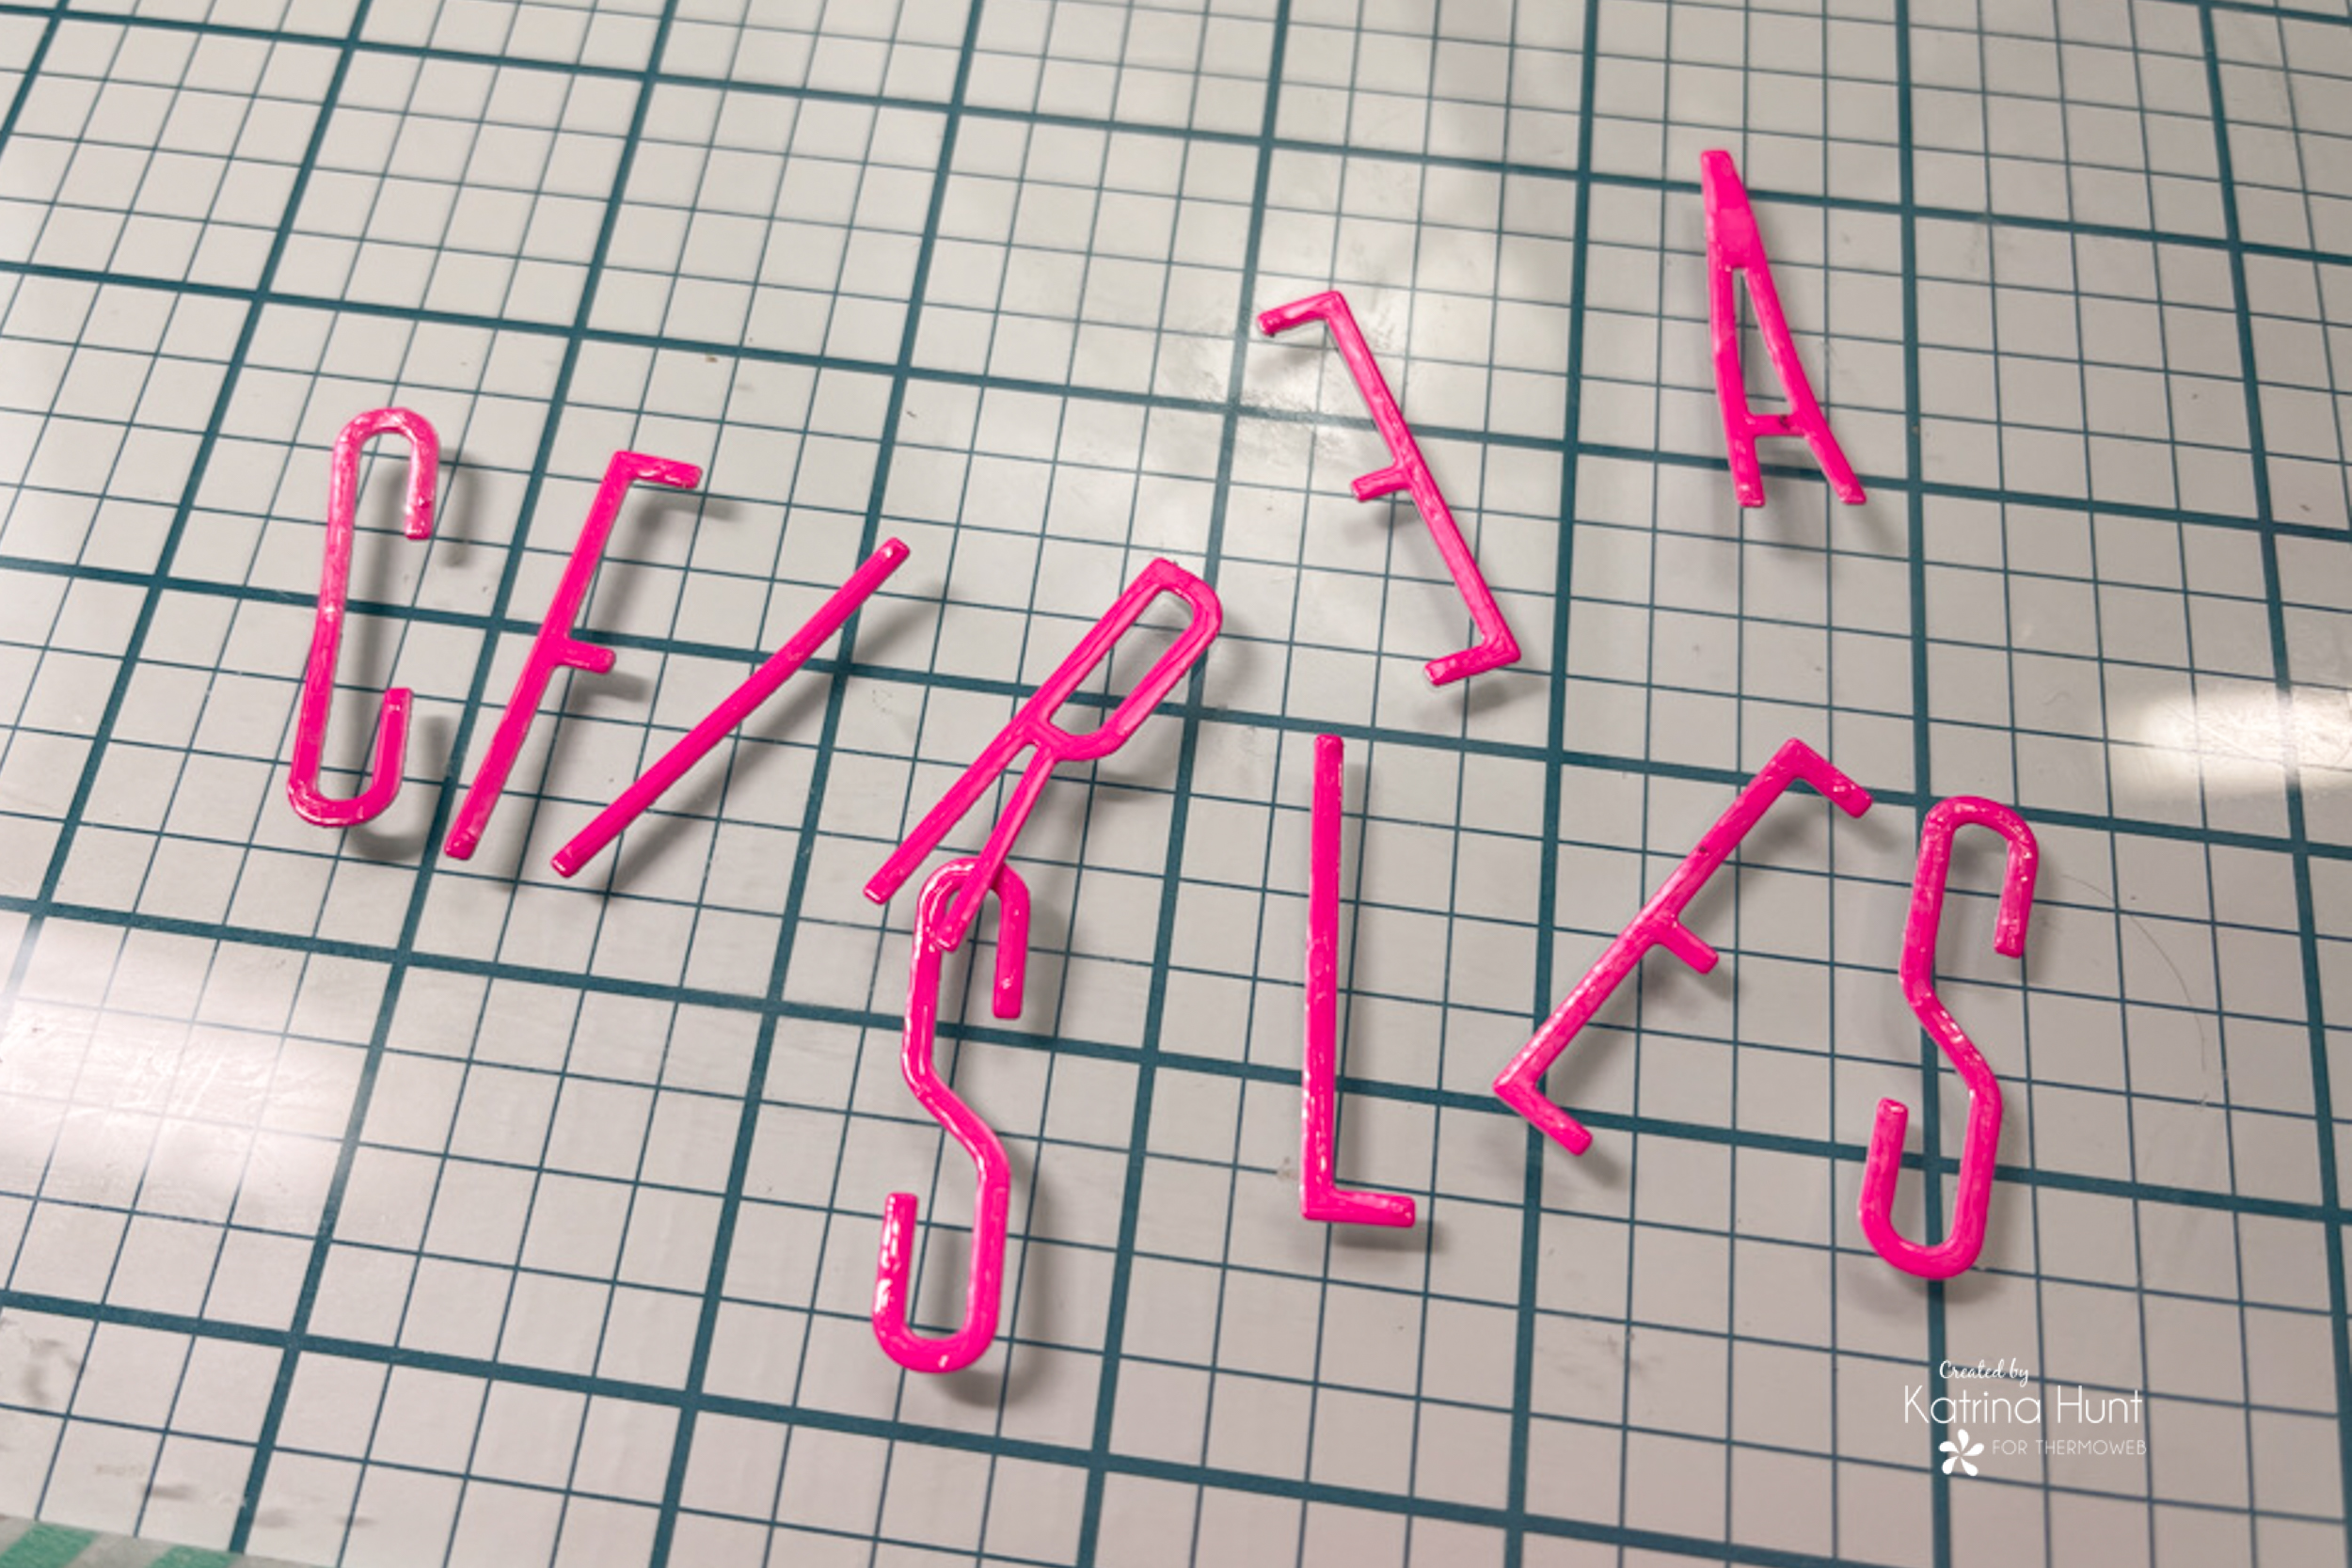
I save any leftover pieces from the sheet that I made to die-cut, so that I can use them in a future project!
Using The NEW Transfer Adhesive Sheets
Last, but certainly not least, I used the new Adhesive Sheets from Gina K-Love Is. You can use the new transfers with the Enamel Sheets also!! Yay!!! I cut out a bunch of the little hearts from the sheet. Next, remove the protective backing and lay them down on white cardstock, and run thru your die cutting machine (or laminator, but I was die cutting!).
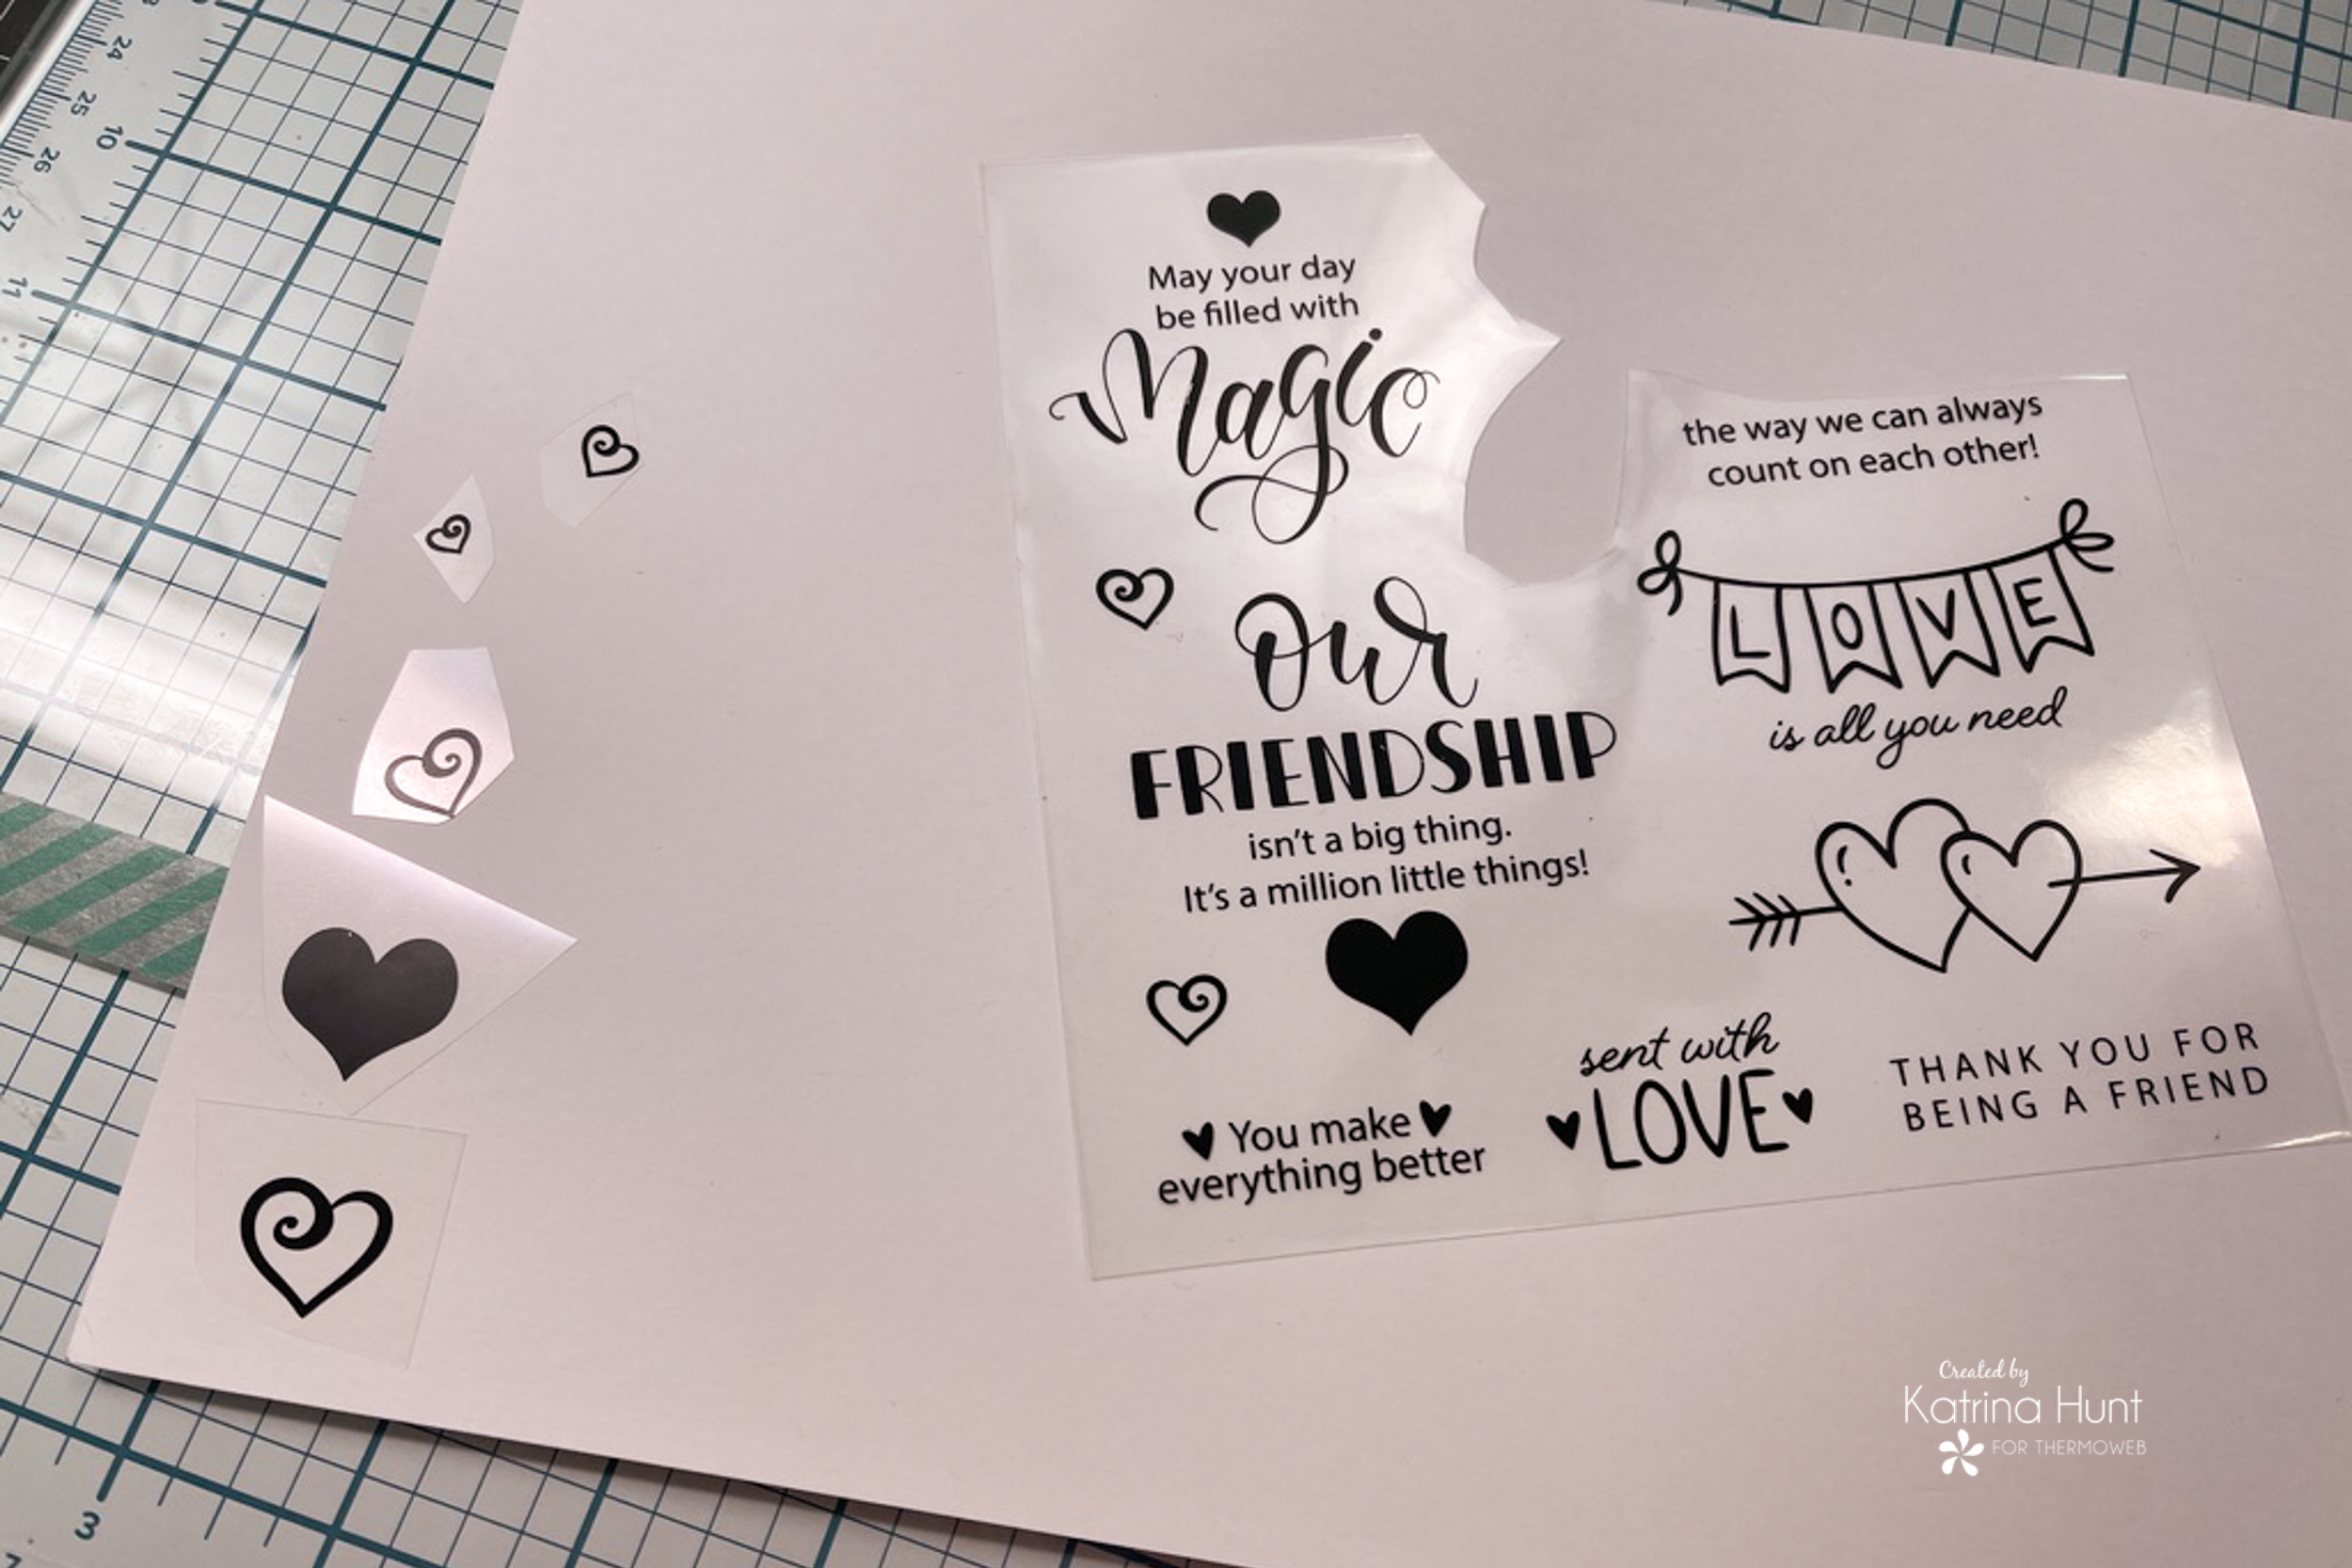
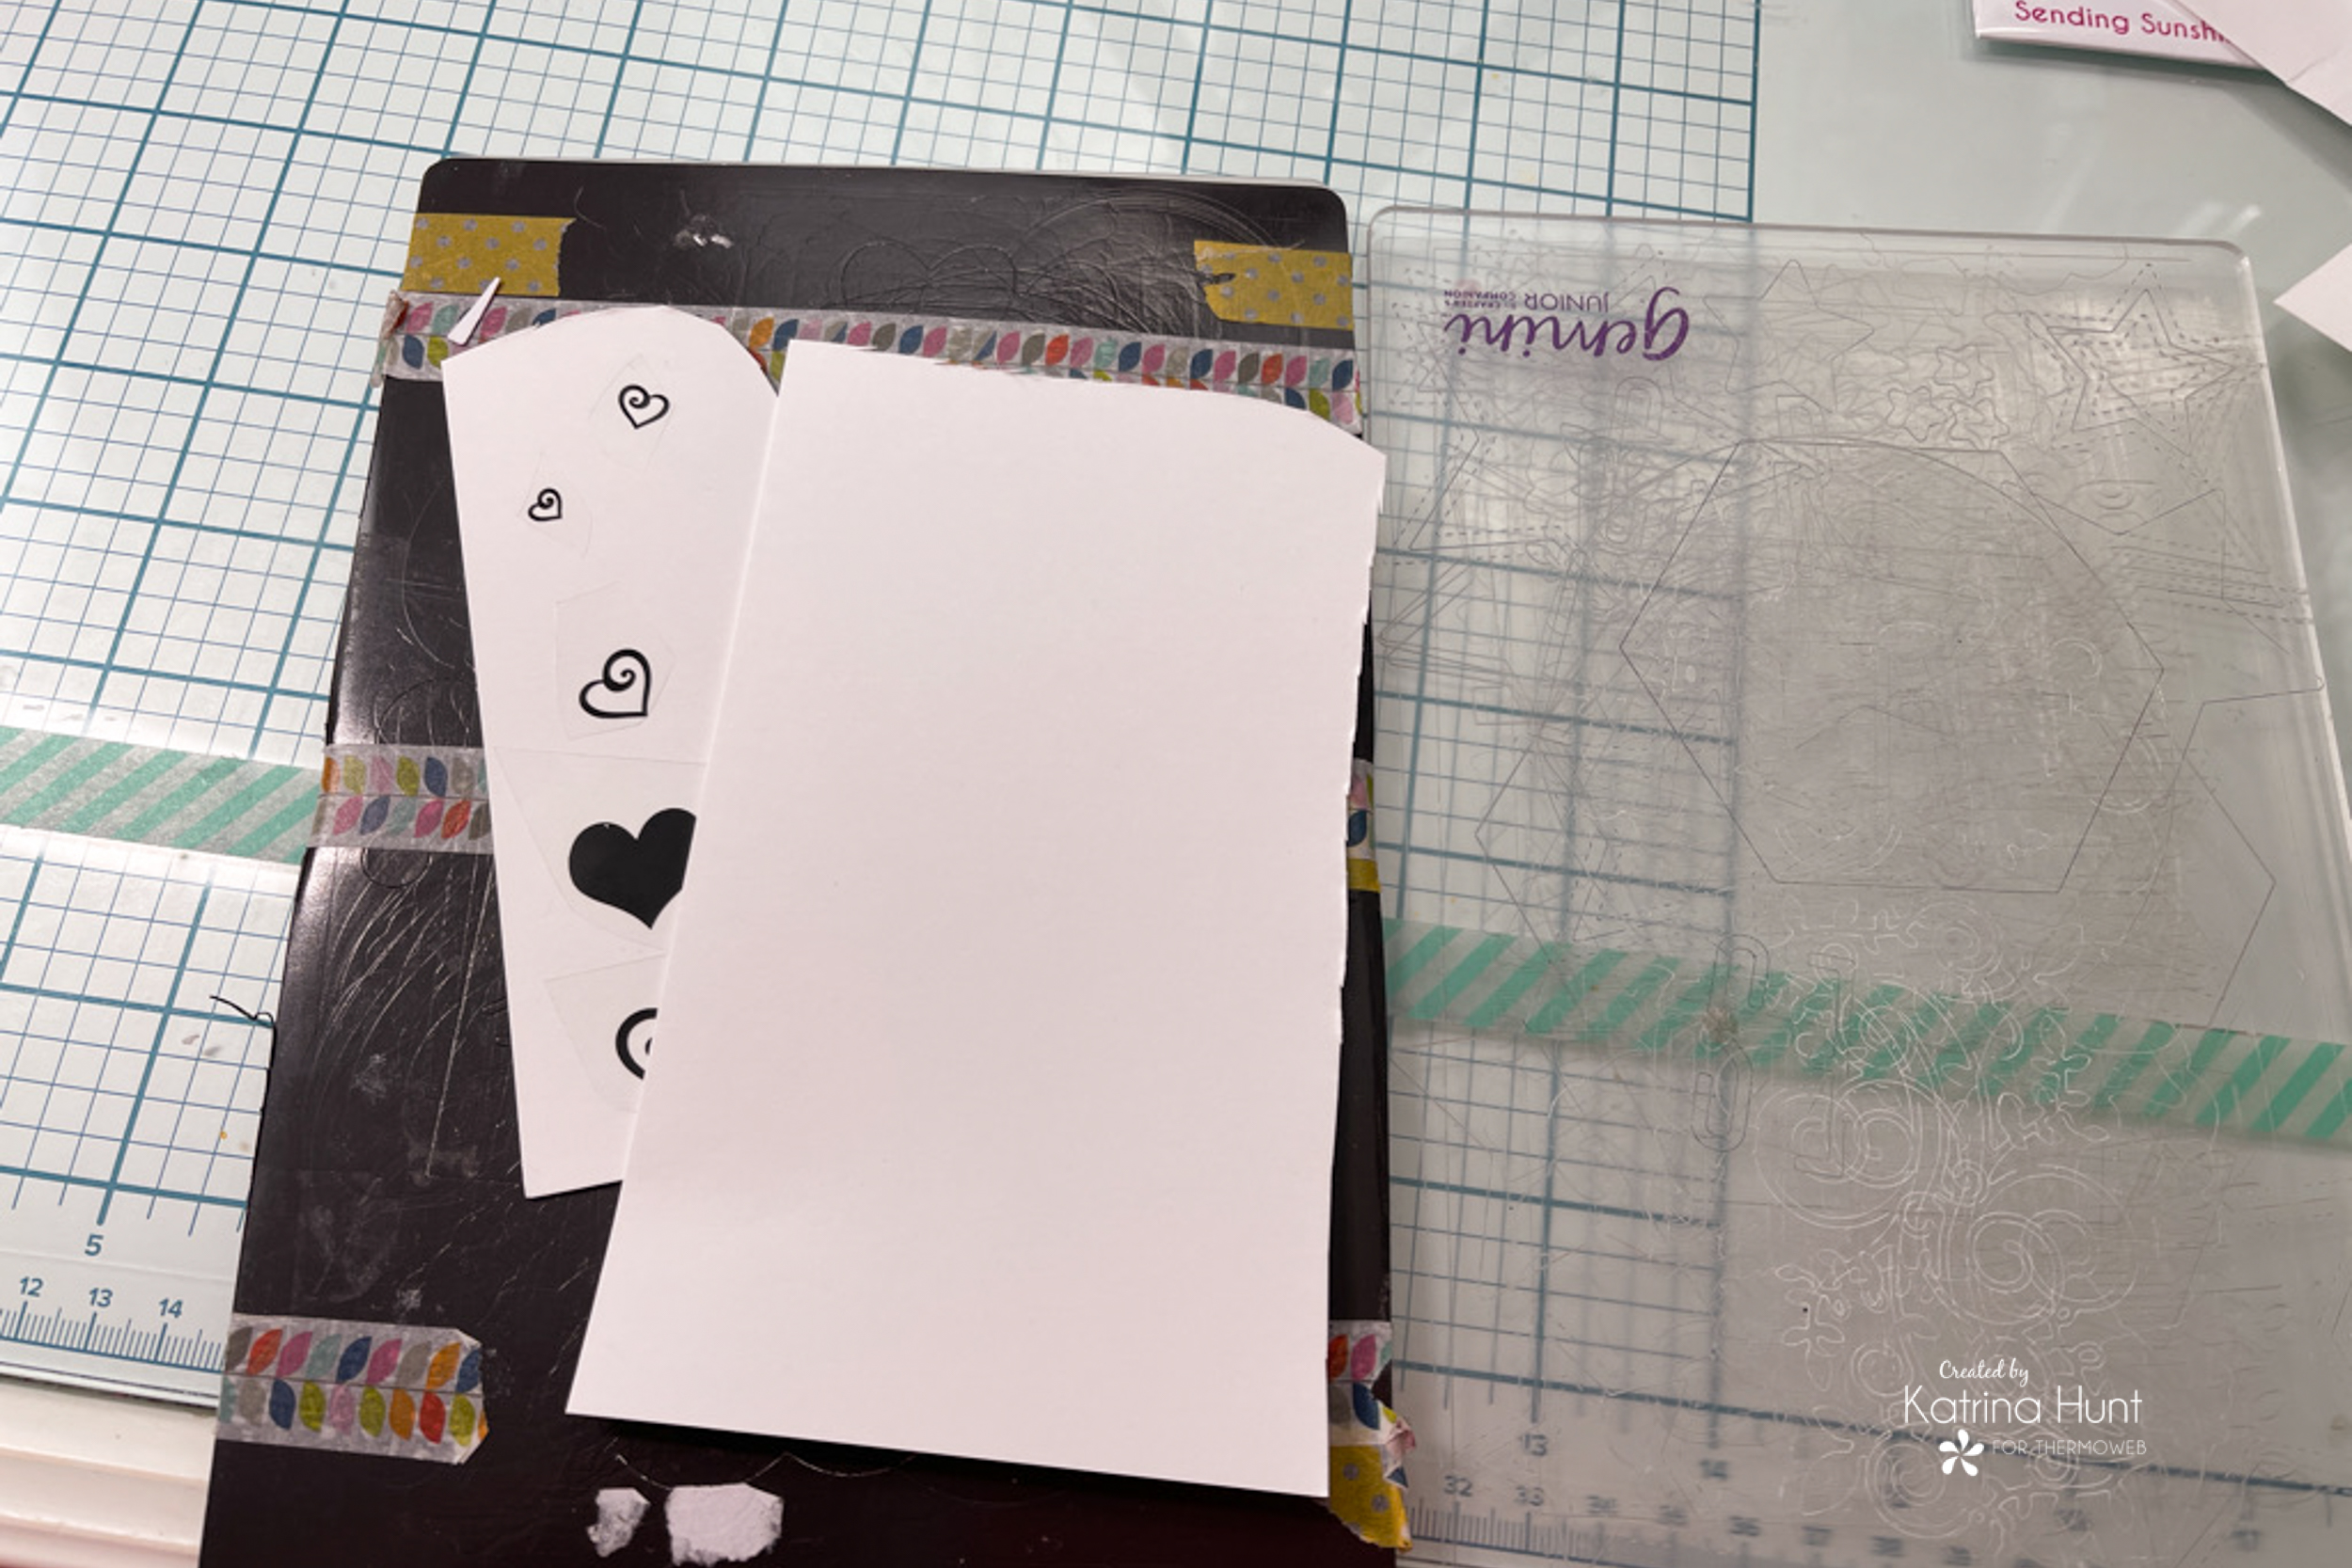
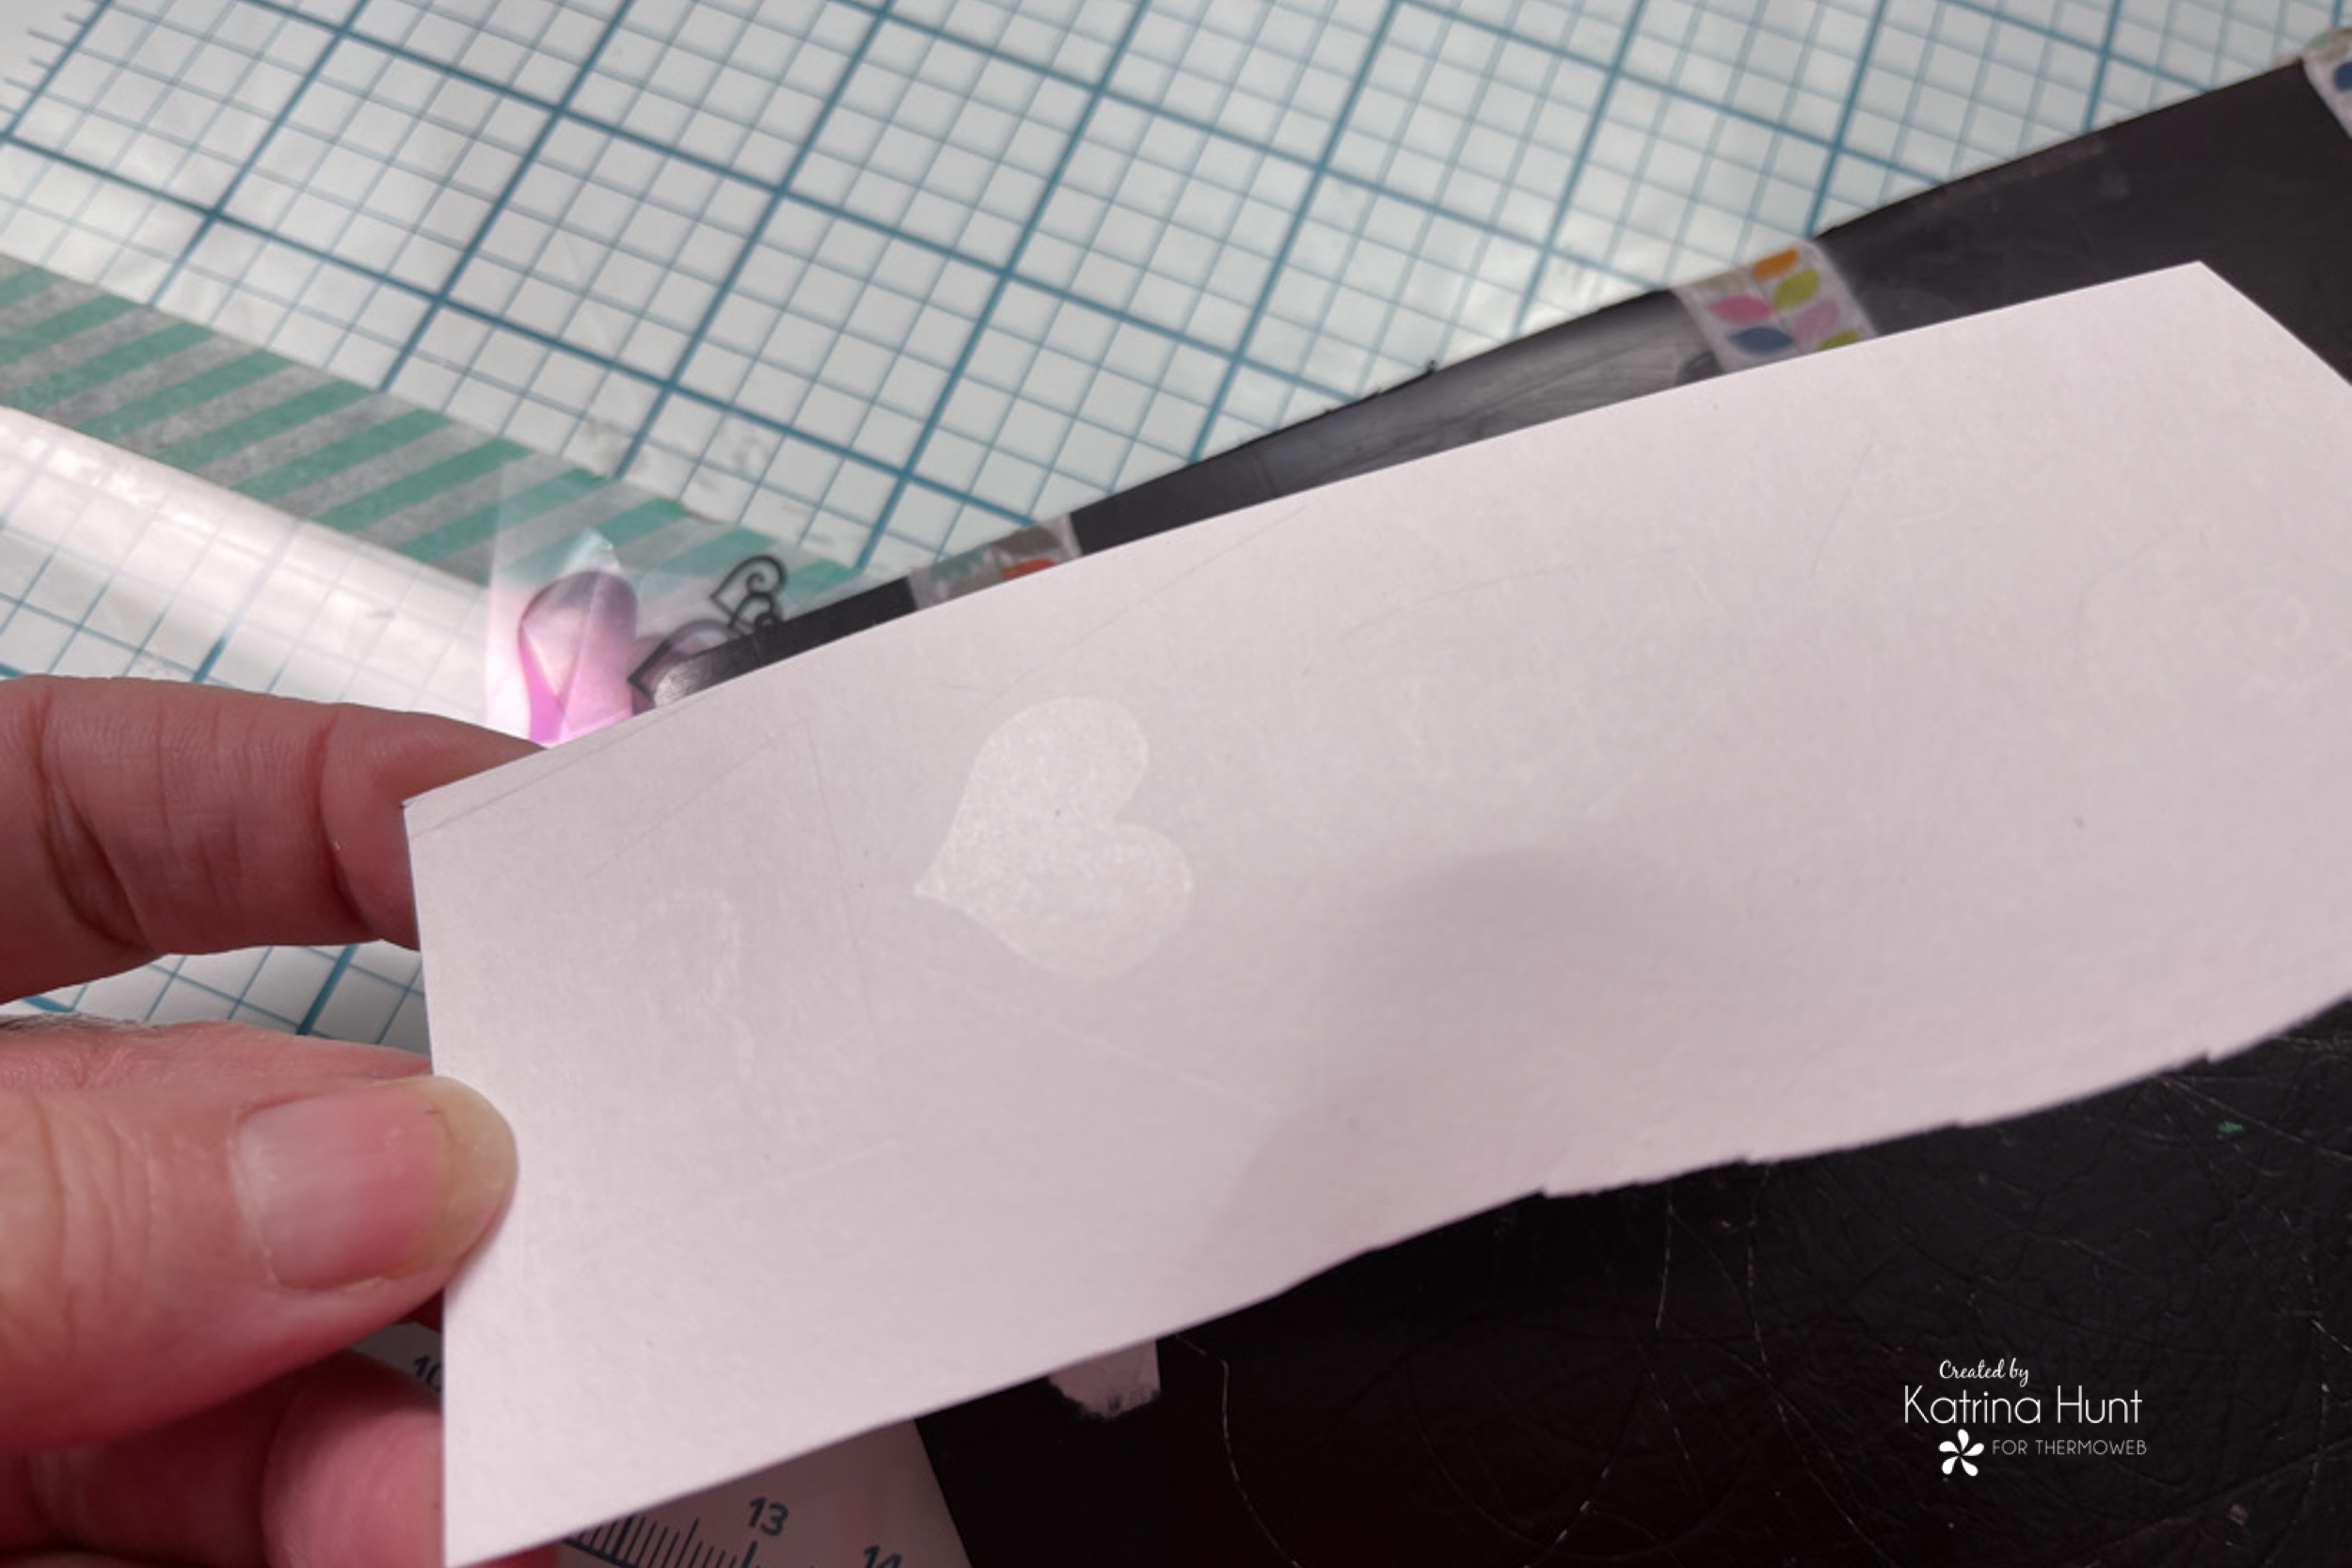
Once you are done with the first pass thru in your machine of choice, you will remove the plastic piece that has the black print. This will leave adhesive on your cardstock. If you look closely, you can see the solid heart below.
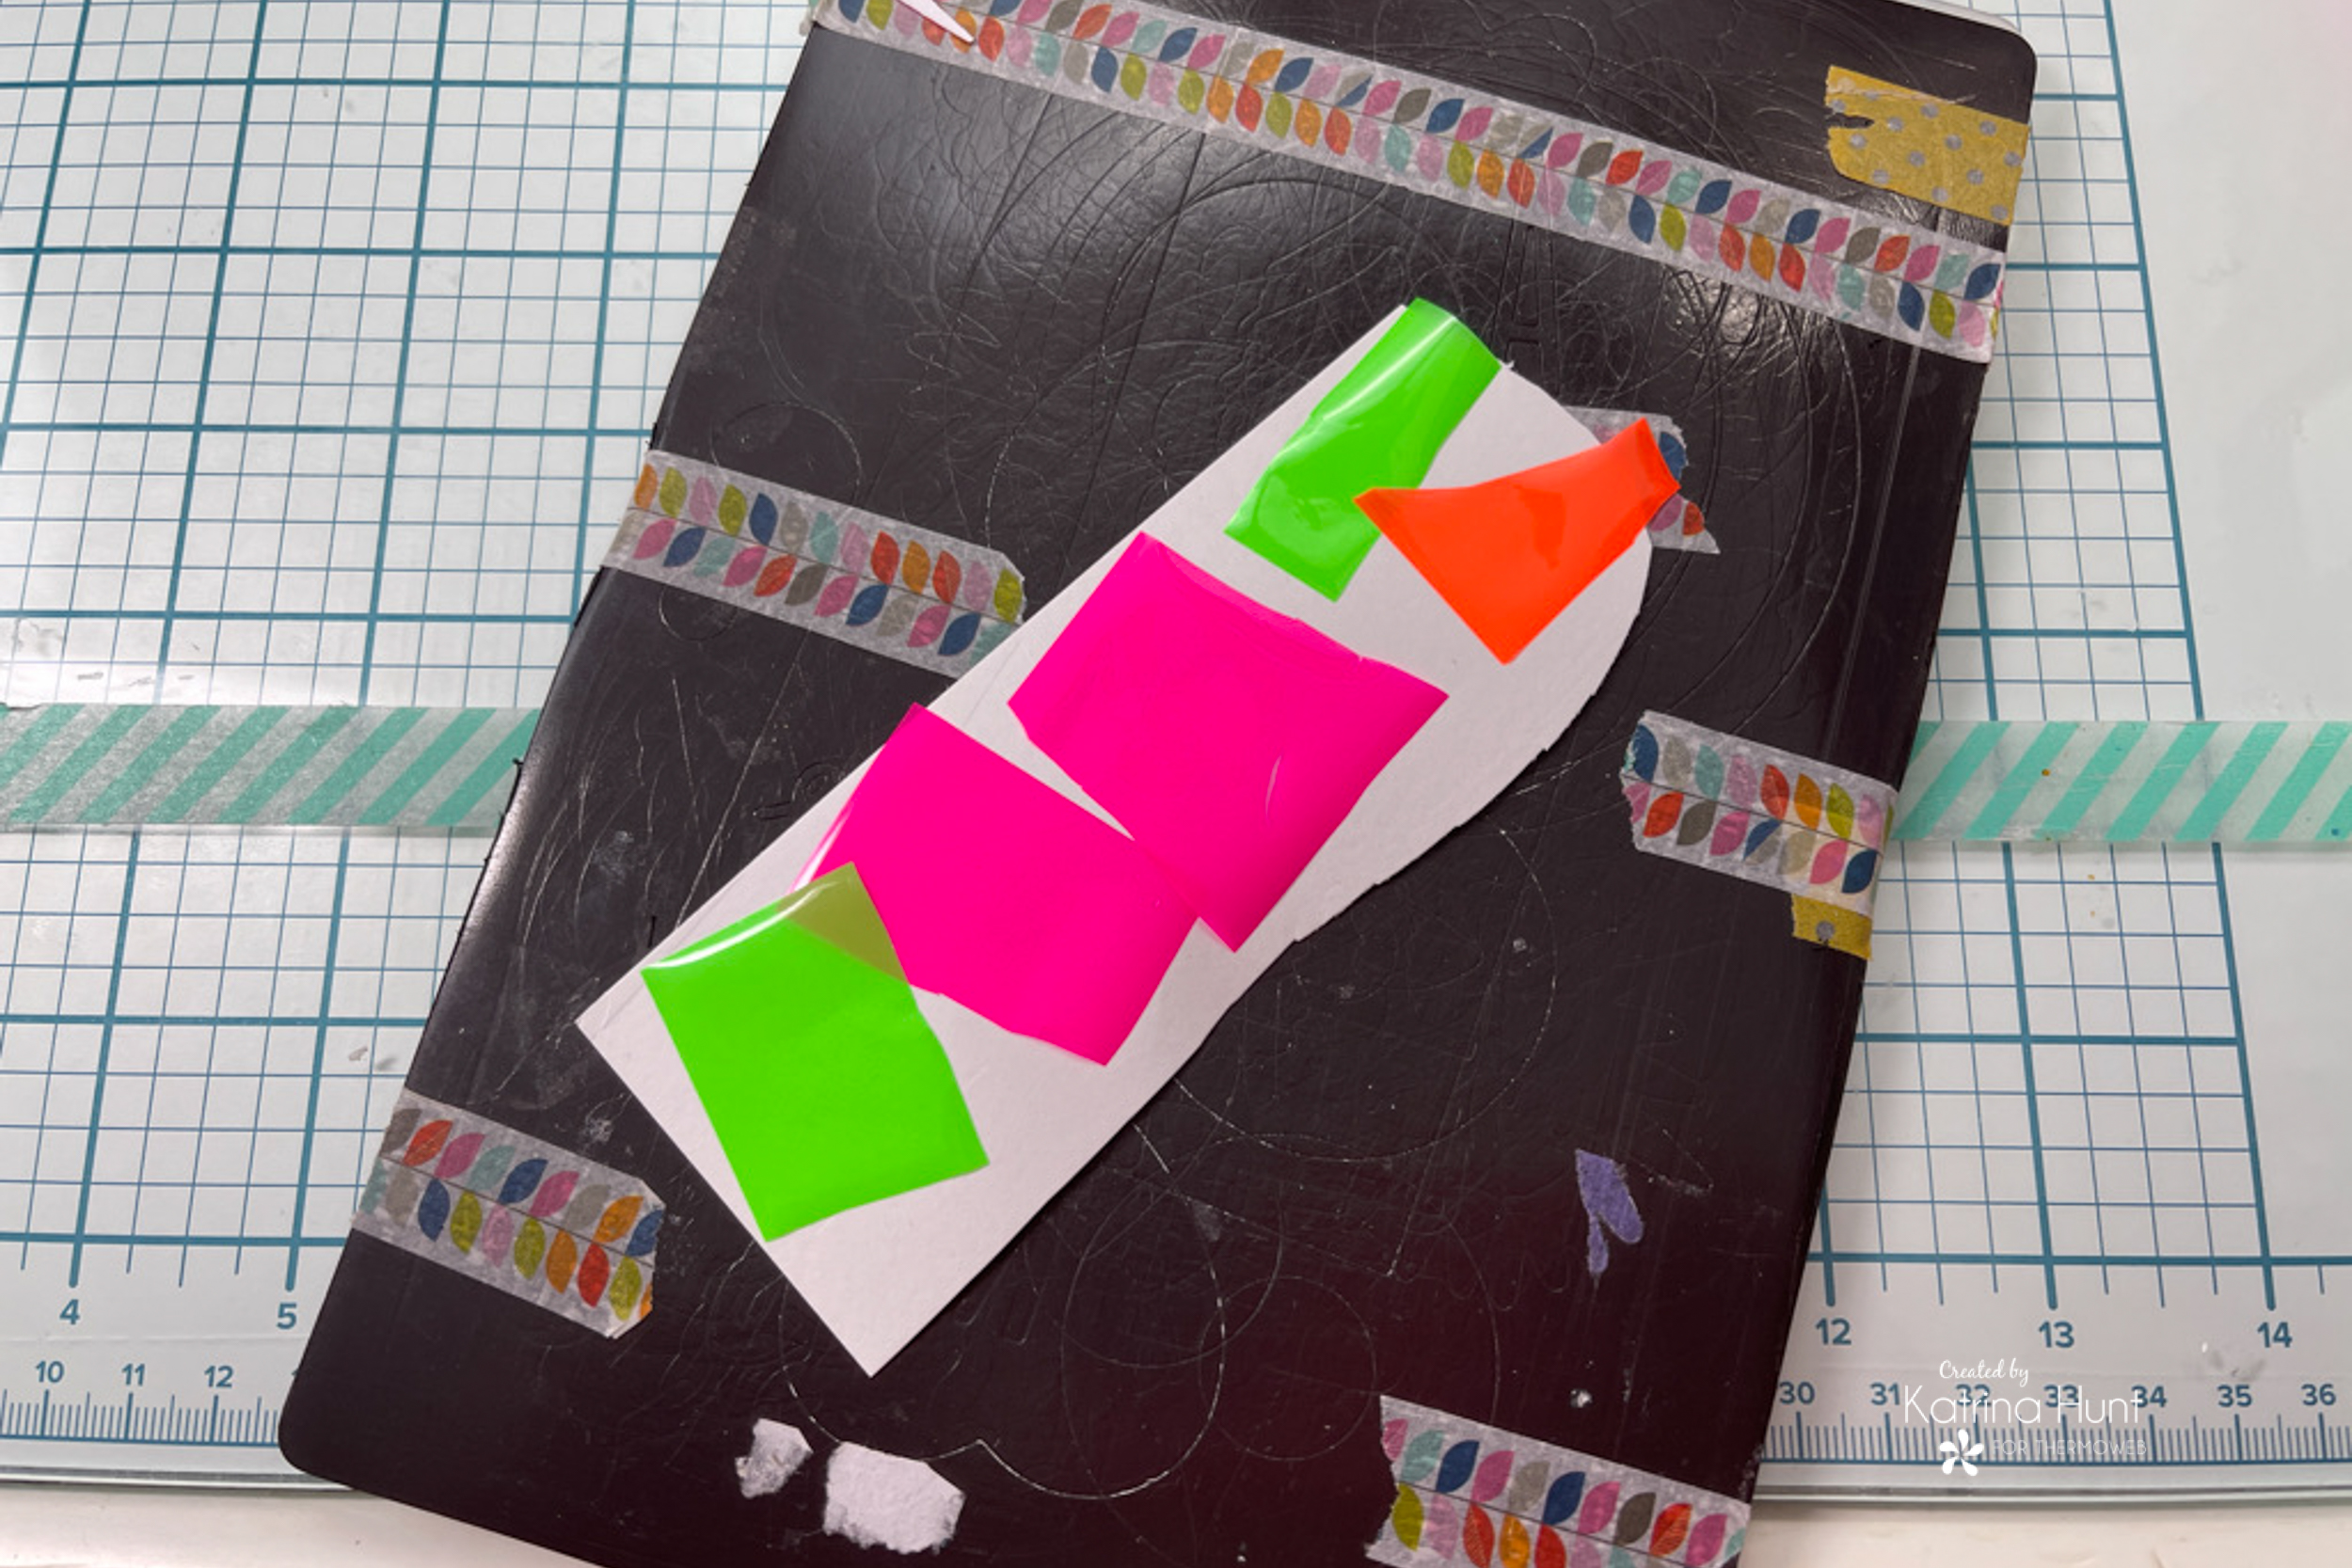
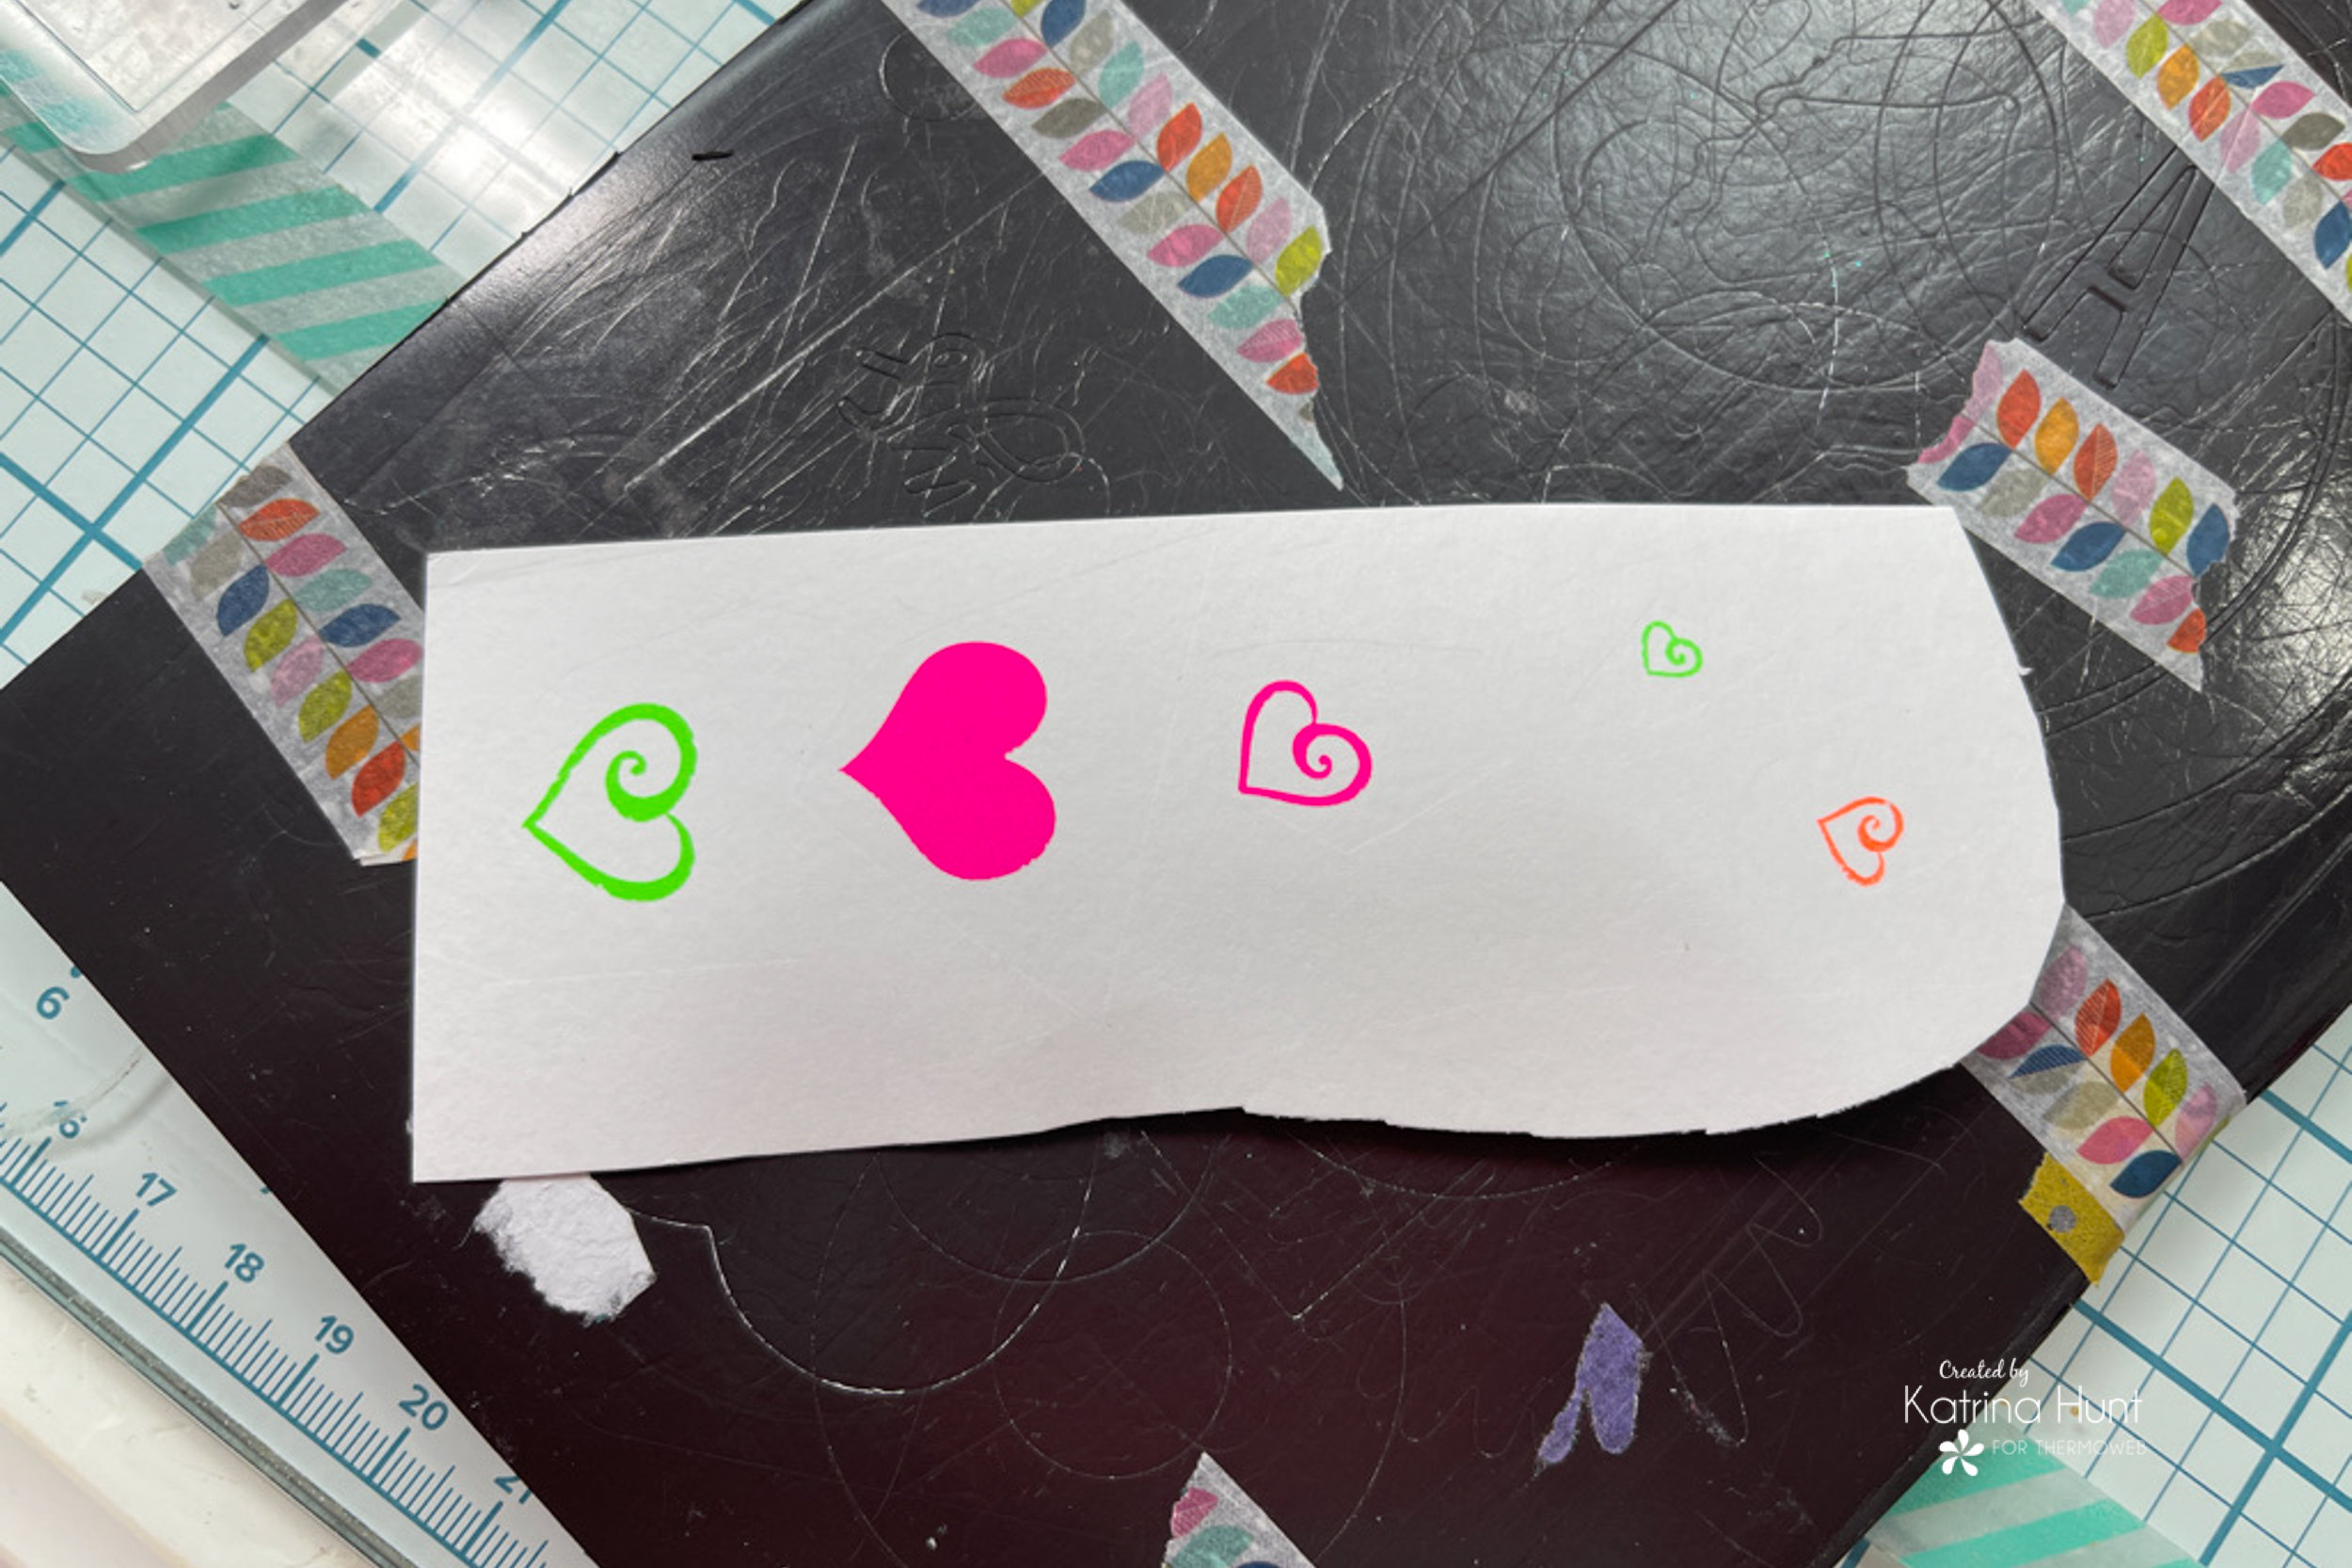
Time for your Enamel Sheets again! Here I used Poppin’ Pink, Orange Glow and the Screamin’ Green as my color choices. You will want to cut pieces of each color to cover the heart you are wanting to color. Now, pass-thru your die cutting machine again and you have a cute little enamel embellishment you can use. The adhesive transfers work on pictures also and I wish I would have put the hearts on them, but I had already adhered my pictures down when I thought of it!
To finish up, I just added some flowers and leaves from the stamp set and some random old Maya Road embellishments that I had in my stash. I did stamp one of the sentiments from the set and used it as a little accent. For my journaling, I just trimmed a few strips of cardstock and handwrote in my notes. I love how this layout turned out!

I hope you give the Rina K Designs products a try! If you love bright colors, I think you will have fun!!! Happy Friday and thanks for joining us for Unconventional Week!!!
This post contains affiliate links. For more information, see our disclosure HERE.