Hello Crafty Friends!!
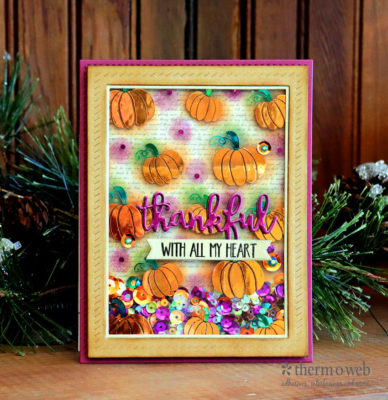
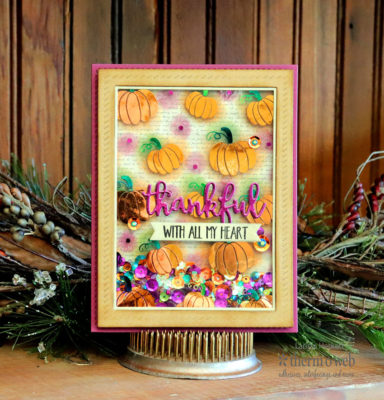
Larissa here today sharing a BEAUTIFUL Fall Thankful Shaker Card using some of the NEW Deco Foil Clear Toner Sheets in Pumpkin Patch!! I LOVE the look of the Multi-Layered Foiling and wanted to share how you can create this Design for your own Fall Themed Projects!!
Multi-Layered Foiling Technique Thankful Shaker Card!!
Supplies Used:
Deco Foil Clear Toner Sheets in Pumpkin Patch
Deco Foil Transfer Sheets in Emerald Watercolor, Plum and Copper
iCraft Easy-Tear Adhesive Tape 1/8″
3D White Foam Sticky Strips
Deco Foil Toner Sheets
iCraft Mixed Media Adhesive
Other Products:
Gina K Designs Cardstock in Plum Punch & Kraft
Lil’ Inker Designs Thankful Word Die
Lil’ Inker Designs Thankful Thoughts Stamp Set
Distress Inks in Rusty Hinge, Seedless Preserves, Peeled Paint and Lucky Clover
Sequins Purple/Orange Metallic,
Studio Katia Jade Sequins
Multi-Layered Foil Technique for Thankful Shaker Card:
First Pick the Colors of Deco Foil you want to use for your Project!! I went with:
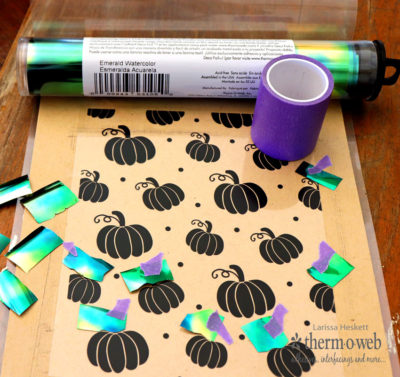
Emerald Watercolor Deco Foil for the Pumpkin Stems!! Just cut a Strip wide enough and then cut them into strips to fit over the Toner on the Pumpkin Patch Sheets!! Using Purple Tape to hold them in place!!
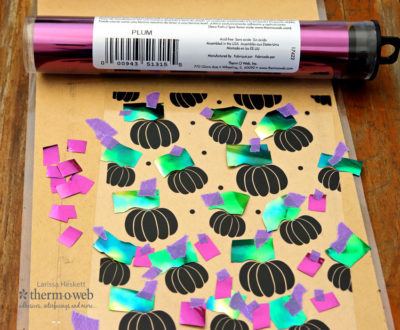
Next, I used the Plum Deco Foil for the Dots!! Again just cutting it into strips and cutting them down into Tiny Squares!! I like using my Small Left Over pieces of Foil so there is NO WASTE!! Save and Use EVERY bit you have!!
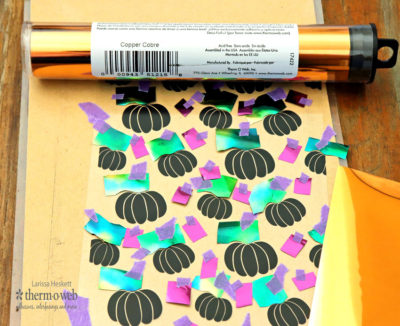
Finally, cut a Piece of Copper Deco Foil to cover the entire piece and run it all through your Laminating Machine!!
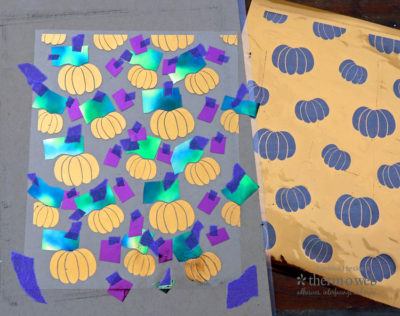
Then SQUEAL in DELIGHT when you remove the Foil to see what you’ve created!! It just NEVER gets Old!! Then SAVE that Negative piece for another Project!! I’ll be back SOON with some FUN ideas on ways to use them!! Wink Wink!!
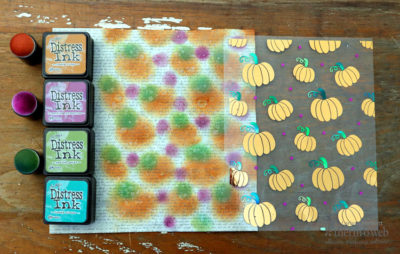
For the Background, I used a Piece of Script Patterned Paper and Inked it up using Distress Inks in Rusty Hinge, Seedless Preserves, Peeled Paint and Lucky Clover!! Its pretty easy to do just hold the Foiled piece over your patterned paper and Ink using a Mini Ink Dauber!! It doesn’t have to be exact, just close enough to see the colors behind the Images when they are layered over each other!! For even more interest, I added some Water Droplets once all of the Ink was added!!
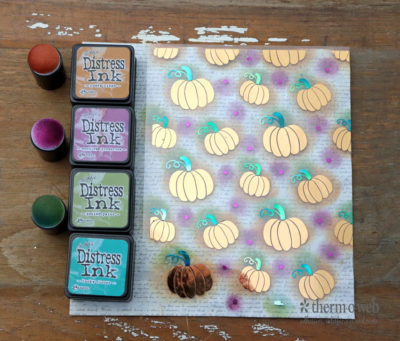
Here you can see how the Inked Color shows from behind the Foiled Images!! I just LOVE the look and thinks it adds a TON of interest!!
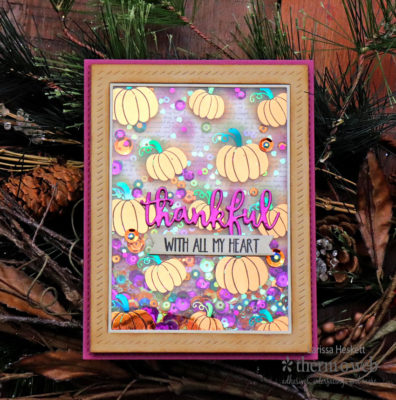
I wanted to make a Shaker Card so I used a Rectangle Die to create my Frame from some Kraft Cardstock!! I added the Foiled Clear Toner Sheet to the back of the Frame using some iCraft Adhesive Tape in 1/8″!! Then I adhered some 3D White Foam Strips to the back of the Frame to create my Shaker Window!! I added the Mixture of Sequins and Crystals and adhered it to the Inked Patterned Paper using more iCraft Adhesive Tape in 1/8″!! I adhered the Shaker to a Gina K Designs Cardstock A2 base!!
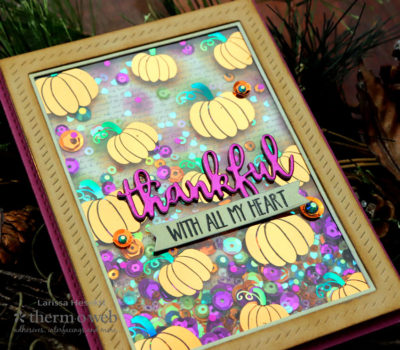
I wanted the Sentiment to match my Card Design, so I Foiled some Deco Foil Toner Sheets with some of the Plum Deco Foil and then Die Cut the Thankful Word Die!! I Die Cut the Thankful Word Die 3 more times from some of the Gina K Designs Cardstock and glued them all together using the iCraft Mixed Media Adhesive!! Then I Stamped and Embossed the Sentiment onto a Banner and added s Few of the Sequins and Crystals to add some Texture to finish off the Front of my Card!!
THANKS SO MUCH for stopping by today and I hope I’ve given you some ways to use your leftover scraps and use them to try this Multi-Layered Foiling Technique!! If you create something I hope you share with on Social Media using the #Hashtag #decofoil, #thermoweb, #icraft as we LOVE to see what you create!! Have a FABULOUS WEEK!!
2 Comments on Multi-Layered Foiling Technique Thankful Shaker Card!!
1Pingbacks & Trackbacks on Multi-Layered Foiling Technique Thankful Shaker Card!!
-
[…] HERE & HERE!!?? If not follow the links to get a look at them!! Remember I told you NOT to throw away those Negative Foil pieces after doing the Multi-Layered Foiling Technique!!?? Well, today I’m going to show you how to take those AMAZING Negative Left Over pieces and create some pretty AWESOME Halloween Cards out of them using some Deco Foil Products!! […]

DUMONTIER Marjorie
September 21, 2018 at 11:42 am (7 years ago)Oh My god ! This is sooo awesome !!