


 Hi friends, Ellen here! Happy Monday! It’s that time of the year to celebrate all spooky things.
I used Deco Foil flock in two different ways on these Halloween projects. Below I like to explain how the different techniques.
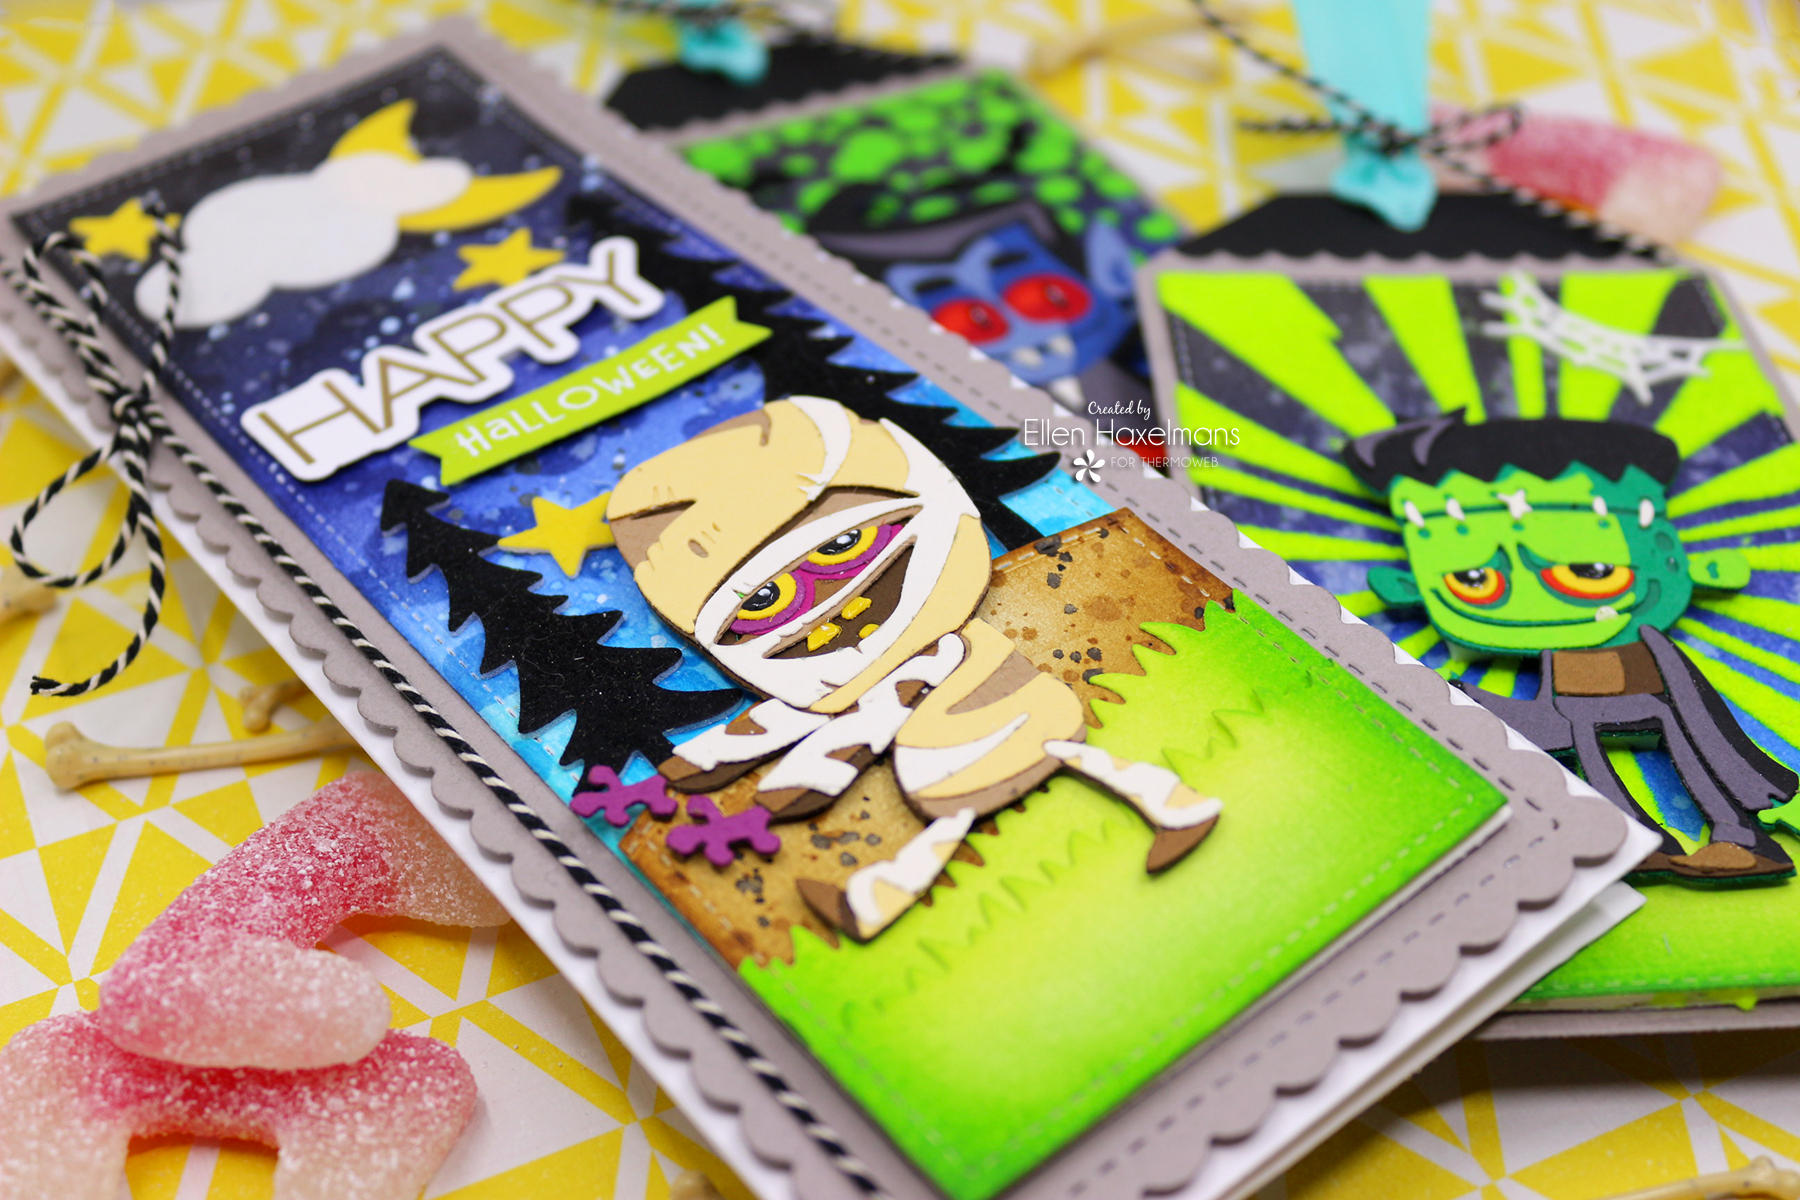
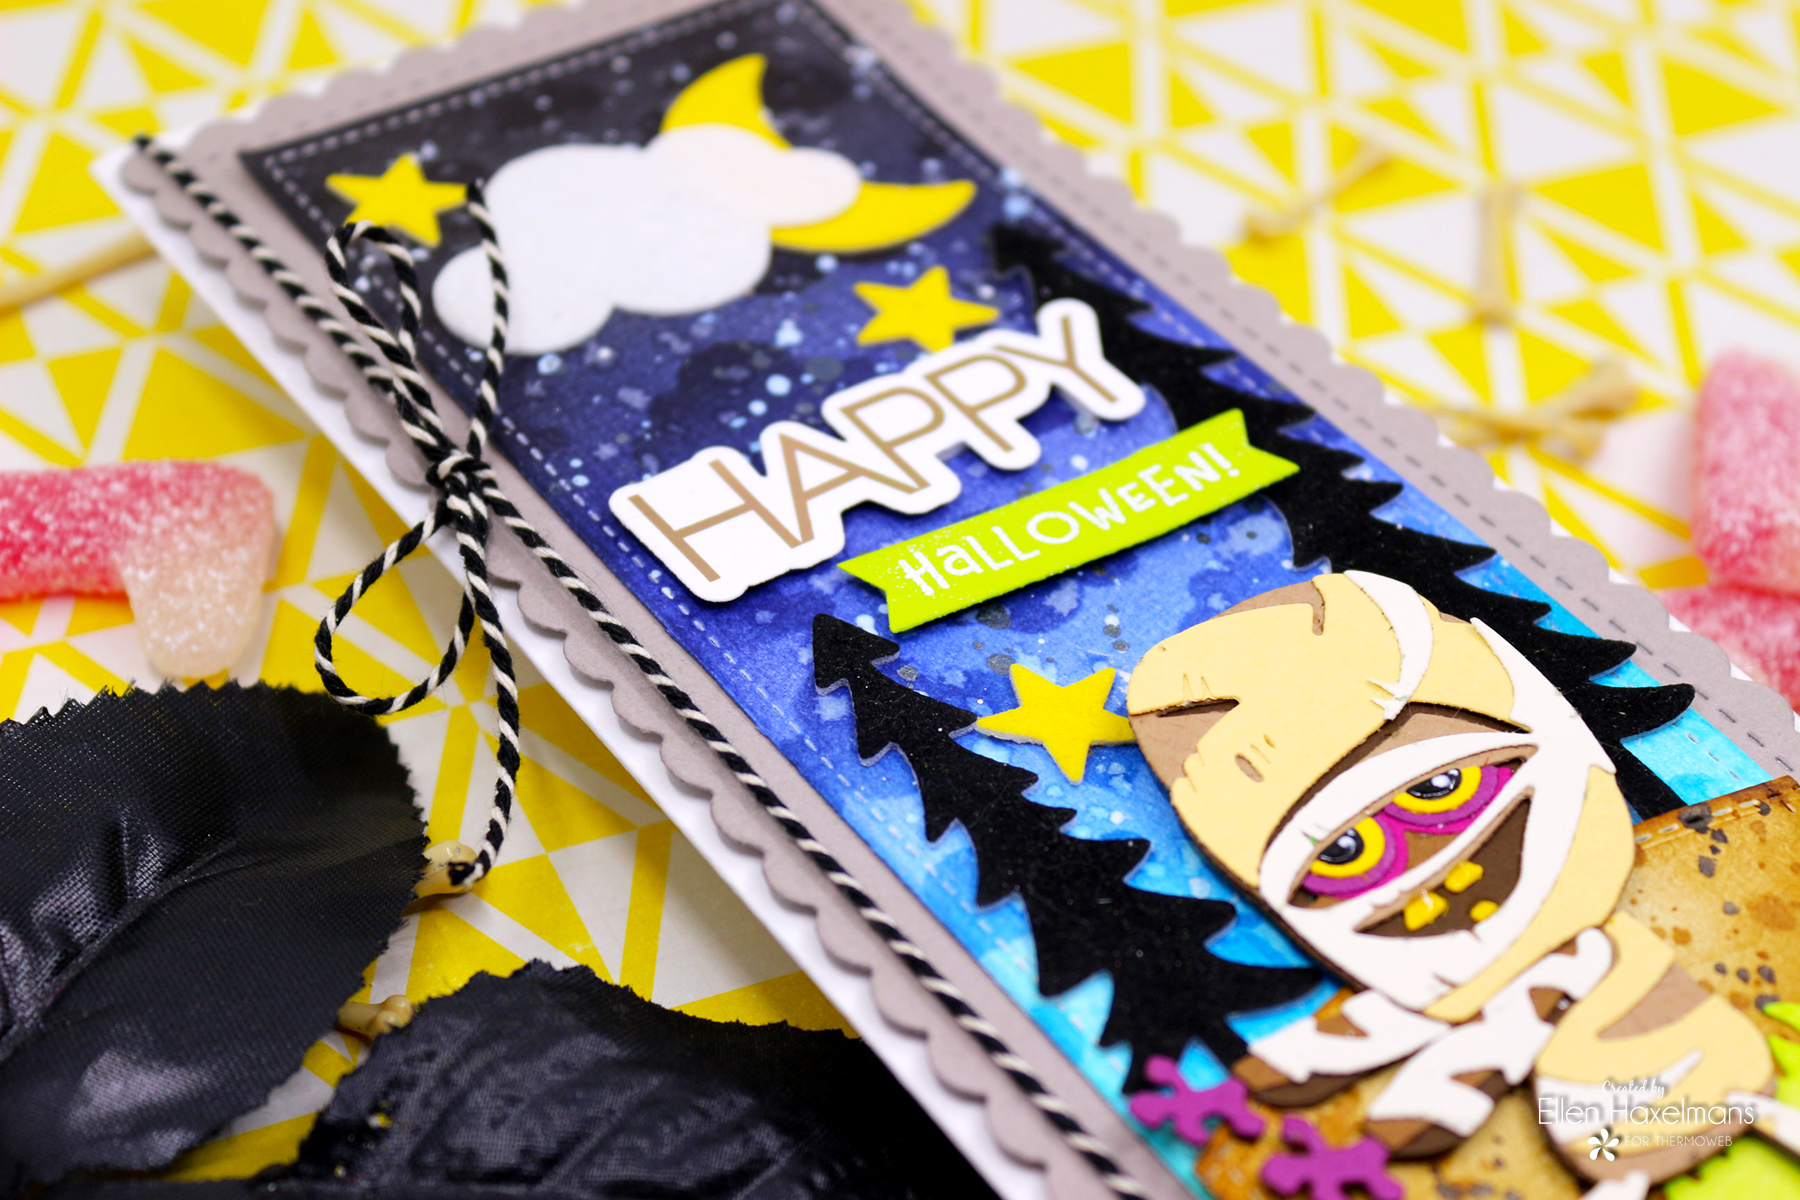
Monsteriffic Trick or Treat Halloween Cards with Deco Foil Flock
First I will give you directions using Flock Transfer Sheets with the Deco Foil Foam Adhesive Sheets.
When I use the foam sheets with the flock, I like to transfer the flock on the foam first and afterward die-cut it. Just because It helps you to see the details of the dies.
First, you cut a piece of adhesive foam sheet slightly larger than the die you want to use. Next, you cut a piece flock a little larger than the foam. Then you can peel the paper liner off the front side of the foam to expose the adhesive. We do this to place the flock (color side facedown) on top.
It’s very important to run through a manual die-cutting machine to add pressure. The pressure makes sure the flock will really stick on the foam. Then you can peel away the flock sheet from the foam. As last you can cut the flocked foam with your dies. Don’t forget there is still a remaining liner to stick the flock on to your project.
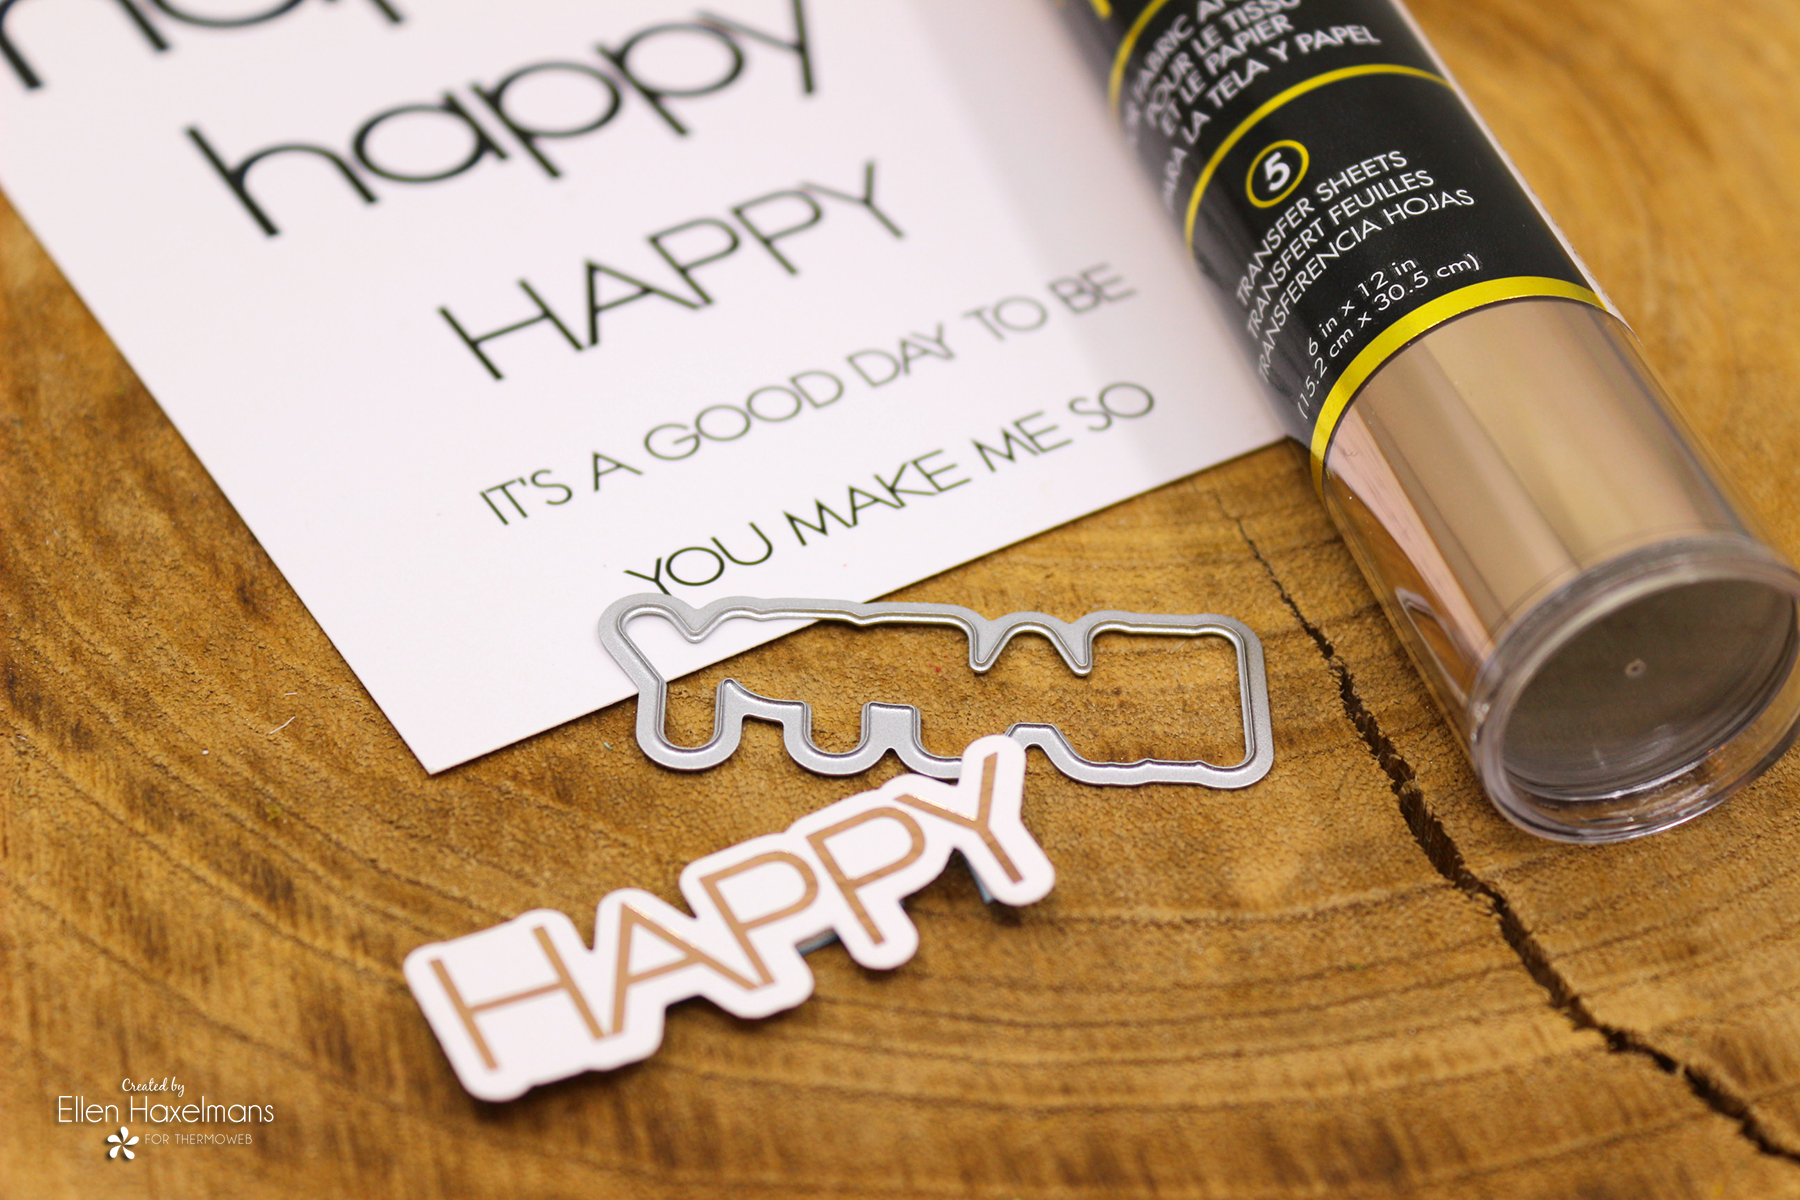
I also used the super new and fun Tone Card Front. I pushed a piece of the Rose Gold Deco Foil Transfer Sheets with the toner card through the laminator and cut it with the coordinating die (Deco Foil Stamp & Die Set Happy Everything).
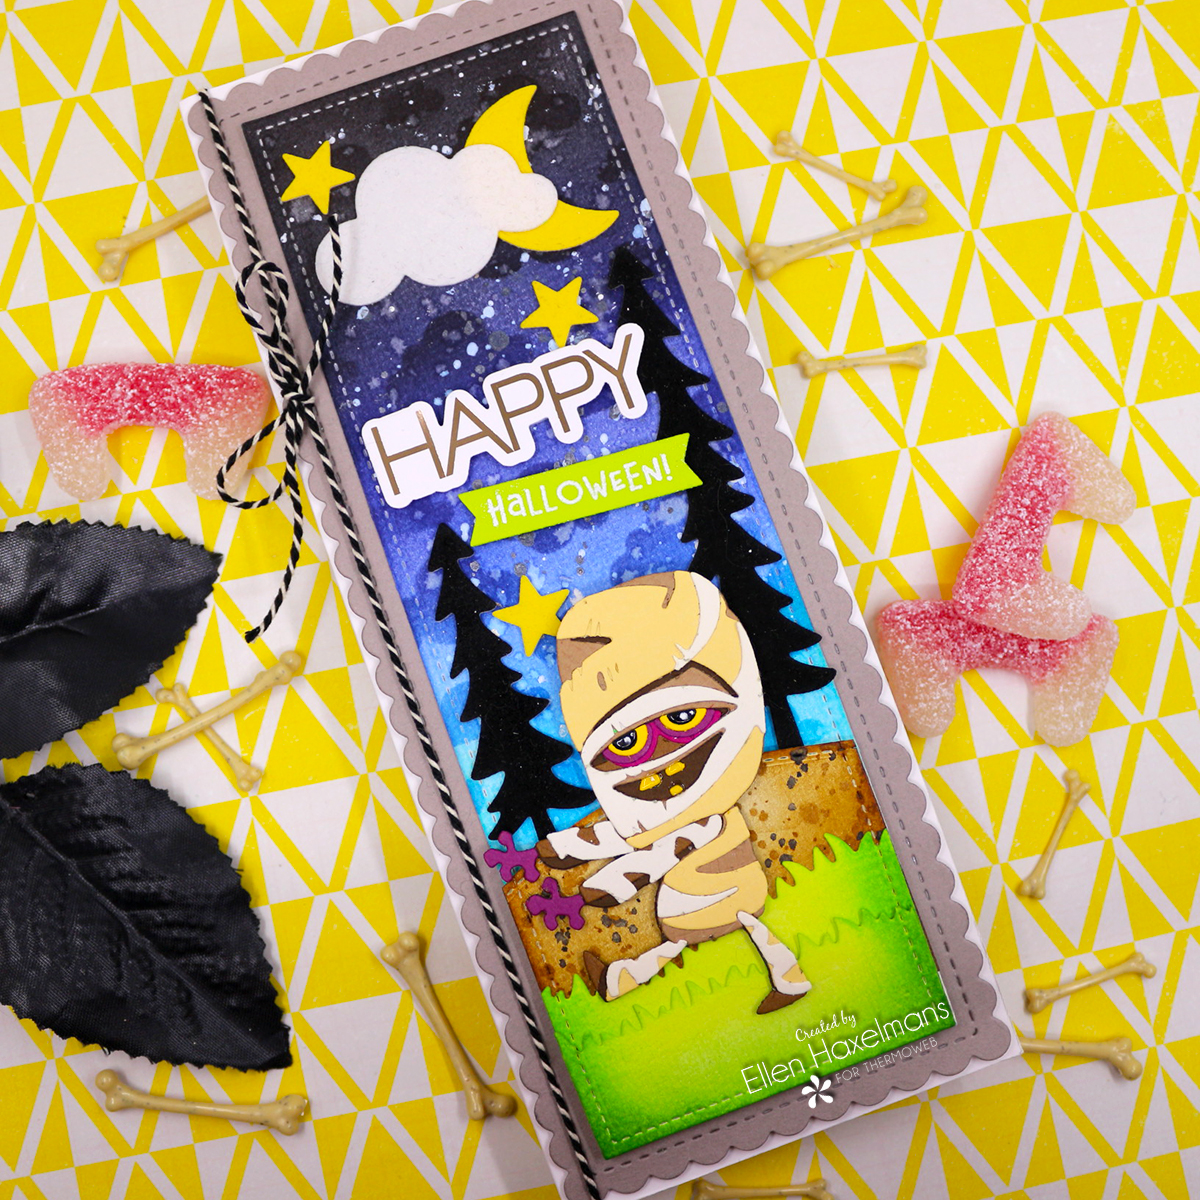
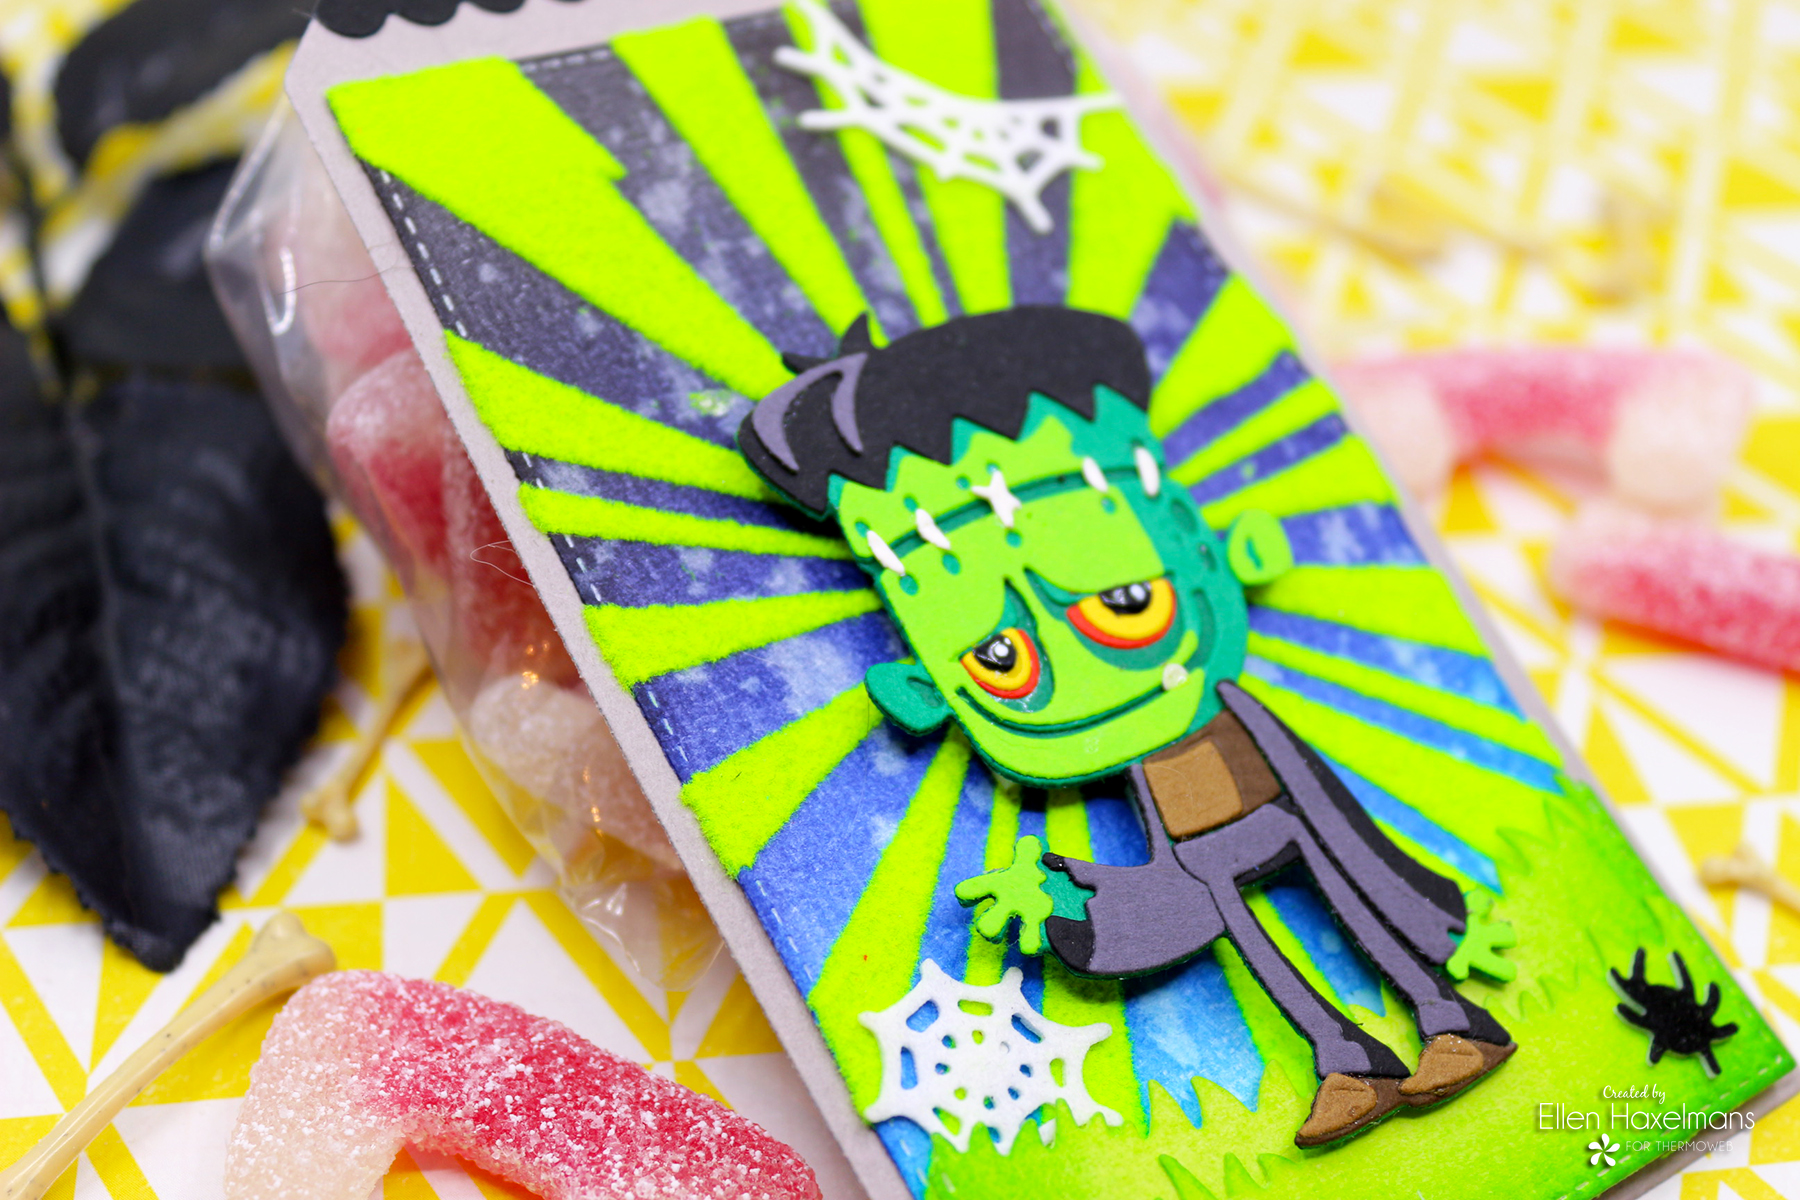
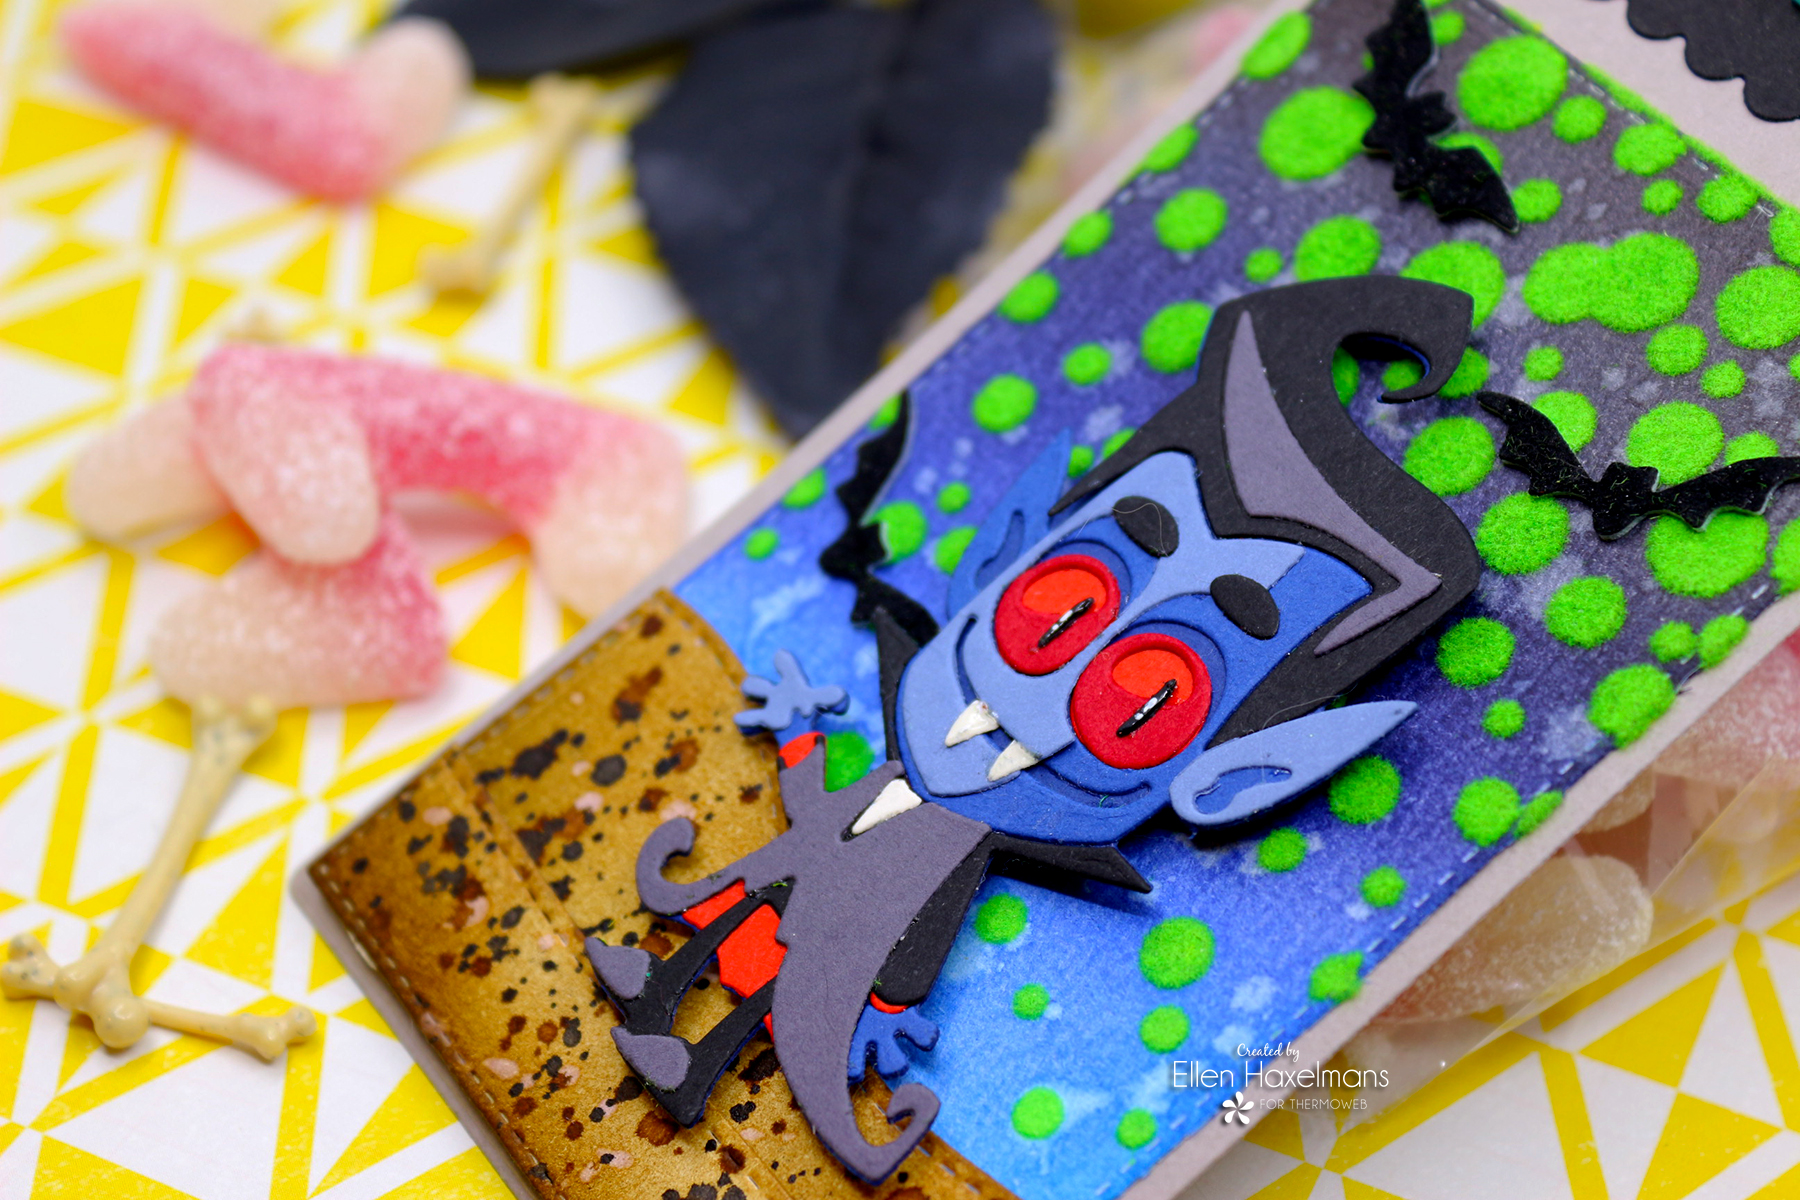
As you can see I used the flocked shapes as elements on my background. It’s so much fun to create a scene. It does make the card look so very special.
Let me give you directions on how you can use Deco Foil Transfer Gel with the flock.
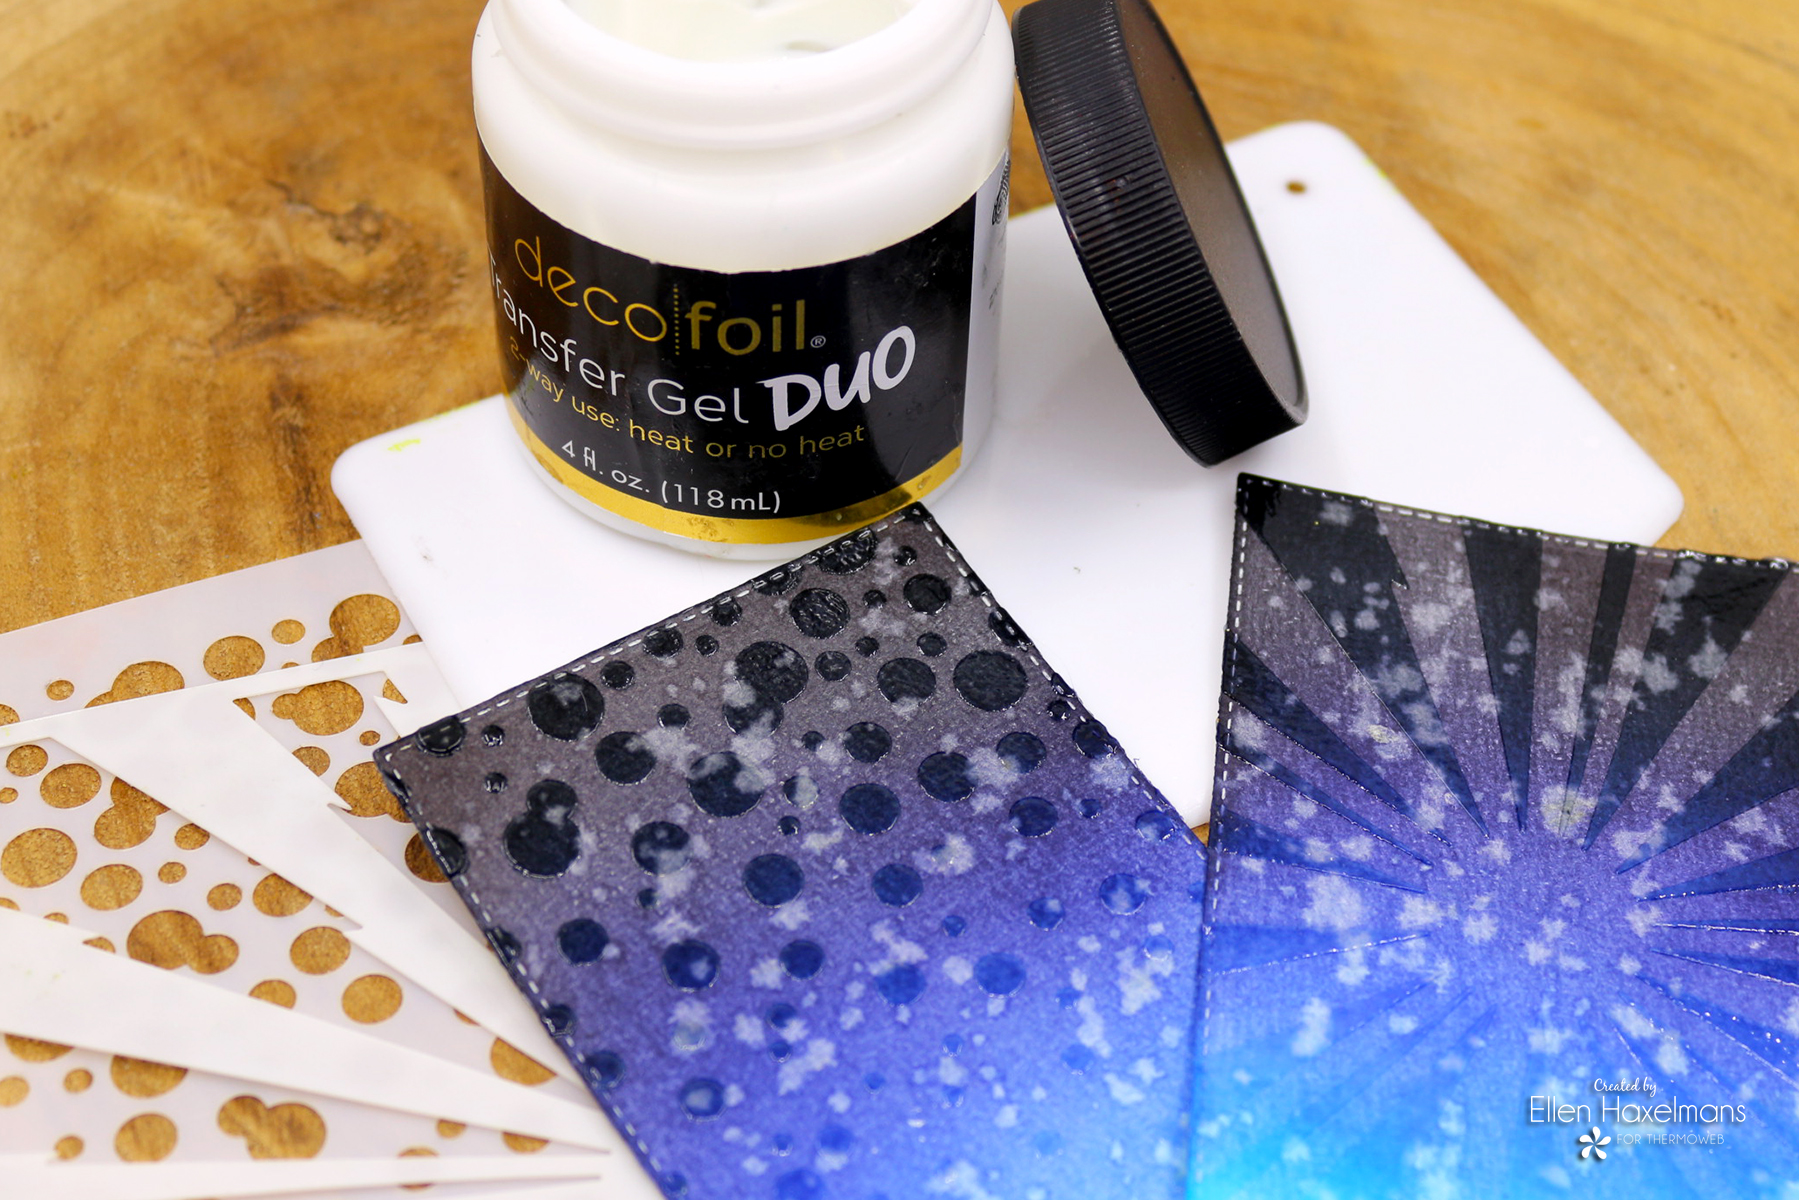
When I want to use the flock on my background, I do color the background first. I use ink and splatter water on top. Then I bring in the stencils and Deco Foil Transfer Gel Duo. For best results, spray the back of the stencil with Pixie Spray to hold the stencil in place. Apply Deco Foil Transfer Gel across the stencil using the Deco Foil Stencil Pal. Let it dry completely (when the gel is clear it’s dry).
Cut a piece of flock slightly larger than the background and place the design facedown onto the colored side of the flock. Then you can run it through a hot laminator (don’t forget to protect it with parchment paper). Once cool, peel away the flock sheet to reveal the flocked design.
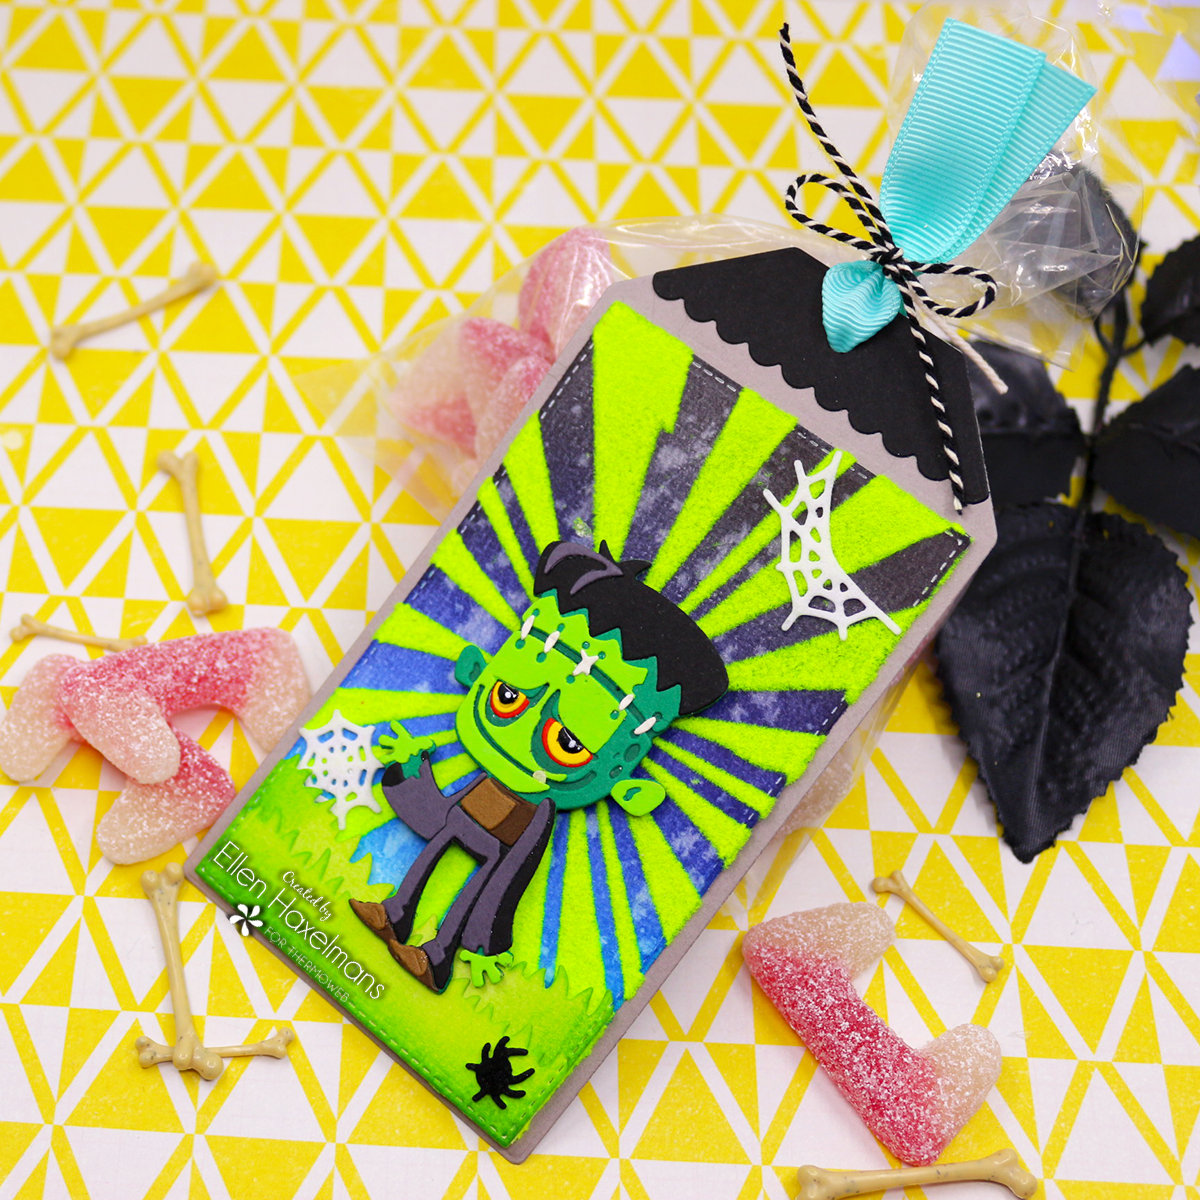
The flock really makes the elements on your tags pop. It’s so very pretty.
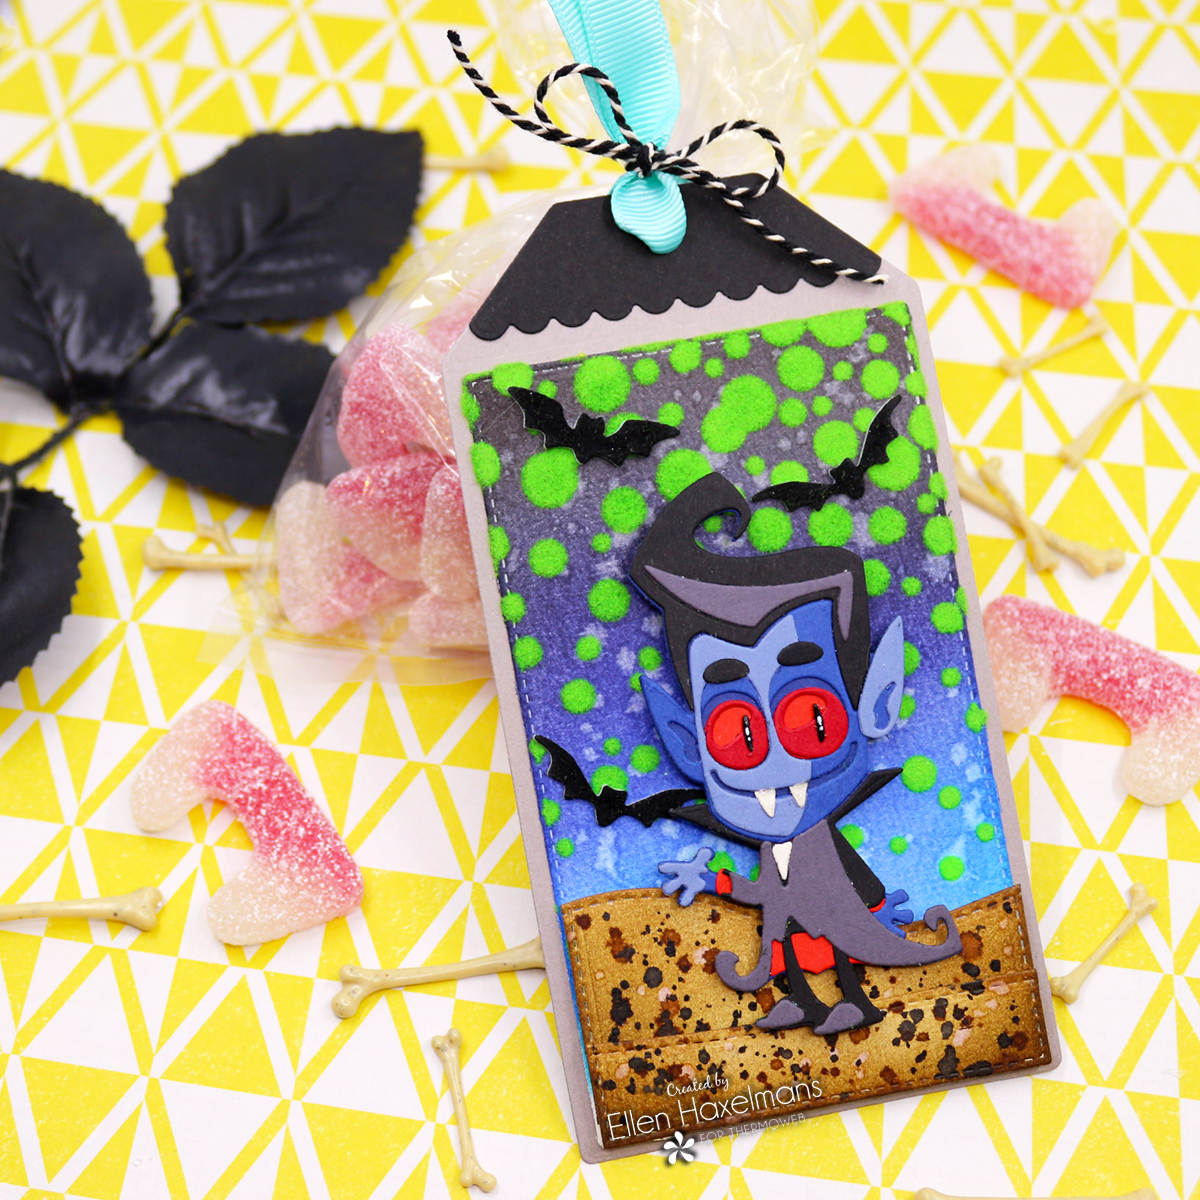
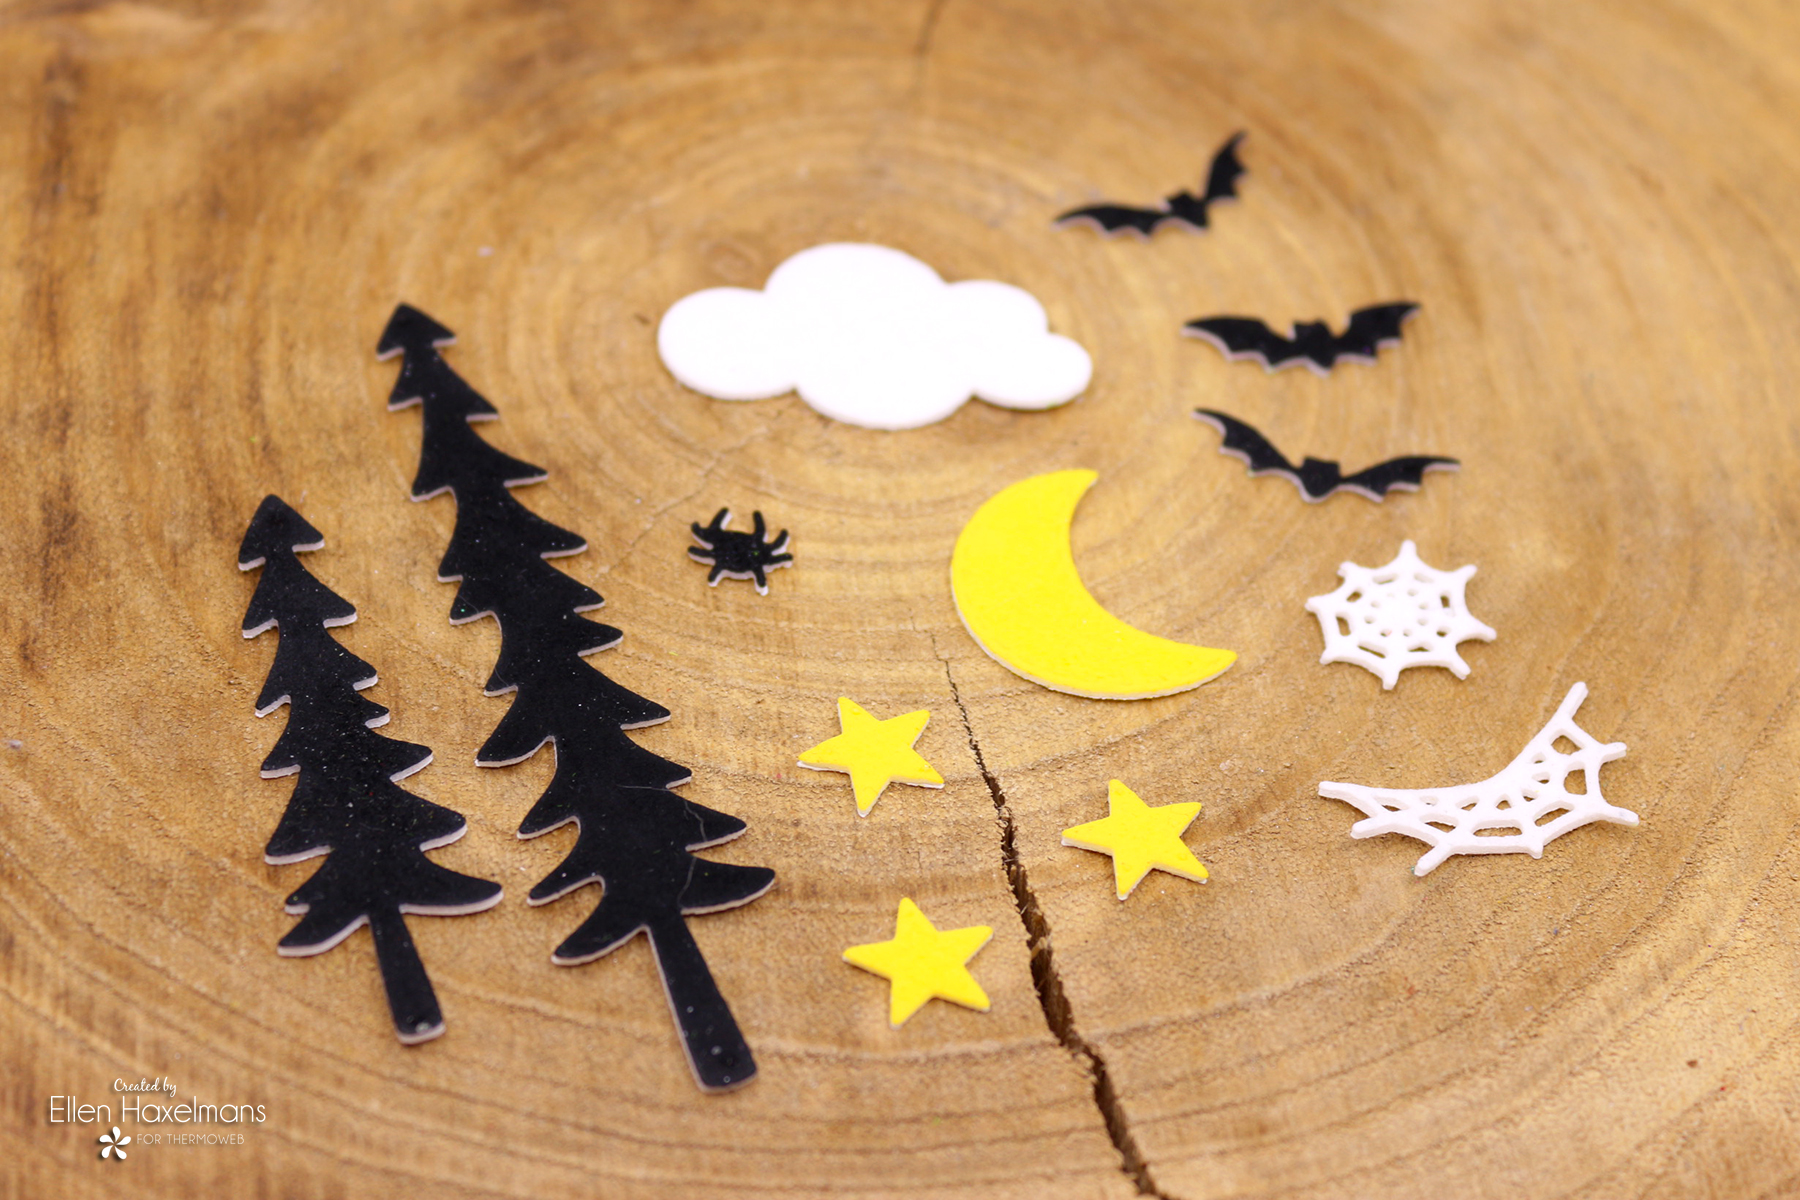
As you can see I still used a few pieces from the Flocked foam onto my tags.
I hope I inspired you to make some flocked cards, further I hope you keep it glamorous and spooky!
Supplies:
Deco Foil Flock Transfer Sheets, Sunshine Yellow
Deco Foil Flock Transfer Sheets, White Latte
Deco Foil Flock Transfer Sheets, Black Velvet
Deco Foil Flock Transfer Sheets, Green Envy
Rina K. Designs Neon Flock Transfer Sheets, Hello Yellow
Deco Foil Foam Adhesive Sheets, White
Deco Foil Transfer Gel Duo, 4 fl oz
Deco Foil Stencil Pal, 2 PK
Deco Foil Toner Card Fronts Happy Everything
Deco Foil Stamp & Die Set Happy Everything
Deco Foil Transfer Sheets, Rose Gold
iCraft 3D Foam Squares Dispenser Box 320 count (White)
Gina K. Designs Permanent Adhesive Dot Runner, 30 ft., Clear
Other Supplies: Costume Party, Colorize by Tim Holtz – Sizzix Thinlits, Die-namics Grassy Hills – My Favorite Things, Die-namics Hills – My Favorite Things, Craftable Punch die Halloween – Marianne Design, Zapp Attack Stencil – Heffy Doodle, Bubbly Stencil – Newton’s Nook Designs, Cloudy Sky Stencil – Newton’s Nook Designs, Sky Scene Builder Die Set – Newton’s Nook Designs, Forest Scene Builder Die Set – Newton’s Nook Designs, Slimline Frames & Portholes Die Set – Newton’s Nook Designs, Large Slimline With Sliders dies – Lawn Fawn, Dies Mini Slimline tags – Carlijn Designs
[…] like my last project post (click to see the monster-theme Halloween cards and tags I created) I used Deco Foil Flock in two […]