


Mixed Media Halloween Haunted House by Wendy Cuskey
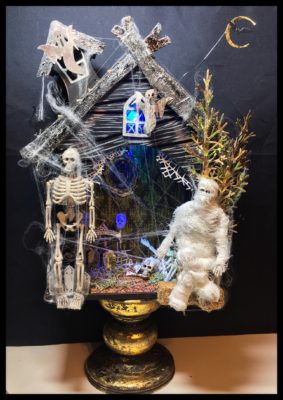
Hi all, Wendy here with my Halloween Haunt project, the perfect mantel decor for a Halloween party or just seasonal display. ThermOWeb mixed media and Deco Foil products are the perfect complement to any home decor craft project, giving just the right finishing touches. Keep scrolling through photos to see the inside.
Therm-O-Web Supplies used:
iCraft Mixed Media Adhesive
iCraft Deco Foil Adhesive Pen
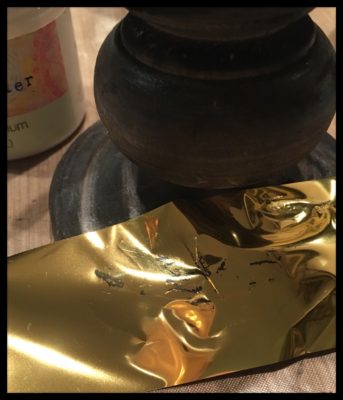
Rebekah Meier Designs Mixed Media Transfer Foil – Amber Watercolor
Deco Foil Transfer Sheets – Gold
Deco Foil Transfer Sheets – Pewter
Deco Foil Transfer Sheets – Spring Green
Other Supplies Used:
Sizzix Big Shot Die-Cutting Machine
Sizzix Thinlit Die Set – Trick or Treaters by Tim Holtz
Sizzix Thinlits Die – Cobweb by Tim Holtz
Sizzix Thinlits Die – Village Graveyard by Tim Holtz
Sizzix Thinlits Die Set – Haunted House by Tim Holtz
Sizzix Thinlits Die Set – Holiday Shadow Box by Katelyn Lizardi
Haunted House Shadow Box from Craft Store
Wood Pedestal, Black Paint, Cardstock, Cheesecloth, Child’s Halloween Necklace, Computer Printable, Craft Foam, Craft Hay Bales, Craft Moss, Craft Skeletons, Craft Wire, Die Pick or Paper Piercer, Faux Spider Webbing, Halloween Scrapbook Puffy Stickers (faux picture frame), Hot Glue and Glue Gun, Old Sewing Pattern, Paint Brushes, Patterned Paper, Toothpicks, White Paint
Mixed Media Halloween Haunted House Instructions:
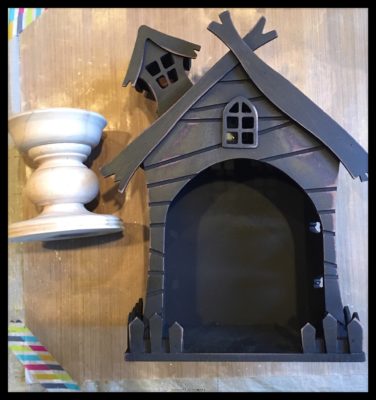
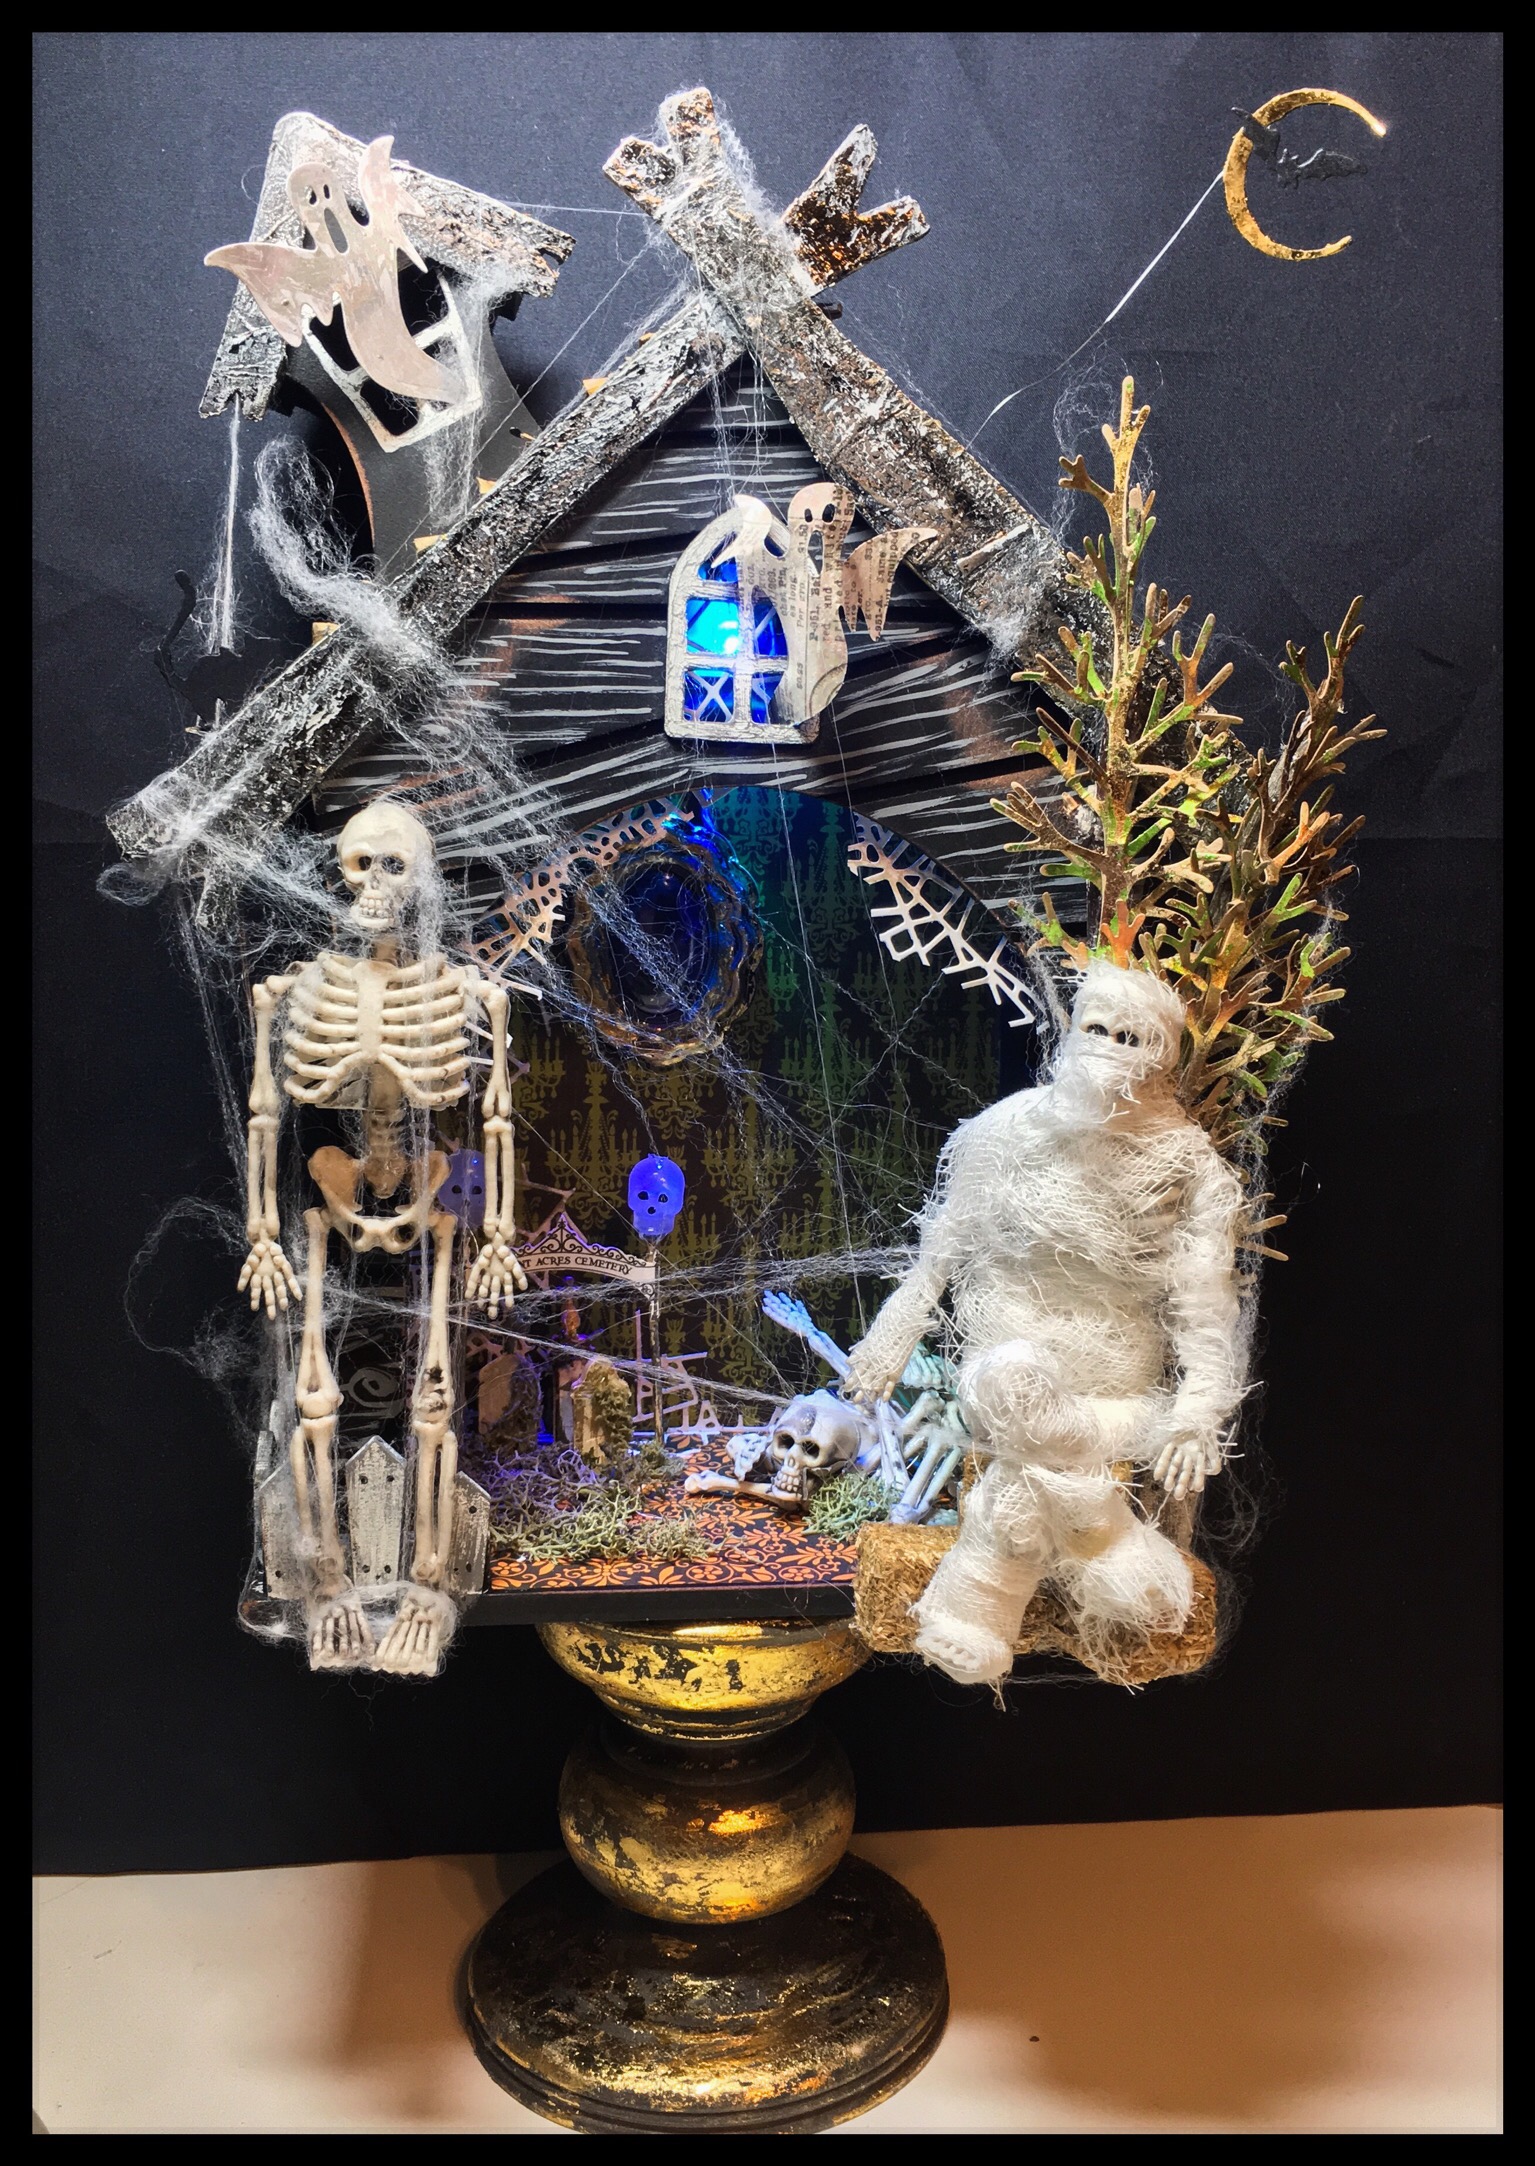
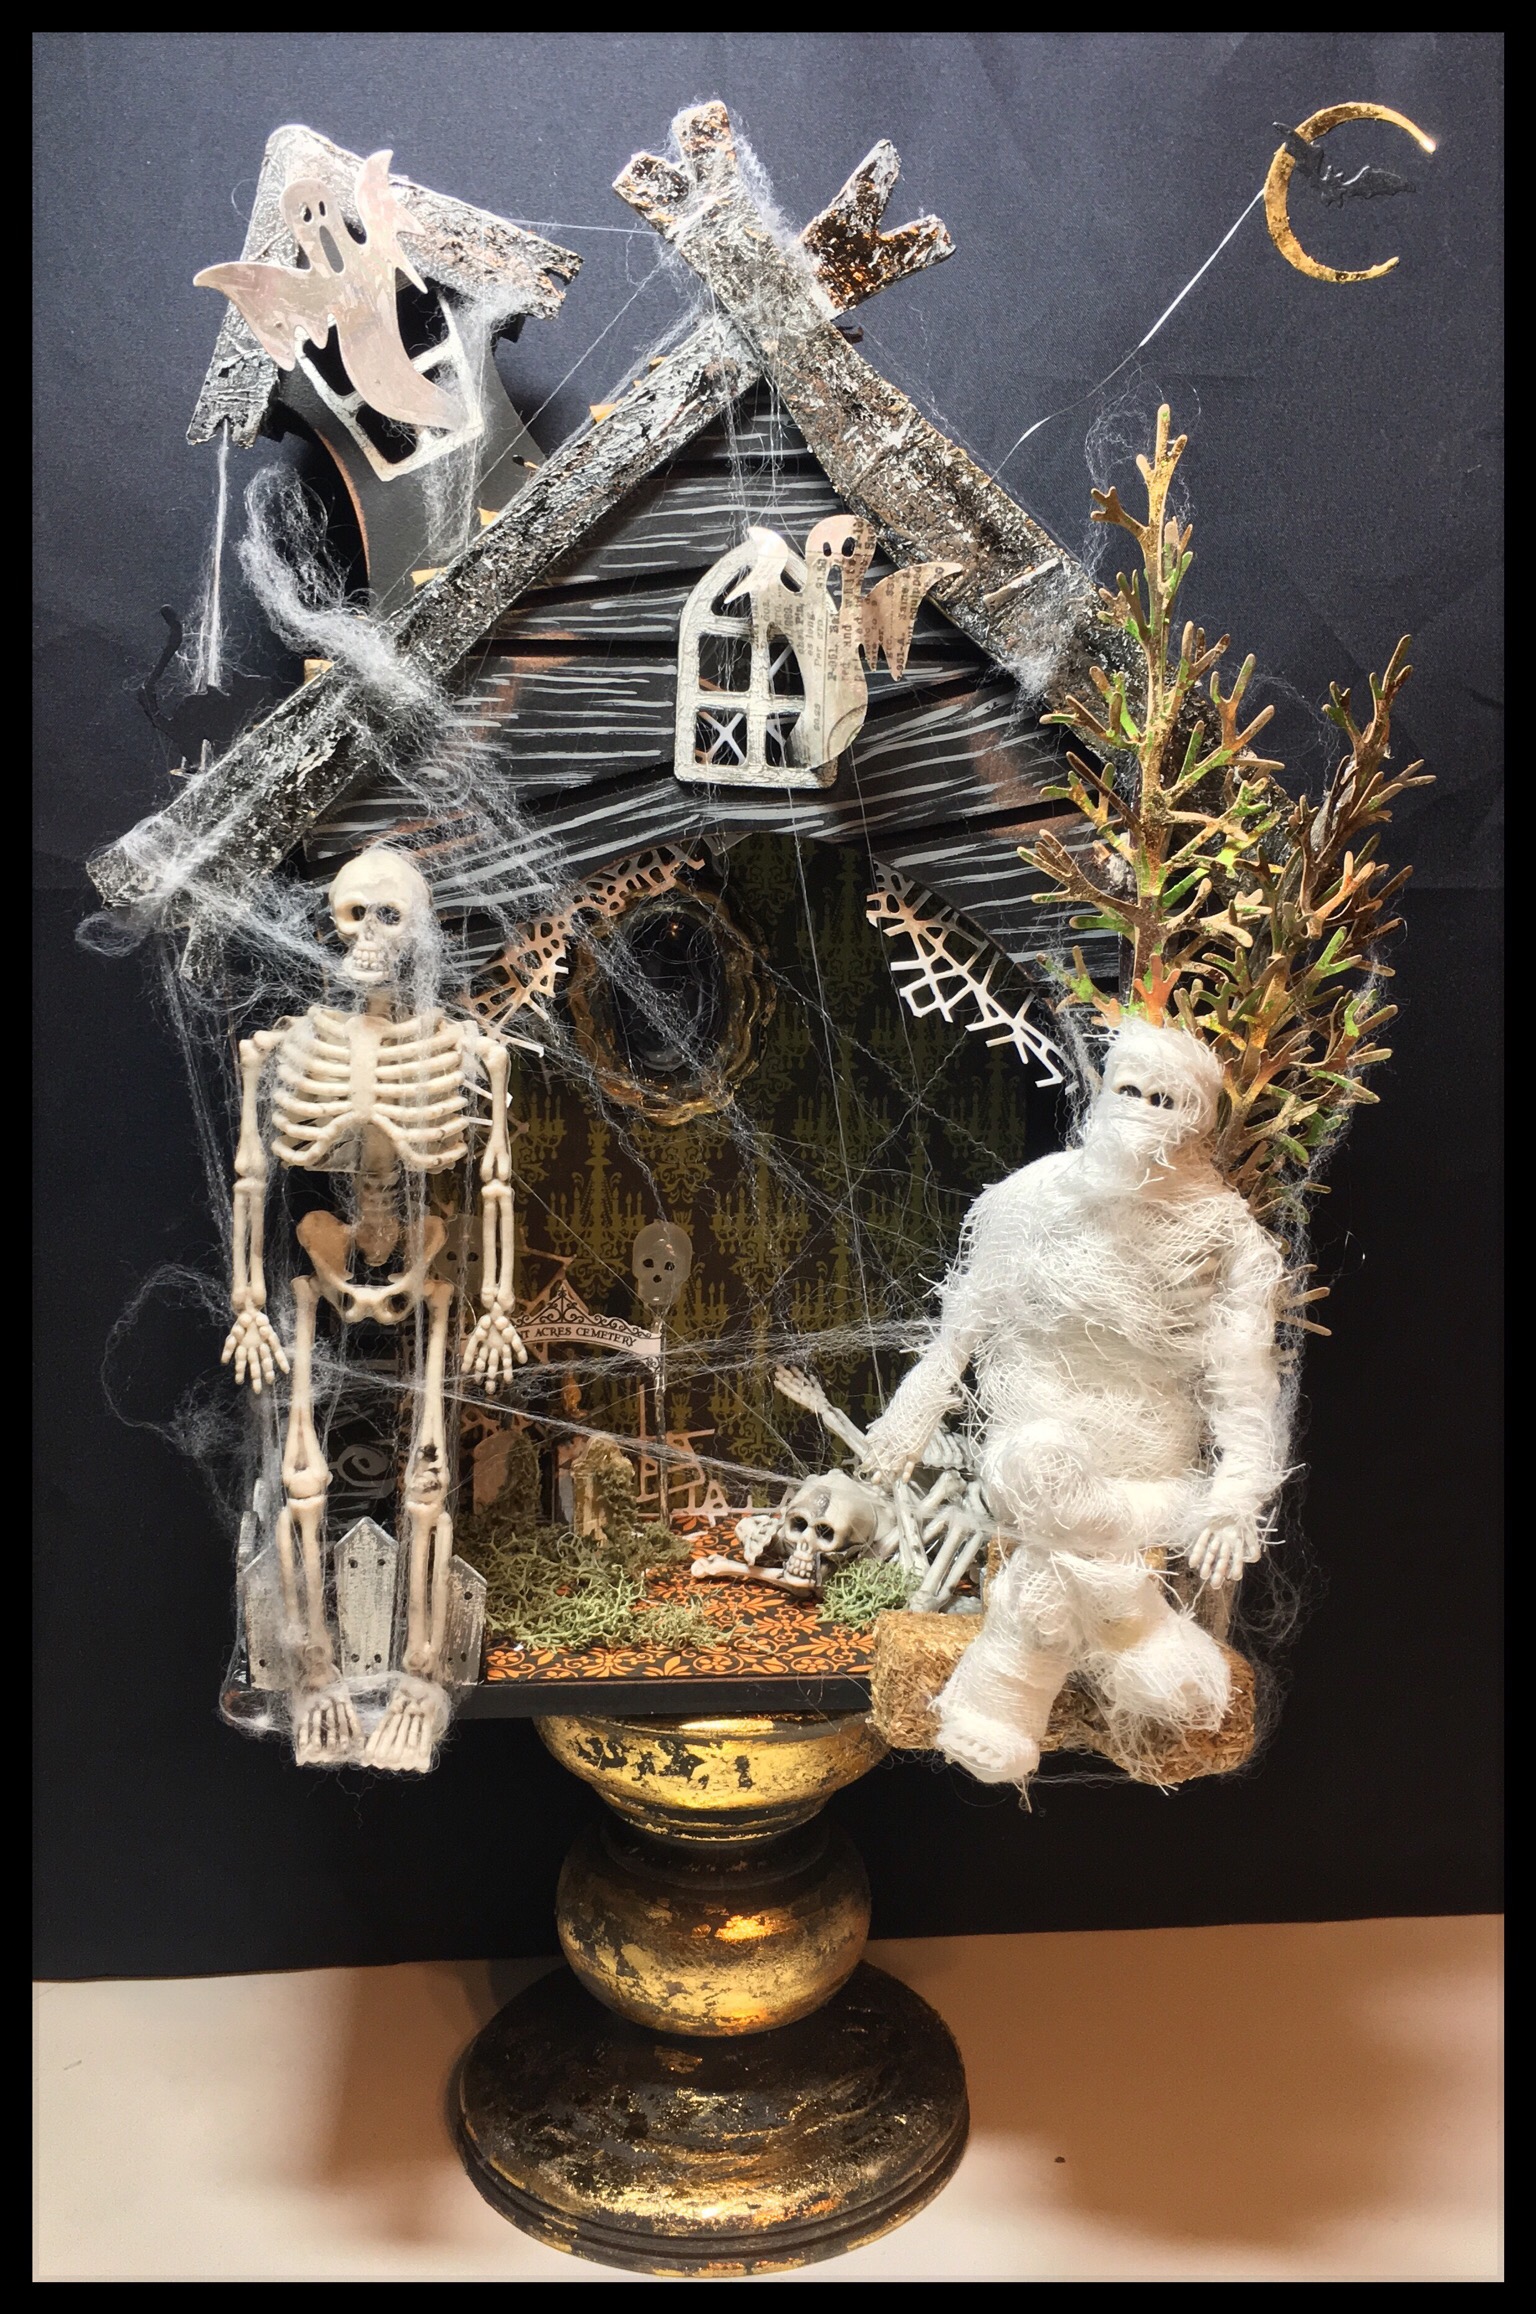
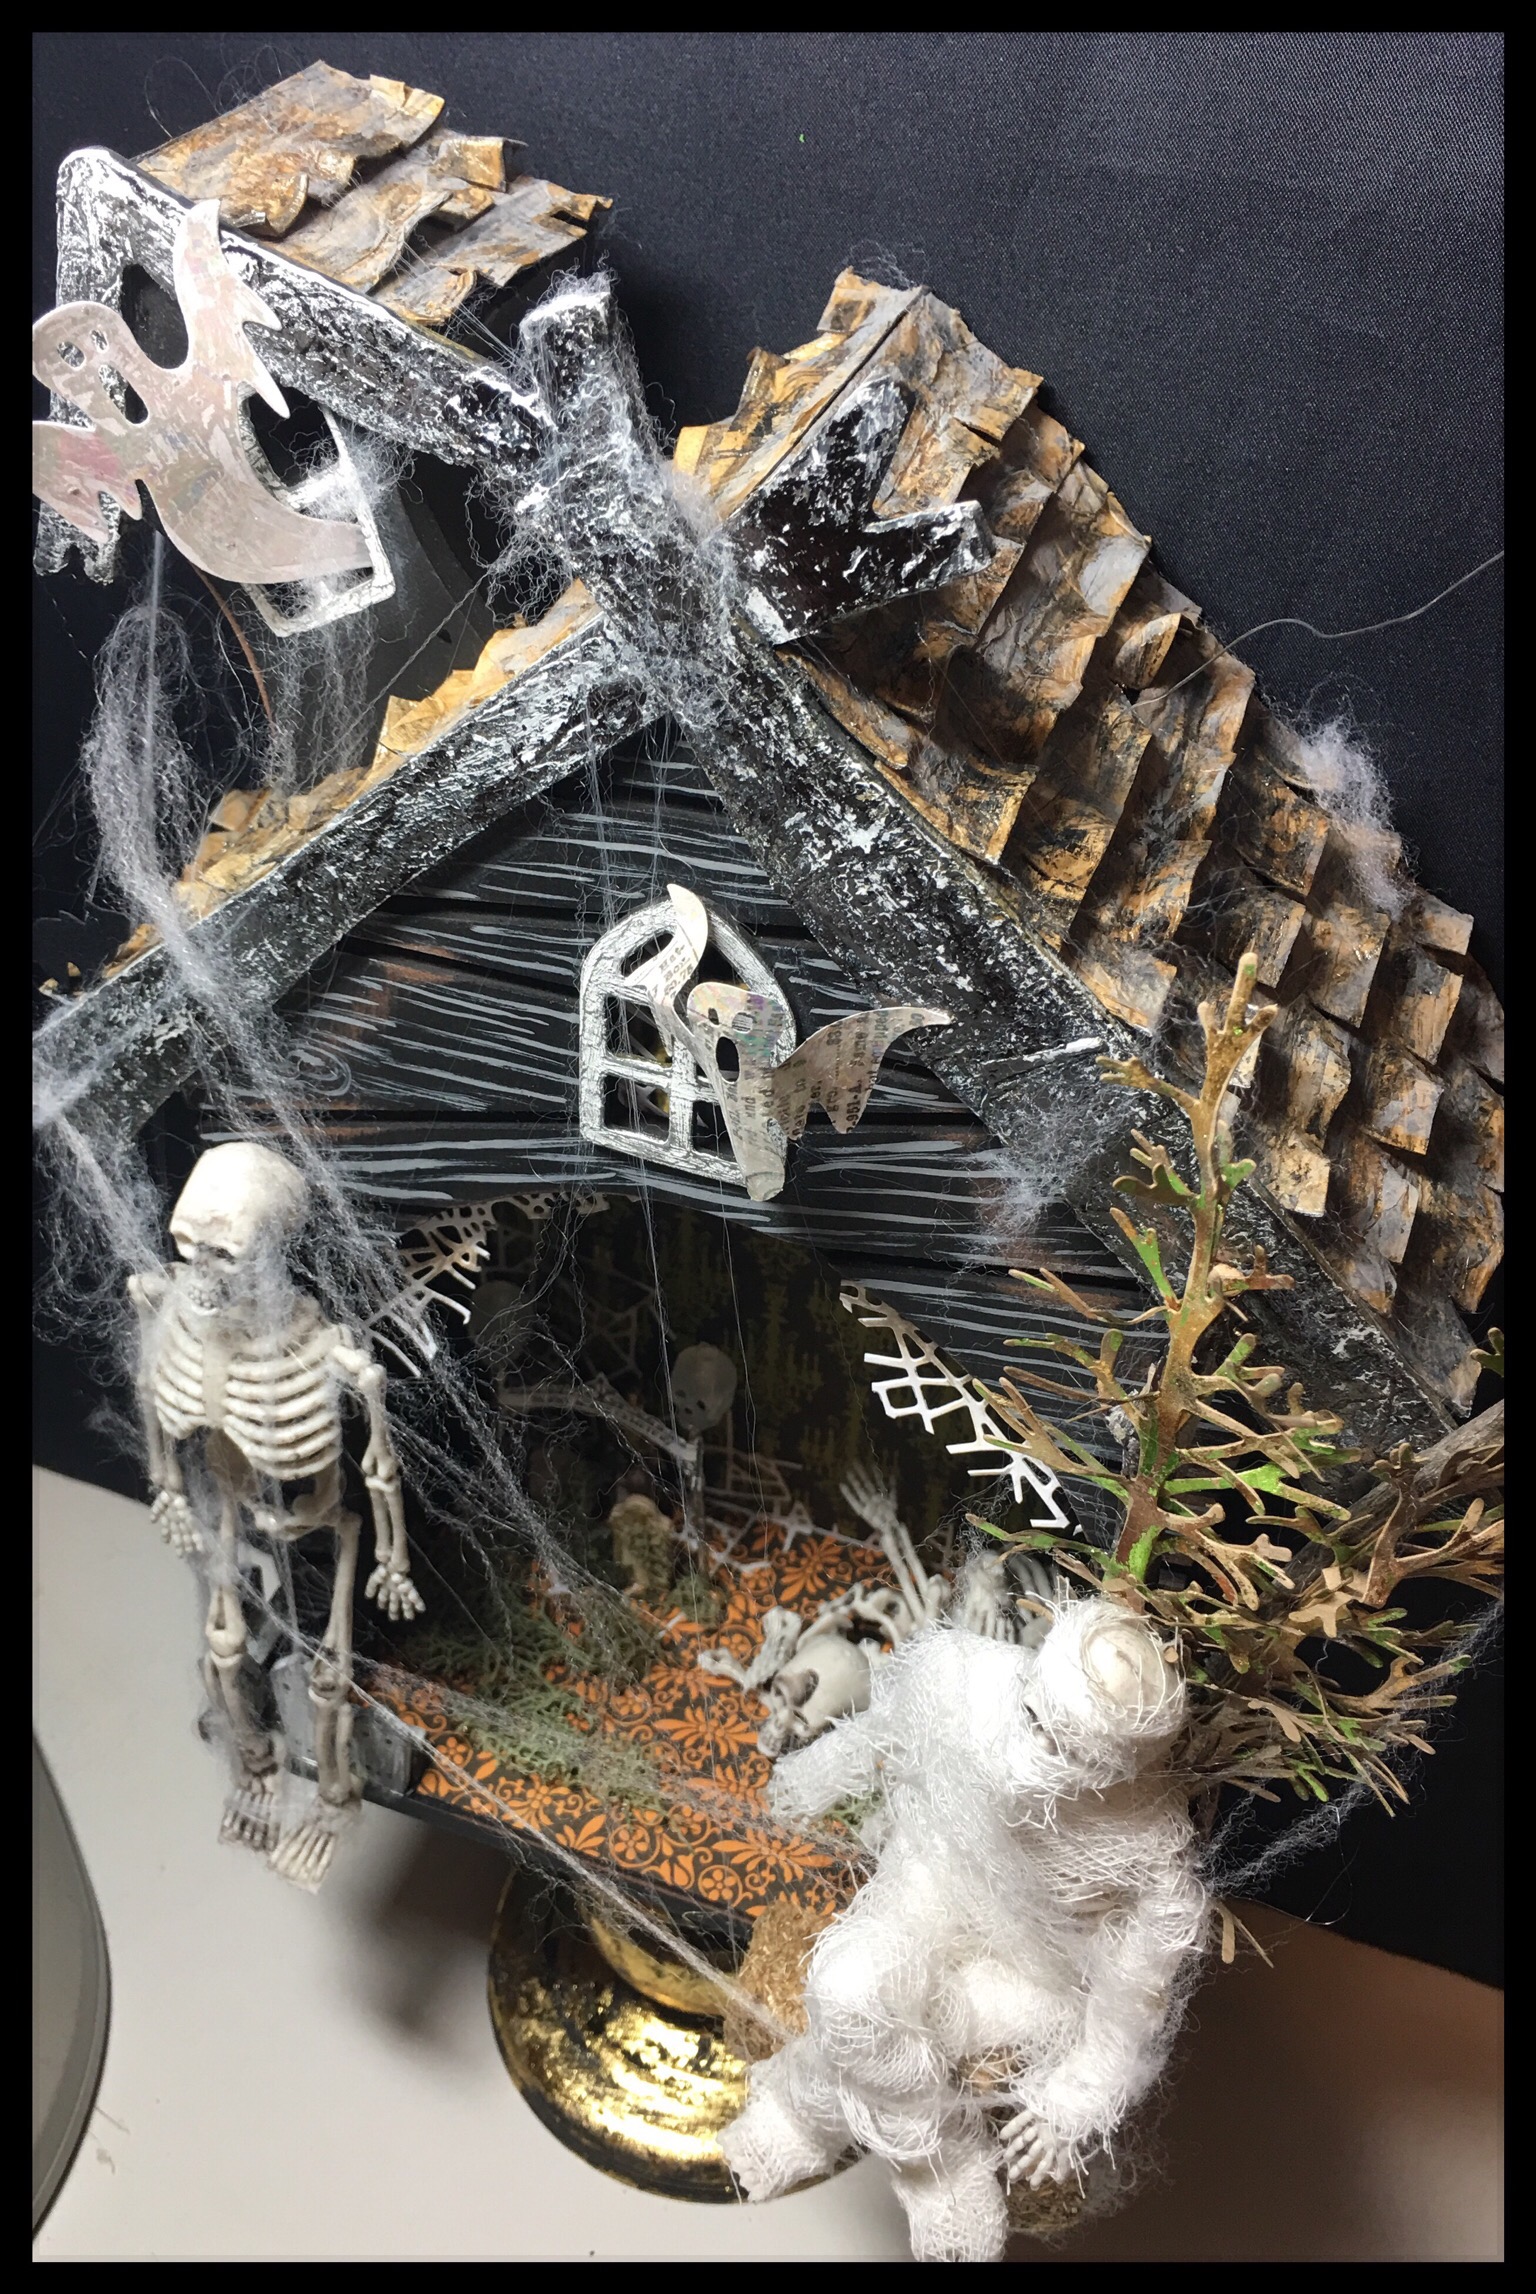
Begin with a shadow box or plain haunted house home décor piece from your local craft store (mine lights up with a switch on the back, but other than that was very plain and unappealing) and a raw wood pedestal.
Hint: If you can’t find a haunted house shadow box, buy a plain wood shadowbox and add two wood planks at the top to create a roof . . . instant haunted house!
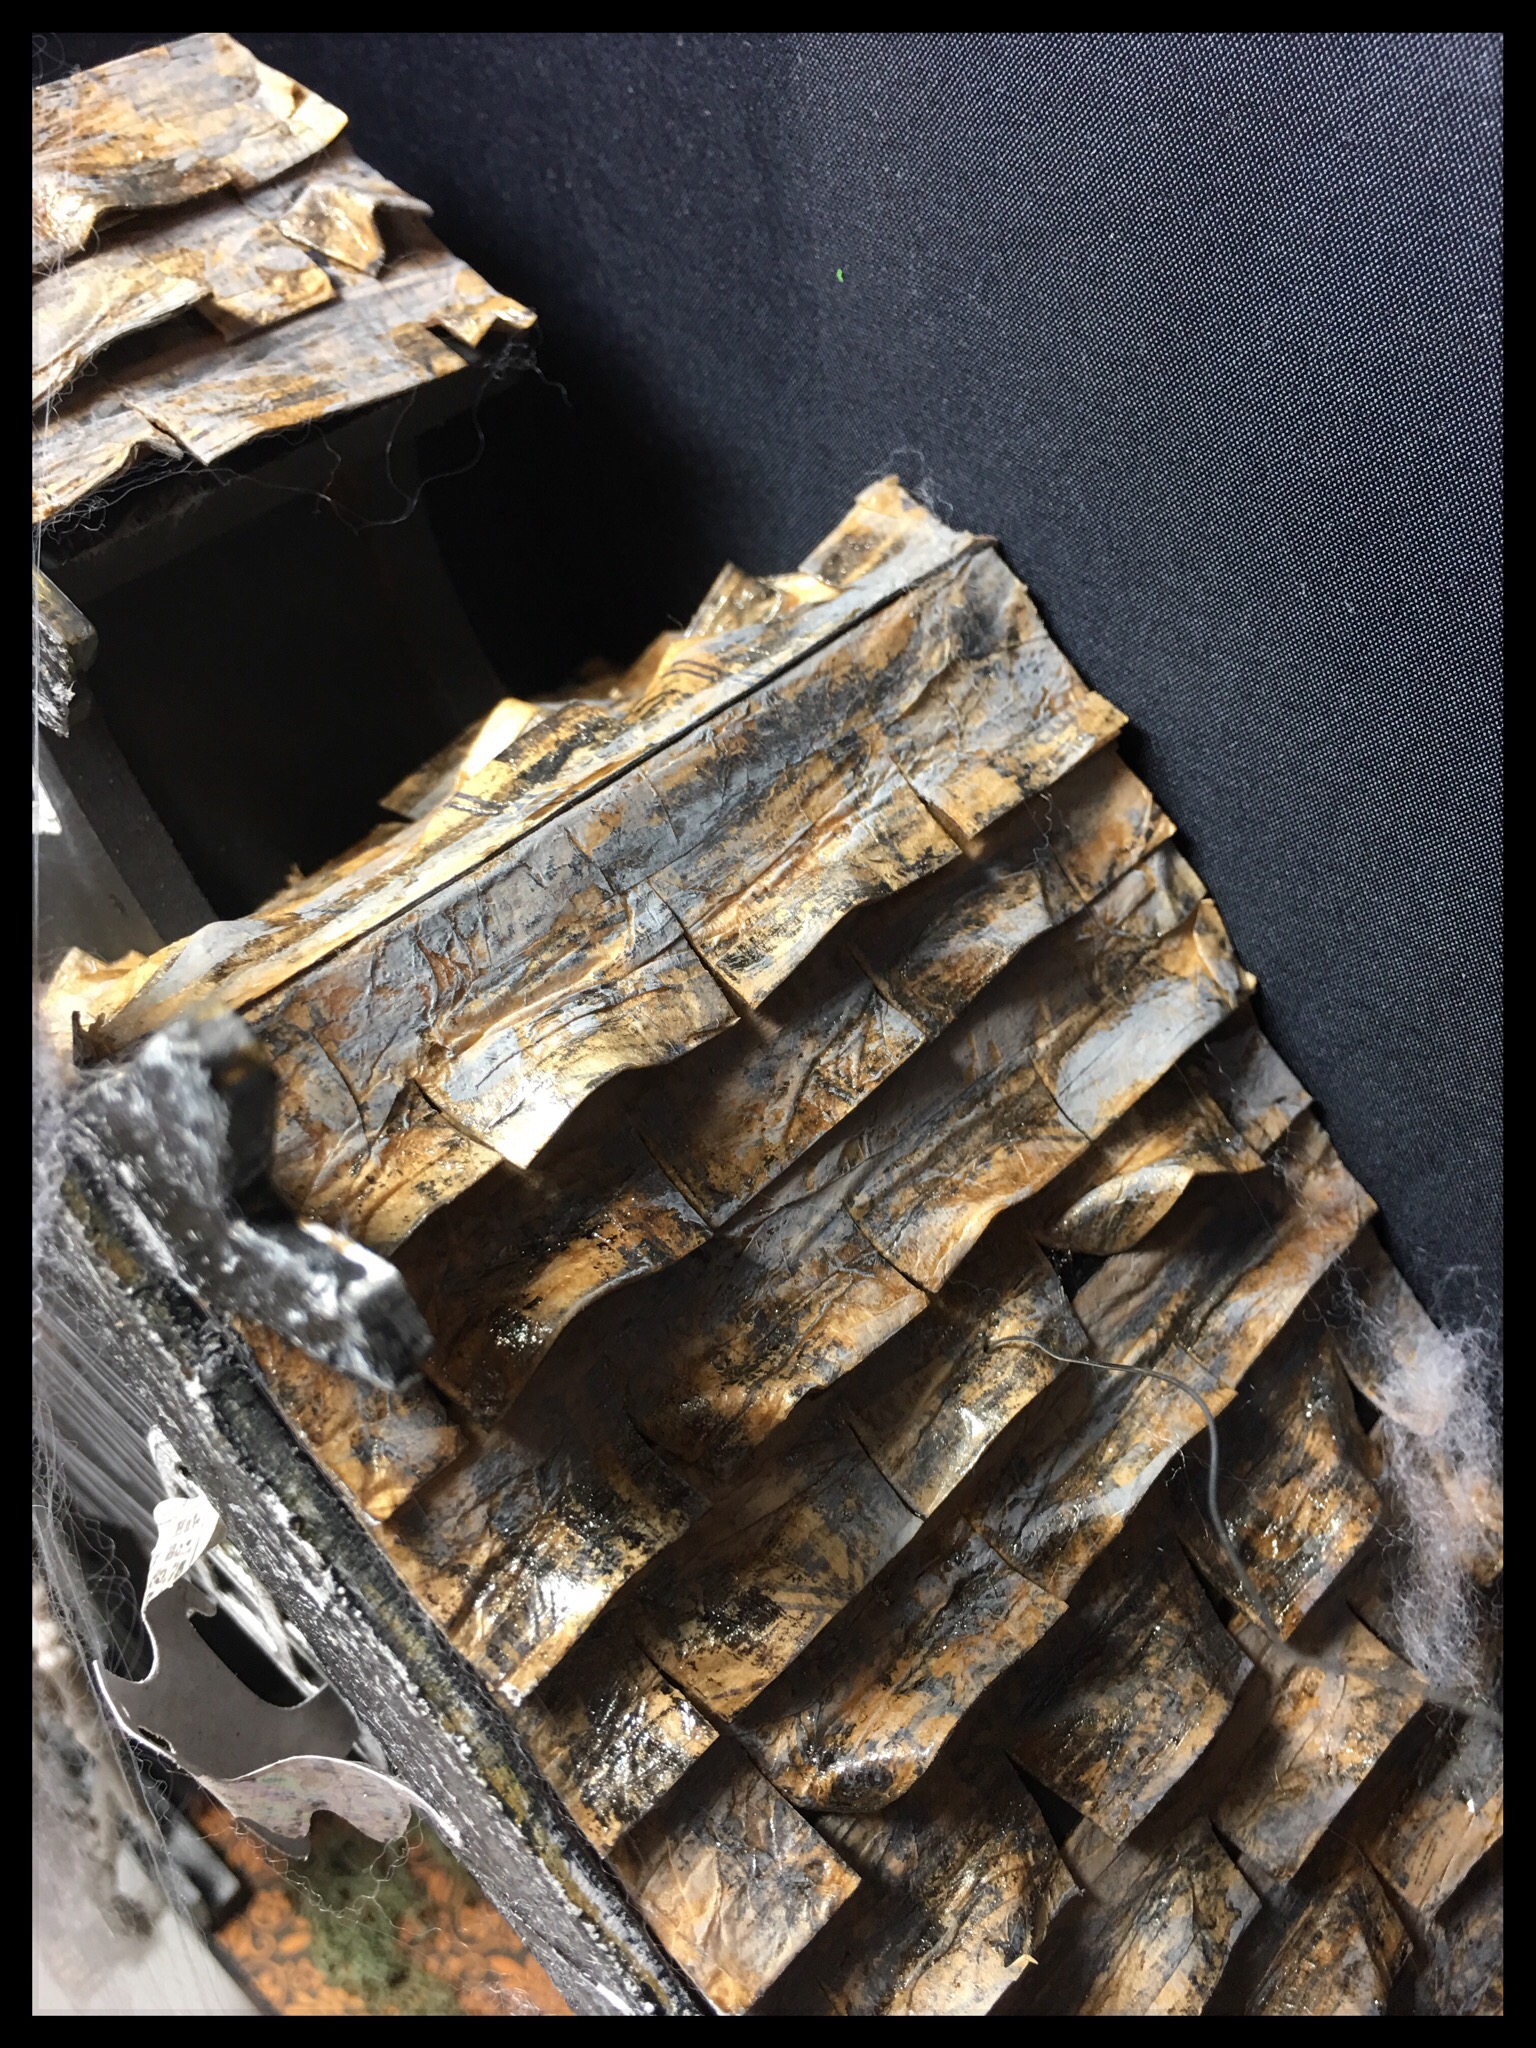
Next, using Rebekah Meier Mixed Media Medium, a piece of brown cardstock cut to the width of my roof and an old sewing pattern, I created a textured piece which I will use to cut my roof shingles.
Hint: Coat the cardstock in Mixed Media Medium and then lay the pattern over the top, ruching the pattern as you go. Trim the excess pattern paper from the sides.
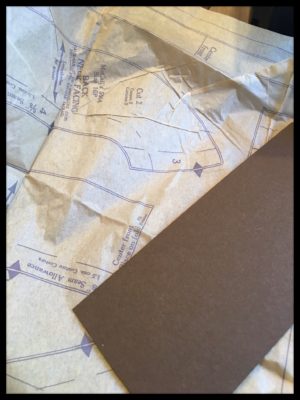
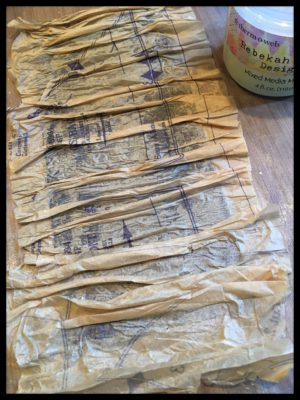
I cut the pattern covered cardstock into strips approximately 1/2 “ wide and then snipped it into sections to create the look of singles.
Hint: Don’t snip the shingles in the same place on each strip – you want to be able to stagger the shingles.

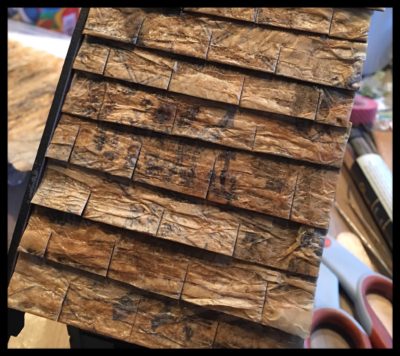
Once you have all of your strips cut and snipped, begin layering them onto your rooftop, starting at the bottom.
Hint: Lay them out before you adhere them to make sure you will meet evenly and snugly at the top.
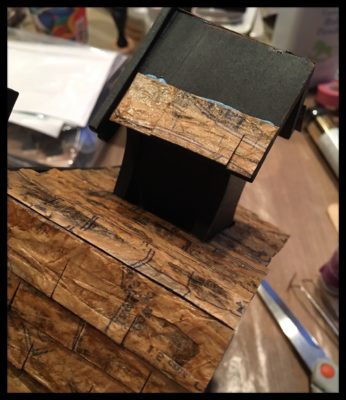
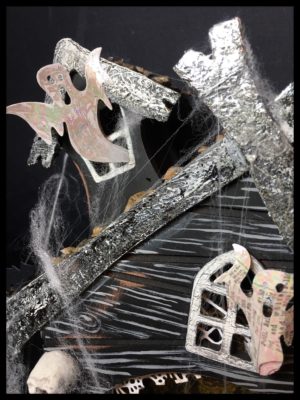
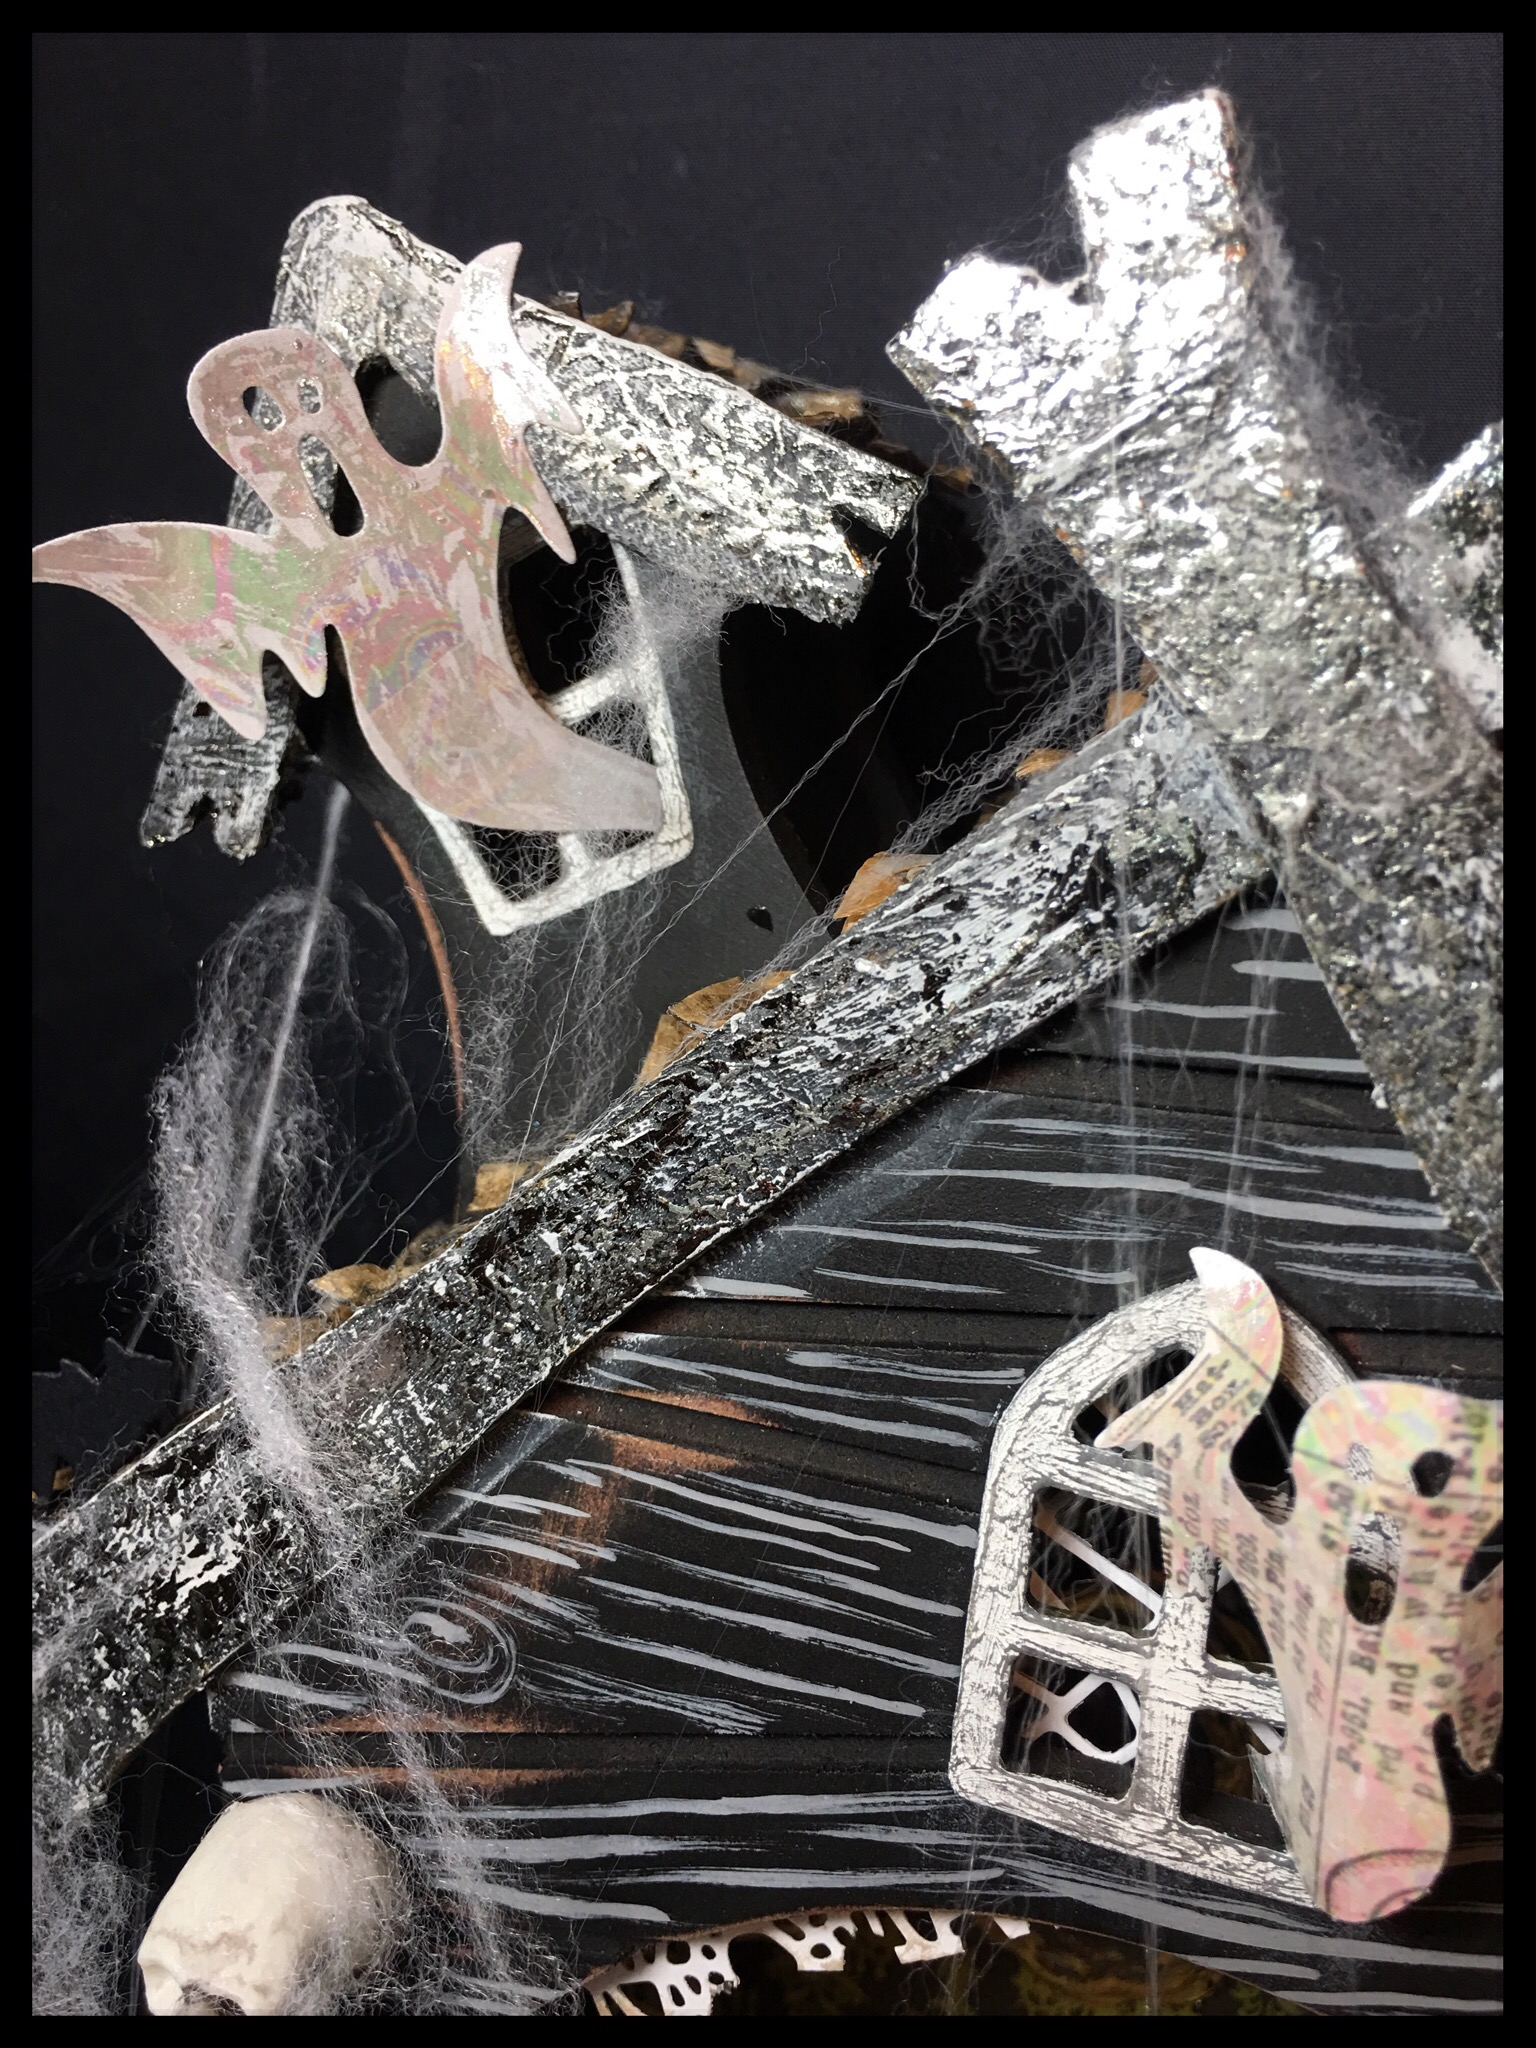
Once your roof is installed, apply some Rebekah Meier Mixed Media Medium randomly with a paintbrush, allow to dry until tacky and then apply Deco Foil Transfer Sheets – Pewter to the rooftop. Using a die pick or paper piercer, lift some of the areas of the roof and pinch to create even more texture and dimension.
Hint: Do not cover your entire roof with the Mixed Media Medium or the pattern will not show through at all once you apply the Deco Foil. You want the Deco Foil to accent and add another layer of texture.
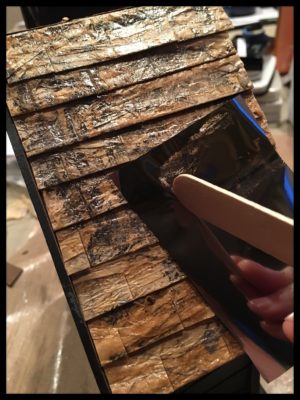

I went back in with a little paint and added some grunge.
Using iCraft Mixed Media Adhesive, repeat the pattern ruching and foiling process on the roof trim (if your haunted house has one).
Hint: If your haunted house does not have trim, create a trim piece by cutting and painting some chipboard.
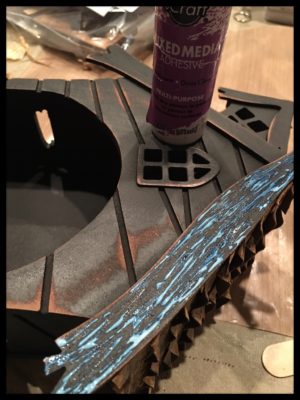
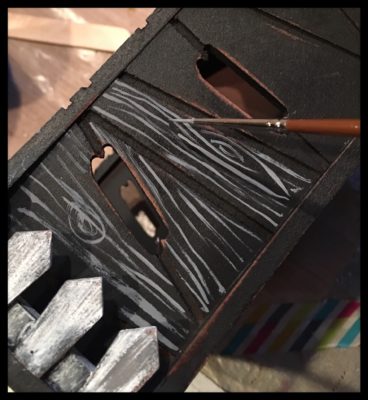
Finish the exterior of your house by painting any other parts which need embellishing. I added a woodgrain pattern and painted the fence and window trim on my house.
Hint: Dry brush a little black paint over the white to create a dingy look.
With a little paint, paper, Deco Foil and mixed media medium I transformed my plain shadow box house into a piece of art!
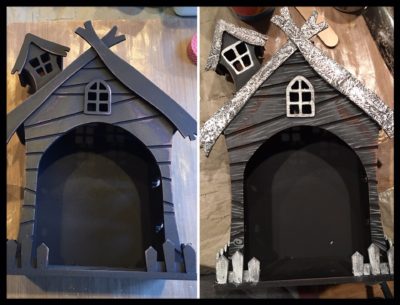
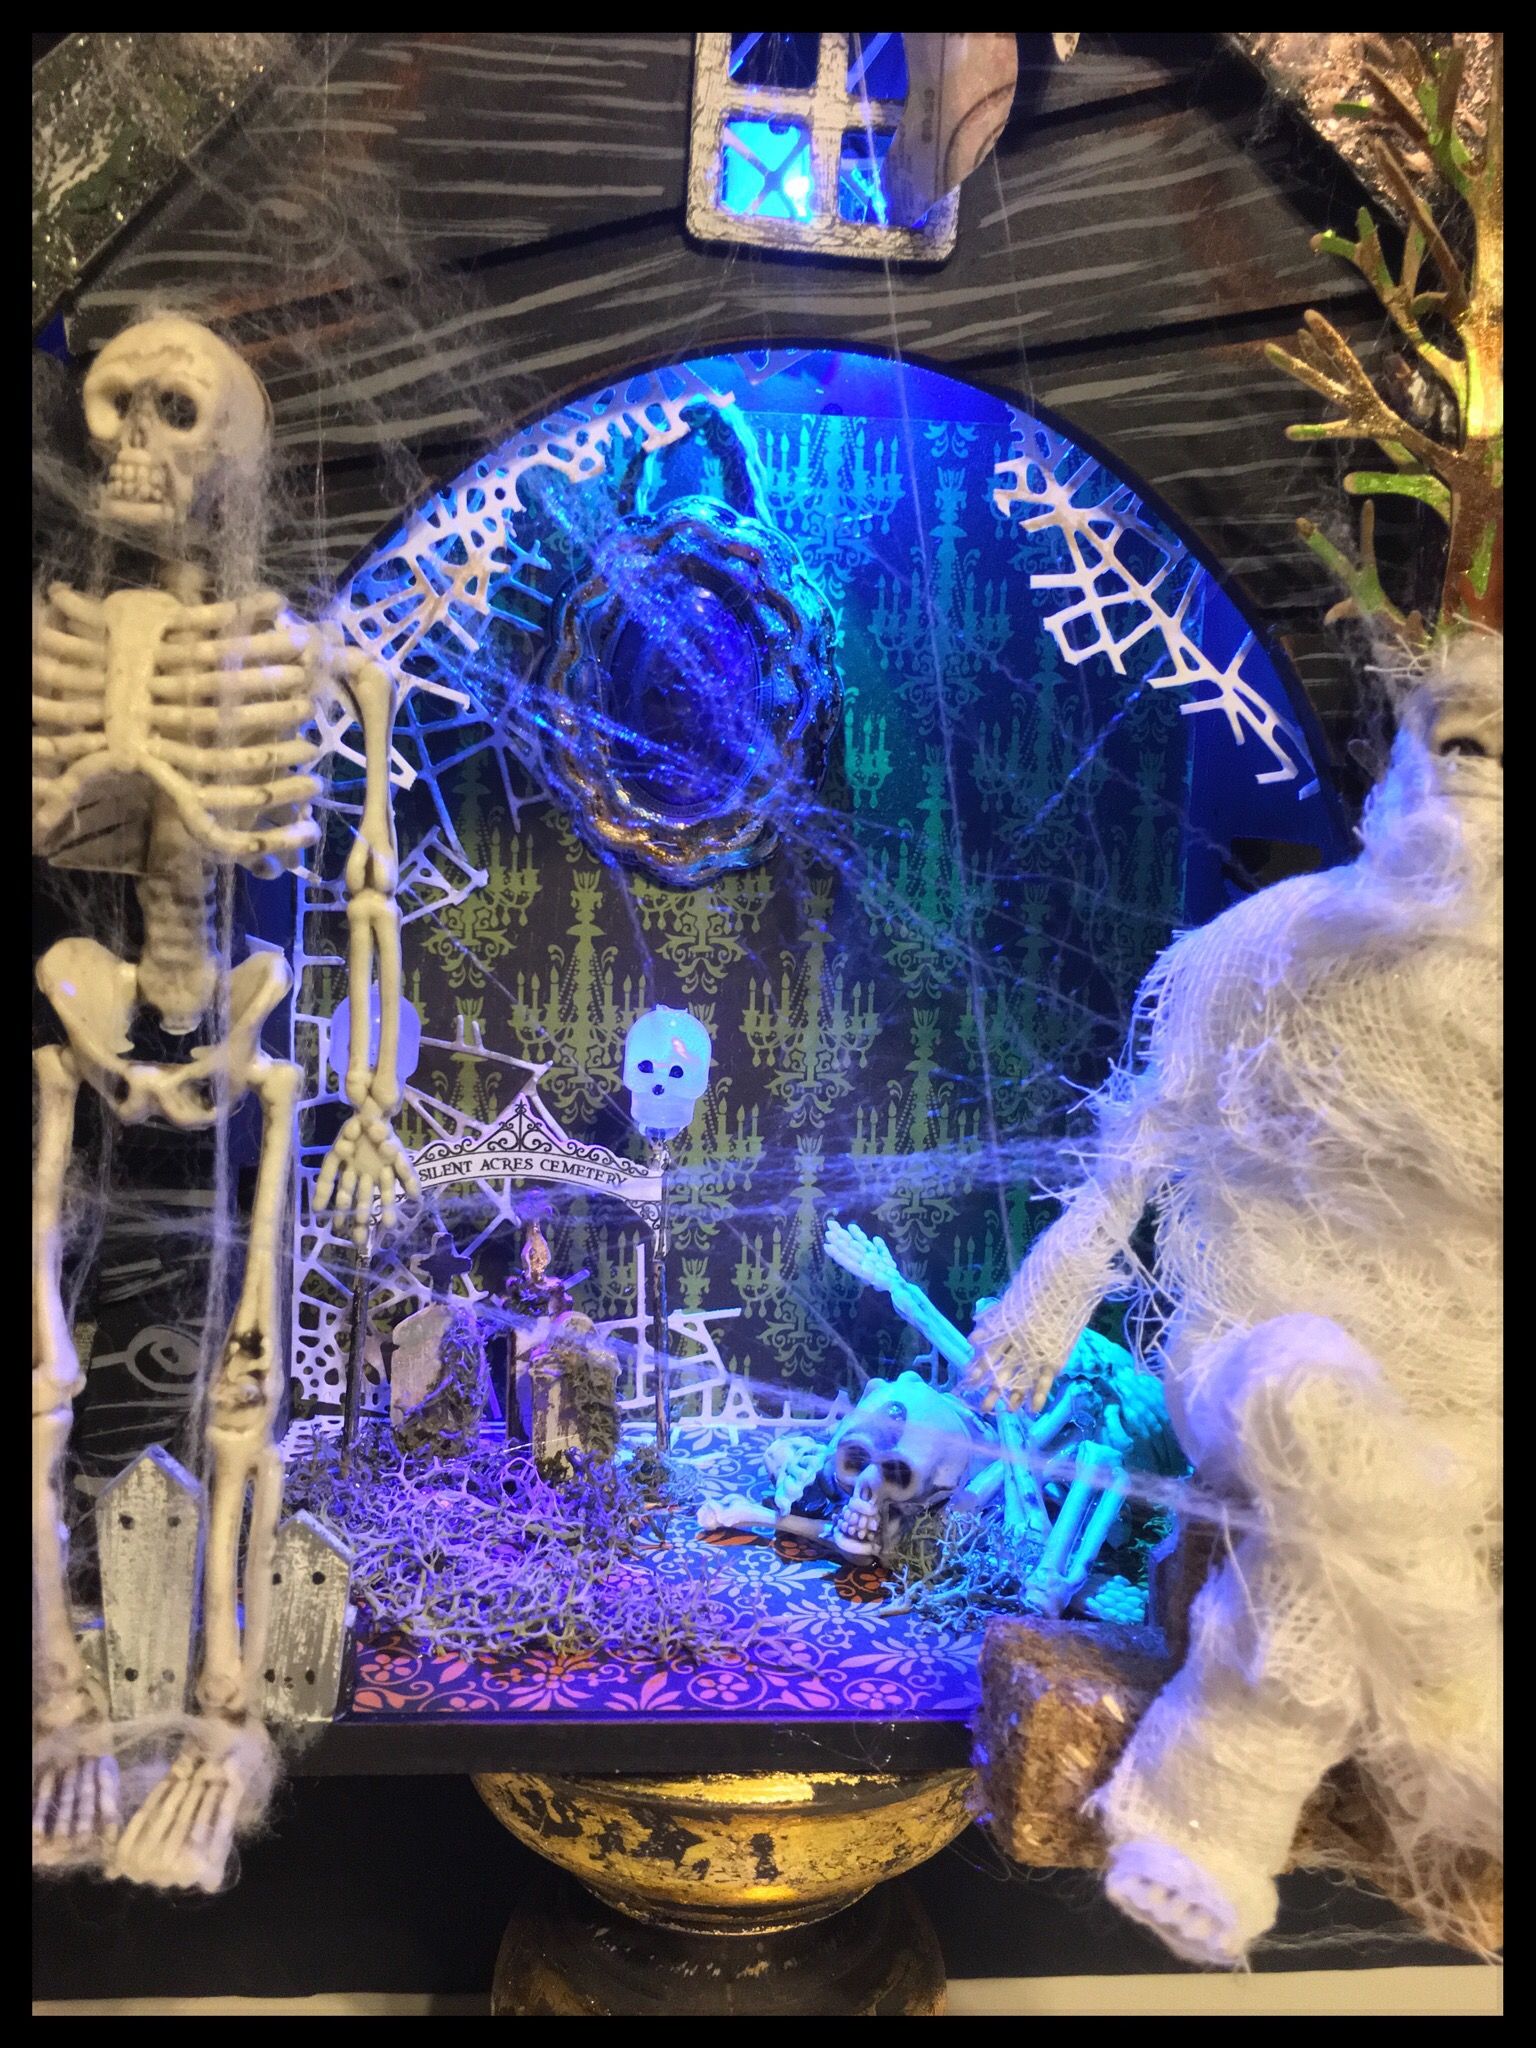
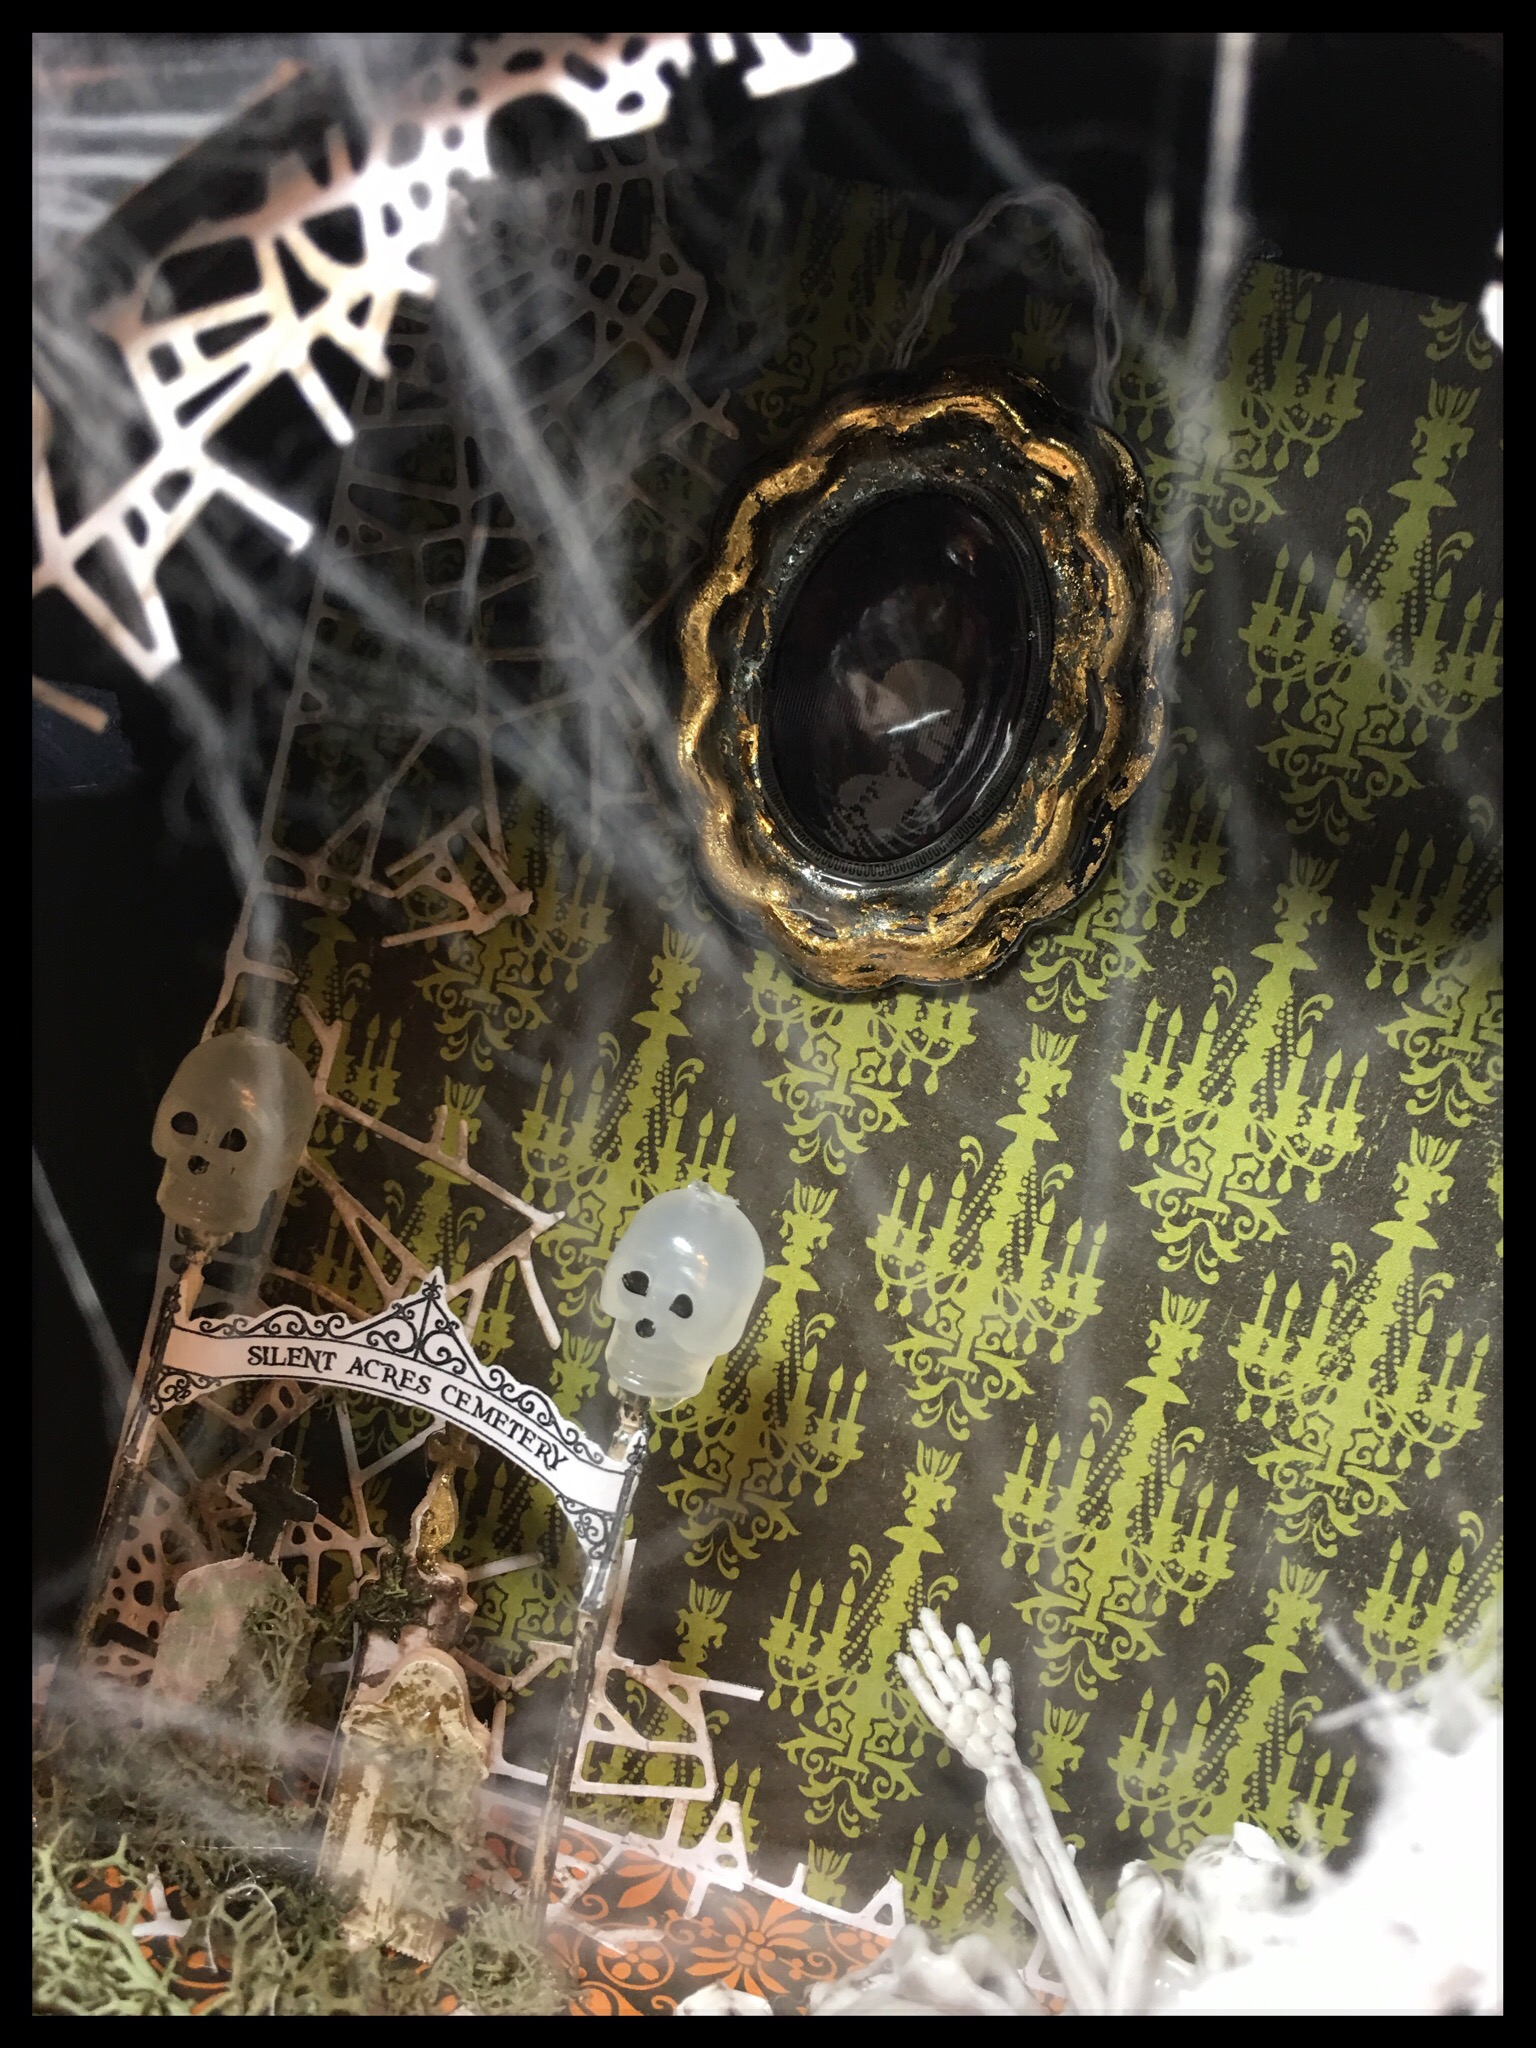
Add some Halloween scrapbook paper to the back to mimic wallpaper.
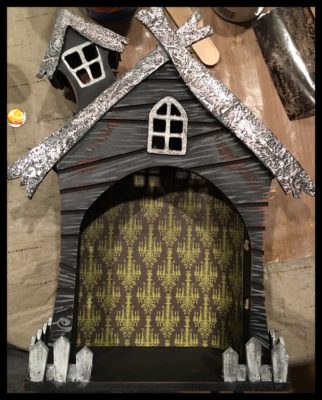
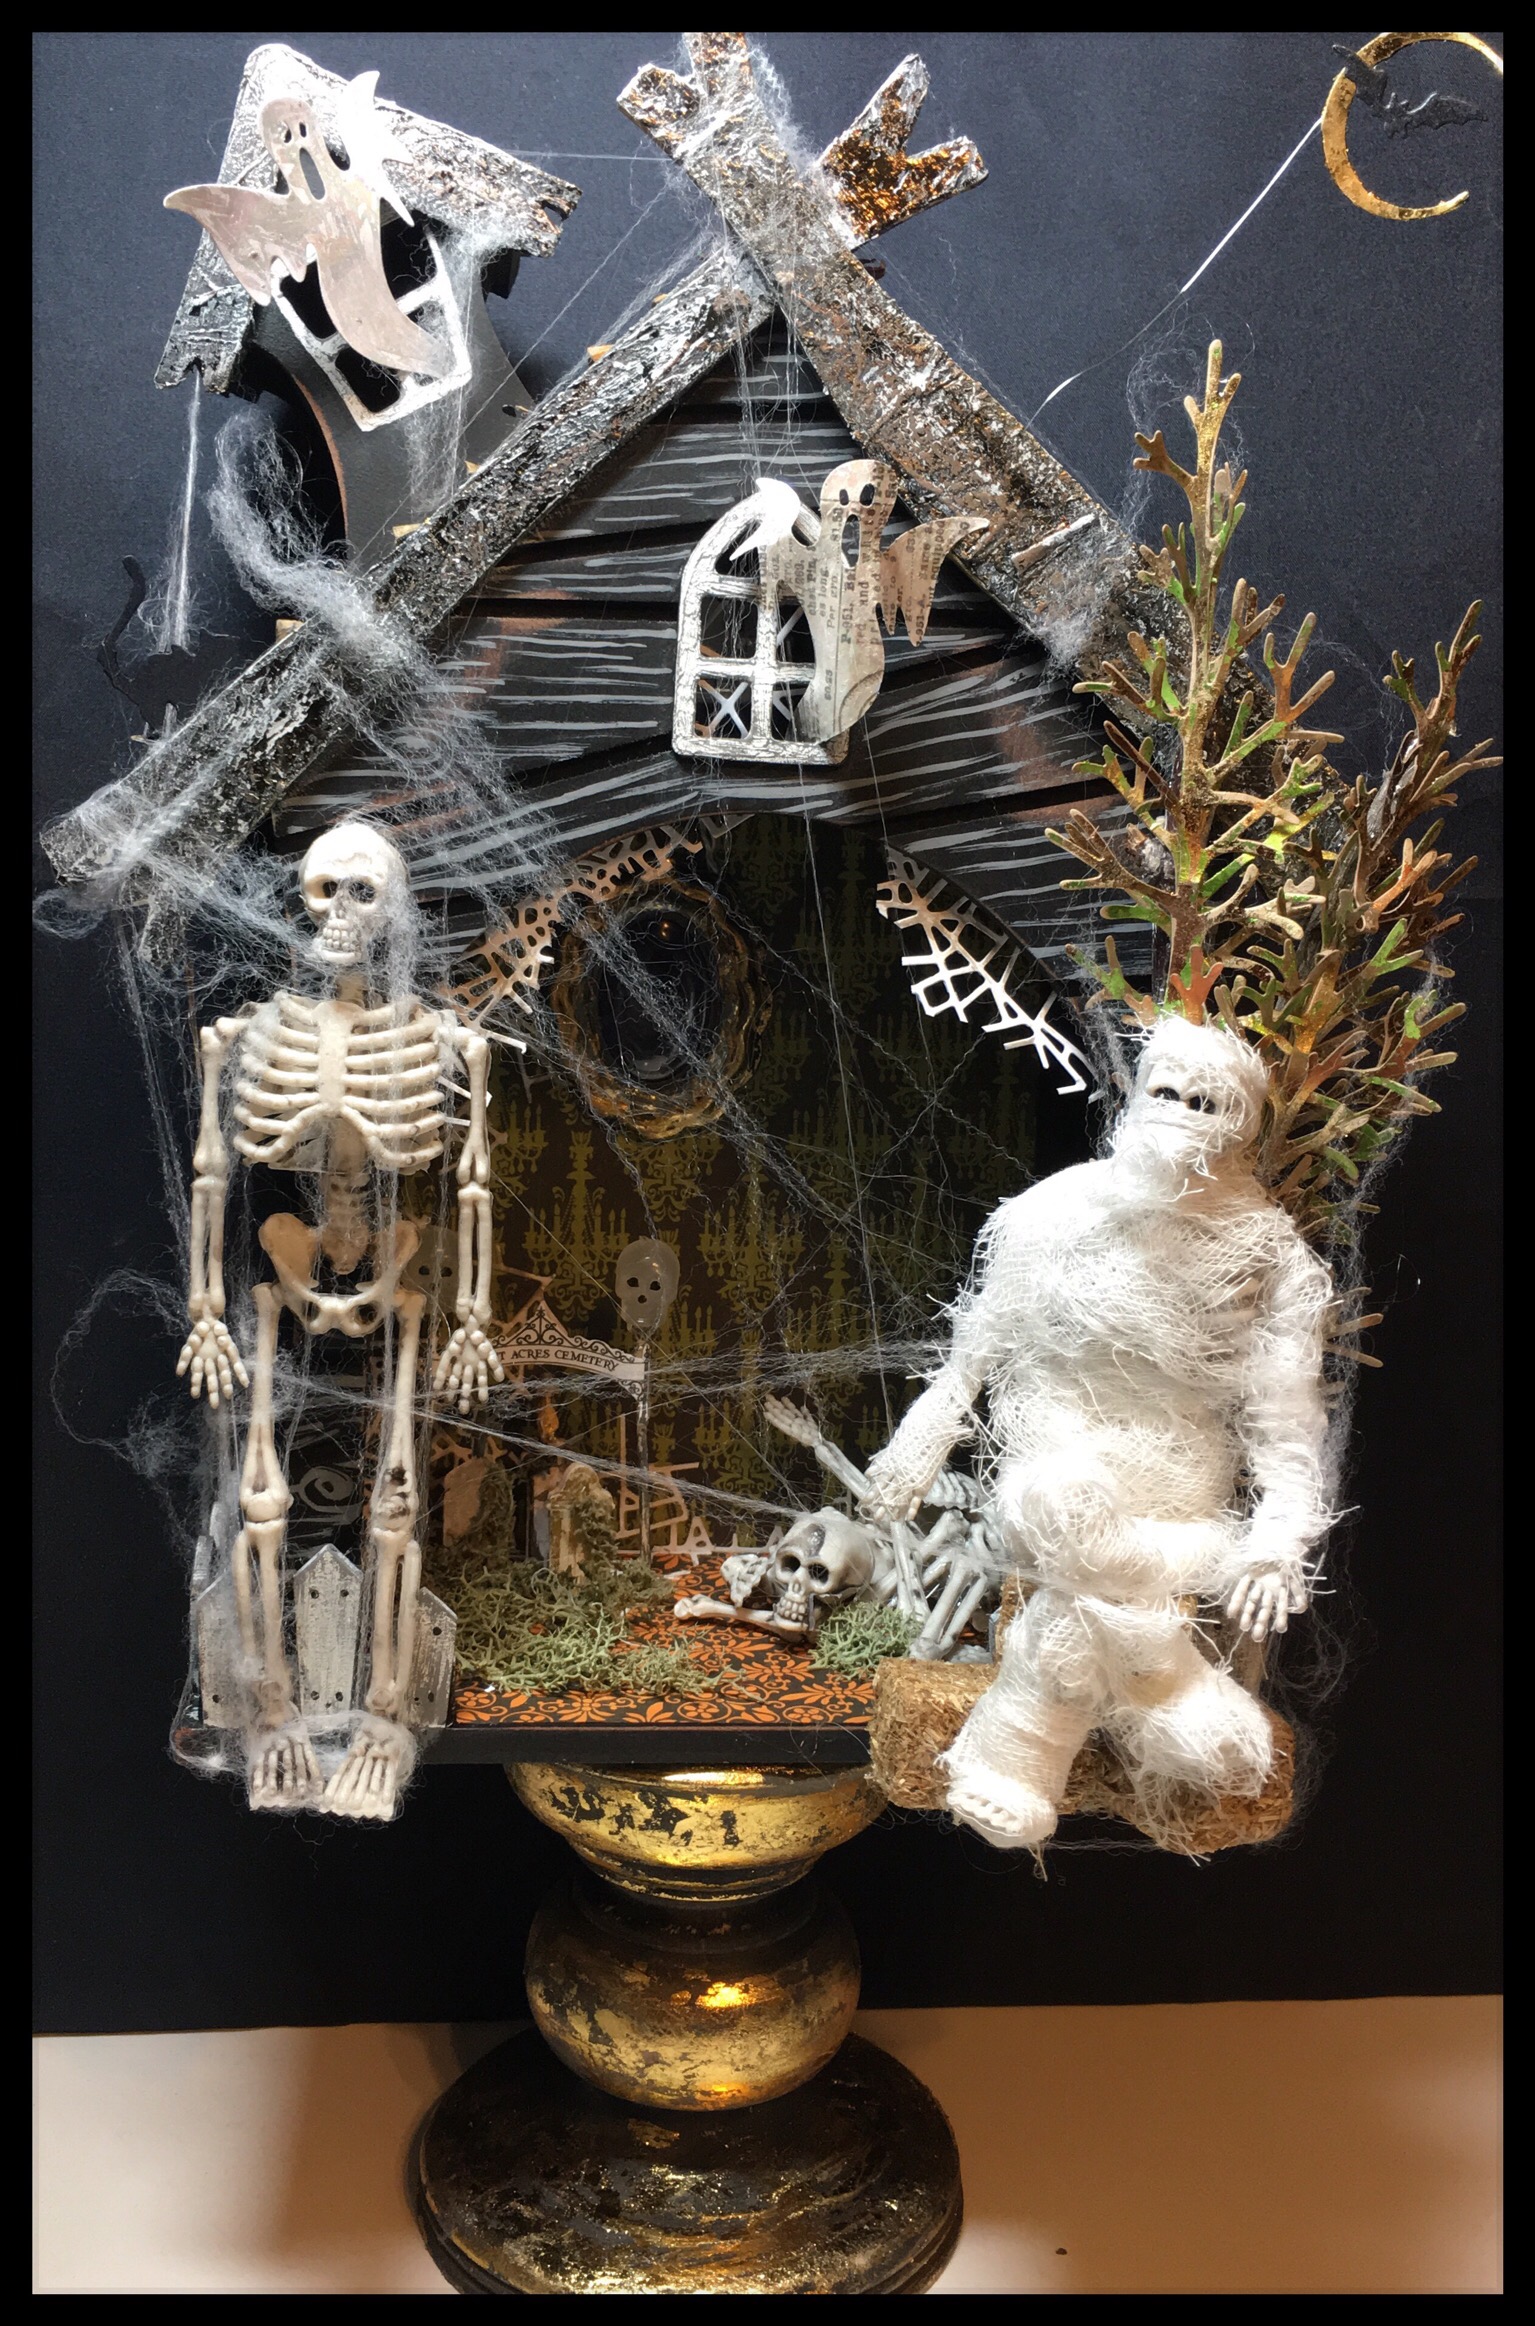
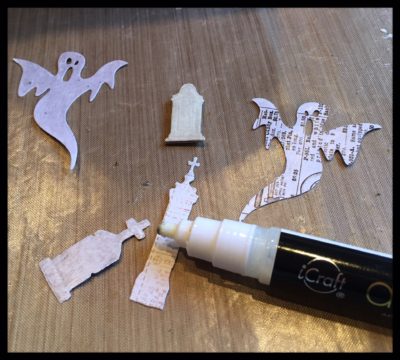
Next, let’s work on our Haunted House embellishments . . . Die-cut a variety of Halloween shapes you intend to use on your house. I die-cut tombstones, ghosts, fall trees, trick-or-treaters, cobwebs, a moon and some bats. I also created a graveyard entry gate on my computer and fussy cut it so I could attach it to toothpicks. Gather any other Halloween craft store goodies you might want to use.
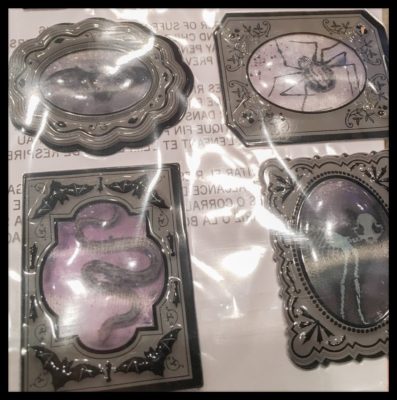
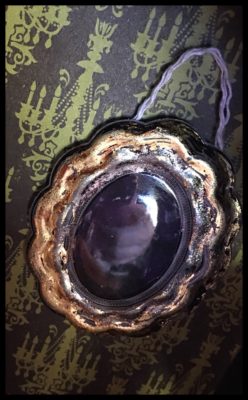
I used a Halloween puffy sticker, added some iCraft Glue Pen and Deco Foil Transfer Sheets – Gold and Pewter to create a framed photo for the wall.
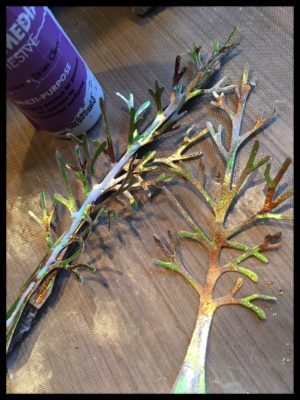
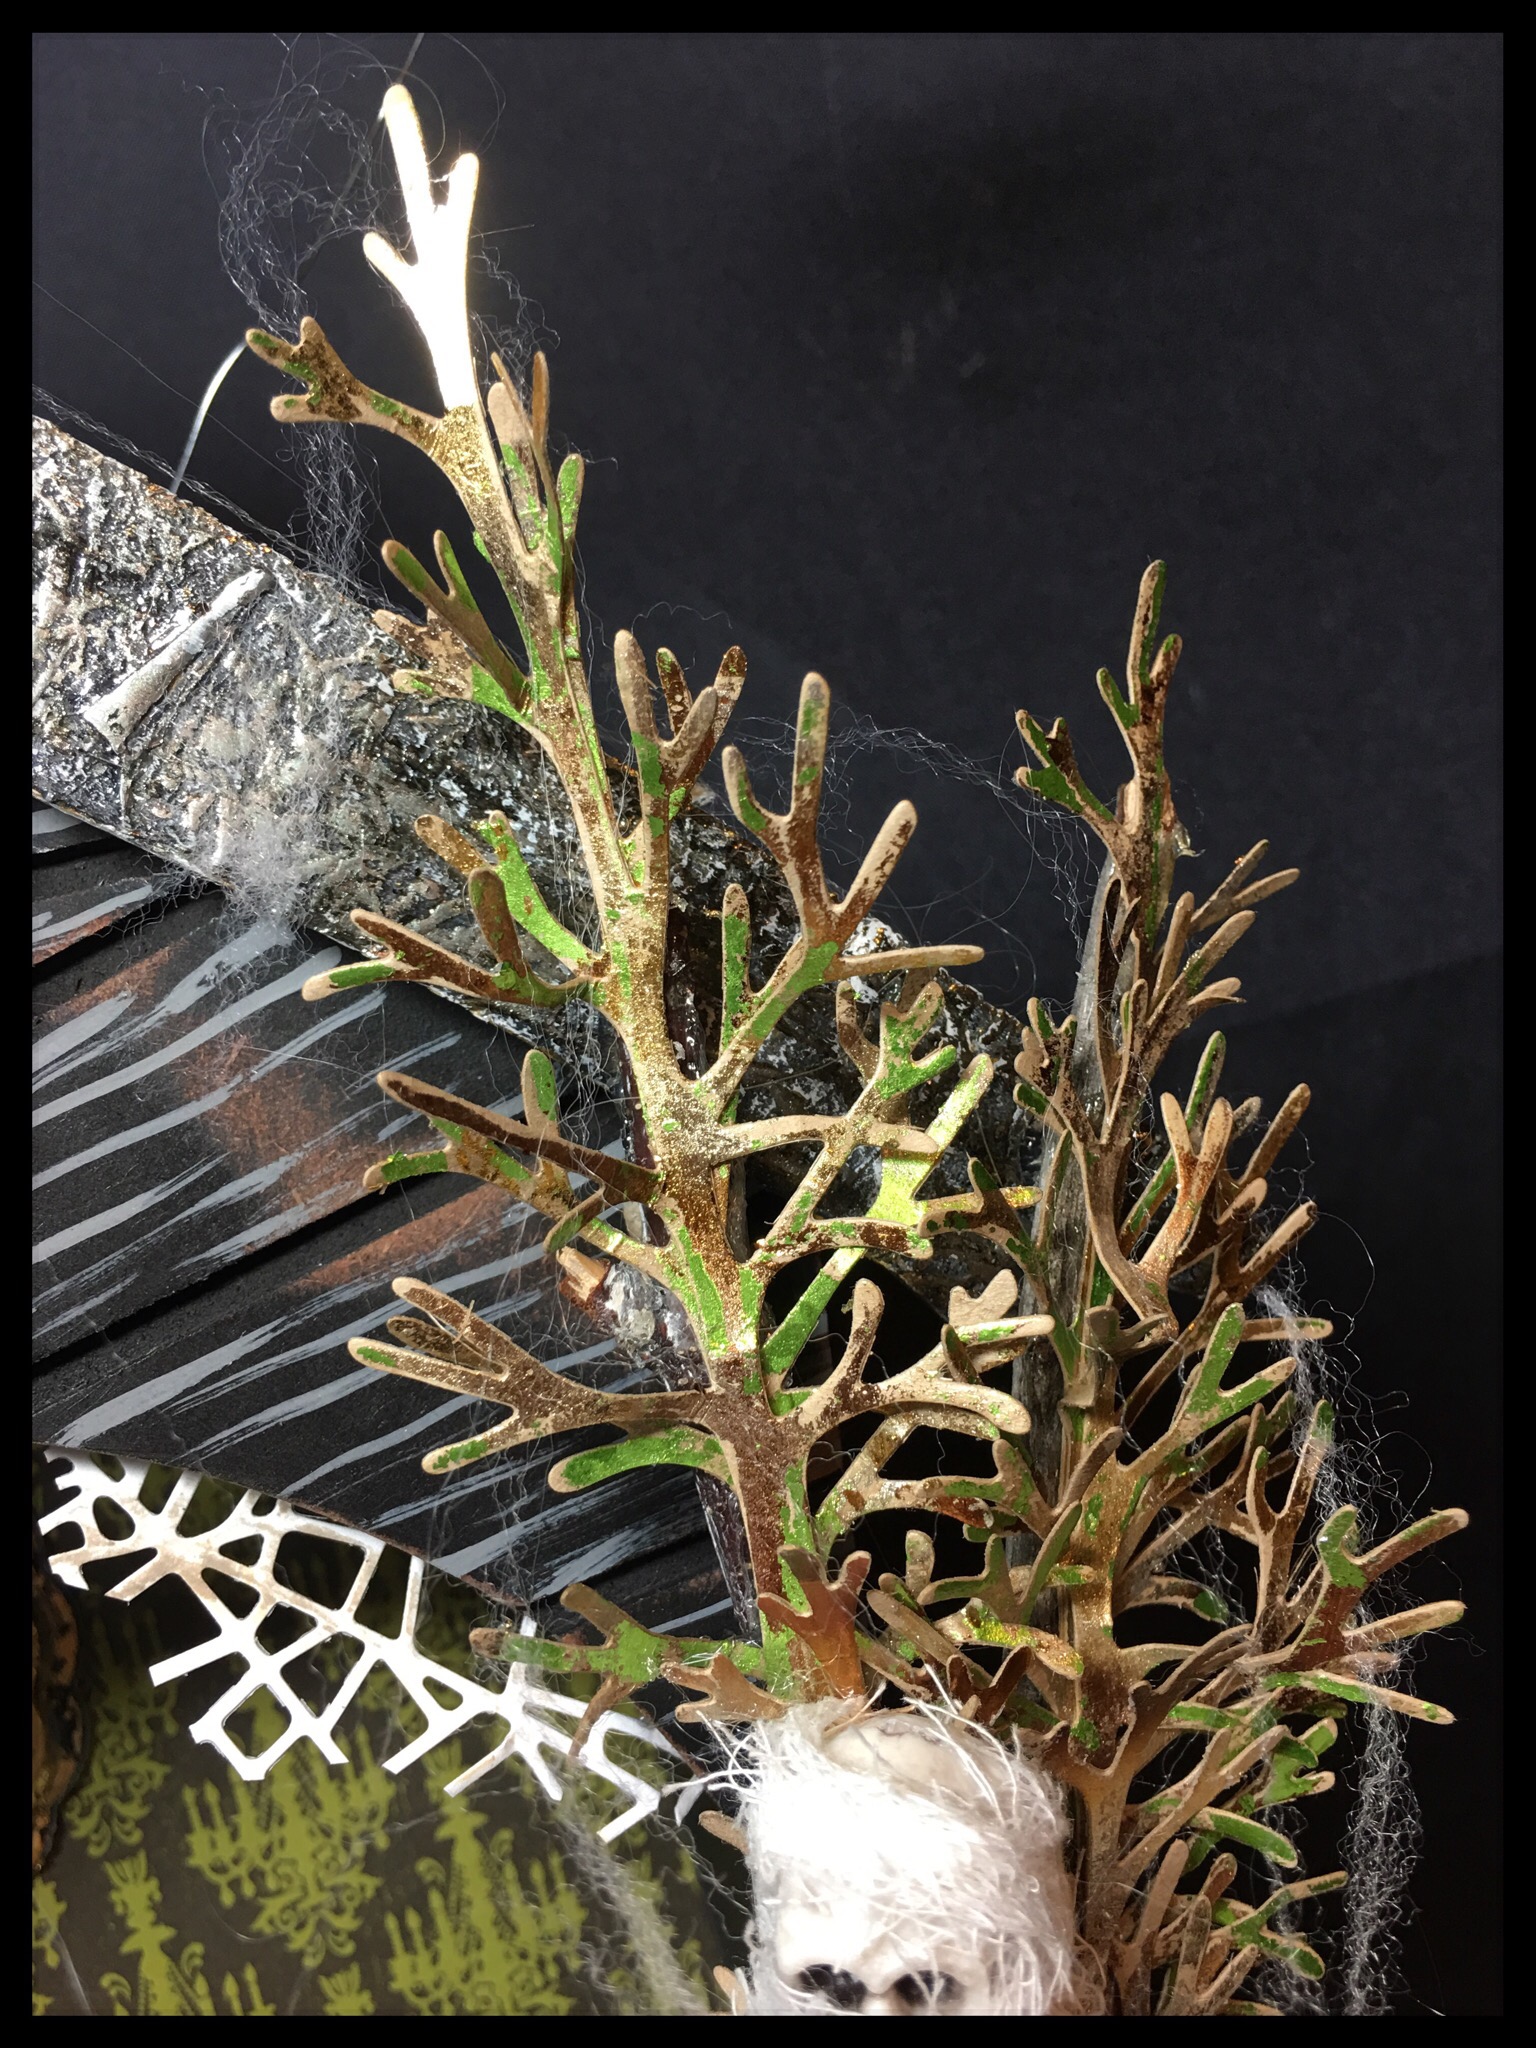
On the tree die-cuts, I used my Glue Pen and the Amber Watercolor and Spring Green Deco Foil Transfer sheets to make my fall trees pop.
Hint: For the first layer of Deco Foil choose the color you want to be predominant (I chose Amber Watercolor) and then with your glue pen swipe randomly (and scarcely) over the tree for your second color.
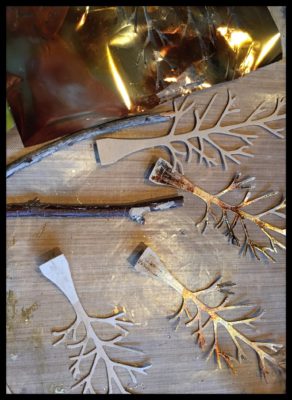
I adhered my die-cut trees to real branches from the backyard. I only apply the iCraft Mixed Media Adhesive down the center of the tree so that I can bend the branches to create dimension.
Hint: I layer two to three die-cut trees on each branch, staggering the heights to create fullness.
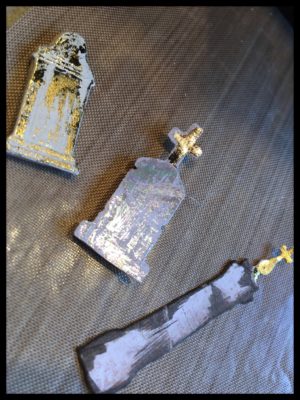
Next, using your iCraft Deco Foil Glue Pen, give your tombstones and ghosts the foil treatment. I used Deco Foil Transfer Sheets in Pewter and Gold on the tombstones and Opal on the ghosts.
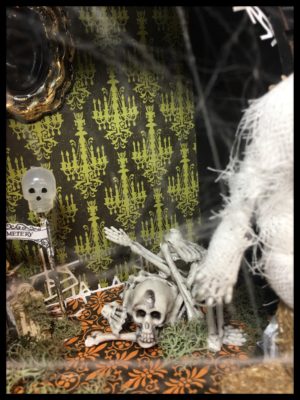
Next, I cut the cat from my trick-or-treaters die-cut, took the skeleton heads off of a child’s necklace and began to embellish my haunted house.
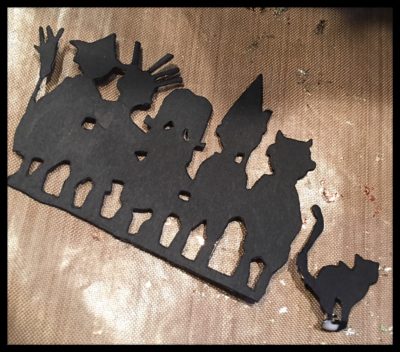
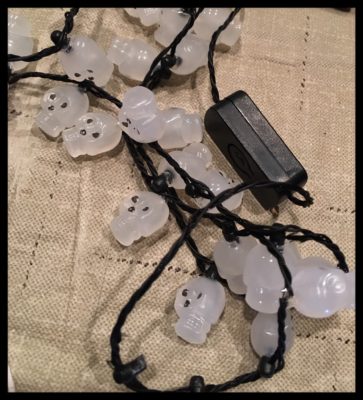
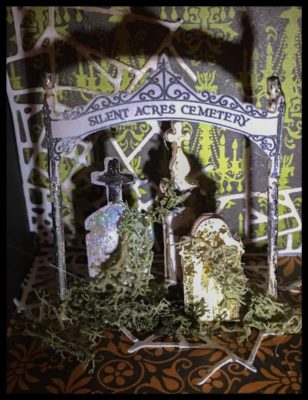
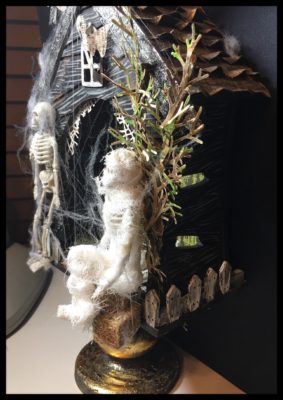
Hint: Use one skeleton to embellish the outside of your house and another cut in pieces to create a pile of bones inside. Use a third skeleton wrapped in strips of cheesecloth to create a mummy. I bent my mummy legs and sat him on a stack of mini hay bales.
Use the items you have gathered to decorate your haunted house.
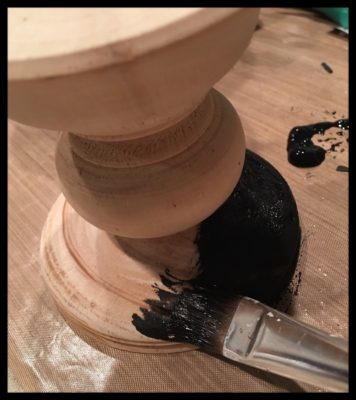
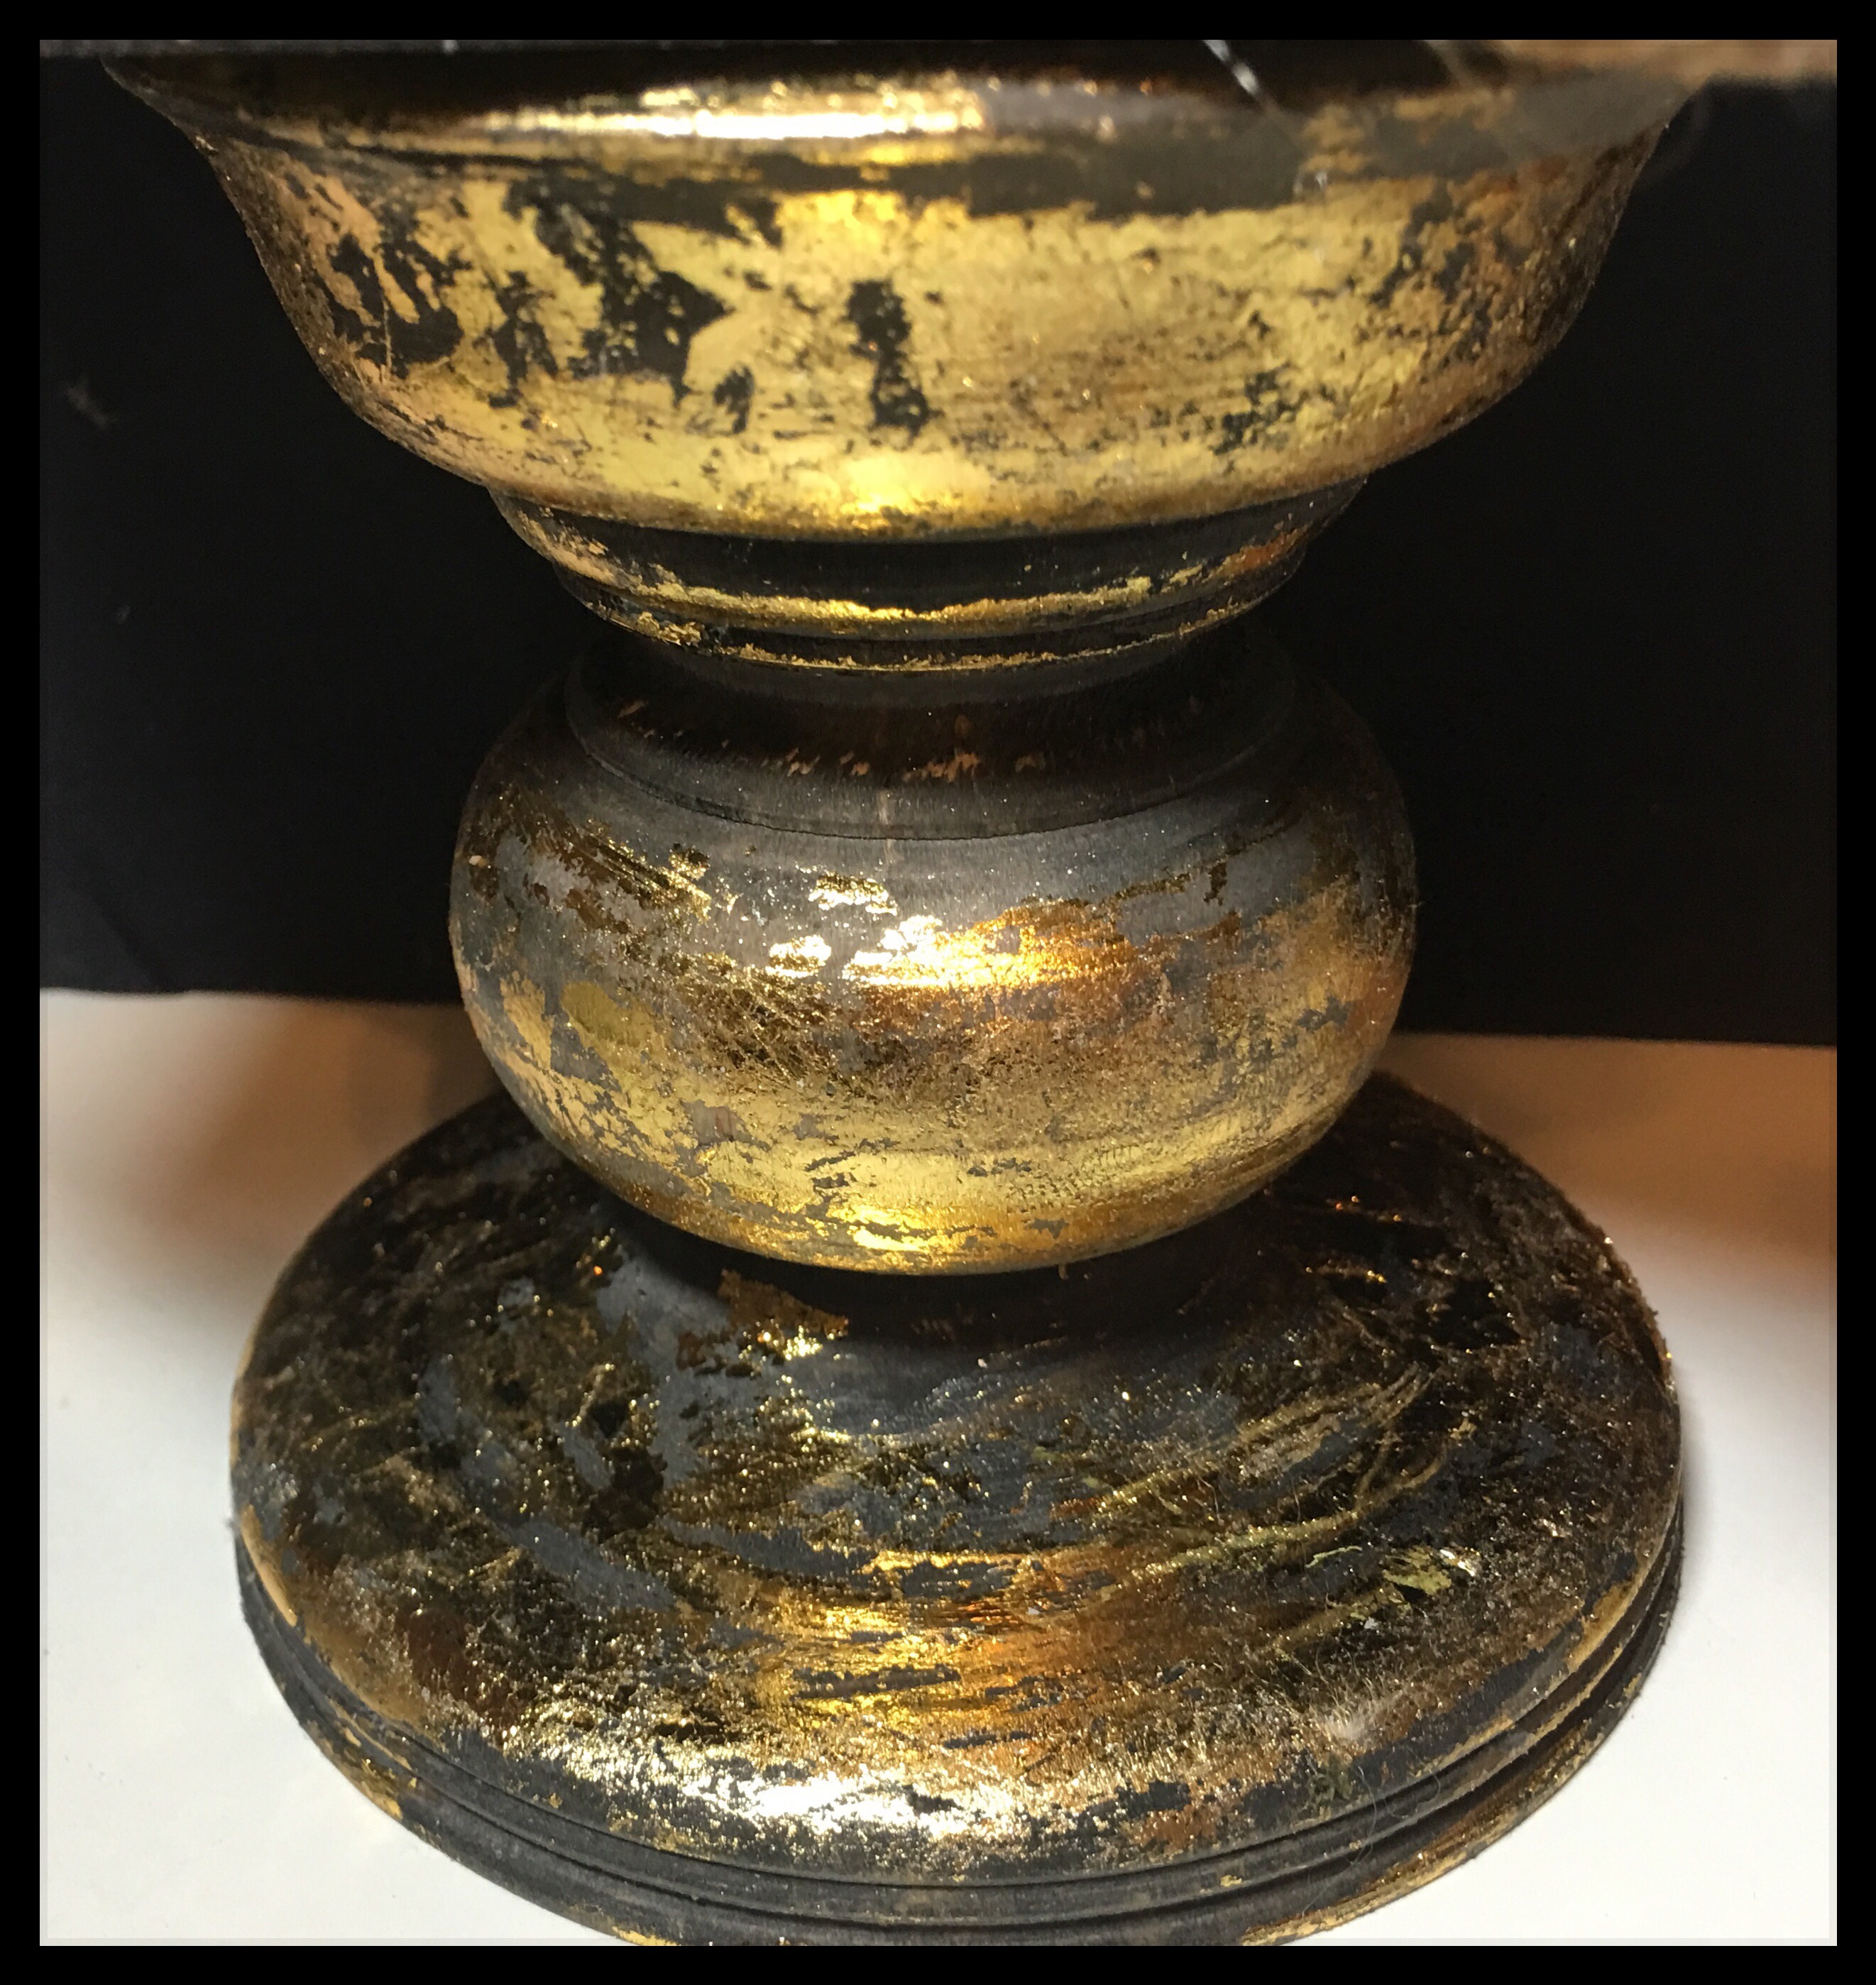
The real finishing touch on this haunted house is the pedestal, and I love, love, love how mine came out. I wasn’t sure if it would work but decided to just play with my Deco Foil Transfer Sheets a bit and it totally did!!
I started by giving the wood a wash using a black paint and water mixture.
Hint: It turned out that the paint opacity was not crucial because I covered a good portion with Deco Foil. So if you have an old pedestal that is already painted, just follow the steps after painting.
I brushed on some Rebekah Meier Mixed Media Medium using an old paint brush.
Hint: Keep your brush wet by wrapping in a wet paper towel while you are working with the foil (thank you Tim Holtz for that tip) or your medium will dry on your brush.
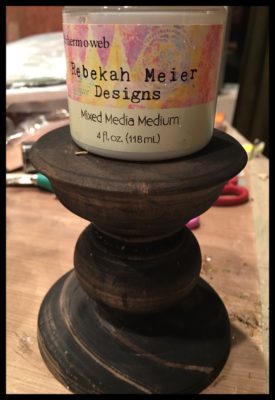
Allow the medium to dry until tacky and then go to town with the gold foiling (or whatever your preference as there are a ton of Deco Foil colors from which to choose).
Here is my finished piece . . . how cool is this?!?

Next, adhere the pedestal to the bottom of the house and stretch a little faux spider webbing over the whole piece and voila . . . a Halloween Haunt!


Happy Halloween and happy crafting!!
Wendy