Hello everyone, Deb Riddell here and I’m so excited to share with you some projects that I made with Therm O Web’s fabulous new Deco Foil Metallix Transfer Gels and Deco Foil Flock Transfer Sheets.
These products are being released right now at Creativation 2019 in Phoenix, Arizona and you are going to love them!
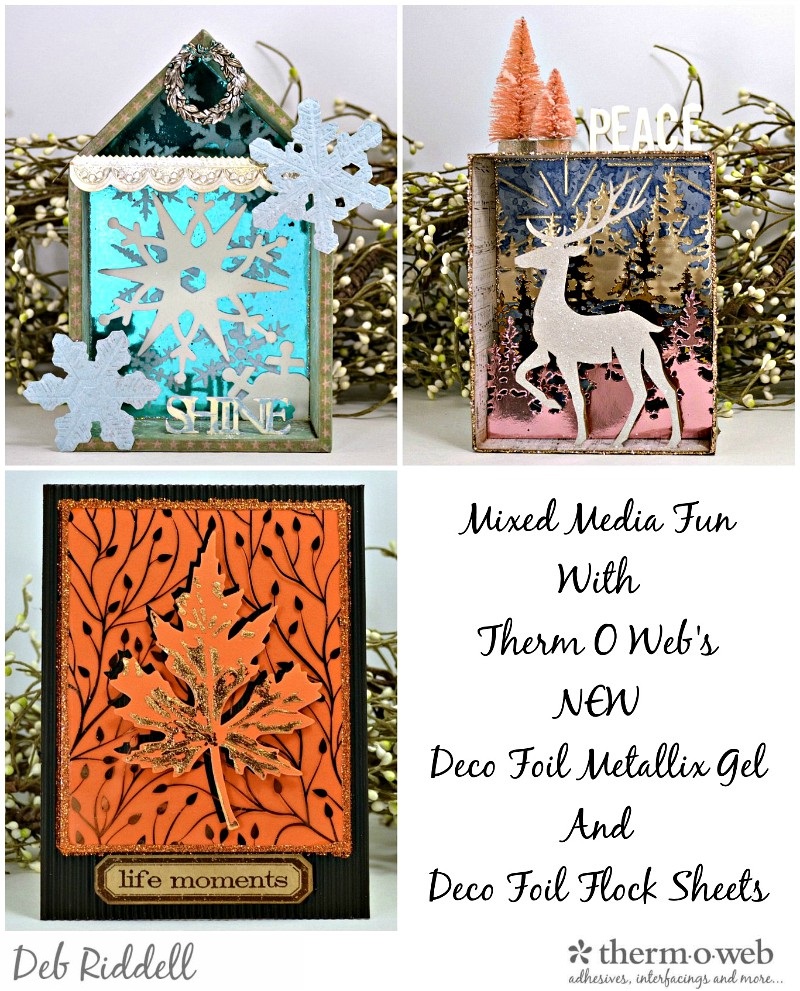
I don’t have many step-out photos to share with you as it was a bit of a rush to get these projects completed for Creativation but I’ll share some close-ups with you and describe my process, hope you will enjoy seeing them!
Therm O Web Supplies Used:
Deco Foil™ Metallix Gel • Champagne – Coming Soon!
Deco Foil™ Metallix Gel • Copper – Coming Soon!
Deco Foil™ Flock Sheets • White – Coming Soon!
Deco Foil™ Flock Sheets • Orange – Coming Soon!
Deco Foil™ Transfer Sheets • Bronze – Coming Soon!
Deco Foil™ Transfer Sheets • Rose Quartz – Coming Soon!
Deco Foil Stencil Pal – Coming Soon!
Deco Foil™ Transfer Sheets • Aqua
Deco Foil™ Transfer Sheets • Copper
Deco Foil™ PeelnStick Toner Sheets
Deco Foil™ White Foam Adhesive
Deco Foil™ Transfer Gel
Deco Foil™ Clear Toner Sheets • Branching Out
Deco Foil™ Starburst Stencil
Deco Foil™ Adhesive Pen .34floz
iCraft Easy Cut Adhesive™ Sheets • Sm
3D White Foam Sticky Strips • 1/2 in
Memory Tape Runner XL™
iCraft Ultra Bond Adhesive 2 fl oz
Purple Tape
Gina K. Designs Foam Squares Black (320 squares)
Other supplies used:
Foil Laminator • 12 inch
Sizzix – Layered Leaf Bigz die and Texture Fades Folder; Snowflake Duo die and Texture Fades Folder; Snowflakes #3 die; Prancing Deer die; Tree Line die; Mini Scallop 3D Impresslits die; Leaf Blueprint die; Easel die
Stampers Anonymous – Snowflakes Layering Stencil; Leaf Blueprint stamp
Ranger Ink – Distress Archival Ink; Distress Ink; Distress Stain; Stickles Glitter Glue; Clear Rock Candy Distress Glitter; Distress Mixed Media Heavystock; Alcohol Inks
Advantus – Tim Holtz Christmas Paper Stash; Tim Holtz Dapper Paper Stash; Idea-ology Vignette House; Metallic Kraft Stock; Idea-ology Christmas Design Tape; Idea-ology Christmas Typography; Idea-ology Tree Lot Small and Mini; Idea-ology Wreath Adornment
Miscellaneous – kraft cardstock; corrugated black cardstock; blue cardstock; shine chipboard; white and blue acrylic paint; gloss varnish
Mixed Media Fun with Deco Foil
Shine Vignette House Instructions:
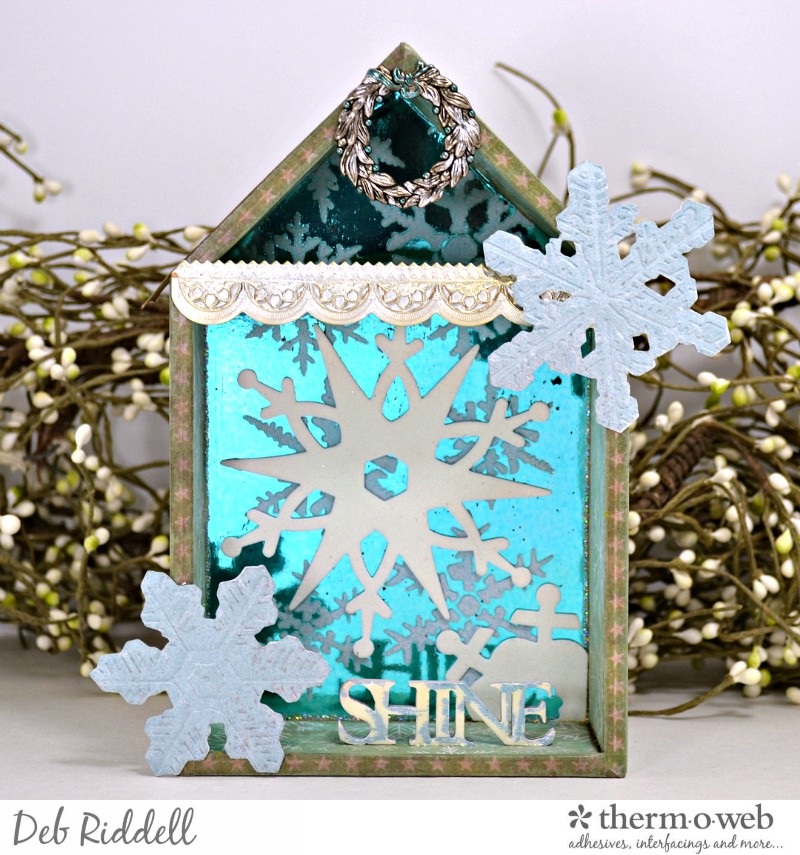
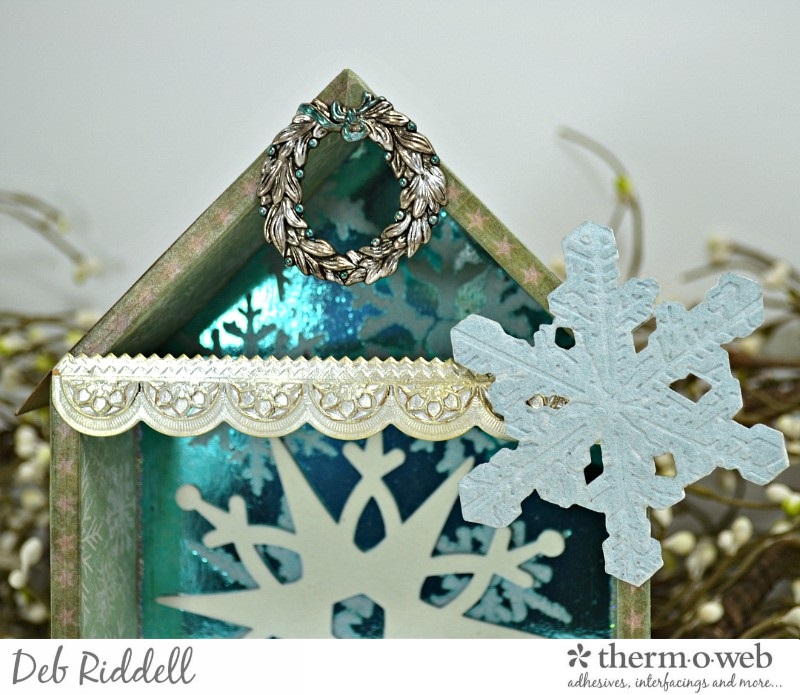
Foil Deco Foil PeelnStick Toner Sheet with Aqua Deco Foil Transfer Sheets. Stencil snowflakes onto the foiled Toner sheet with Deco Foil Transfer Gel and let dry till clear (about one hour). Apply White Deco Foil Flock Sheet (remember to apply it flocked side DOWN) over the stenciled pattern and run through your laminator. Peel off the Flock Sheet to reveal those beautiful flocked snowflakes! Trim the flocked and foiled Toner Sheet to size and adhere to the back of the Vignette House. Line the rest of the box, inside and out, with coordinating scrapbook papers.
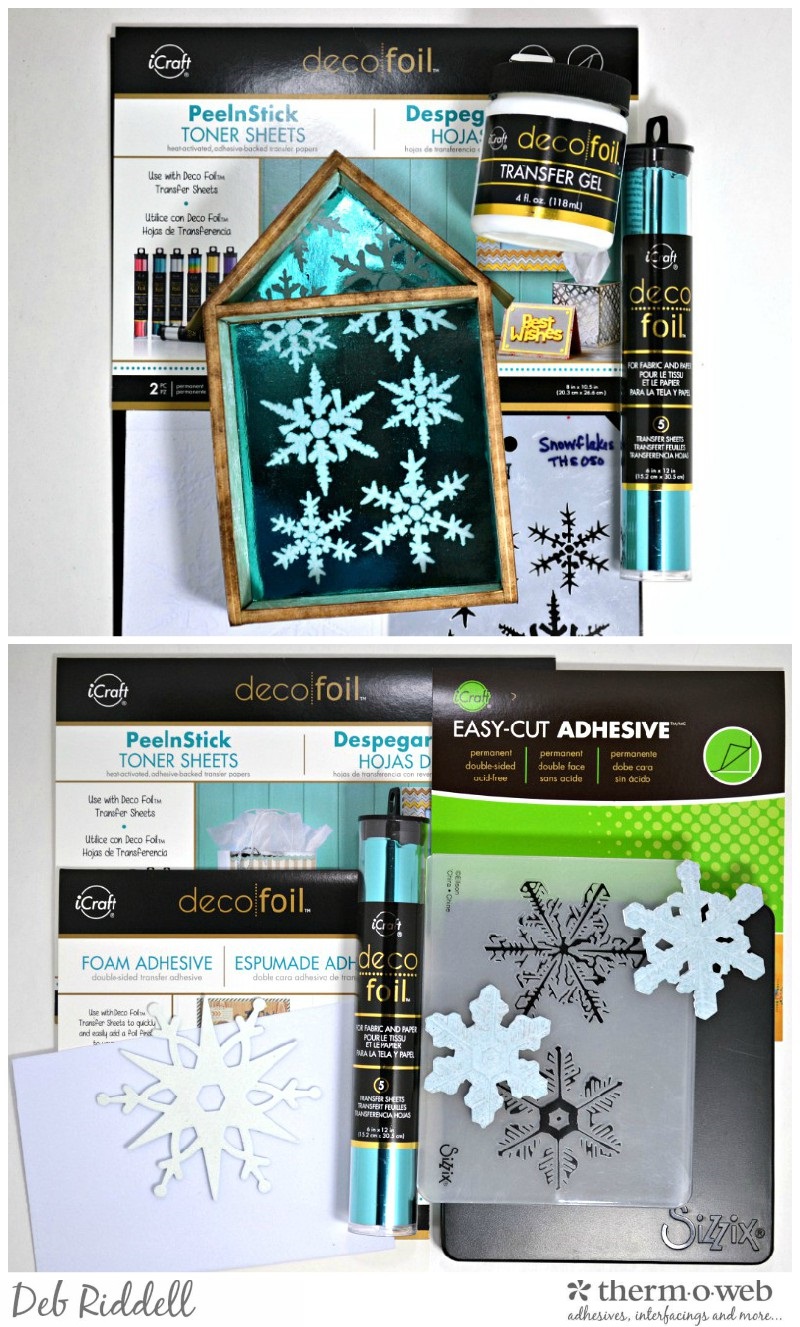
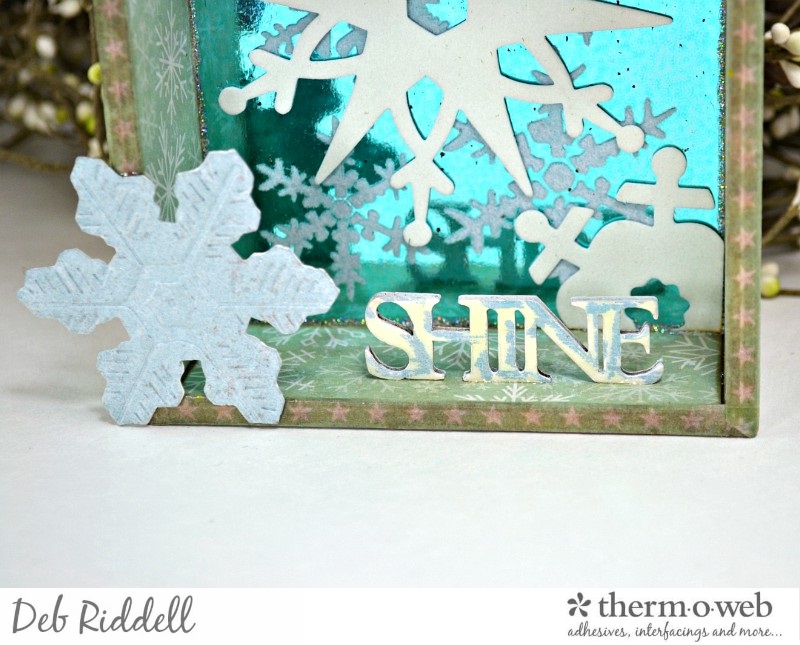
For the large snowflake, adhere White Deco Foil Flock Sheet to Deco Foil Foam Adhesive and back the flocked Foam sheet with scrapbook paper for stability. Die cut the flocked Foam sheet with the Snowflakes #3 die. For the smaller snowflakes, cover Deco Foil PeelnStick Toner Sheet with Aqua Deco Foil and then adhere iCraft Easy-Cut Adhesive over the foiled side of the Toner sheet. Apply White Deco Foil Flock Sheet to the Easy-Cut Adhesive, the blue colour of the foil is visible through the Flock, an effect I love and can’t wait to play with more! Die cut with the Snowflake Duo die and emboss with the coordinating Texture Fades folder.
Adhere the large snowflake to the back of the Vignette house with Ultra Bond Adhesive. I had a portion of a snowflake that was die cut at the same time so I just added it to the bottom right corner. Add a bead of Star Dust Stickles Glitter glue around the edges of the foiled background to cover any gaps if desired.
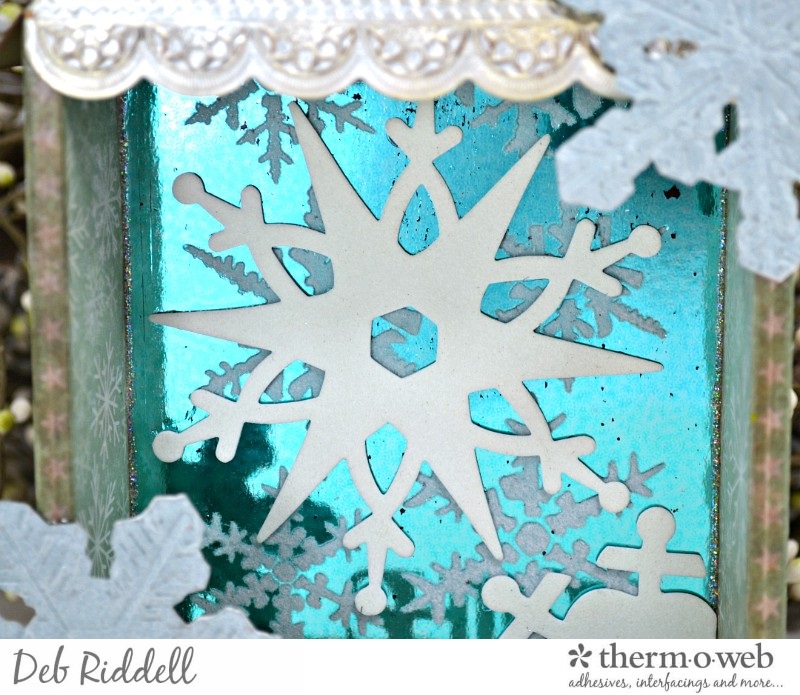
Cover the front edge of the Vignette House with coordinating washi tape. Die cut a scallop to add along the ‘eave’ with the Mini Scallop 3-D Impresslits die from sanded silver Metallic Kraft Stock. Adhere one of the flocked and foiled snowflakes to the right corner. Colour a Wreath Adornment with alcohol inks and apply to the peak of the roof.
Paint a ‘shine’ chipboard word with white and blue acrylic paint and finish with gloss varnish, adhering it to the bottom with Ultra Bond Adhesive once dry. Adhere the remaining foiled and flocked snowflake to the bottom left corner and your Shine Vignette House is complete.
Peace Deer Shadow Box Instructions:
Ink a piece of cardstock with several shades of blue Distress Inks and stencil Champagne Metallix Gel through the Starburst Deco Foil stencil once the inks are dry (the Stencil Pal applicator works beautifully when applying gels or mediums through your stencils!). Set aside for the Metallix Gel to dry thoroughly (I left it about 2 hours).
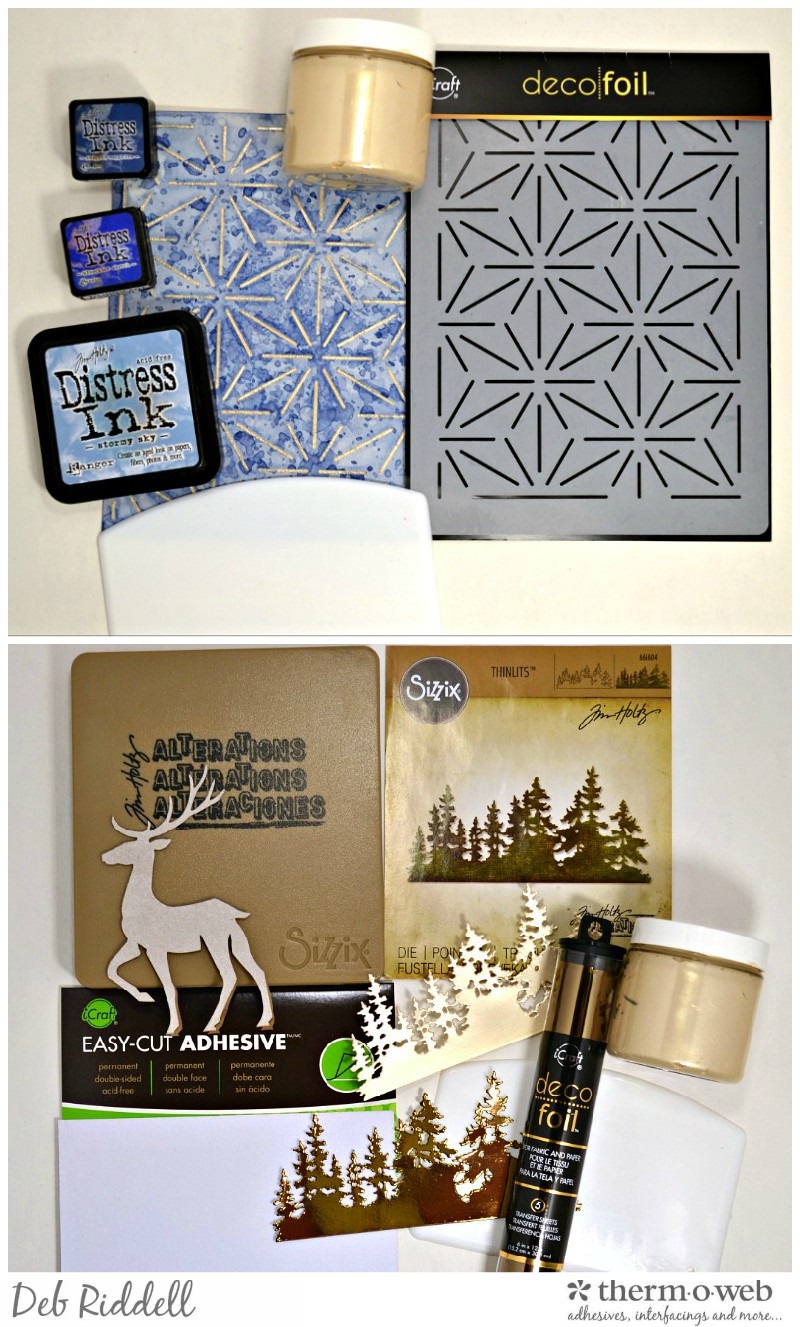
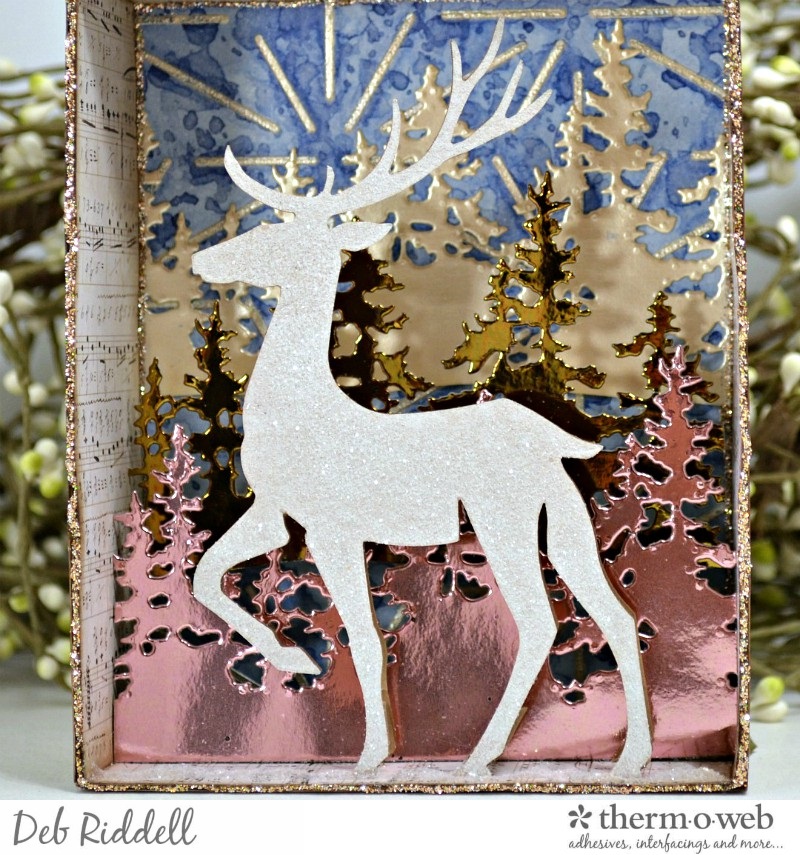
Apply more Champagne Metallix Gel to a piece of cardstock and let dry completely (this one I left to dry overnight as I was going to die cut it). Foil PeelnStick Toner Sheet with Bronze Deco Foil Transfer Sheet. Die cut both with the Tree Line die. Cover a piece of kraft cardstock with Easy-Cut Adhesive and apply White Deco Foil Flock Sheet over top. Die cut the Flocked cardstock with the Prancing Deer die.
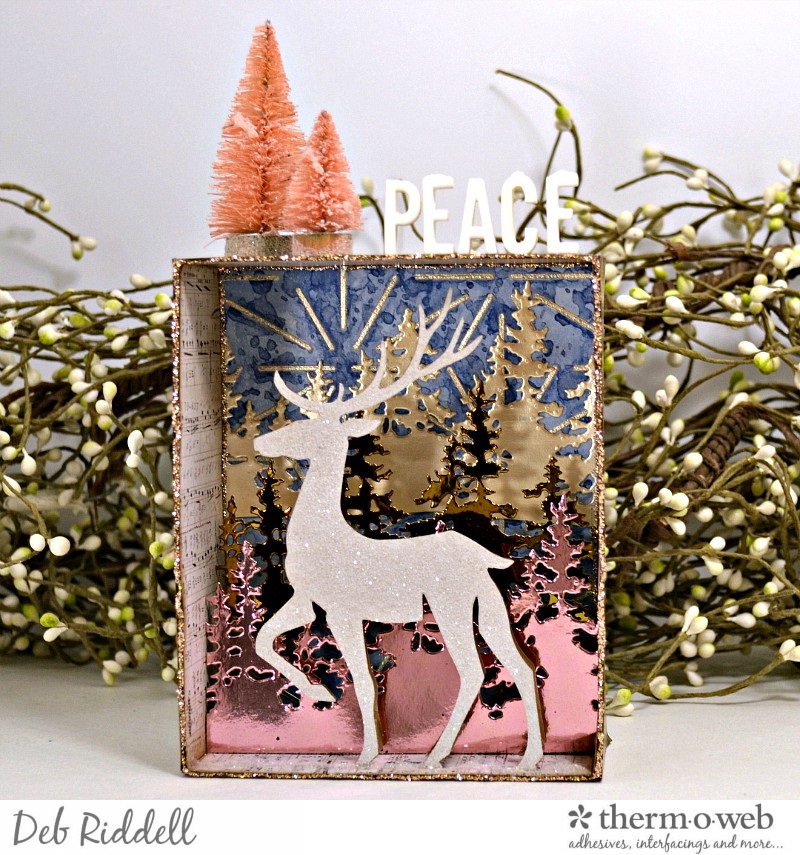
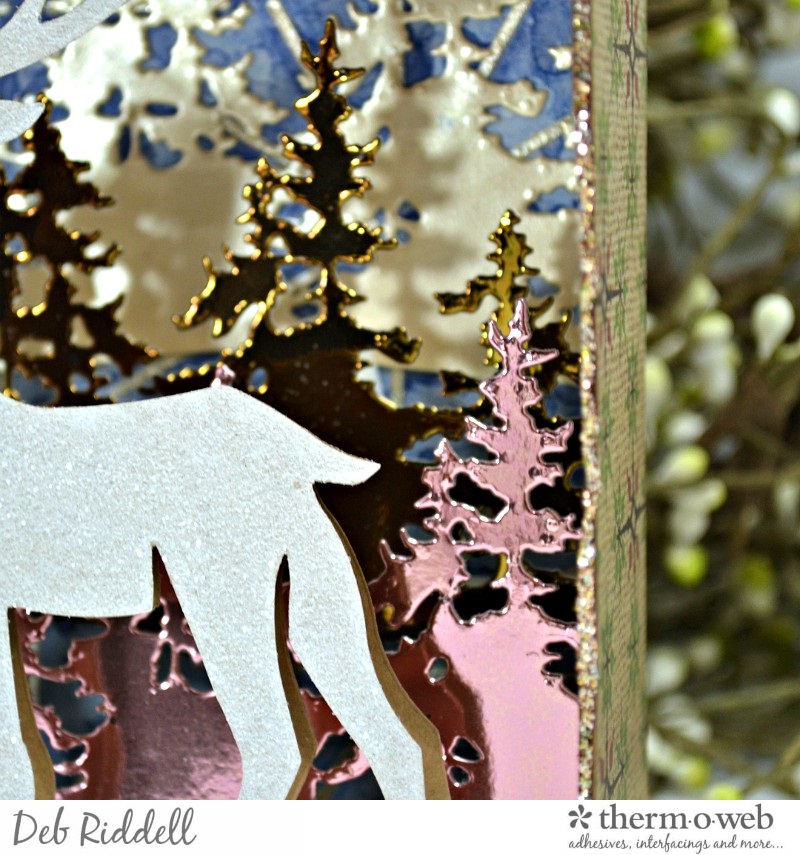
Make a shadow box from chipboard and line the back of it with the Metallix stenciled cardstock. Cover the rest of the shadow box with scrapbook papers of your choice and add a bead of Platinum Stickles Glitter glue around the inner edge to cover any gaps. Adhere the Champagne Metallix Tree Line die cut over top of the background about 2/3 of the way up. Add the Copper foiled Tree Line die cut about 1/2 way up the box, bumping it out slightly with iCraft 3D Foam Strips. I decided I needed another line of trees to complete the tableau so I foiled more PeelnStick Toner Sheet with Pink Quartz Deco Foil and added it along the bottom of the shadow box, bumping it out with more iCraft 3D Foam Strips.
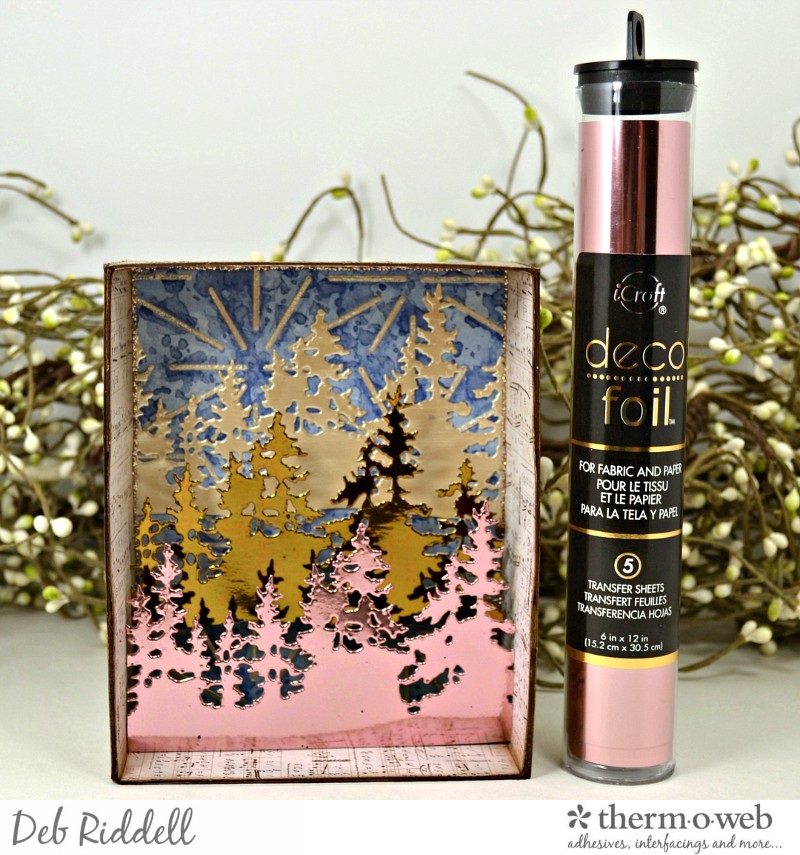
Adhere the Flocked Prancing Deer in front of the trees. To get a bit of snowy glitter around his feet, add pools of Ultra Bond Adhesive and sprinkle on Clear Rock Candy Distress Glitter. As an unexpected and beautiful bonus, I found that the fine glitter was attracted to the Deco Foil Flock so I sprinkled glitter over the whole deer for a beautiful wintery effect. Add a bead of Platinum Stickles Glitter glue around the outside edge of the shadow box to finish it off.
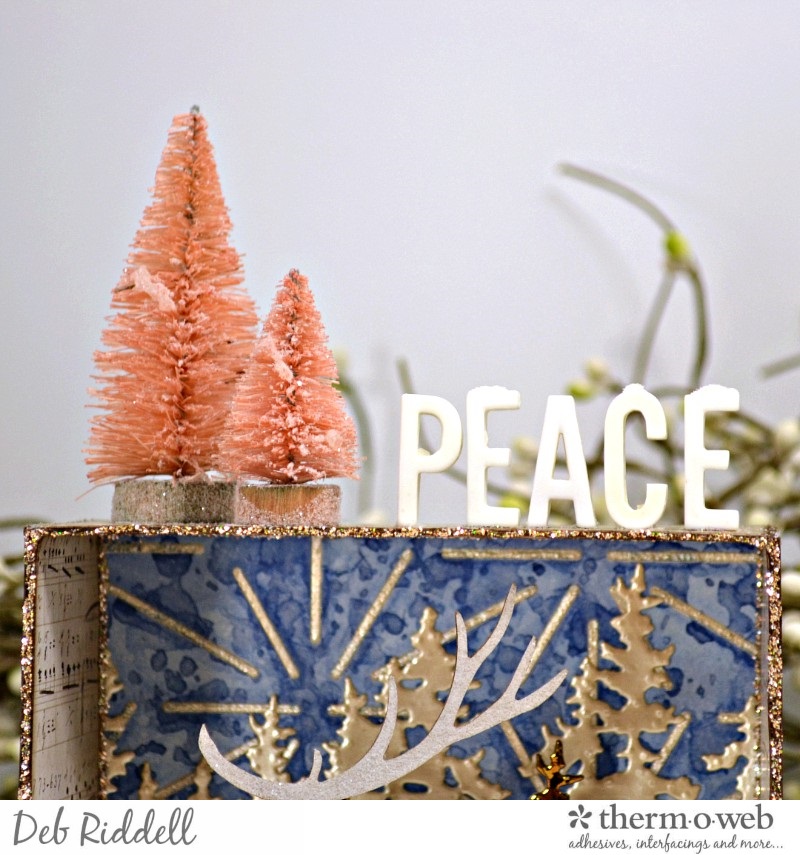
Spritz a Mini and Small Wood Lot tree with pink water based stain and adhere to the top of the shadow box along with the word ‘peace’. Add more Ultra Bond Adhesive here and there on the trees and the ‘peace’ word and sprinkle on more Clear Rock Candy Distress Glitter.
And with that your Peace Deer Shadow Box is complete, I love the dimension of all those layered trees and how the new Deco Foil colours and Metallix Gel coordinate so beautifully!
Life Moments Mixed Media Panel
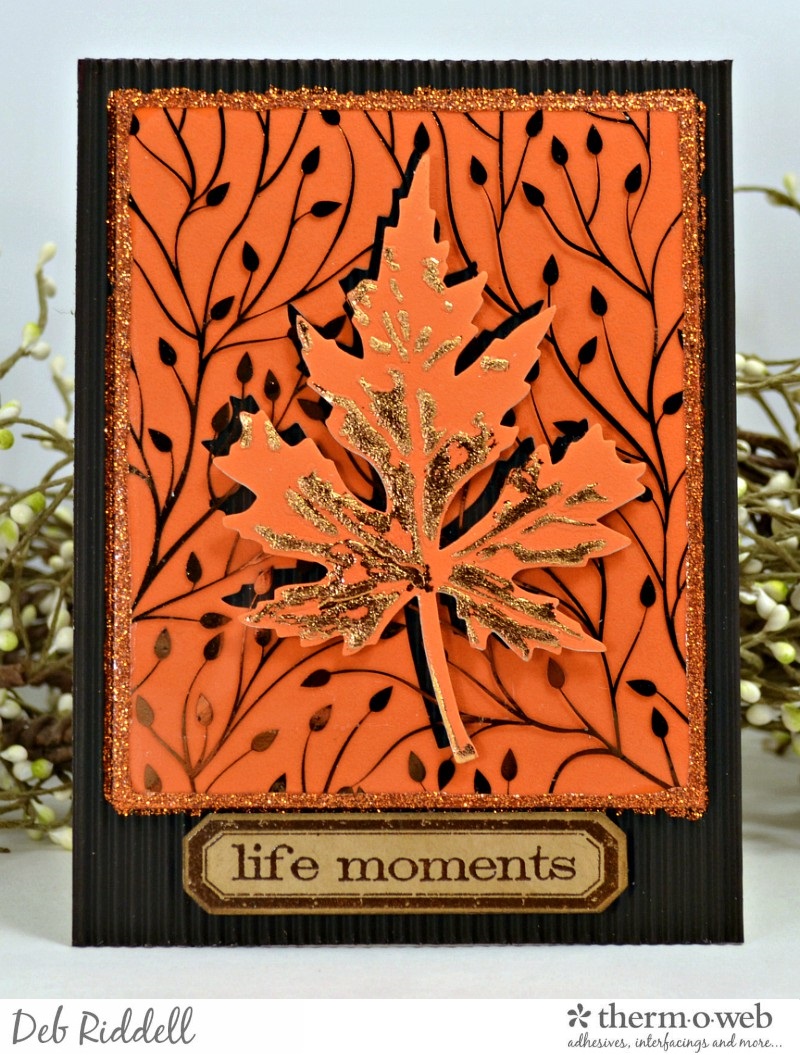
Adhere Orange Deco Foil Flock Transfer Sheets to Deco Foil Foam Adhesive (remember, flock side DOWN!). Back the flocked Foam Adhesive with a piece of cardstock for stability and die cut a Layered Leaf, embossing it with the coordinating Texture Fades Folder. Apply Deco Foil Adhesive to the raised embossed areas on the leaf with the Deco Foil Adhesive Pen and let dry till tacky (only takes a few minutes). Place the leaf back into the Texture Fades folder and lay a piece of Copper Deco Foil Transfer Sheet over it, with the foil (shiny side up!) against the adhesive. Run the Texture Fades folder back through your die cutting machine and peel off the Deco Foil sheet to reveal the embossed foiled highlights on your leaf.
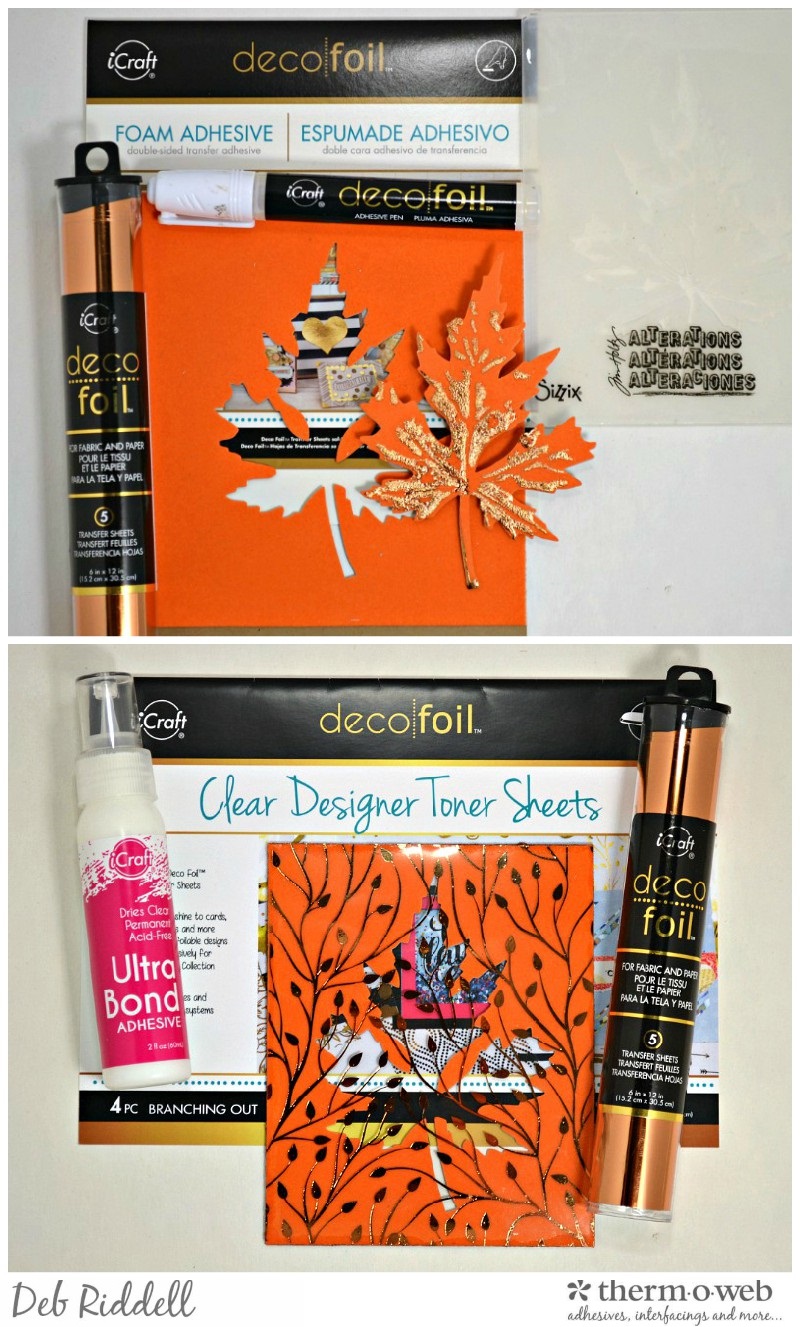
Foil a piece of Branching Out Clear Designer Toner Sheet with Copper Deco Foil. Trim the piece of orange flocked foam that the leaf was die cut from to size (about 4 1/2″ x 5 1/4″) and cover it with the foiled Clear Designer Toner Sheet, adhering it with a bead of Ultra Bond Adhesive just around the edges.
Adhere the flocked foam background to a piece of black corrugated cardstock, cut to about 6 3/4″ x 5 1/4″, with iCraft Memory XL Tape Runner. Add a line of orange glitter glue around the edges of the flocked foam.
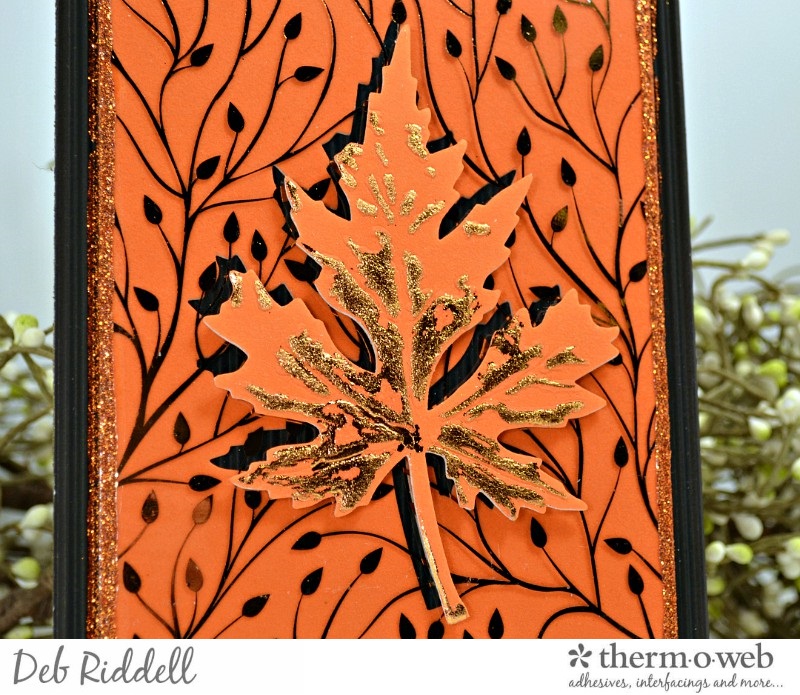
Pop the embossed flocked leaf up on some Gina K. Designs Black Foam Squares, off setting the leaf slightly from the negative image below to form a shadow line.
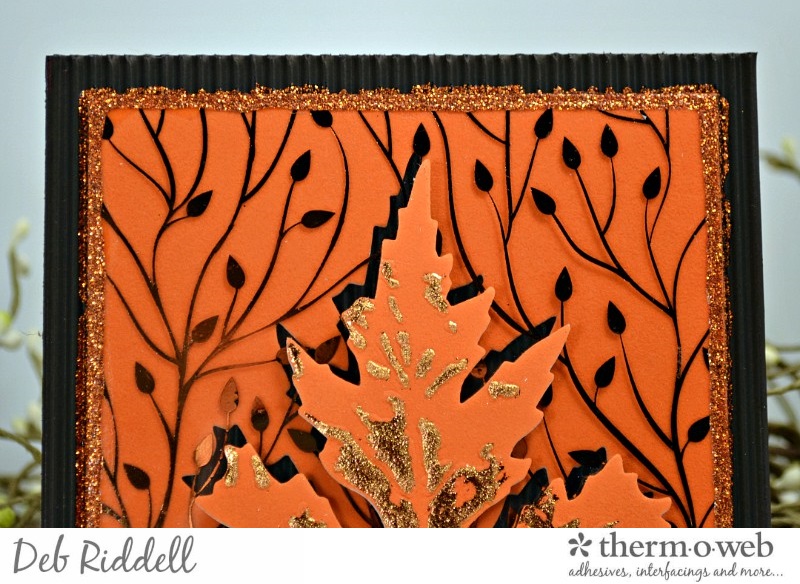
Stamp the sentiment (Leaf Blueprint stamp set) onto kraft cardstock with brown permanent ink and clear emboss. Die cut with the coordinating dies and pop the sentiment up on more Gina K. Designs Black Foam Squares below the leaf.
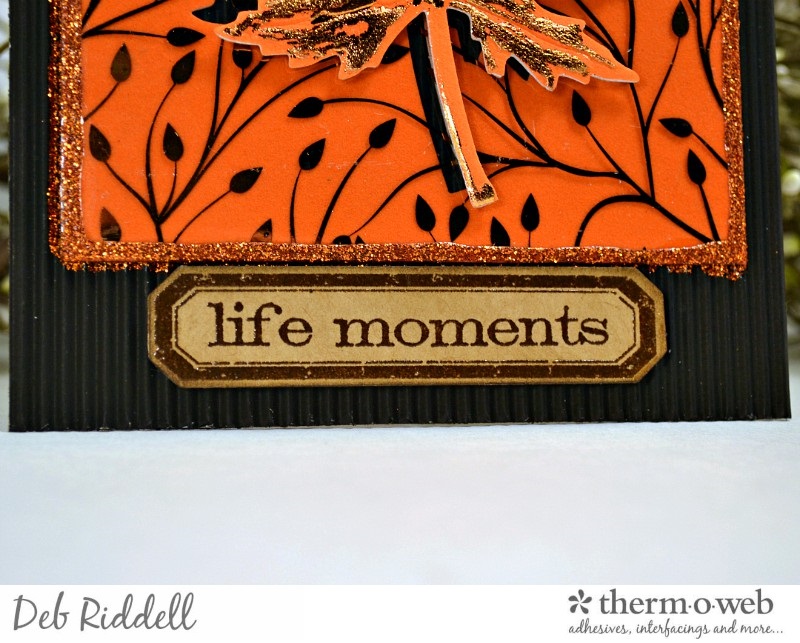
Add an Easel die cut to the back for display and your Life Moments Mixed Media Panel is complete.
I hope that you have enjoyed seeing how these projects came together, I had so much fun working with all these wonderful new products from Therm O Web!

Be sure to stay tuned over the next few weeks to see all of the amazing projects created by the Design Team with these new fun products, you are going to love them all! Thanks as always for stopping by and happy creating,
Deb xo

Ann B
January 21, 2019 at 1:11 pm (6 years ago)Wonderful projects Deb!
Deb Riddell
January 21, 2019 at 2:08 pm (6 years ago)Thanks so much Ann! Deb xo