


I’ll admit – I was supposed to make an ornament for this tutorial but my idea didn’t quite work out as planned – instead something better did! And actually – our tree is so big that this miniature quilt could technically work as an ornament! So here’s a tutorial for you to create your own mini quilt ornament!
Memory Tree Mini Quilt Ornament
brought to you by Persimon Dreams
Kim Lapacek, artist & dreamer
Fabric Requirements –
White:
(3) 6.0” x 3.5” rectangles (photos will be fused onto these)
Background (presents):
(6) 3.0” x 3.0” squares
(2) 2.5” x 3.0” rectangles
Tree Trunk (purple ombre)
(1) 1.5” x 3.0” rectangle
Border (purple ombre)
(1) 1.75” x 5.5” rectangle (bottom)
(2) 1.25” x 11.5” rectangles (sides)
(1) 1.75” x 7.0” rectangle (top)
Backing Fabric: 8.5” x 14” rectangle
Batting: 8.25” x 13.5” rectangle
Binding: (1) WOF x 2.25”
Other:
1 HeatNBond® EZ Print Inkjet Transfer Sheet Package – For Light Colored Fabric
Memory Christmas Tree Mini Quilt Ornament
Finished Quilt Size – 12.5” x 7.0”
Designed and Pieced by Kim Lapacek
Transferring your Photo Memories to Fabric
The first step to this fun project is to transfer your photo memories to fabric using HeatN Bond® EZ Print Inkjet Transfer Sheets for Light Colored Fabric.
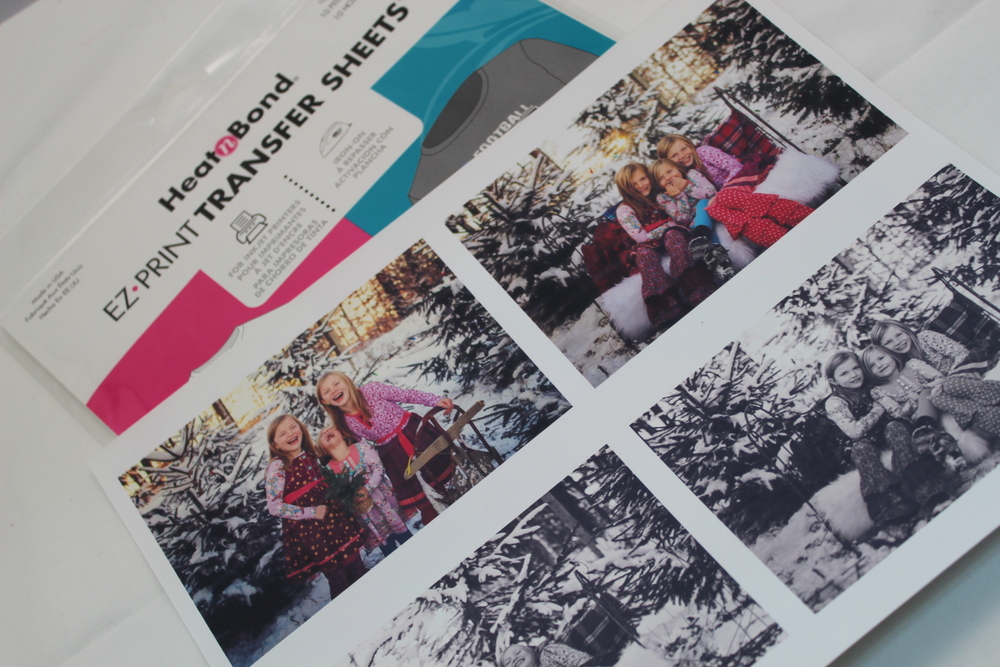
Choose which photos you’d like to memorialize on this miniature quilt. The higher the resolution the better the photos will look transferred. Follow the instructions included with your HeatNBond® EZ Print Inkjet Transfer Sheets exactly for smooth printing. Photo’s of my children taken by Karmen Lindner Photography.
Side note – I can never seem to remember if my printer prints to the top of paper in the paper tray or to the bottom side. Before I print onto my special sheets I make a mark on a scrap piece of paper and run something random through to see which side is printed to. On my printer it prints to the bottom side.
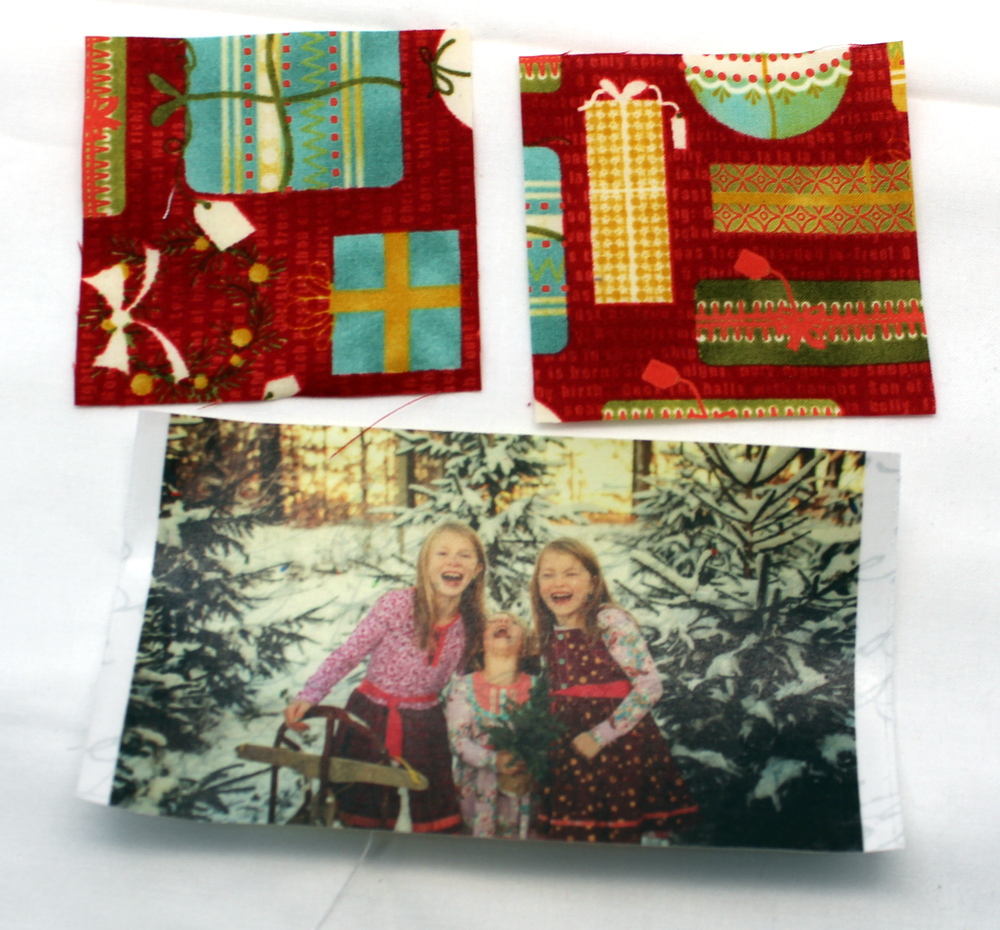
I chose to transfer onto an off white fabric with just a touch of print on it. 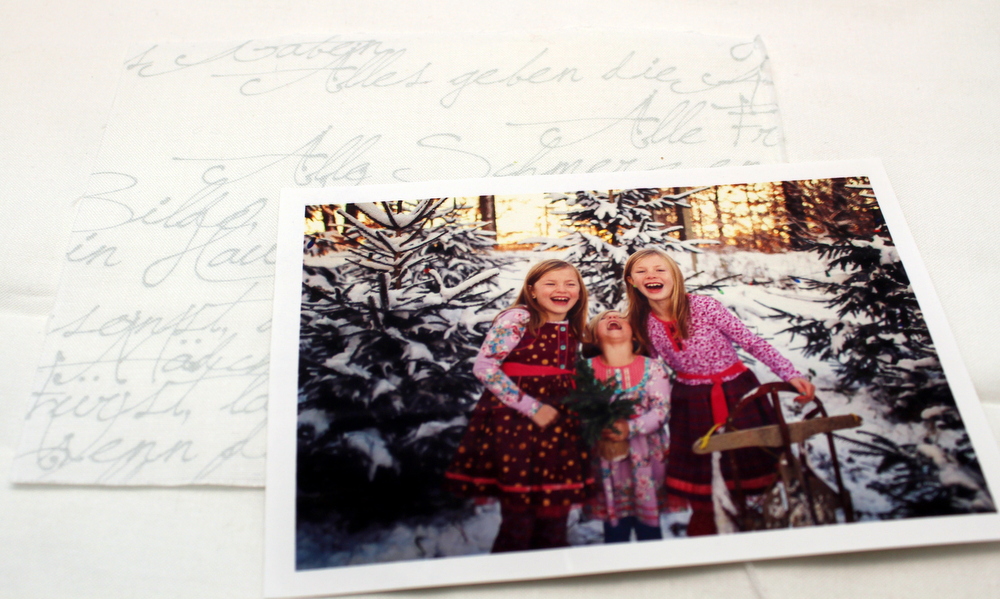
Trim your printed photos down so the white edges are just slightly larger than the photograph and round the corners. Again – follow the instructions included with your HeatNBond® EZ Print Inkjet Transfer Sheets exactly for smooth transferring.
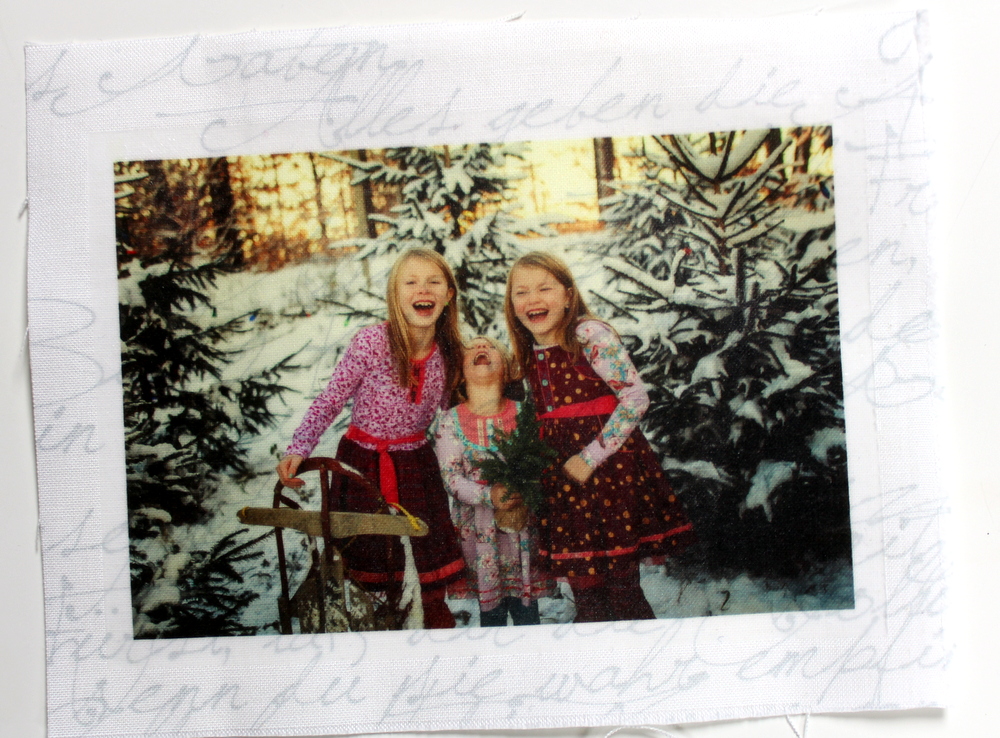
I love how you can see just a bit of the print from the fabric through the photo.
Once the photos are transferred to the white fabrics. Trim the fabrics to 5.5” x 3.0”. Try to position the part of the photo you want seen most as low as possible on this rectangle.
Create Flying Geese Memory Blocks
Take two of the 3.0” background squares.
Fabric A will be the “goose” of this brick and the photograph, with the background fabrics as the corner of the geese.
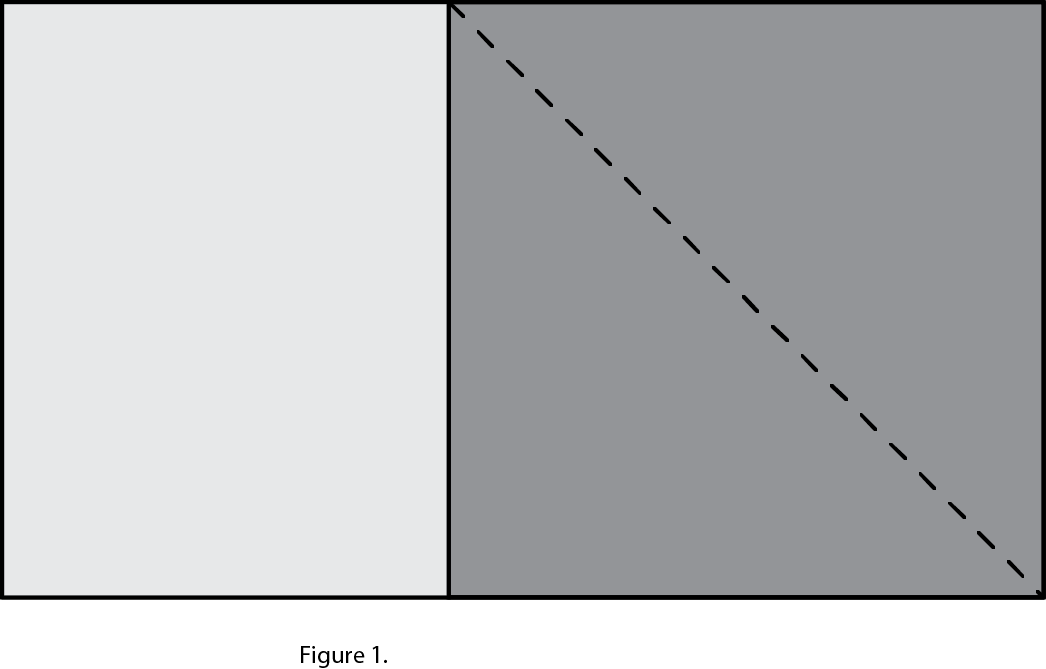
On the two background squares, draw a diagonal stitch-guide line on the wrong side of the fabric.
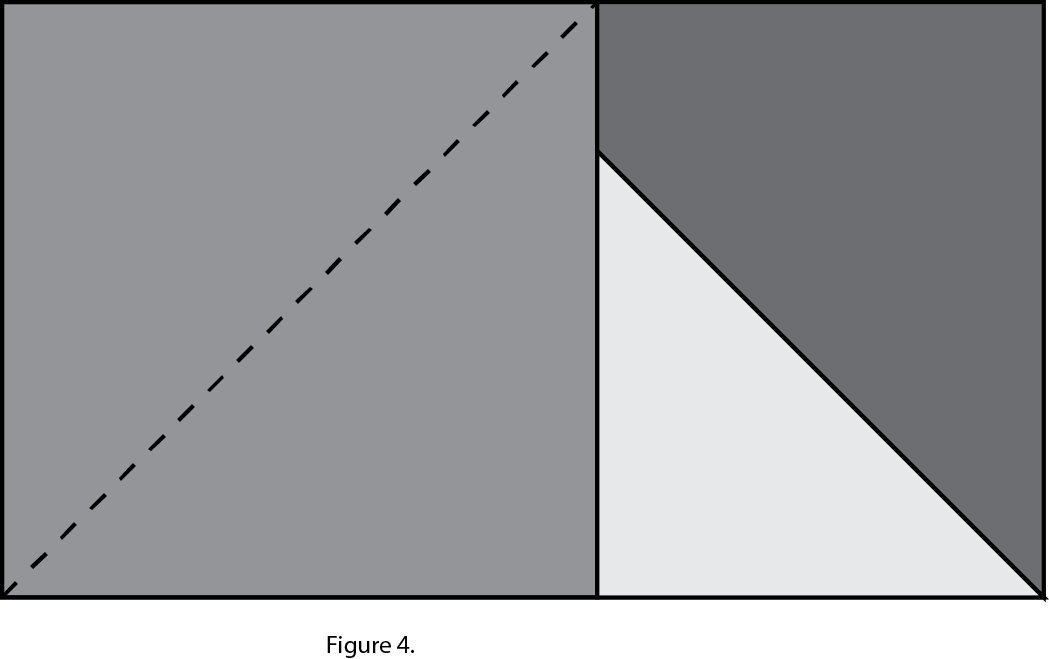
Place one square right-sides together lined up with the right edge of the rectangle with the stitch-guide line oriented as shown in the figure. Sew directly on the stitch-guide line.
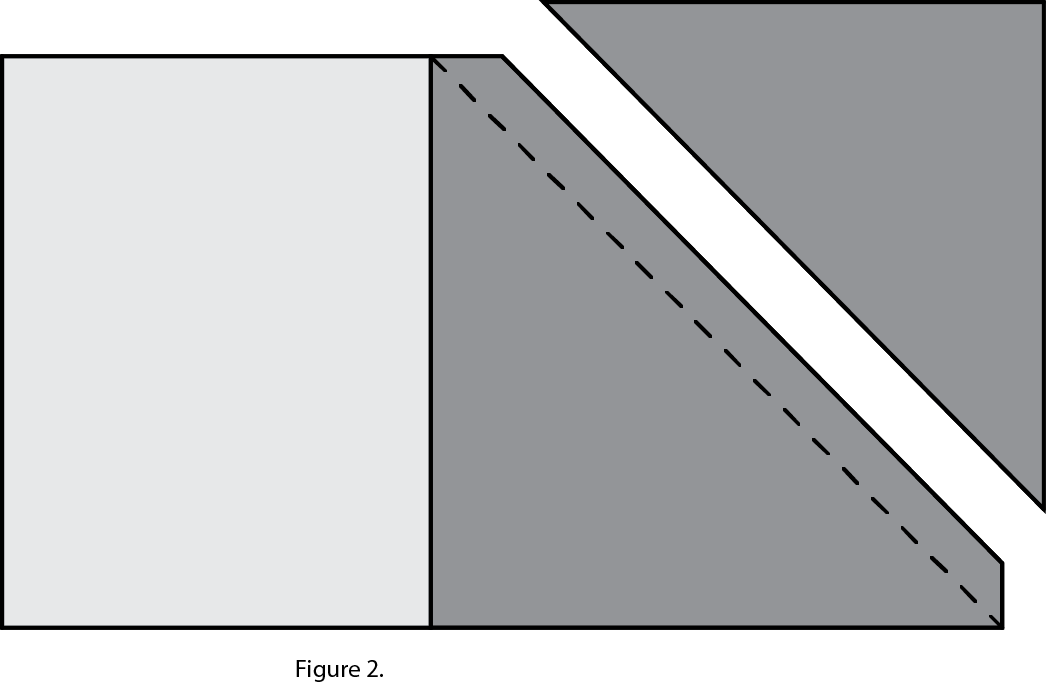
Trim off the excess triangles a quarter-inch past the stitching.
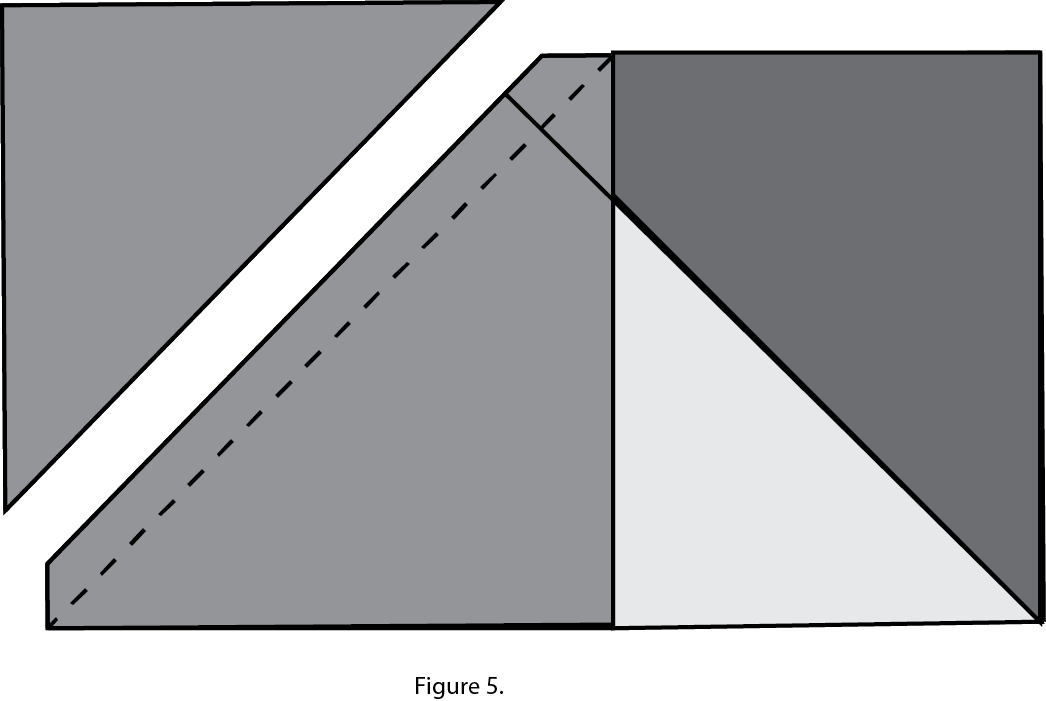
In this instance finger press the background fabric toward the smaller square. You can place a pressing sheet down to press the photo transferred fabric again but it’s not worth the risk with this project.
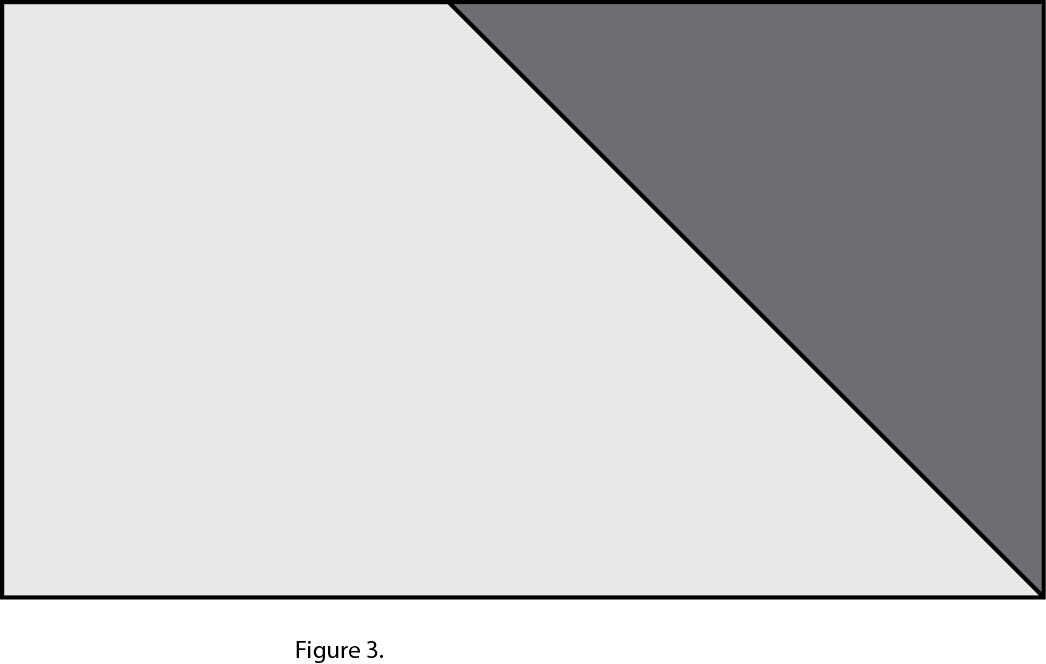
Place the other square right-sides together lined up with the left edge of the rectangle with the stitch-guide line oriented as shown in the figure.
Sew directly on the stitch-guide line.
Trim off the excess triangles a quarter-inch past the stitching.
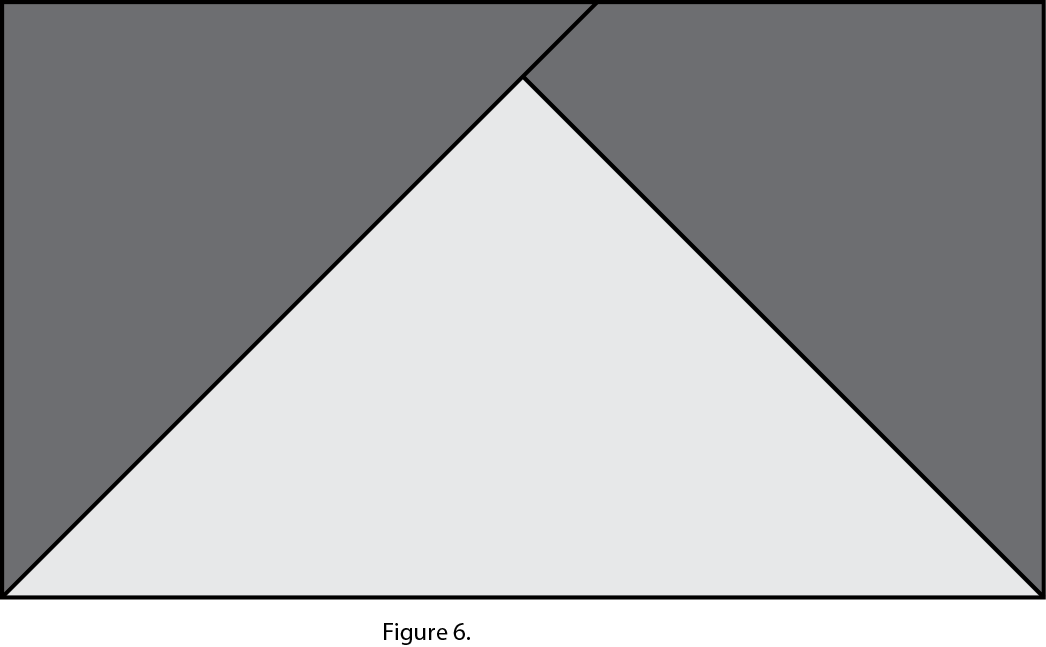
Once again, In this instance finger press the background fabric toward the smaller square
Repeat this to make three “Memory Geese” blocks. Please do not forget to finger press instead of using the iron.
Tree Trunk Block
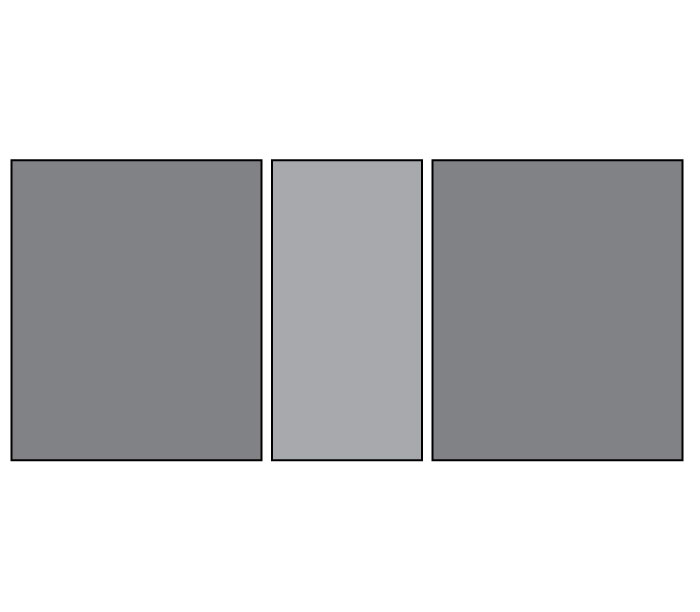
Take the (2) 2.5” x 3.0” background rectangles and place them on either side of the 1.5” x 3.0” trunk strip.
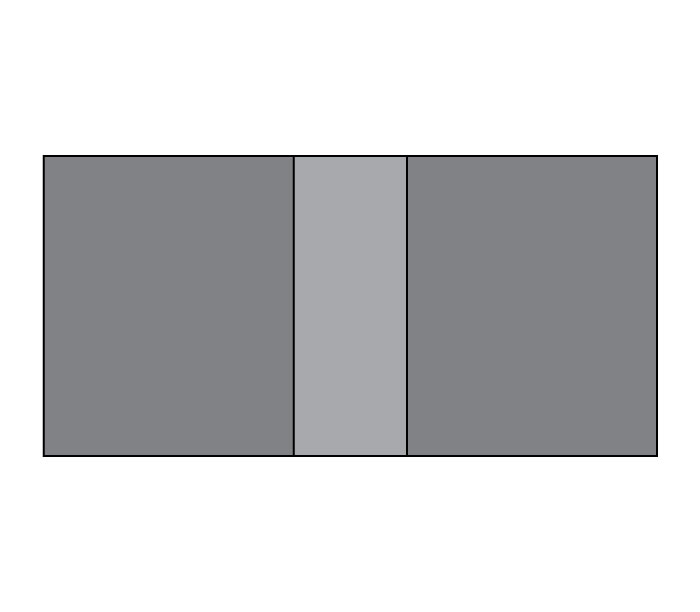
Stitch the three rectangles together. Press towards the background fabric.
Piecing it all together
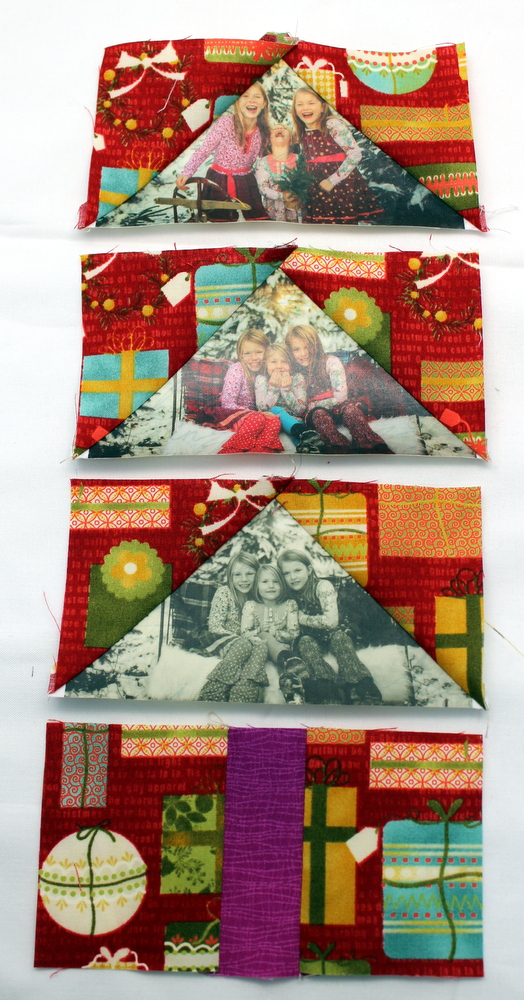
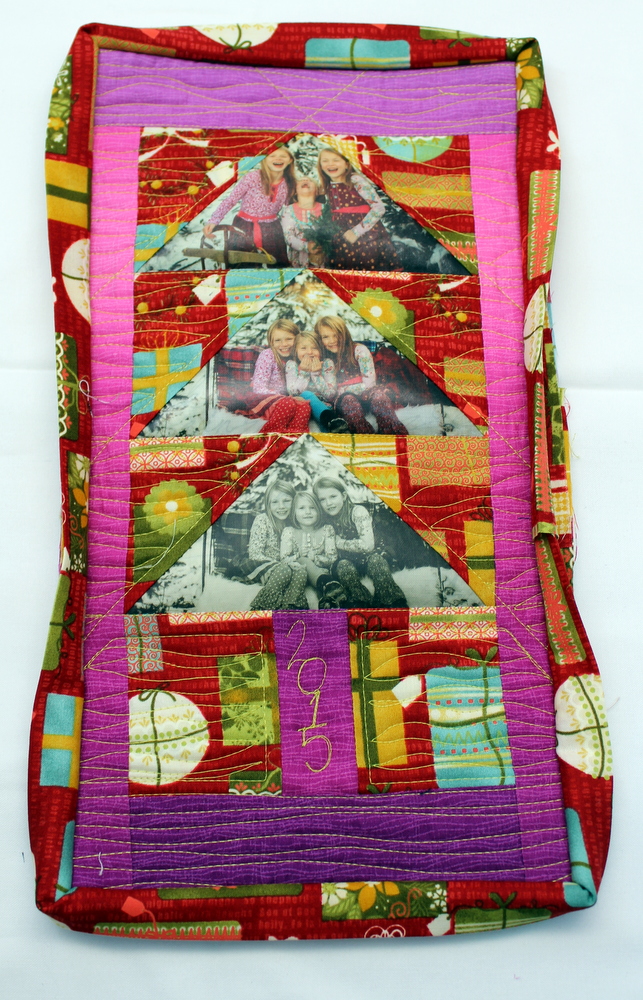
Place the Geese Memory Blocks in the order you wish them to be sewn together.
 I personally chose to put the serious picture on the bottom,
 the start of the giggles in the middle and
 the unrestrained pure joy and happiness at the top. The tree trunk block should go at below these geese blocks.
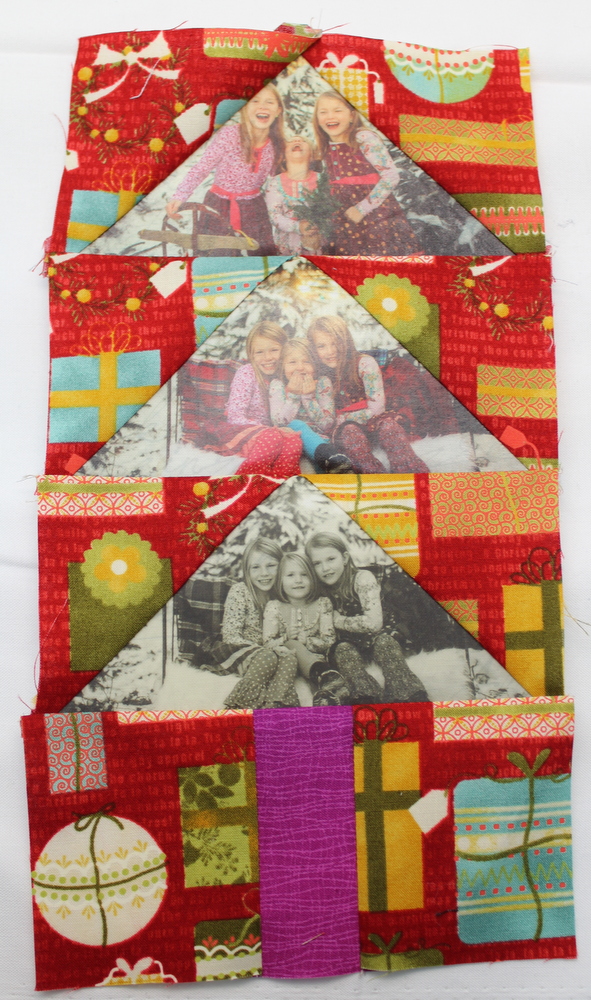
Now stitch the rectangles together. Finger press any seams that are on the photo fused.
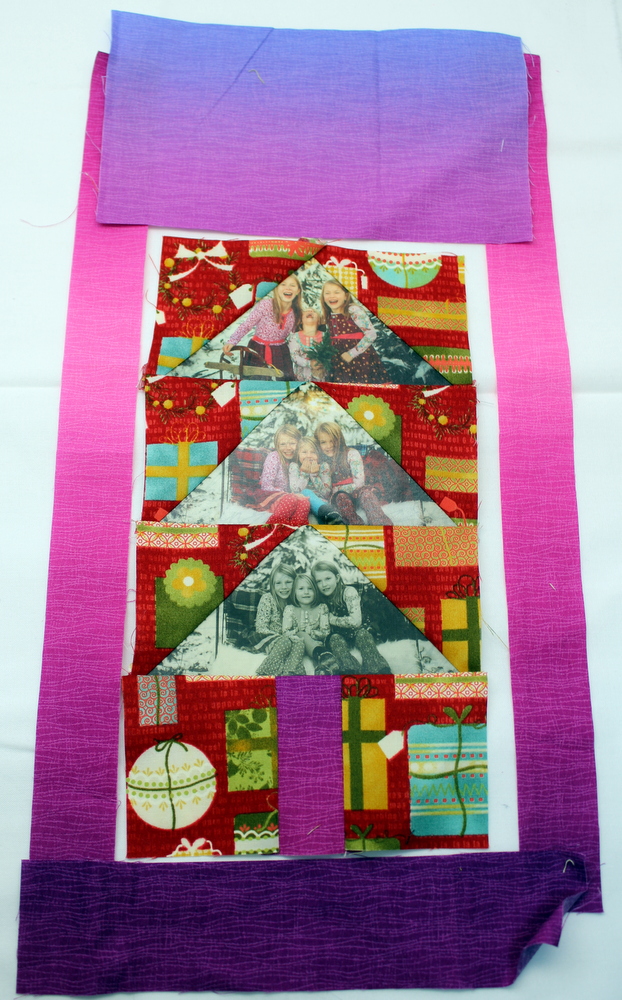
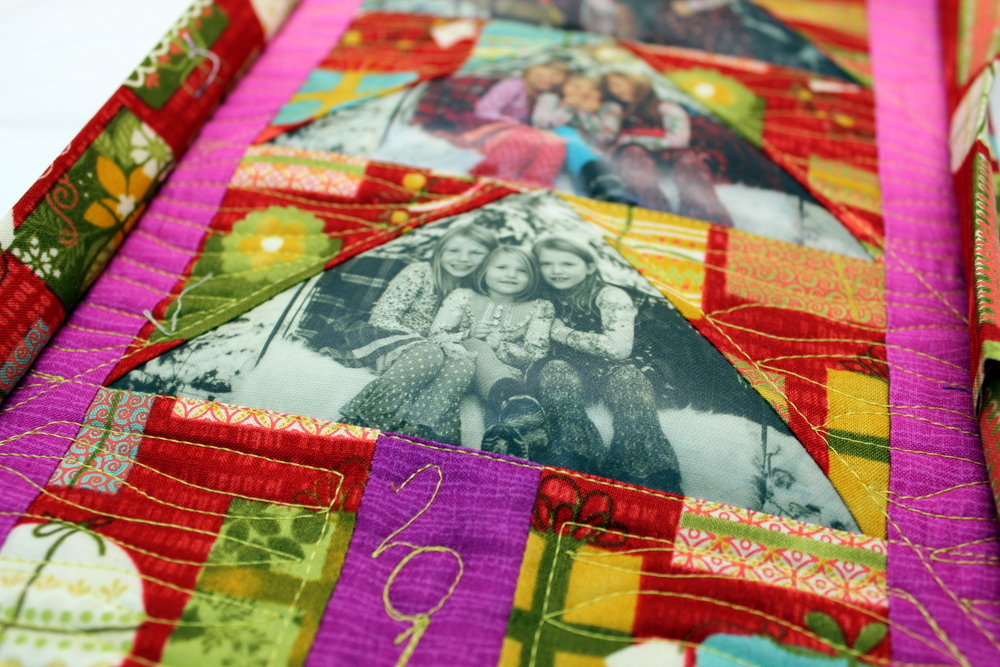
Add the borders. Because I chose to use ombre fabrics I started out with my strips larger than they needed to be. The bottom strip was sewn on first, then the two side strips and finally the top strip. This created the ombre look I was aiming for.
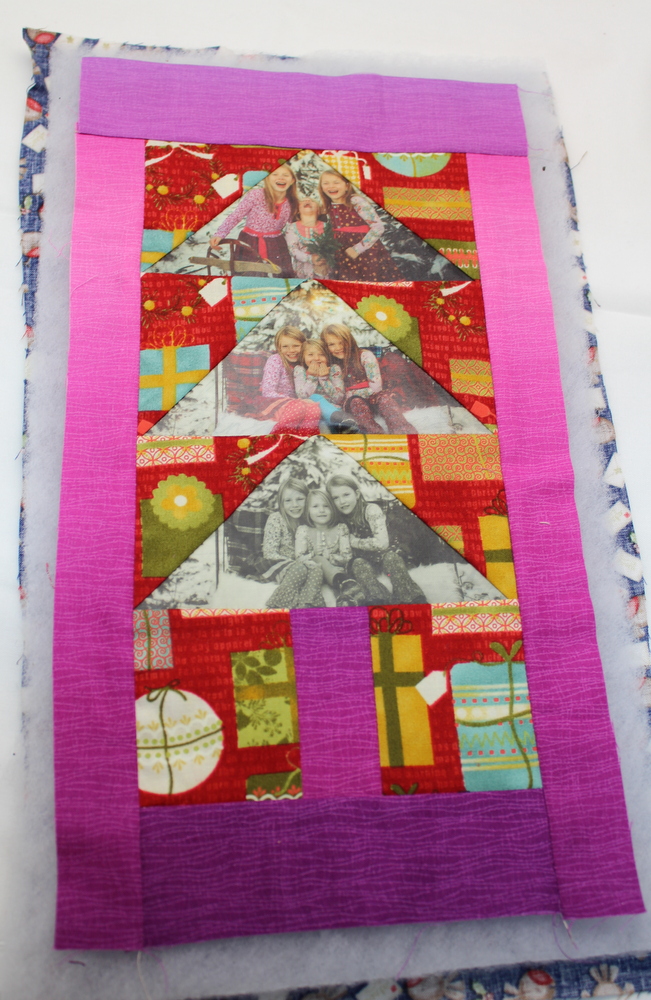
Once the mini top is pieced, layer the batting and backing fabric and use SprayN Bond® basting adhesive to baste the layers together.
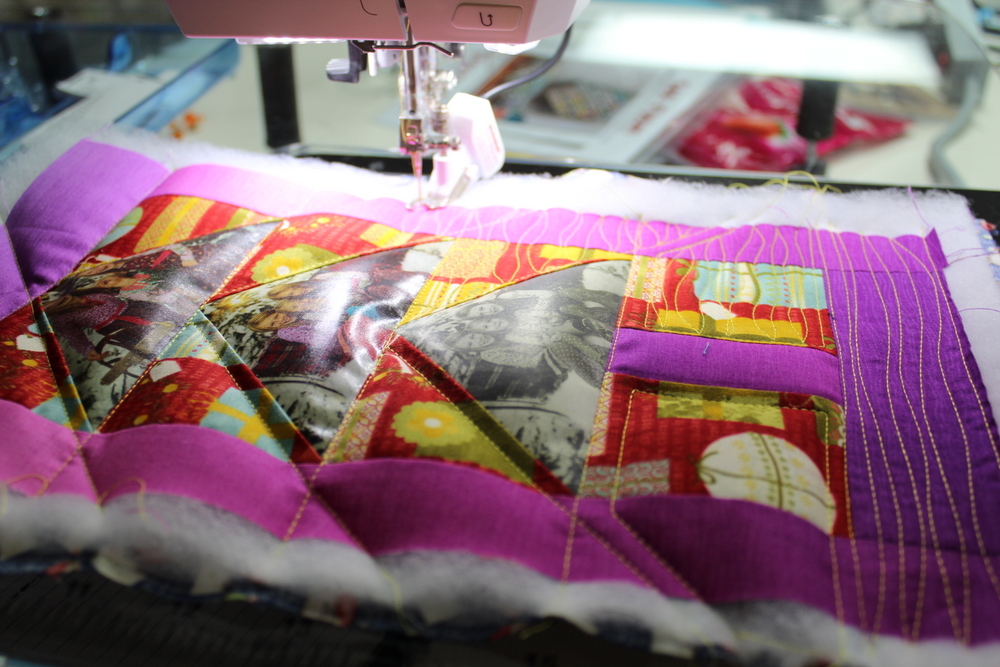
Quilt as you desire.
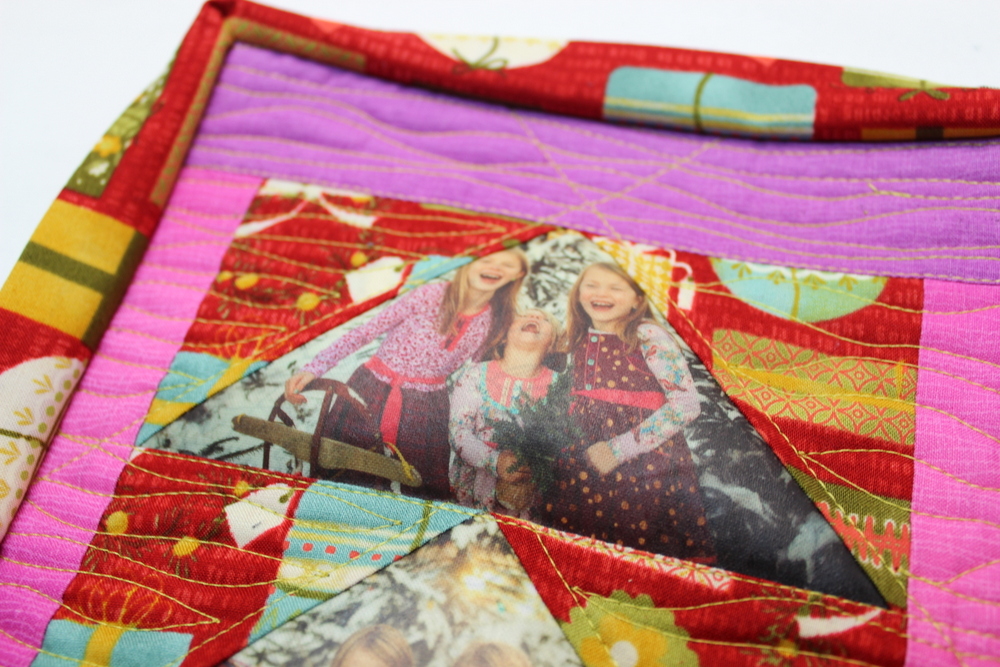
 Once the quilting is done, trim the quilt square and attach the binding in the method you prefer.
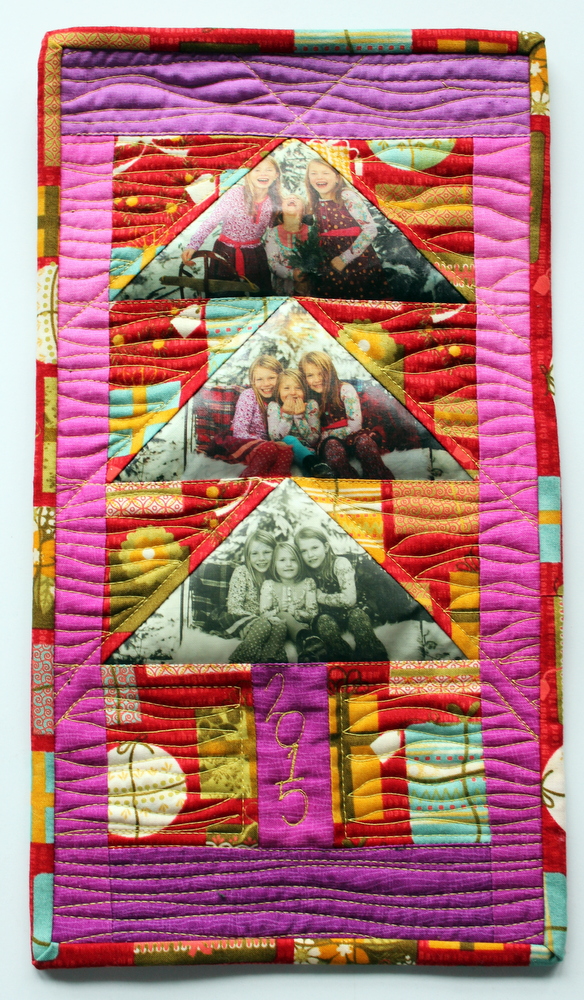
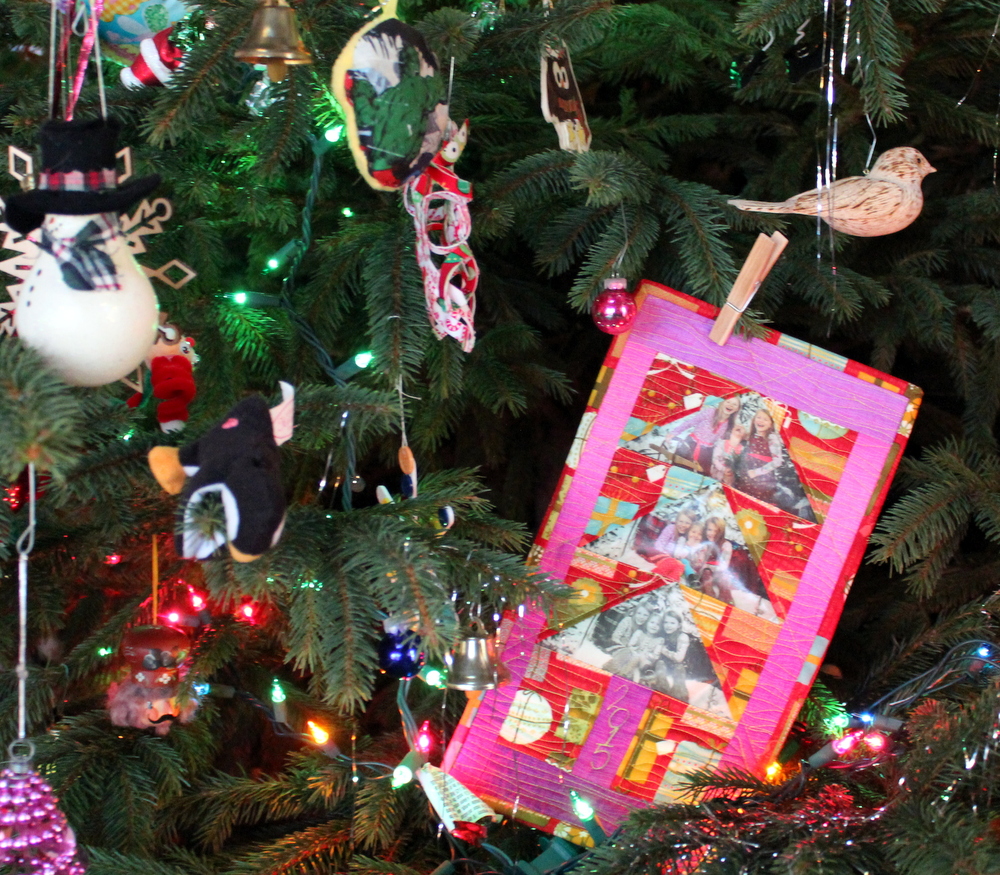
And with that you have an adorable miniature quilt ornament! Or hang it somewhere fun in your home! Enjoy!
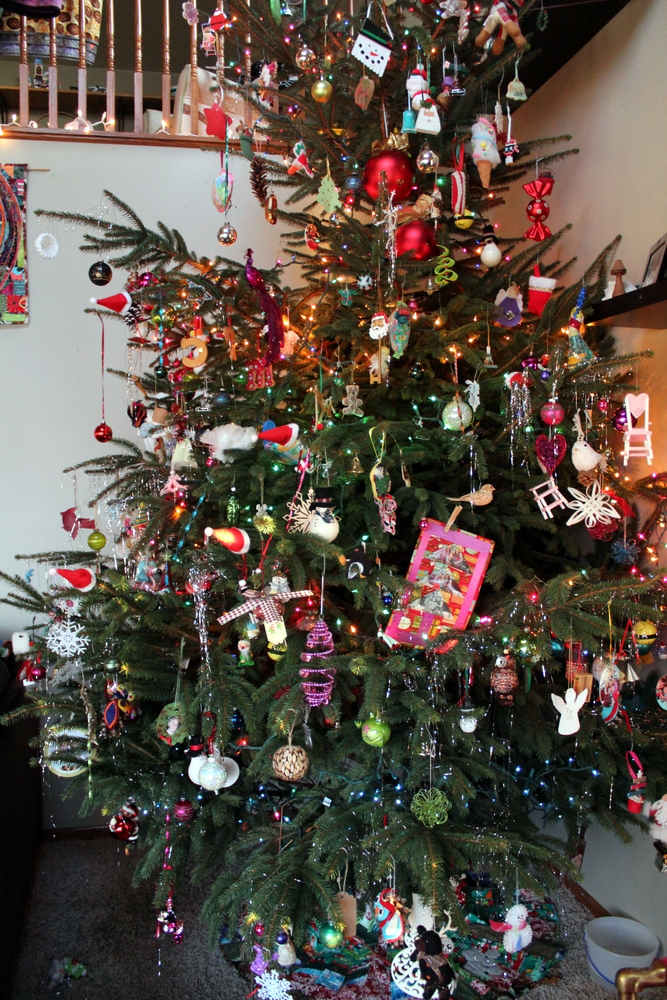
I can’t stand far enough back to get an entire shot of the 15-foot Christmas tree in my home!
BunnyD
December 13, 2016 at 10:25 am (7 years ago)What a fabulous project!