Pillows are so fun to make, but finding the right fabric for home decor can be a challenge. Anna Griffin has the pretties designs for Blend fabrics and if you have a garden at your home, her newest fabrics, Lila, are perfect for you. This pillow is a quilt as you go project with HeatNBond fusible fleece, therefore it has so much soft texture you’ll love lounging with it.
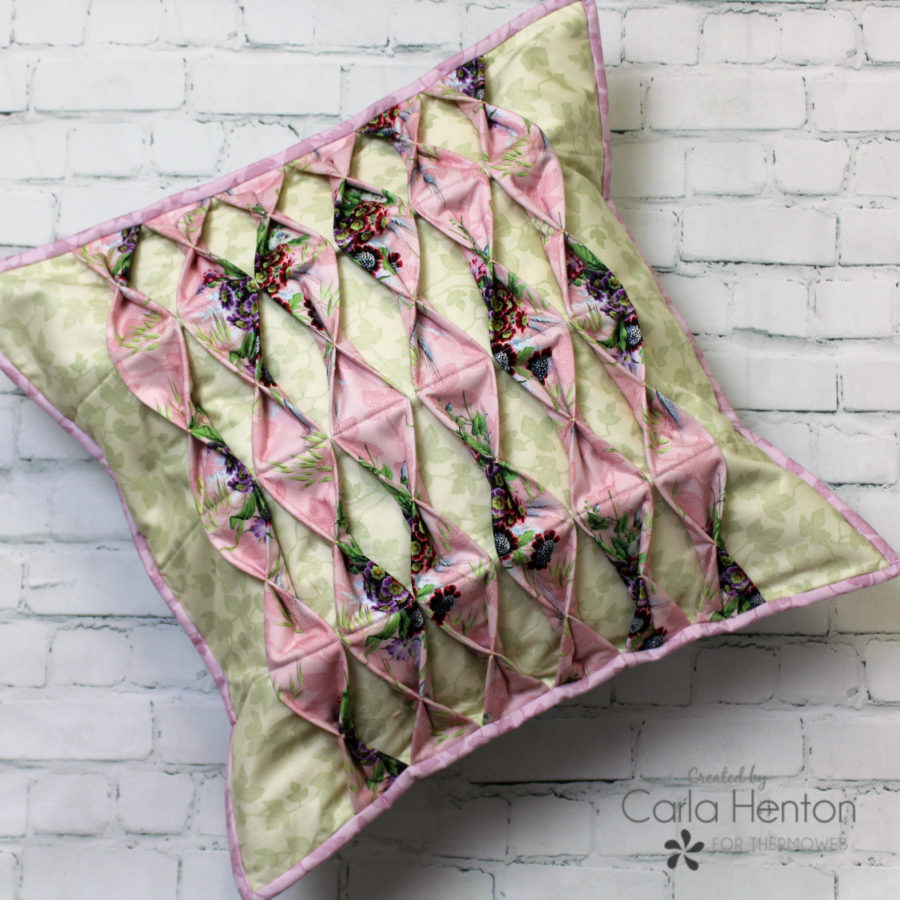
Garden Pillow
by Carla at Creatin’ in the Sticks
Finished size: 18″ x 18″
Garden Pillow Supplies:
Thermoweb Supplies:
HeatNBond High Loft Fusible Fleece
1 square 18 1/2″ x 18 1/2″
6 strips 2″ x 18 1/2″
Fabric: Anna Griffin for Blend – Lila collection
Pillow top background (Vines Green) –
2 strips 4 1/2″ x 18 1/2″
5 strips 2 1/2″ x 18 1/2″
Pillow top pleat fabric (Primula Pink) –
6 strips 4 1/2″ x 18 1/2″
Pillow envelope backing (Vines Blue) –
2 rectangles 13 1/2″ x 18 1/2″
Binding fabric ( Vines Lavender) –
2 strips 2 1/4 x Width of Fabric
Other fabric:
backing for pillow top (won’t be seen) Muslin –
1 square 18 1/2″ x 18 1/2″
Other supplies:
Aurifil 12 wt thread (#2205), Aurifil 50 wt thread (#2021) Iron: (I love my Oliso Pro), erasable fabric pen, 18” x 18” pillow form, sewing machine with a walking foot and 1/4″ foot, chopstick, wonder clips, and general sewing supplies: rotary cutter, cutting mat, scissors, pins, etc.
Garden Pillow Instructions:
All seams are stitched at ¼”
Read all instructions before beginning
Step 1: Prepare the pleat strips
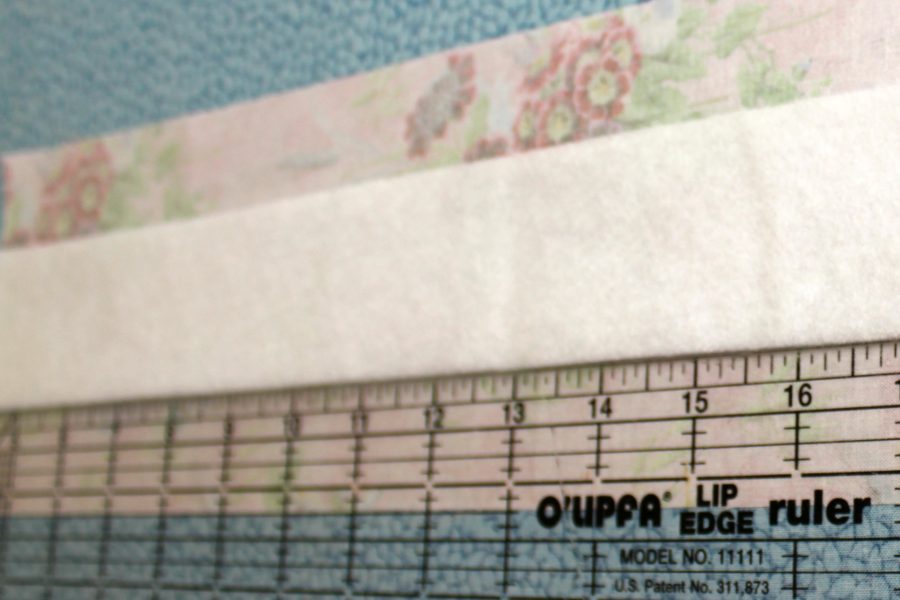
Firstly, bond the HeatNBond High Loft Fusible Fleece 2″ strips to the center of the wrong side of the pink pleat strips. Leave 1 1/4″ on each long side of the strips. Follow the package instructions to bond the fleece.
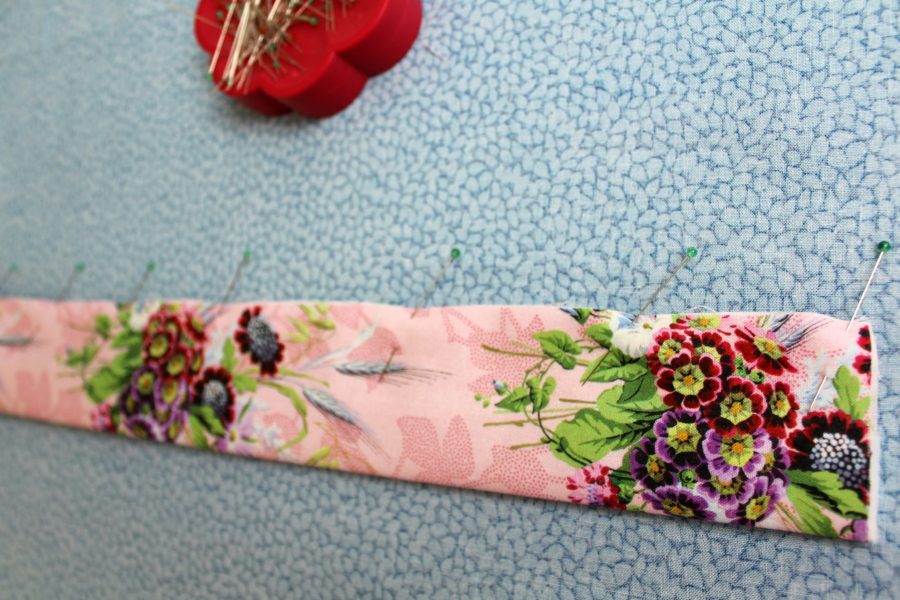
The next step is to fold the fleece bonded strips in half lengthwise with the fabric wrong sides together. Press and pin the raw edges together.
Step 2: Prepare the pillowtop foundation
Fuse the 18 1/2″ x 18 1/2″ HeatNBond High Loft Fusible Fleece square to the wrong side of the muslin following the package instructions. If necessary, square the unit to 18 1/2″ after the fleece is bonded.
Step 3: “Quilt as you go” pillowtop
Firstly, place one 4 1/2″ x 18 1/2″ green fabric strip on top of the muslin backed fleece square, fleece side up, lining up the raw edges on 3 sides.
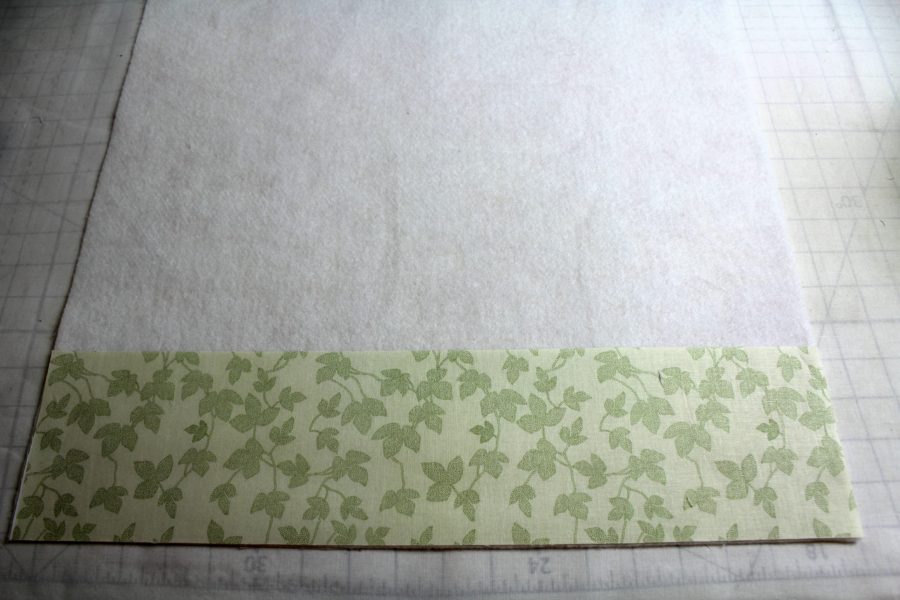
The next step is to line up all raw edges of one of the prepared pleat strips with the green strip and pin.
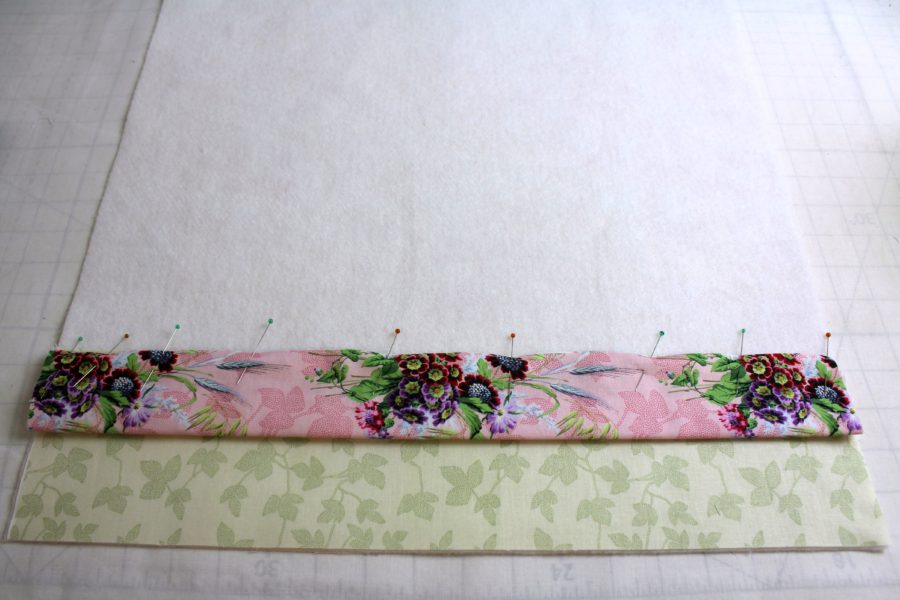
Once the pleat is pinned in place, one of the green 2 1/2″ x 18 1/2″ strips is pinned on top of the pleat strip right side down sandwiching the pink pleat strip. Pin this strip on the same side that the pleat is pinned.
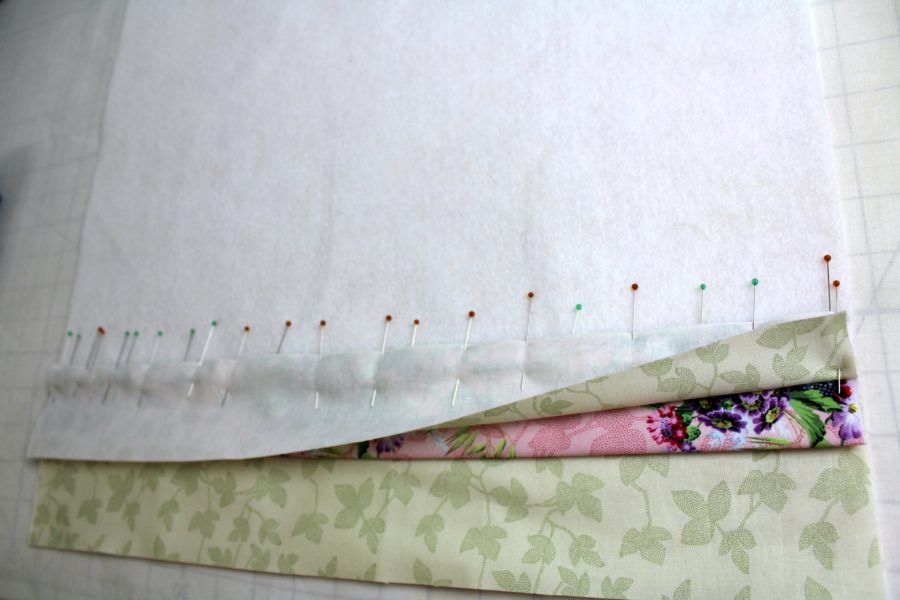
Lastly, finish the first pleat strip, stitch a 1/4″ seam on the pinned side through add of the thicknesses. Press the green strip toward the seam allowance covering more of the fleece, however, leave the pink pleat strip in place for now.
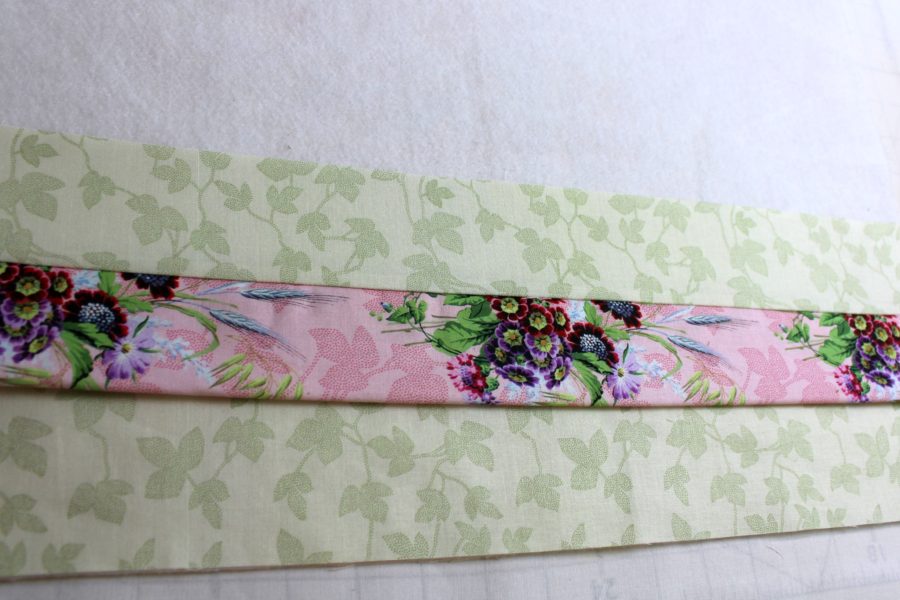
Continue to repeat the steps to cover the center of the fleece with the 2 1/2″ x 18 1/2″ green strips and pink pleat strips.
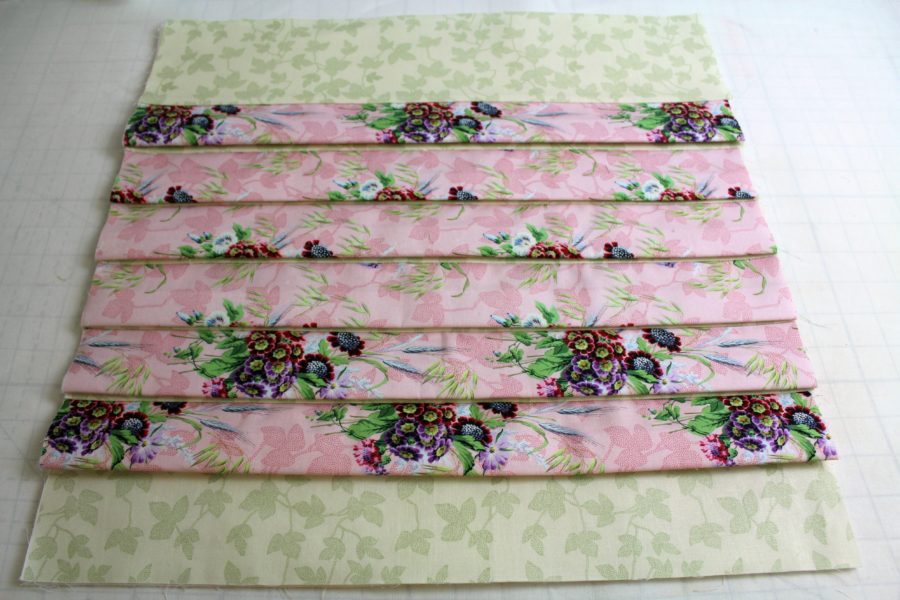
Place the last pleat strip with the 4 1/2″ x 18 1/2″ green strip as the 2 1/2″ strips were stitched to finish covering the fleece with fabric.
Sep 4: Press the pillowtop and quilt
Flatten each pleat strip by centering the pressed fold over the stitched seam and press. Tip: flatten the pleats by gently pushing the sides out with a chopstick inserted inside the pleat. Moreover, flatten it with hands and press with an iron.
Pin the raw edges of the pleats and baste 1/8″ all around the pillowtop with a walking foot.
After the edges are basted, mark the quilting lines with an erasable marker. Mark a line across the pleats in the middle and then mark lines 4 1/2″ from the center marked line. Finally, stitch on the marked lines with a walking foot and remove the marked lines.
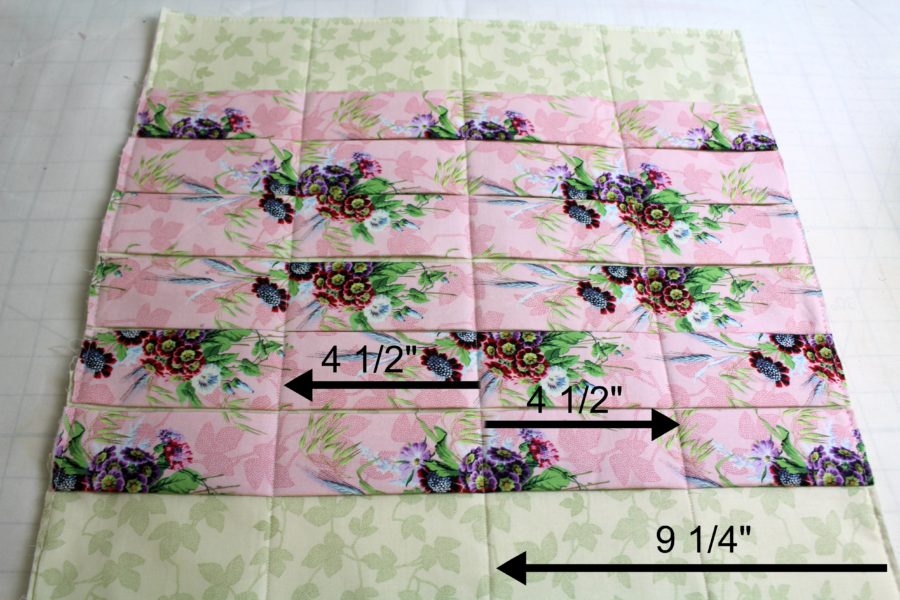
Step 5: Finish envelope pillow back and bind
Finish the pillow by hemming the two pillow backing pieces on one 18 1/2” side. With the pillow top right side down, place the hemmed sides in the middle of the back of the pillow top, right sides up, and pin matching all the raw edges. Baste the back pieces to the pillow front, wrong sides together. Finally, bind the edges with a favorite method.
Step 6: Finish the pleated pillowtop
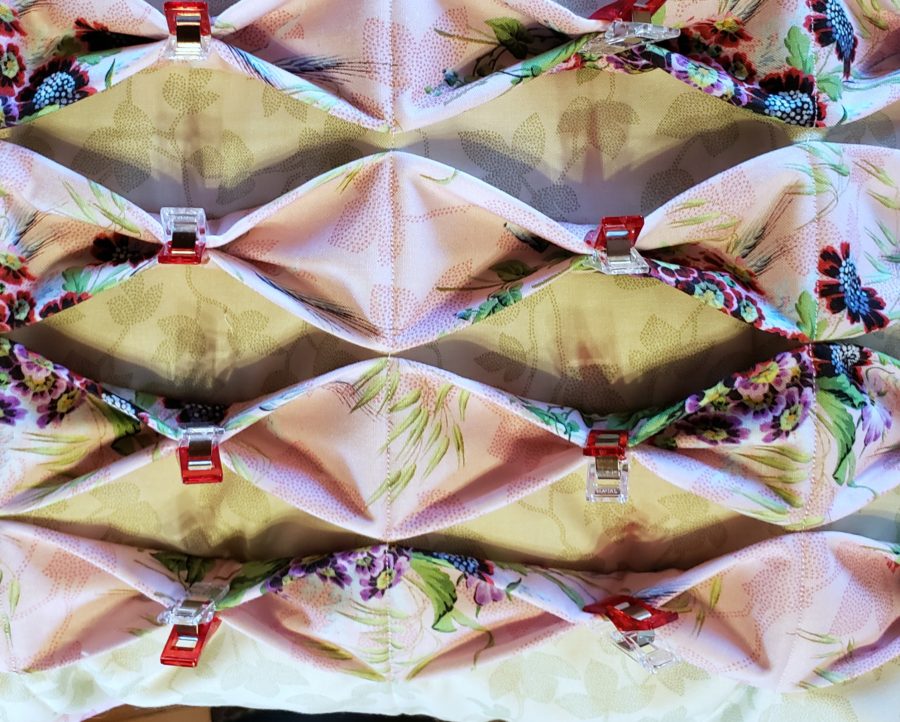
Clip each pink pleat strip in the middle of each section.
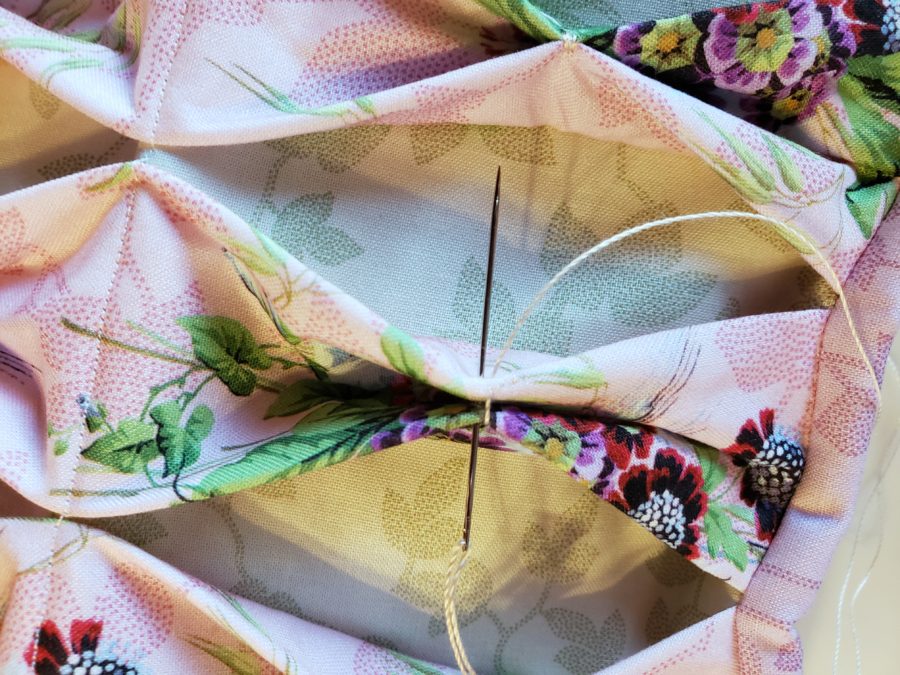
Hand stitch whip stitches with Aurifil 12 wt. thread with several stitches in the middle of each section. Finally, insert the pillow form into the pillow cover.
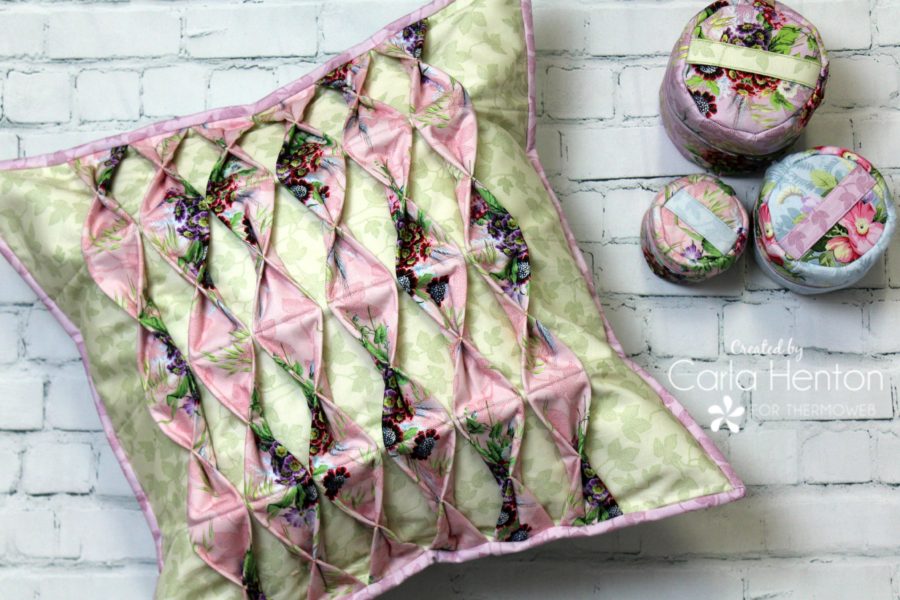
It was such an honor to prepare these items for the Blend Fabrics’ spring quilt market booth. You’ll find the tutorial for those fabric jewelry boxes shown in this picture HERE.
Carla

Gilda McCain
June 5, 2019 at 9:03 pm (6 years ago)Love the fabulous pillow. Thanks for sharing the process. I am definitely finding your blog.
judyschulz
January 6, 2021 at 12:06 pm (4 years ago)I love this pillow. I took the effort to save this in a printer form so I could use it later when I had more time. Also I must have a printed copy in front of me in order to sew, I don’t do well with electronic devices. But I will surely make this.