 Hello crafty friends! Today I’m here to share my Magical Monarch Summer Journal, highlighting the new Brutus Monroe Magical Monarch stamps, dies and foil. Follow along to the end for a bonus project using your scraps.
Magical Monarch Summer Journal
Junk Journal Supplies:
iCraft Deco Foil Transfer Sheets – Shattered Glass and Silver Sketch
iCraft Ultra Bond Liquid Adhesive
iCraft Double-Sided Adhesive Foam Tape
iCraft Easy Cut Adhesive Sheets
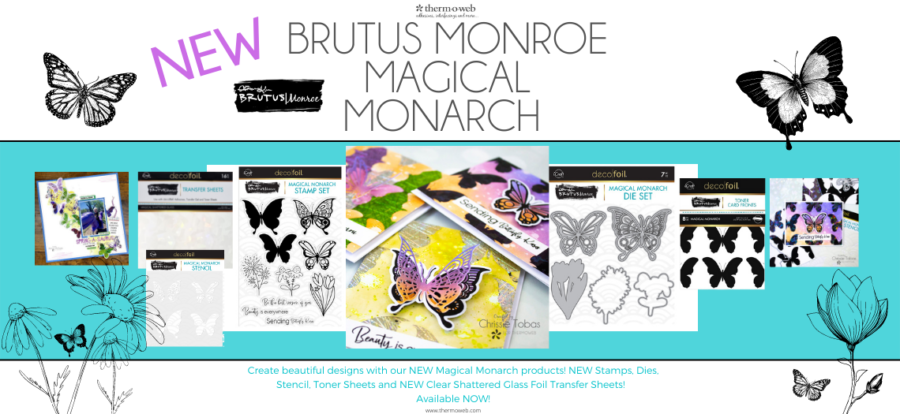
Brutus Monroe Magical Monarch Stamps and Dies
Brutus Monroe Chroma Glaze

Other Supplies: premade travel journal, gelli plate, paints, die-cutting system, brayer, ink pen, gold twine, and stamp pad.
Summer Journal Step One:
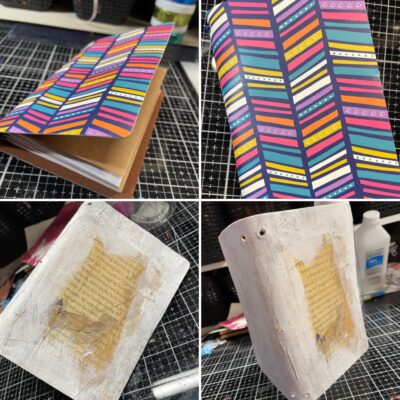
I started this project much like my last one; I used a premade travel journal from a local dollar store. I love that this allows me to concentrate fully on my covers and not worry about constructing a base. And because I decided to try out foils with my gelli plate, I wanted to use all my time to play! I prepped my journal by collaging book pages onto the cover and then adding gesso.
Hint: If you are not able to find a premade traveler’s journal with inserts, create a simple cover and use some inexpensive notebooks inside.
Summer Journal Step Two:
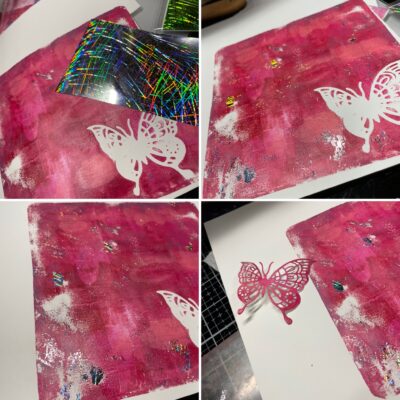
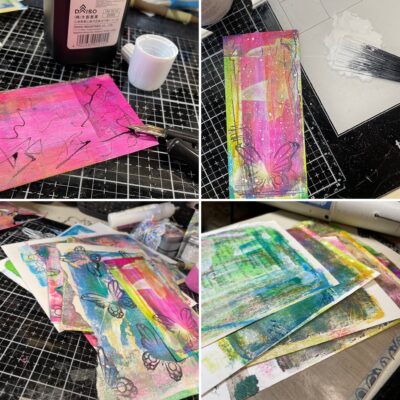
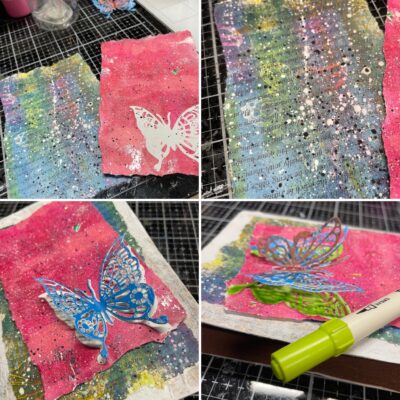
Start by rolling acrylic paint over the surface of the Gelli plate and then press a die-cut Magica Monarch butterfly into the paint. Immediately lay a piece of cardstock over the surface and press it into the gelli plate. Give it a minute to let the paint transfer to the paper and then gently peel the paper up. I absolutely loved the way it looked with the negative space butterfly. As a bonus, you also have a painted butterfly die-cut.
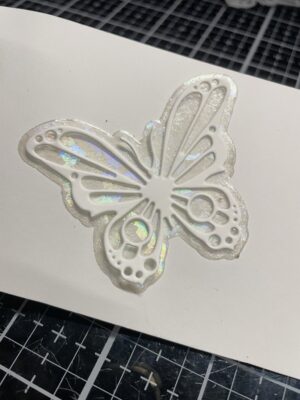
This step is important. Immediately, before the paint dries, press a foil transfer sheet (dull side down) over the paint surface. Leave the foil transfer sheet for a few seconds before you peel it up. The foil will stick to the paint as it dries and remains on the painted surface. This was the perfect finishing touch.
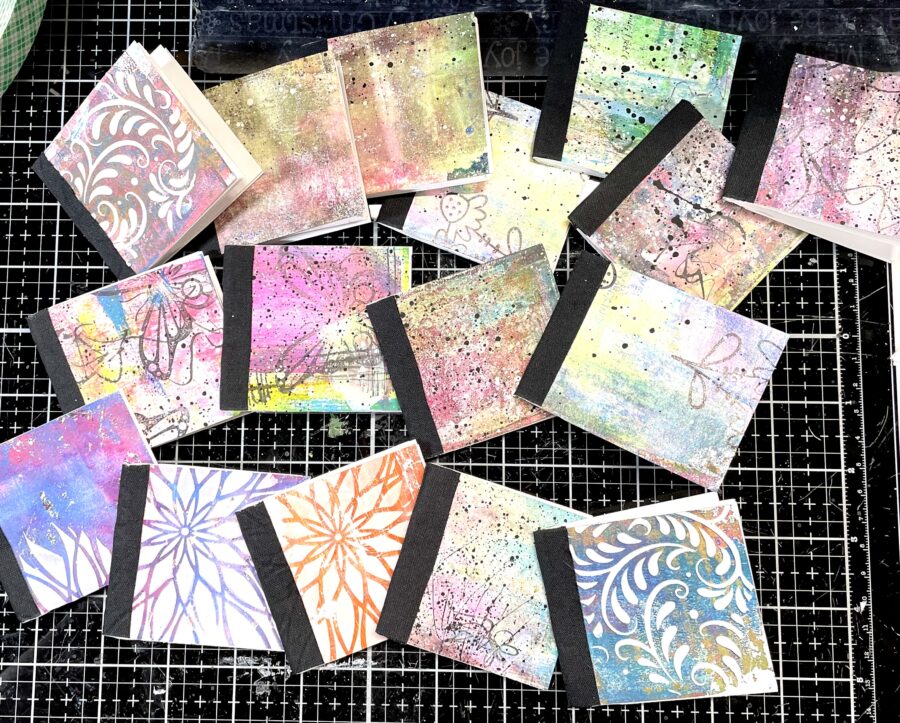
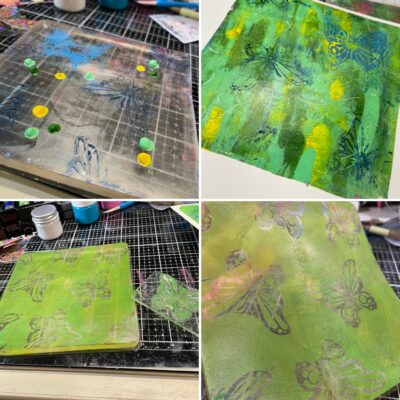
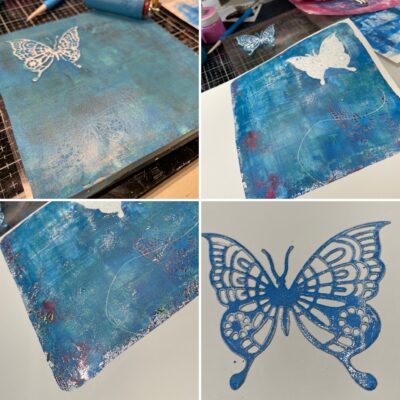
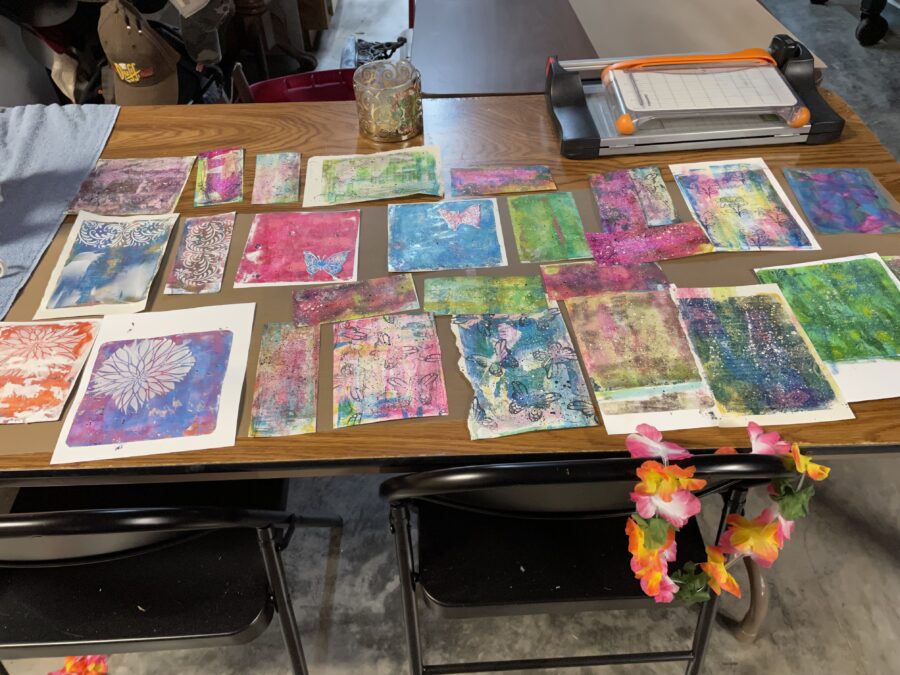
I was having so much fun that I made a ton of prints using different techniques. I added foil to some and stamped images on some after they were dry. The Magical Monarch stamps were perfect for this application. I also doodled with black ink on some and splattered paint on others. Don’t forget to use different papers for your prints (I used book pages and cardstock but you could easily use patterned scrapbook papers that you don’t especially like).
Hint: Use stamps (see picture below) to create painted images or to remove paint from areas before you make your print.

Summer Journal Step Three:
Next, waste a little time making embellishments that ultimately, you won’t use. At least that was my next step. But these came out so cute and definitely won’t go to waste.
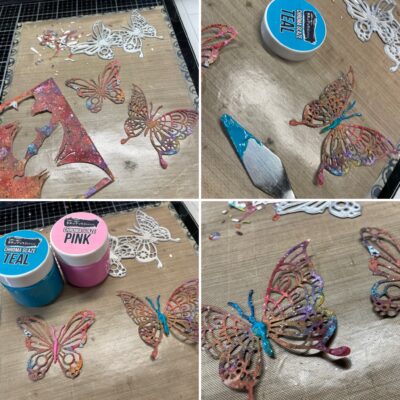
Die-cut the Magical Monarch butterflies (detailed) from one of your prints. I added some Chroma Glaze to the body of each one for added interest.
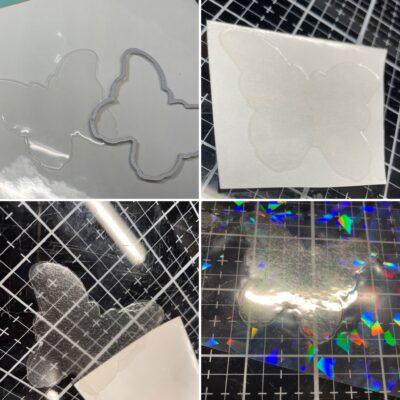
Next, peel the release paper from an iCraft Easy Cut Adhesive Sheet and press it onto a piece of clear acetate and die-cut using the background butterfly from the Magical Monarchs.
Finish by peeling the remaining backing paper and pressing the Shattered Glass Foil Transfer Sheet onto the acetate to create a stunning background for your butterfly.
Hint: If you don’t have any clear acetate, use a piece of discarded packaging.
Summer Journal Step Four:
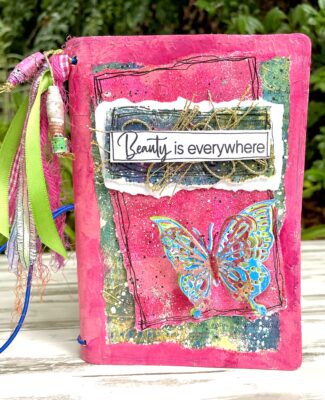
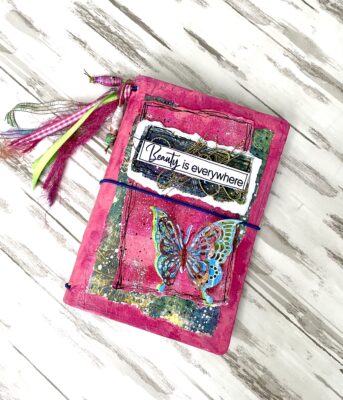
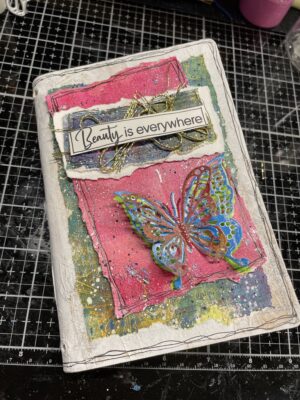
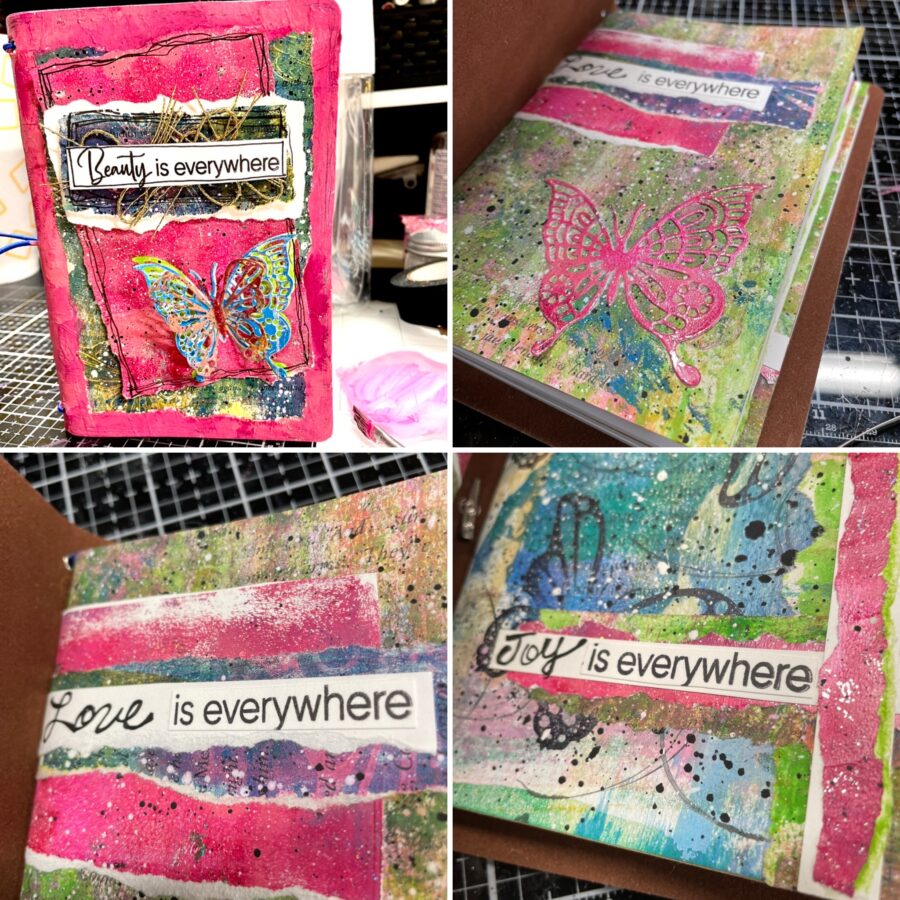
Next, choose a couple of your favorite prints for the cover. I tore the edges of mine rather than use a paper cutter for a more organic feel. I just love the hints of a butterfly on the darker print.
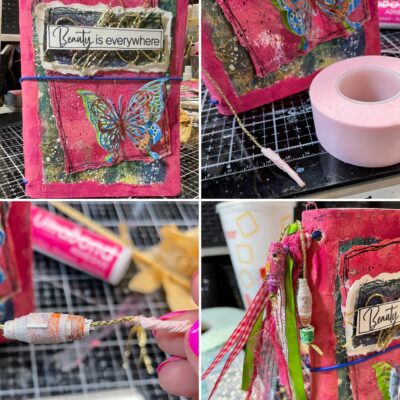
Layer your prints onto the cover and add your die-cut butterfly. Create a focal point using a quote from the Magical Monarch stamps set, a torn piece from a print, and some gold twine.
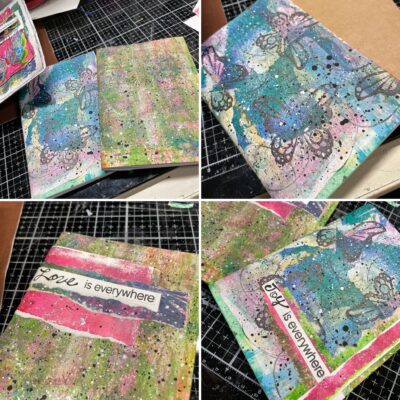
Finally, cover the inside notebooks with more of your Gelli prints. I loved the “Beauty is everywhere” sentiment so much that I used it on both notebook covers as well. I simply cut the word “beauty” off and replaced it with another word for each booklet.
Hint: Use the torn scraps from your cover pieces to embellish the inside covers.
Summer Journal Step Five:
I thought I wanted the background for the cover to be white, but once the journal was complete, I decided I didn’t like it and painted over it. Now I love, love, love it!!
Hint: Use extra butterfly die-cuts to embellish inside notebook covers.
Summer Journal Step Six:
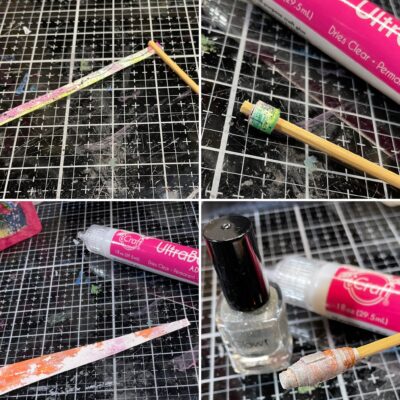
I finished off my journal with some paper beads and ribbons/strings. Where did I get the beads you ask? I made them from print scraps of course. You can see the process in the pictures below; it’s really quite simple. For the smaller bead use a straight strip of paper and for the tapered bead use a triangle-shaped strip. Add Ultra Bond Liquid Adhesive inside as you wind the bead.
Use a little Pixie Tape to create a pointy end on your string so you can easily add your paper beads.
Hing: Use nail polish to add glitter and to seal the bead.
BONUS PROJECT!
I had so much fun making prints that I went a bit wild. I had so many left over, and since where I work we need little, pocket-sized notebooks, I had a blast using the scraps to create one-of-a-kind notebooks for everyone!