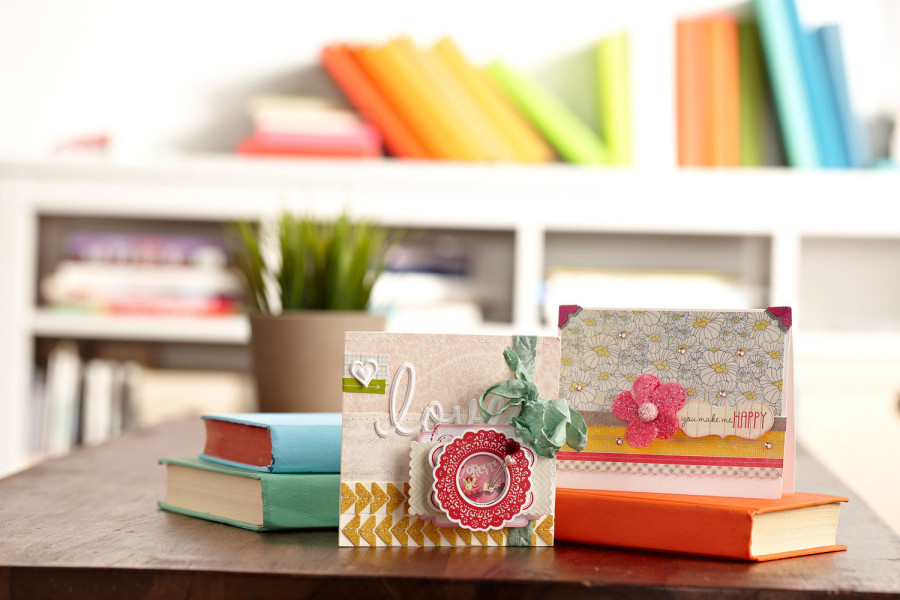
Supplies:
Therm O Web Foam Strips
Therm O Web Memory Runner XL
Therm O Web Zots
Therm O Web Glitter Dust Photo Corners (coming soon!)
Pink Paislee (papers, stickers)
Maya Road (stick pin)
Prairie Bird Boutique (ribbon)
Pebbles (arrow sticker)
Ribbon
Washi Tapes
Sewing Machine
White Cardstock
{finished card size is 4 by 4}
Instructions for “Love” card:
1. Cut a piece of white cardstock that measures 8 inches wide by 8 inches high. Fold in half with the on the fold running on the left side of the card.
1. Use the NEW Glitter Dust Photo Corners to create a unique border on the bottom portion of cardstock. Stack the photo corners to create two long rows. Trim to the size of the card and adhere with machine stitching. Or if you do not have access to a sewing machine, simply apply with the adhesive backing on the photo corners.
3. Next cut a piece from the light pink patterned paper that measure 4 inches wide by 3 inches high. Adhere to the card using Therm O Web Memory Tape XL Runner. For a bit of added embellishing…machine stitch onto the cardstock.
4. Add various washi tapes to the left side of the card. Use Therm O Web Zots to adhere heart and “love” diecut to card.
5. Tie the seam binding ribbon onto right side of card into a nice bow. Next select some diecuts to add to the card layering them with Therm O Web Foam Strips for added height and dimension.
6. Finish off the card with the Maya Road pins that when pushed into the foam behind the diecuts.. will help keep the pins in place. (great tip and no sharp pins to worry about!)
You Make Me Happy Card by Julia Sandvoss
Supplies:
Therm O Web Foam Squares
Therm O Web Sticky Strip Runner
Therm O Web Bling Zots
Therm O Web Glitter Dust Photo Corners (coming soon!)
Therm O Web Glitter Dust Spray in Iridescent
White A2 Card or cardstock trimmed to size {5 1/2 in wide by 4 11/4 inch high}
Authentique Papers
Small Rhinestone Gems
Petaloo Flower
Fiskars Scallop Border Punch
{Finished card size is an A2}
Instructions for “Happy” Card:
1. Cut the following paper sizes: floral background paper to size of 5 1/4 inches wide by 3 inches high, solid grey paper to size of 5 1/2 incheswide by 1/2 inch high, yellow print paper to size of 5 1/2 inches wide by 3/4 inches high and last the grey print paper to 5 1/2 inches wide by 1/2 inch high.
2. Use the Fiskars border punch (or decorative scissors) and punch the bottom edge of the grey print paper.
3. Place the floral background paper in box or enclosed area to help control any possible overspray. Spray the paper with a light layer of Glitter Dust Spray. Allow first layer to dry and repeat. Then use the Therm O Web Sticky Strip Runner and add adhesive to the backside the floral paper. Adhere onto white card.
4. Next use the Sticky Strip Runner and add adhesive to the backside of the yellow print paper. Add to card placed to bottom edge or floral paper. Using the Runner add adhesive to the grey print paper and tuck under the bottom edge of the yellow print paper. Then add adhesive to the solid grey paper and add to card to conceal edge between floral paper and yellow print.
5. Use Therm O Web Foam Squares under the card sentiment diecut from Authentique for added height and dimension. Press onto right side of card. Add flower to the left side of sentiment.
6. Add Therm O Web Bling Zots to adhere small colored rhinestones around card on flowers and on sides of sentiment.
7. Tuck Therm O Web Glitter Dust Silver and Pink Photo Corners onto top edge of card for a glitter finishing touch!
Don’t forget, you can pick up all the Therm O Web Adhesives used in these projects on at our Therm O Web Online Store! Just click here to shop!

