


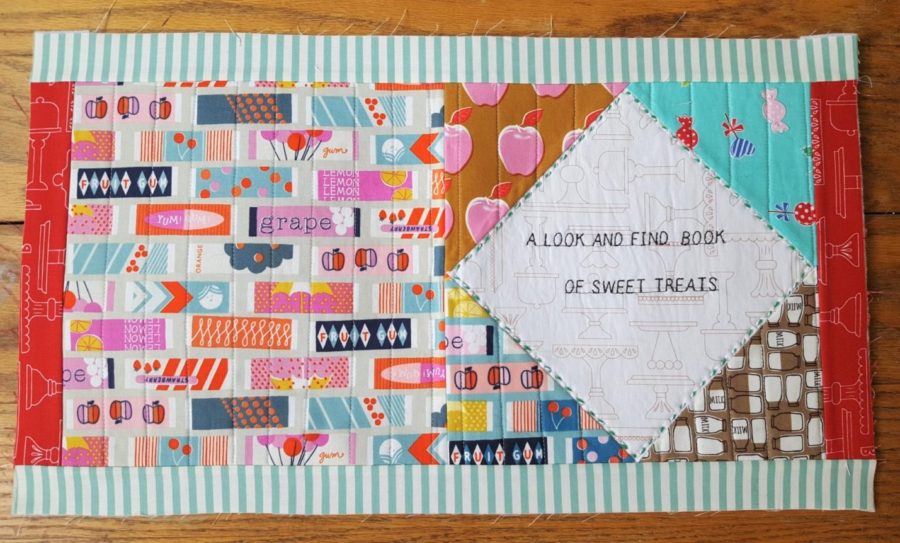
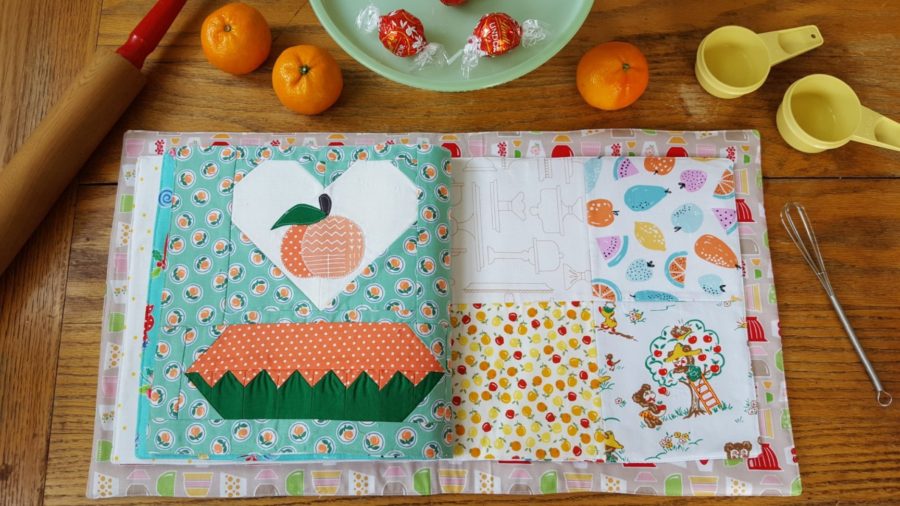
Hello! It’s Stephanie from Sissy Belle Sews, back with another fun project tutorial for you! This month I, along with three other designers, are showing you what we made with the four blocks featured in the Food for Thought sew along we shared with you earlier this month. My block, “Peach Pie,” features both traditional piecing and applique.
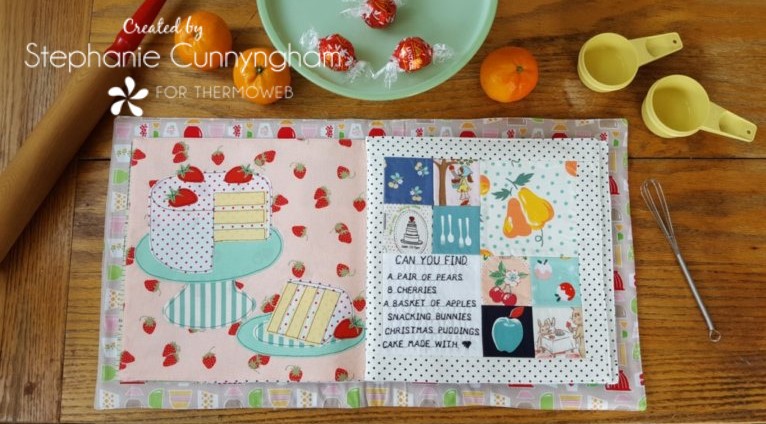
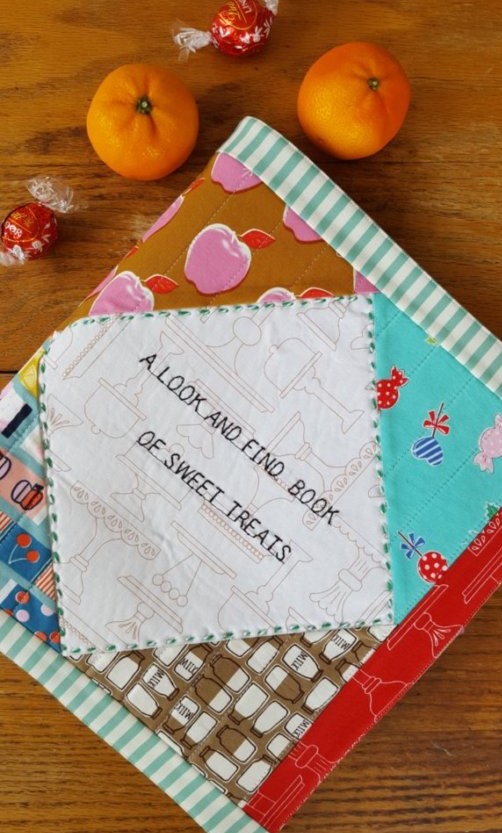
Look and Find Book
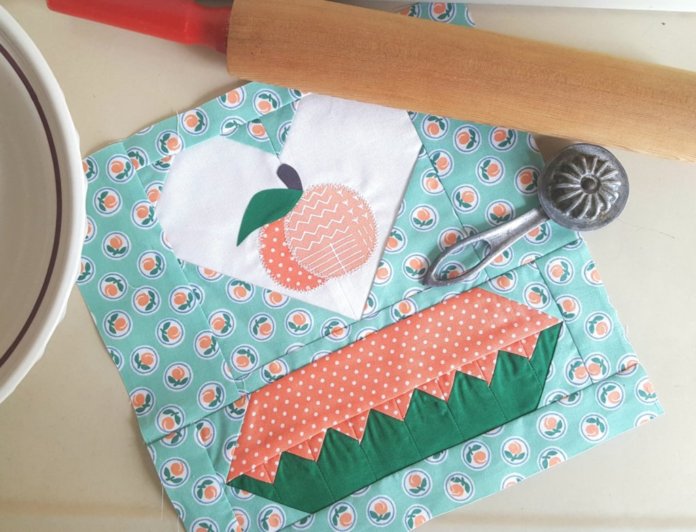
I have to admit, I am an extreme novice when it comes to designing and sewing applique blocks, and many of the products I used in this post were new to me. I will have to tell you, though, that they made all the difference in how these blocks turned out, and I am so excited to keep learning about and improving on my applique skills!
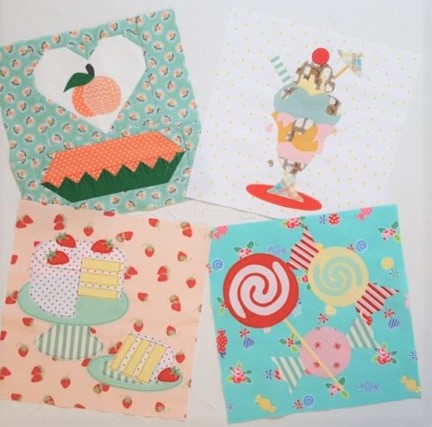
After I finished the four blocks from the sew along, I decided to turn them into a fun soft, quiet book for my kids. I am so excited to share with you how to make your own look and find book of sweet treats! I know you, and any little people you might have in your life will find this a delicious project!
Look and Find Book Supplies Needed:
- Patterns and templates for the four Food for Thought blocks from the sew along, plus supplies needed for each one. Make blocks as instructed on each individual pattern. Trim to 10.5″ when finished.
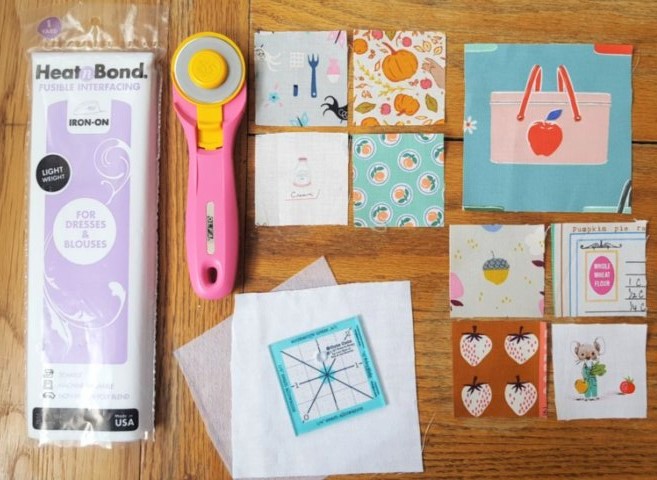
- Scraps of various fabrics featuring food or other fun things to find (fussy cut away!)
- Fat quarter of white fabric for look and find lists
- Fat quarter of background fabric for look and find pages
- 2 Fat quarters or scraps for book cover and lining
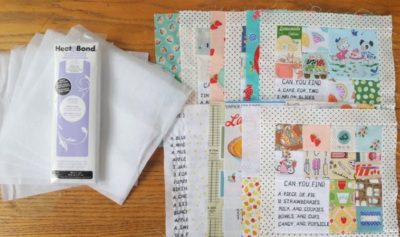
- 2 packages of Heat n Bond Craft Extra Firm fusible interfacing
- 1 package of Heat n Bond Lite fusible interfacing
- 1 package of Heat n Bond fusible fleece
- Black thread
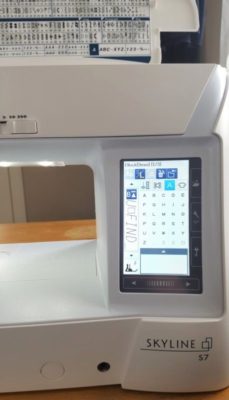
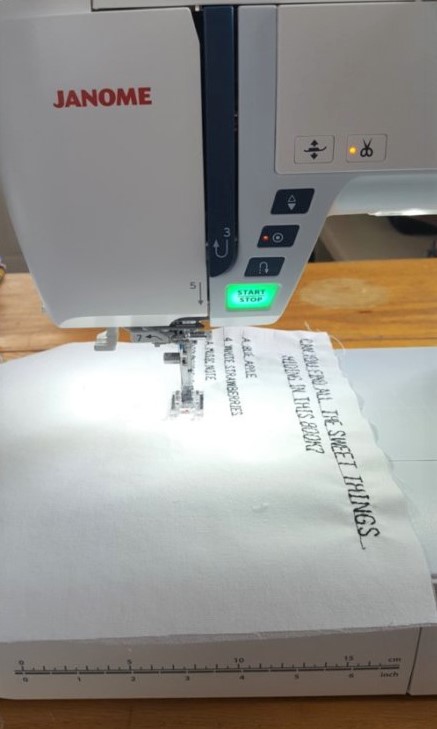
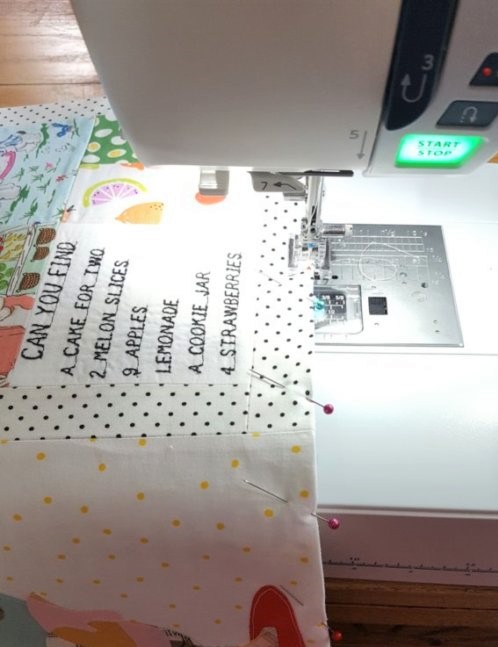
- Sewing machine that can sew letters and numbers
Sewing Instructions
Look and Find Pages
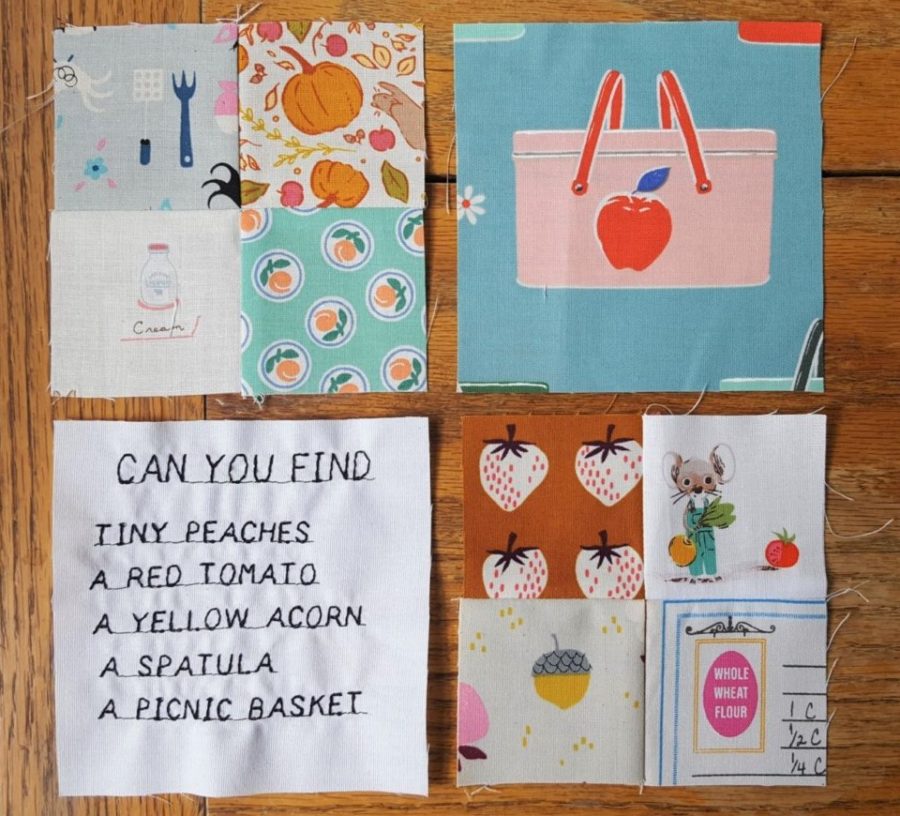
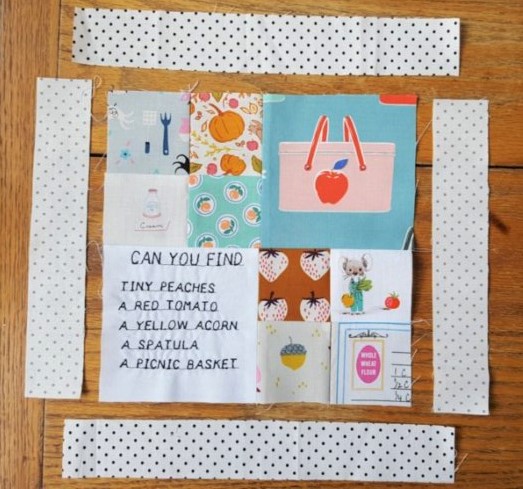
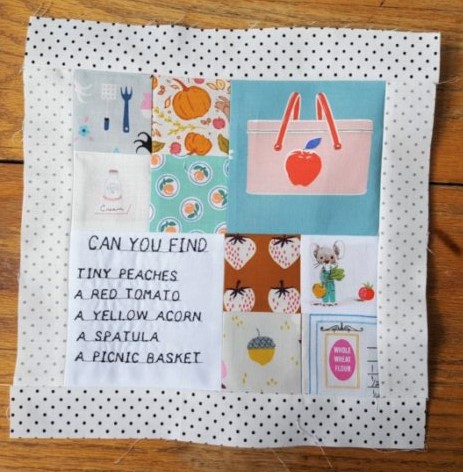
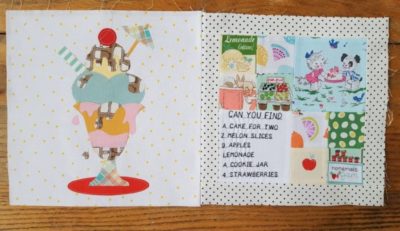
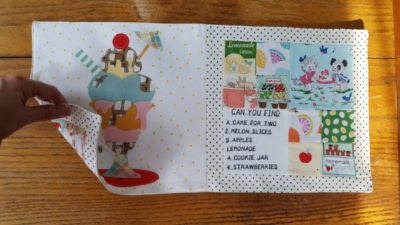
- You can make as many look and find pages as you want to. For this tutorial, the total number of pages in the book needs to be a multiple of four. For my book, I made the four sew along blocks, four look and find pages, 1 look and find list page and three patchwork pages. My book has 12 pages in total. The following instructions are for one block. If you want your book to be like mine, make four.
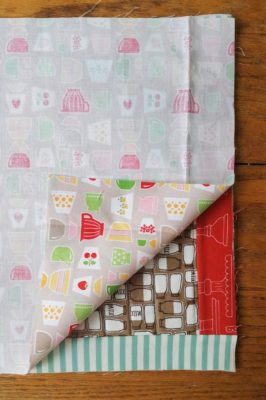
- Cut a 4.5″ square from the white fabric and from the Heat n Bond Lite interfacing. Fuse the interfacing to the wrong side of the white fabric according to package instructions.
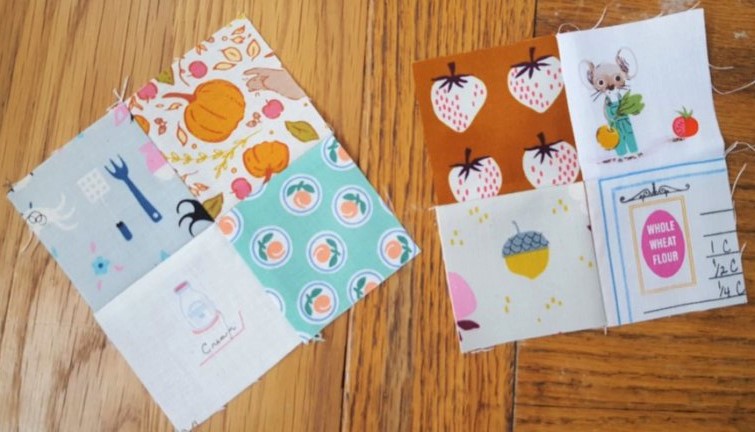
- Fussy cut your fabrics into either twelve 2.5″ squares, eight 2.5 ” squares and one 4.5″ square, four 2.5″ squares and two 4.5″ squares, or three 4.5″ squares. I found it helpful to use transparent 4.5″ and 2.5″ square rulers for this step.
- Sew your squares together.
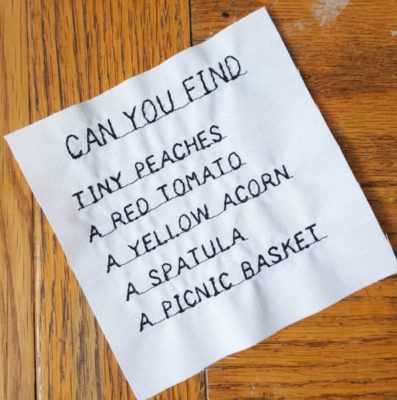
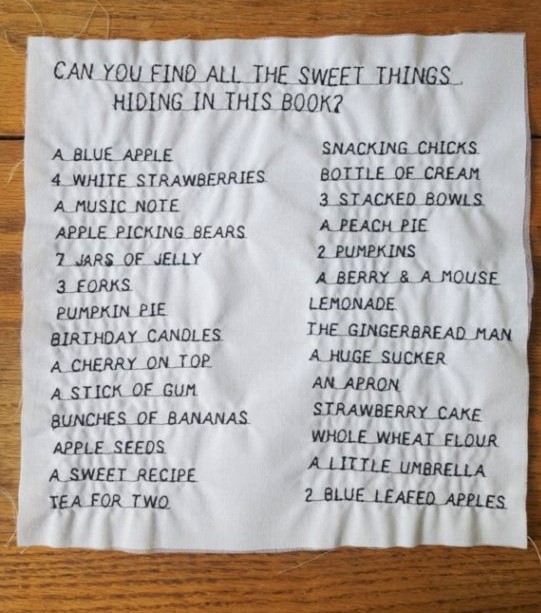
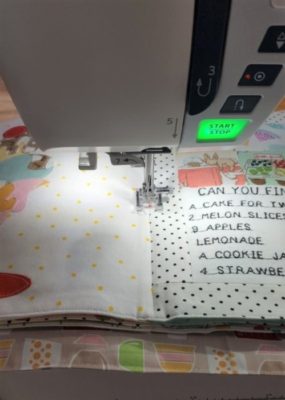
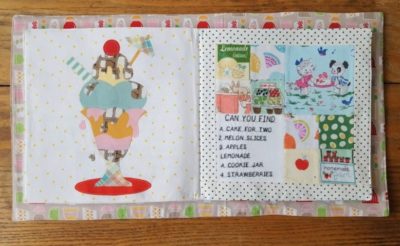
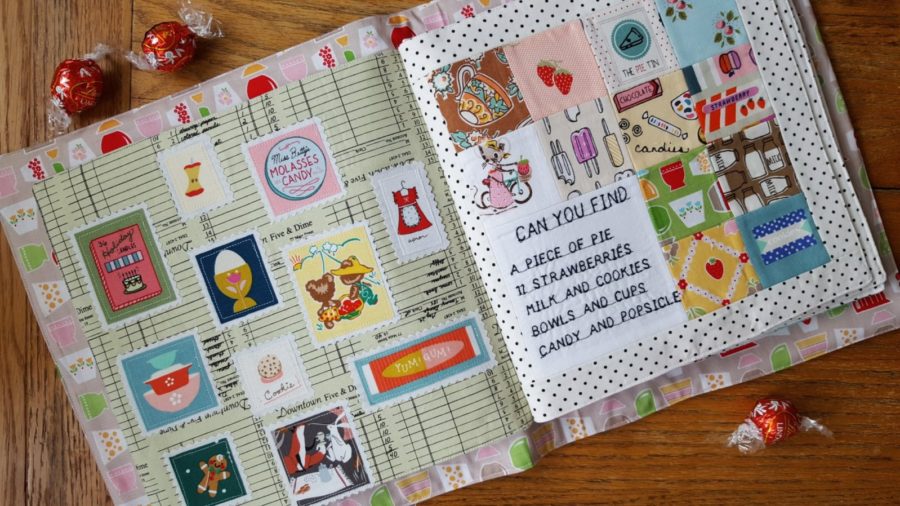
- Using your machine, sew a list of things to find on the white square of fabric.
- Arrange the patchwork and list squares and sew them together.
- Cut the background fabric into 1.5″ strips. For each page, you will need two 1.5″ x 8.5″ strips, and two 1.5″ x 10.5″ strips. Sew the strips to each side and to the top and bottom of each page. Trim finished page to 10.5″ square. Make as many of these pages as desired.
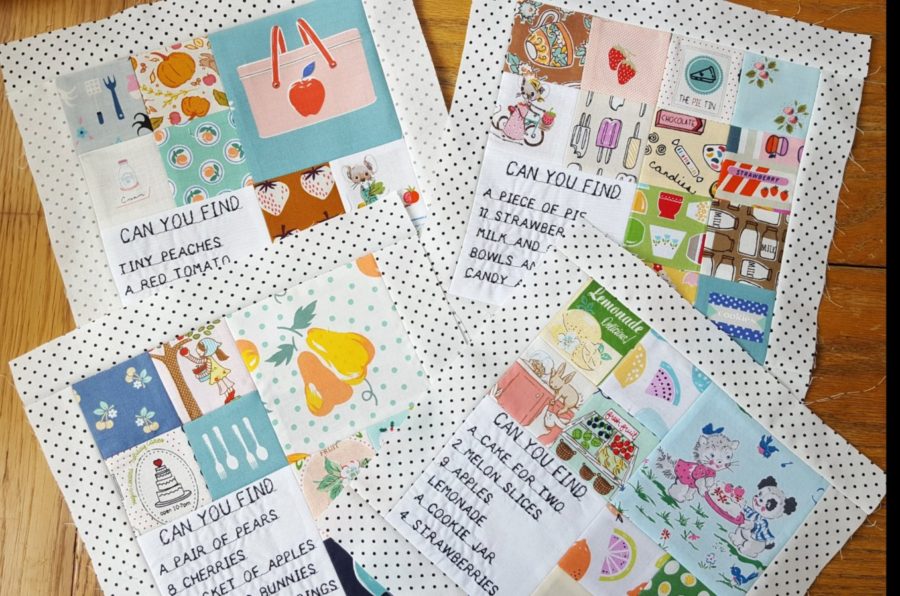
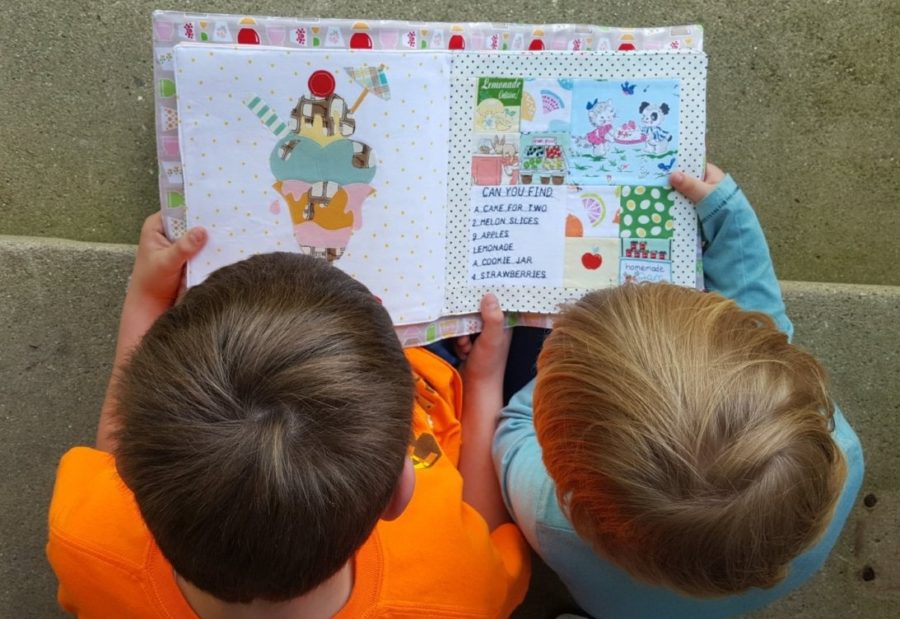
- To add more pages to the book, I made a page of “food stamps,” two pages of random patchwork, and one more challenging look and find the list. You can completely customize your pages to include anything you want!
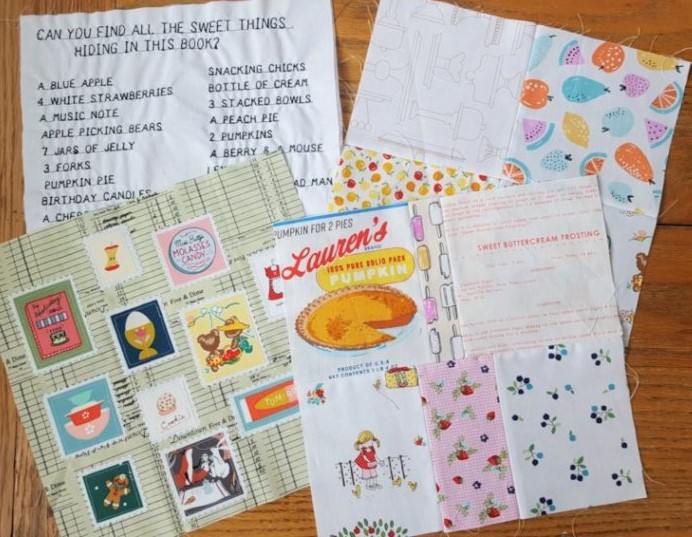
- To make the book a little more challenging for my older son, I made a look and find list with lots more things to find throughout the book. For this page, I cut a 10.5″ square of white fabric and fused a 10.5″ square of Heat n Bond Lite to the back. I then used my machine to stitch out a list of lots of things for him to find across the whole book, not just on one page!
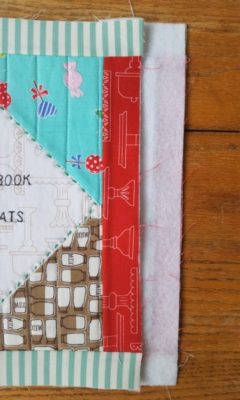
- Once all of your book pages are finished, cut your HeatnBond Craft Extra Firm fusible interfacing into 10″ squares. Fuse one square to the back of each book page, leaving a 1/4″ border of plain fabric around all edges.
- Arrange book pages as desired and sew them together in pairs.
- With right sides facing, sew two pairs of book pages together, leaving a large opening along the bottom for turning.
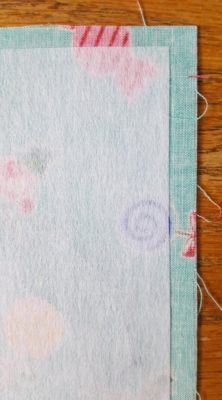
- Turn right side out, pin the seam allowance closed, and top-stitch close to the edge all the way around. Repeat for remaining book pages.
- To make the front and back covers, cut two 11.5″ squares from your fat quarters, or make them patchwork and scrappy if desired! Sew the 11.5″ squares together to make an 11.5″ x 22.5″ rectangle. Same goes for the inside cover pages as well.
- Cut an 11.5″ x 22.5″ rectangle from the fusible fleece and fuse it to the back of the book cover following package instructions. Quilt as desired.
- Sew the book cover and lining together, right sides facing, and leave a large opening on the bottom for turning. Turn right side out, press, and top-stitch close to the edge.
- Lay ALL of the book pages on the lining side of the book cover and center. Very slowly and with a wide stitch, sew in the seam of the pages to secure the book pages to the cover. See TIPS below:
- Use at least a 2.0 stitch length.
- Start sewing approximately 1″ from the top edge of the pages and stop sewing approximately 1″ from the bottom edge. This will prevent you from having to sew through the thick seams along the edges.
- Use the wheel on the side of your machine to manually lower and raise the needle for stitching to avoid breaking or bending your needle.
- Hand-stitch instead of machine sewing if desired. Use a tapestry needle and two strands of thread.
- Fold your book in half and admire your hard work!
- Then share it with some little people who can admire it too!
Susan
May 29, 2019 at 4:23 pm (5 years ago)That’s pretty nifty! Thanks for sharing such a wonderful idea. No one would guess you hadn’t been appliquéing for years.