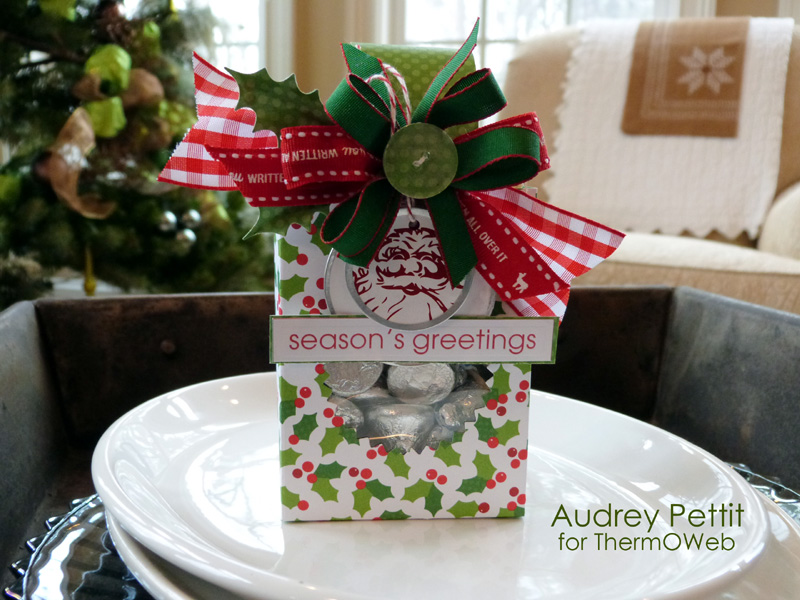


Season’s Greetings Treat Holder by Audrey Pettit
Supplies:
Therm O Web 1/2″ SuperTape
Therm O Web 1/8″ SuperTape
Therm O Web Zots Singles Adhesive Dots Medium
Therm O Web Zots Singles Adhesive Dots 3D
Patterned Paper: Doodlebug
Dies: Papertrey Ink, Prickley Pear Rubber Stamps
Cardstock Sticker: Little Yellow Bicycle
Metal-Rimmed Tags: Creative Imaginations
Button Studio Tool and Clear Button Cap: Epiphany Crafts
Trim: May Arts, Creative Imaginations, Craft Supply
Clear Transparency

1. Cut a 10.5 x 5.5 piece of patterned paper. Using a bone folder or scoring board score as follows:
A. Along the long side, score at 2″, 5″, 7″ and 10″
B. Along the short side, score at 1.5″
2. Crease along each score line and flatten back out. Turn the paper so that the long edge closest to the 1.5″ score line is at the bottom. Cut up each score line to that 1.5″ line. Remove the smallest notch at the far right corner.

3. Tape a circular die to the center of the first 3″ panel, and then run through your die cutting machine.

4. Trim a piece of clear transparency to fit behind the die cut opening. Apply SuperTape around the edges of the transparency and adhere to the back of the box pattern.

5. To assemble box, apply 1/2″ supertape to the front of the skinny tab. Remove liner, fold box, tuck tab to the inside of the folded box and adhere.
6. Apply Supertape to the bottom flaps, fold in and secure.
7. Cut a strip of patterned paper for the handle. Apply SuperTape to the ends and adhere at the top of the box.
8. Embellish handle with trims, buttons, tags, and a cardstock sticker sentiment.

Today is FREE SHIPPING day!
If you’ve been waiting for the perfect time to order some of our products…HeatnBond, iCraft, Zots and more…don’t miss out! Details are on our website!

