


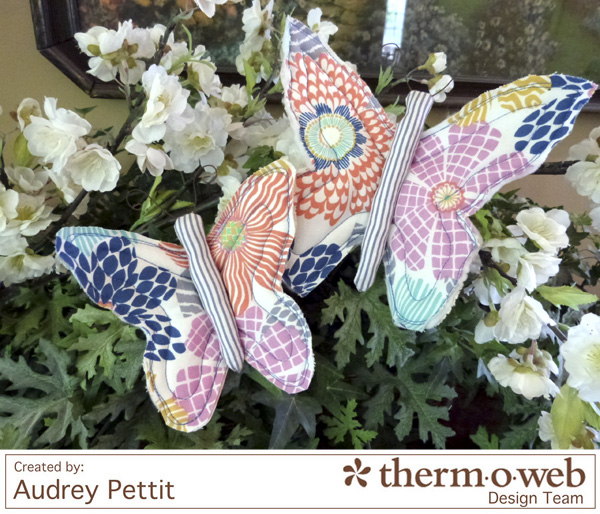
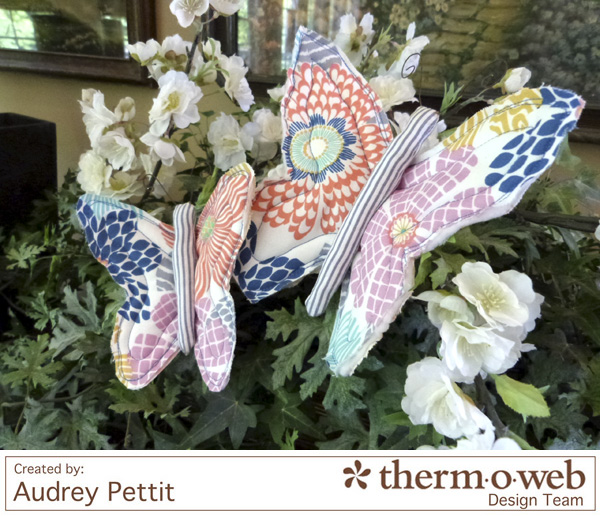
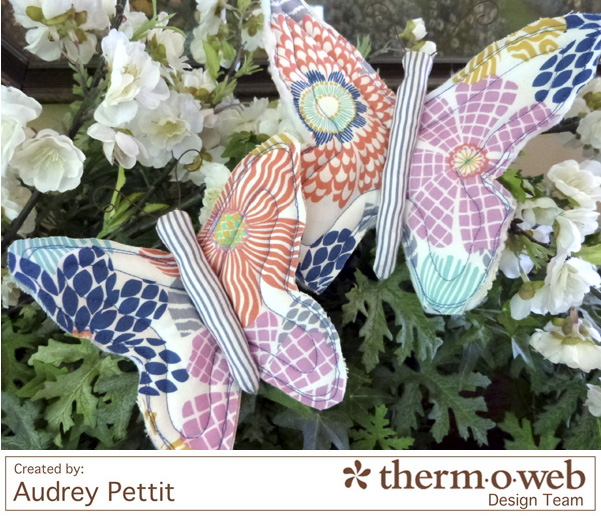
This week, the Therm O Web team is playing with our friends at Dear Stella Fabrics. And just in time for summer, I have some bright and happy quilted butterfly clips to share, made with Dear Stella’s beautiful June Bug collection and Therm O Web Stitch n’ Sew™ Fleece.
June Bug Butterfly Clips by Designer Audrey Pettit
Project Supplies:
Therm O Web Stitch n’ Sew™ High Loft Sew-In Fleece
Therm O Web Fabric Fuse™ Liquid Adhesive
Dear Stella June Bug Fabric Collection
Rusty Wire
Polyfill Fiber Stuffing
Small Clothespins or Clips
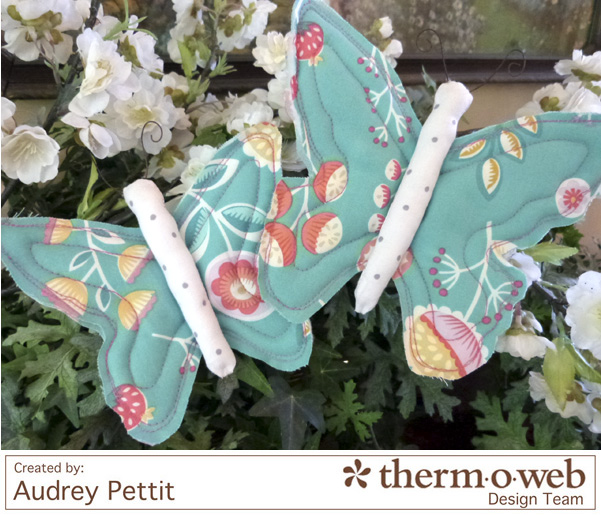
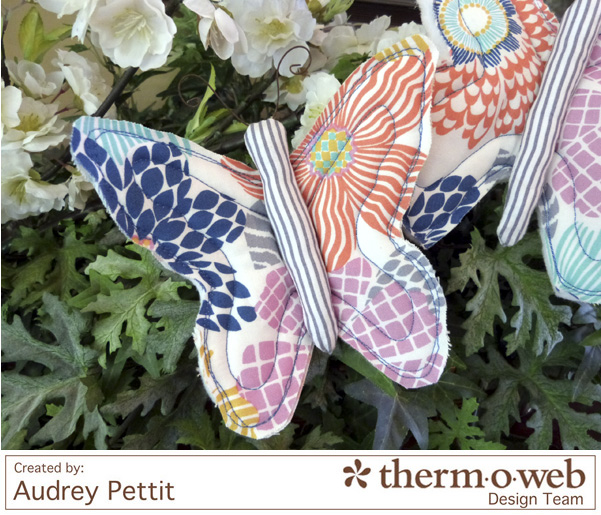
I love prim fabric creations and love adding them into my decor for the seasons and holidays. These bright, but rustic butterflies can easily be tucked into a bowl or basket, or by adding a little clip to the back, these cuties can do double duty as an ornament. I’ve clipped my butterflies to some silk greenery, and it makes me smile to see them perched in the flowers.
To me, the best thing about prims is that they don’t need to be perfect, which is wonderful for novice sewers, like me. As a matter of fact, the more rustic a prim is, the better. For these butterflies, I free-hand drew two sizes of patterns. A good tip is to fold a piece of scrap paper in half and draw half of the butterfly wings coming from the fold. Cut out the pattern, and open it up, and you will have perfectly symmetrical wings. You can also download any number of free patterns from a simple Google search on the internet.
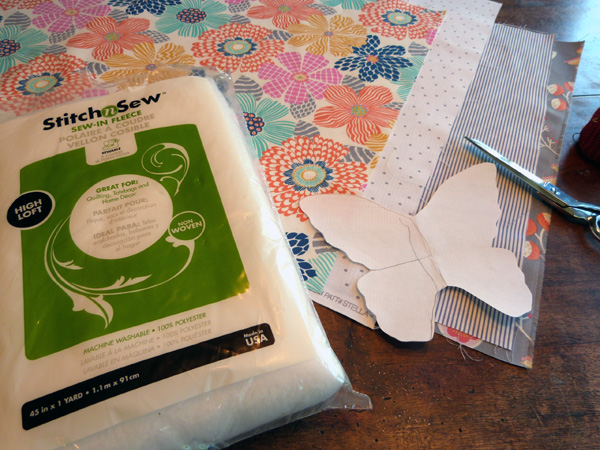
To begin, gather your fabrics, patterns, and Therm O Web High Loft Stitch n’ Sew Sew-In Fleece.
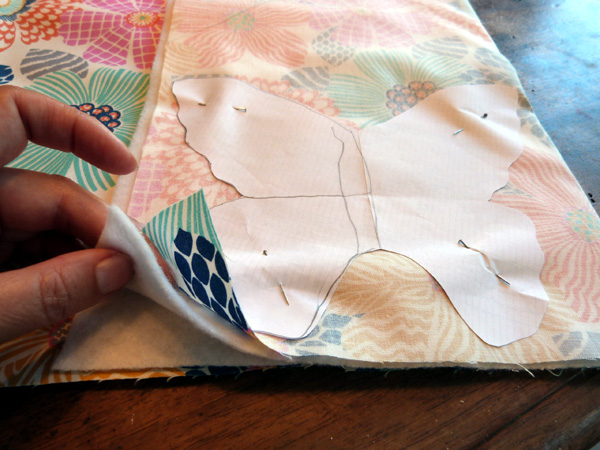
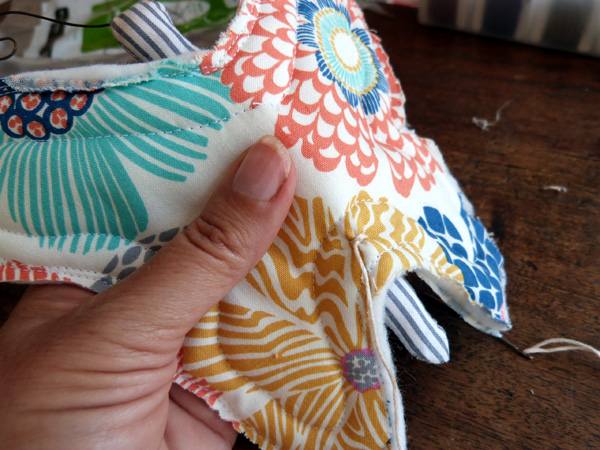
Fold your fabric in half, with right sides facing. Sandwich two layers of fleece in between the fabric. Pin the pattern to the top and cut out.
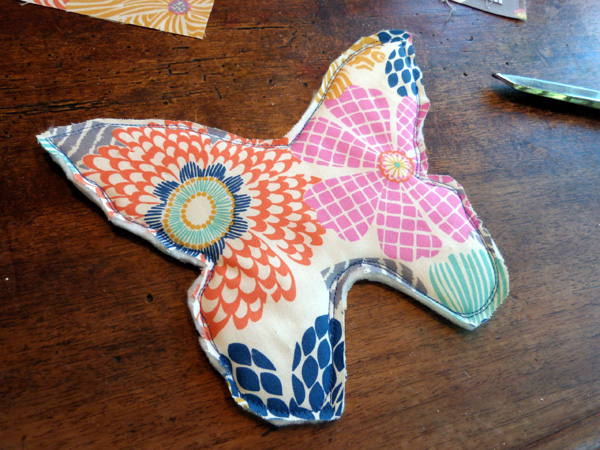
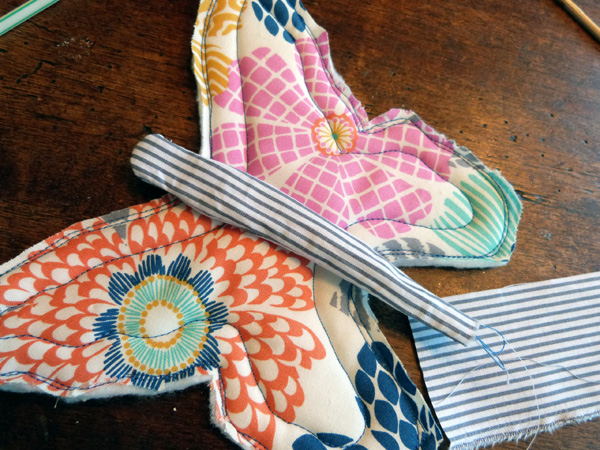
Remove the pattern. Lay the body pieces together, this time with the wrong sides facing. Sandwich both layers of fleece between the body pieces. Pin, then machine stitch around the edge of the butterfly. I used a colorful matching thread, and went around the edges twice for a fun whimsical look. Trim the fabric edges to match, if necessary.
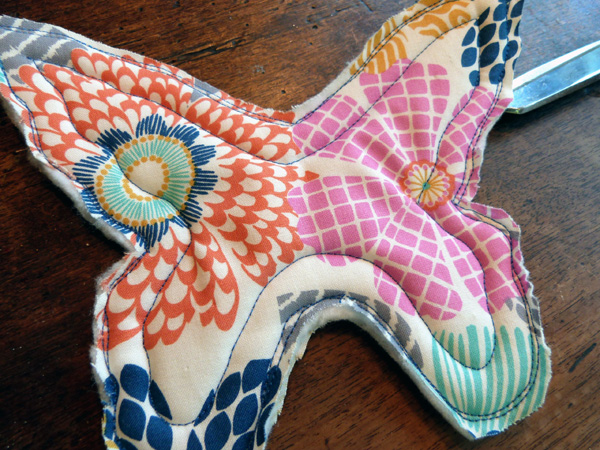
Stitch one more time around the inside of the butterfly shape, for a pretty top-stitched, quilted detail.
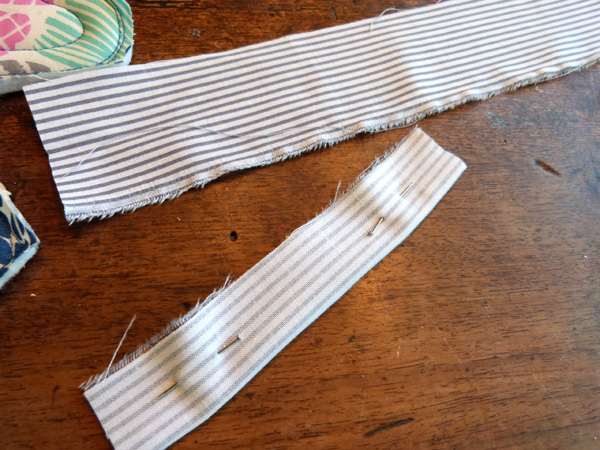
For the body, cut a long strip of fabric that is appoximately 2″ wide. Trim a length that is long enough to extend off the top and bottom of the wings. Fold the fabric in half, lengthwise, with right sides facing, and pin in place. Stitch along one end and the open side in sort of an “hourglass” shape, so that there is a slightly rounded head and an indentation right below the head. Leave the bottom of the tube open for turning.
Turn the body right side out. A good tip is to insert a straw into the tube, all the way to the stitched top. From the outside, poke a thin wooden skewer into the end of the straw, pushing the fabric down into the straw. Continue pushing until the fabric is turned.
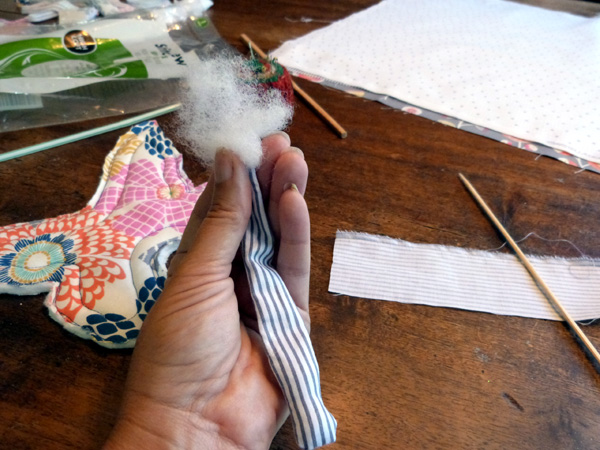
Stuff the body with polyfill fiber. Stitch the end closed, or glue the end shut with Fabric Fuse™ liquid adhesive.
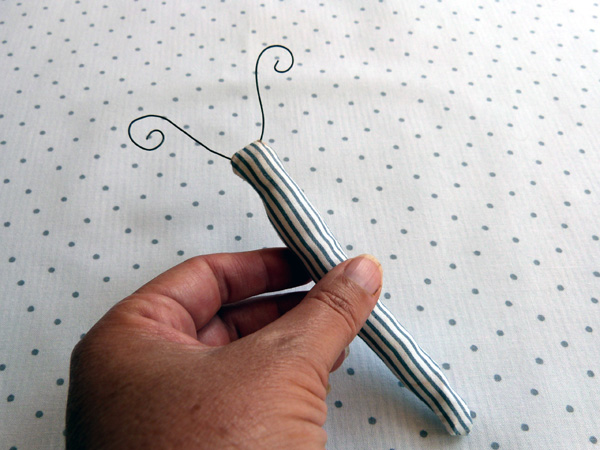
Poke rusty wire through the top of the head, and curl the ends.
Lightly tack the body to the wings by making a few stitches from the back. Pull the stitches tight to create a bit of lift in the wings. Then stitch a small clothespin or clip to the back for hanging.
Enjoy!