


Time to think about holiday cards and what to make and send! I have long adored this Joyous Holiday Stamp Set from Reverse Confetti and thought it would make the sweetest holiday card for a friend this season!
Joyous Holiday Card
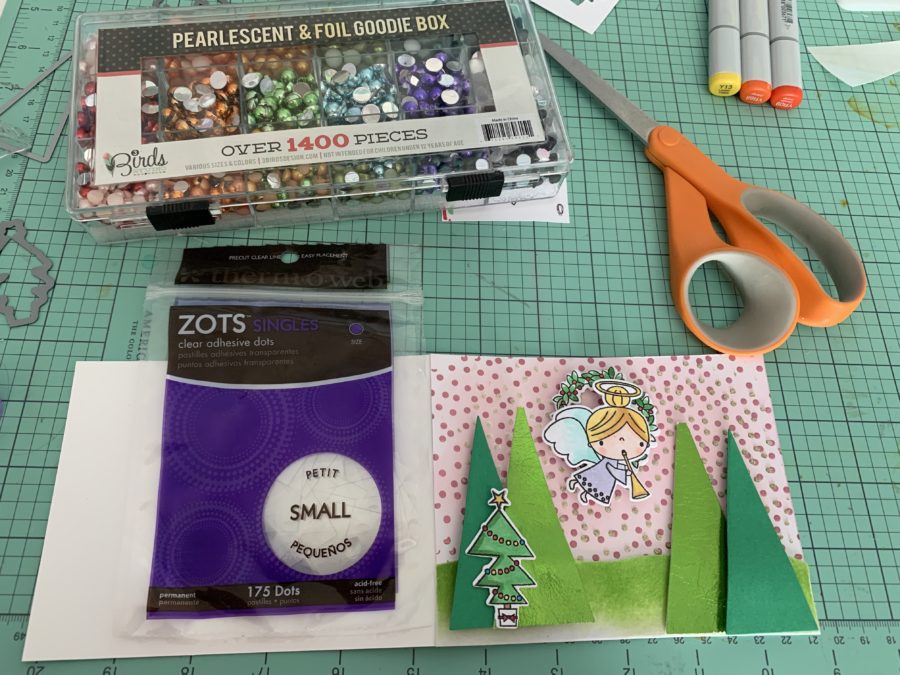
Let’s gather our supplies first…
Deco Foil Fairytale Enchanted Rose Transfer Sheets
Deco Foil DUO Transfer Gel
Gina K. Designs Glitz Glitter Gel – Gold
Deco Foil Flock Transfer Sheets – White Latte
Pixie Tape
Stencil Pal
Zots Small Adhesive Dots
3D Foam Squares
Gina K. Designs Adhesive Dot Runner
Gina K. Designs Premium White Cardstock
Echo Park Paper Stencil
Green Cardstock
Gems or Sequins
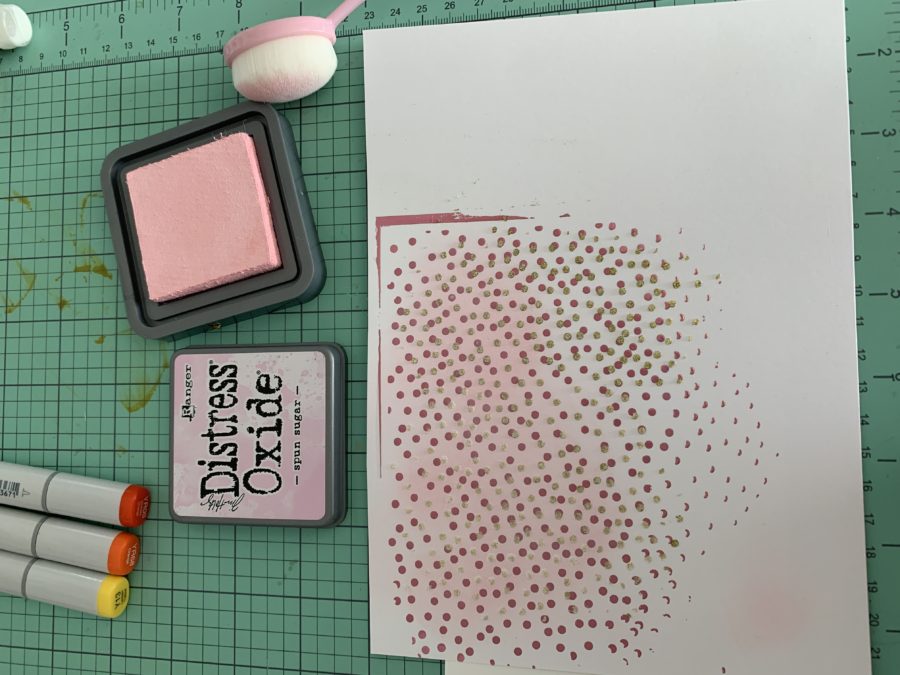
Tim Holtz Distress Oxide Ink – Spun Sugar
Reverse Confetti Joyous Holiday Stamp Set & Confetti Cut Die Set
Now let’s get started…
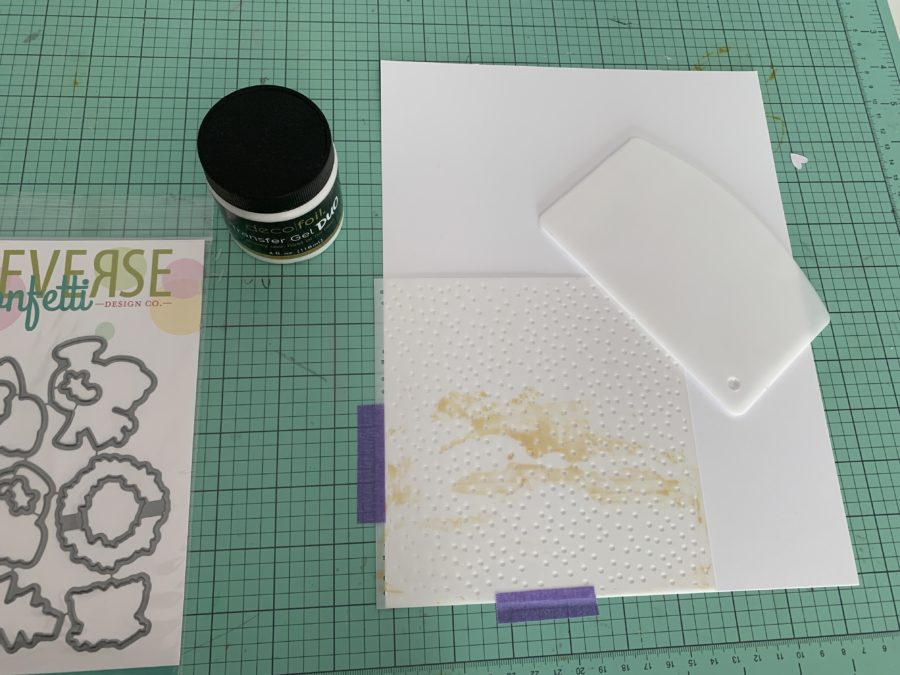
Purple Tape to Hold Your Stencil
First, use Purple Tape or your Pixie Spray to hold the stencil in place over a piece of white cardstock.
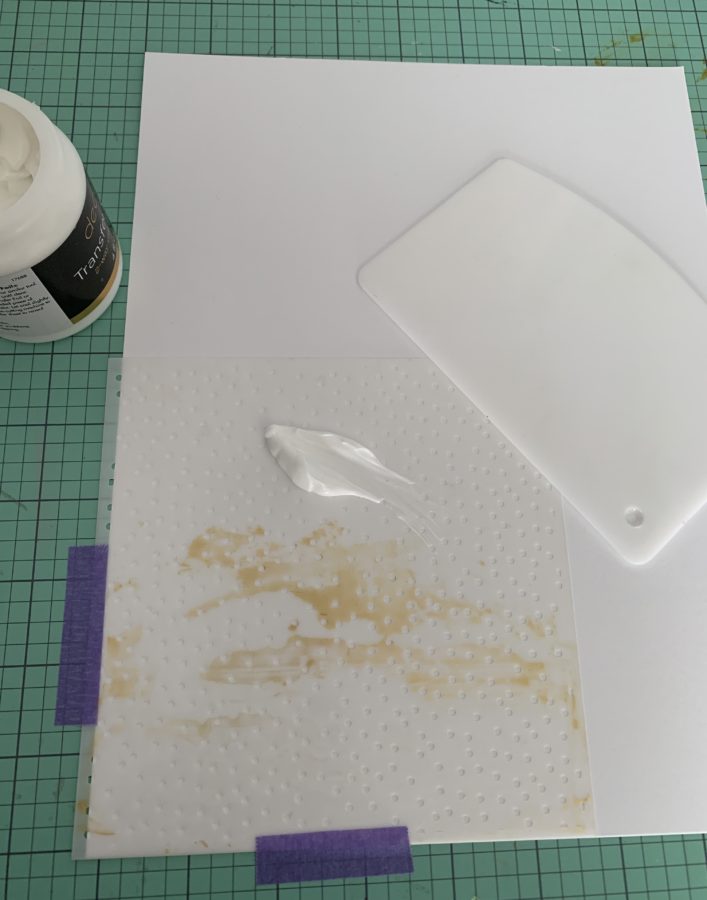
Apply Deco Foil DUO Transfer Gel
Apply a light coat of our Deco Foil DUO Transfer Gel with the wide side of our Stencil Pal. It’s a must-have tool on your craft table! Set aside to dry. Wipe off your tools and stencils.
Once dry take a piece of the Enchanted Rose Foil, place dull silver side down, color side up, and run through a manual die cutting machine for pressure OR through your hot laminator to transfer the foil onto the DUO.
Then here’s the fun part…redo those same steps…lay the stencil down onto the cardstock only this time OFFSET the stencil so it’s not sitting in the same spots. Then apply the Glitz Glitter Gel over the stencil to create a unique background of foil and Glitz. (my apologies as I accidentally deleted this image).
Ink the Background
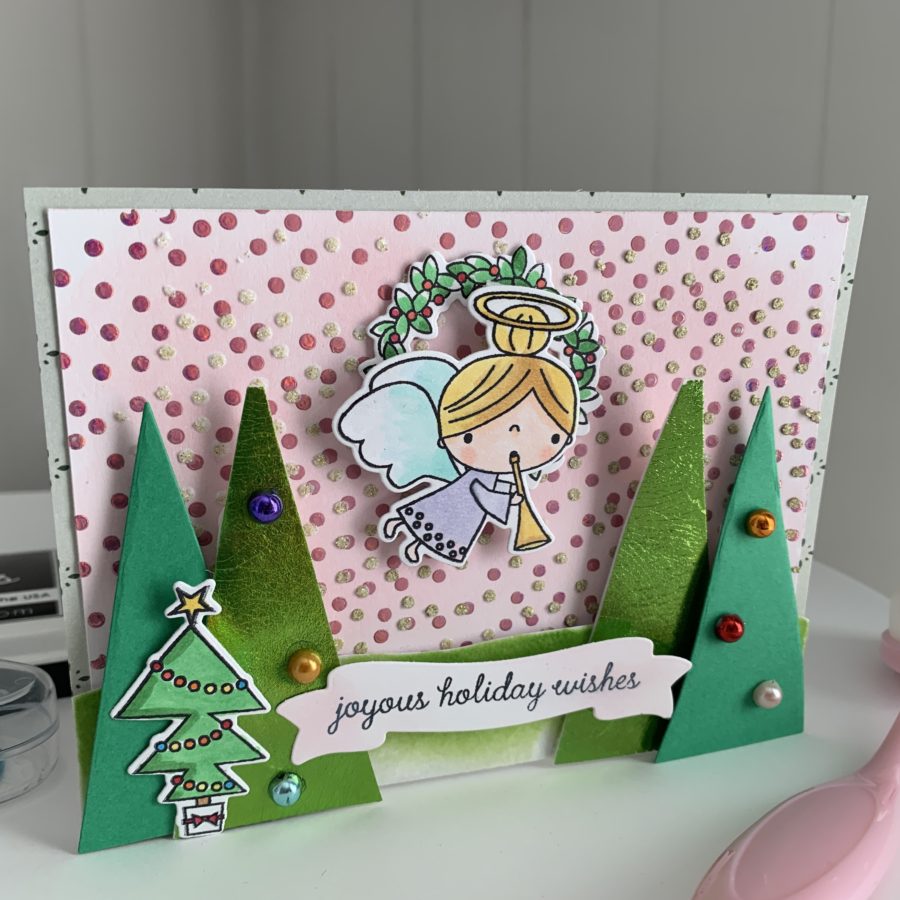
Once you’ve foiled and applied the Glitz…add a light bit of ink over the images for a soft, pretty pink background.
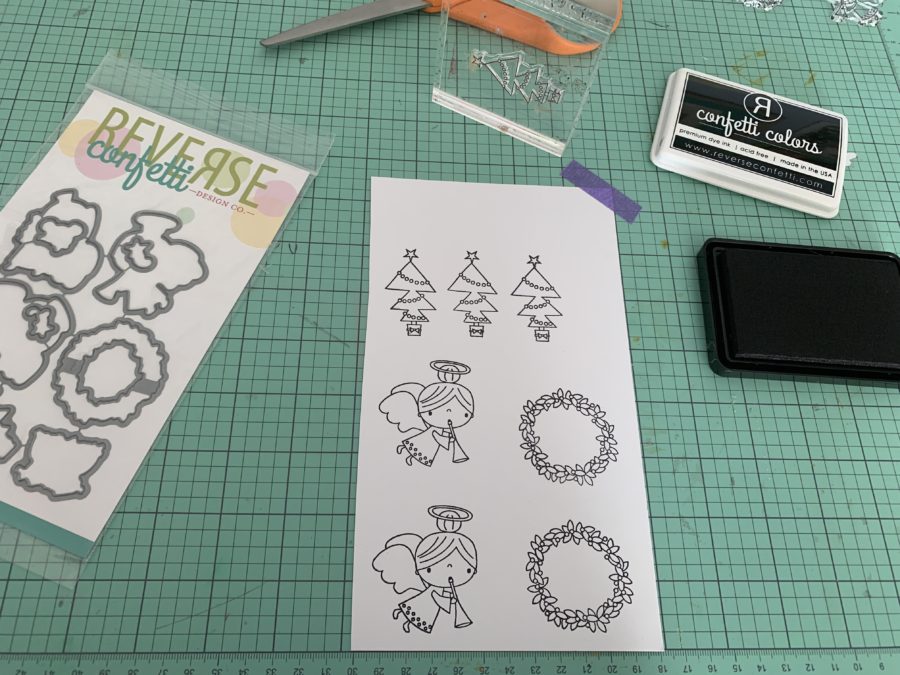
Next, it’s time to stamp! Stamp a few images out in the Reverse Confetti Confetti Colors Midnight ink. I like to stamp a few in case I want to layer an image and also in case I don’t like the colors on my first go. Or perhaps I make a mistake. Because let’s face it…that happens.
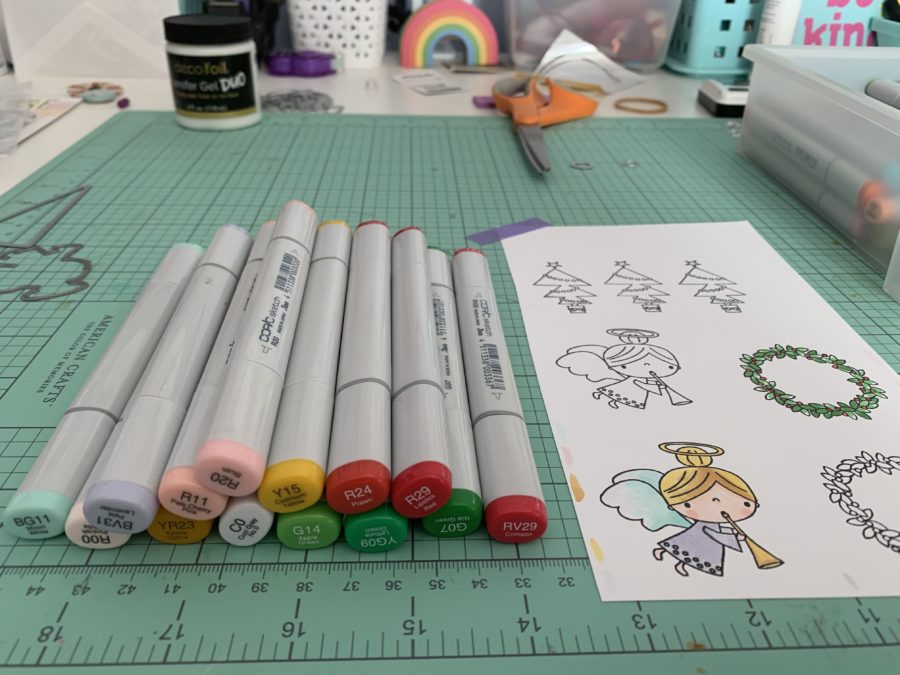
Now the fun and relaxing part…coloring the images. I am not a professional Copic colorer and just do my thing as honestly…that’s to me how you should work. No rules…do you!
After coloring, I used the coordinating Confetti Cuts to die cut out my images. I always use our Purple Tape to keep things in place while doing so.
Create some Foil Trees
I then use our Lily Pad Green Foil and applied it to our Deco Foil Foam Sheets. Hand cut a triangle tree twice. And then did the same with cardstock to make four trees. I hand cut a piece of the white flock and lightly inked it for the green grass look I was going for to coordinate with the foiled trees.
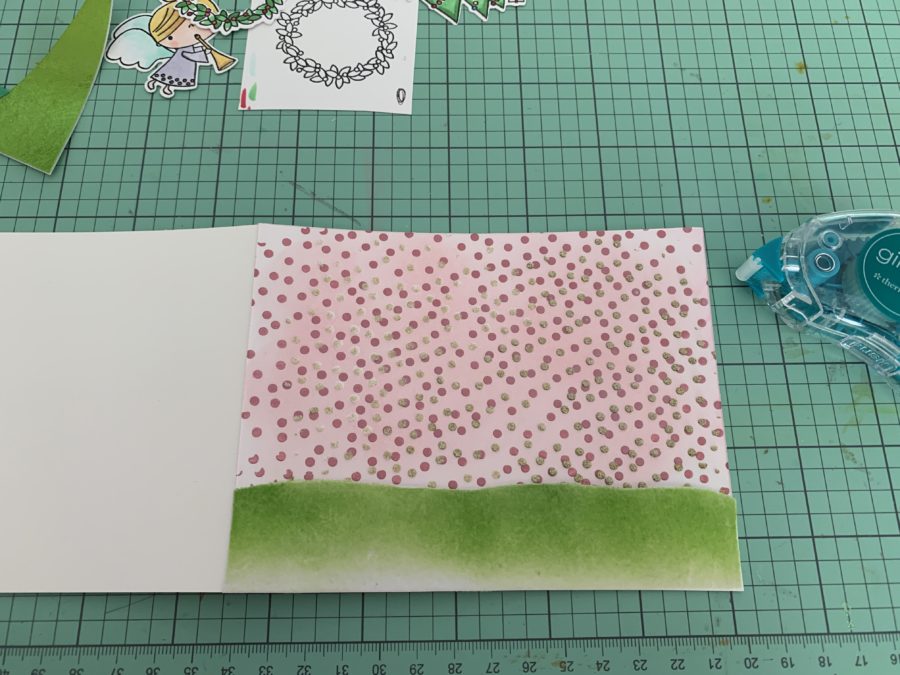
I used the Gina K. Designs Adhesive Dot Runner to adhere the foil and Glitz background to my card and then the white flock grass strip.
I added the trees to the base using foam squares on the top trees to lift off the background. I adhere the stamped tree to the tree group. Then used the runner to adhere the stamped wreath. I added Foam Squares to the back of the stamped angel before placing her onto the card.

I used Small Zots (you could also use our Ultra Bond Liquid Adhesive) to adhere gems to the trees and last the stamped sentiment over the trees.
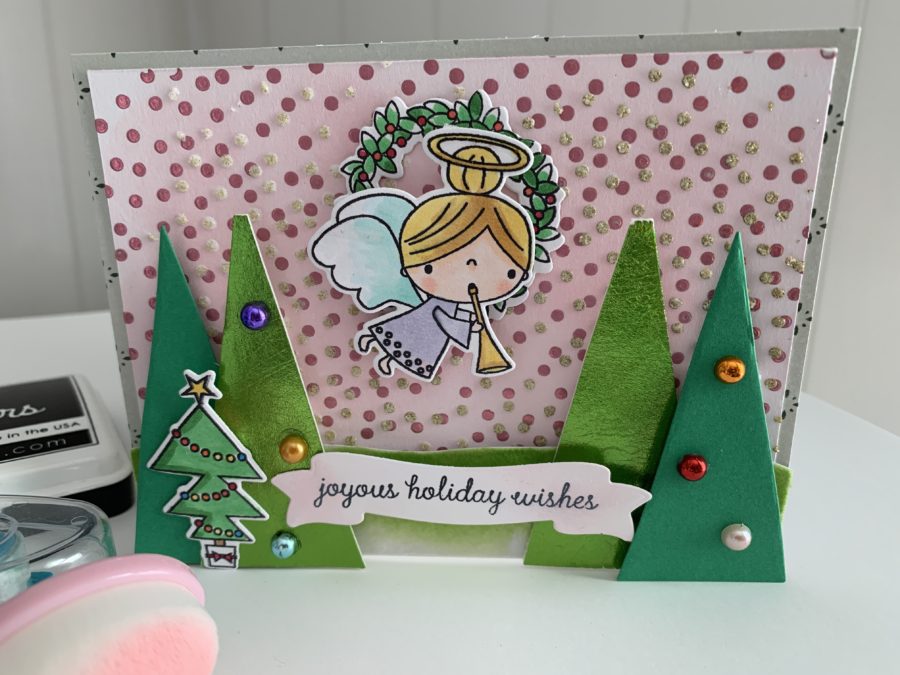
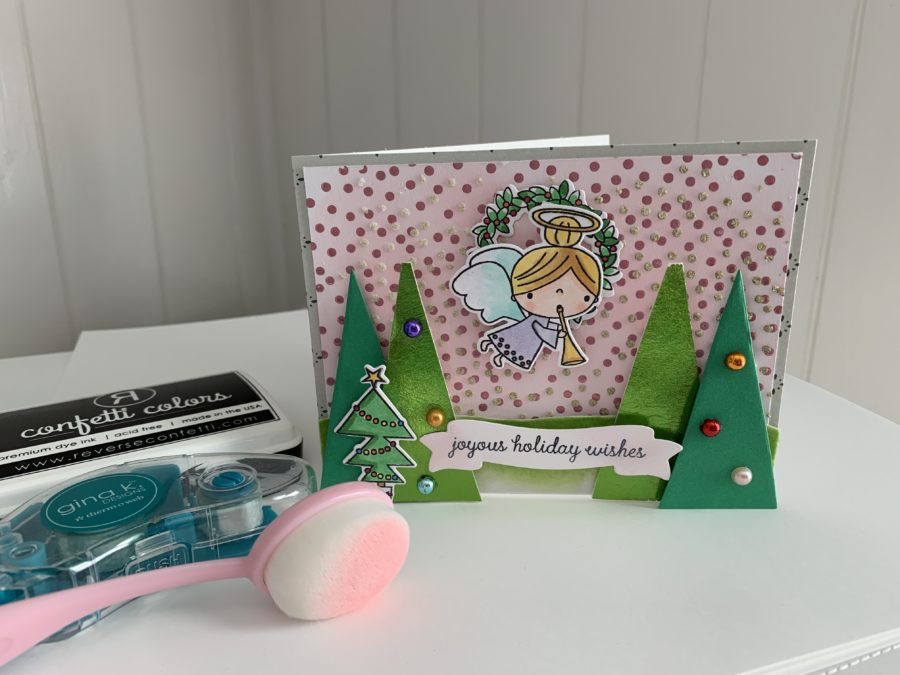
I hope you’ve enjoyed this sweet holiday card featuring Reverse Confetti and ThermOWeb!
Denise Bryant
November 11, 2020 at 3:30 pm (3 years ago)Really cute card! I love the sweet angel and the trees! The stenciled background looks great!