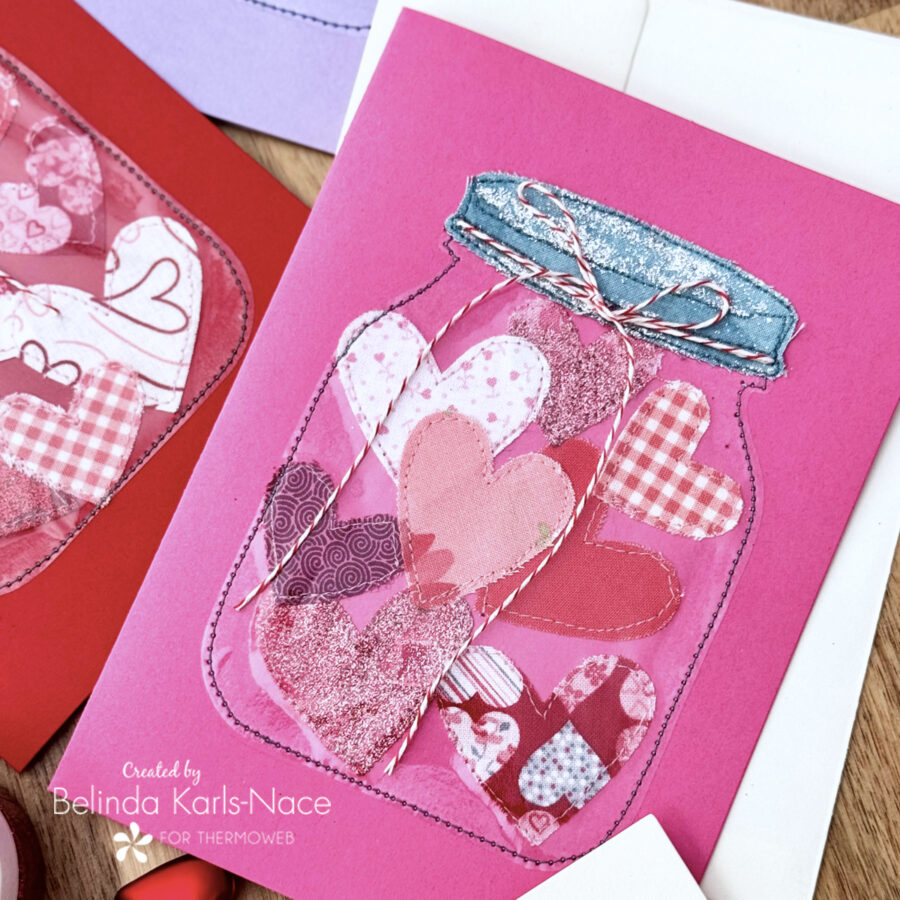
Jar of Hearts Stitched Valentine Card
Greetings friends! It’s Belinda Karls-Nace from Blue Ribbon Designs, here today with a brand new project tutorial featuring HeatnBond Sparkle Paste and HeatnBond Iron-On Vinyl. Today, I am excited to share my “Jar of Hearts Stitched Valentine Card” with you.
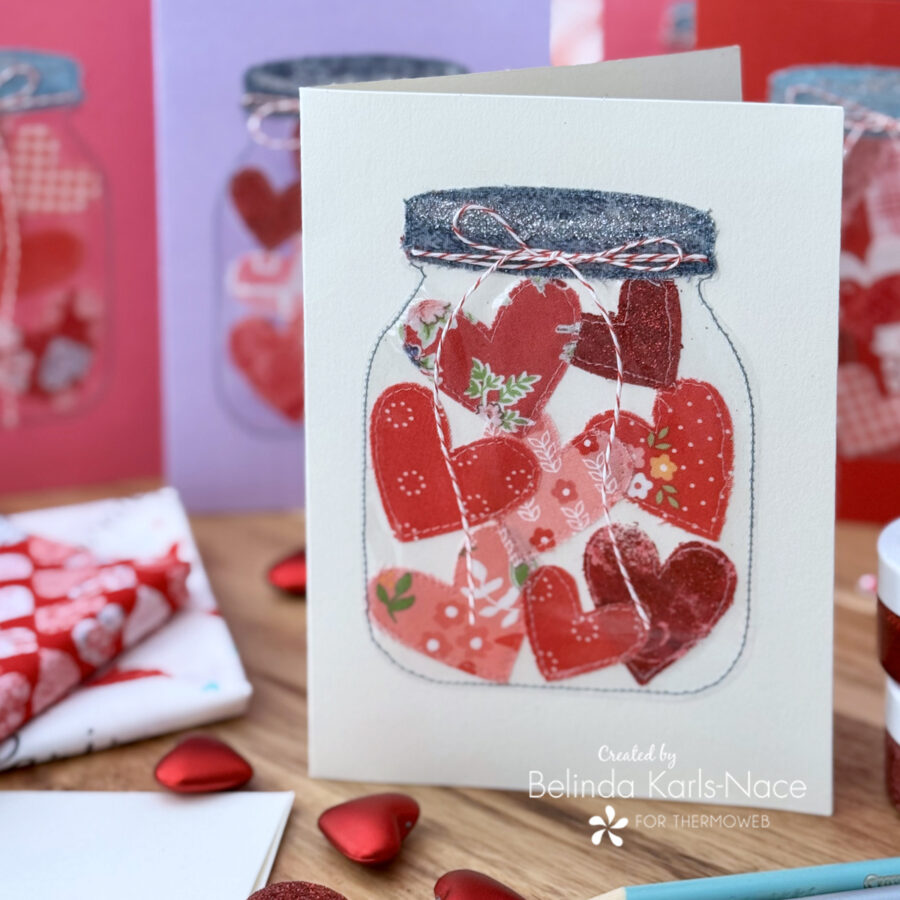
What a fun project I have for you today! Have you ever stitched a greeting card using your sewing machine? Recently, I stitched up a few for Christmas and it prompted the idea to make some valentine cards. Right away, I knew I wanted to use the new HeatnBond Sparkle Paste to add some glittery goodness, then I was inspired to add some HeatnBond Vinyl to the mix. I worked up a plan to create jars of hearts and I was thrilled when they worked out exactly as I imagined. This is a great project for scraps of fabric and is easily adaptable and embellished. I will give you some additional creative ideas as we work through the tutorial.
Let’s get started! Simply gather the materials/supplies listed below, then download the pattern with PDF templates.
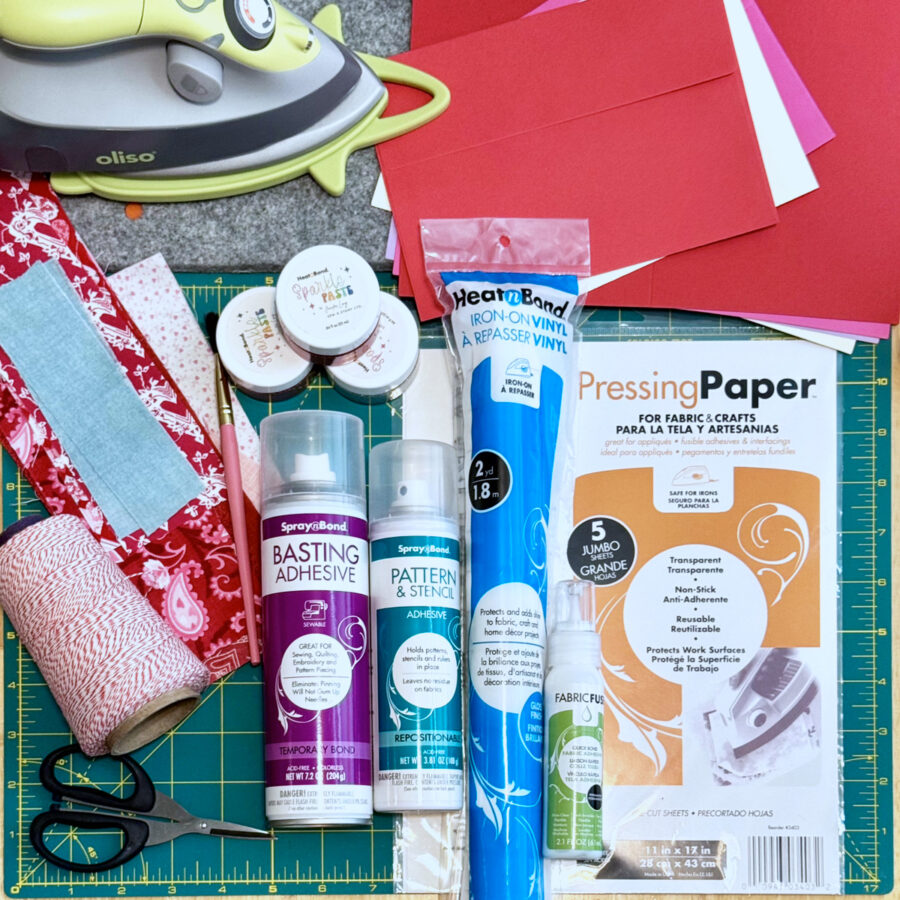
What you need for each card:
- HeatnBond Sparkle Paste by Jennifer Long of Sew a Story (use your favorite colors!)
- 19154 Fire Truck
- 19153 Sugar
- 19148 Silver
- HeatnBond Iron-On Vinyl, Gloss Finish
- 4 ¼” x 5”
- HeatnBond Pressing Paper Fabric and Craft Sheets
- 1 Sheet
- SpraynBond Basting Adhesive Fabric Spray
- SpraynBond Pattern & Stencil Spray
- HeatnBond Fabric Fuse Liquid Adhesive
- Cotton Fabrics
- Scraps for hearts and jar lid
- Blank Card with Envelope – 5” x 7”
- Baker’s Twine
- 18”
- Paint Brush
- Oliso Iron
- Olfa Cutting Tools (cutting mat, rotary cutter)
- Sewing Machine
- Basic Sewing Supplies/Tools (small sharp scissors, sewing thread, pencil, etc.)
How to make a Jar of Hearts Valentine Card (5” x 7”)
1. Download and print the Jar of Hearts Stitched Valentine Card PDF.
Jar of Hearts Stitched Valentine Card – A Project for the Therm O Web Blog
- Print actual size – do NOT “fit to page” or “shrink to fit.”
- Print on regular printer paper.
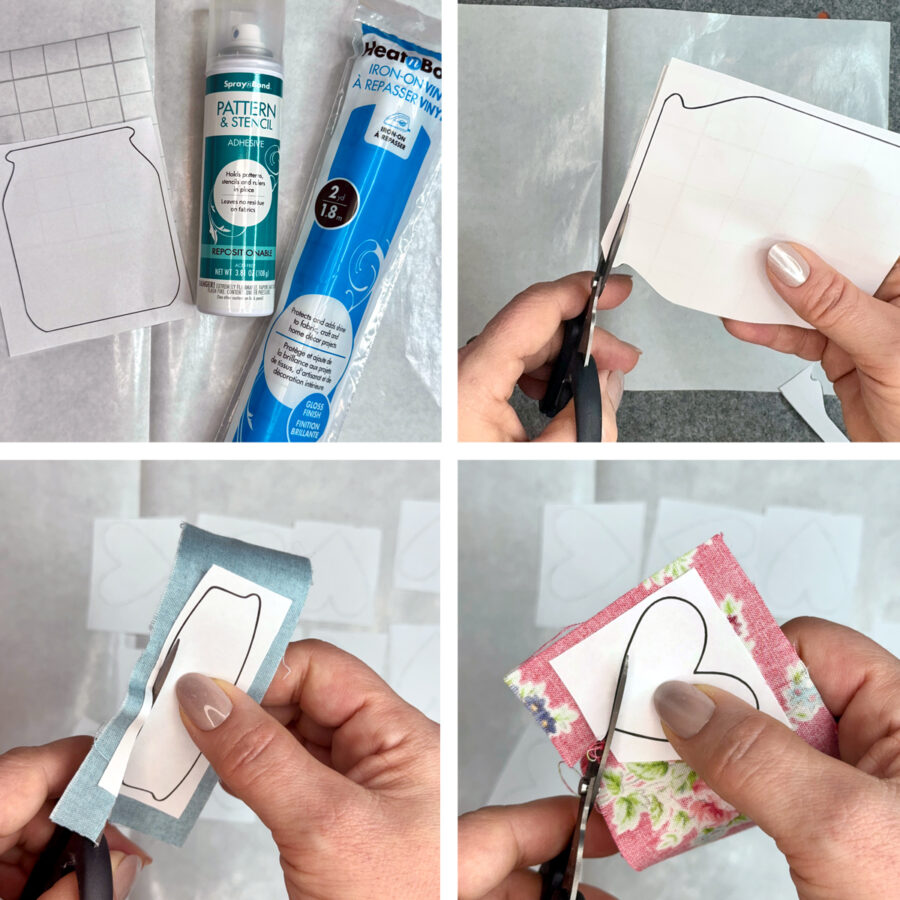
2. Using the templates provided and SpraynBond Pattern & Stencil Spray, cut out shapes.
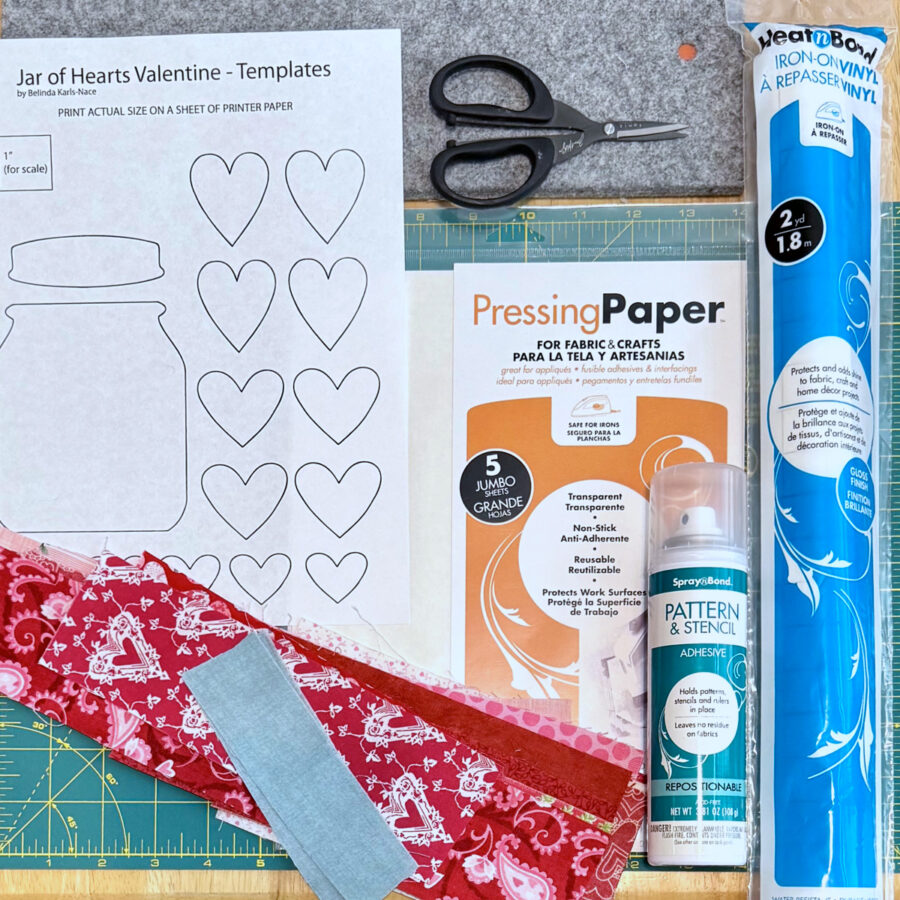
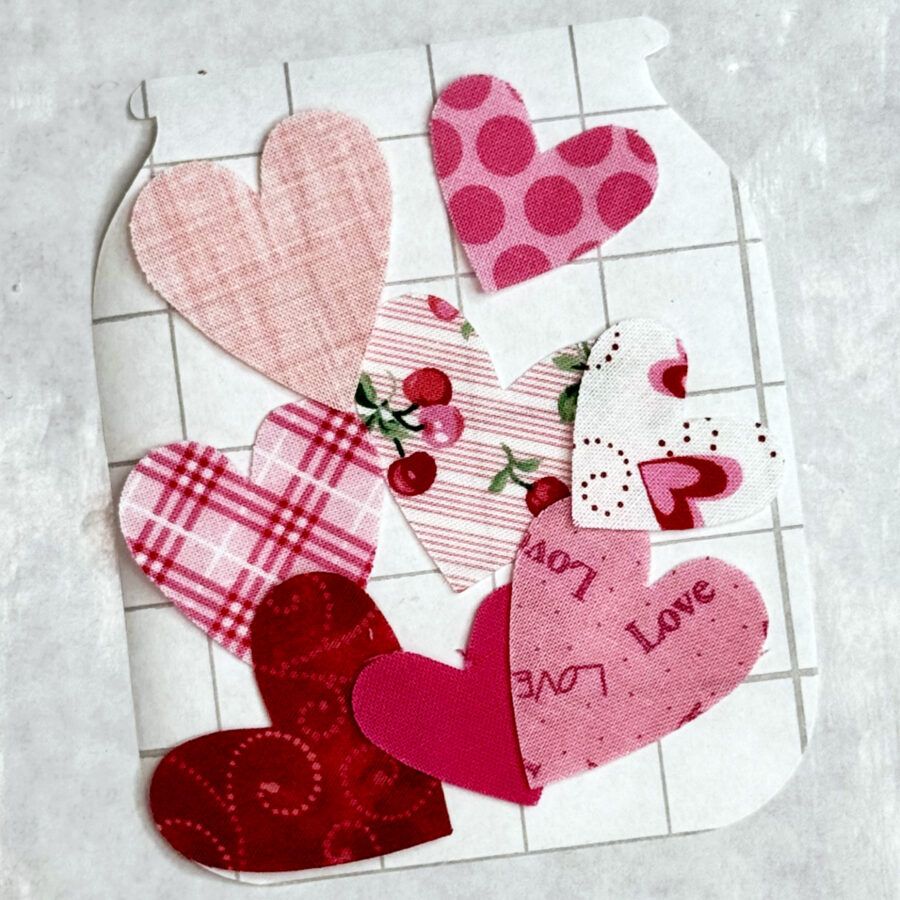
- Loosely cut apart paper templates and apply to backs of fabric/vinyl with SpraynBond Pattern & Stencil Spray. Cut or trim the piece(s) on the solid lines printed on the paper to create the desired shape(s). Cut out the hearts and jar lid from scraps of fabric. Cut an assortment of hearts; three shapes and sizes are provided. Cut the jar shape from HeatnBond Iron-On Vinyl; model uses Gloss Finish.
- Protect work surface with HeatnBond Pressing Paper.
- Shake SpraynBond Pattern & Stencil Spray well. Hold can upright, 12 inches from pattern or stencil.
- Press spray pad button and apply a light coating of adhesive using a sweeping motion.
- Let dry 1 minute.
- Press pattern or stencil to back of fabric/paper side of vinyl, repositioning as needed. (If tack is too light, repeat step 1.)
- Cut or trim the piece(s) on the solid lines printed on the paper to create the desired shape(s).
- Before storing can, hold upside down and press spray pad button for a short burst to clear nozzle
3. Add Sparkle Paste to assorted hearts and jar lid.
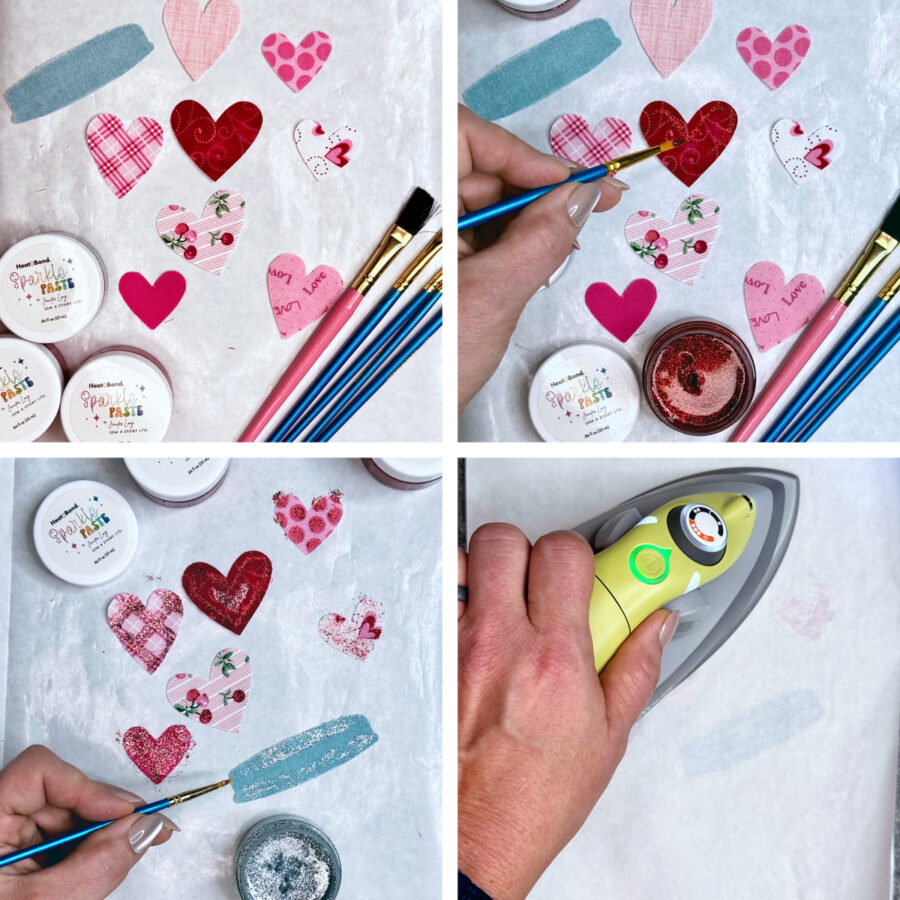
- Apply HeatnBond Fire Truck and/or Sugar Sparkle Paste to assorted hearts. I applied it to several hearts for each jar. Apply HeatnBond Silver Sparkle Paste to the jar lid. I used a small paint brush to apply. Play with the sparkle paste to get your desired results.
- Protect work surface with HeatnBond Pressing Paper. PRO TIP: Work on one side of the pressing paper – then cover with the other side when pressing.
- Apply the desired amount of Sparkle Paste to fabrics with a brush or palette knife. Wash the tools immediately afterward in warm, soapy water.
- Let dry 1 hour.
- Preheat dry iron to cotton setting (high heat), no steam. Cover design with HeatnBond Pressing Paper and press with medium firm pressure for 60 seconds.
- Let Sparkle Paste cure for 24 hours. Sparkle Paste will now be permanent and machine washable. I omitted this step, as the card will not be washed and can cure after assembly.
- The durable glittery finish won’t flake off and will stand up to frequent use and handling.
4. Add hearts to card.
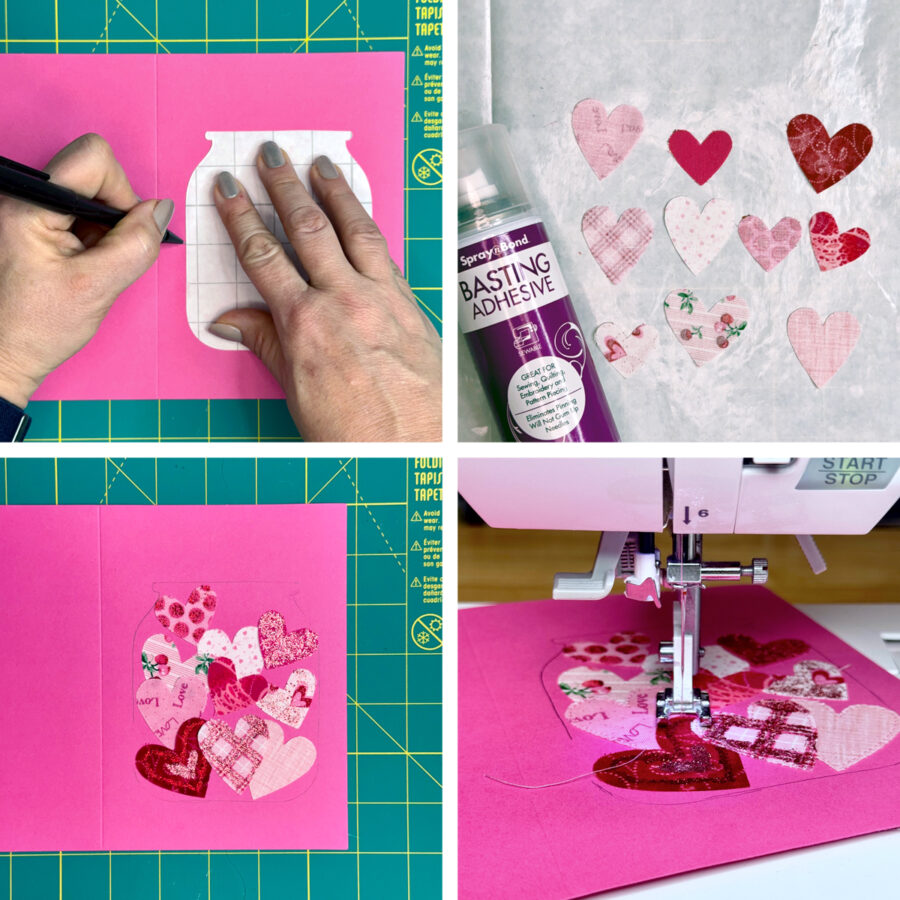
- Lightly trace around the vinyl jar on the front of the card with a pencil. This will give you a guideline of where to place the hearts.
- Apply SpraynBond Basting Spray Adhesive to the backs of the hearts to hold them in place for stitching.
- Protect work surface with HeatnBond Pressing Paper.
- Shake SpraynBond Basting Spray Adhesive well.
- Hold can upright, 12 inches from fabric shapes. Press spray pad button and apply a light coating of adhesive using a sweeping motion.
- Wait 30 seconds, then place the hearts on the card inside the jar outline. Reposition as needed.
- Using a sewing machine and a universal needle, stitch the hearts in place with your favorite stitch and coordinating sewing thread. I used a straight stitch. PRO TIP: Stitching through the card will dull the needle, so a used needle is fine – no need to use a brand new needle.
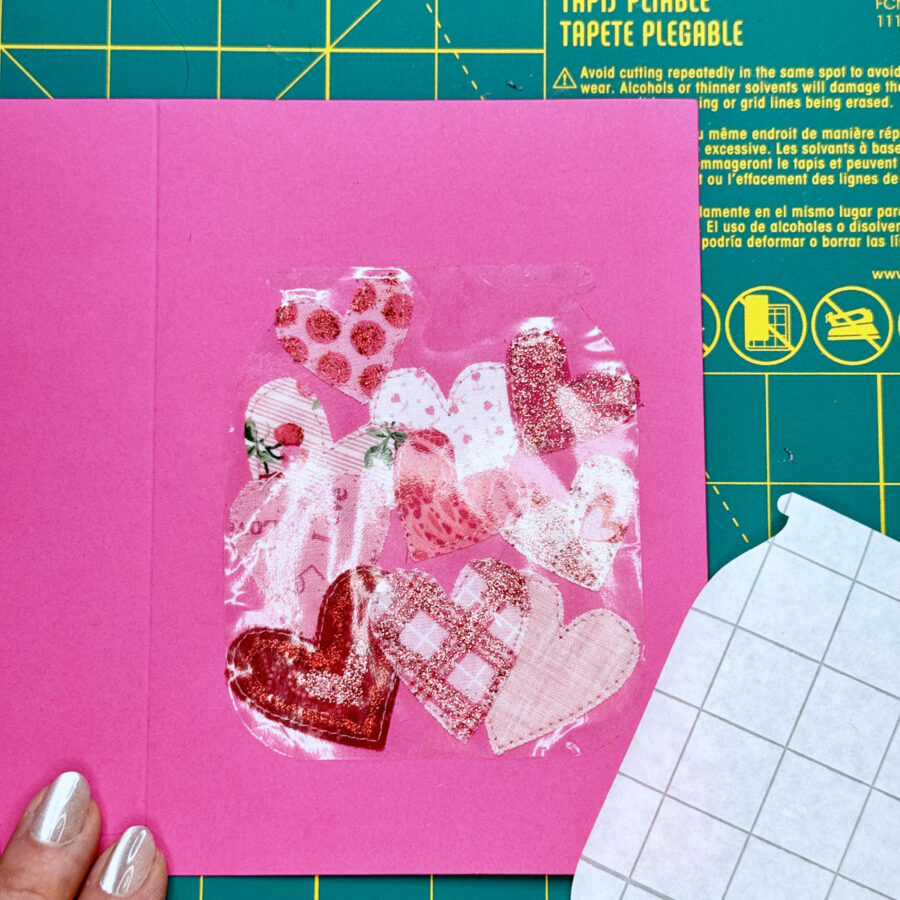
5. Apply the vinyl jar.
- Apply the vinyl jar over the hearts and stitch in place.
- Erase the pencil line beforehand, if necessary.
- Remove paper from back of HeatnBond Vinyl and place where you traced the line. The back side (paper side) goes against the card/fabric hearts.
- DO NOT iron the vinyl in place – it will lightly adhere to the card – reposition if necessary.
- Using a sewing machine and a universal needle, stitch the jar in place with your favorite stitch. I used a straight stitch and the same color of sewing thread that I will use for the lid.
6. Apply the jar lid.
- Apply SpraynBond Basting Spray Adhesive the back of the jar lid to hold it in place for stitching.
- Use the same directions found in Step 4, B.
- Using a sewing machine and a universal needle, stitch the jar lid in place with your favorite stitch and coordinating sewing thread. I used a straight stitch. I stitched several curved lines on the lid to give it dimension.

7. Optional: Add any personalization, if desired.
- If your sewing machine can sew letters, you can stitch words on the front of your card.
- You may choose to stamp or print a sentiment.
- A tag could be added to the baker’s twine.
- Here are some phrases you could use:
- Full of Love
- Filled with Love
- Lots of Love
- Love Sweet Love
- Sending Love
- XOXO
- Love You
8. Add the baker’s twine tie.
- Apply baker’s twine to the rim of the jar lid with HeatnBond Fabric Fuse Liquid Adhesive or stitch the twine in place.
- Apply a very thin line or dots of glue on the rim of the jar lid.
- Using your finger or paintbrush spread glue into a thin, even layer.
- Press baker’s twine with light pressure into place. If needed hold or secure in place until glue is set. I centered the baker’s twine on the rim of the lid, leaving long ends on each side. Then brought the ends to the center. Once dry, I tied a bow and trimmed the ends.
- For best results, let dry 4-6 hours
9. Finish card.
- Secure a piece of cardstock on the back of the cover to hide the stitching, if desired. I did not do this, as I liked the look of the back.
- Write a note to your valentine and send or deliver your masterpiece.
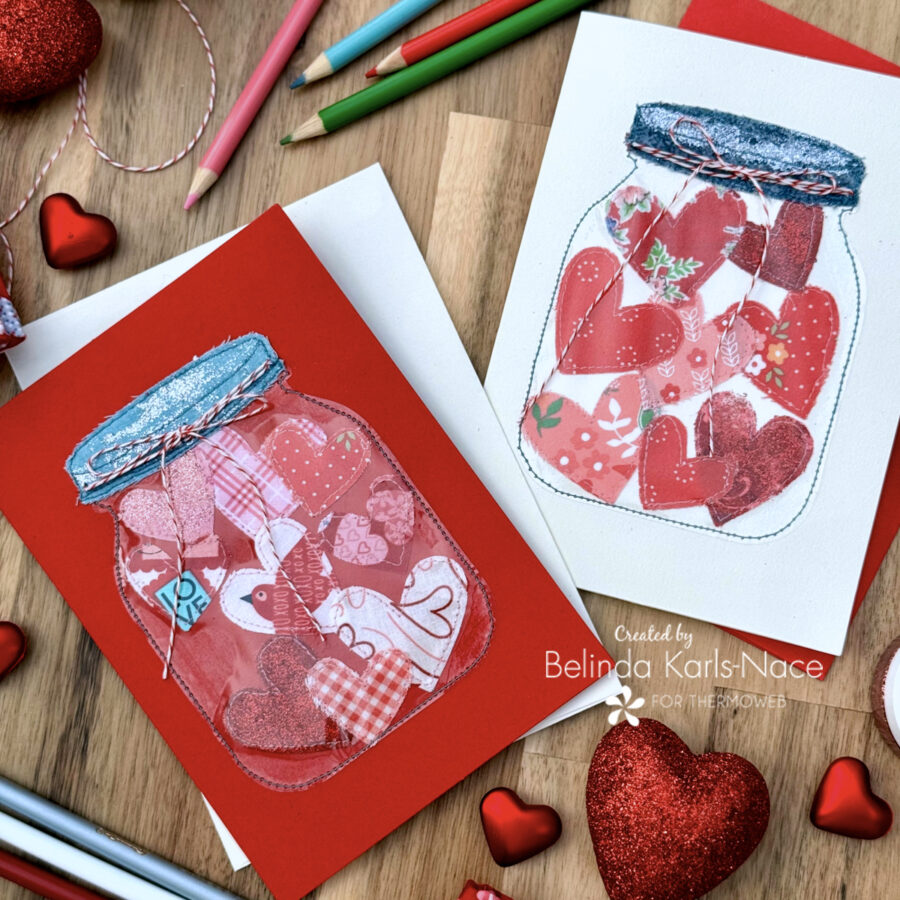
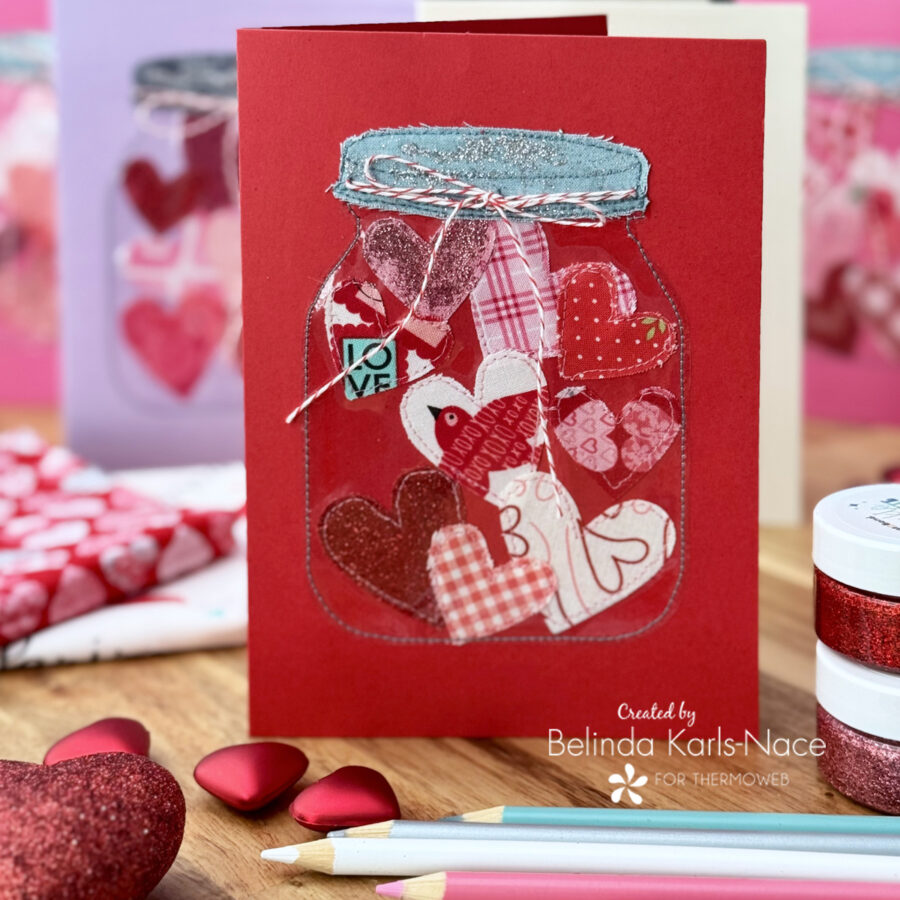
Your Jar of Hearts Stitched Valentine Card is complete. Doesn’t the HeatnBond Sparkle Paste add the perfect glimmer and shine to the hearts and lid?!…and the glossy vinyl gives the look of a glass jar.
Thank you for joining me today for my Therm O Web blog tutorial. I hope you will brighten the day of someone special by creating a one of a kind card. To see more of my projects and patterns, stop by my blog, website, and/or Instagram – I would love to visit with you and see what you create!
