


When I was little we had a neighbor that would hang candy canes on her Christmas tree. When we’d go over to visit she’d let us take a candy cane from the tree. That is where the idea for this banner came from. I only used one cotton fabric but it’d be fab in multiple prints as well. Let’s get started.
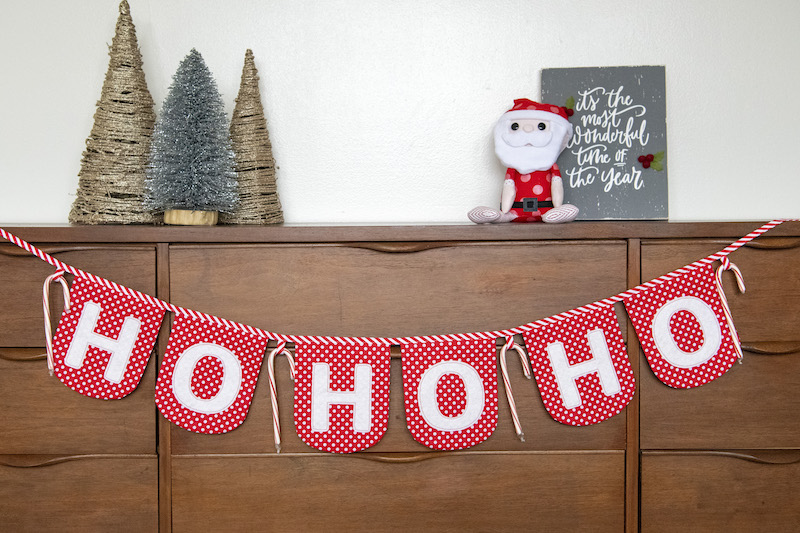
Ho Ho Ho Candy Candy Fabric Banner
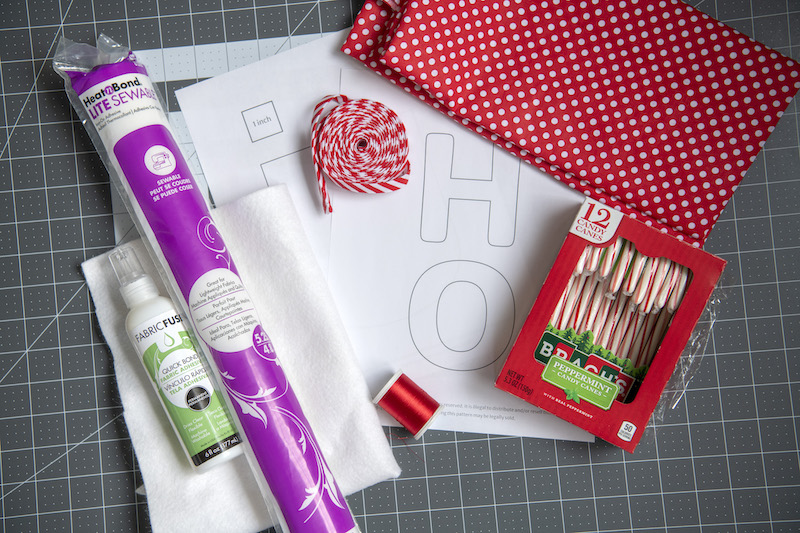
SUPPLIES:
-
- Pattern pieces (download here)
- Half a yard of cotton fabric
- One package double fold bias tape
- Wool Felt
- HeatnBond Fabric Fuse Liquid Adhesive
- HeatnBond Lite Iron-on Adhesive
- Coordinating thread
- Candy canes
- Pen
- Ruler
- Straight pins
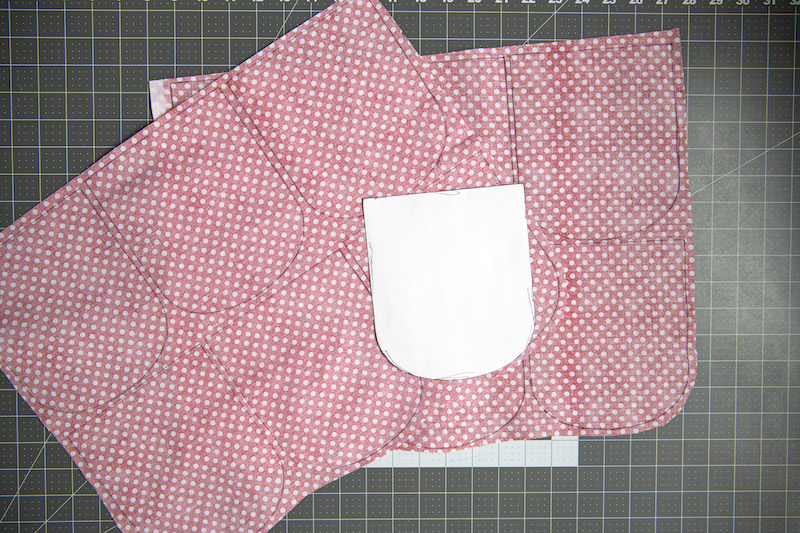
First we need to iron our fabric. Then take the flag pattern piece and trace 12 flags on the back of your cotton fabric. Cut them out.
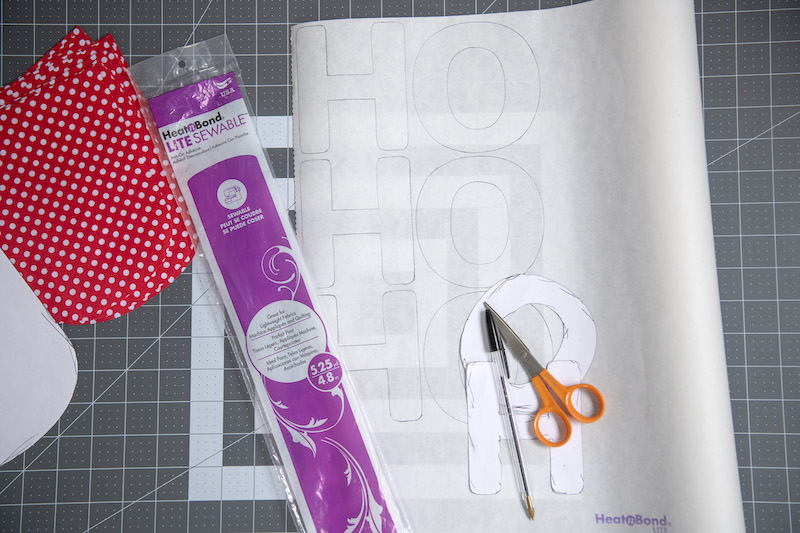
Grab your HeatnBond Lite Iron-on Adhesive and your banner letters. Trace each letter three times on the smooth side of your adhesive. For banners, you trace the letters backward, so I usually trace them with the ink side down. For these two letters, it doesn’t make a difference.
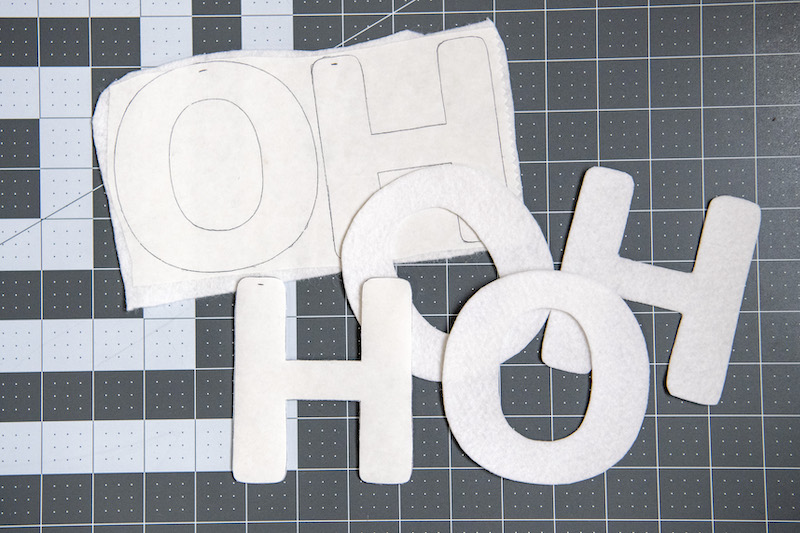
Cut out your letters, leaving negative space around them, and iron the HeatnBond Adhesive to your felt. Make sure to use a barrier fabric between the iron and your felt to avoid singing the felt. Cut out the letters. I put a little mark so I remember which side is the top.
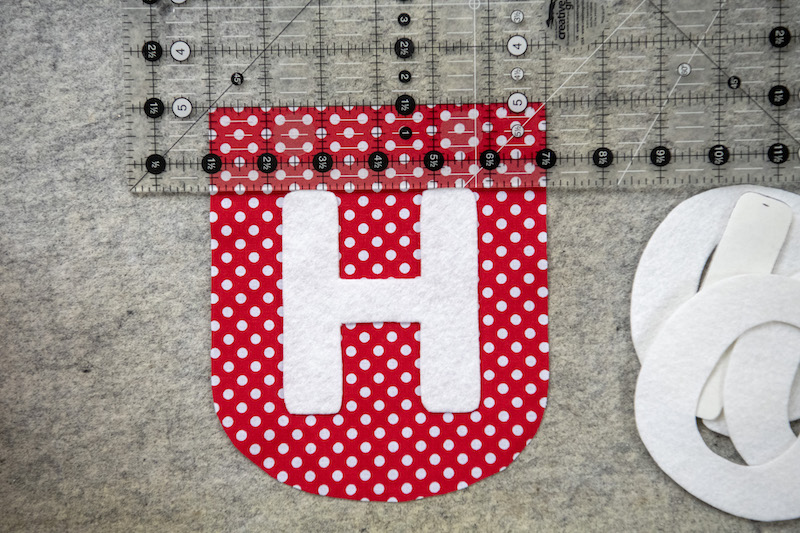
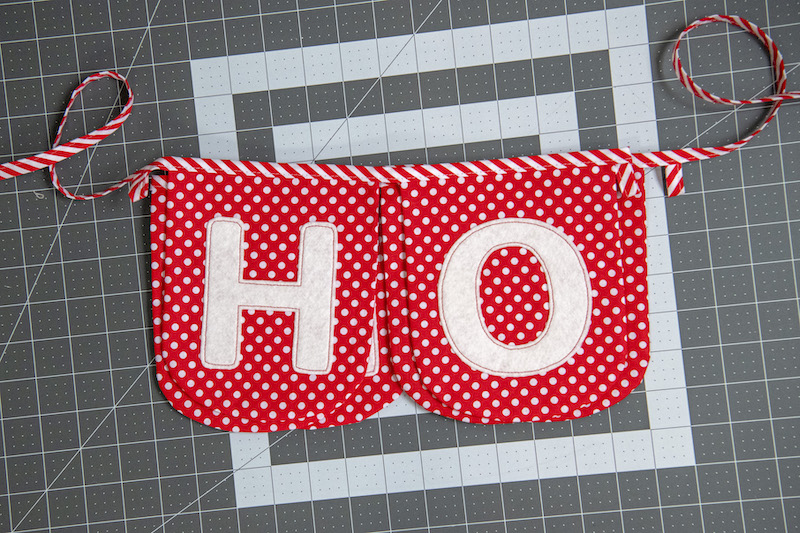
Once all your letters are cut out grab six of your banner flags. Take one flag and using a ruler measure 1.5” down from the top of the flag (the straight edge). Center your letter with the top of the letter meeting the ruler. Press to adhere the letter in place. Repeat with the remaining letters.
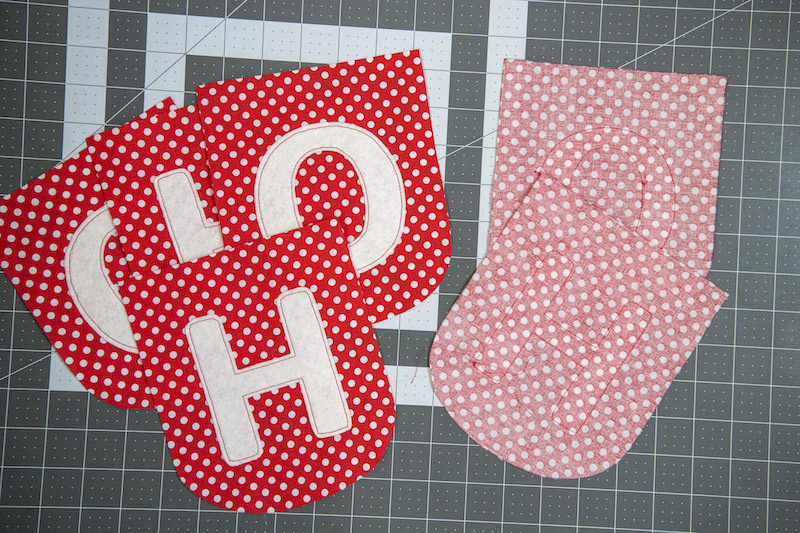
Take the letters to your sewing machine and using contrasting thread sew around the perimeter of each letter. Do not backstitch.
Pull the threads through to the back and tie them off instead.
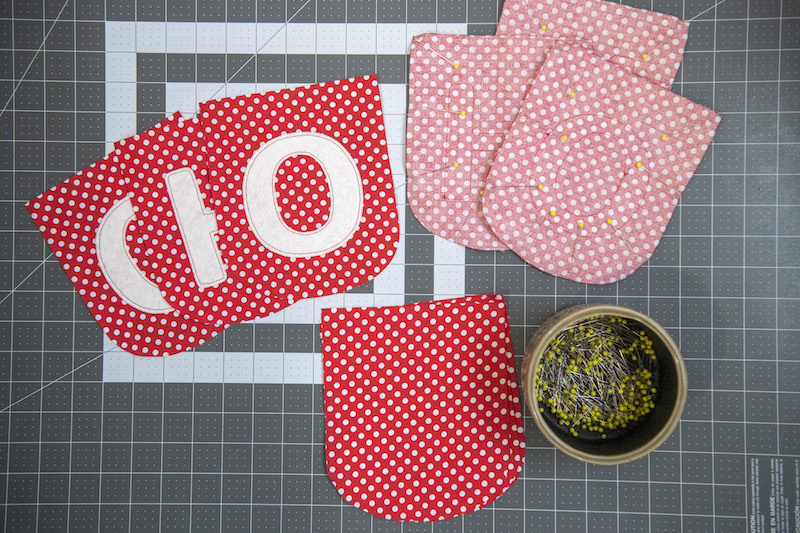
When you are finished sewing the letters, grab the remaining six flags. Place one of your letter flags on top of a blank flag, right sides together. Pin all along the sides leaving the straight edge on the top open.
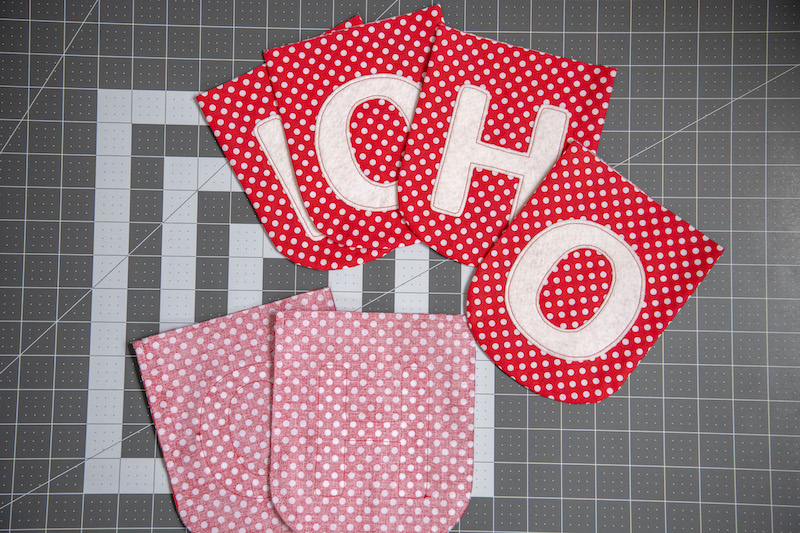
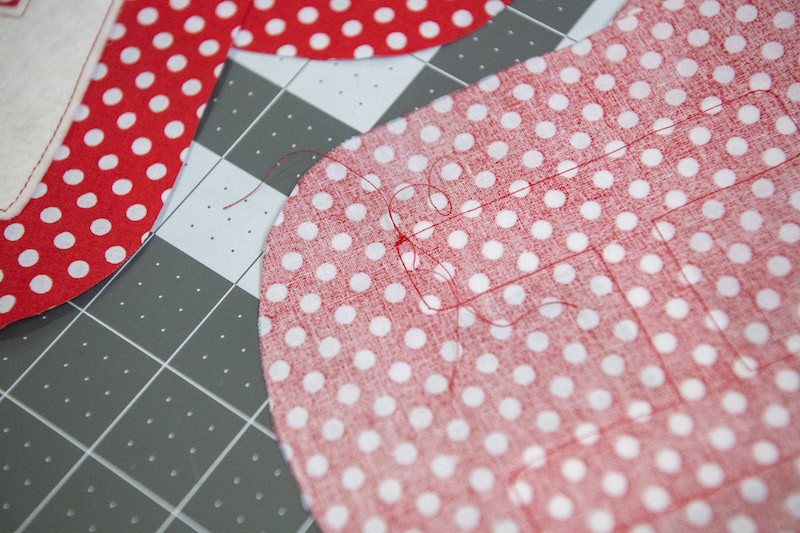
Sew the pinned edges around each flag backstitching at the beginning and end using a ¼” seam allowance (the top straight edge is not sewn). Turn each right side out and press.
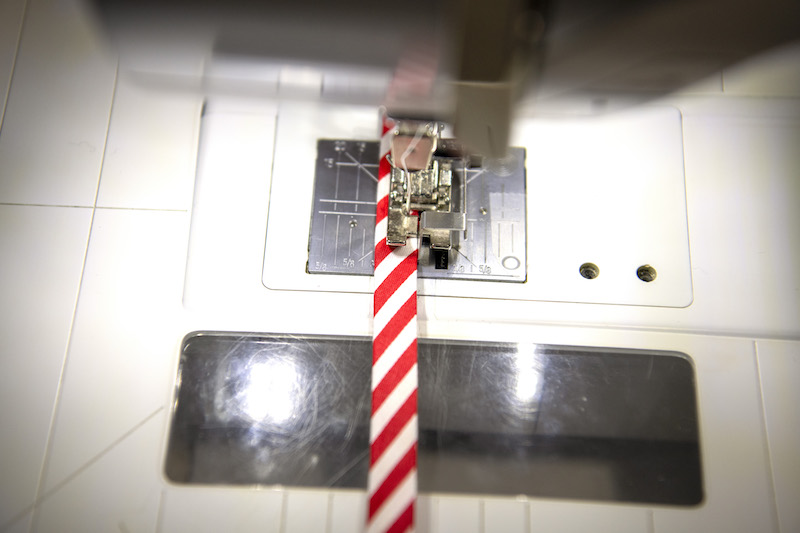
Set your flags aside and grab your bias tape. Cut off a 10” piece from one end and top stitch the opening closed. You can stitch along the other edge as well if you prefer that look.
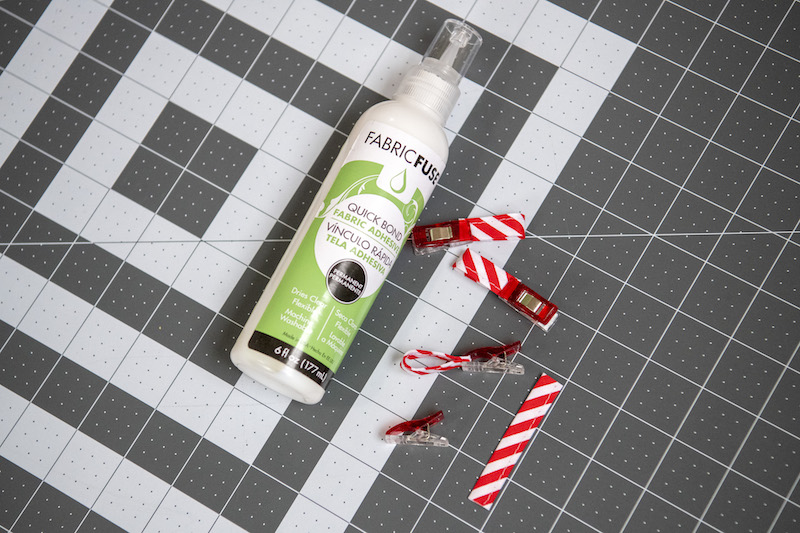
Cut your 10” piece into four 2.5” pieces. Fold each piece in half so the raw edges touch and with a small line of HeatnBond Fabric Fuse Liquid Adhesive fuse the ends together just at the edge. I used a clip to hold them while they dry.
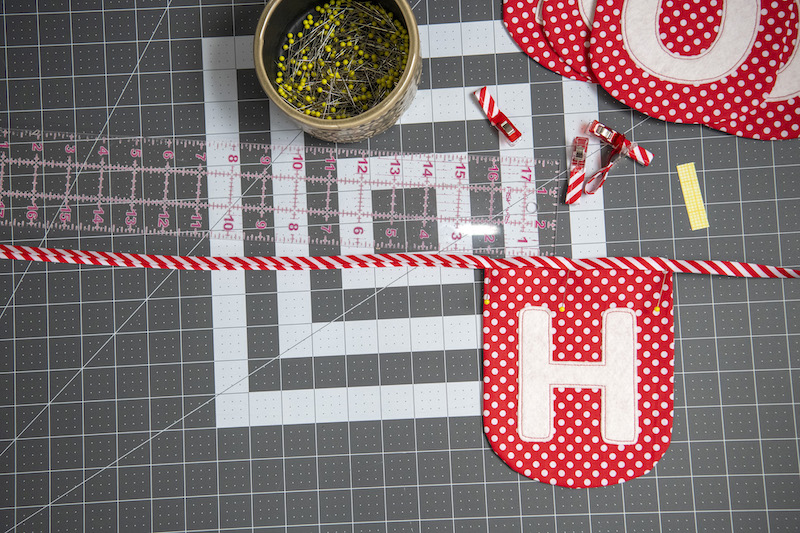
Next we just need to string them all together. Grab your remaining bias tape, your letters, and your bias loops. I like to have 18” for ties on both sides of my banners. You can make them longer or shorter if preferred. Measure in 18” and place your first “H” sliding the raw edge of the flag in between the bias and pinning it in place.
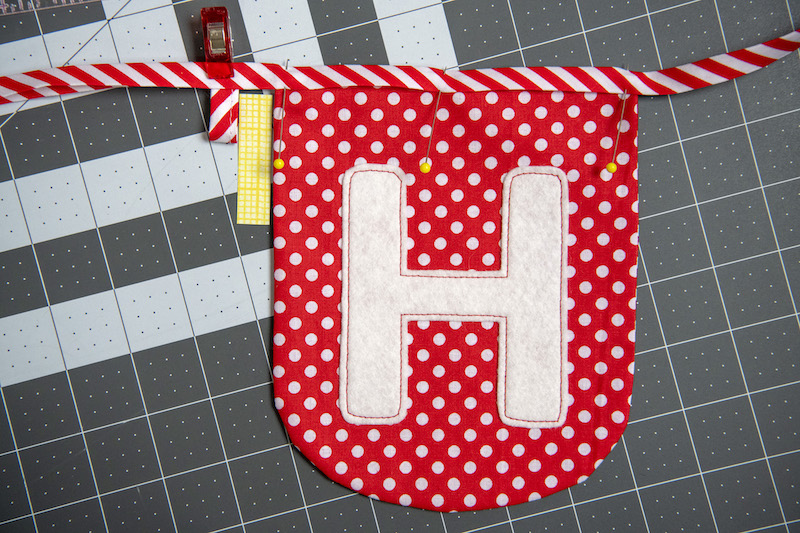
The first tab goes to the outside of the “H” (to its left). Measure out ½” and slide the raw edge of your loop into the bias and pin. I cut a ½” piece of cardstock to make it easier and help as my guide for spacing.
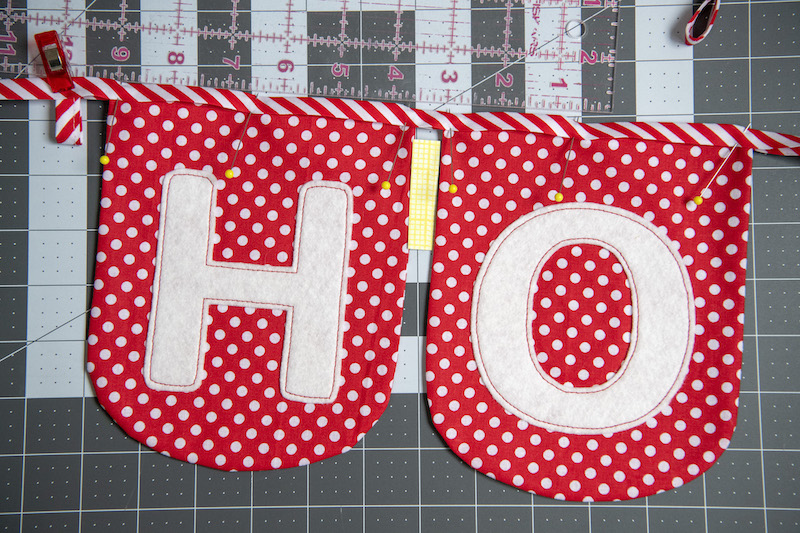
Next place your first “O” spaced ½” from your pinned “H”
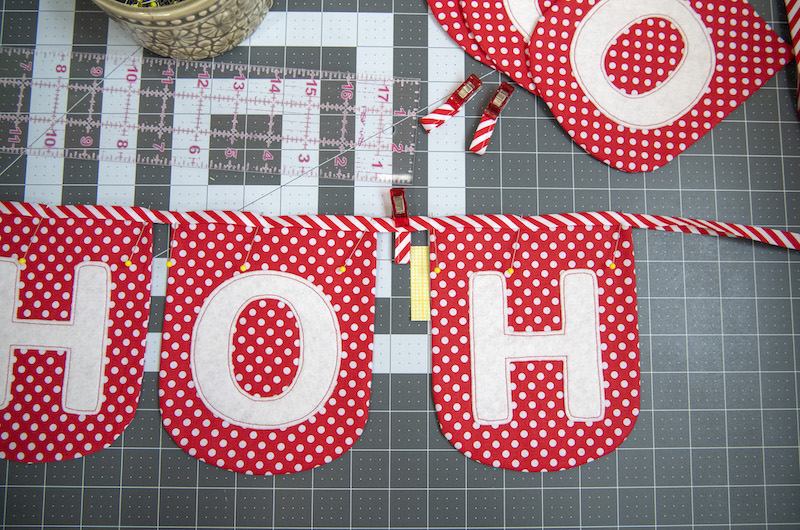
Then measure ½” and place your second bias loop. After the loop measure ½” and place your second “H”. Repeat until you have all your letters and loops pinned in place.
Take to your sewing machine and top stitch.
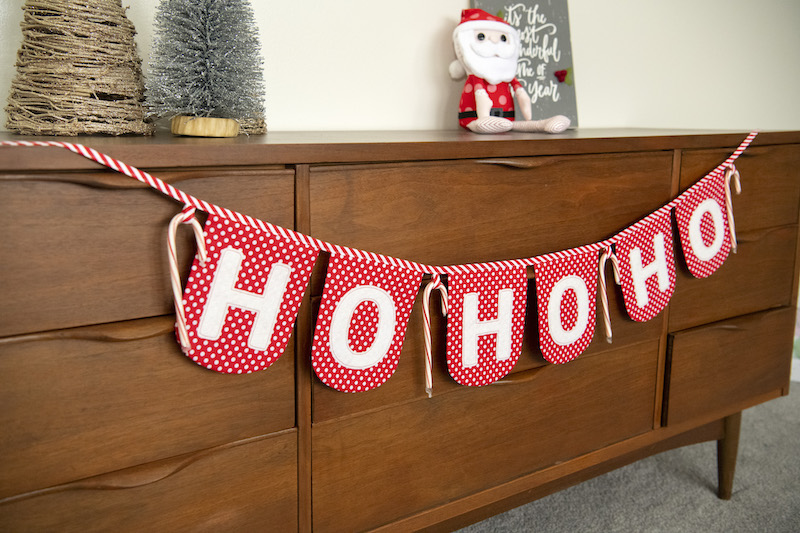
Trim your thread tails and you are finished. Hang your banner and slip candy canes in each loop. Next time you have a friend or family member stop by you can offer them a candy cane. You could substitute the candy canes for ornaments as well or leave the tabs off all together. Thanks for sewing along! Hope you’re staying warm and getting plenty of sewing time in.