Hey Therm O Web fans! It’s Katrina and I am so excited about the new releases in the DecoFoil line that I couldn’t wait to experiment, play and work out things you can do with them! So, are you ready to learn about how to use your Silhouette (or other electronic die cutting machine) along with the print and cut feature with the NEW Clear Designer Toner Sheets? Grab a cuppa, sit down and get ready to have some fun!
Hello Spring Layout Using Deco Foil Clear Designer Toner Sheets
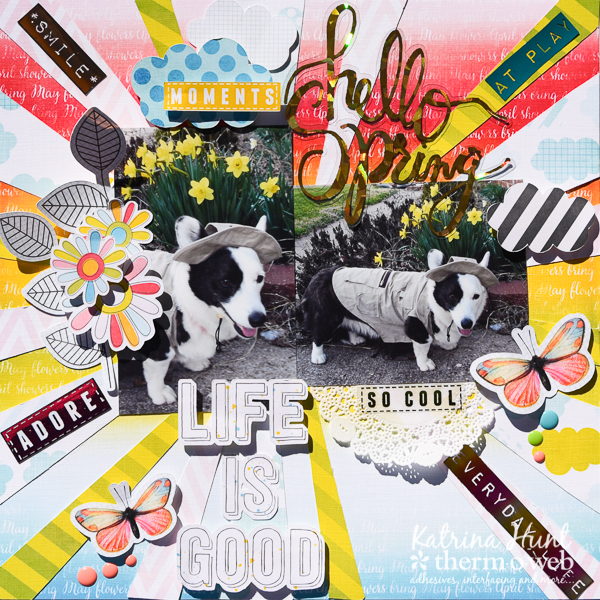
Therm O Web Supplies Used:
Therm O Web 3D Foam Squares-1/4 inch
Therm O Web Memory XL Tape Runner
Therm O Web Deco Foil Clear Designer Toner Sheets
Therm O Web Deco Foil – Summer Rainbow
Therm O Web Deco Foil – Wild Cherry
Therm O Web Deco Foil – Gold Shattered Glass
Therm O Web Deco Foil – Copper
Therm O Web Deco Foil Turquoise (Satin)
Therm O Web Deco Foil Spring Green
iCraft Mixed Media Adhesive 2.1 oz
12″ inch Laminator
Other Supplies Used: Doily-Hobby Lobby; Enamel Dots-My Mind’s Eye and Simple Stories; Storyteller Raine (Just Jaimee) Digital Scrapbooking Kit-The Lilypad; Bright Sunshiny Day Dressed Up Template (FiddleDeeDee Designs)-The Lilypad; Cardstock-Red River; Silhouette Cameo with Print and Cut feature; Photoshop CC; Canon Laser Printer; Epson Wide Format Printer 1430
Hello Spring Layout Using Deco Foil Clear Designer Toner Sheets Instructions:
I will start by saying, this is a hybrid layout, which means everything is basically printed from a digital kit on my wide format printer (paper and elements). The elements I printed for my page that are foiled, I used my Canon laser printer for. So if you aren’t used to doing digital or hybrid, it’s not scary it just takes a little time to get comfortable and practice with it! And it’s a lot more fun to play.
Warm your laminator up for at least 20 minutes.
Use digital elements to create the items you want to print and cut, then foil. If there are items that you want to use that are colored, most of the time you can change those and fill with black in Photoshop. For example, the “Adore” label is pink, but it’s easily changed to black. Open in Photoshop (or Photoshop Elements, although the steps may be slightly different)
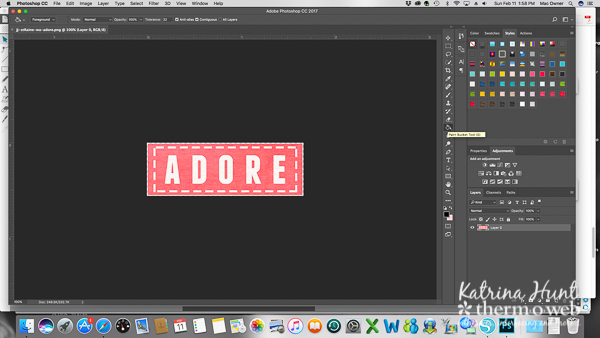 Select the “paint bucket tool” and make sure your foreground color is black. Place the mouse pointer on any of the pink areas, click and it will change to black. It will leave the white unchanged and it also didn’t pick up the little piece in the middle of the letters. Just place the pointer right in the middle and click. As long as your pointer is in the pink area, it will only change that pink area to black. If you change the white, don’t worry, just go to “edit” and undo. Then you can try again!
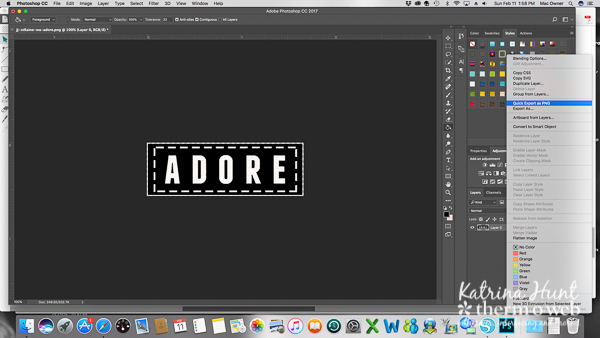
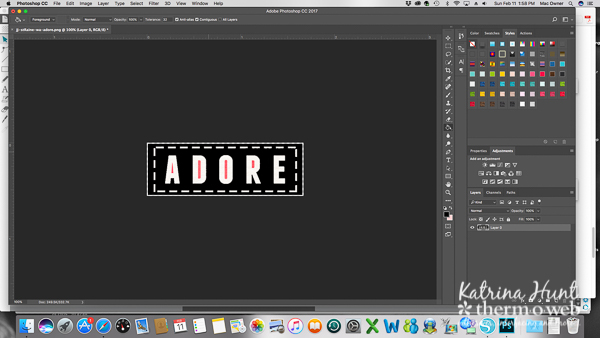 Once your element is filled in with black then you will want to Quick Export as a PNG file. To export, right click on your layer and a menu will come up with the option. Rename your file, because you want to save the original. I rename the same, just add a 2 in the name so that they are placed by each other in my folder.
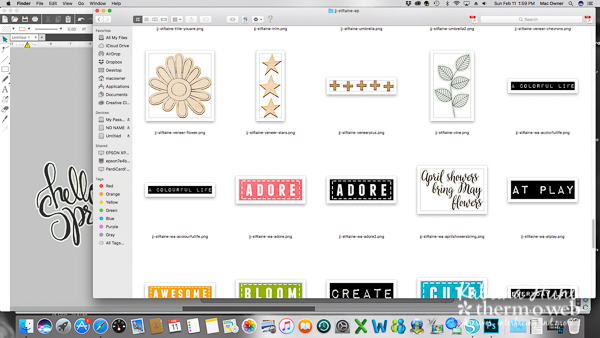
 Here is what my folder looks like now. You can see the original pink label and then my black one. Also, the ones that are black in here like the “at play” and “create” you wouldn’t need to do the above step, you could just print and foil!
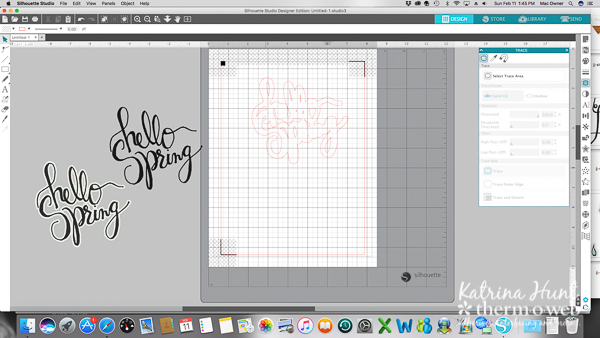
 Next, I worked on my title in Silhouette Studio. I do have the designer edition of the software, but you should be able to do this in the regular version. I wanted some of the Clear Designer Toner Sheet to be showing around my title. If you look closely, there are two Hello Spring files that I could use, one has a little bit of a border around it, so I used that to “trace” around. I first pulled both of the pngs into the software and drew a box around them to “group” them, then resized until I had a sized I liked. This keeps both of the files reduced at the same rate, which will help me keep the “border” around my words. You also want to make sure that in your page setup your registration marks are turned on. You will need these for the print and cut feature.
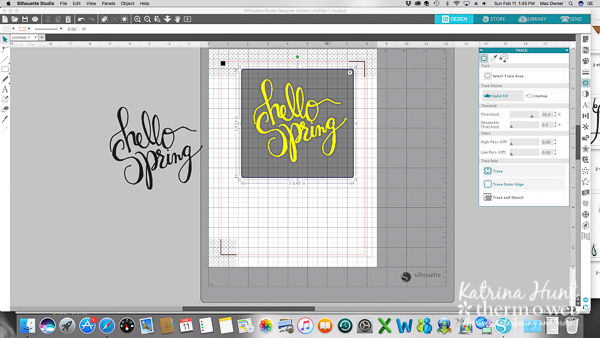
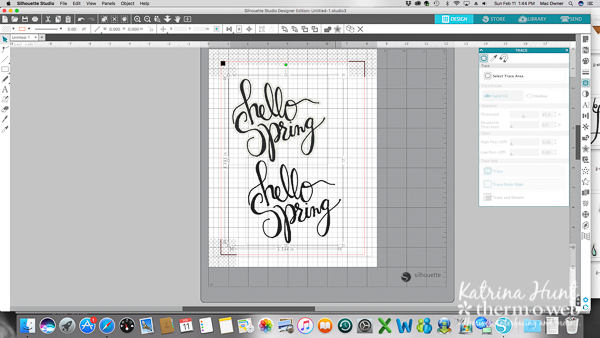 I then traced the file that had the extra border around it. Pull up the trace panel, then “select trace area”, move your threshold slider up until what you want to cut is completely filled in with hello. This first picture shows you that the “hello spring” if filled in, but not the border that I am wanting to keep around it.
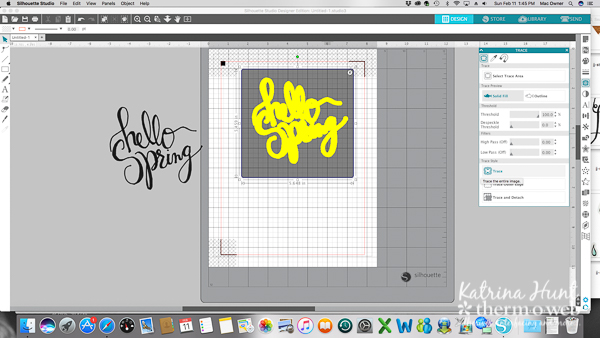
Below you can see I moved the threshold up to 100% and it completely filled in the border. I selected “trace” which will cut anything that is inside or outside the yellow. There is also the “trace outer edge” option, but I wanted the “holes” of my letters to be open.
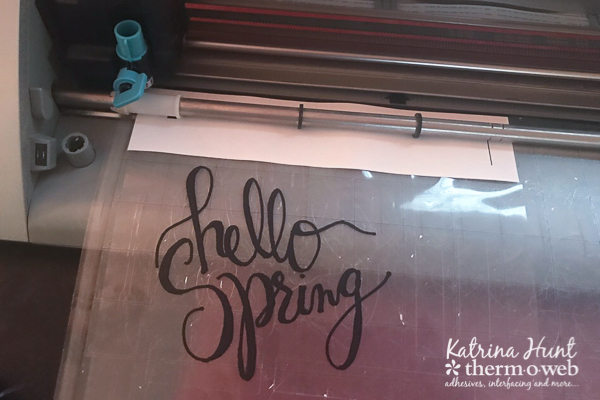
Then I placed the “hello spring” without the border into the cut lines I created and centered it. I then pulled other elements I wanted to cut and foil from the digital kit. Here is what my clear toner sheet looked like after printing. And HERE is where I ran into trouble. I had trouble getting my Cameo to read the registration marks. I did a little google search and came across a video from The Silhouette School blog that talked about shiny sticker paper that had the same problem. It’s solved by trimming paper and adhering it where the registration marks print, then the machine can read the marks easily.
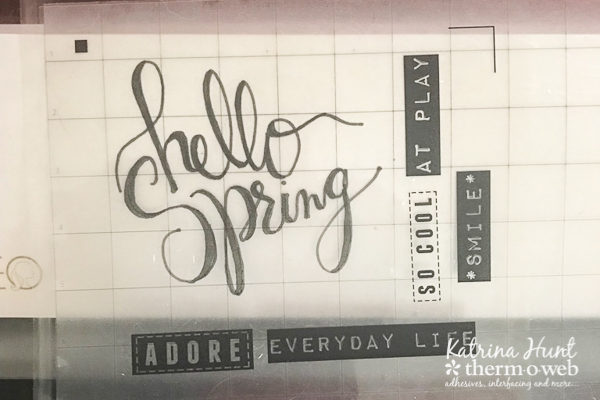
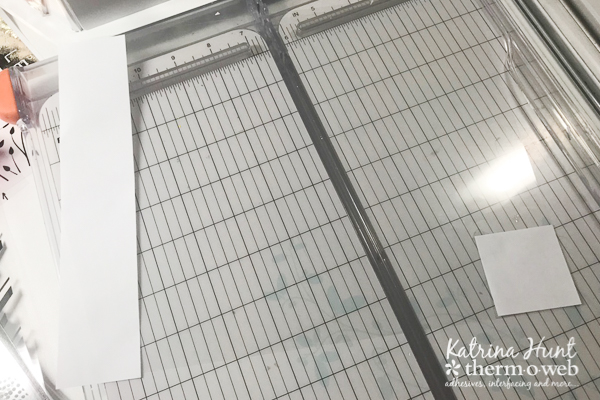
So, I printed on regular copy paper, so that I would know how much of a strip I would need to cut. Mine was 1.75 inches high by the 8.5 inches wide. I cut the same for the bottom area but cut a 1.75 x 1.75-inch square. Then I adhere the blank strips at the top and bottom of my clear toner sheet.
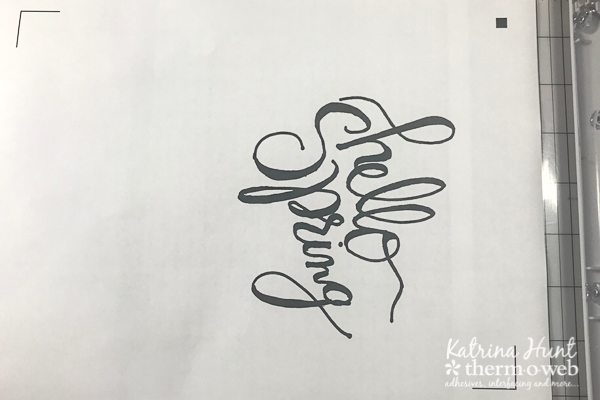
 Run thru your printer from your Silhouette software and then your machine will be able to read the registration marks.
NOTE: Make sure to have your files print below the area of the strip of paper you cut! Ask me how I know!!
 Once your images are cut, then you can foil them. Here you can see the border that was left around my title when I cut it. I LOVE this technique and will be doing it a lot! How fun for layouts or cards!
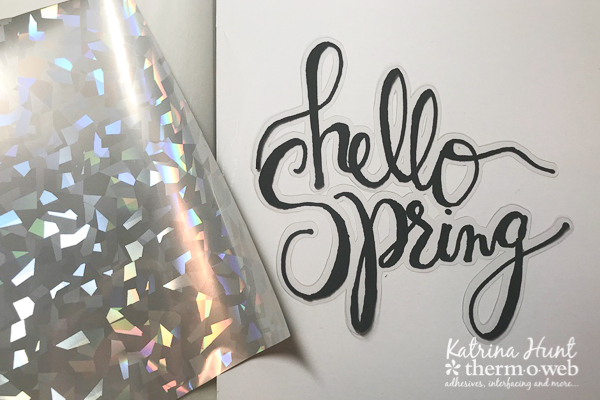 And here are close-ups! Gold Shattered Glass Deco Foil.
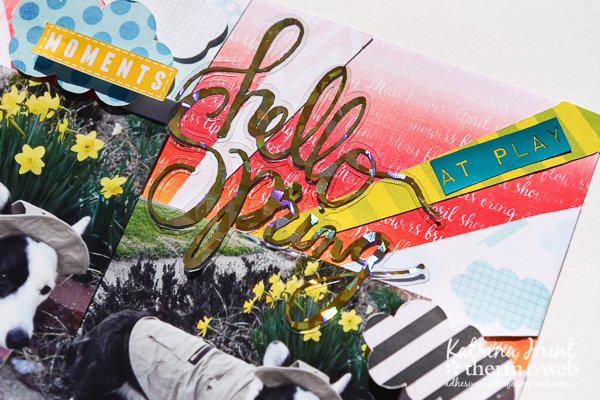 Copper Deco Foil on this label.
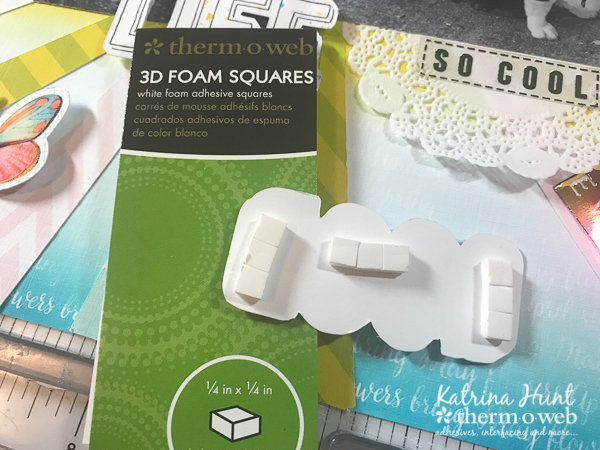
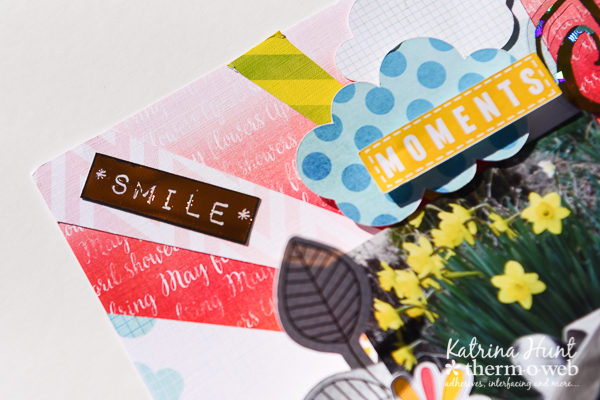 All the dimension in the layout comes from the 3D Foam Squares. All elements are either cardstock or the Clear Designer Toner sheets, but you wouldn’t know there weren’t stickers or chipboard when you use the foam squares!
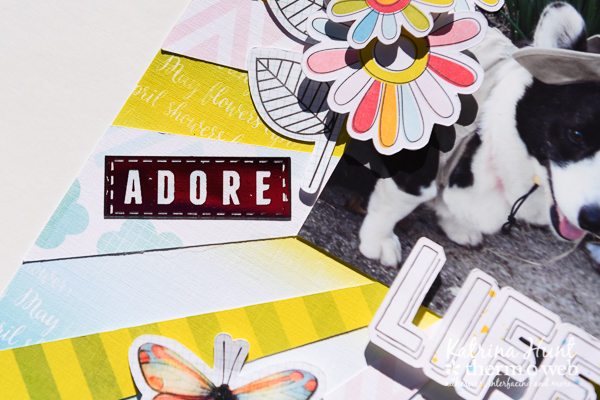
 Here is the label that was changed to black from pink so it could be foiled! The new Wild Cherry Deco Foil on this label!
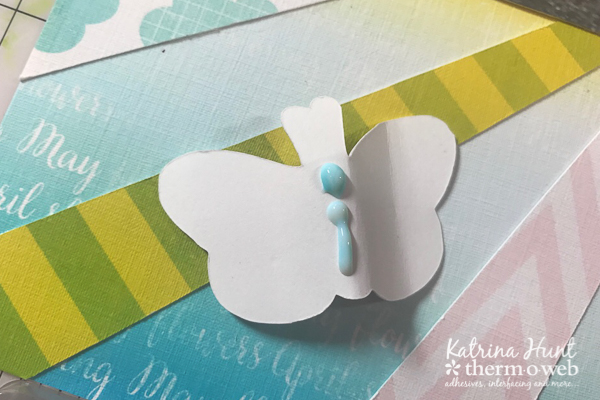
 Also, the iCraft Mixed Media Adhesive is perfect for hybrid work! I used it for the middle of the butterflies and then just bent their wings to give them some “lift”.
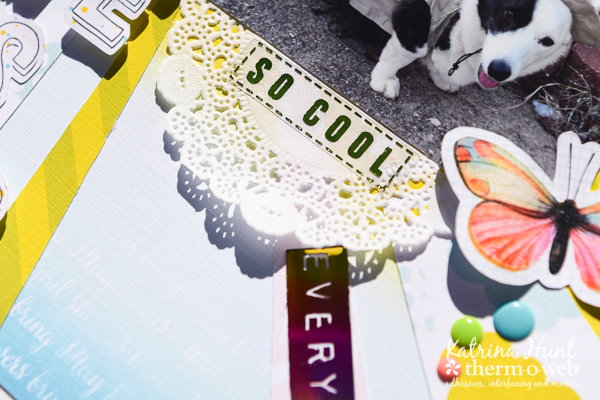
 AND I love this label. The letters and stitches were already black, so I just printed them and look at how fun that clear label is! This is the Spring Green DecoFoil.
So whew, that was long, but hopefully, you will try this because it’s SO FUN to do! If you have any questions, please leave them below and I will try to answer them the best I can! Have a great week!!! Happy Scrapping!
SaveSave
SaveSave
