


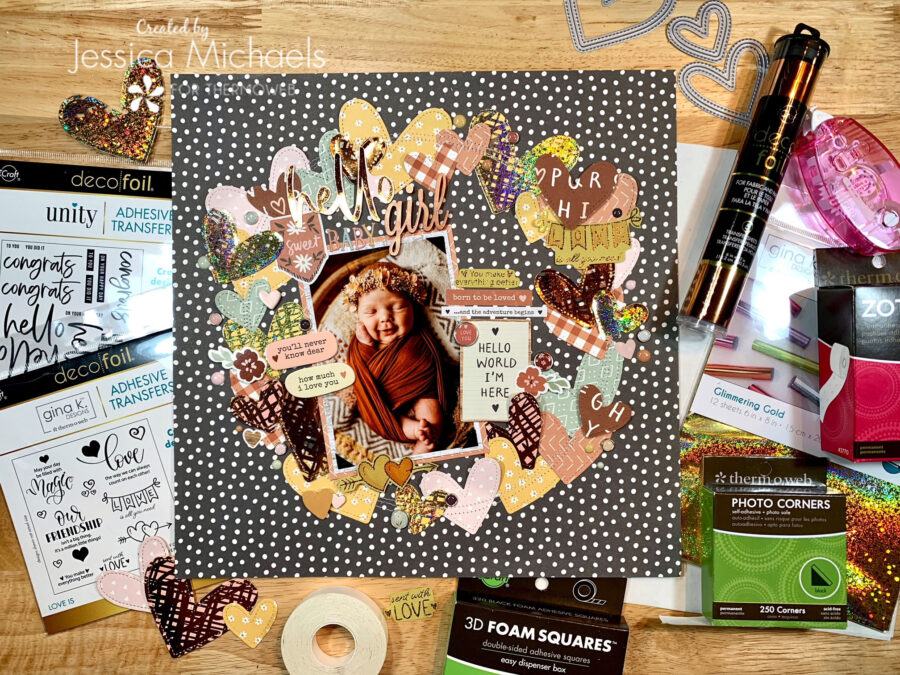
 Hello Baby Girl Scrapbook Layout
by Jessica Michaels
Hello and Happy New Year! Jessica here with my layout for Hearts Galore week using foil, adhesive transfer sheets, and all the hearts. Let me tell you, I have some major heart eyes for how this one turned out! I don’t know about you but when I’m scrapbooking a really good photo, sometimes I feel like I don’t do the photo justice with my finished layout. That did not happen here. I feel like the added sparkle from the foil and adhesive transfer elements is just what this layout needed to bring it to life!
Therm O Web Supplies Used
Memory Runner XL
Memory Runner XL Refill
Easy Tear Tape 1/4″
3D Foam Squares Box, Black
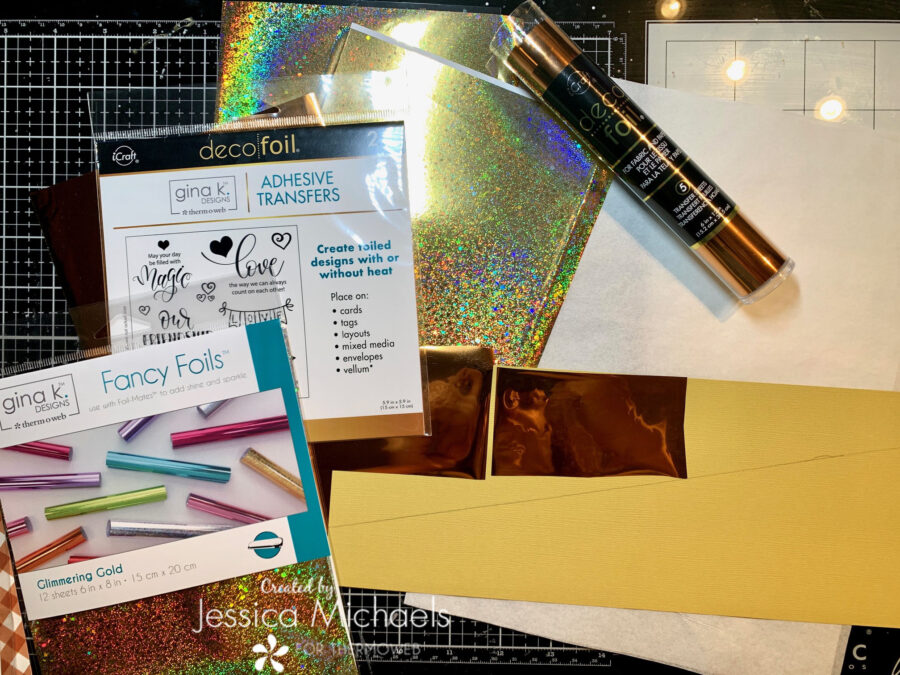
Gina K Fancy Foils, Glimmering Gold
Deco Foil Flock Transfer Sheets, Copper
Brutus Monroe Designer Toner Sheets, Static
Gina K Adhesive Transfers, Love Is
Unity Adhesive Transfers, Sentiments 2
Craft & Carrier Sheets
Photo Corners, black
Zots Bling
Other Supplies Used
Simple Stories Boho Baby collection
“Wild Child” Page Kit by Meridy Twilling
Distress Oxides in Dried Marigold and Saltwater Taffy
Hero Arts Blending Brushes
Copic Ciao markers in YR68 and E95
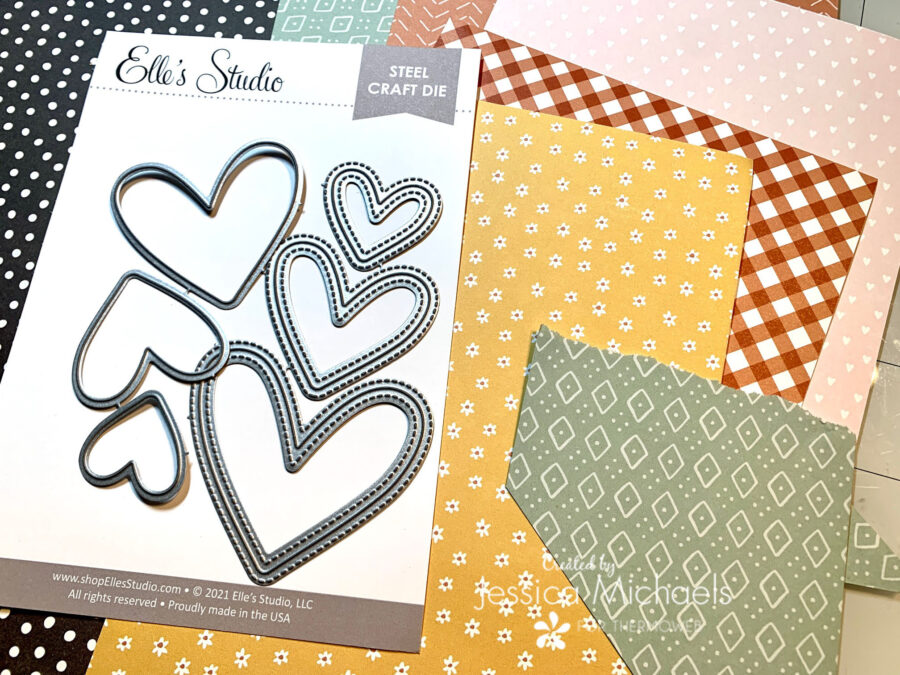
Elle’s Studio Stitched Hearts Dies
Manual Die Cutting Machine
Laminator
I started this layout by pulling out a sheet the patterned paper from the Boho Baby collection by Simple Stories. I also pulled out the coordinating small paper pad and my heart dies by Elle’s Studio to create lots of hearts for my layout with my manual die-cutting machine. I wanted to create a heart wreath to give my photo a very loving and cozy feel as this was the photo shoot of my sweet baby girl. It’s hard to believe she is already turning two months old!
I decided I wanted to add some sparkle with foil so I grabbed some Deco Foil in Copper, and some Gina K Fancy Foils in Glimmering Gold. I felt these two colors matched the colors in the collection quite nicely. I then reached for my Brutus Monroe Designer Toner Sheets in Static(which I’ve been favoring lately). I pulled out one of the clear sheets and one of the white background sheets and cut them both in half so I could get both foil colors on each of the sheets.
I sandwiched those with the colored side of the foil up(on top of the toner sheet) between my craft and carrier sheet and ran through my laminator. I then die-cut hearts from those sheets. I did find that no matter how tightly I shimmed it through my manual die-cutting machine, it still did not want to cut through the clear toner sheets, so I did end up having to trim those the rest of the way out with my scissors which were easy enough.
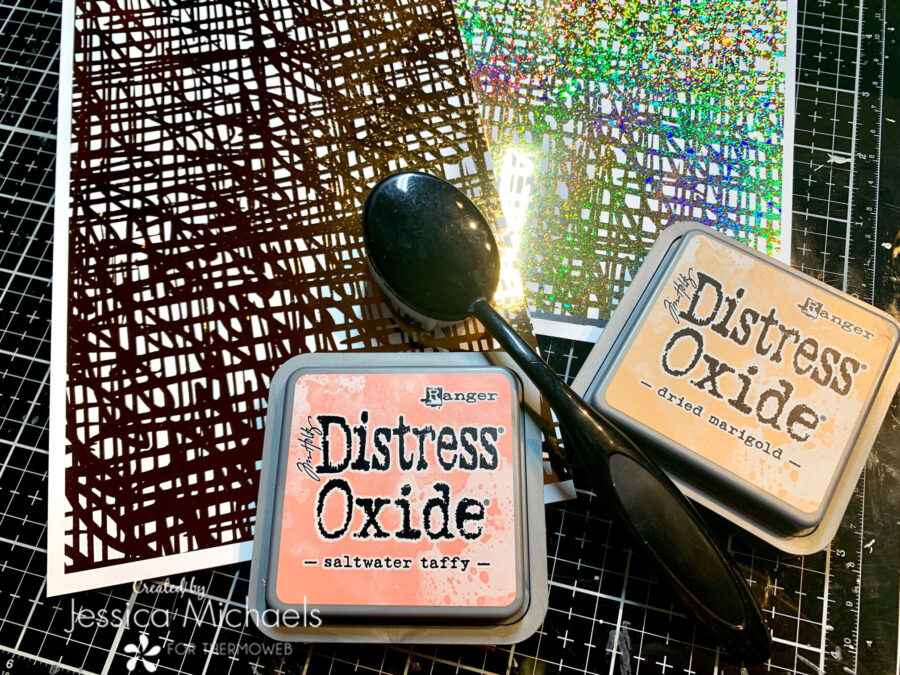
I then thought I’d like to change the background color on these to match my layout a little better. So I grabbed some distress oxides and my blending brushes and applied them in a circular motion to each sheet. I then wiped the excess off the foil with a paper towel. Normally I would have done this step before I foiled, as I think it works a little better that way. I did end up with some foil flakes on my fingers but didn’t really notice that it hurt my sheets by wiping them off with the paper towel. Then I just die-cut some more hearts from these.
I wanted to pull in some of the adhesive transfers as I thought the designs from Unity and Gina K were perfect to accent this layout. I browsed my scrap file and found this golden yellow textured cardstock and cut out which transfers I wanted to use. You can see by my previous pencil line I must have been using this for another layout that I didn’t end up using which is good because it worked out for this one!
I adhered the transfers to the yellow cardstock by peeling the backing off and gently pressing onto the cardstock to hold it in place. I then sandwiched the paper with transfers between my craft & carrier sheet and ran through my hot laminator. Once that came out, I peeled the top sheet of the transfer off and applied scraps of Copper Deco Foil and ran it through my laminator again with the craft & carrier sheet. I really like using those sheets with my sandwich because when doing smaller pieces like this I don’t have to run the full clear sheet through that came with my machine which takes much longer and sometimes I am a bit impatient!
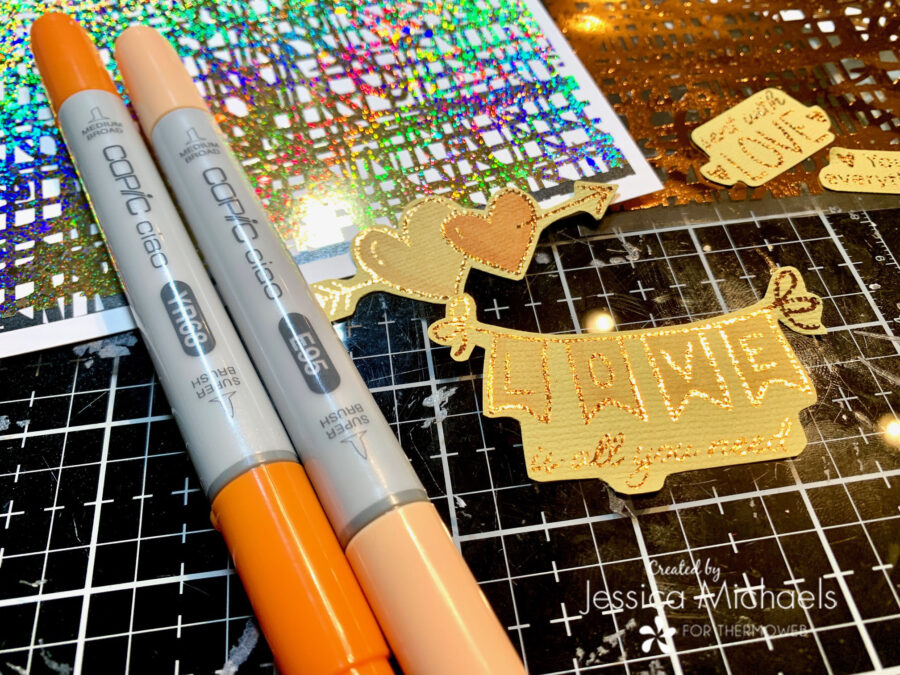
Once I peeled off the excess foil sheets I thought they looked a little plain, so I colored them in with some of my Copic markers. I used my Memory XL Tape Runner to adhere to my page once I got my heart wreath established which you will see below.
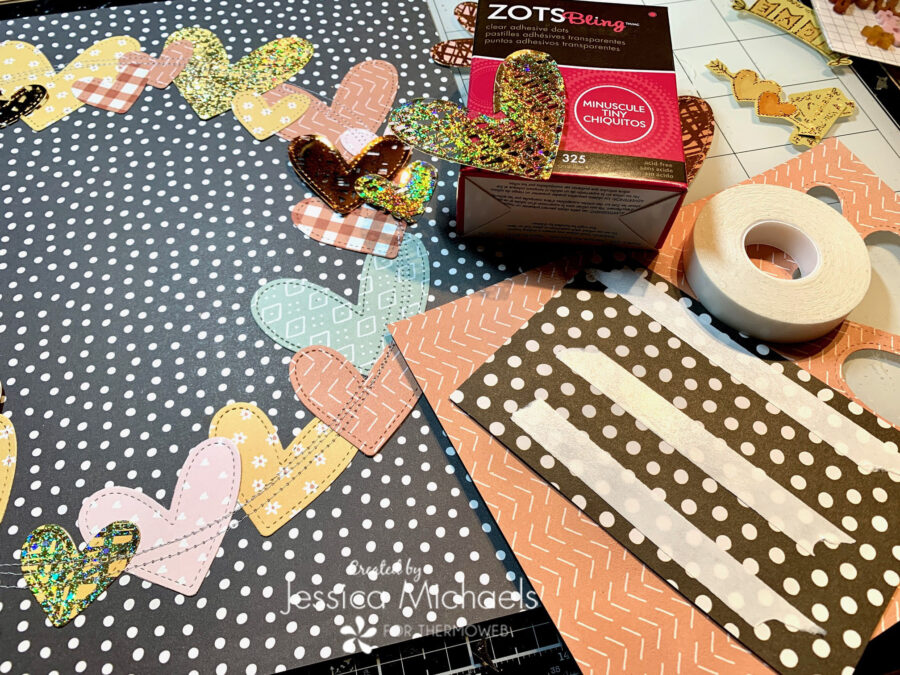
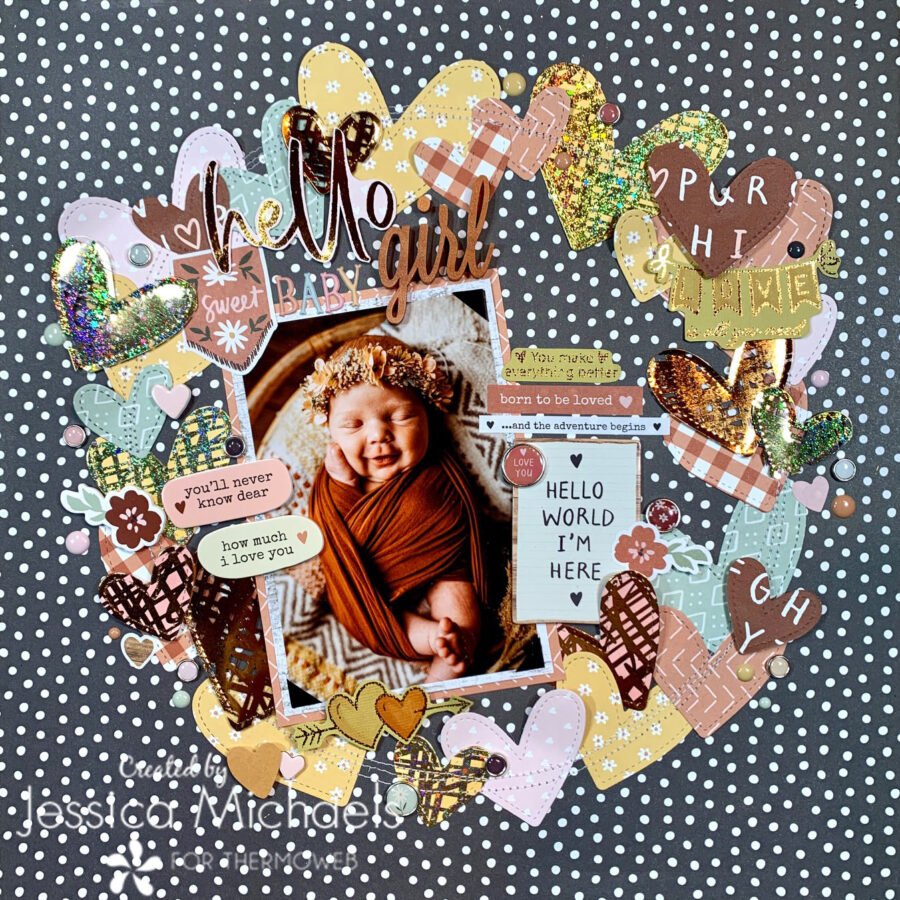
Remember all the hearts I said I was die-cutting? Here you can see I’ve placed them down lightly to my page with my tape runner and bling zots for the clear toner sheet hearts, and then I used my sewing machine to stitch messy circles around the page to create my heart wreath. I just love the look and feel of stitching on a scrapbook page! Here you can see that glimmer of the Gina K Fancy Foil and the Deco Foil with those toner sheets! Aren’t they just beautiful? I then matted my photo with some patterned papers using some of the easy tear tape! Super easy, just like the name of it!

Here is a close-up of the beautiful transfers and toner sheets! I love them and really love how you can create beautiful scrapbook layouts by making your own embellishments!
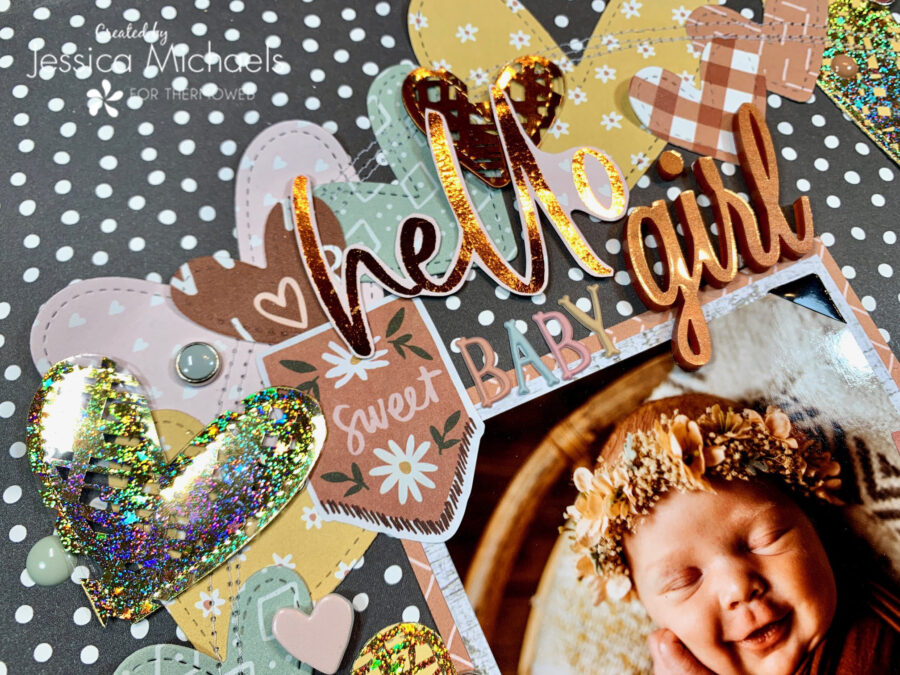
Here you can see more of the glimmering goodness with those hearts and then I also used the Unity transfer sheets for the “hello” part of my title! I just did that transfer with some copper deco foil onto one of the patterned paper scraps I had laying on my desk and fussy cut around the letters. I used the bling-sized zots again here to attach to my page. Just look at my baby girl’s sweet face! Oh my heart!

I finished it up by adhering some more hearts and transferring elements with some 3D adhesive squares in black to pop them up off my page. I also added some adhesive brads and enamel dots from the SS Boho Baby collection I’m using.
I don’t have a process video for this one today because time has not been my biggest fan this holiday season, but if you have any questions for me just list them in the comments below and I’ll get back to you!
Thank you for being here today and I hope I was able to inspire you to create!
Jessica
This post contains affiliate links. For more information, see our disclosure HERE