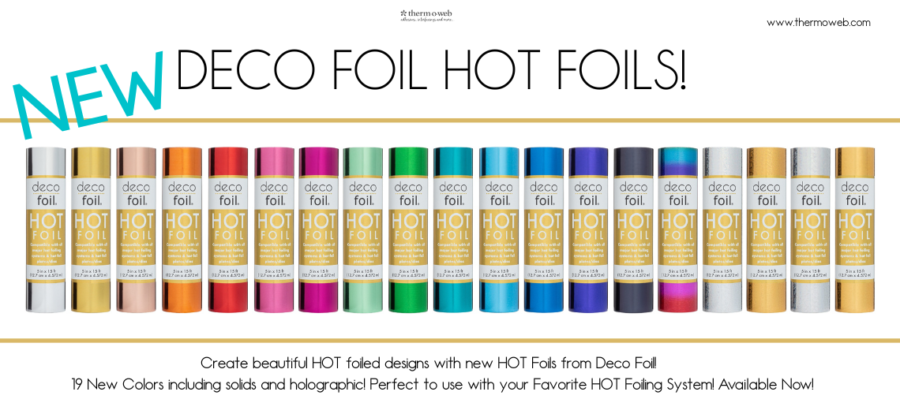
NEW Deco Foil HOT Foils from Therm O Web
While temperatures might be cooling down…Deco Foil® is heating things up with our NEW Deco Foil® HOT Foils! Available in a variety of colors, including solids and holographic, HOT Foils will make every project sparkle and shine! HOT Foils can be used on a variety of materials including cardstock, ribbon, leather, fabric and more.
 Our HOT Foils are intended to work with any standard hot foiling system and your favorite hot foil plates. We advise referring to your owners’ manual for instructions on how to create HOT foiled project using your hot foiling system and hot foil plates. You can also create foiled designs using existing metal dies.
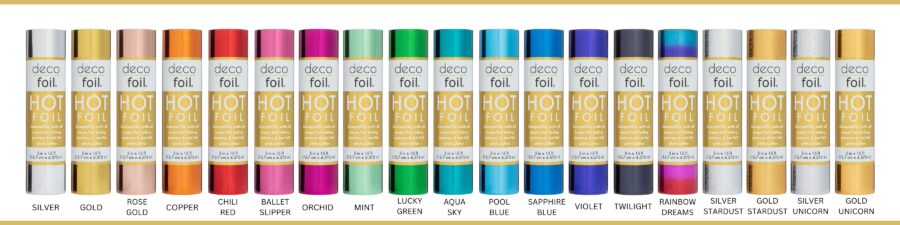
We’re excited to officially bring your NINETEEN stunning colors. Our gorgeous rainbow of 19 colors offer you something for every project. With a We a rainbow of choices at your fingertips that we’re certain you will love!
And the good news is…in celebration of this HOT new release we’re offering YOU Buy Three Get One FREE starting today on all of our NEWEST HOT Foil colors! Yes…Buy 3 Get 1 Free valid only on our website ….no coupon code is needed. Now, here’s the question…which colors will you choose?

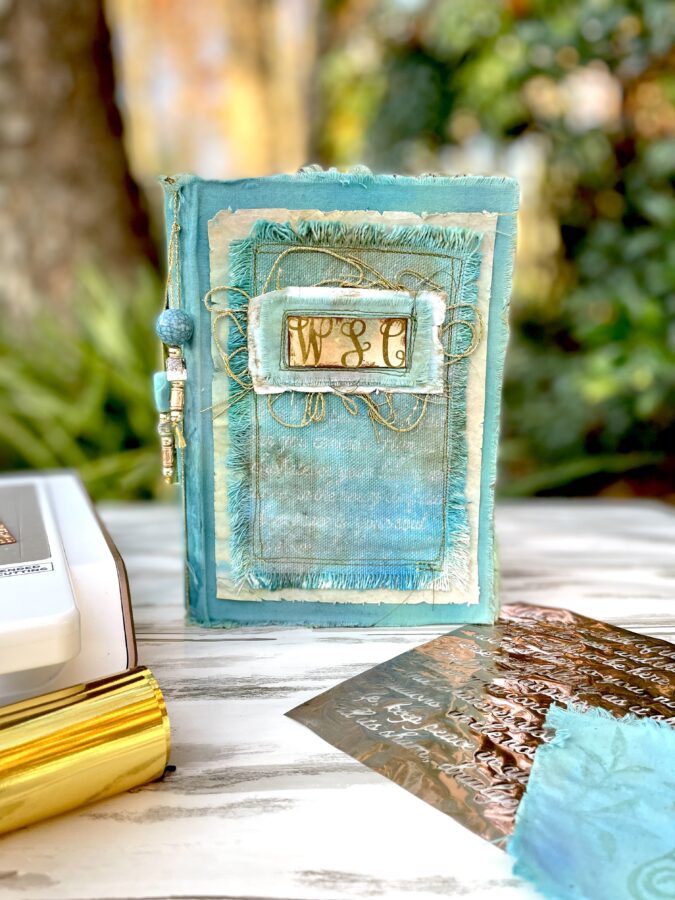
To get you inspired we’re kicking off this week of fun with a beautiful fabric journal from our mixed media resident artist…Wendy Cuskey. Be sure to join us all this week for more project ideas PLUS a Facebook Live Wednesday evening in our Craft Room with Justin. We’re certain there will be a fun giveaway too! wink wink
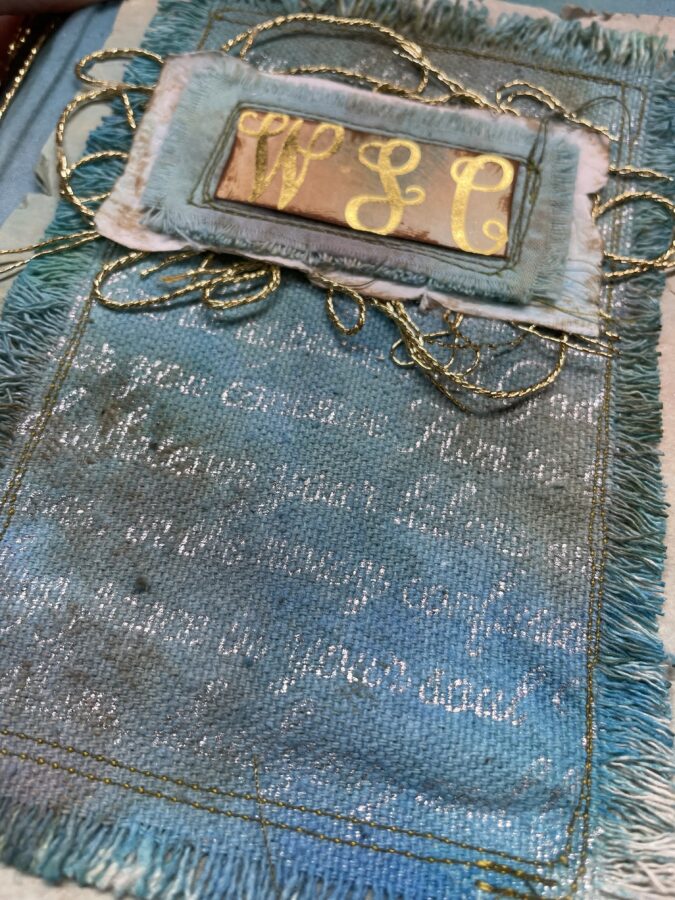
Fabric Journal with Hot Foil
Hello again crafty friends. Today’s project is a fun dyed fabric journal, featuring Therm O Web’s new HOT Foils! Follow along to the end for a video flip-through of this journal.
Journal Supplies:
iCraft Deco Foil HOT Foils Transfer Sheets – Gold & Copper
iCraft Ultra Bond Liquid Adhesive
Oliso Mini Iron
Other Supplies: Fabric, inks or dyes, medium-weight chipboard, interior papers, scissors, ribbon, book pages, beads (optional) Glimmer machine and plates.
Journal Step One:
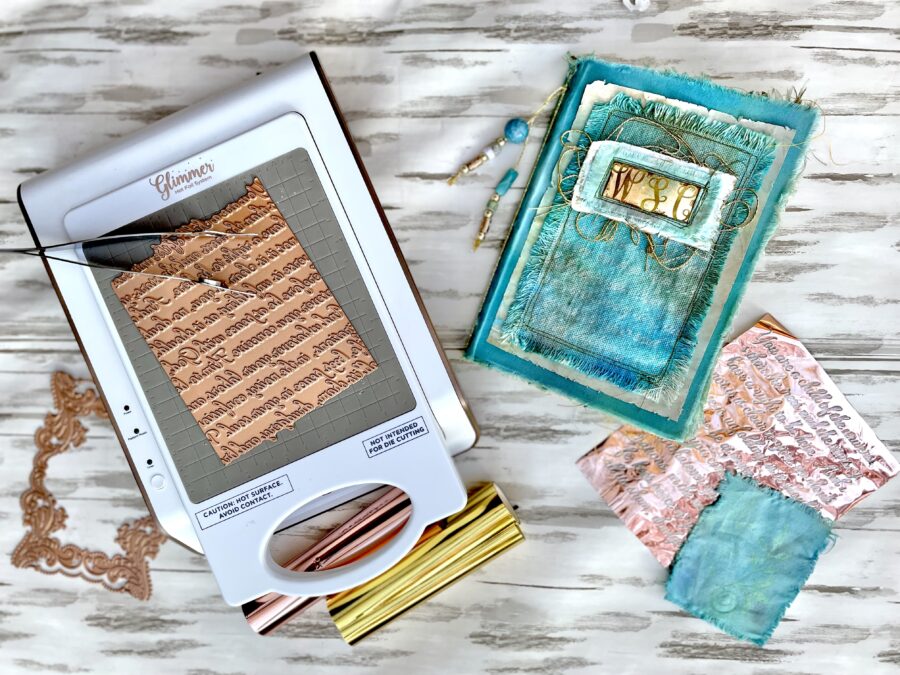
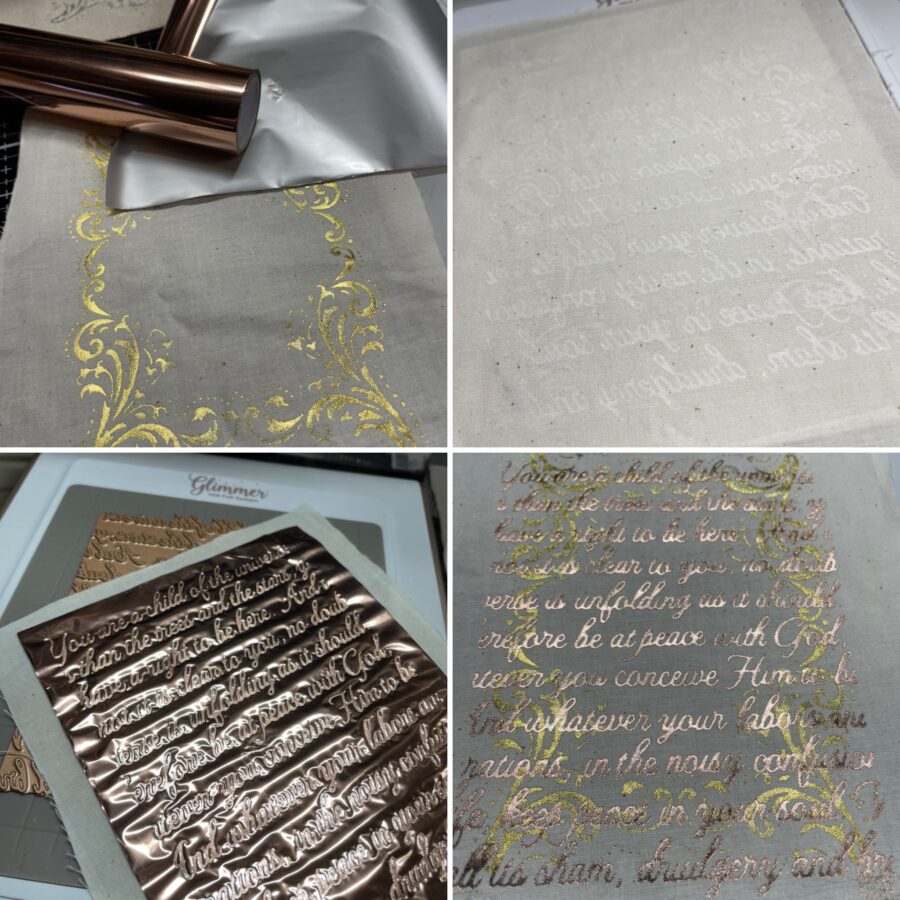
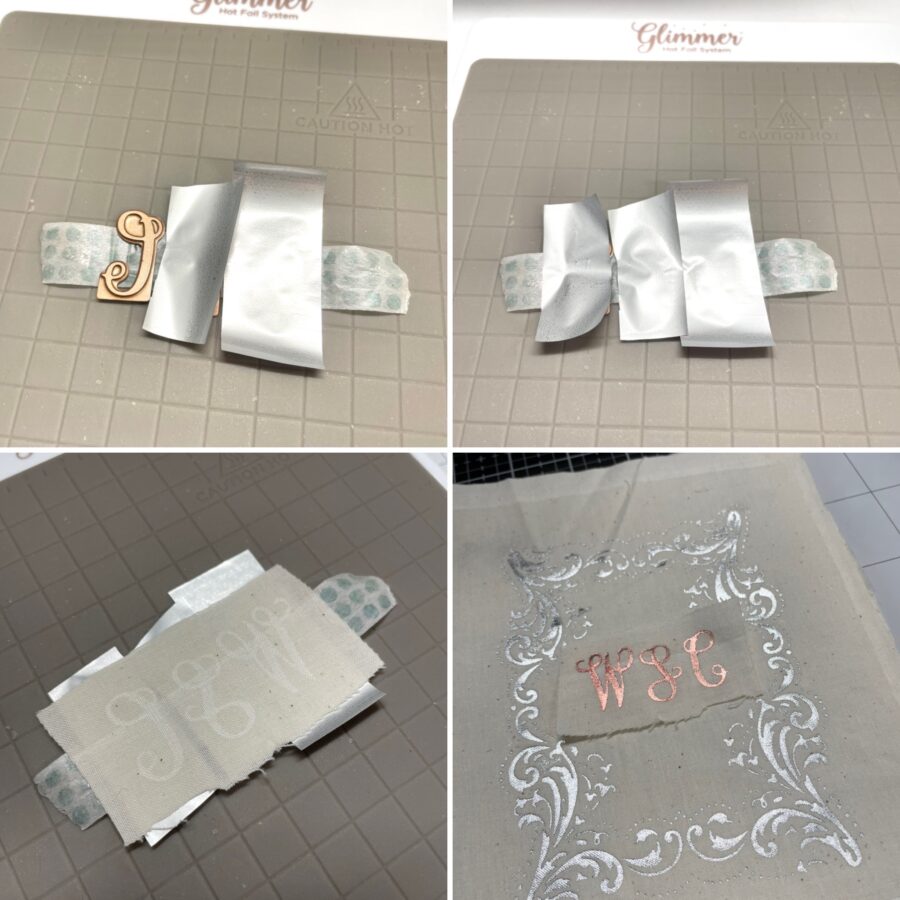
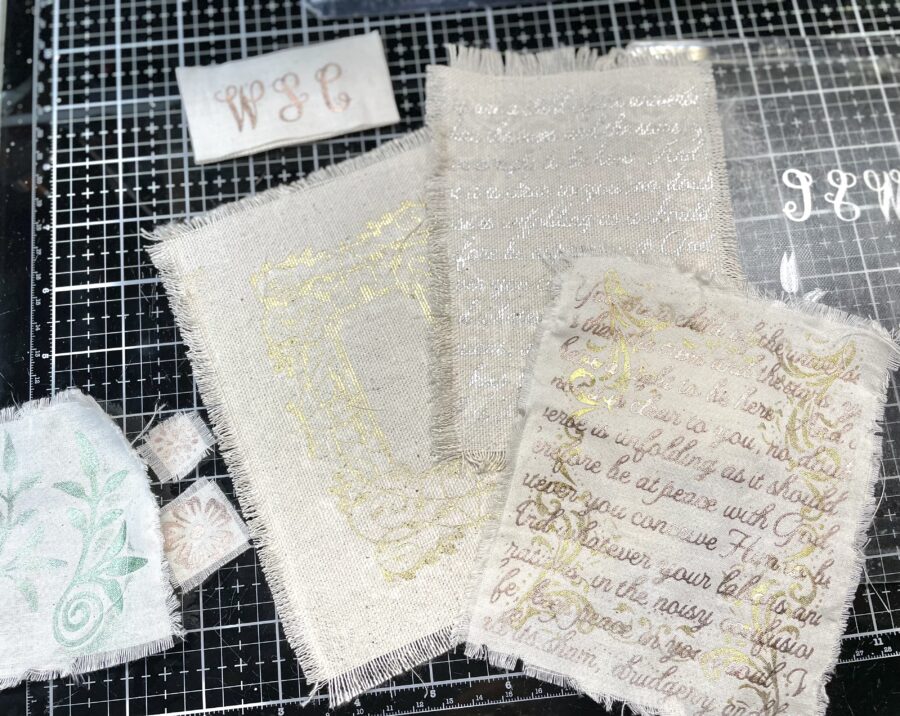
Begin by hot foiling your designs onto several pieces of fabric. I made sure that one piece of my fabric was large enough to use as a cover.
The Glimmer machine has its own instructions for use, but in a nutshell, lay your Glimmer plate (design side up) on the heating surface and heat the plate. Next, lay your foil (dull side up) over the plate. Follow up by laying your fabric over the foil and then adding your clear plate to finish the sandwich. As you can see in the first set of pictures below, you can even double up your designs to create something completely different!
I can’t tell you how satisfying it is to peel away the release film and see what it’s left behind.
Hint: I always use a piece of lightweight chipboard as an extra shim to the sandwich.
Journal Step Two:
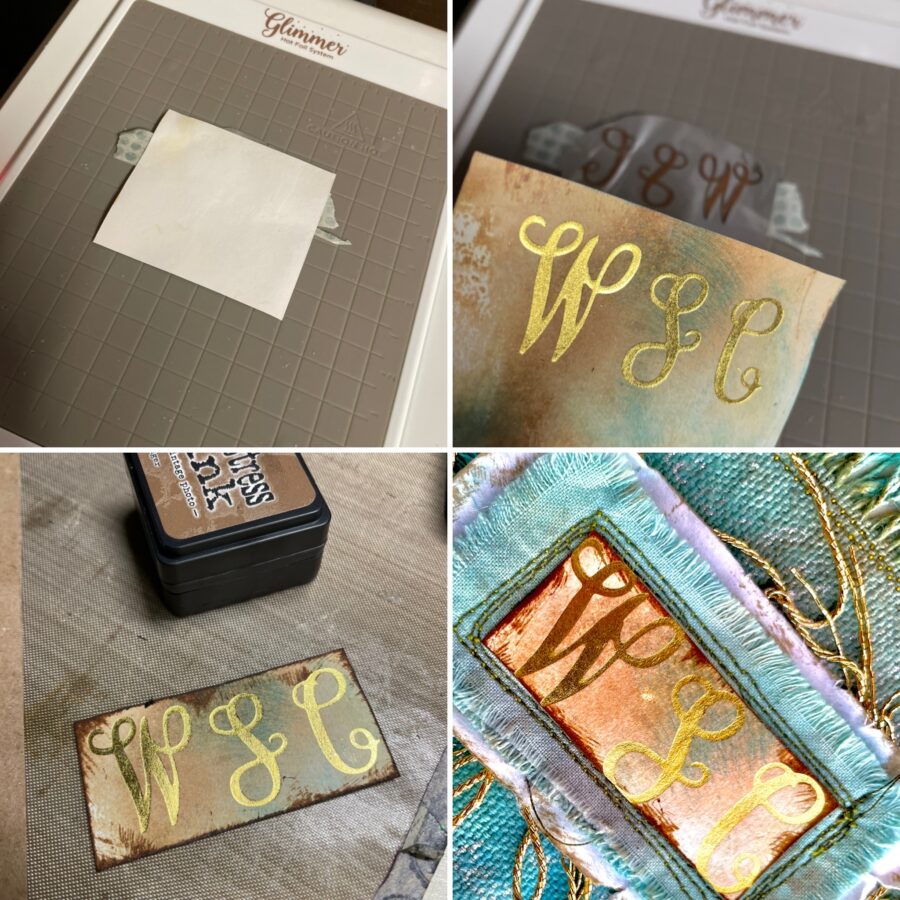
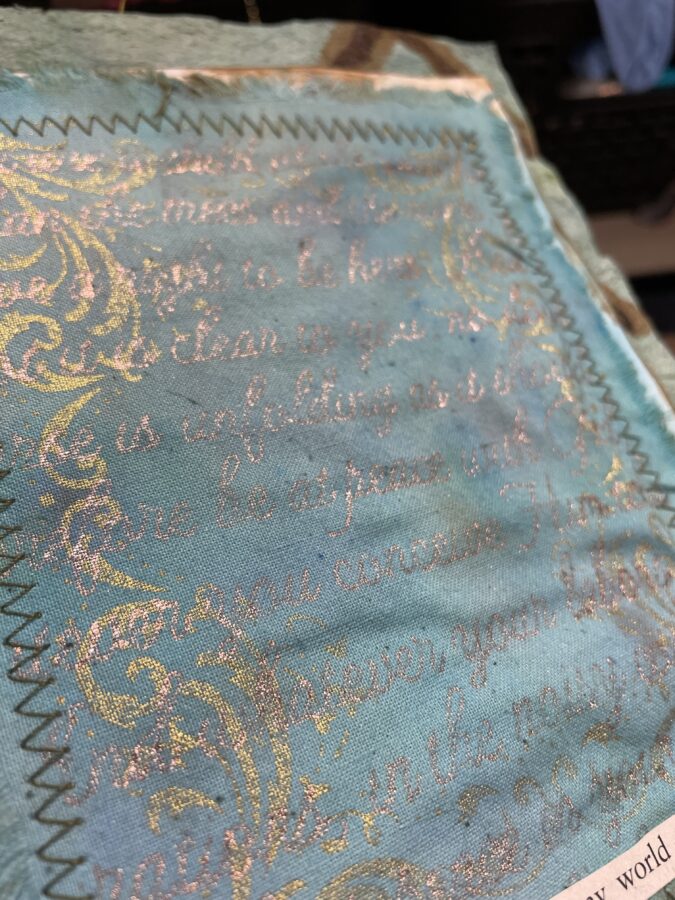
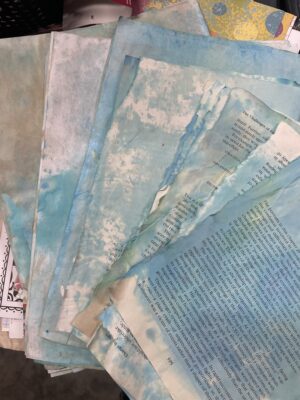
For me, step two consisted of dying any and all items I might want to use in my journal. You will see there was a lot I didn’t use, but I like to have choices. I used both Distress Ink and Distress Oxide inks as well as some pigment powders and other sprays I had on hand to dye my fabrics and papers. I just kept adding inks and then spraying with water until I had the colors I wanted. Make sure to spread them out to dry.
Hint: If you want a crisp bright foiling effect, foil your fabric after you dye it. I did go back and add some foil to the dyed pieces, but because I like the shabby feel, the ones I foiled before dying were my favorite.
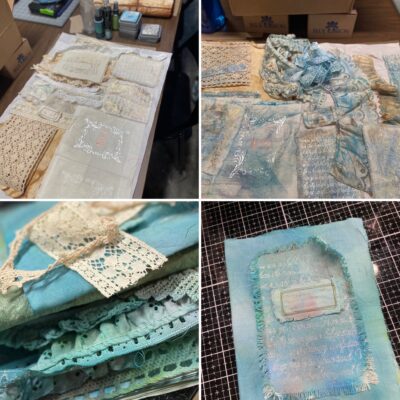
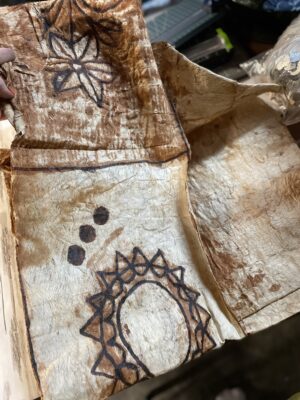
Note: You will also see (in the video) a fabric-like paper that I used on the inside cover and to cover the signature. This is Hawaiian tapa or kapa cloth that I dyed along with my other papers and fabrics. It looked like this before it was dyed.
Journal Step three:
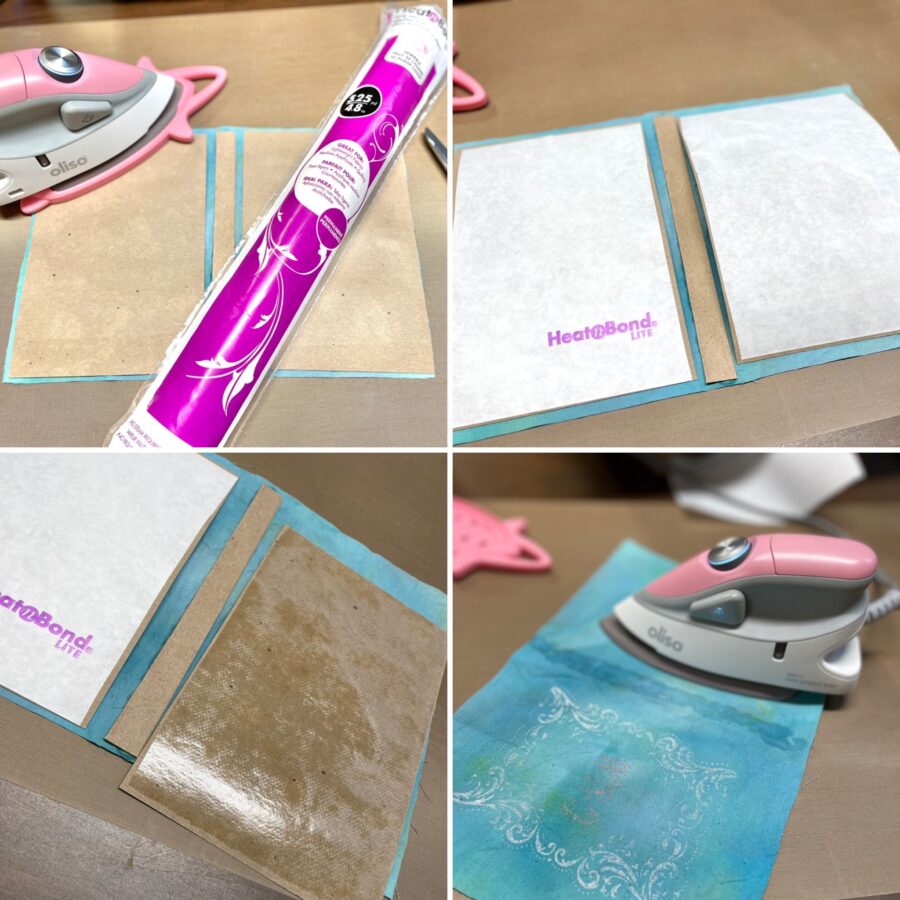
Create your cover by adding lightweight chipboard for structure and stability. I’ve said it before and I’m saying it again . . . HeatNBond is my absolute, hands-down favorite way to adhere fabric to paper. You get a smooth, permanent finish with no mess.
Hint: Make sure to flip the cover over and iron the fabric side as well.
Journal Step Four:
Next, using the papers and book pages you hopefully dyed in step two, create one signature to add to your book. Because I was keeping this book and know I will add each page as I journal, I did not add a lot to the interior. I did add some fabric and did a little sewing on the pages (you can see that in the video flip through at the end), but if you are going to give this as a gift, you might want to add more inking to the interior pages.
While I didn’t add much in the way of embellishments to this journal, I did create a “story” as I sometimes do to add to the pages. You can see in the second image, phrases I cut from book pages. It can be very therapeutic to sit and cut phrases from old book pages and arrange them into a story. I keep baggies of phrase types (i.e. scary, love, friendship, etc.) to make it easy. Sometimes, however, I do it like I did today. I scroll through pages looking for specific phrase types to include in my current project. I added them to the journal in the order they are in the image.
Hint: If you don’t want to dye papers, just substitute scrapbook paper or watercolor paper to use as an art journal.

Journal Step Five:
Finish by putting everything together. You can see in the video flip through below, that I added more of the foiled fabric inside my journal.