


Today we’re quite happy to introduce you to a Guest Designer joining us for Bee Week here at Therm O Web! Daisi Toegel caught our eye on Instagram when we saw her sharing projects featuring our products. Daisi tagged us in those (which we love when you do!) so we could see what she was working on. That simple act of tagging us is what led to us asking her to join us as a Guest for a couple of projects!

The materials used for this project are:
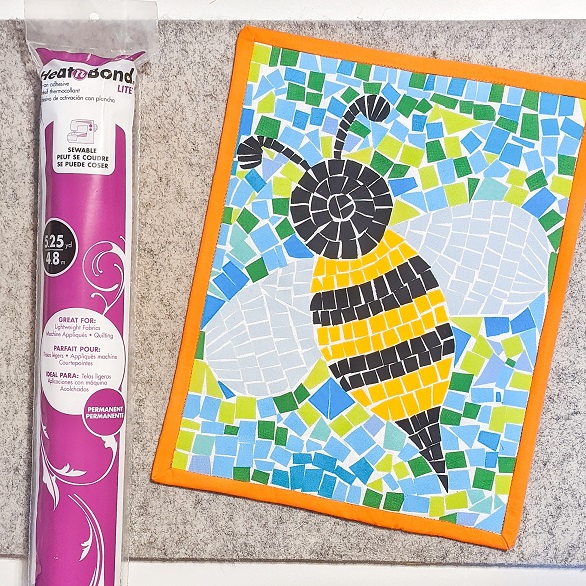
*Heat’n’Bond Lite 1/2yd Fusible Adhesive
*fabric scraps
*1 Fat Quarter for background
*1 Fat Quarter for Backing
*Scrap batting or 14in x 11in rectangle
*2 strips of 2 1/2in x WOF (44in) for binding
*paper scissors, cutting mat, rotary cutter, sewing machine, tweezer, and quilting ruler.
Happy Bee Fabric Mosaic Quilt Wall Hanger
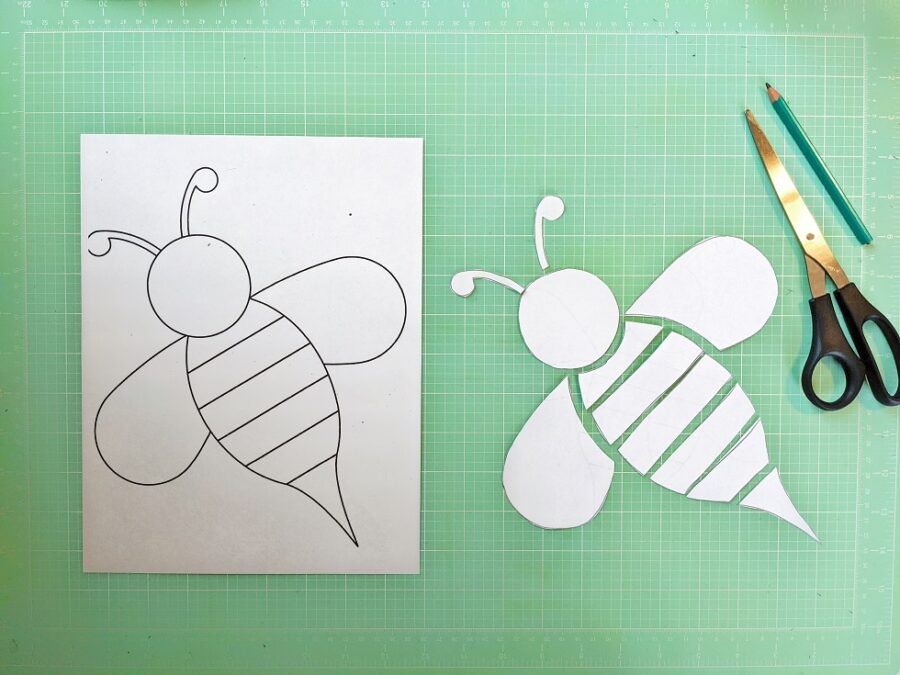
 To begin, download the free template by Craftsonsea.co.uk here Bee
You can use any template you want, I found this template very cute and with space enough to work with the small fabric squares inside the design.
Print 2 copies of the template, cut one of them into every section of the bee body, this will help to determine how much fabric will be used.
Gather scrap fabrics in the colors you will use for the project. Any size works here!!!
Choose what color your background will be, take into consideration that we’ll be using the template under the background fabric to follow the design (see next steps), so the lighter the background fabric the better.
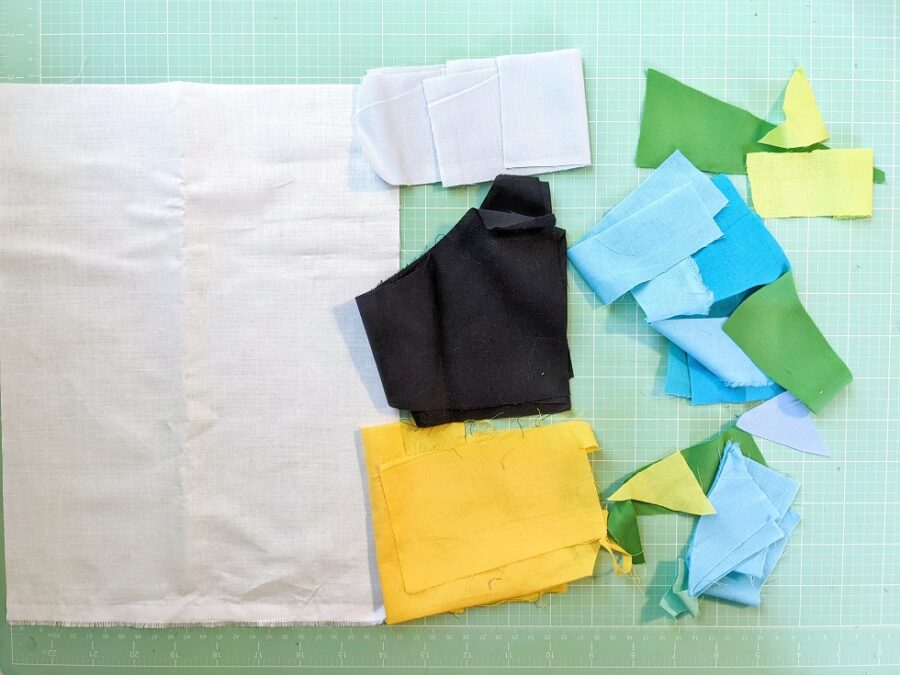
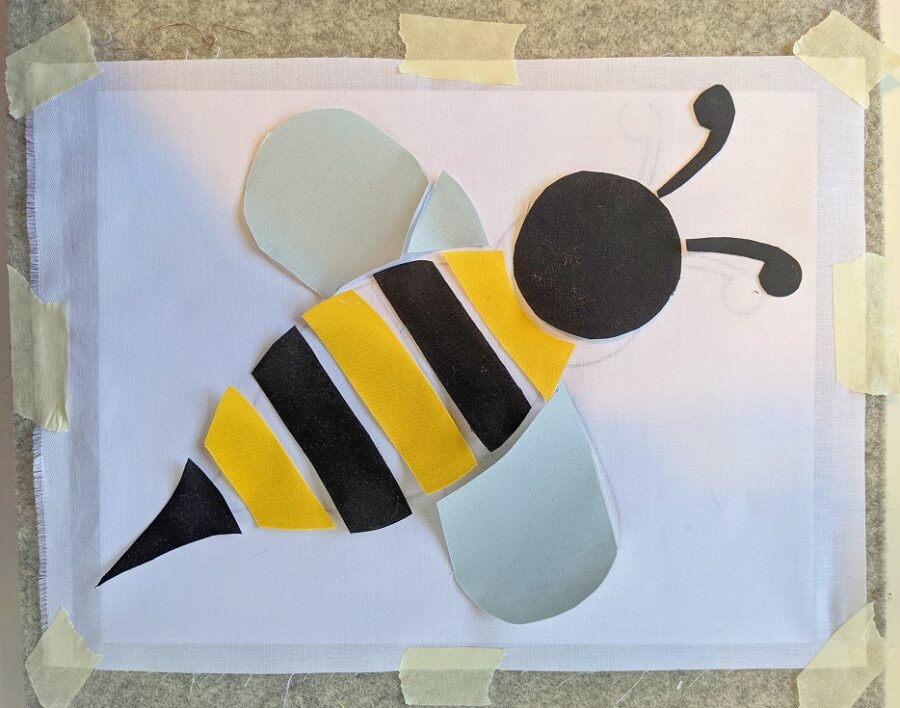
Match your fabric scraps to the cut pieces of the template to make sure that you will have fabric enough for the area you want to cover. For the background is best to overestimate, place the scraps around the shape as in the picture, and don’t worry if it seems that you have bigger pieces, they’ll all be cut into smaller ones to fill it out.
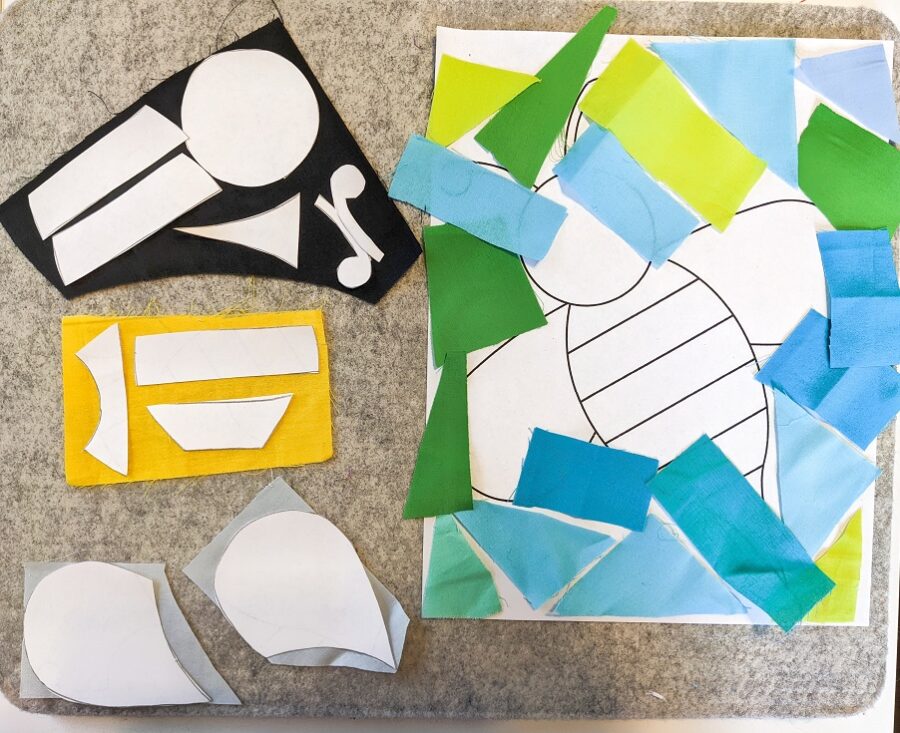
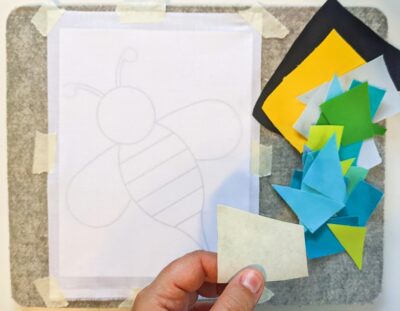
It’s time to fuse all scrap pieces. First press each one before fusing to make sure it’s nice and flat, then lay them all down on Heat’n’Bond Lite and fuse. You can use any surface you want to work on, I used my wool pressing mat and masking tape to hold both the template and the background fabric on top of it, so I can easily follow the design pieces as I go.
Cut each shape from your template and leave the background pieces to be cut in the end. Remember that you will have to cut the shapes mirrored if you’re not using a solid color fabric, so the shapes fit the right side up when you lay them down like you see below.
 The fun is about to start! Before sub cutting any of the shapes above into smaller pieces, remove the paper from the back for each one as you go, it will be much easier to simply lay the fabric down and fuse, but if you forget to remove the paper from the back before cutting it use the help of a tweezer, also good for placing the small pieces down on the background fabric.
It’s entirely up to you how you will cut each shape you’ve pre-fused, I found it easier to cut the smaller shapes as the antennas in its own direction, and the same for the head forming a circle, for the body I cut in the center of each strip with a bit of a curve to follow its shape too.
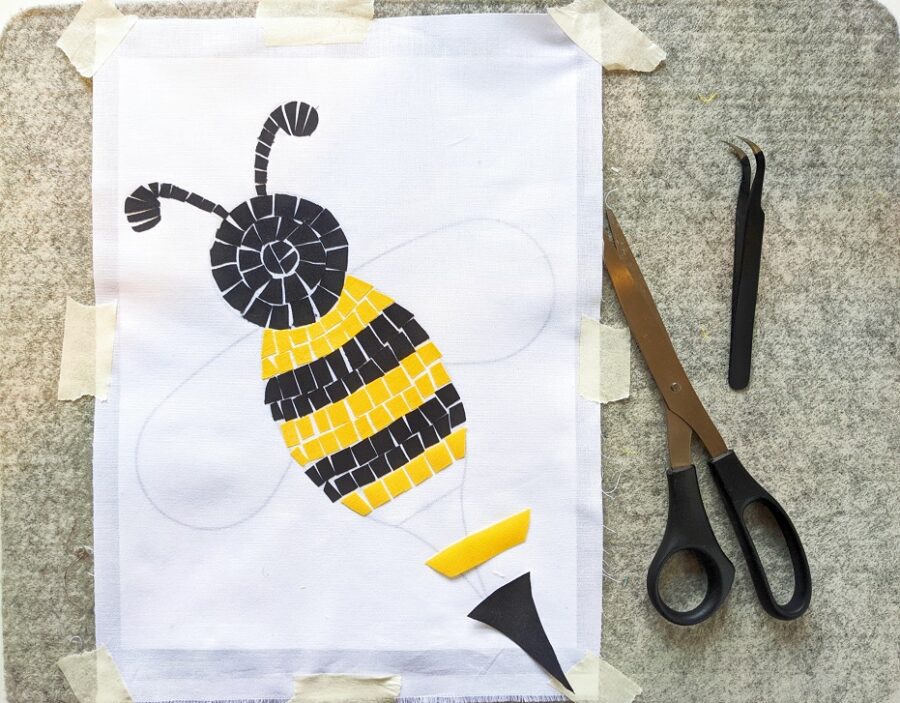
For each section that I finish, I press, so I make sure it won’t move as I go.
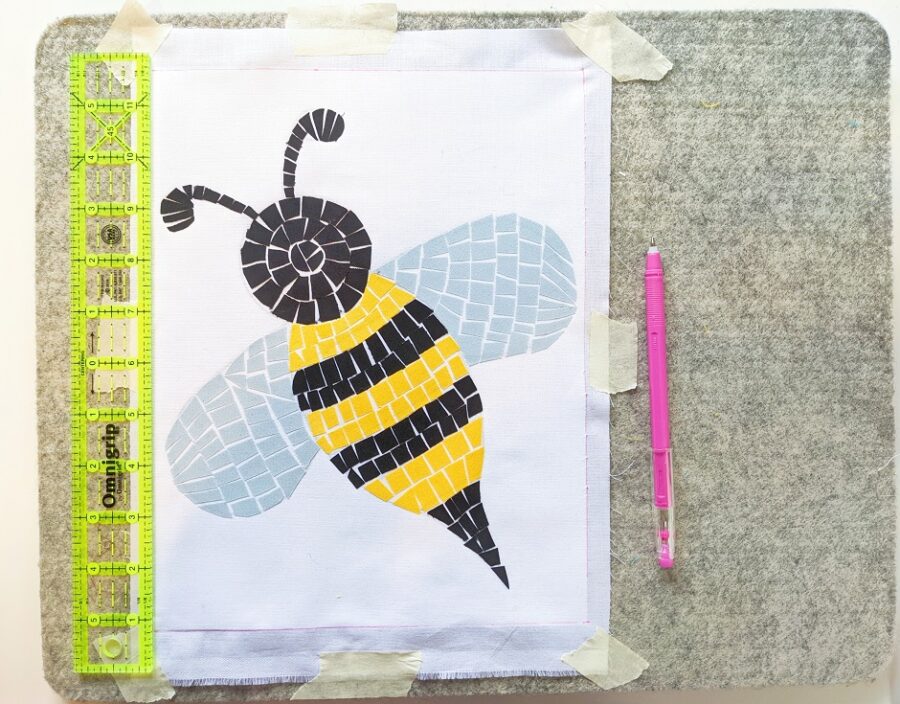
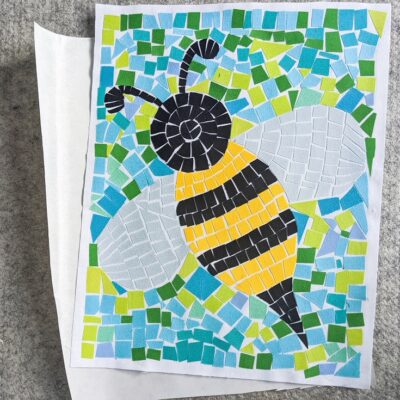
Once I am done with the body, it’s time to finally play with the background.
For the background fabrics, I simply made sure to mix the colors the most I could to give it a real stained glass look. I randomly cut various shapes, some smaller than others and as I laid them down I observed if any spot needed to be filled so I cut a shape that could fit it.
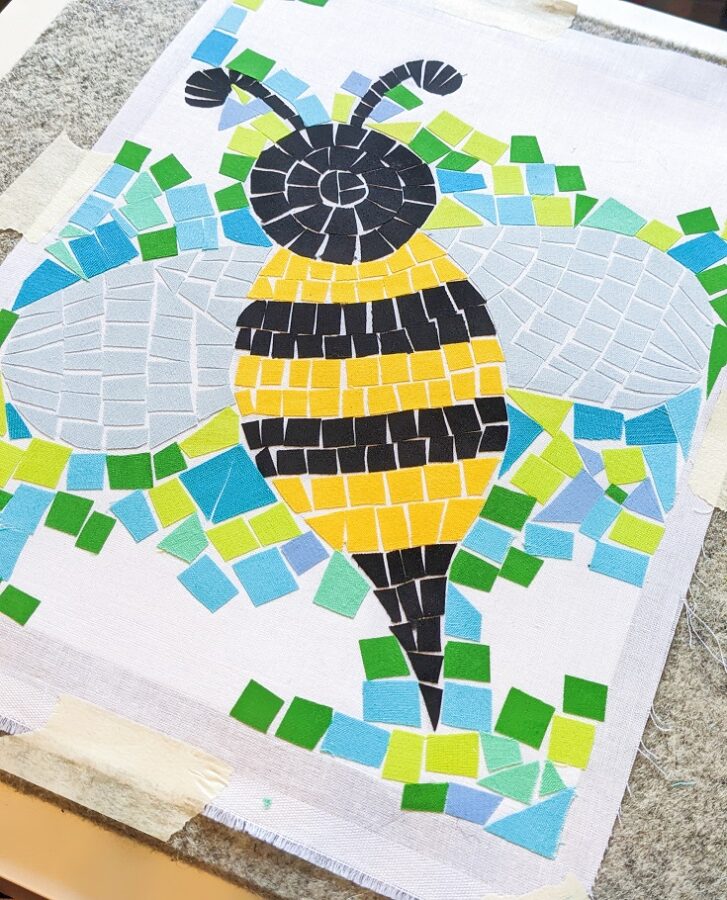
Every 3 inches of the area that I did I pressed. I left about 1/4in on the edges uncovered so the binding would not touch the mosaic.

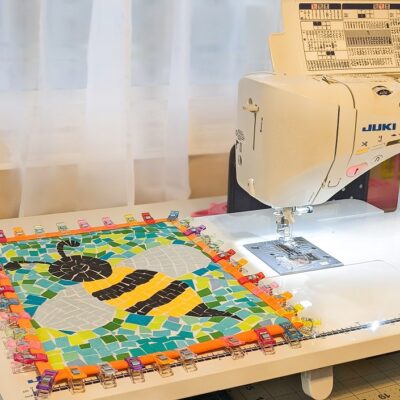
This work will not be quilted, so in order to attach a batting and background fabric to it, I used Heat’n’Bond Lite to fuse both sides.
This is a small project, so it’s perfect for using those batting scraps we always wind up saving. I fused the front and backing fabric to the batting leaving a bit of extra on the sides to make sure I would not cut the work when I trimmed.
It’s now time to bind it! I chose a contrasting color that would pop with the mosaic colors. Regular quilt binding instructions are suggested.
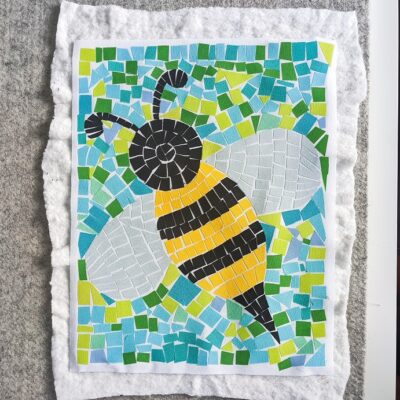
And it’s done!!!
 Daisi Toegel – Quilter and Pattern Designer
Be sure to follow Daisi on Instagram and visit her website to learn more about her and her projects!
http://www.instagram.com/daisitoegel
http://www.flowersew.com