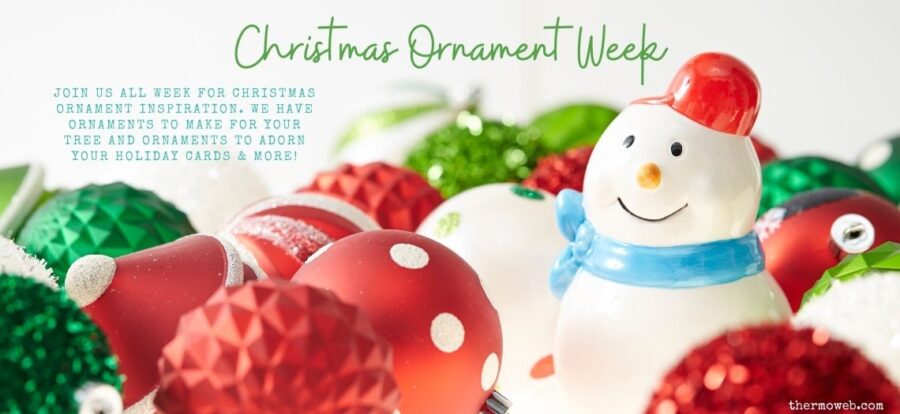
We’re kicking off a new week here on the Therm O Web blog and what better ideas to share than Christmas ornaments. We’re right on the cusp of the season of many of us preparing to decorate and the one steadfast thing we share across all of our traditions seems to be adorning the tree with beautiful ornaments.
Join us all this week as we share festive ideas with you to fill your tree, cards, gift boxes, and more!
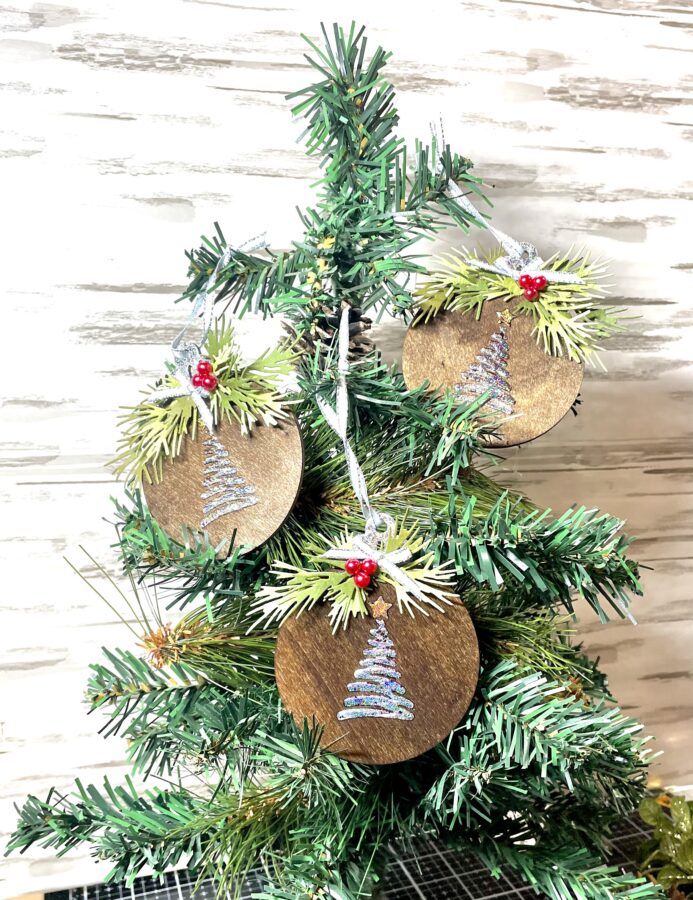
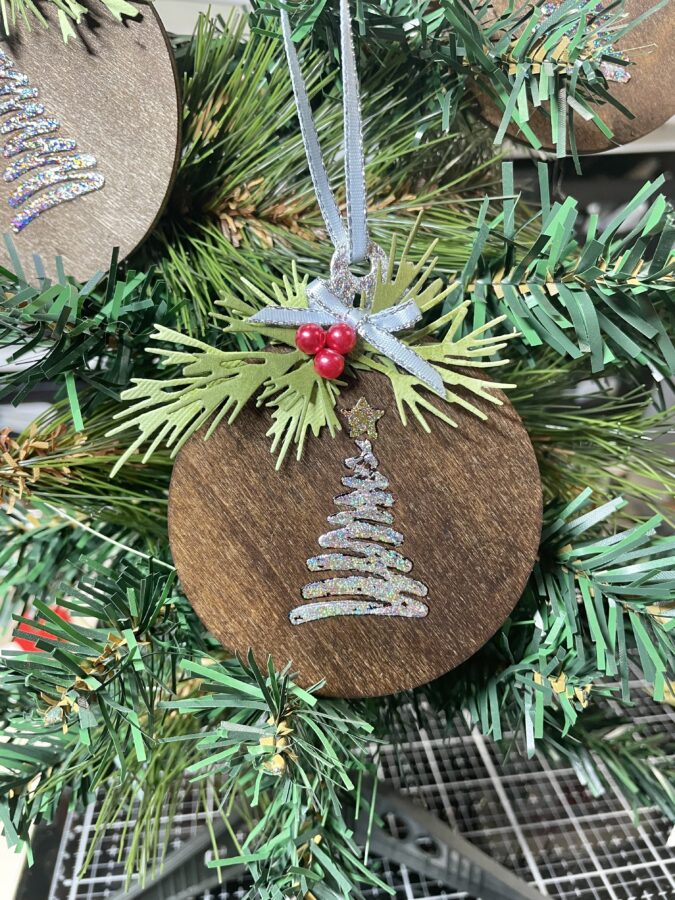
Handmade Foiled Holiday Ornaments with Unity
Supplies:
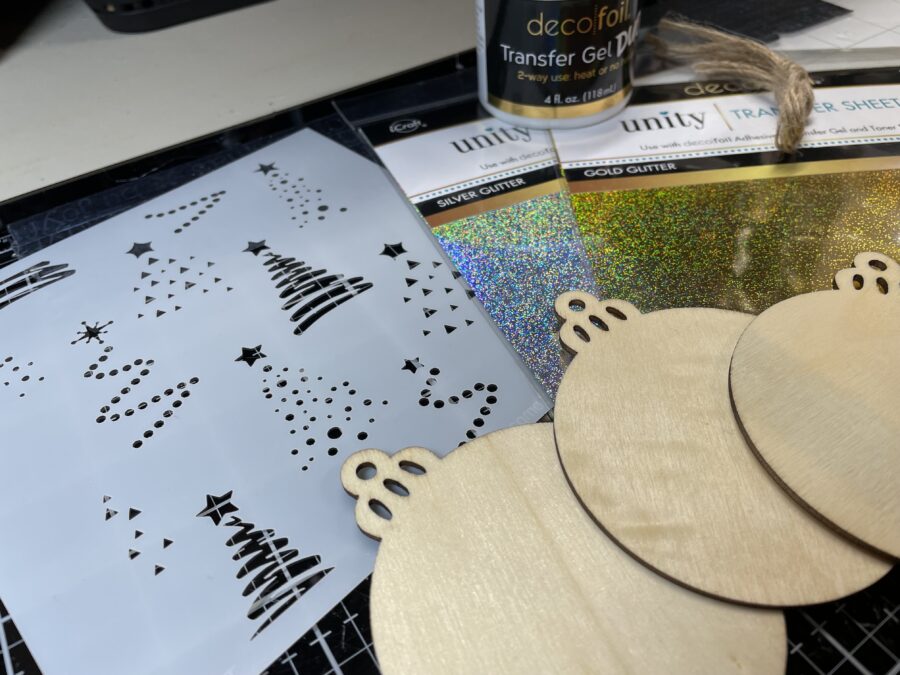
Deco Foil Transfer Gel DUO
Deco Foil Unity Transfer Sheets – Silver Glitter and Gold Glitter
Pixie Spray
Deco Foil Adhesive Pen
Ultra Bond Adhesive
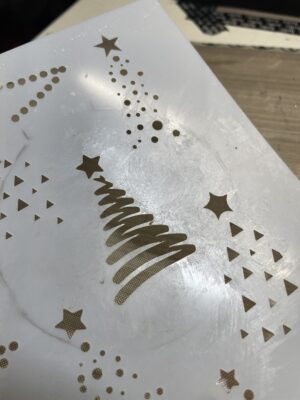
Unity Ornamental Pines Stencil
Other Supplies: Wooden or die-cut ornament, die-cut leaves, pearl beads, red alcohol ink, Distress Ink and applicator, Distress Ink Stain or similar product, palette knife and ribbon.
Foiled Unity Ornaments Step One
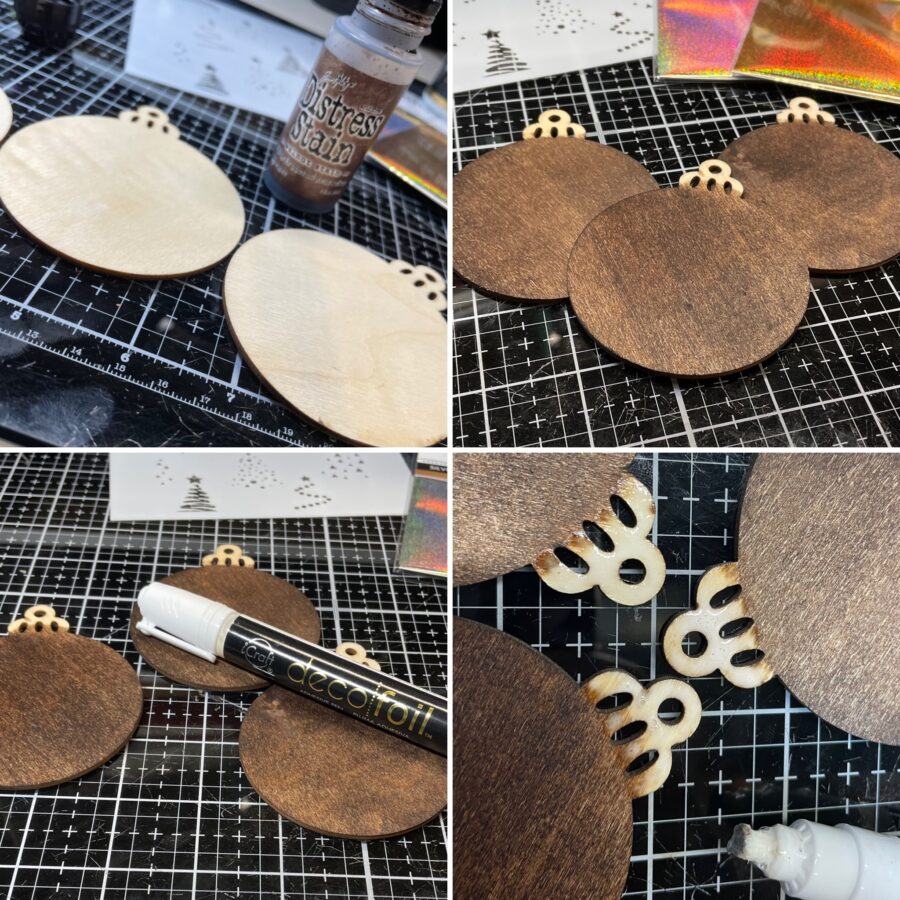
First, using Distress Stain or watered-down brown paint, stain the round portion of your wooden ornaments (I purchased mine on Amazon).
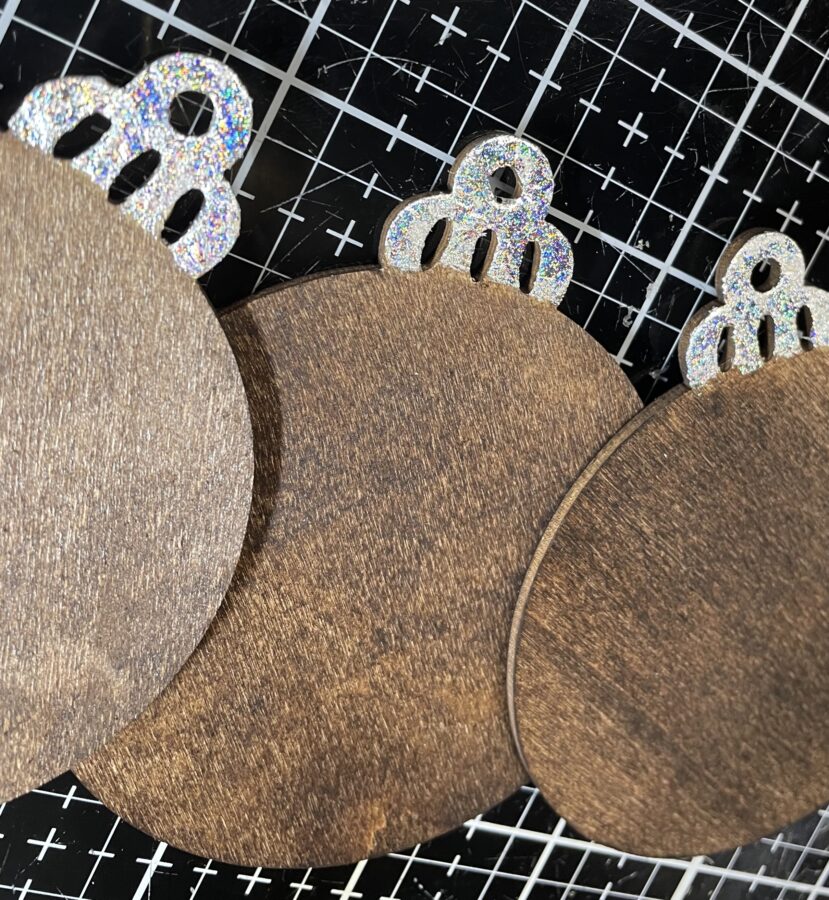
Next, add adhesive to the ornament topper using the Deco Foil Adhesive Pen. Allow the adhesive to come to tack (dry but tacky to the touch). While you are waiting on adhesive, cut three small squares of the Silver Glitter Unity Foil Transfer Sheet large enough to cover the ornament toppers. Finally, press the dull side of the Foil Transfer Sheet against the tacky ornament topper and burnish to transfer the foil to the ornament.
Hint: You can use a die-cut ornament instead of a wooden one. Simply die-cut it five or six times and adhere them together to create a thicker dimensional ornament.
Foiled Unity Ornaments Step Two
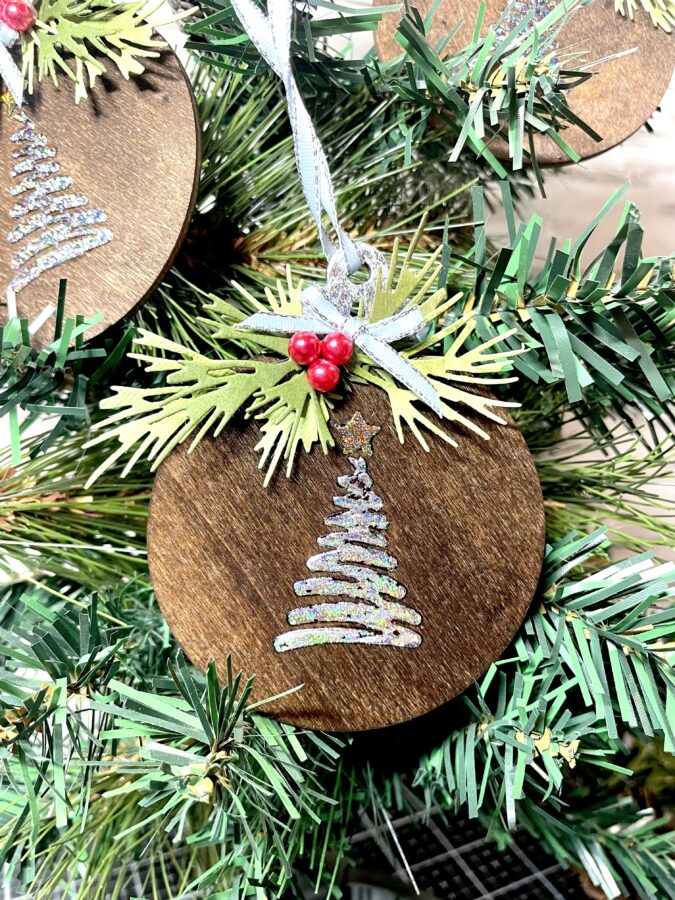
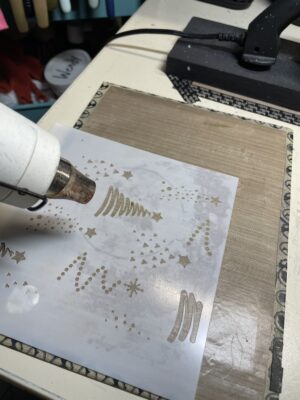
First, line up your ornament so that the Unity Ornamental Tree is in the center, and draw the outline on the stencil with a pencil so that you can line up each ornament.
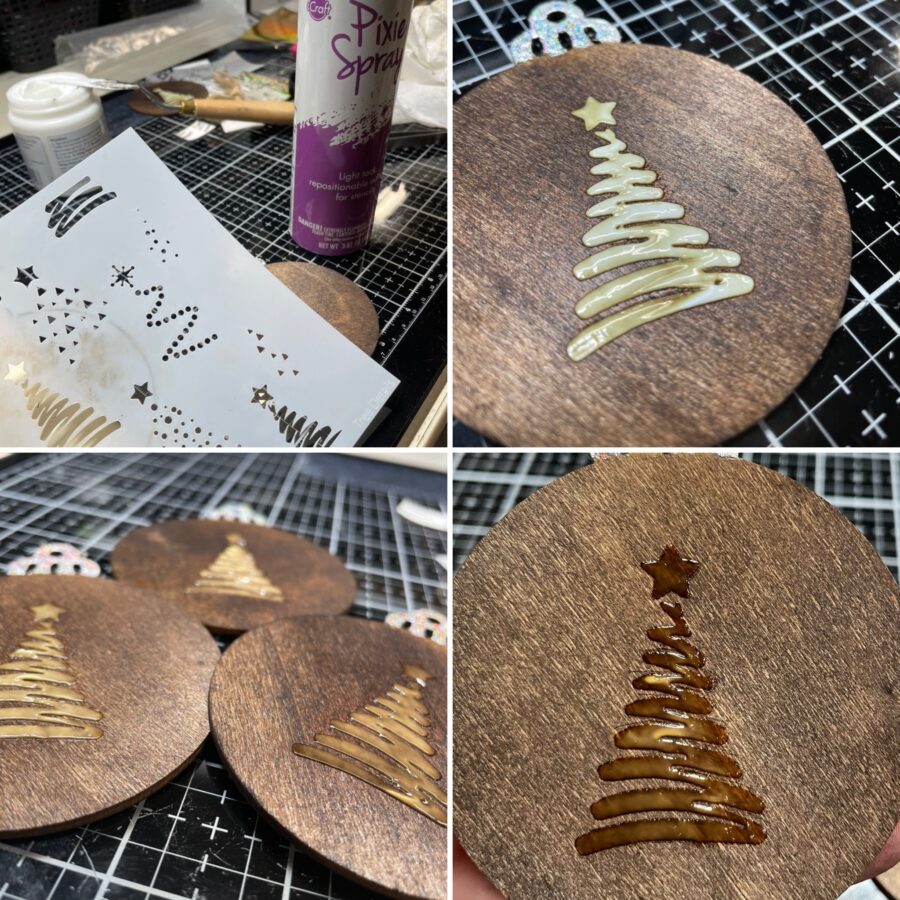
Next, spray the back of the stencil with iCraft Pixie Spray and wait until the spray comes to tack before pressing it onto your ornament (lined up inside the pencil markings). The Pixie Spray will keep the stencil temporarily adhered to the ornament.
Using a palette knife or spatula, spread a thin, even layer of deco foil Transfer Gel Duo over the tree stencil and then carefully lift it off. The Transfer Gel Duo will have a milky white appearance when you first apply it but turn clear when ready for foil application. You can see the difference in the picture below.
Hint: If you are like me and tend to be a little rough with your stencils, and some of the small slivers get a little bent, just place your stencil on a flat, heat-safe surface and apply a bit of heat (not too much) and press it flat. It will be like new!
Foiled Unity Ornaments Step Three
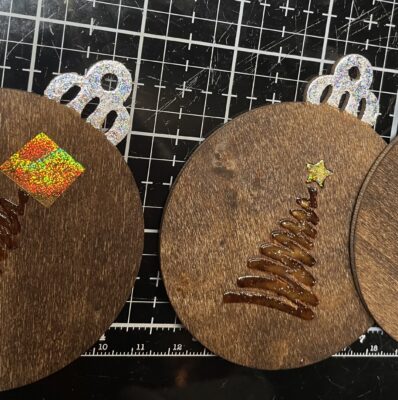
First, cut tiny squares of Gold Glitter Unity Transfer Foil just large enough to foil the stars. Press the foil, dull side down, onto the star and burnish with your finger. Pull off the release paper to reveal your beautiful gold star.
Repeat this step with the Silver Glitter Unity Transfer Foil and the trees. These ornaments already look amazing!
Hint: Do not burnish the foil with a hard tool as it might damage or spread out the Transfer Gel Duo and damage your tree. Don’t worry though, after about 24 hours the Gel will be completely set and your foiled image will not move at all.

Foiled Unity Ornaments Step Three
Okay, you could stop here if you want a true country look, and just add some jute twine to hang them. Of course, that’s not what I did 😊. If you want to dress yours up a bit like I did, follow along to the end.
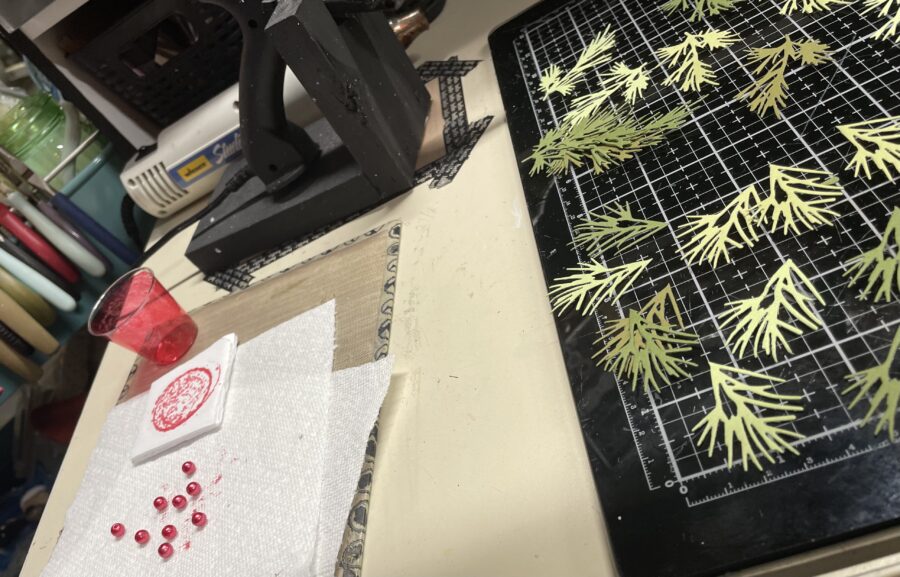
First, drop some pear beads (I used nine) into a small plastic cup and add a few drops of red alcohol ink. Cover and shake until the beads are coated. Once the beads are coated, spread them on a paper towel to dry. While your beads are drying, die-cut some leaves and shade them with green inks.
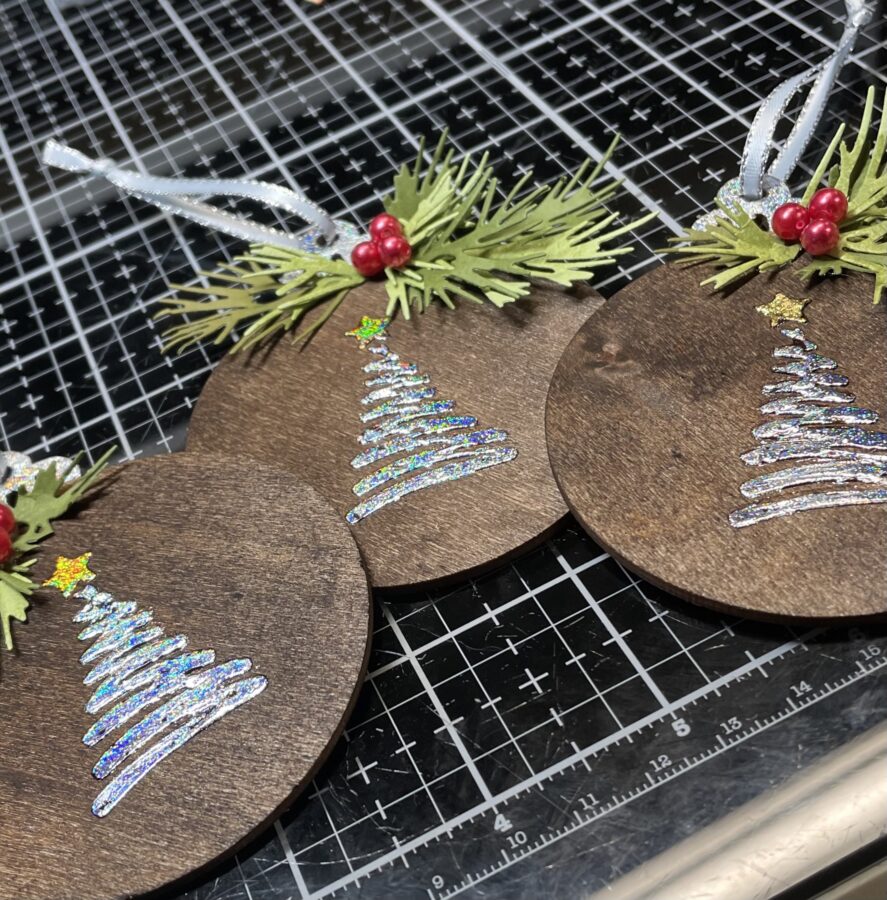
Next, adhere your leaves to the top of the ornament using Ultrabond Liquid Adhesive. Add the red beads to look like holly berries.
Finally, add a bow at the top and a ribbon hanger to finish off your ornaments!
I hope you enjoyed this tutorial as much as I enjoyed sharing it with you. Happy crafting!
It’s the holiday season and what better way to celebrate than with a Giveaway! We’re sharing Christmas Ornament ideas and want you to be able to shop for many of the products our designs are using! Simply follow the entry software to get entered to win! One random winner will win a $35 Gift Card (plus free shipping) to shop with us! That might be YOU!