 Hello everyone! Thanks for stopping by. This is Amanda from Twiddler’s Nook popping in with
  a little bundle of Halloween treat bags to share with you! I absolutely love creating gift packages like this…but add Halloween to the mix and I was over the moon! And these are perfect for Booing your neighbor or treats for school parties and games. So much fun! Let’s have a look and then get started.
Halloween Treat Bags with Foil
Products used today:
Brutus Monroe Mixables Toner Card Fronts – really radiant and floral fantasy
Brutus Monroe for Deco Foil – Orange Sketch and Copper Ripples
Deco Foil Flock Transfer – Purple Punch and Screamin’ Green
iCraft Ultra Bond Liquid Glue Oen
3D foam squares
Easy-Tear Tape
Avery Elle treat topper die
Lawn Fawn tiny gift box bat add on dies
Pink & Main zig-zag circle dies
Pink & Main layered circle dies
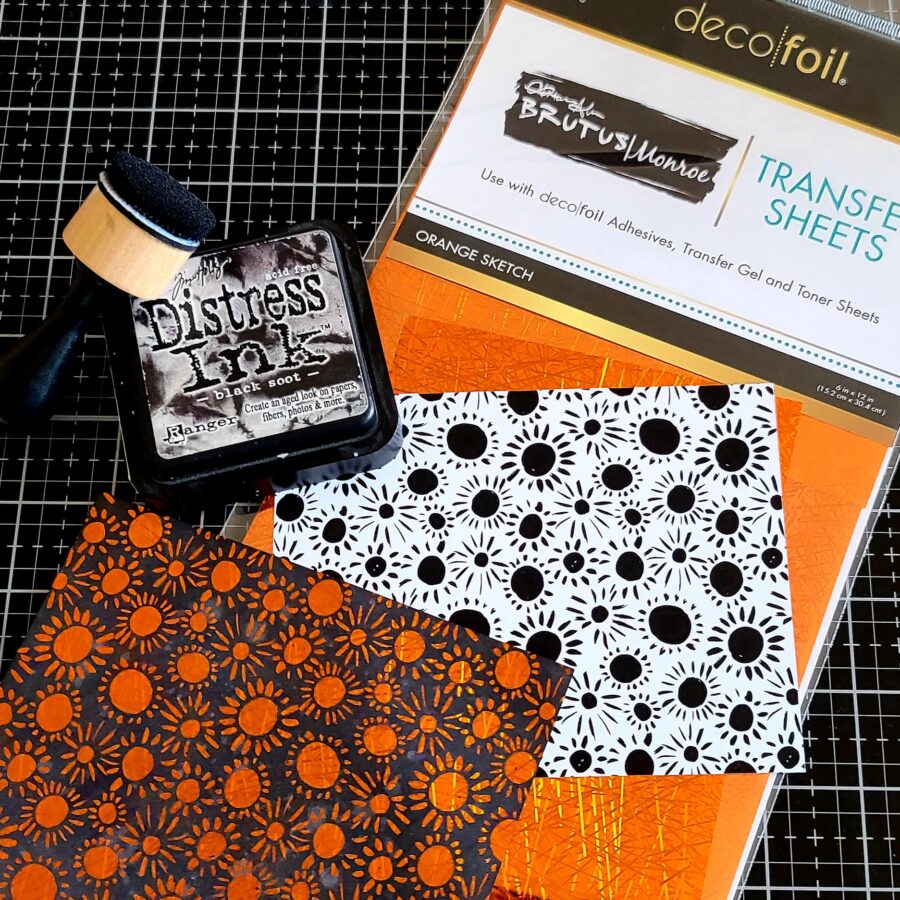
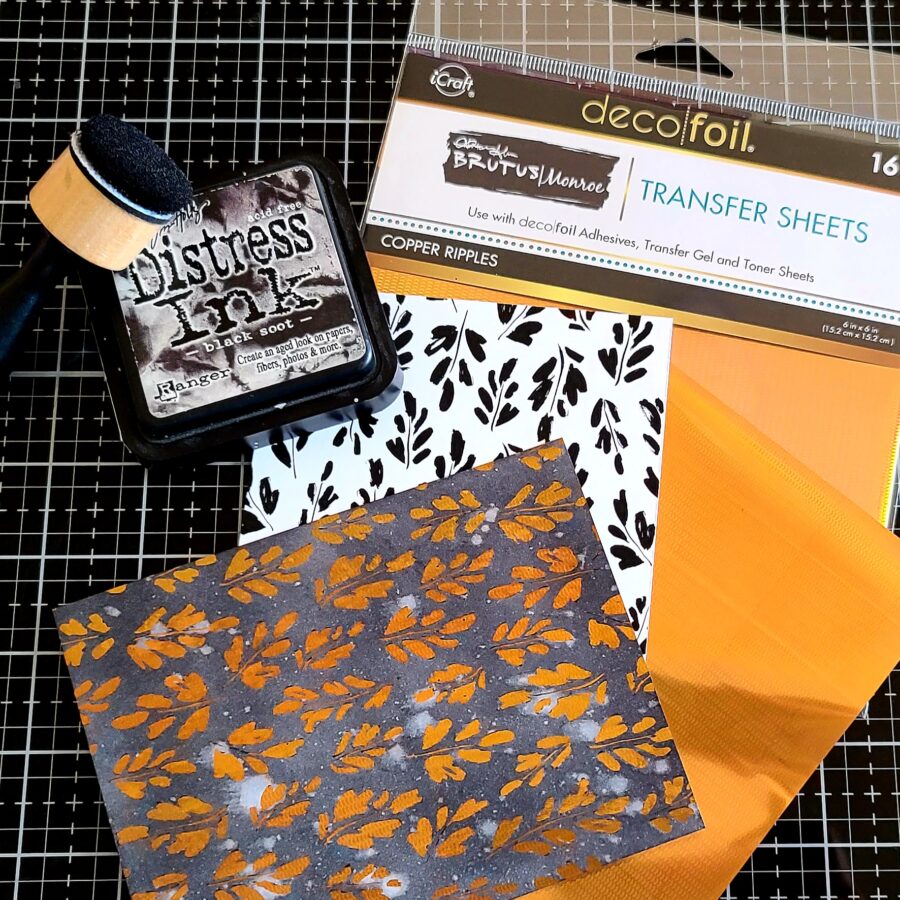
I chose a pattern from each collection of Brutus Monroe Mixables toner card fronts and ran them through my heated up laminator – one with copper ripples deco foil and the other with the orange sketch. After they were foiled, I inked them both up with black soot distress ink and spritzed them with water.
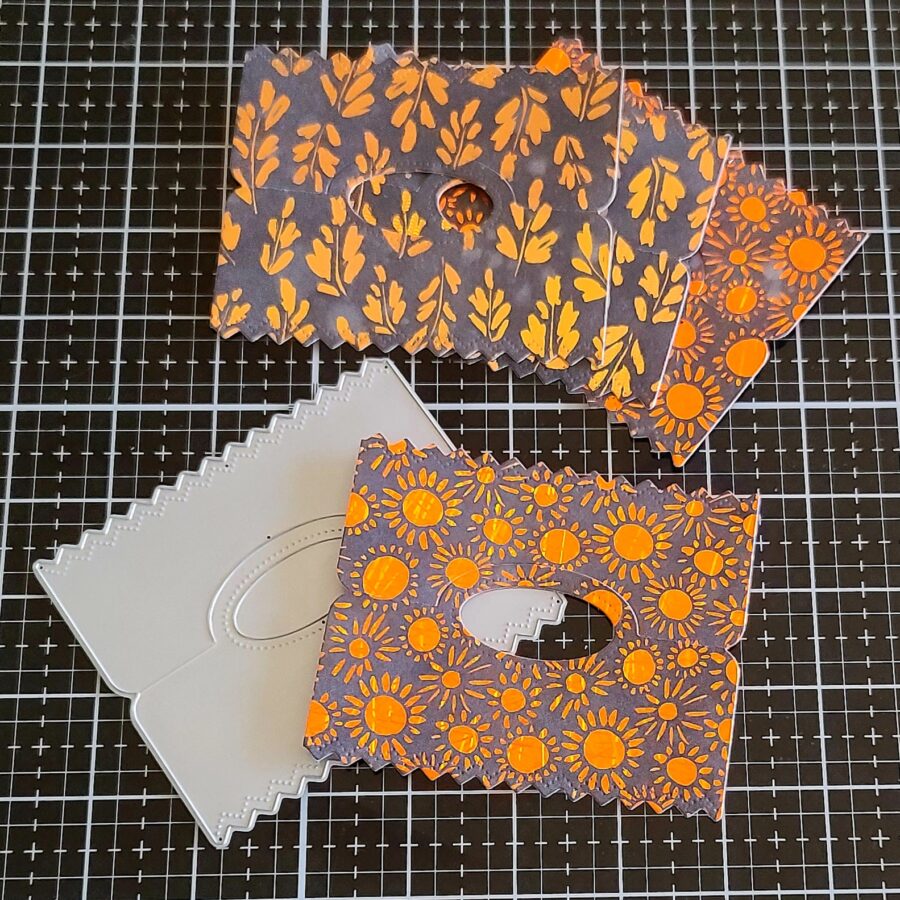
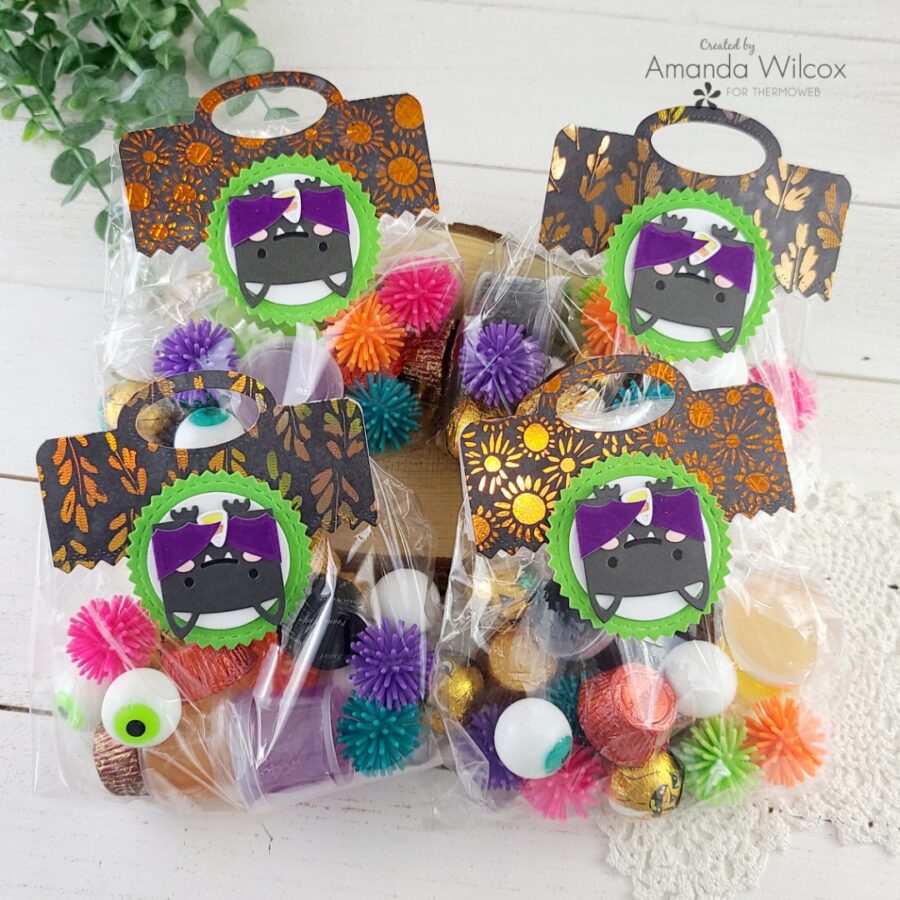
Then I die cut each one with the Avery Elle treat bag topper die to create the bases for my project.
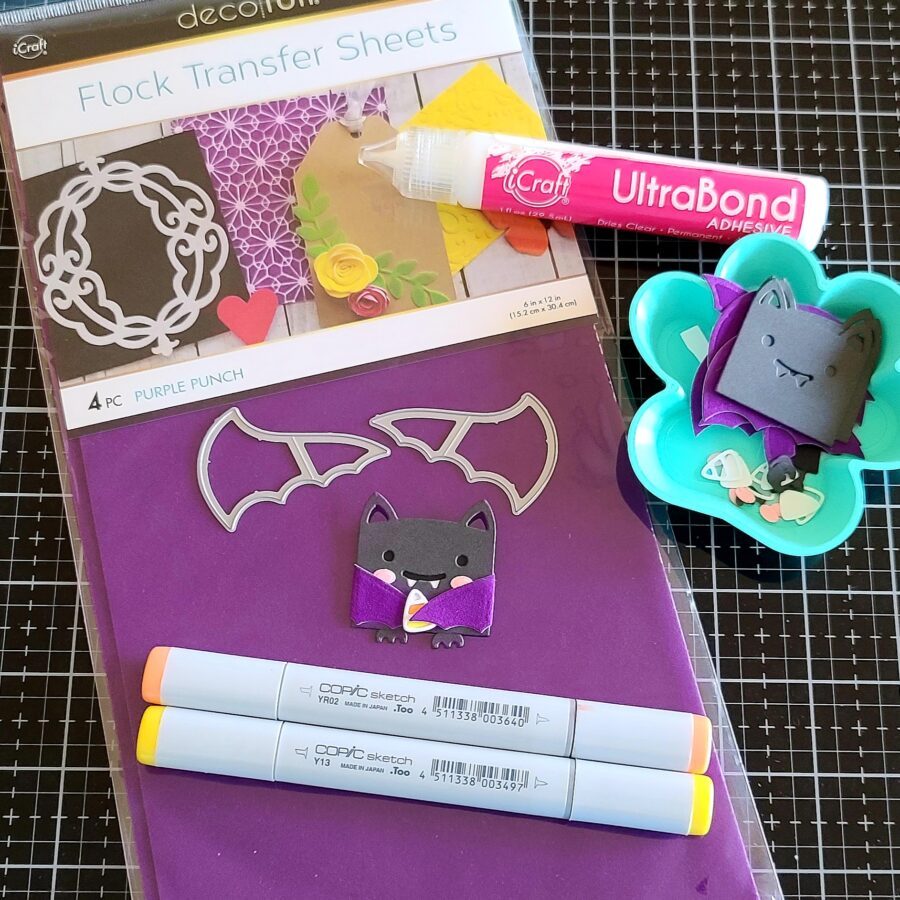
Next, I pulled out the Lawn Fawn tiny gift box bat add-on dies and cut my pieces for that. I thought it would be fun for a little texture and color to cut the wings from purple punch deco foil flock. I used the Ultra Bond glue pen to adhere all the pieces together.
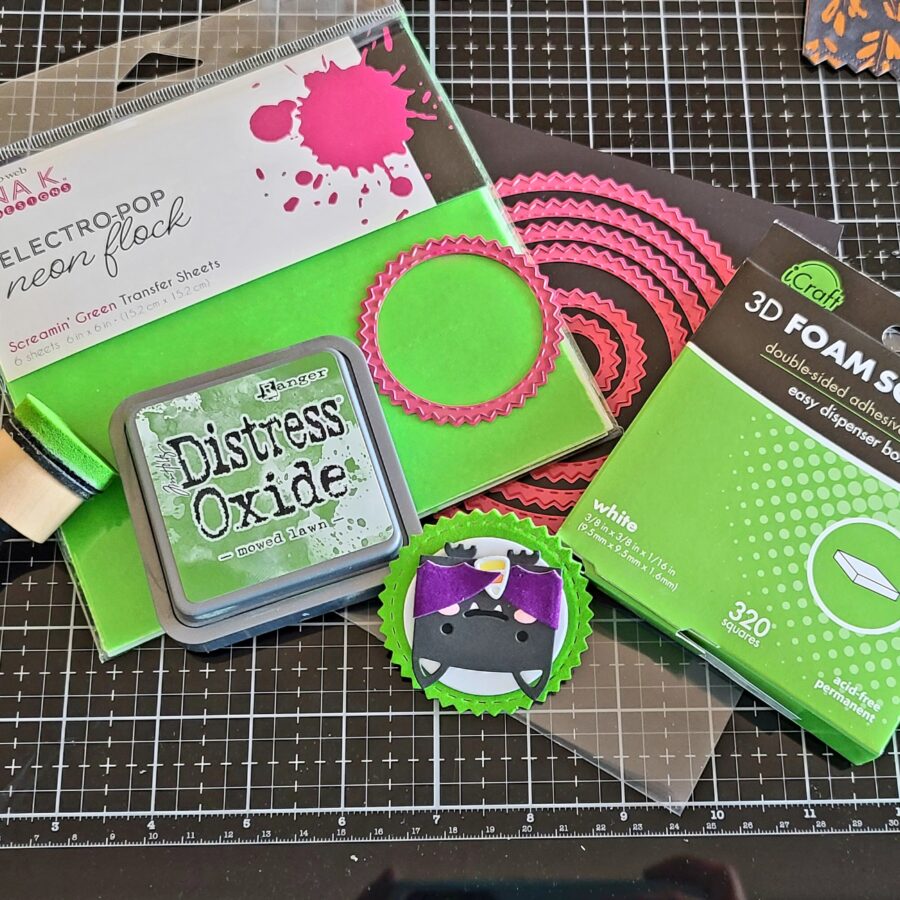
Next, I die-cut white cardstock circles from the Pink & Main layered circles dies and popped my bats upon them with 3D foam squares. Then I cut 4 Pink & Main zig-zag circles from screamin’ green Electro-pop neon flock! I inked up the edges with mowed lawn distress oxide ink and used liquid glue to adhere them to the circles with my bats.

Next, I filled some cellophane bags with Halloween-themed treats and toys I picked up and stapled the tops of the bags shut. I lined the inside of the treat toppers with easy tear tape, removed the release paper, and folded them around the top of the bags.
Finally, I adhered the cute bat circles to the bottom center of the treat toppers with more tear tape and all of my treat bags are complete.
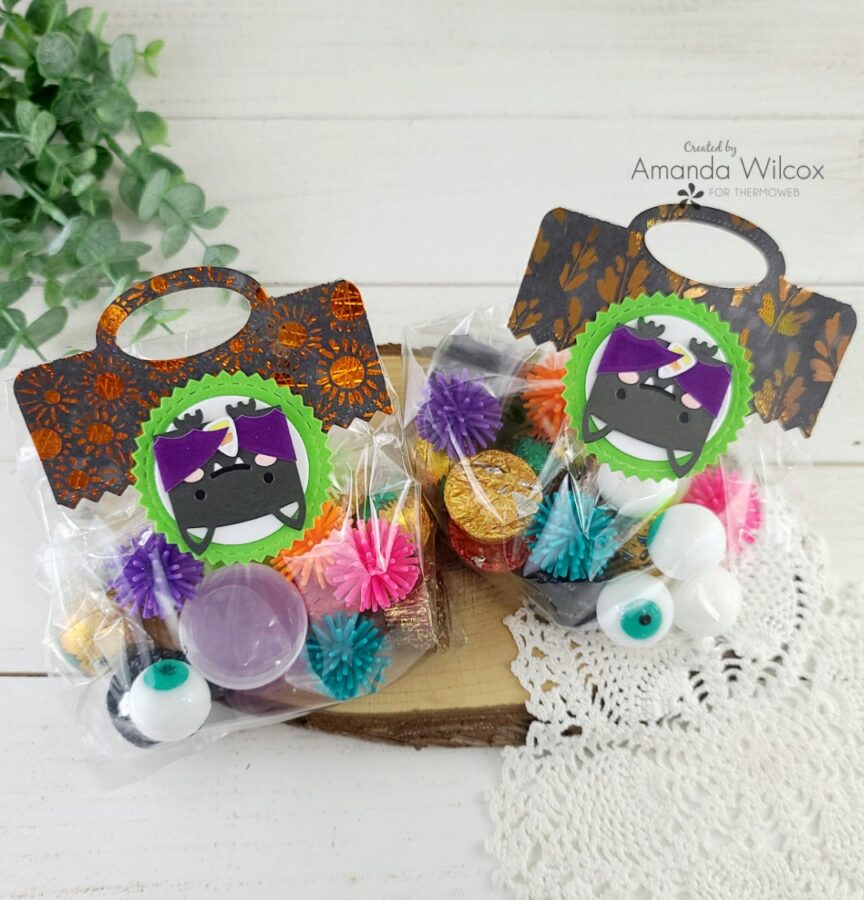
Here’s a look at both designs. Aren’t they so much fun!?! I’m really excited to give them out to a few special kiddos in my life!
I hope you enjoyed today’s project. I appreciate you sharing your time with me. Have a fabulous day! And be sure to visit our friend Laura Kelly for some FREE Boo Your Neighbors printables and more! Let the Halloween games begin!