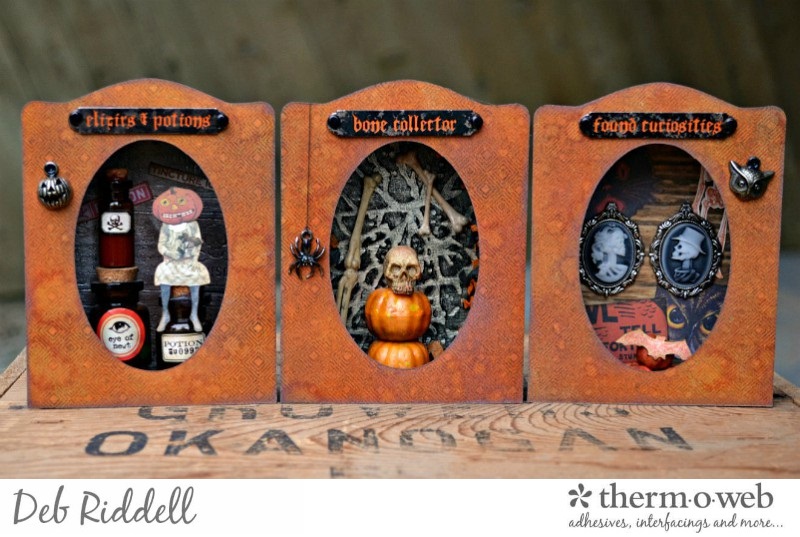
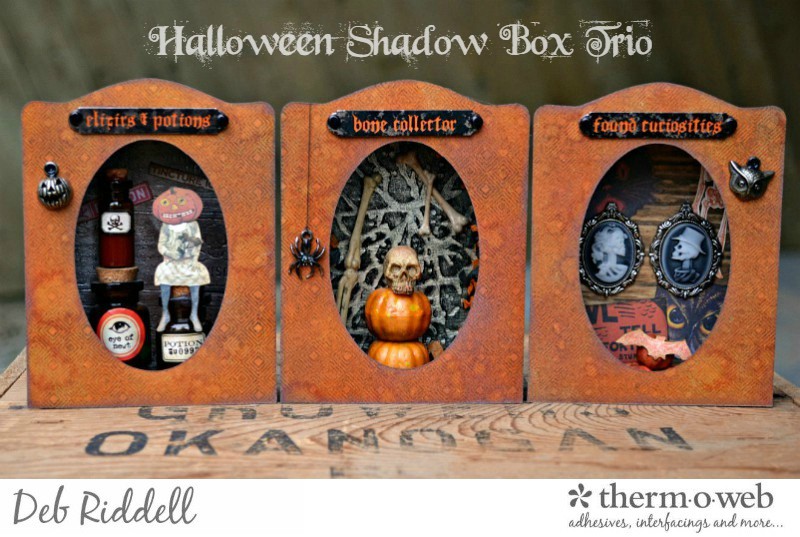
Hello everyone and welcome, it’s Deb Riddell here and I have a tutorial to share with you today for a trio of Halloween shadow boxes created with Rebekah Meier Designs Mixed Media Art Paper, Mixed Media Foam Sheets and Mixed Media Transfer Foils.
Halloween Shadow Box Trio With Rebekah Meier Designs
Therm O Web Supplies Used:
Rebekah Meier Designs Mixed Media Art Paper 9″ x 12″ (4 sheets per pack)
Rebekah Meier Designs Mixed Media Foam Sheets 9″ x 12″ (2 sheets per pack)
Rebekah Meier Designs Transfer Foil 6″ x 6″ (12 sheets per pack) • Patina
Rebekah Meier Designs Transfer Foil 6″ x 6″ (12 sheets per pack) • Antique Pearl (Satin)
iCraft Mixed Media Adhesive 2.1 fl oz
SuperTape™ Roll • 1/4 in
Memory Tape Runner XL™
Other supplies used:
Trinket Box and Frame die; Poison Labels, Wood Planks and Cracked embossing folders – Sizzix
Distress Stain, Distress Paint, Distress Ink, Alcohol Ink – Ranger Ink
Diamonds stamp – Stampers Anonymous
Assorted Halloween Idea-ology – Advantus
Halloween themed scrapbook paper
Miscellaneous – black and orange acrylic paint; black and white cardstock; die cutting machine; paper trimmer; scissors
Halloween Shadow Box Trio Instructions:
Ink a sheet of Rebekah Meier Designs Mixed Media Art Paper with an orange water reactive stain or spray (this is Carved Pumpkin Distress Stain). Randomly ink the stained Art Paper with a dark brown water reactive ink (Ground Espresso Distress Ink was used here) and then spritz the art paper with water droplets to activate the ink and stain. Dry thoroughly and then stamp the colored Art Paper with a diamond patterned stamp (this is the Diamonds background stamp) with a black permanent ink. Peel off the backing paper from the Art Paper and adhere it to some black cardstock. Die cut three front panels with the Trinket Box & Frame die (with the oval Movers & Shapers insert in place) from the prepared Art Paper and set them aside for the time being.
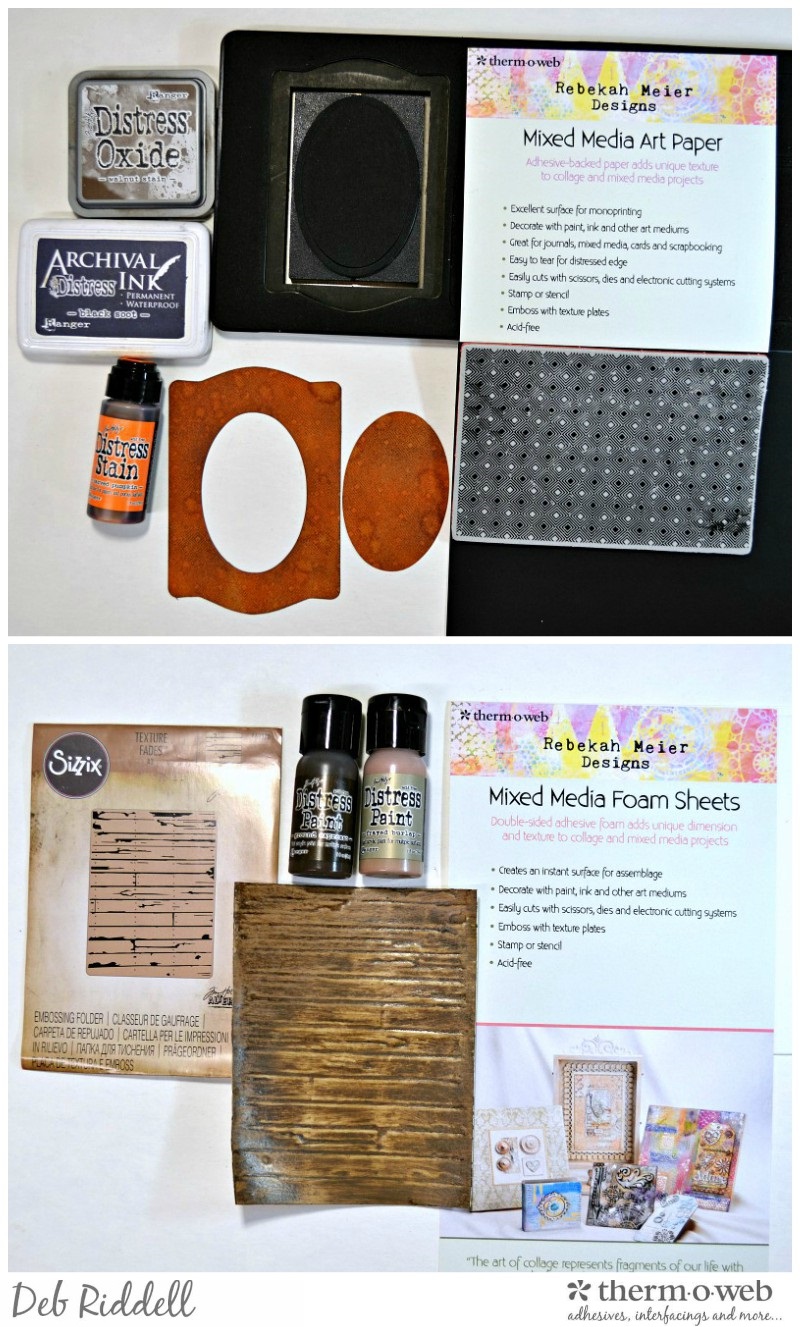
Emboss a piece of Rebekah Meier Designs Mixed Media Foam Sheet with the Wood Planks Texture Fades embossing folder and peel off one side of the backing paper. Paint the exposed foam first with a beige acrylic paint, let dry thoroughly and then add another coat of dark brown acrylic paint, wiping the dark brown paint back before it dries completely to leave it in the recesses of the embossed Foam Sheet. Remove the remaining backing paper from the painted Foam Sheet and adhere it to a piece of white cardstock (or black cardstock, it doesn’t matter as it will not be seen in the finished shadow box).
Cut two more pieces of Mixed Media Foam Sheet and apply Patina Mixed Media Transfer Foil to one of them and Antique Pearl Mixed Media Transfer Foil to the other by removing one side of the Foam Sheet backing paper and burnishing the foil onto the exposed adhesive with a soft cloth.
Emboss the Antique Pearl foiled Foam Sheet with the Cracked embossing folder, apply a coat of black paint to the foiled and embossed Foam Sheet and wipe it off before it dries to leave the paint in the recessed areas of the embossing. Emboss the Patina foiled Foam Sheet with the Poison Labels Texture Fades embossing folder, applying an orange paint to it and removing it as well before it dries. Remove the backing paper from each piece of embossed Foam Sheet and adhere them to white or black cardstock.
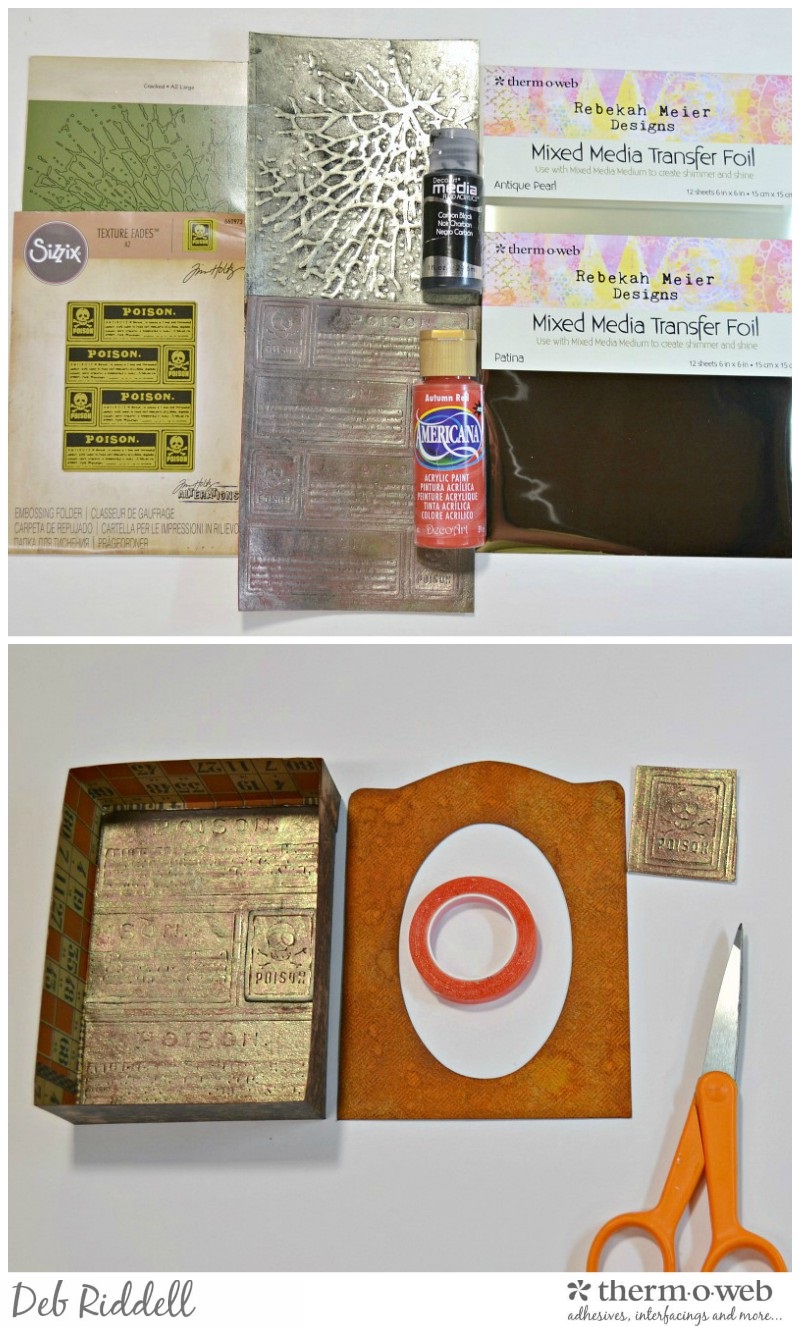
Die cut the side pieces of your shadow box from patterned Halloween paper with the Trinket Box die. Die cut a back panel from the Poison Label embossed Mixed Media Art Foam. Assemble the sides of your box with iCraft SuperTape and adhere the Foam Sheet background onto the bottom with either SuperTape or iCraft Mixed Media Adhesive. I cut out another skull and crossbones poison label from the remnants of the Mixed Media Foam Sheet that was left over for a bit more dimension.
Repeat the process for the two remaining shadow boxes, adhering the Cracked embossed Mixed Media Foam Sheet onto the bottom of one box and the painted Wood Planks Foam Sheet onto the bottom of the remaining box.
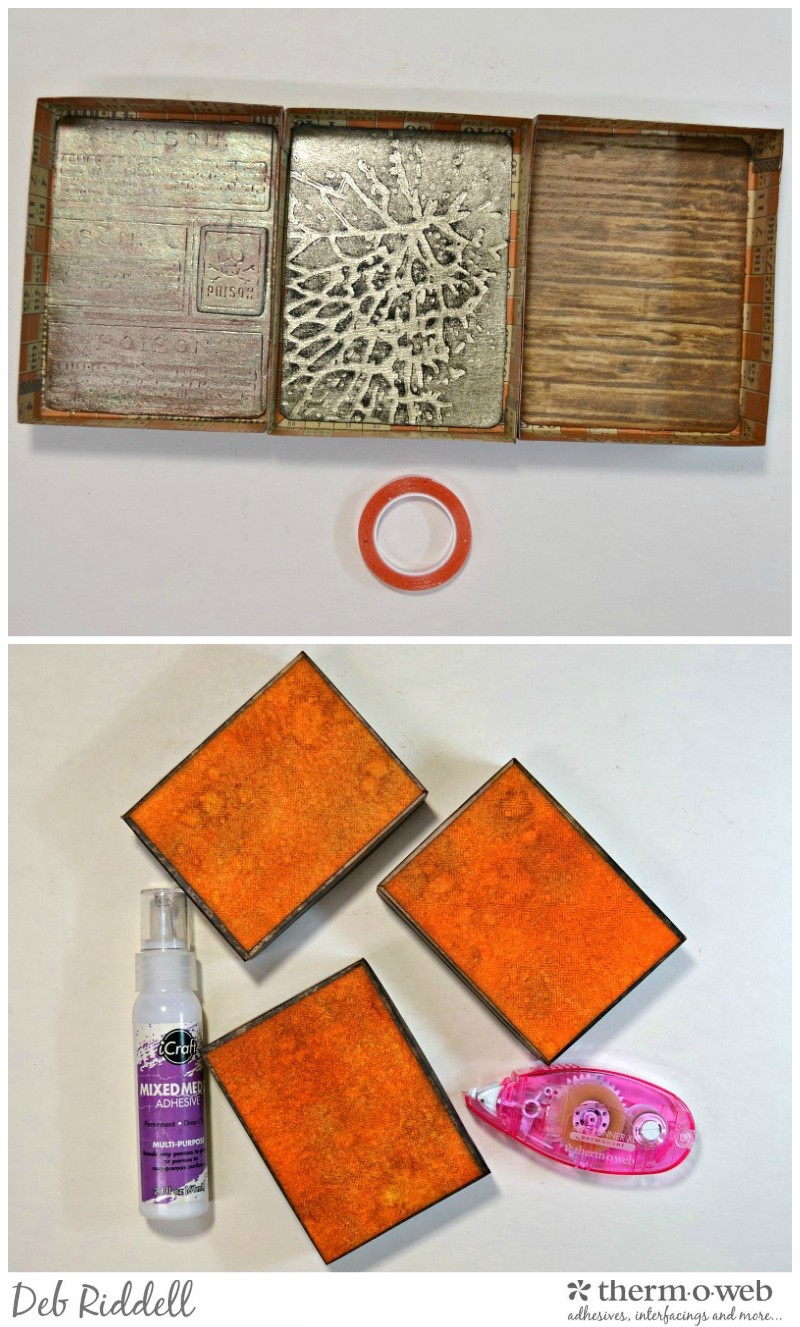
Cut three panels for the back of each box from the prepared Mixed Media Art Paper that was used to cut out the front panels, removing the backing paper from the Art Paper and sticking it to more cardstock for stability. Adhere the panels to the back of each shadow box with either ICraft Mixed Media Adhesive or your Memory XL Tape Runner.
And now comes the fun part, decorating the inside of each shadow box! Starting with the Poison Label box, color some Tinsel Twine with Pitch Black alcohol ink, heat the Tinsel Twine slightly with a heat gun to shrivel up the tinselly bits and glue it around the edges of the Foam Sheet background with Mixed Media Adhesive.
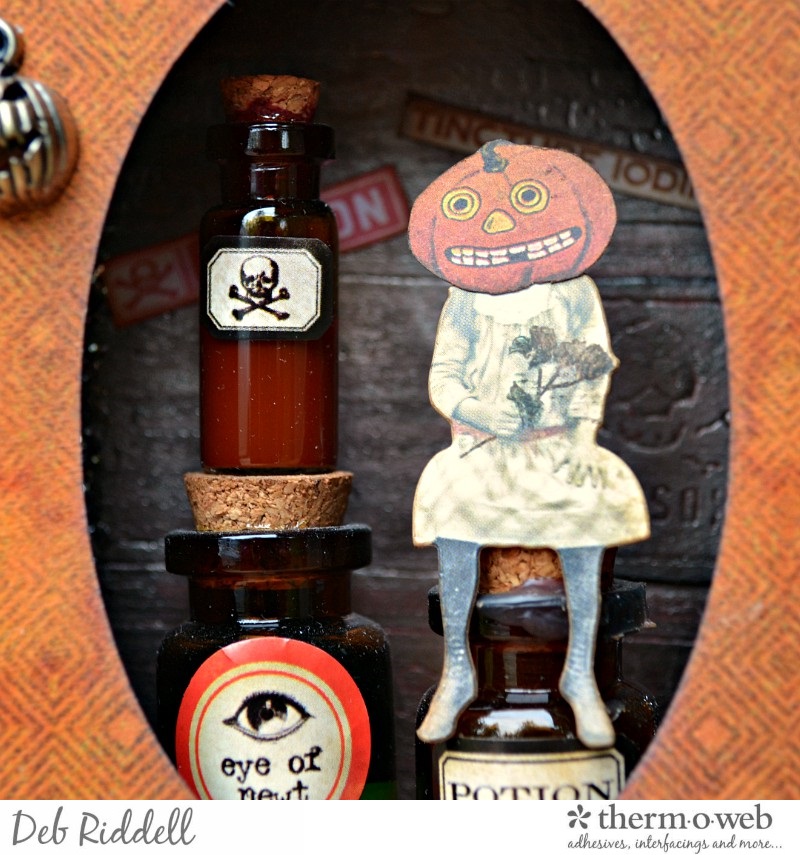
Adhere some Halloween ephemera phrases to the back panel. Fill up some Apothecary Vials with a variety of items (I added green dish soap and some small round buttons into the ‘eye of newt’ bottle, some Vintage Distress Mixed Media Medium in the ‘potion’ vial and some Red Pepper alcohol ink and clear liquid glue in the bottle with the skull and crossbones label). Add a pumpkin head to a little sitting Ancestors Paper Doll and perch her on top of one of the bottles. Stack the other two vials on top of each other and pop them on top of a putka pod pumpkin. Adhere everything in place with iCraft Mixed Media Adhesive.
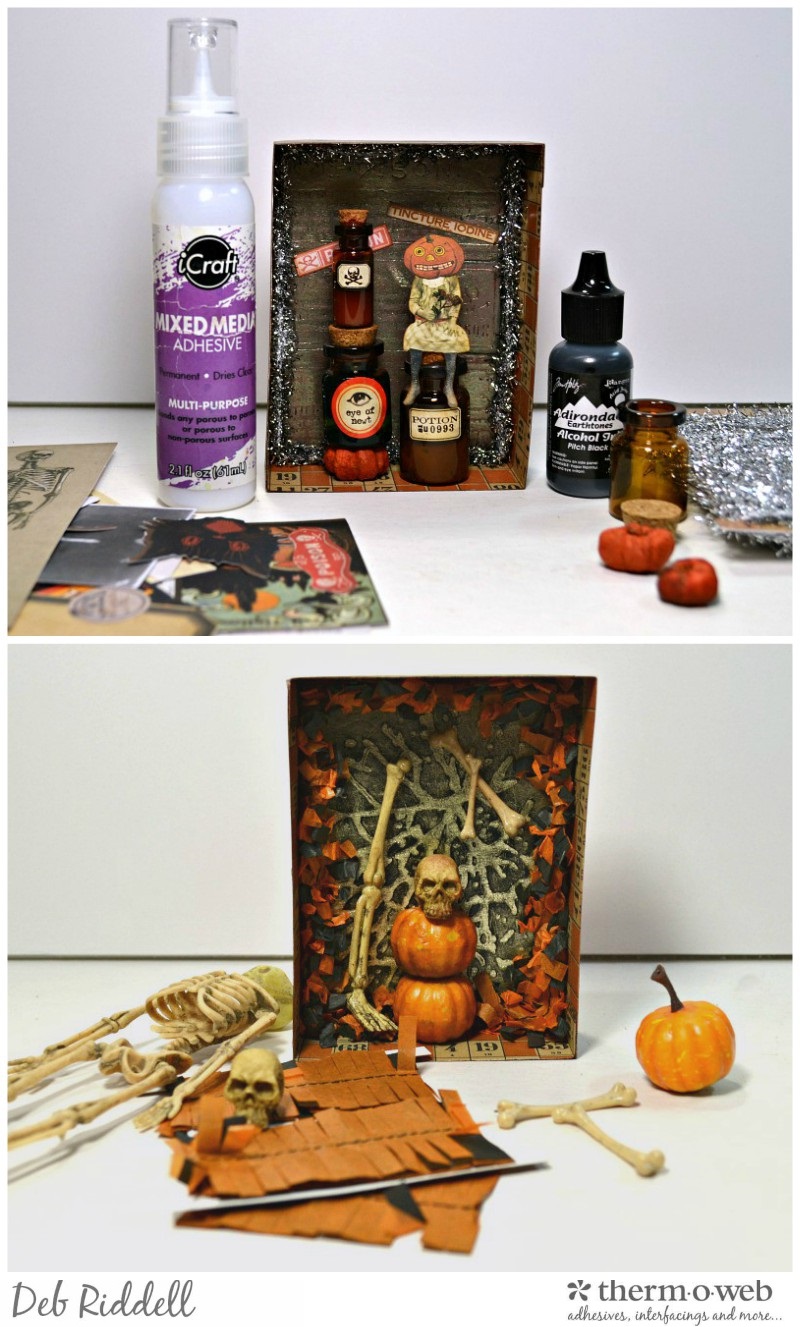
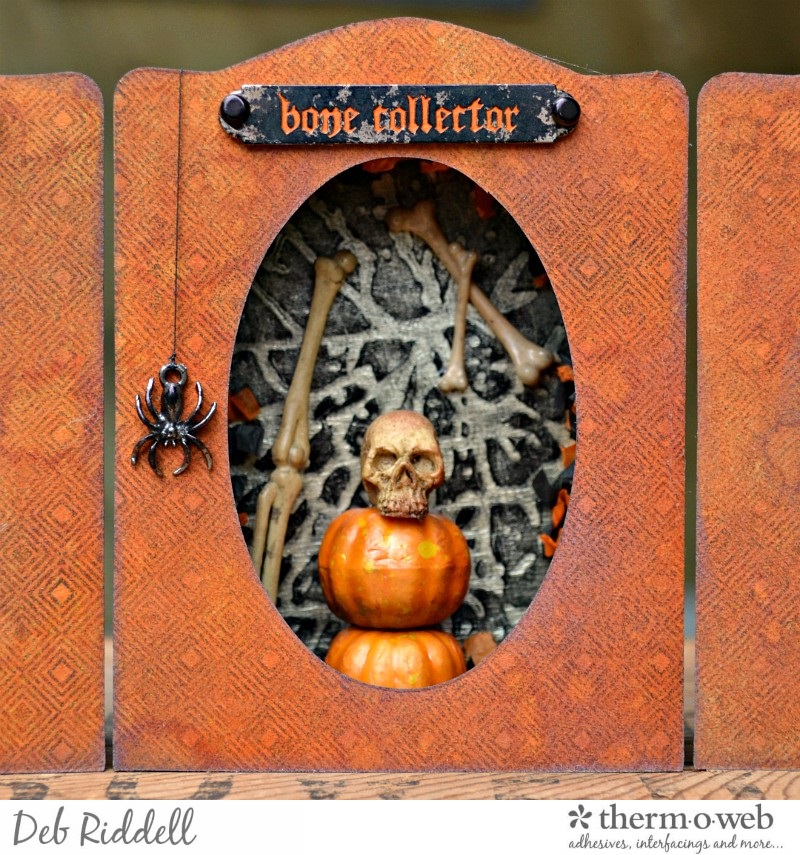
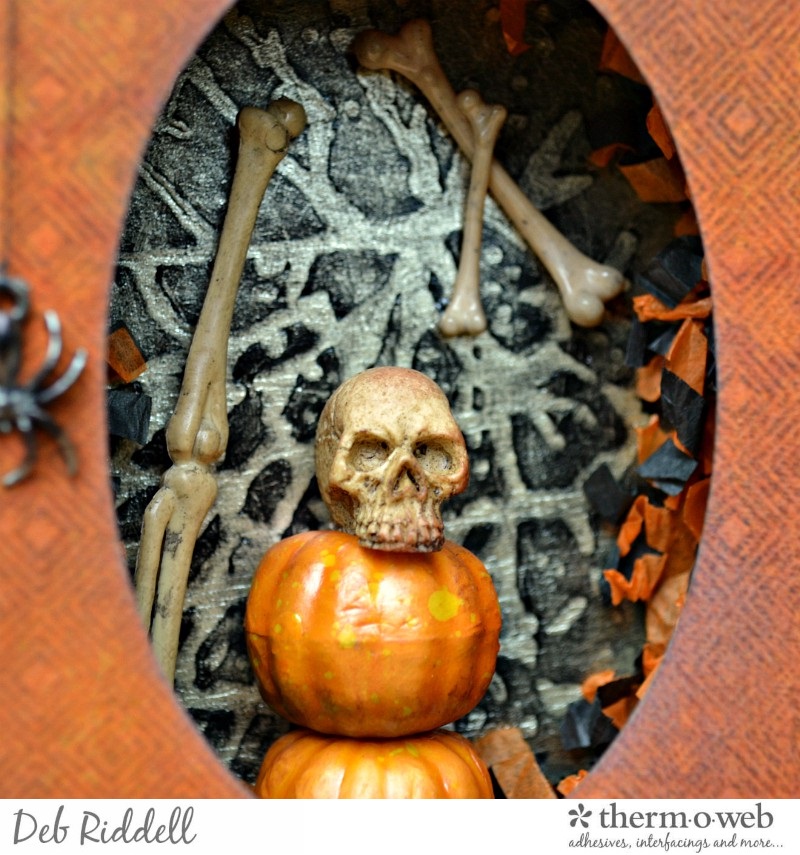
Crinkle up some Halloween Fringe and adhere it around the edges of the Cracked Foam Sheet background. Stack a couple of Pumpkin Pieces on top of each other and perch a Skulls skull on top with iCraft Mixed Media Adhesive. Add some Boneyard bones and if you have any spare skeleton parts hanging about your stash add them too!
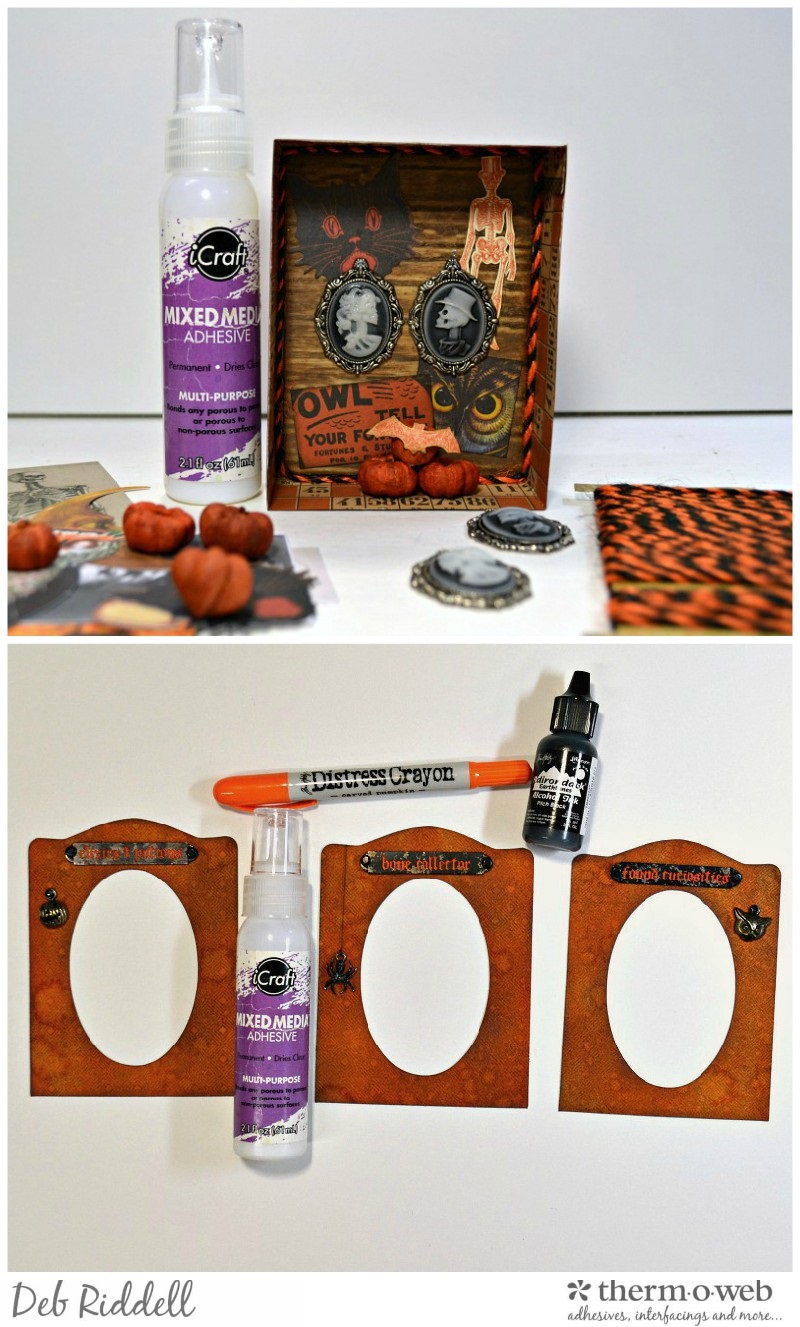
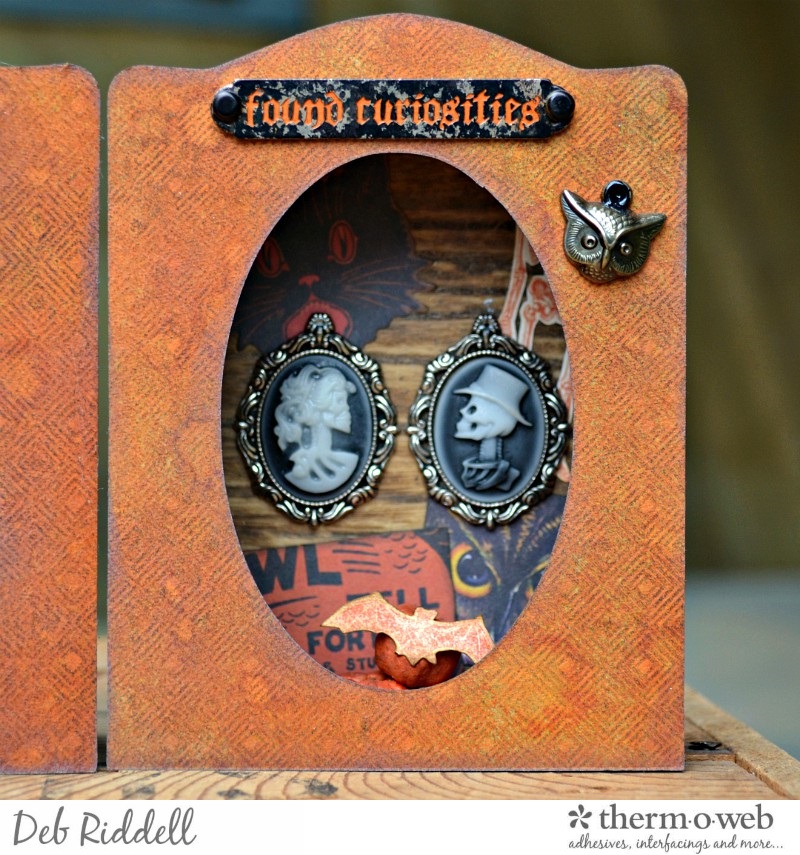
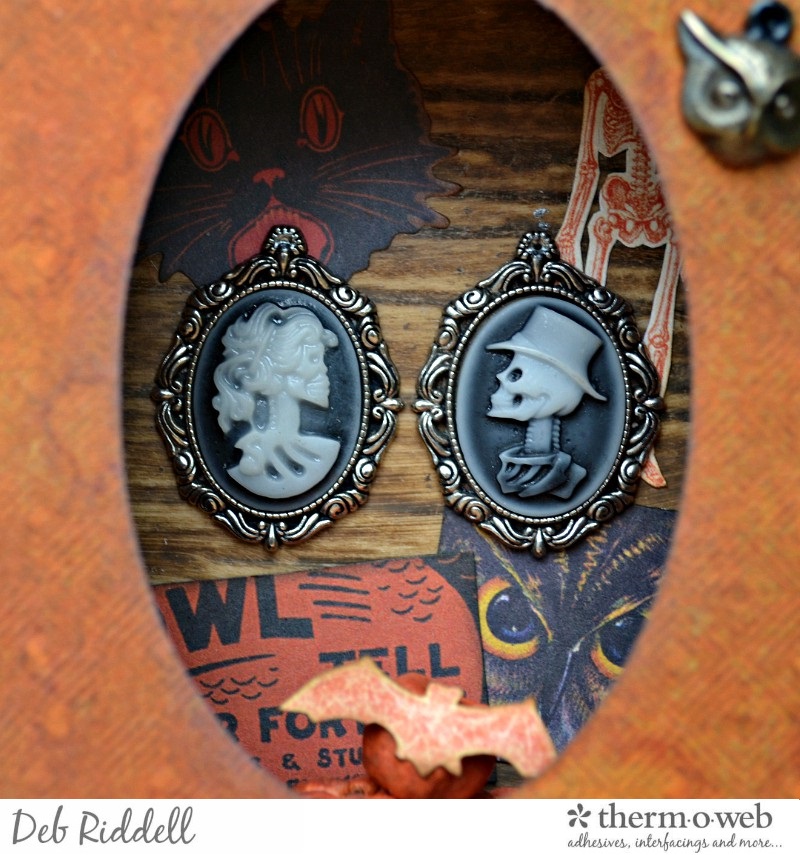
For the Wood Planks shadow box, adhere a piece of Halloween Jute String around the edges of the Foam Sheet background. Select a variety of Halloween ephemera images and adhere them to the back panel. Add a couple of Crypt Cameos and stack up more putka pod pumpkins along with an ephemera bat, adhering everything into place with iCraft Mixed Media Adhesive.
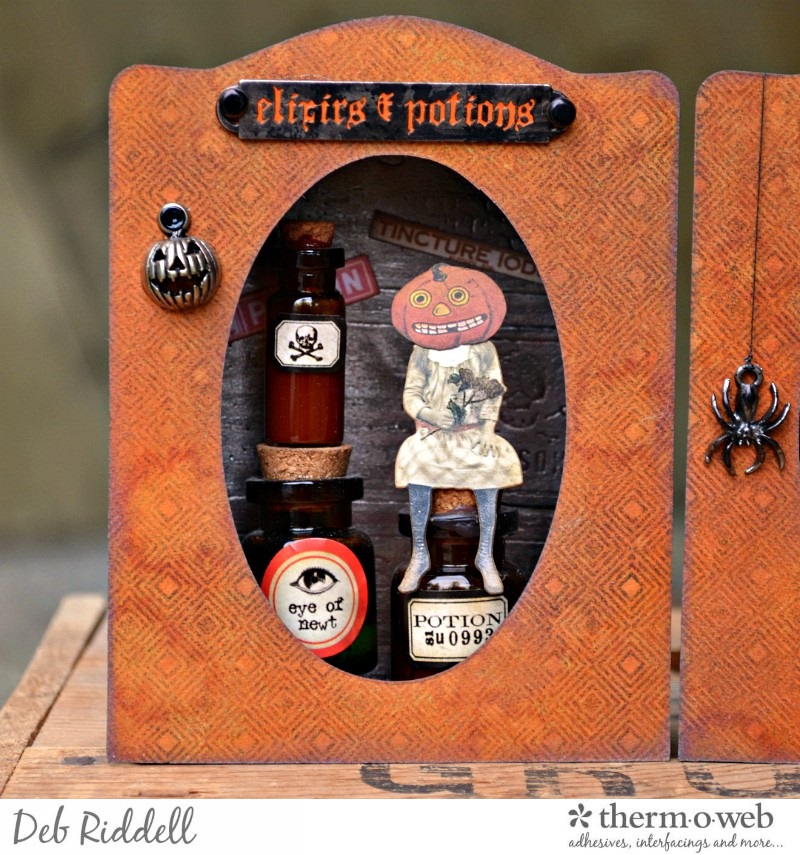
Select three Halloween Word Bands and ink them with Pitch Black alcohol ink. Once the alcohol ink has dried thoroughly, rub Carved Pumpkin Distress Crayon over the Word Bands to emphasize the wording and rub off the excess crayon with a soft cloth. Select some Halloween themed metal charms, inking them with Black Soot or Mushroom alcohol ink if desired and adhere everything to the front of your prepared Art Paper panels with iCraft Mixed Media Adhesive.
Run a thin bead of iCraft Mixed Media Adhesive around the edges of each shadow box, lay the prepared front panels over top and your Halloween Shadow Box Trio is complete! Here are a few close-ups of the finished shadow boxes.
I hope that you have enjoyed seeing how they all came together and that you’ve been inspired to create some of your own Halloween home decor with Rebekah Meier Designs’ Mixed Media line of products from Therm O Web. Thanks as always for stopping by today and happy haunting!
Deb xo

Denise Bryant
October 11, 2018 at 12:21 pm (7 years ago)Delightfully spooky! Love these!
Deb Riddell
October 11, 2018 at 7:03 pm (7 years ago)Thanks so much Denise! Deb xo
Susie Bentz
October 12, 2018 at 10:33 am (7 years ago)So many great ideas in this project! Thank you so much for the great tutorial!
Deb Riddell
October 12, 2018 at 2:30 pm (7 years ago)Thank you Susie, so glad you enjoyed it! Deb xo