


These Halloween hoops have become one of my favorite projects that I’ve made plus you know what else I love…they come together pretty quickly too! And faster if you don’t add many additional embellishments to them.
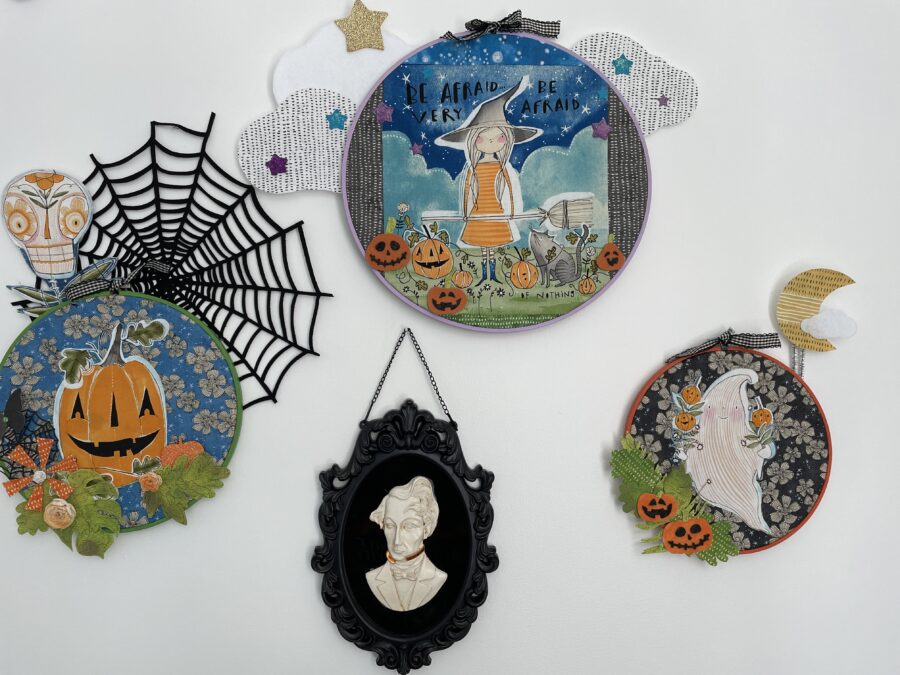
Halloween Applique Hoop Art
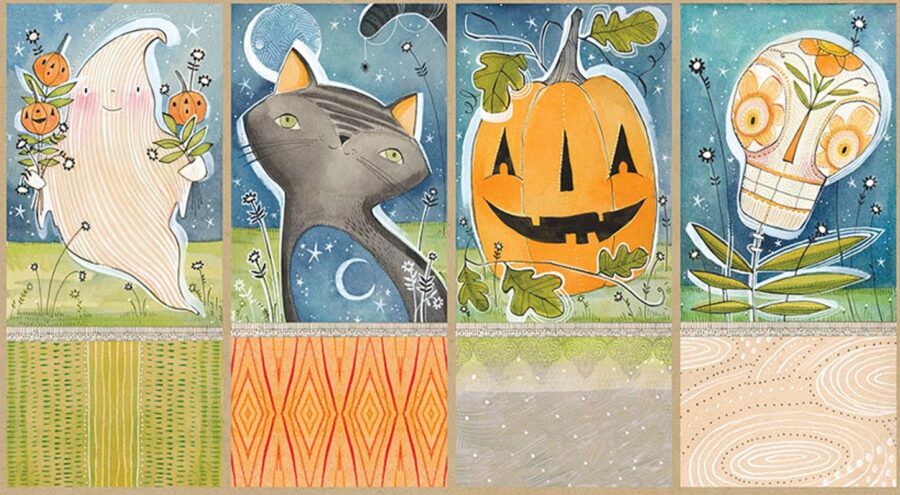
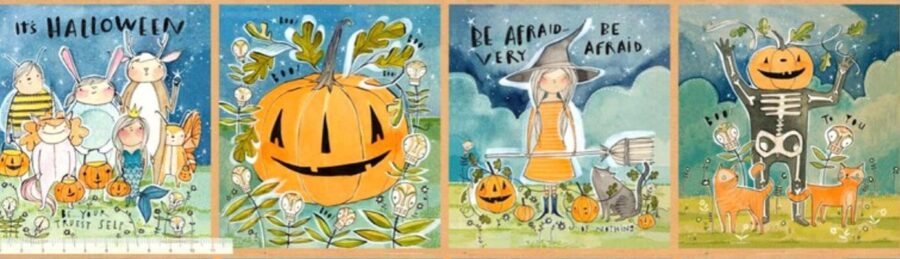
 This idea would work equally well for Christmas and Valentine’s Day… Easter…you get the idea! For all these hoops I used Cori Dantini’s Spirit of Halloween Fabrics…they’re just perfect for the holiday…with gorgeous designs and colors!
Here are a few tips and tricks for how I made these fun decorations for the holiday!
Ghost Applique Hoop
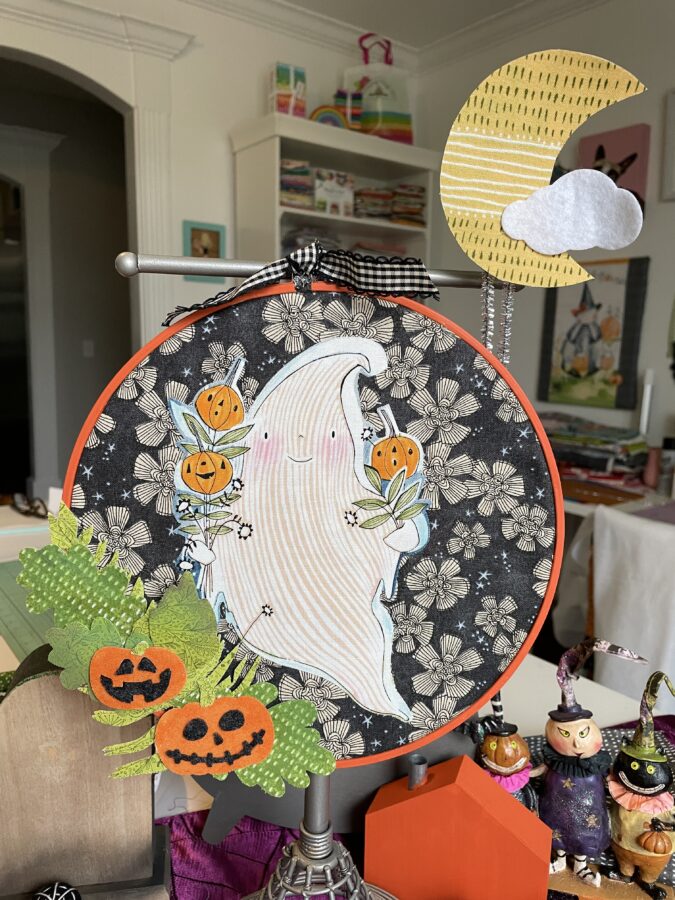
The first thing I did was to paint my wooden hoop. I picked up a variety of sizes of hoops at the craft store and then chose the one that would best fit the design I was working with.
While the hoop dried I applied some HeatnBond Lite Fusible Adhesive to the backside of the ghost panel. Then I fussy cut out the ghost and heat set that onto the black floral fabric.
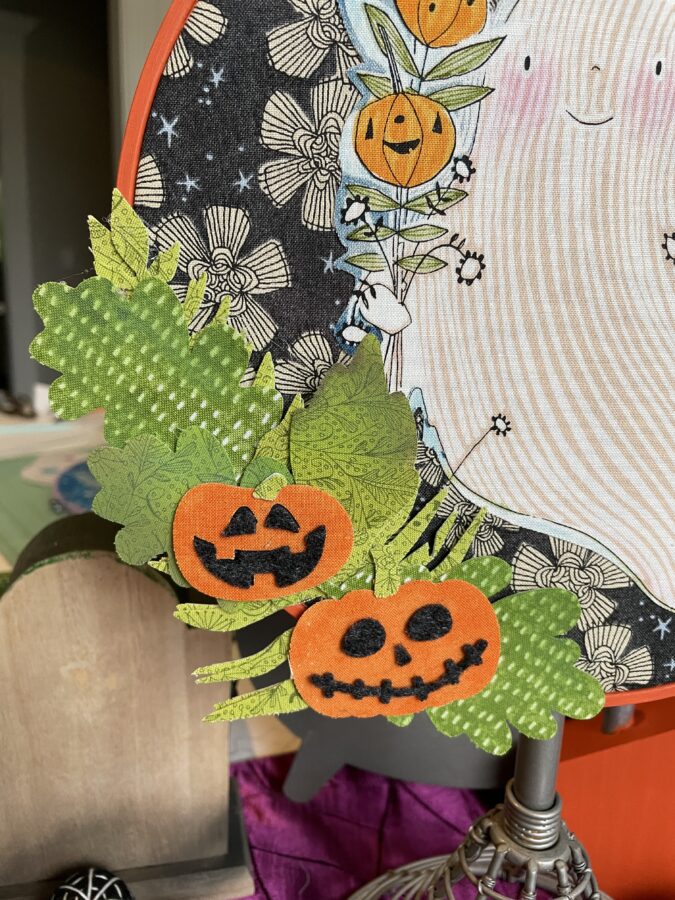
Next, I grabbed some of the green prints and heat set our HeatnBond Extra Firm Craft Interfacing onto the back. Then I grabbed some Stamp Market Autumn Leaves Dies and die-cut various leaves. I used a bit of Distress Ink on them to give them a little dimension.
I followed the same steps with some orange fabric and then die-cut the pumpkins with an Echo Park Paper Pumpkin Die. I used the same dies one more time and then die-cut some black felt to layer on the pumpkins. I used Fabric Fuse Liquid Glue and added all the leaves and pumpkins.
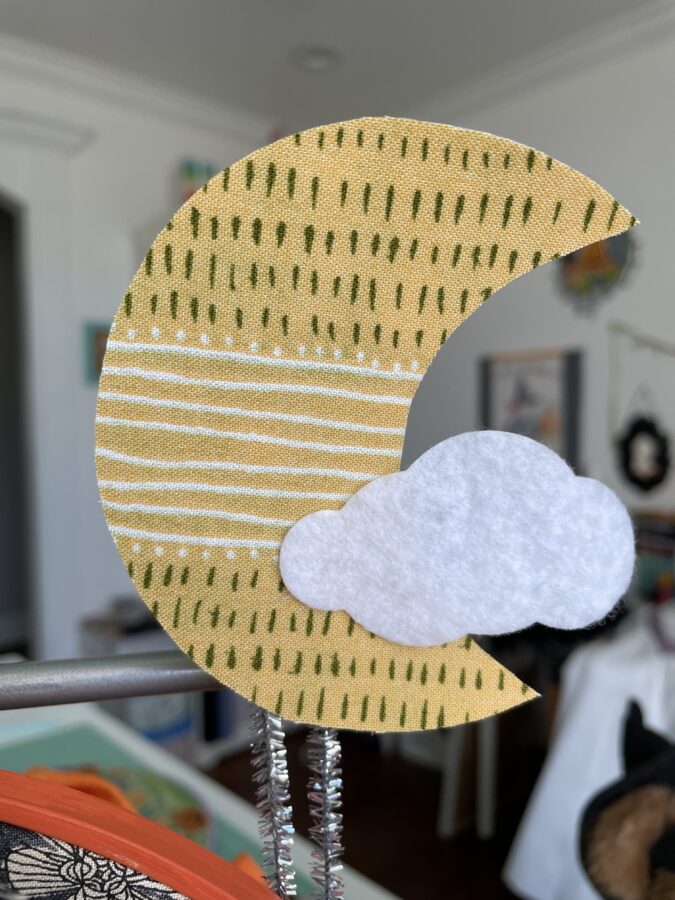
For the sweet moon, I again added our Craft Interfacing onto the fabric from the panel. Handcut out the moon shape. I then used our StitchnSew Sew-In Fleece and hand-cut a cloud. Fabric Fuse is perfect for adhering the cloud to the moon. And then last I used a silver pipe cleaner to connect the shapes onto the hoop with some hot glue!
Halloween Witch Hoop
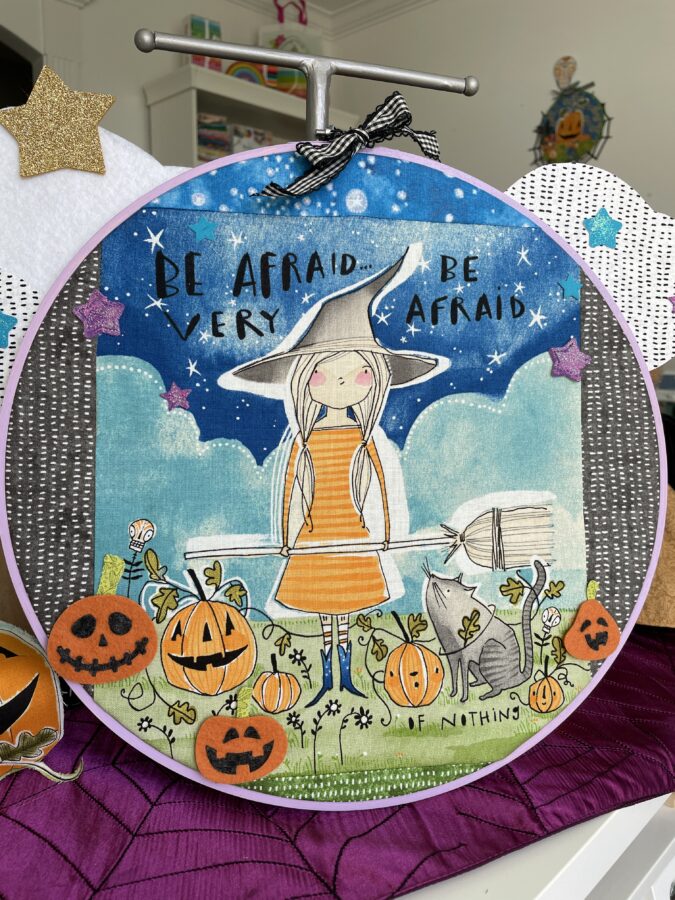
This hoop came together really quick! First again I painted the hoop and set it aside to dry. I selected some of Cori’s seeds fabric to add to the fabric panel.
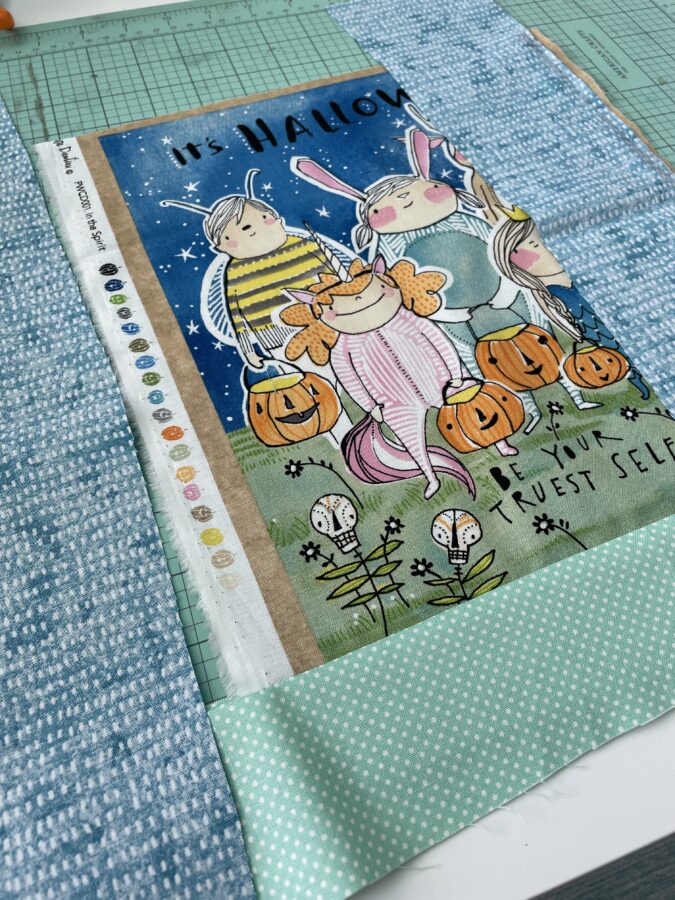
Pressed my seems and added the fabric panel to the hoop.
For the dotty cloud, I again added our Craft Interfacing onto the seeds fabric and then hand-cut out the two cloud shapes. I then used our StitchnSew Sew-In Fleece and hand-cut another cloud.
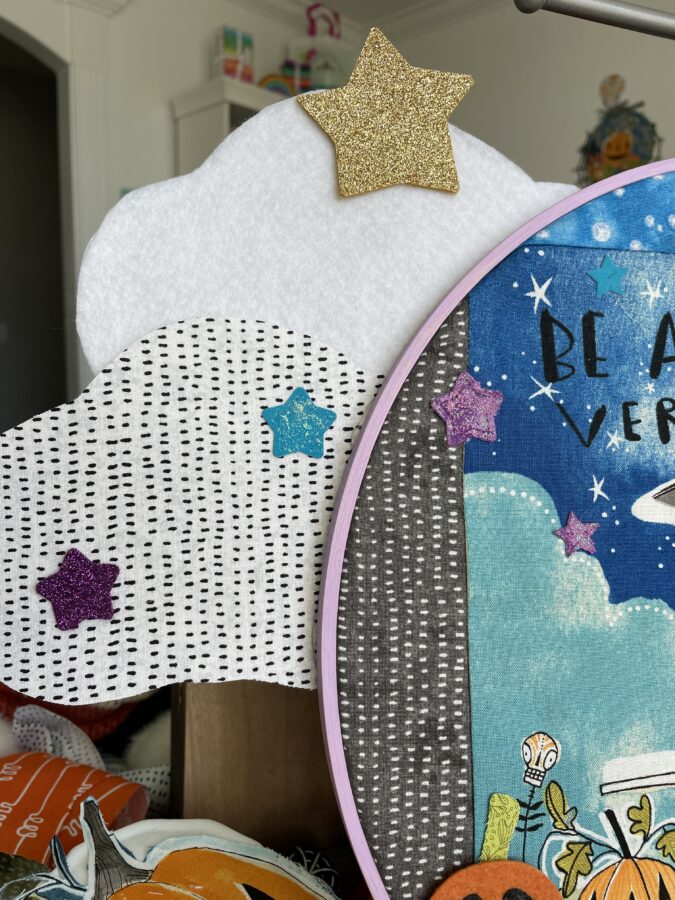 Next, I die-cut some star shapes from our Purple and Blue Diamond Flock and Benzie Designs Glitter Felt. (so beautiful!) I added a little bit of our Rina K. Designs Electro-Pop Neon Pink to the Purple & Blue Stars for a bit of shimmer.
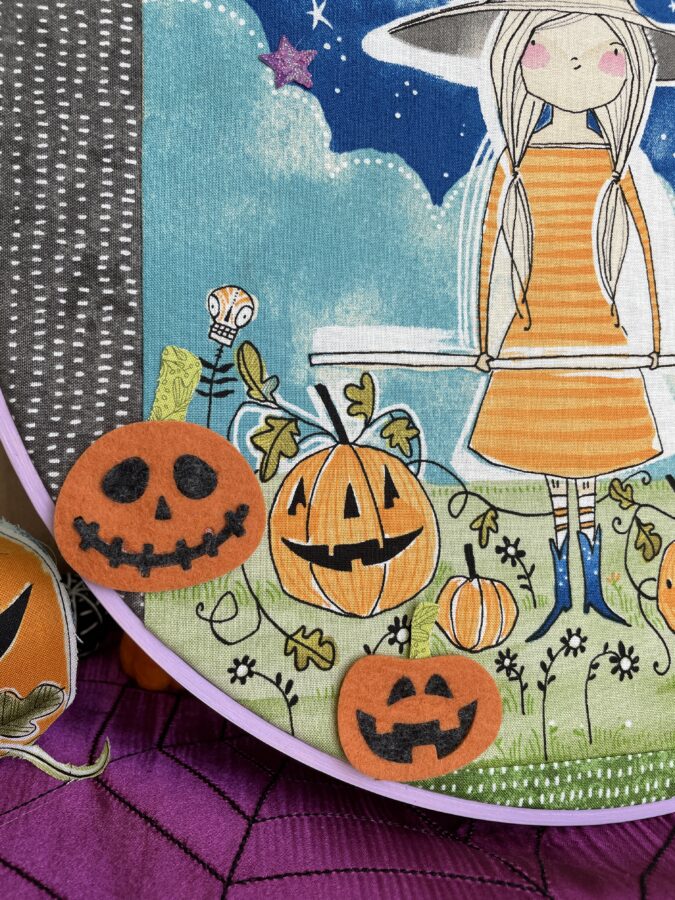
I had a few pumpkins leftover from the previous hoop and just added them onto the hoop with Fabric Fuse!
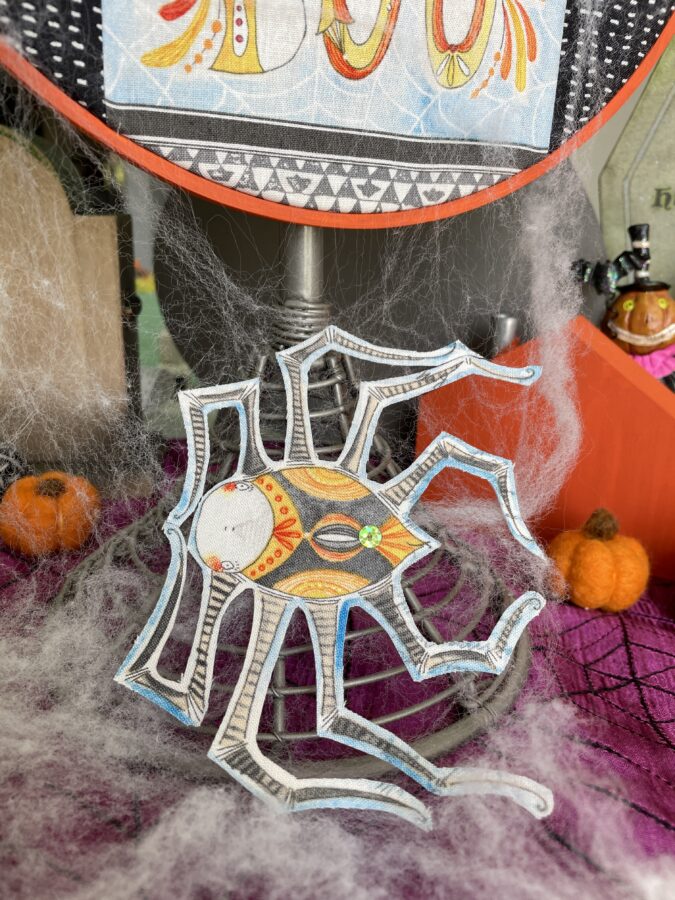
Boo Spider Halloween Hoop
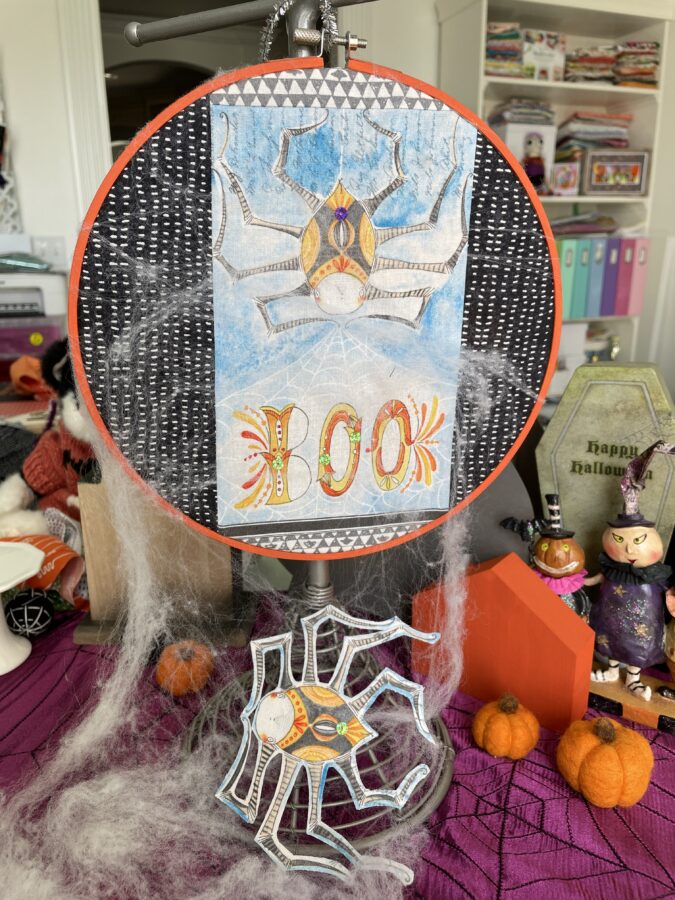
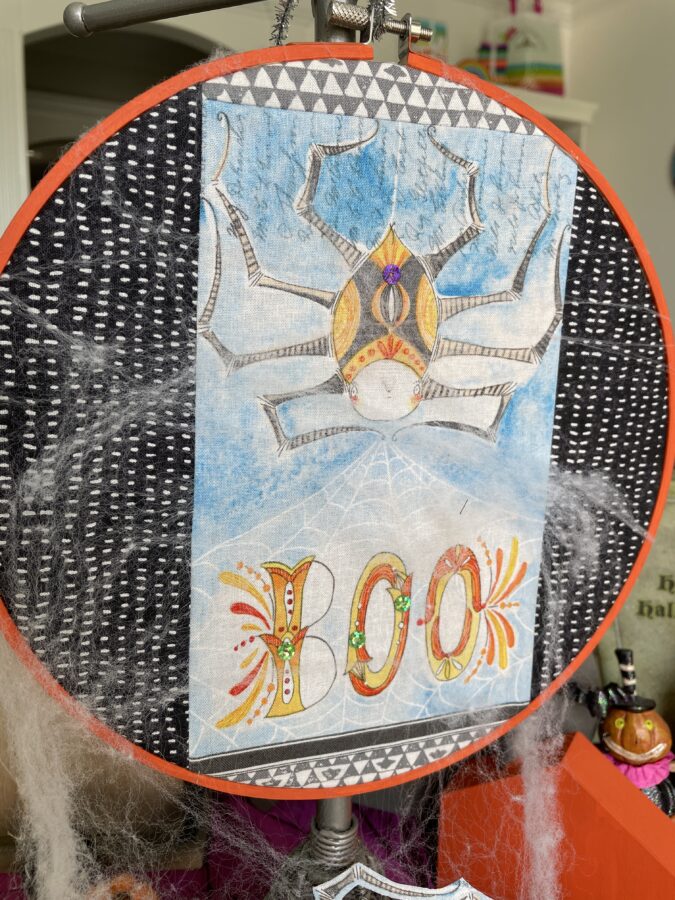
For this one I decided to do something a little different and wanted a spider that would hang with the web from the hoop… another option would be to hang it with some thread or embroidery floss too! Here’s what I did…This hoop came together really quick!
First again I painted the hoop and set it aside to dry. I selected some of Cori’s seeds fabric to add to the fabric panel. Pressed the seems and added the fabric panel to the hoop.
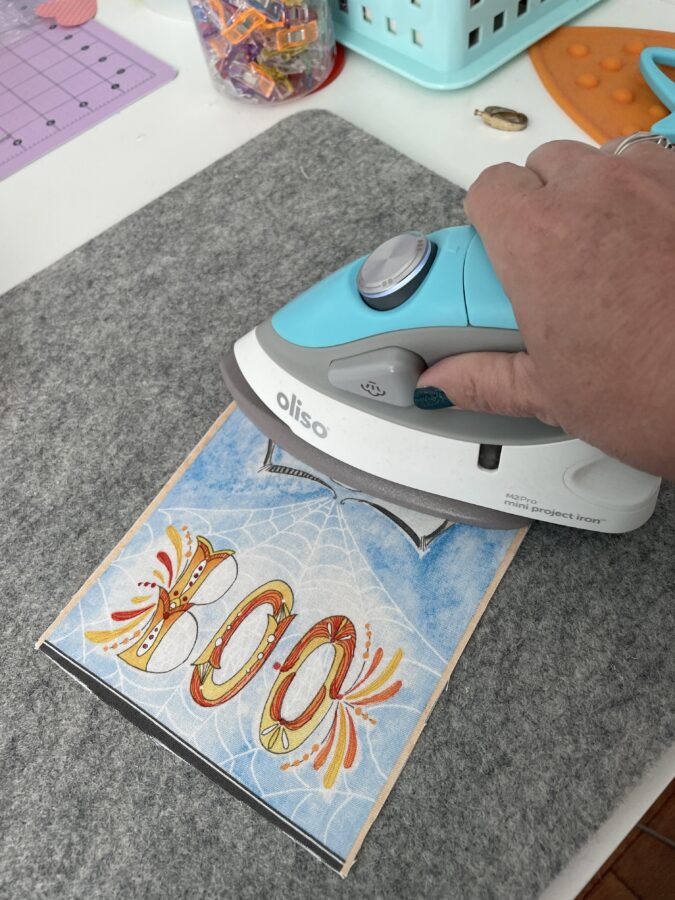
Next, I took our Craft Extra Firm Interfacing and pressed a piece onto the spider panel. (this is from an older Cori Dantini Collection)
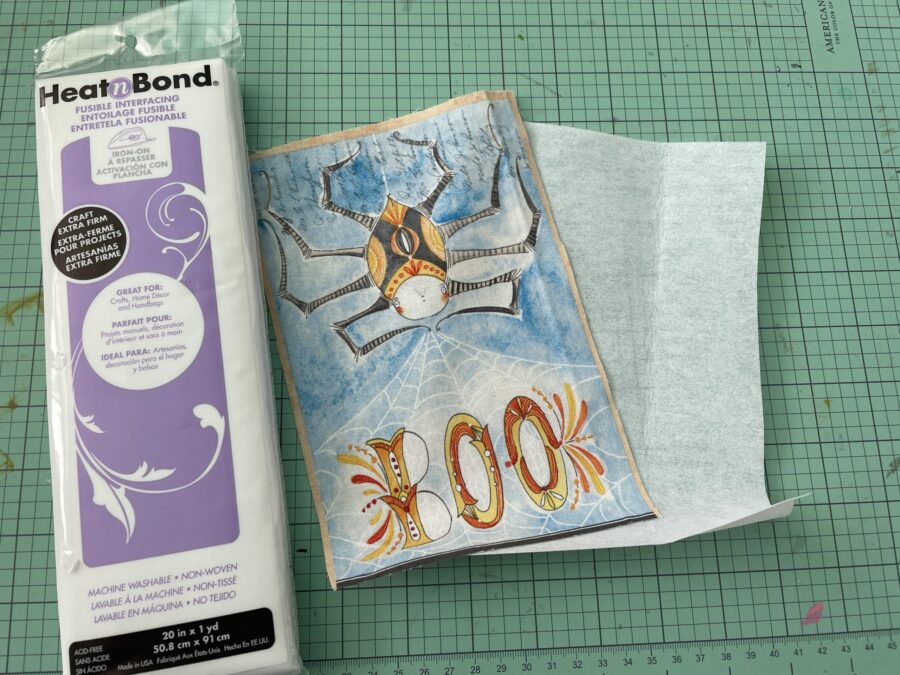

I first pressed with some pressing paper and then once set went back over to make sure it was smooth.
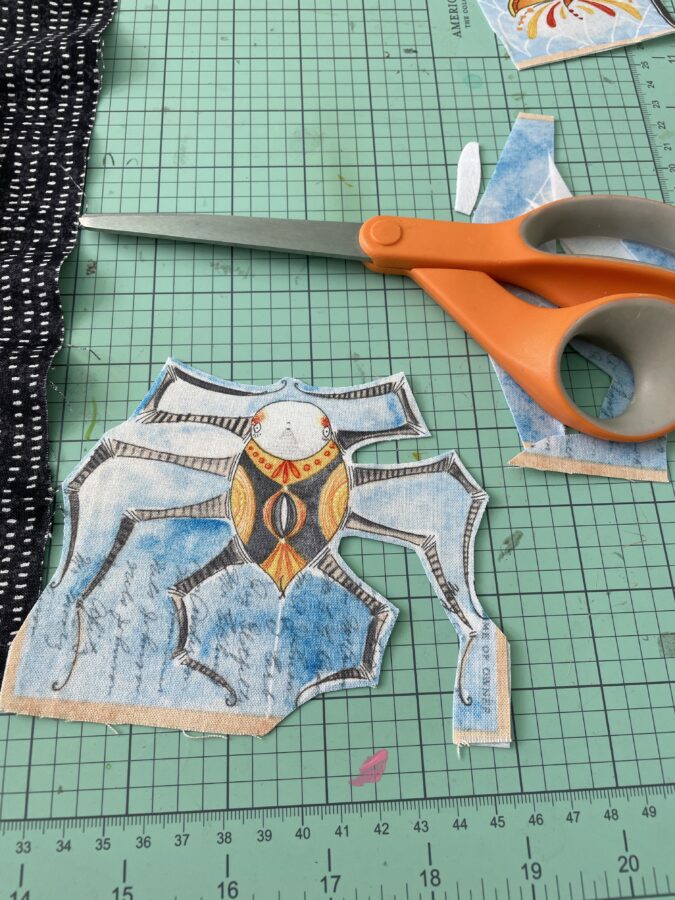
Once pressed I hand-cut out the spider. Make sure you have good scissors and you’ll have no issues doing this!!
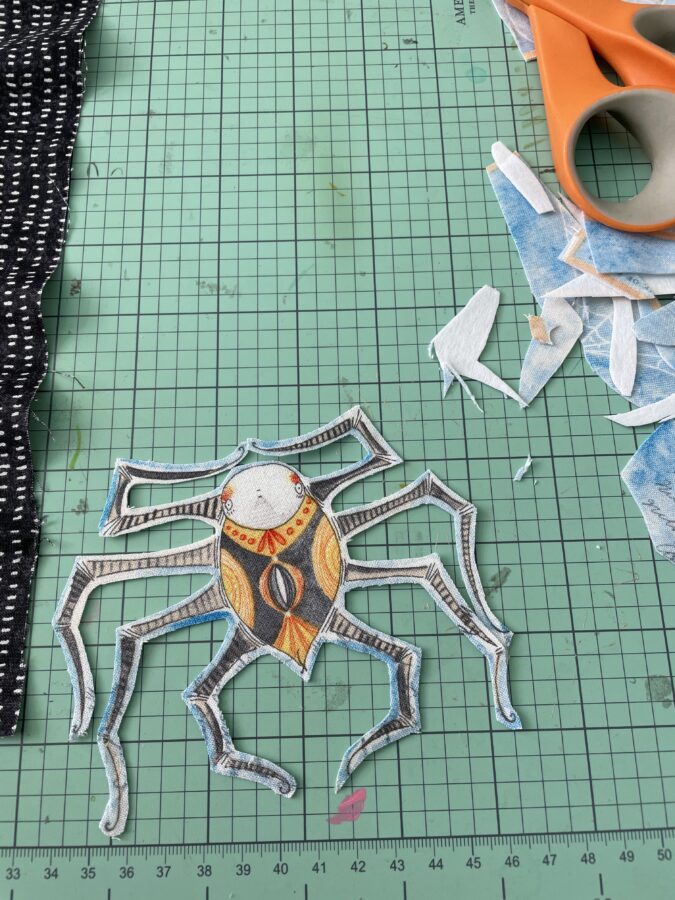
Here’s that cutie all cut out with the added Extra Firm Interfacing to give it stability!
Next, I added some sequins to the BOO and spider with our Fabric Fuse and then used some spiderweb to wrap around and hang them together!!
Medium Pumpkin Applique Hoop
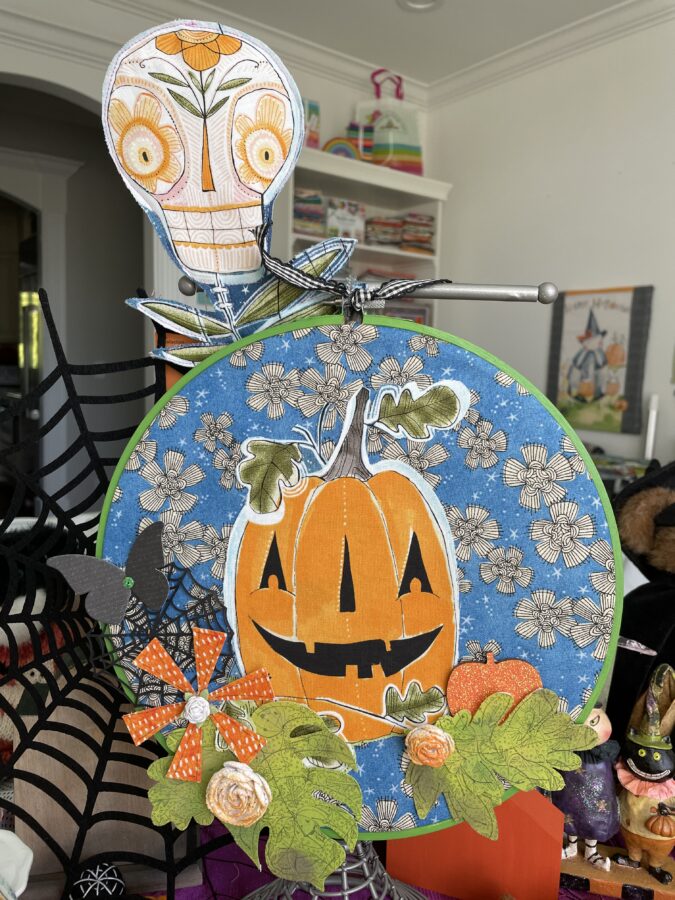
The first thing I did was to paint my wooden hoop. Since I picked up a variety of sizes of hoops at the craft store …I chose the one that would best fit the design I was working with.
While the hoop dried I applied some HeatnBond Lite Fusible Adhesive to the backside of the pumpkin that I hand-cut from the fabric panel. Then I fussy cut out the pumpkin and heat set that onto the blue floral fabric.
Next, I grabbed some of the green prints and heat set our HeatnBond Extra Firm Craft Interfacing onto the back. Then I grabbed some Stamp Market Autumn Leaves Dies and Sizzix leaves and die-cut various leaf shapes. I used a bit of Distress Ink on them to give them a little dimension.
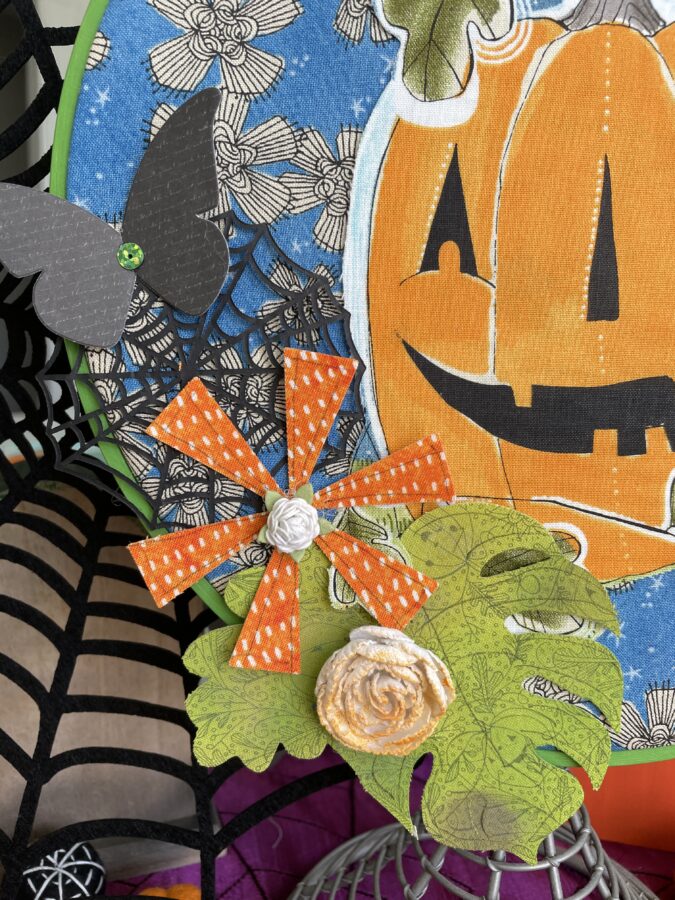 I then used a Reverse Confetti die and die cut the orange seeds fabric that I had heat set interfacing on. I went through my fun supplies and gathered up some spiderwebs, butterflies, flowers and started adding those onto the floral print with our Fabric Fuse Liquid Adhesive.
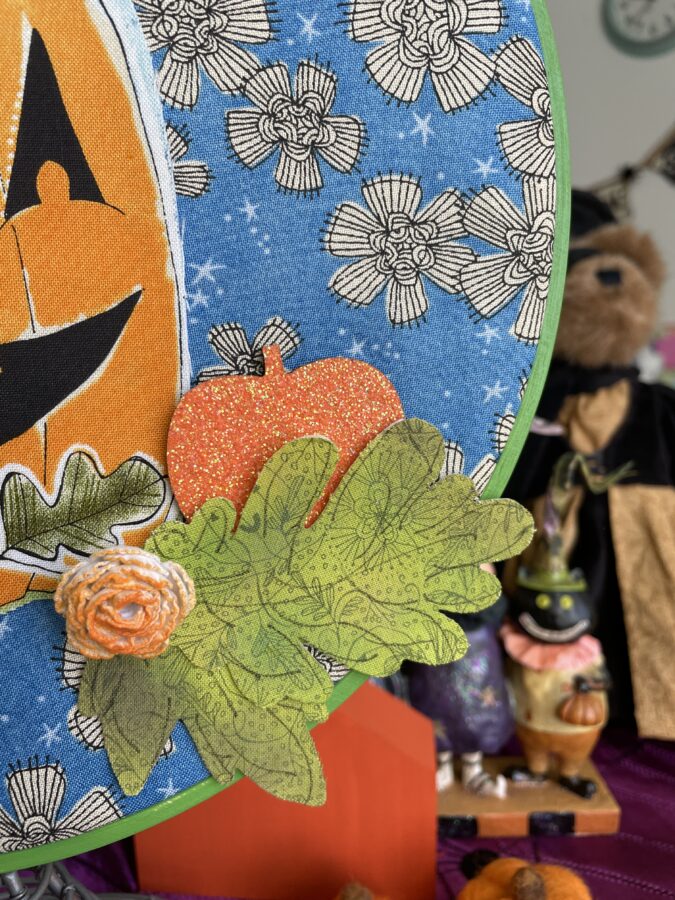
A few more leaves, some flowers and a wooden glittery pumpkin finish it off!
Enjoy and Happy Halloween!
Supply List:
Wood Embroidery Hoops
HeatnBond Lite Fusible Adhesive
HeatnBond Craft Extra Firm Interfacing
StitchnSew Sew-In Fleece
Fabric Fuse Liquid Adhesive
Glitz Glitter Gel – Think Pink
Deco Foil Flock Transfer Sheets – Blue Diamond & Purple Punch
Distress Inks & Paint
Benzie Design Felt and Glitter Felt
The Stamp Market Autumn Leaves Dies
Echo Park Paper Pumpkin Dies
Reverse Confetti Circle with Burst Tag Confetti Cut
Oliso Mini Iron