


 Hello Tea Lovers, it’s me Daryl from Patchouli Moon Studio to share my Therm-O-web project with you for Gingham Week here on the Therm-O-web Blog.
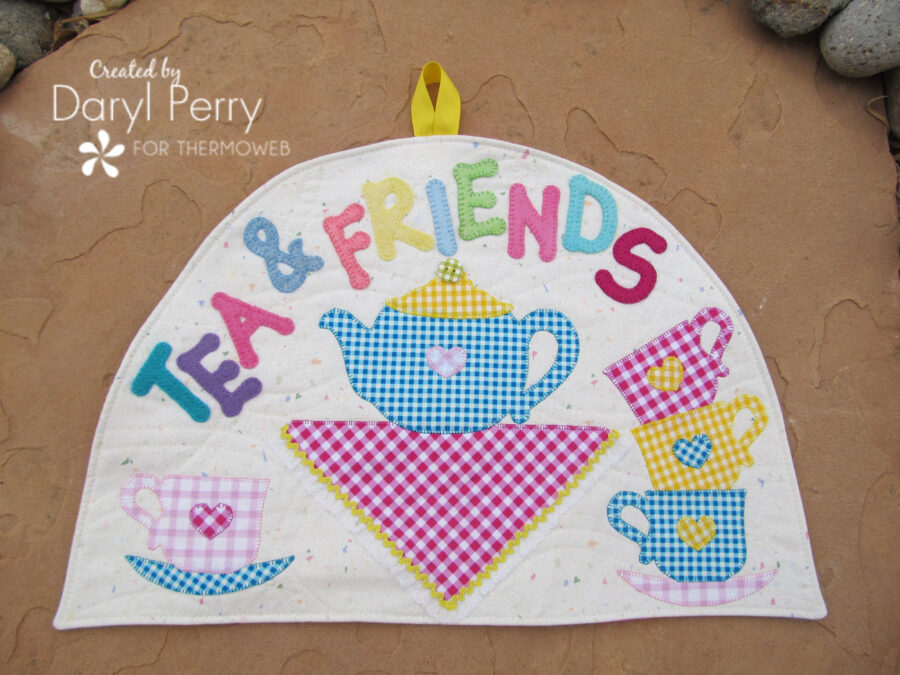
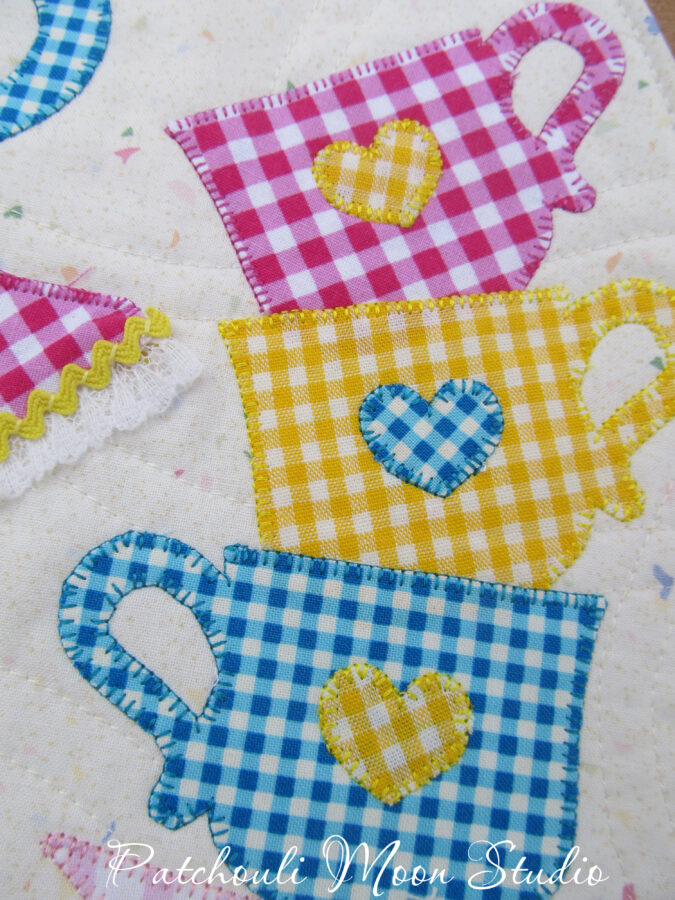
Tea always goes better with friends. Add some fun gingham fabrics and you practically have a party already.
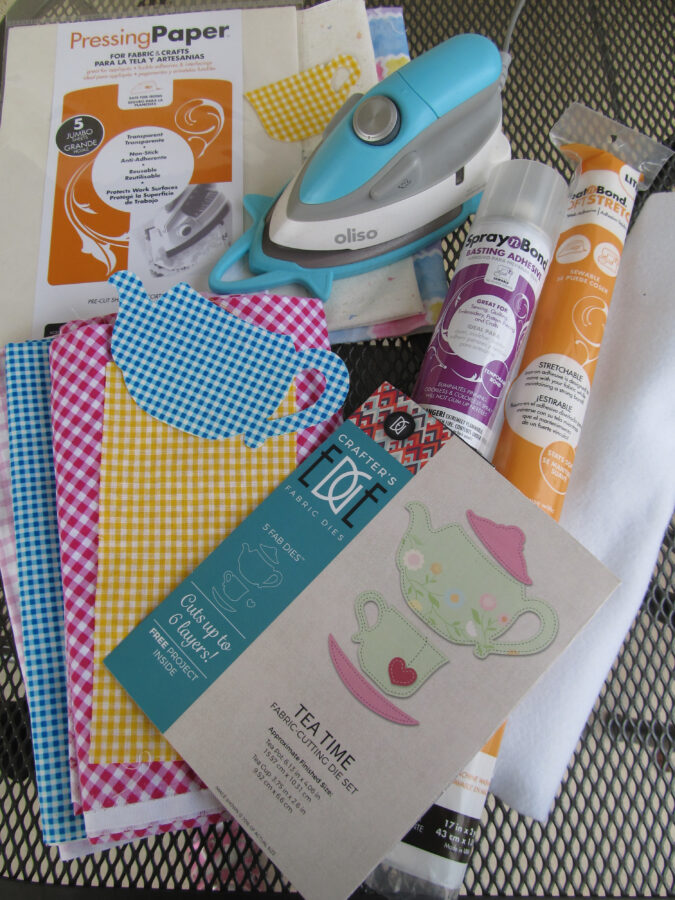
I used Crafter’s Edge Tea Time die cut set to create the teapot and teacups and saucers. I also used Crafter’s Edge 1/2 Square triangle die-cut for the tablecloth. Some lettering in felt and a bit of lace and rickrack for the tablecloth complete this cute wall quilt.
Materials Needed:
- A variety of colors and scales of Gingham fabrics (8″ square or smaller for each)
- Small pieces of felt for the letters
- 14″ high x 20″ wide fabric for background
- 14″ high x 20″ wide backing fabric
- 14″ high x 20″ wide piece of StitchnSew High Loft Sew-in Fleece
- HeatnBond Lite Iron-on Adhesive
- 13″ piece of narrow lace (optional) for tablecloth
- 13″ piece of tiny rickrack for tablecloth (optional)
- 5″ piece of 1/2″ wide grosgrain or similar ribbon for hanging the quilt
- 1/2″ button for top of teapot lid (optional)
- Thread for quilting, thread for stitching appliqué shapes
- Embroidery floss in a variety of colors to match the felt lettering (optional)
- Pressing Paper
- Iron (I love my Turquoise Mini Project Iron by Oliso Irons for small projects)
- SpraynBond Basting Adhesive
- Clips or pins
- Fabric pencil or marking pen
- Crafter’s Edge Tea Tim Set
- Templates click here for lettering and tea appliqué shapes if you don’t have the die cuts
- Tape measure
- Sewing machine and basic sewing supplies
Gingham Tea Cozy Wall Quilt
Instructions: Be sure to read all the instructions first before beginning!
- If using the Tea Time die cut set, first fuse the HeatnBond Lite adhesive on the wrong side of each of your gingham fabrics and then cut using the Crossover II Cutting machine by Crafter’s Edge or a similar cutting machine. Note: that on some teacups I flipped the fabric over so I had 2 handles of the teacups on the right and 2 on the left. Otherwise, trace the templates onto the paper side of the fusible adhesive and press according to the manufacturer’s directions. The templates have already been reversed for you. Cut out shapes and set the appliqué pieces aside for now.
- If using felt or fabric for the lettering, cut out in the same way as you did the teacups & teapot. The lettering has been reversed for you, so trace onto the paper side of the fusible adhesive so they will read correctly after the cut. Set aside for now.
- Use the 5.5″ 1/2-Square Triangle die cut from Crafter’s Edge for the tablecloth, or use the template and trace onto the fusible adhesive in the same manner as before.
- Layer your backing fabric wrong side up and place your fleece on top, then place your background fabric on top of the fleece right side up. Fold back the background fabric halfway and following the SpraynBond instructions, spray onto the fleece and fold the fabric back down over the sprayed areas, and press with your hand to secure. Repeat on the other half and then flip the piece over and repeat to secure the backing fabric.
- Now quilt the fabric sandwich as desired. The fabrics have all been cut oversized to allow for any shrinkage during the quilting process and appliqué process.
- After you have quilted the piece, you will need to make your tea cozy template out of paper. So to start tape two pieces of 8 1/2″ x 11″ paper together to create a larger piece of paper. At the bottom center of the large paper make a mark (a dot or small line) to mark the center, then measure 8 3/4″ to the right of the mark and make another mark, and measure 8 3/4″ to the left of the center and make a mark. So that line should measure 17 1/2″ across. Next measure from the bottom center vertically up 12 1/2″ and make a mark, marking the top center. Next, you will start making marks from the top center top down towards the right corner and then the left corner as follows: Place your tape measure at the bottom center mark with the tape measure at the 0 (zero) mark and hold onto the tape measure there at the 0 mark as you work your way down to the corner on each side. You will be slowly moving in 1″ increments and making marks are you head towards the corner. Once you are at the corner your tape measure should read 8 3/4″ from the center bottom mark to the corner. Now connect the marks you made to create the curve on that side. Once you reach the bottom of the first corner, you can repeat this on the second side, OR fold the paper in half carefully lining up the center marks and the bottom line and cut out the Tea Cozy Shaped template.
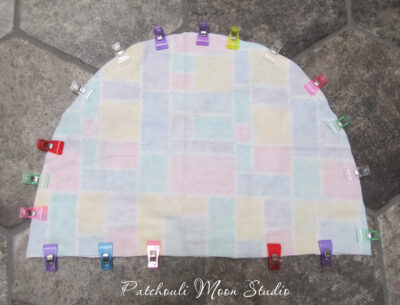
- Now place the Tea Cozy Shaped template over the quilted piece and use pins to mark the outline of the tea cozy shape by pinning around the shape of the cozy as indicated in the photo below. This will help you to place your appliqué shapes within the pinned area and assure your appliqué shapes won’t be cut off later.
- Next, remove the paper from the fused appliqué shapes and using the photo below arrange your shapes and lettering as shown on top of the quilted piece, making sure you place everything within the pinned area, at least 3/8″ inside the pins to allow for your seams later. Add the lace and/or rickrack trim over the edge of the triangle and tuck under the cut edges of the trim, if using, and pin in place. Place the Pressing Paper over each section carefully and press to fuse in place, be careful and don’t press your pins!
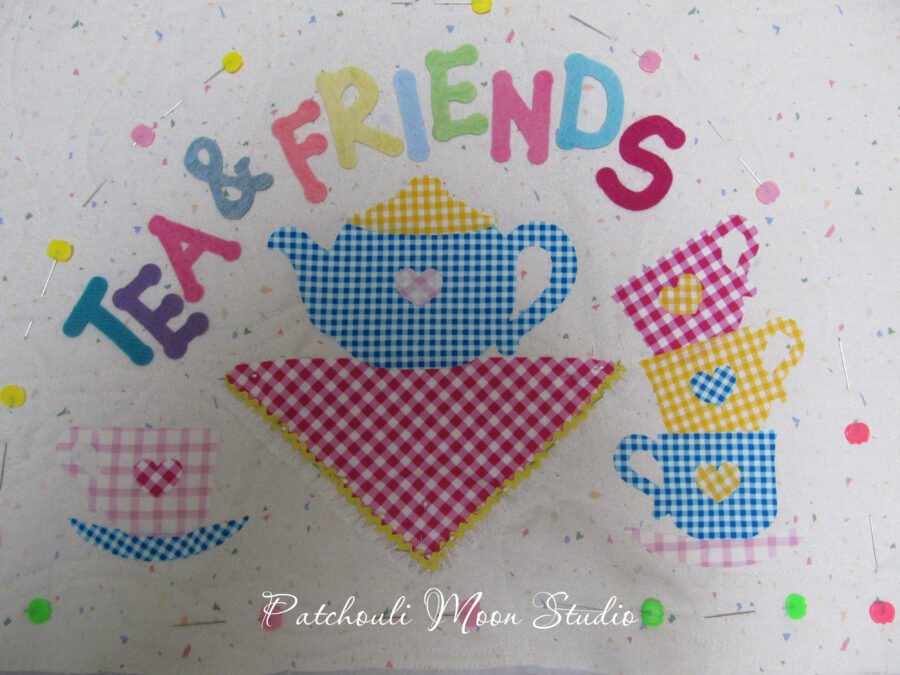
8. Stitch around all the shapes using a blanket stitch, straight stitch, zigzag stitch or whatever you prefer. I used a machine blanket stitch for everything, except I blanket stitched the lettering by hand with embroidery floss (2 ply). I also hand-stitched the rickrack in place, but you could sew by machine if desired. It’s your preference. (see closeup below)

9. Once the stitching is complete, remove the pins and give it a good pressing with your iron. Use the Pressing Paper over the appliqué to protect your work.
10. Now place the Tea Cozy paper template that you made over your piece and make sure there is space all around for a seam allowance, so keep the template centered the best you can. A lightbox might help to allow you to see your applique better. Place something on top of the template to help to weigh it down in a couple places. Even a can of soup or beans will help to hold the template in place as you take your pencil or fabric marking pen to trace around the tea cozy template onto the fabric.
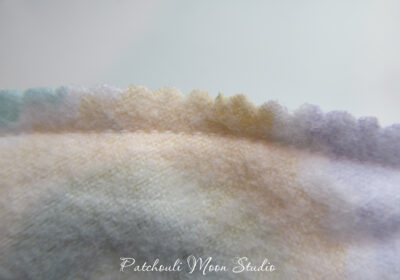
11. Cut out on the line and then zigzag stitch or serge all around the piece first to keep the quilting stitches from coming undone.
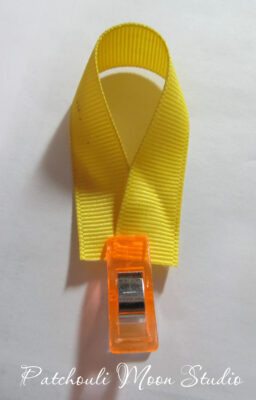
12. Next take your grosgrain ribbon piece and fold it in a loop like the photo below.
13. Find the center top of the quilt and center the loop with the raw edges at the top and overhanging the top by 1/2″ and pin in place. Baste the ribbon to the quilt using 1/8″ seam to hold. Do not trim the 1/2″ of ribbon sticking up! It will add a bit of stability leaving the excess ribbon in place.
14. Next, layer the backing fabric right-sides-together with the quilt and clip or pin in place all around, leaving the bottom 5″ open to turn the quilt.
15. Sew all around the piece using 1/4″ seam allowance, leaving the bottom 5″ unsewn to turn the quilt.
16. Before turning, snip the bottom 2 corners at a diagonal to reduce the bulk in the corner but don’t snip too close to the stitching. Then using pinking shears or regular scissors, make little snips into the curved areas only. Press to set the seams and then turn right-side-out.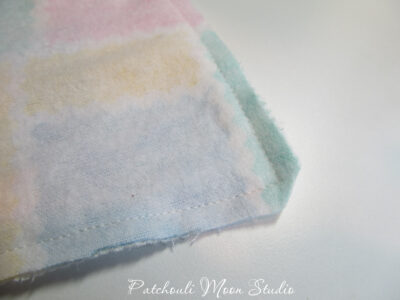
17. Using a turning tool carefully poke out the 2 corners and shape the curve and then press all around, using the Pressing Paper over the appliqué shapes to protect them.
18. Make sure you press the opening in as evenly as you can and clip or pin to hold closed. Then finally topstitch by sewing 1/8″ at a longer stitch length (like 3-3.5) all the way around the quilt, which will close the opening at the same time.
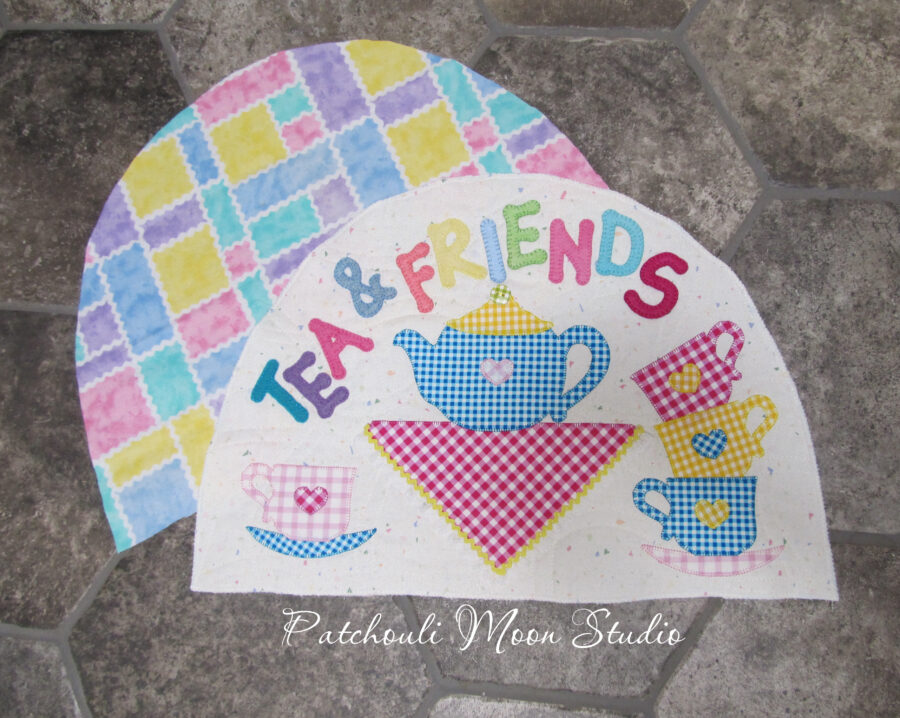
There you have it a sweet Tea Cozy Shaped wall quilt. I hope you enjoy making your own Tea & Friends quilt.
~Daryl