


Wohoo! Did we get your attention?!
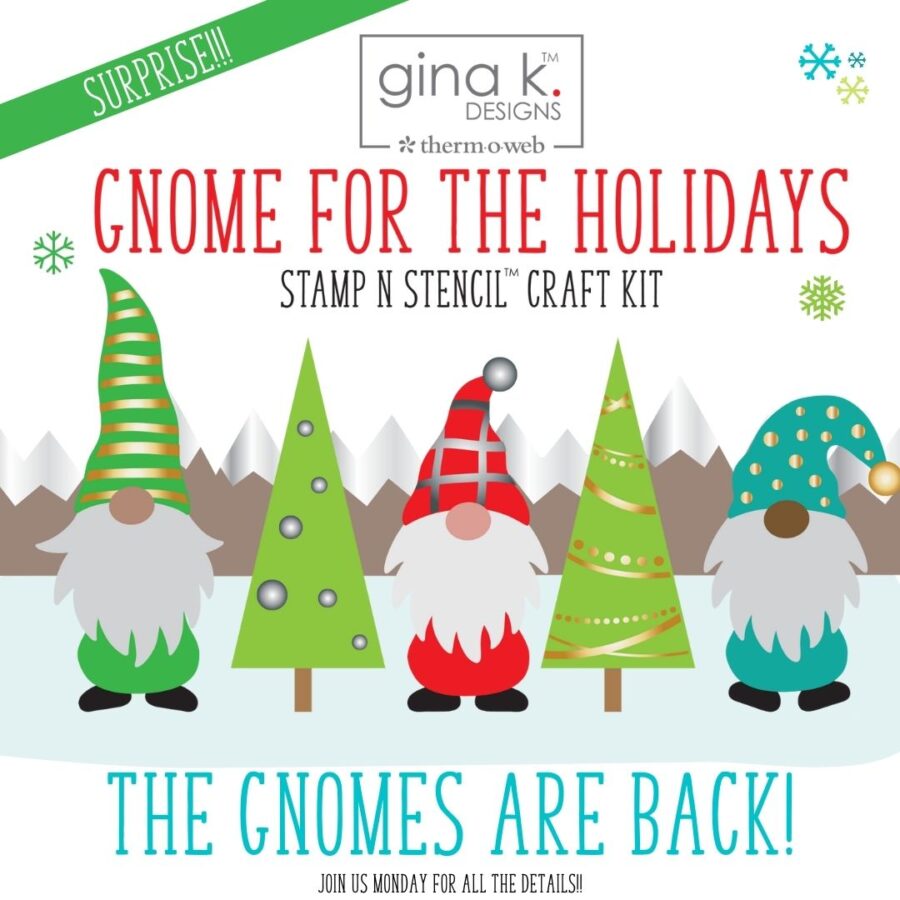
 Surprise!!!! As a blog reader you’re finding out first that our Gina K. Designs Gnome for the Holiday Kit will be back! How amazing is that!
Join us Monday for all the details and a fun surprise we have for you if that wasn’t enough!!
To get you excited about this announcement and get some new ideas for you if you already own this adorable kit… Wendy has some ideas today we think you’ll love!
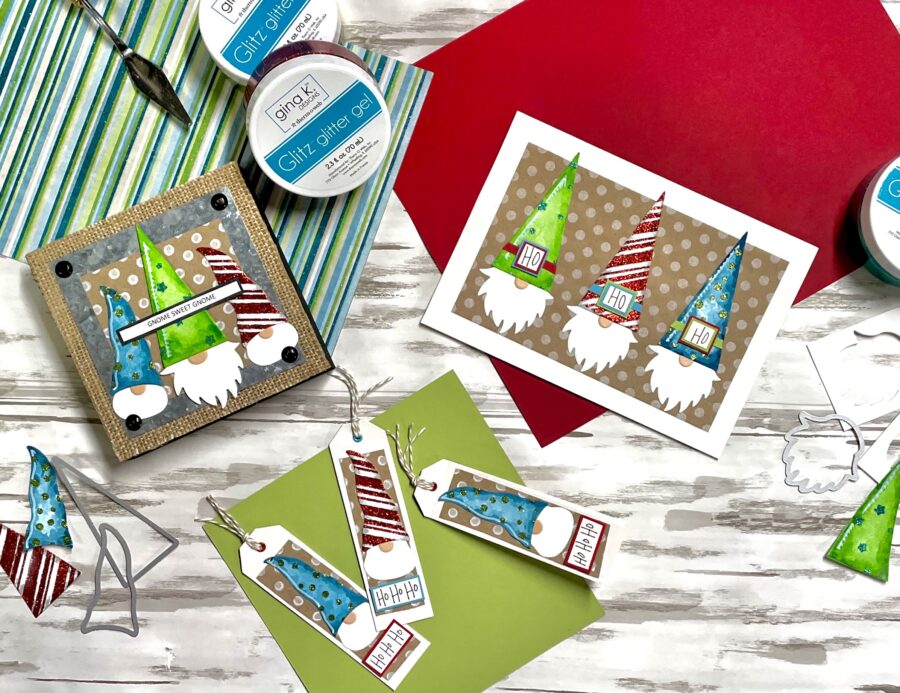
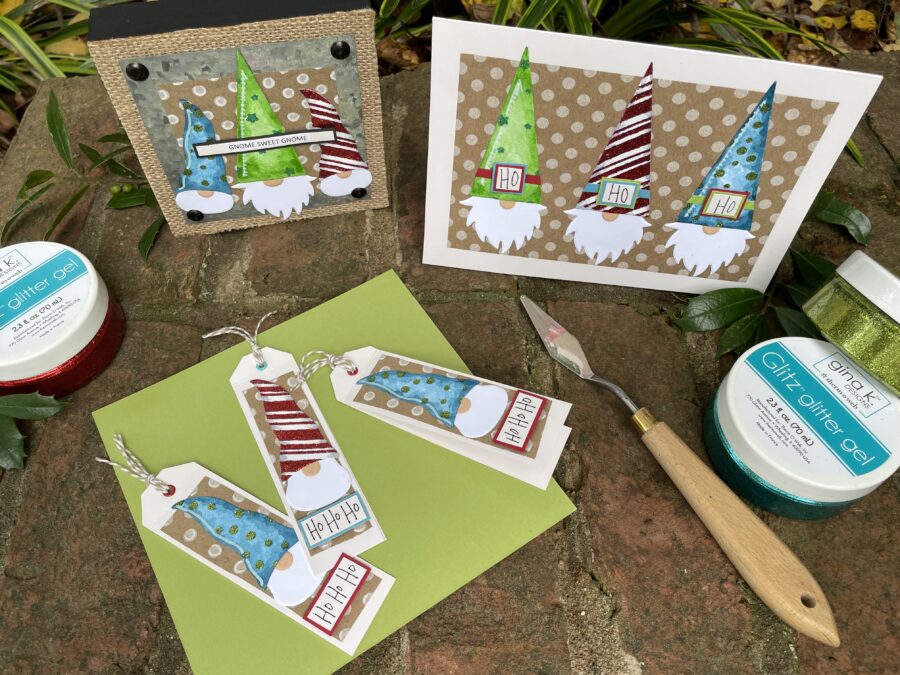
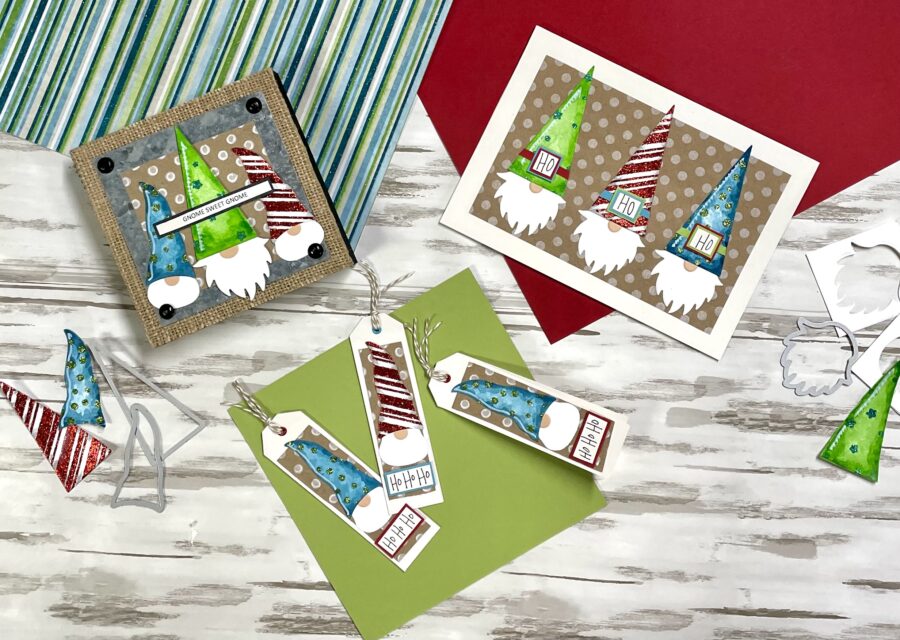
Hello Crafty Friends! In today’s post, we will use the Gina K. Gnome dies for three different purposes. We will create gift tags, a card, and a home décor piece, all using the same gnomes. We’ll give the little guys some extra shine using Gina K. Designs Glitz Glitter Gel and some stencils. Follow along to the end for a bonus “assembly line style” project to get you ready for the holidays.
Gina K. Designs Gnome Dies 3 Ways
Glitzy Gnome Supplies:
iCraft Ultra Bond Liquid Adhesive Pen
Gina K. Designs Glitz Glitter Gel
iCraft 3D Foam Tape Jumbo Roll
iCraft SuperTape Adhesive Roll
Gina K. Designs StampNStencil Gnome for the Holidays Dies – Hang Tight…Coming Soon!
Other Supplies: Cardstock, Patterned Paper, Die-cutting System, Paper Trimmer, Scissors, Black Ink Pen, Score Tool, Wood Display Piece, Twine, Watercolor Paints, and Brushes.
Glitzy Gnomes:
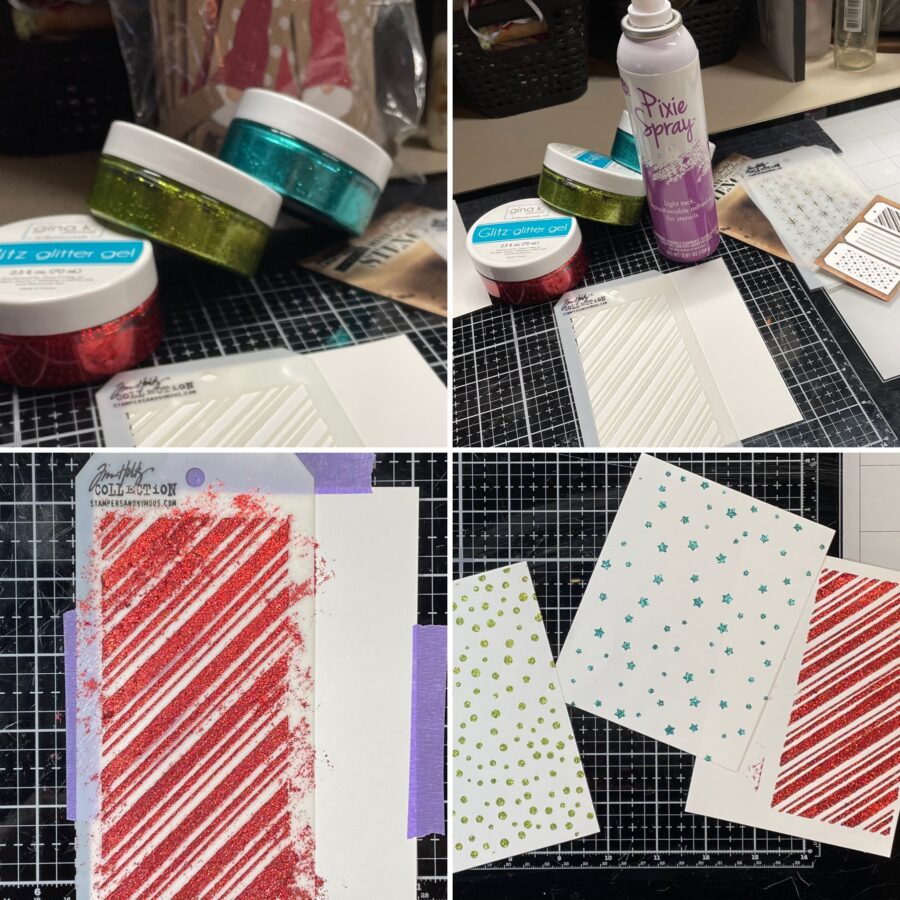
Step One
All three projects begin the same way. Let’s create some gnomes first and then we’ll put together the projects.
Begin by stenciling any designs onto plain white cardstock (any stencils with small designs will work). I used candy stripes, stars, and dots. Next, adhere your cardstock to your workspace using Purple Tape and then secure your stencil using Pixie Spray. Spread your Glitz Glitter Gel over the stencil using a Stencil Pal or spatula. Finally, peel up the stencil (wash stencil immediately or put in a tub of water) and allow Glitz Glitter Gel to dry completely.
Hint: No matter what kind of stenciling you are doing, the use of Pixie Spray helps to give you a super clean design because it keeps whatever medium you’re using from getting underneath the stencil.
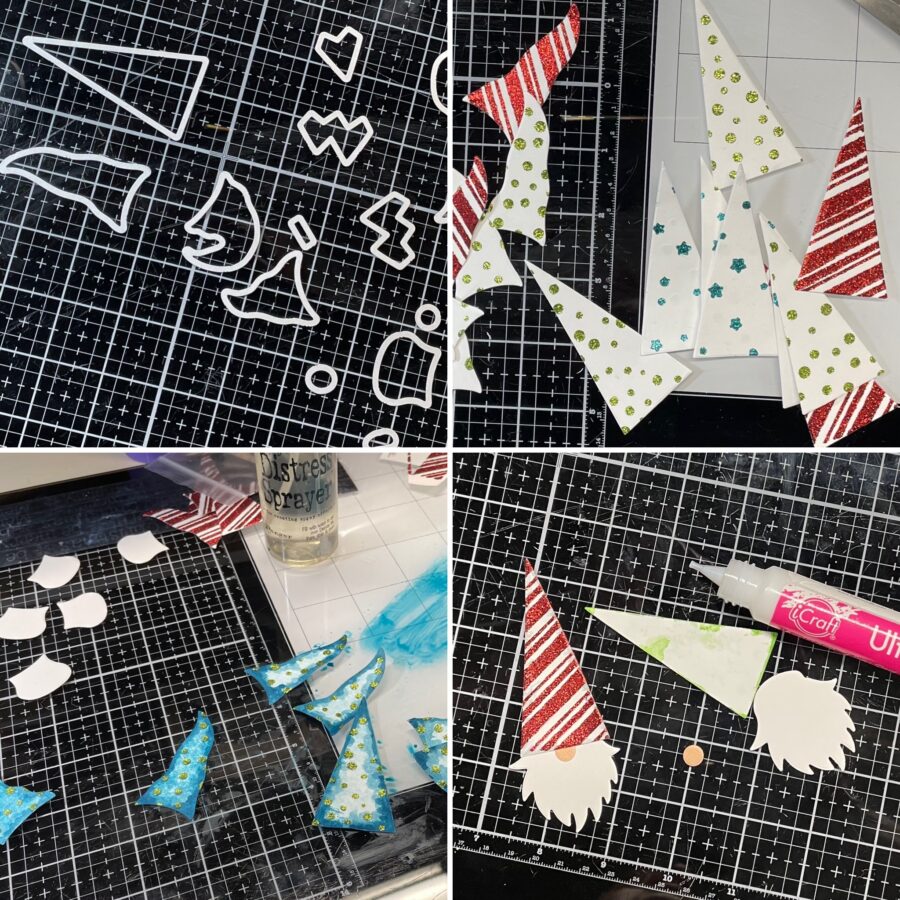
Step Two
Once the stenciled cardstock is dry, die-cut using the Gina K. Designs Gnome for the Holidays hats. Next, die-cut noses from any flesh-tone color and beards from white cardstock. That’s it . . . those are all the pieces you need for your gnomes.
Because the beards are white, we’ll need to add some color to the hats. I chose green paint for the turquoise Glitz hat and teal paint for the grass Glitz hat. Using watercolor paints, build up color, drying the layers in between. Add extra color around the edges to give the appearance of dimension.
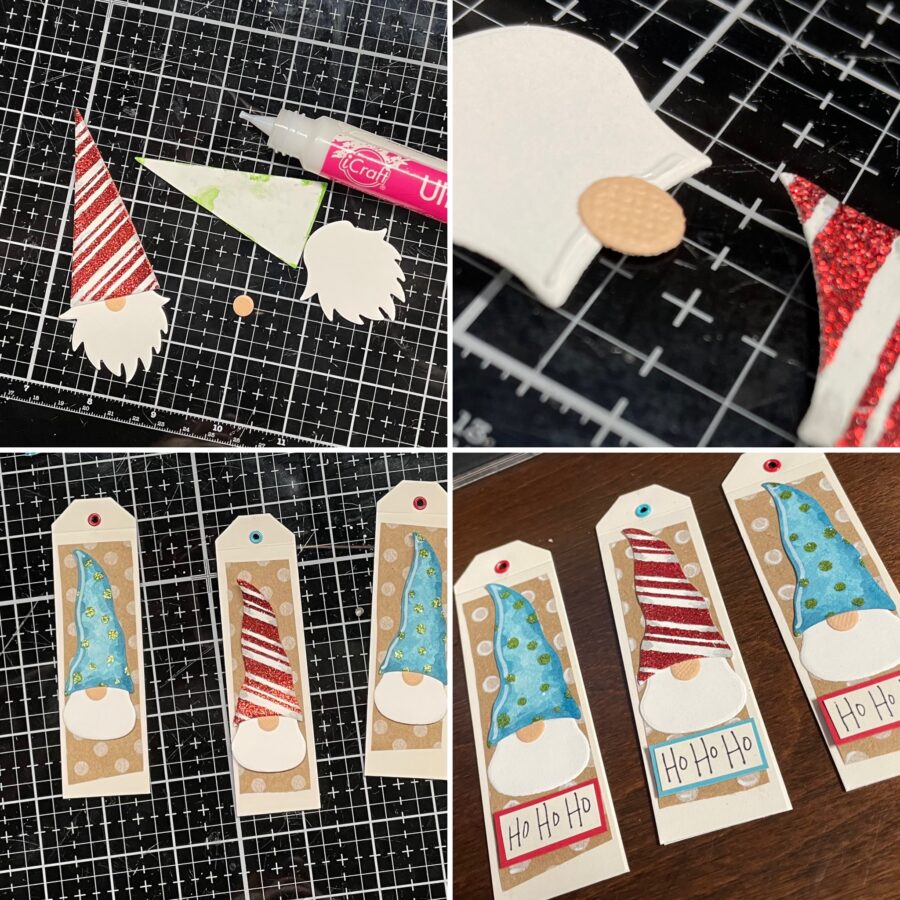
Use your Ultra Bond Liquid Adhesive Pen (after the hats are dry) to assemble your gnomes.
Hint: I like to assemble a bunch of gnomes at the same time. If you have some left after you finish your project, keep them in your stash for a quick last-minute card or project later.
Now, let’s put these gnomes on some projects!
Glitzy Gnome Tags:
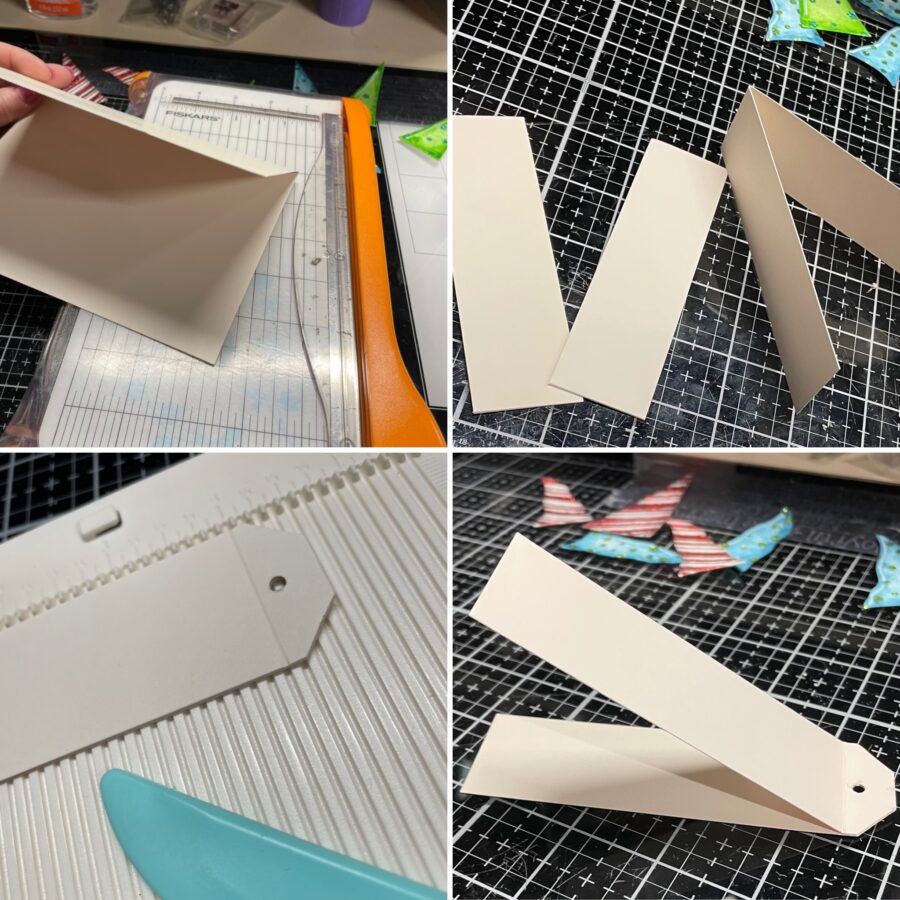
Cut down a card base (or folded cardstock) into 1 1/4″ pieces and punch or cut the corners off at the folded end to create a tag shape. Next, after punching a hole at the top of the tags, score along the top (this will help you open the gift tag to write inside after you add eyelets).
Add a piece of patterned paper to each tag to serve as a background and adhere your gnomes to the background using your Ultra Bond Liquid Adhesive Pen. I have to stop for a minute to say how much I LOVE the new Ultra Bond Pen! It is so easy to use and stores right at your fingertips.
I added a hand-written sentiment adhered with foam tape to the bottom, but you could add any stamped or printed sentiment, or even just a die-cut snowflake.
Add color-coordinating eyelets and baker’s twine to finish off your tags. Your tags are now ready for your personal message inside and to adorn your gifts.
Hint: Use what you have! I didn’t have the perfect patterned paper for the background, but I had a roll of patterned kraft paper from the dollar store. It worked perfectly.
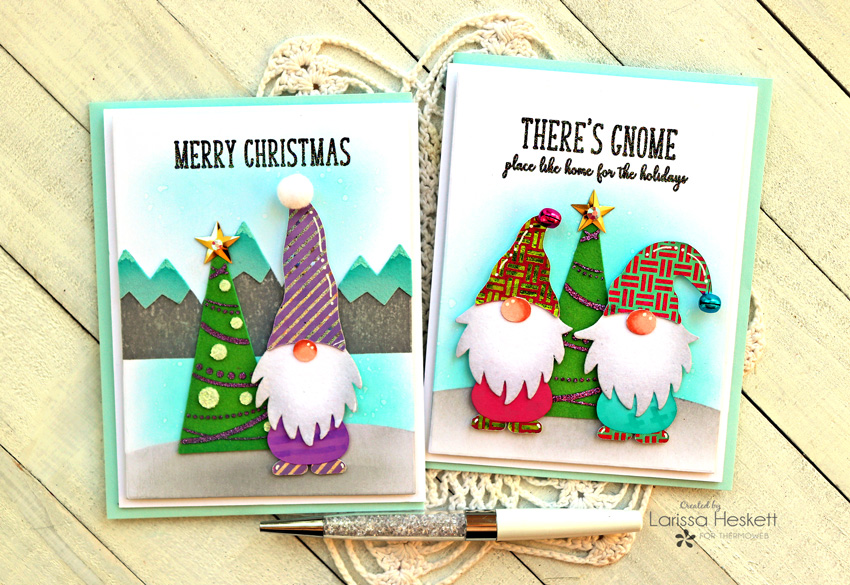
Glitzy Gnome Card:
Adhere some patterned paper to serve as a background to your card base (I used the same patterned kraft paper on mine) and then adhere your gnomes using Ultra Bond Liquid Adhesive Pen.
You can add a coordinating hatband to each hat for contrast and then add a sentiment or die-cut snowflake to the front of each hat using foam tape.
Hint: Use a white paint pen to add a highlight along the edge of your gnome hat.

Glitzy Gnome Home Décor:
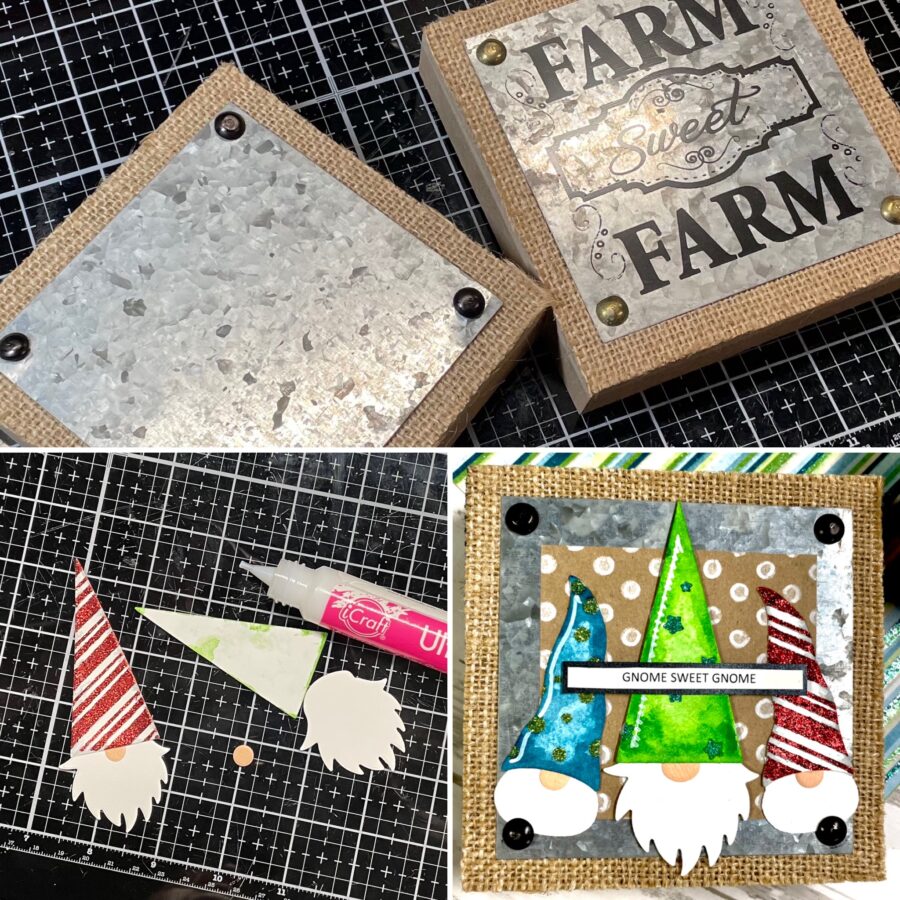
Any small wood décor piece can be your base. As you can see below, I used a home décor wood display piece from the dollar store. I took it apart and put the metal piece on backward and put it back together.
Include a piece of patterned paper to the center to serve as a background (I used the same kraft again).
Adhere one large and two small gnomes to the front of the block. The two smaller gnomes should be on the outer edges adhered with Ultra Bond Liquid Adhesive and the large gnome in the center with foam tape for dimension.
Place a sentiment strip across the hats for a finishing touch.
Hint: I often see wood display pieces like these at the local dollar tree. Even if you can’t find one with burlap and metal, you can use any wood shadow box or block by adding burlap followed by a slightly smaller piece of silver cardstock. You could even add brads to the corners in place of the thumbtacks.
Bonus Time:
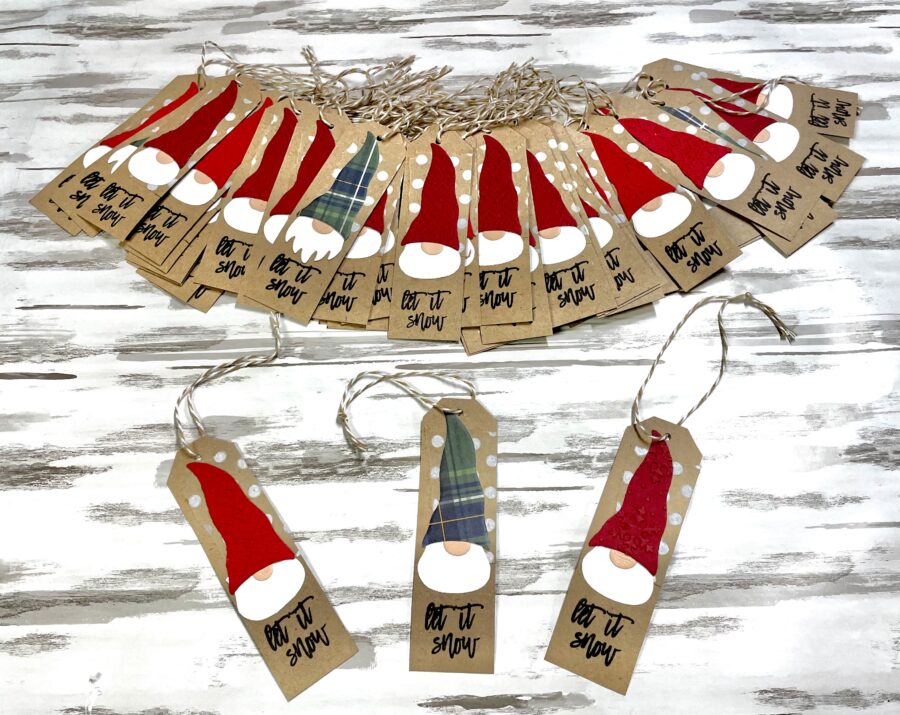
Okay, now for the bonus I promised. Don’t think I’m crazy when you see the picture below, but I love this die set! Remember when I said I like to create my gnomes assembly line style? Well, I wasn’t lying. I made these during the holidays last year after receiving some tags in a swap. The tags I received had hand-cut gnomes on them. I immediately thought of these dies and went to work creating.
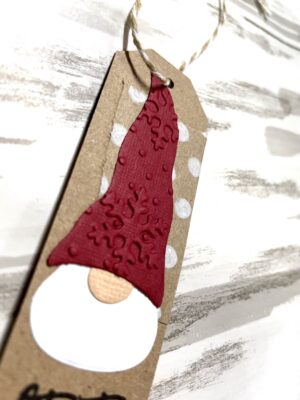
I die-cut all of my hats, beards, and noses first. Next, I embossed the hats (see the close-ups for embossed images). Then I worked the same way for cutting out tags, background pieces, putting together the gnomes, etc. I was able to create a ton of tags in a much shorter period of time than I would have otherwise. I actually made twice this many and these are what I have leftover for this year. They are perfect for tying up gifts for neighbors, teachers or co-workers with a personal touch.
These sold out so fast last year and I totally understand why – they are so much fun! Thanks for sticking with me to the end and happy crafting.

Do check out this tutorial also using our Gina K. Designs Gnome for the Holiday Kit!
MaryB
August 22, 2021 at 7:23 pm (3 years ago)I was fortunate to get the gnomes last year. I can’t wait to see what’s in store for tomorrow!