


 Hello my fabulous crafty friends! This is Amanda from Twiddler’s Nook again.
Today I have a Christmas card with multiple surprises to share and I’m so excited! I had so much fun creating this card. I hope you enjoy it too!
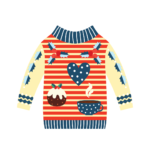
Ugly Christmas Sweater Fun Card with Benzie Felt

Here are the products used on today’s card:
Gina K. Designs Glitz Glitter Gel – Iridescent
Stencil Pal
Pixie Spray
3D Foam Tape
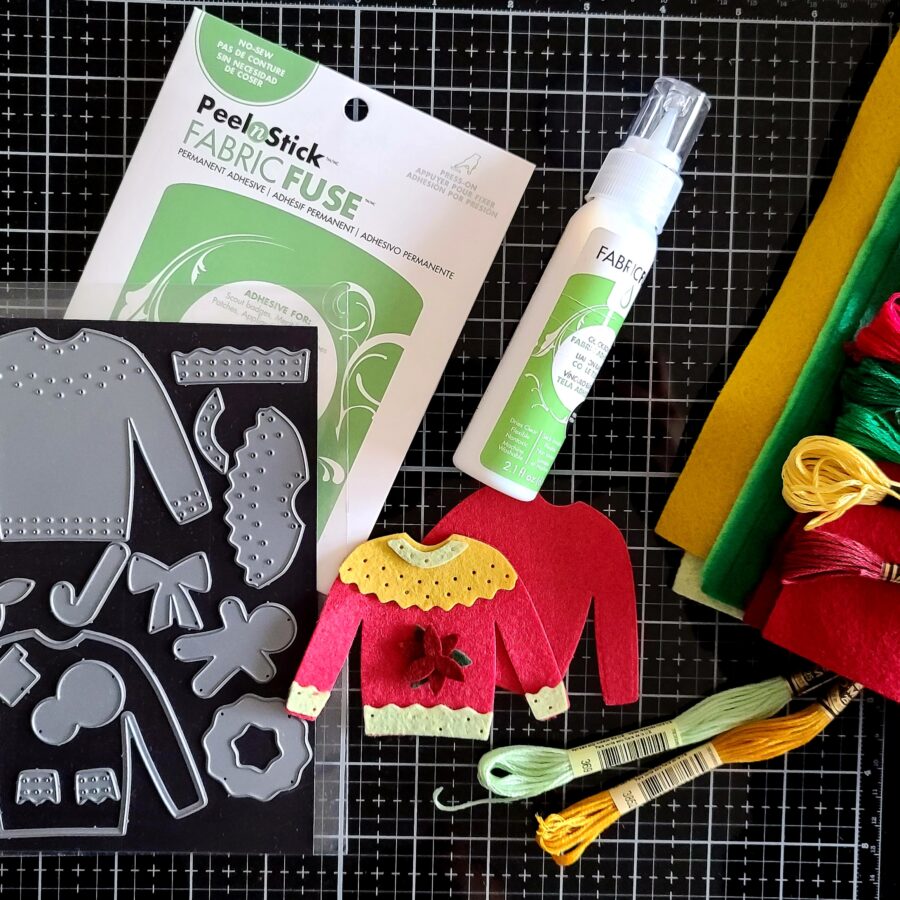
Fabric Fuse Peel-n-Stick Adhesive Sheets
Fabric Fuse Liquid Adhesive
Ultrabond Liquid Glue Pen
Benzie Design Felt – Christmas Palette and coordinating embroidery floss
Benzie Design Ugly Christmas Sweater dies
Pretty Pink Posh Whimsical Christmas stencil
Pretty Pink Posh Eyelet Border dies
Pretty Pink Posh Cozy Fall Critters stamps and dies
Pink & Main Layered Circles dies
Newton’s Nook Banner Trio dies
Newton’s Nook Christmas Roundabout stamps
Blending Buddy brush
Lawn Fawn artichoke ink
Distress Oxide Ink – shabby shutters and forest moss
Ugly Sweater Card Supplies
Ugly Sweater Card Instructions
The very first thing I did was create the ornament that I knew I wanted on the front of my card. I pulled out the Christmas palette of felt and coordinating floss from Benzie Designs, along with my Ugly Christmas Sweater die set. I chose the colors I wanted for each piece and cut them out. When I’m working with felt I absolutely LOVE the fabric fuse line of adhesive. The sheets are great to die-cut or cut with scissors and the liquid adhesive works just like magic without leaving a mess behind.
For this project, I used a little Liquid Fabric Fuse on all the small pieces to hold them in place and then stitched all of the accents on. Last, I added the poinsettia to the center of the sweater along with yellow seed beads for the stamen. Then I cut some strips of Peel-n-Stick Fabric Fuse to adhere to the back and then added a solid sweater cutout to hide all the messy threads.
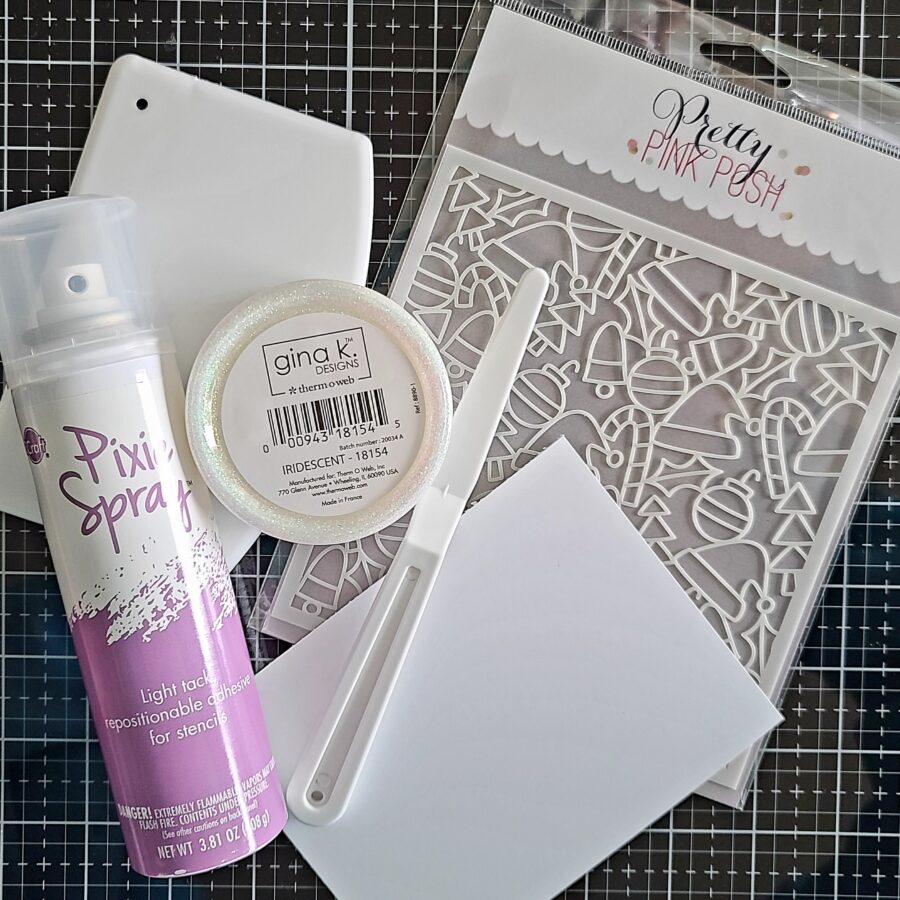
Switching gears to my card, I took my Pixie Spray and coated the back of the whimsical Christmas stencil from Pretty Pink Posh. Once that was dry I adhered it to a white cardstock panel and spread iridescent Glitz Glitter Gel through the stencil with my Stencil Pal. This Pixie Spray is a total lifesaver with delicate stencils like this! Trust me…you’ll never go back after you try it!
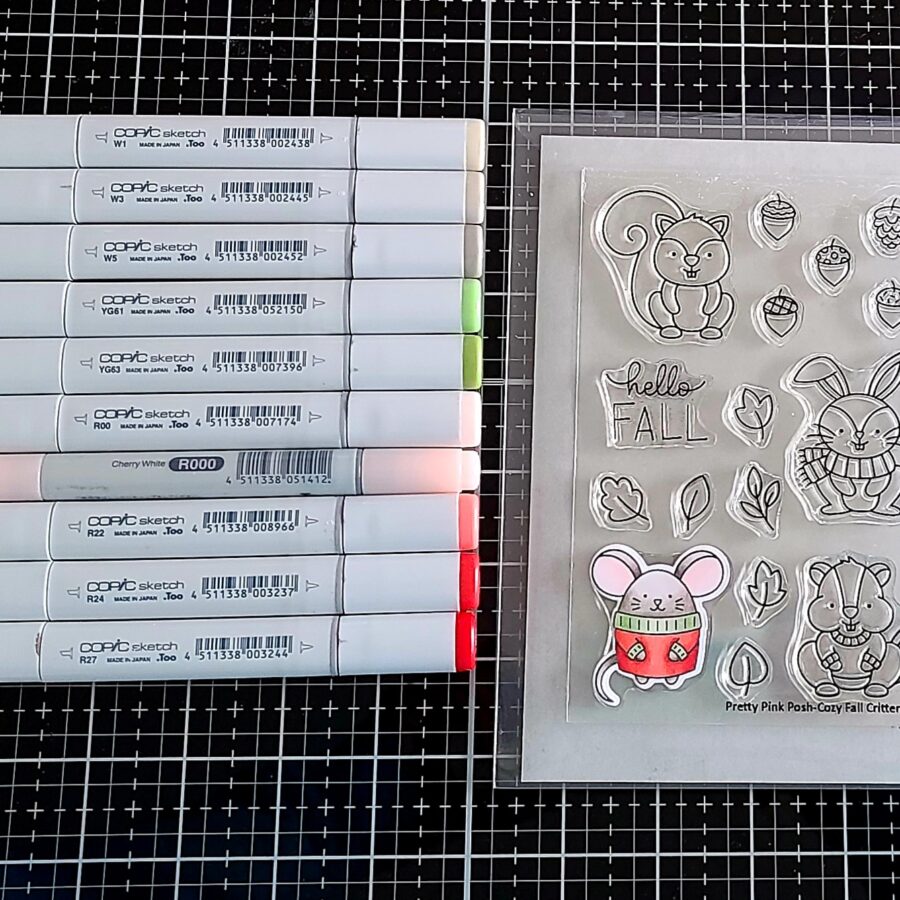
While that panel was drying I stamped the cute mouse from the Cozy Fall Critters stamp set (also from PPP) and colored it with my Copic markers keeping with colors that matched the sweater ornament that will be on the front of the card. Then I used the coordinating dies to cut him out and set him aside while I got inky.
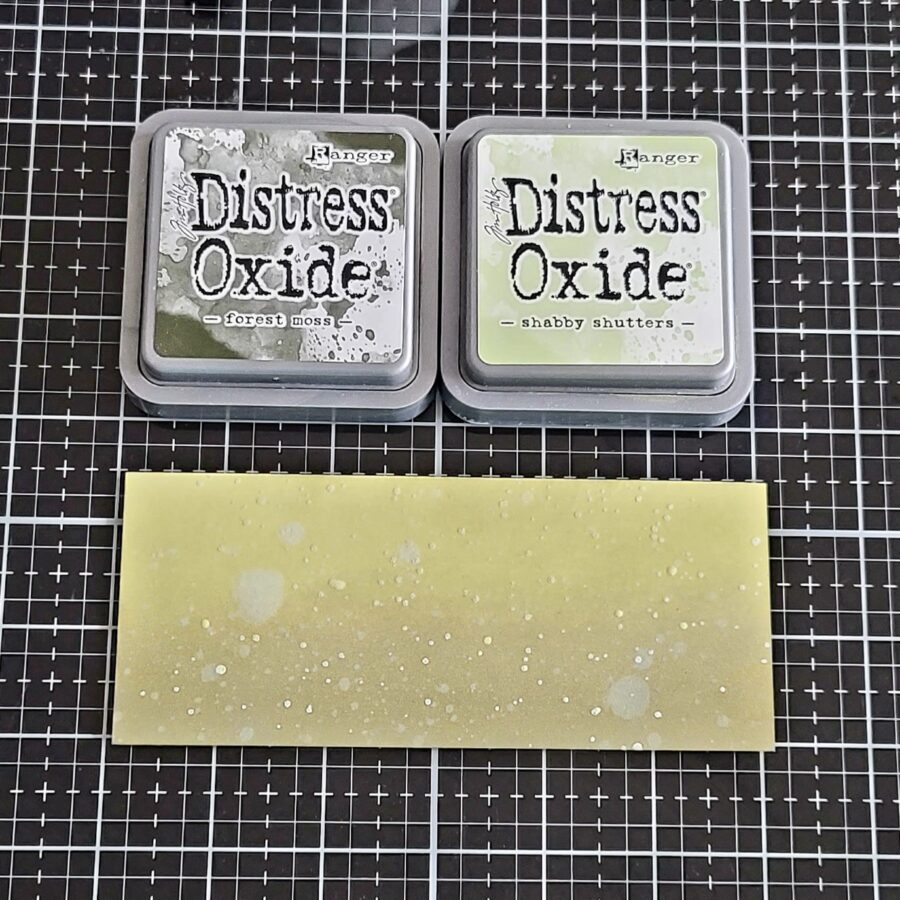
I took a scrap piece of white cardstock and inked it up with distress oxide ink in shabby shutters and forest moss. I spritzed the panel with water and flicked pearl watercolor all over it.

I trimmed it down to 4.25 inches wide and die-cut it with the PPP eyelet border die. My plan is to “hang” the sweater from the hole in the eyelet so it’s secure in the envelope but comes off to go on the tree.
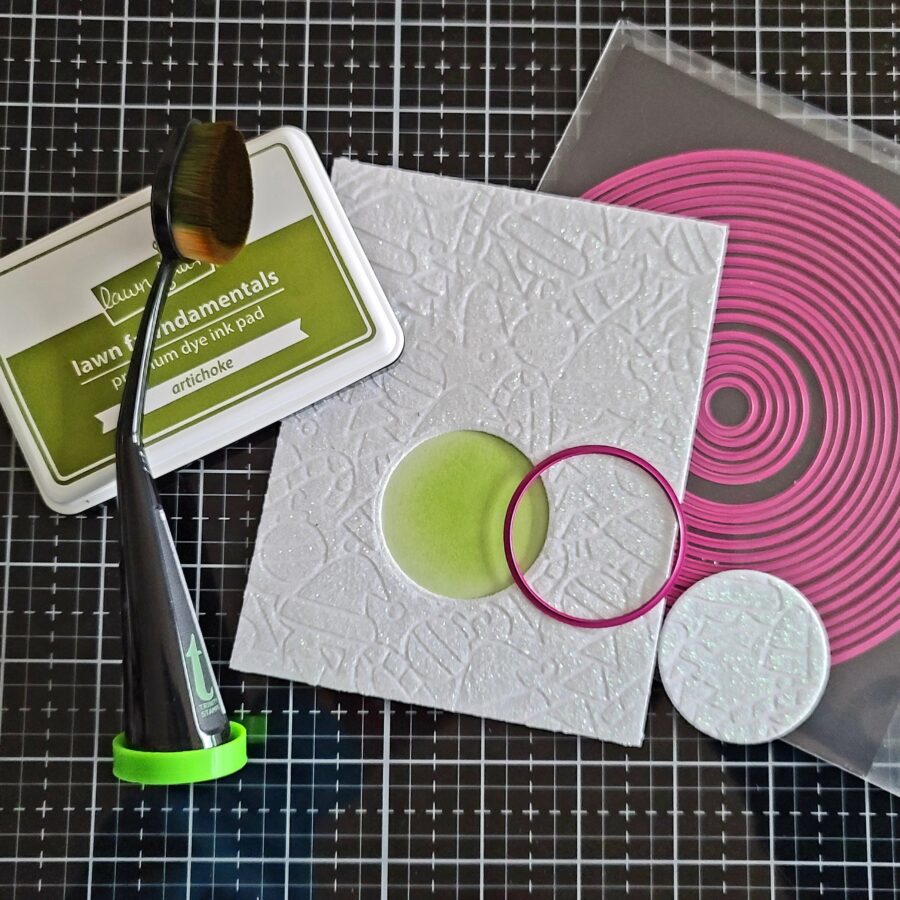
With the glitz panel dry, I used Ultra bond liquid glue to adhere it to a top folding white card base. I chose a circle just smaller than the width of the sweater and cut a hole in the front of my card. Then I used a blending brush and inked up a green shadow on the inside of the card. My mouse will go here and peek through when the sweater is gone.
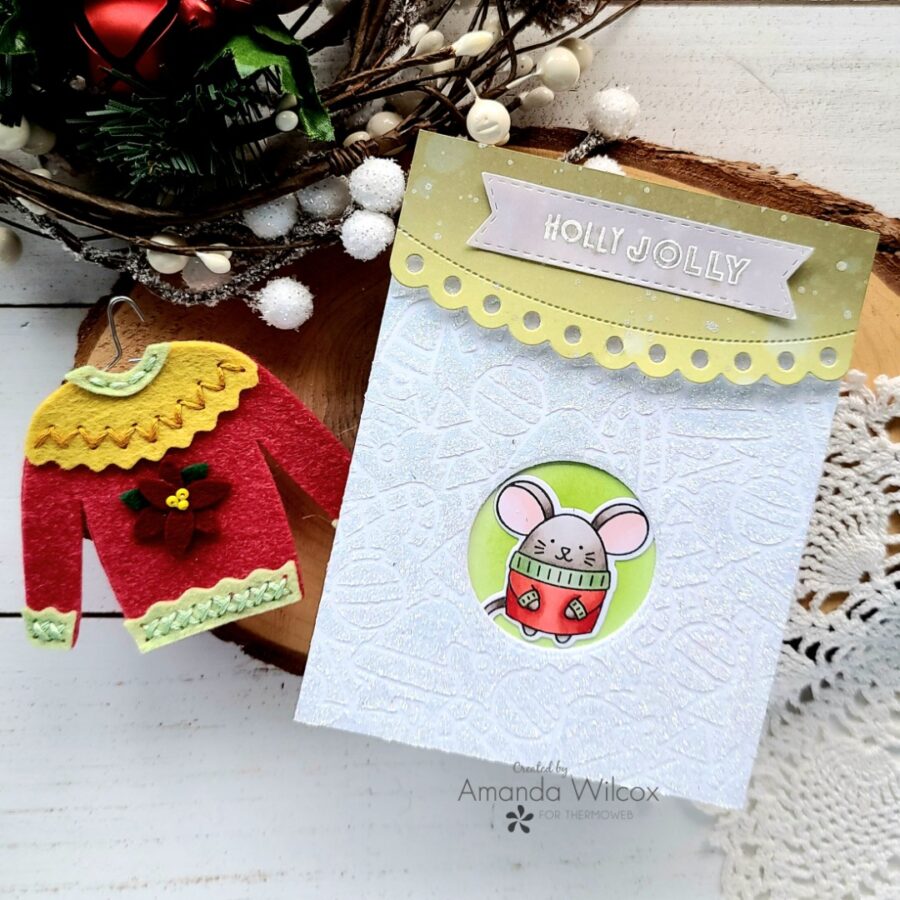
I die cut a vellum banner and heat embossed a sentiment on it in white. Then I smeared a little liquid glue on the back and adhered it to the top. I also added my mouse to the inside with another sentiment.
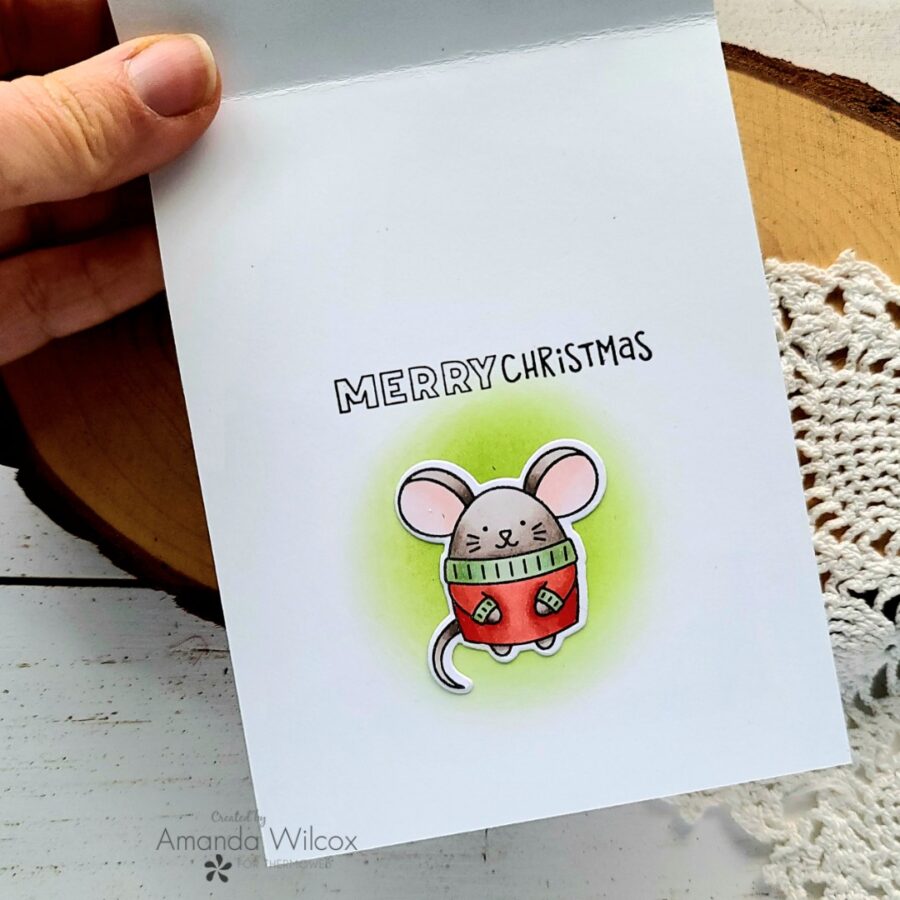
Isn’t he just so sweet! I love continuing the fun from the front of the card to the inside too!
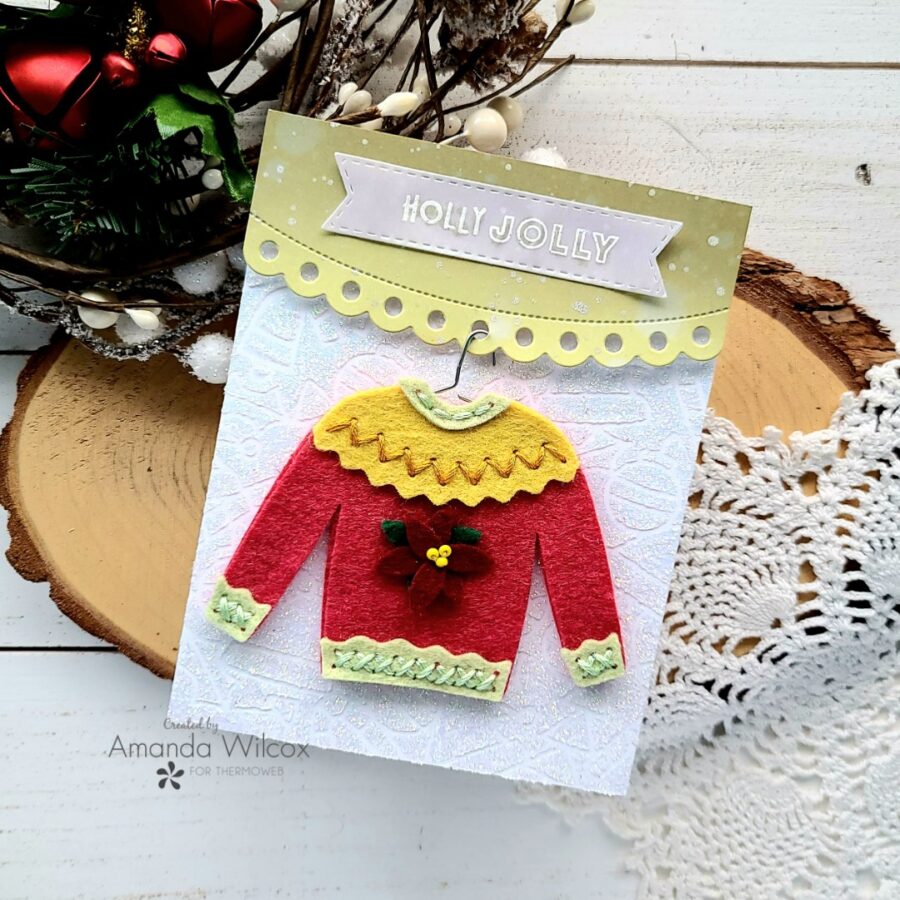
And here is the sweater hanging in place, ready to go! Eeeekkk! I love how it turned out!
I hope you enjoyed today’s project and found some inspiration to create something wonderful and share it with someone.
I appreciate you sharing your time with me. Have a fabulous day!
This post contains affiliate links. For more information, see our disclosure HERE.
pearblossompress
January 3, 2022 at 12:31 pm (2 years ago)I can’t get over how cute this is! And so clever with the mouse inside, so it still looks like a finished card when the ornament is removed. Fantastic job Amanda!