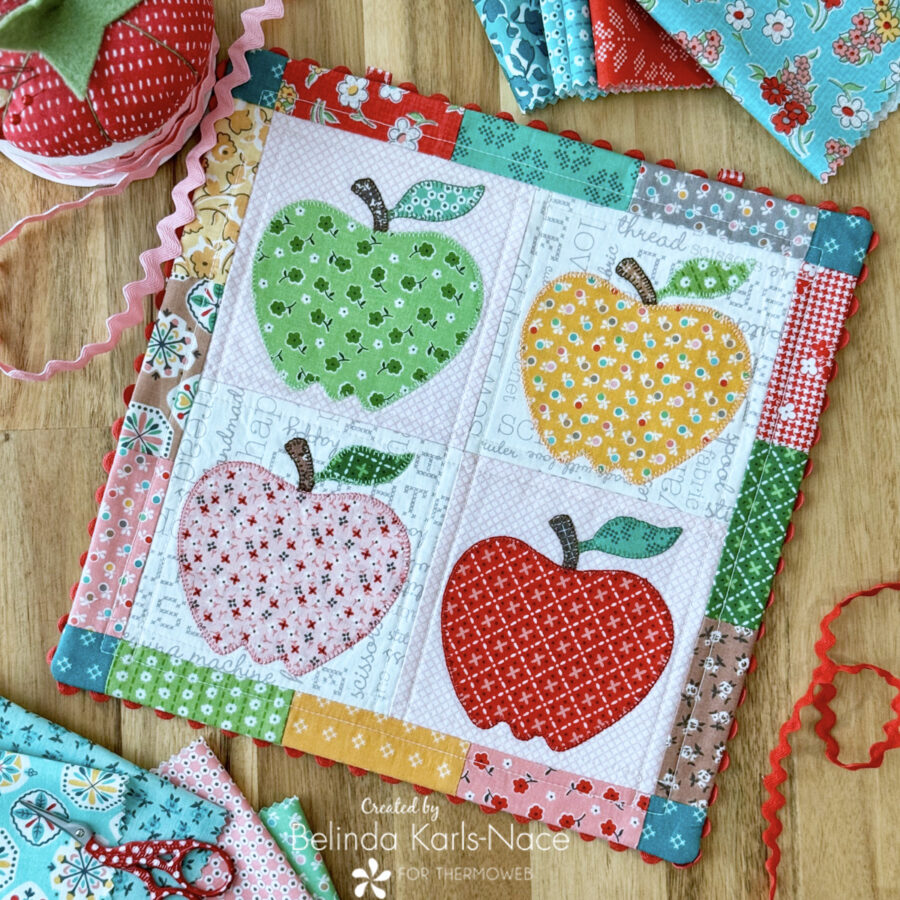
Freshly Picked Mini Quilt featuring HeatnBond
Greetings friends! It’s Belinda Karls-Nace from Blue Ribbon Designs, here with a brand new project tutorial featuring an assortment of my favorite HeatnBond products. Today, I am excited to share my “Freshly Picked Mini Quilt” with you.
Therm O Web recently released a new product, a Tear-Away Stabilizer Value Pack. You may immediately think of tear-away stabilizer as a machine embroidery product, however, I will let you in on a little secret…this is my favorite product for getting the very best machine appliqué results!
I use a tear-away stabilizer sheet under each of my appliqué blocks when doing the appliqué stitches. As a result, my blocks and stitches are nice and flat, without any puckering. Once my pieces are appliquéd in place, I simply tear away the stabilizer from the back and sew the block(s) into my quilt. These magical stabilizer sheets come in two sizes (8” x 8” or 10” x 12”), making them convenient and versatile.
To show off this new product and my technique, I decided to design a fun apple appliqué project, perfect for a back-to-school teacher gift or seasonal décor.
Let’s get started! Simply gather the materials/supplies listed below, then download the pattern with PDF templates and quilt layout image.
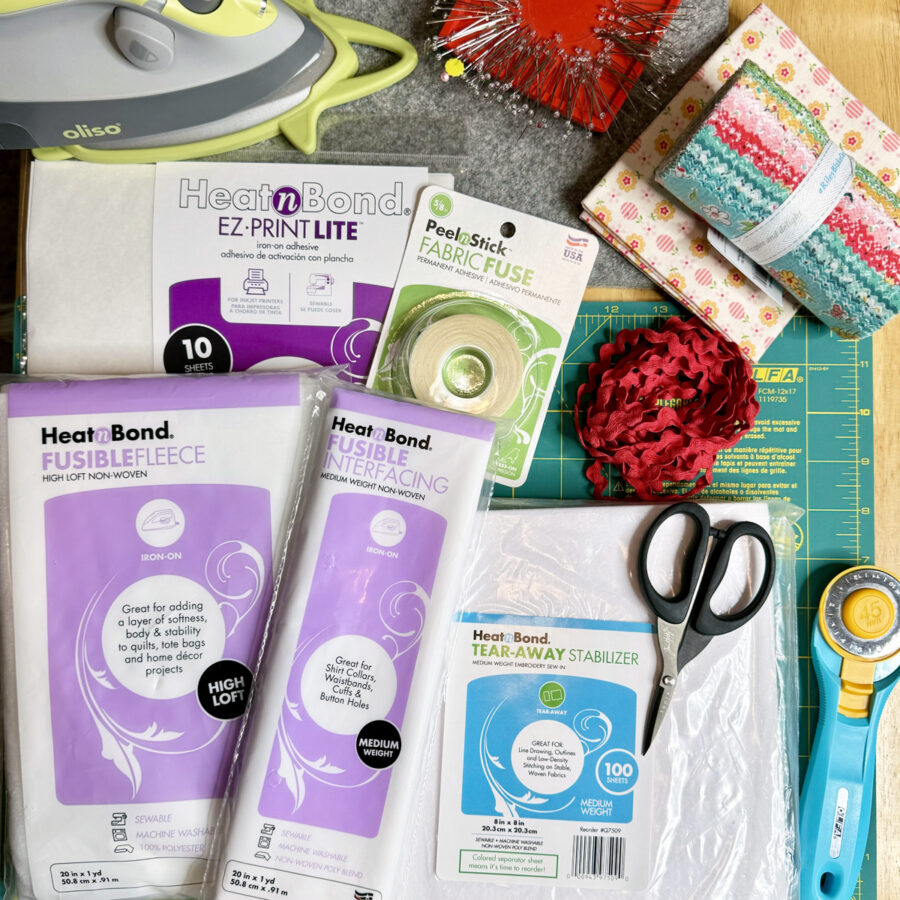
What you need:
- HeatnBond Lite EZ-Print Iron-On Adhesive Sheet, 8.5 in x 11 in
- 1 sheet
- HeatnBond Fusible Fleece
- 1 – 11½” x 11½”
- Tear Away Machine Embroidery Stabilizer by HeatnBond – 8-inch x 8-inch
- 4 sheets
- HeatnBond Medium Weight Non-Woven Fusible Interfacing
- 1 – 11½” x 11½”
- HeatnBond Fabric Fuse PeelnStick Fabric Adhesive Tape, 5/8 in x 20 ft
- 3”–4″ piece
- Cotton Fabrics: model uses Stitch by Lori Holt for Riley Blake Designs, but this project is perfect for scraps and small pieces fabrics you have on hand – I encourage you to use fabric in your stash or scrap bin.
- 4 – 5” squares of light fabrics (background for apple appliqué blocks)
- 4 – 4½” x 4½” squares of red fabric (apple fruit)
- 4 – 2” x 2” squares of green fabric (apple leaf)
- 4 – 1½” x 1½” squares of brown fabric (apple stem)
- 12 – 1½” x 3½” rectangles of various fabrics (border)
- 4 – 1½” x 1½” squares of various fabrics (border cornerstones)
- 1 – 11½” x 11½” piece of backing fabric
- 4” – 12” pieces of ½” rick rack (model uses Hand-Dyed 100% Cotton Half Inch Rick Rack from Lady Dot Creates)
- Optional, if Hanging: Twill Tape or Ribbon
- 2 – 2” pieces (hanging tabs)
- Optional, if Hanging: Quilt Hanger (model uses Ackfeld Scroll Table Stand Quilt Hanger – 12″ x 14″)
- Oliso Iron
- Olfa Cutting Tools (cutting mat, rotary cutter)
- Sewing Machine
- Basic Sewing Supplies/Tools (small sharp scissors, wonder clips, rulers, sewing thread, pencil, etc.)
How to Make a Freshly Picked Mini Quilt
(11½” x 11½” with rick rack)
NOTE: This tutorial requires basic quilting knowledge and foundation piecing knowledge. Therefore, you may need additional assistance to piece your quilt. Please search/visit the Internet or look at a basic quilting book to learn the fundamentals of quilting.
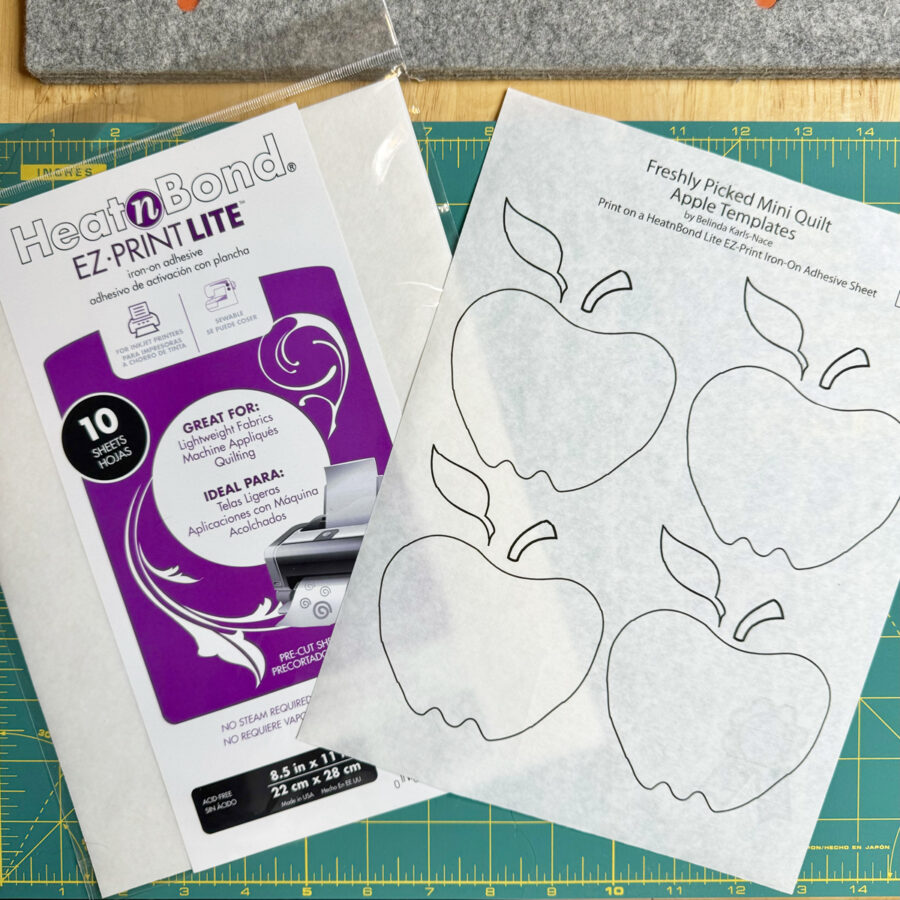
1. Download and print the Freshly Picked Mini Quilt PDF.
Freshly Picked Mini Quilt – A Project for the Therm O Web Blog
- Print actual size – do NOT “fit to page” or “shrink to fit.”
- Print page 1 (cover/quilt layout) on regular printer paper.
- Print page 2 (apple appliqué templates) on one sheet of HeatnBond Lite EZ-Print Iron-On Adhesive (no tracing necessary).
2. Create appliqué blocks.
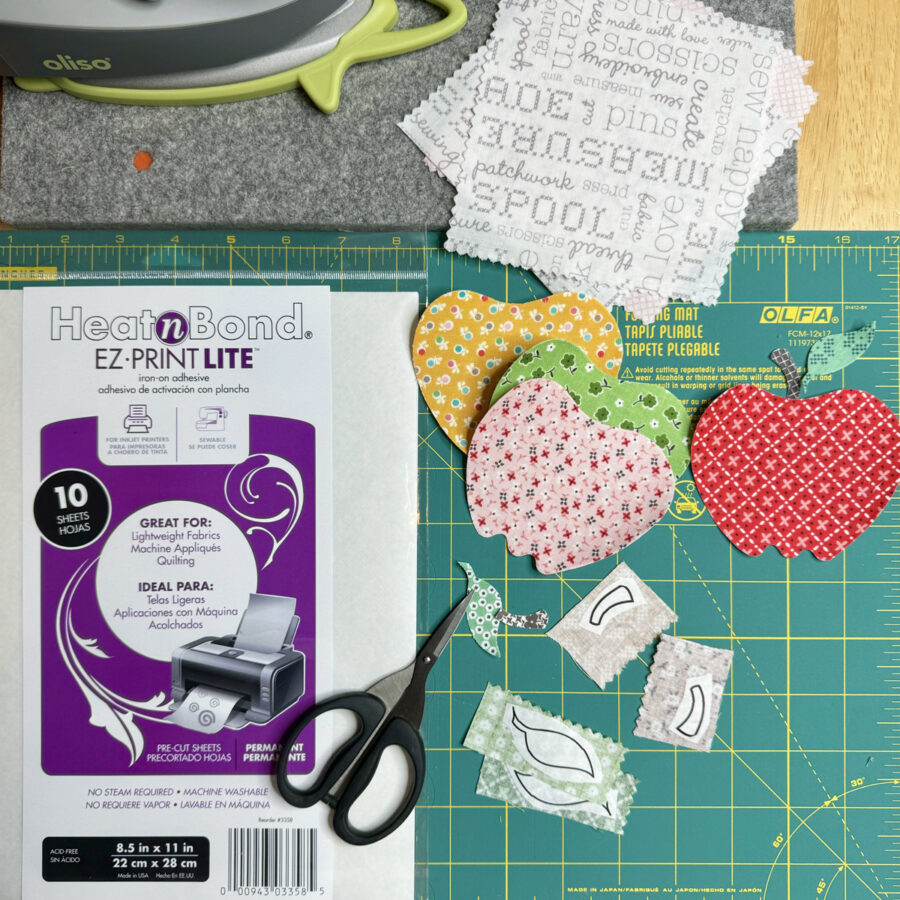
- Loosely cut out the appliqué template(s) printed on HeatnBond Lite EZ-Print Iron-On Adhesive and apply to the back of coordinating fabrics following the package instructions.
- Loosely cut out all shapes, leaving the paper in place.
- Pre-heat iron to medium heat, no steam.
- Place loosely cut apart template(s) on the wrong side of fabrics (printed paper, smooth side, should be face up).
- Place and hold the iron on the paper for 2-3 seconds. Repeat, overlapping slightly, until entire surface is bonded.
- Allow it to cool.
- Cut or trim the piece(s) on the solid lines printed on the paper to create the desired shape. Leave paper in place until ready to fuse in place.
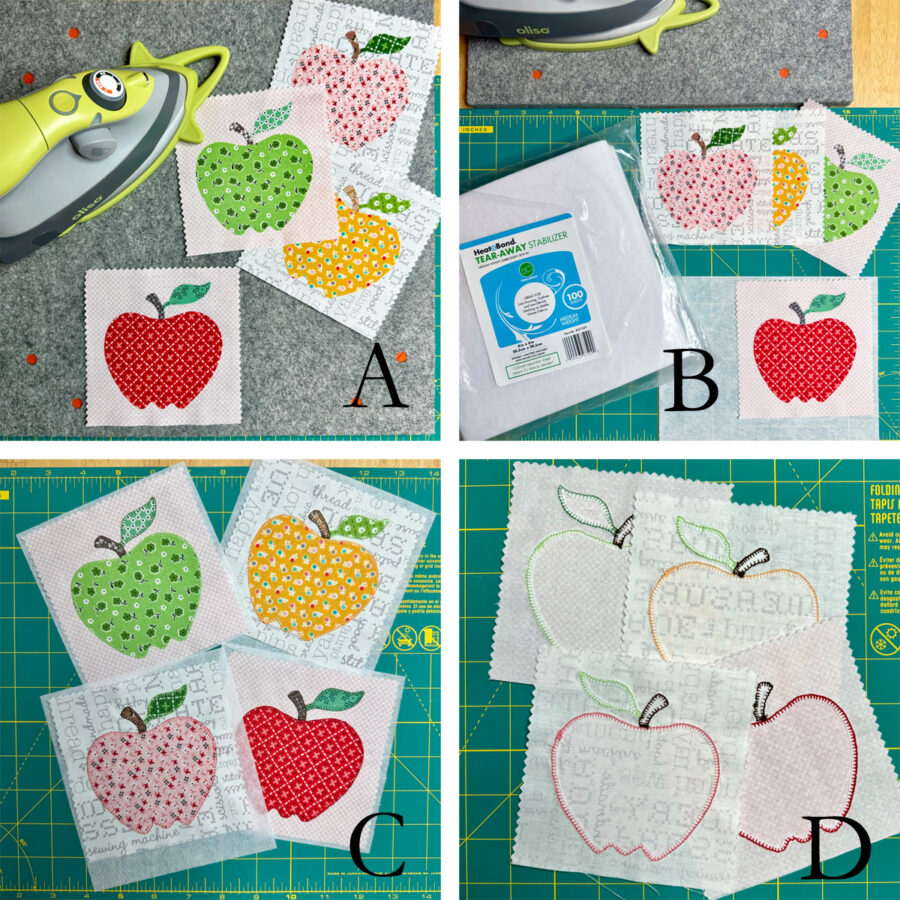
- Center and fuse one apple fruit, one stem, and one leaf into place on each 5” fabric square following the package instructions. Leave an approximate ½” seam allowance around the entire applique shape. Image A.
- Pre-heat iron to medium heat, no steam.
- Peel off paper.
- Center/arrange shapes, adhesive side down on top of the 5” fabric square.
- Press and hold iron for six seconds on each section, overlapping slightly, until the pieces are bonded.
- Repeat for all four blocks.
- Place block on top of an 8” x 8” sheet of Tear-Away Stabilizer. Image B.
- Next, use your favorite appliqué stitch (machine or hand) and coordinating sewing thread, sew the pieces in place. I chose to use a machine blanket stitch. Repeat this step for all four blocks. Set these completed blocks aside. Image C.
- Finally, carefully tear away/remove the stabilizer, being mindful not to distort the block. A small sharp pair of scissors may help get in the tiny nooks and crannies. Image D.
 3.Create the borders.
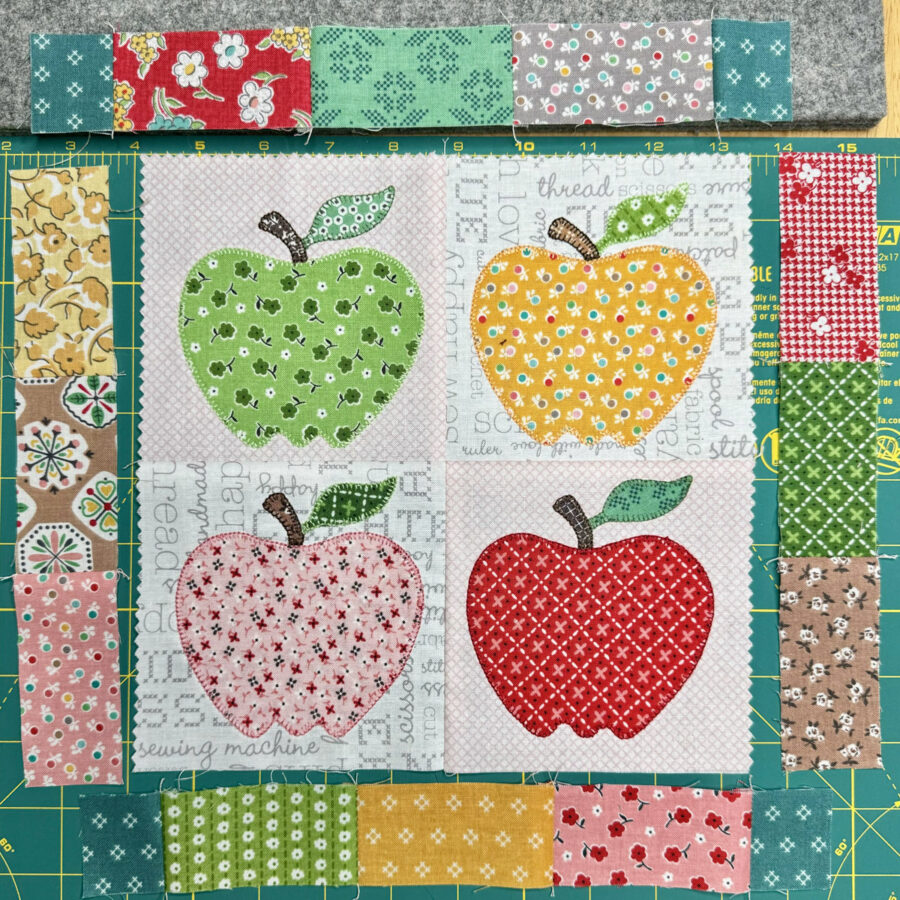
- Create the side and top borders by sewing together the 1½” x 3½” rectangles and the 1½” x 1½” squares, as shown. Use a ¼” seam allowance.
 4. Create the quilt top.
- Lay out, pin, and sew the completed appliqué apple blocks into a four-patch unit.
- Lay out, pin, and sew one border strip unit on each side of the four-patch.
- Lay out, pin and sew one border unit with cornerstones on the top of the combined four-patch unit. Lay out, pin and sew one border unit with cornerstones on the bottom of the combine four-patch unit.
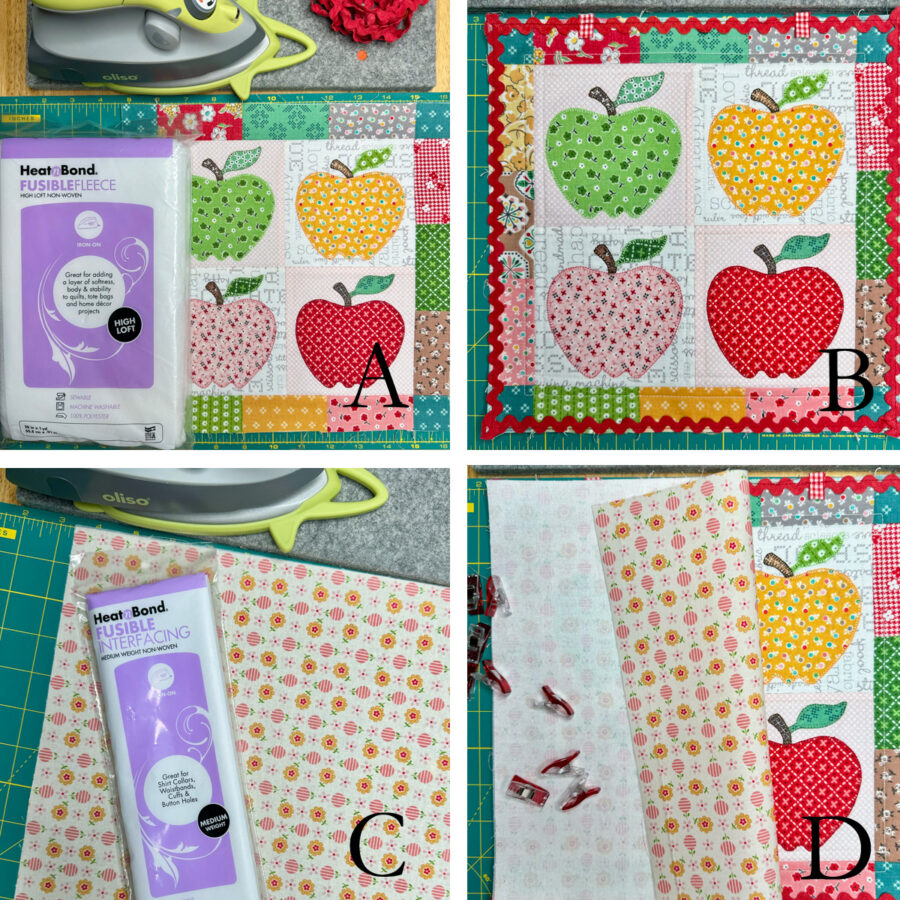
- Center and fuse the 11½” x 11½” piece of HeatnBond Fusible Fleece to the wrong side of the 11½” x 11½” quilt top, following the package instructions. Image A.
- Pre-heat iron to a medium setting, no steam.
- Place the rough side of the Fusible Fleece on the wrong side of the quilt top unit.
- Cover with a lightweight, dry pressing cloth.
- Press and hold iron with medium pressure for 10-15 seconds. Repeat by lifting iron to new area, slightly overlapping previous area until the entire surface is bonded.
- Allow it to cool.
- Quilt as desired.
 5. Assemble the quilt.
- Baste rick rack in place around the perimeter of the quilt top. Image B.
- Baste hanging tabs in place, if desired. Image B.
- Fuse an 11½” x 11½” piece of HeatnBond Medium Weight Non-Woven Fusible Interfacing to the wrong side of the 11½” x 11½” piece of backing fabric. Image C.
- Pre-heat iron to a high setting, no steam.
- Place the rough side of the fusible interfacing against the wrong side of the backing fabric.
- Cover with a lightweight, dry pressing cloth.
- Press and hold iron with medium pressure for 10-15 seconds. Repeat by lifting iron to new area, slightly overlapping previous area until the entire surface is bonded.
- Allow it to cool.
- Place quilt top unit and backing fabric right sides together and sew around the perimeter with a ¼” seam allowance, leaving an approximate 3” opening for turning. Image D.
- Clip corners and turn right side out through opening. Push out corners and press well.
6. Finish the quilt.
- Use HeatnBond Fabric Fuse PeelnStick Fabric Adhesive Tape, 5/8 in, to seal the opening left for turning closed (no sew, no heat).
- First, adhere the tape inside the opening along the edge.
- Next, peel off the paper liner.
- Finally, press opening closed with firm pressure. Try using the rounded side of a metal spoon and pressing down with your thumb while applying heavy, consistent pressure. The harder you press, the better the bond. Repeat on back side of item.
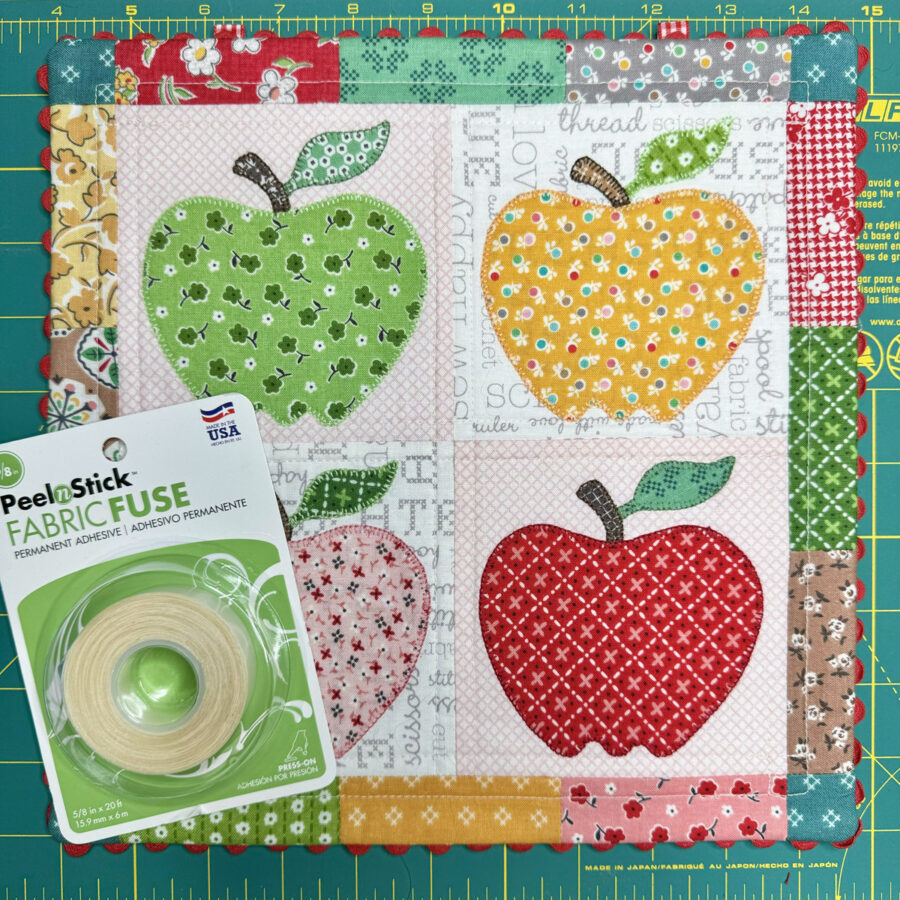
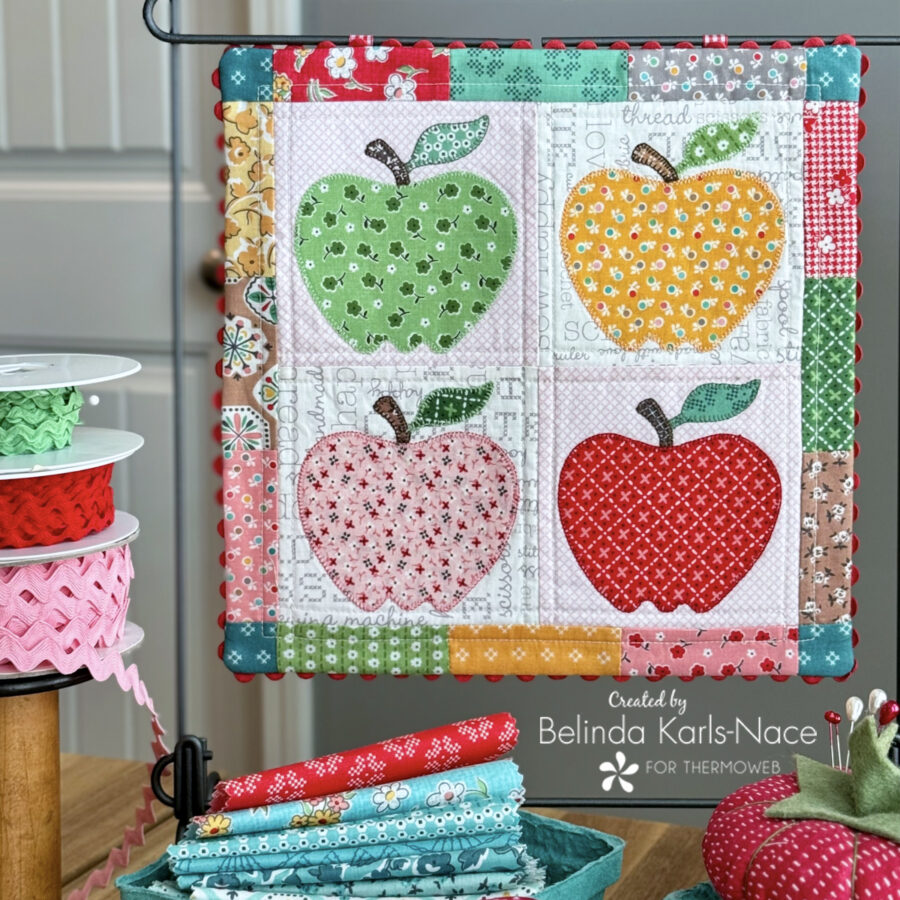
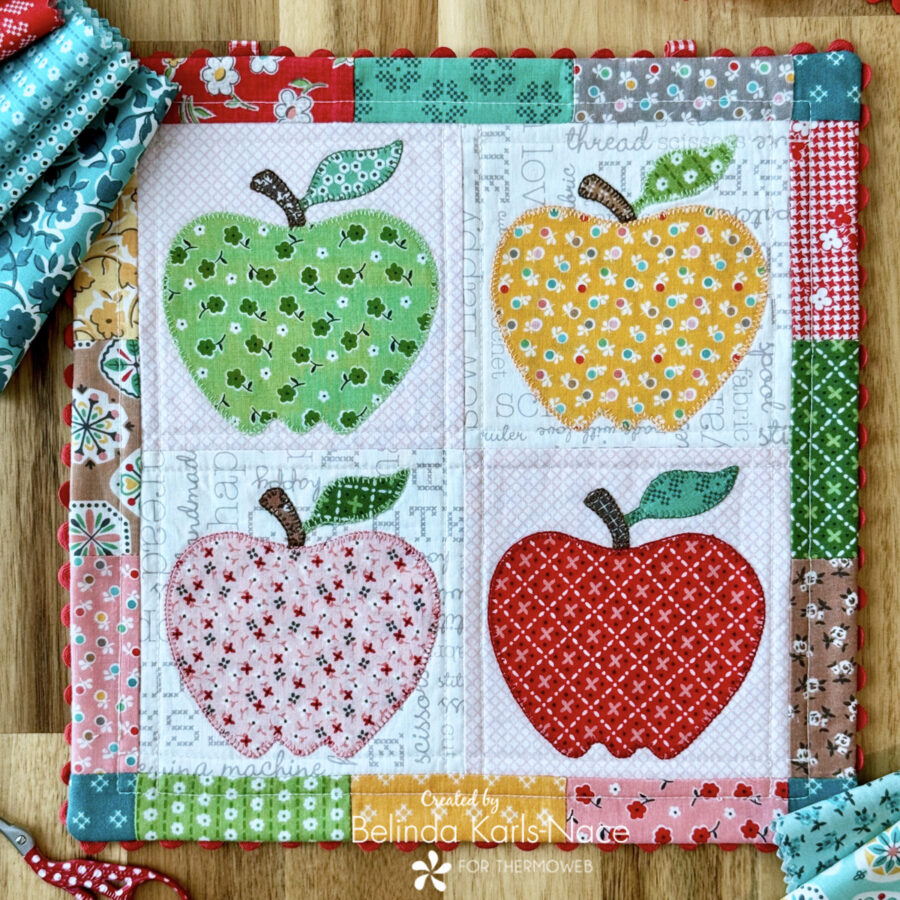 Your Freshly Picked small quilt is now complete. Place your mini quilt on a small quilt hanger or stand to display or use as a table topper. This cheerful project makes a wonderful gift for a teacher or classroom display. In addition, it works great as a candle mat, placemat, or snack mat.
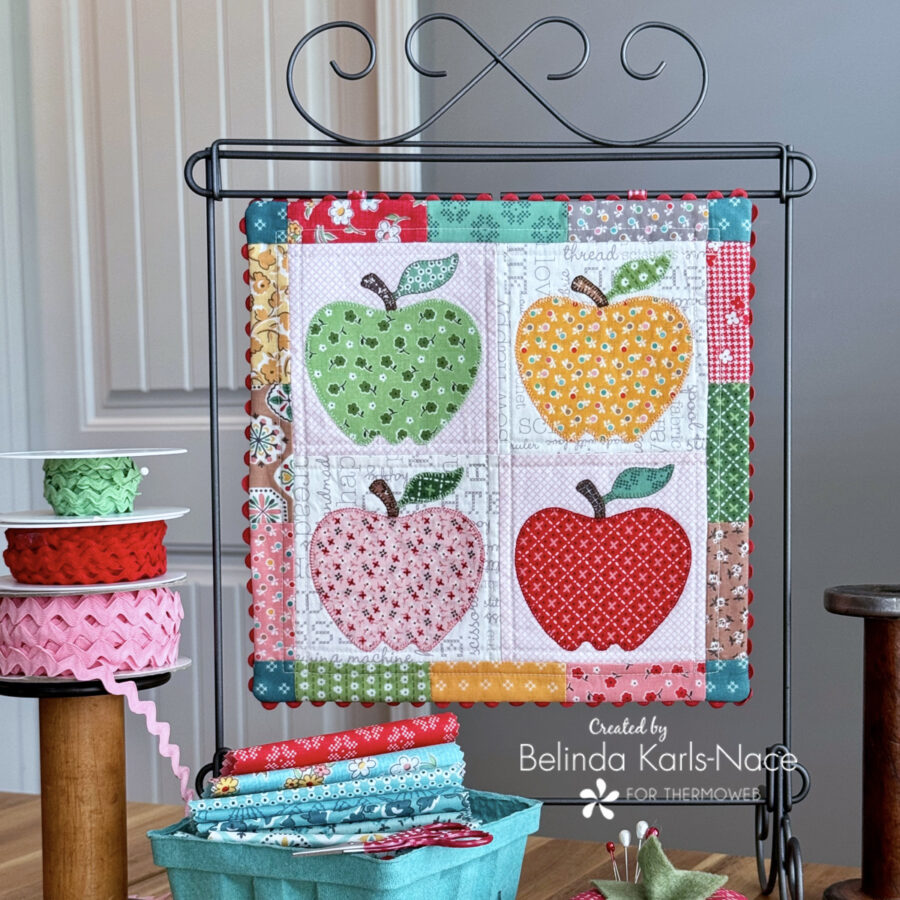
 Thank you for joining me today for my Therm O Web blog tutorial. I hope this post inspires you to create a Freshly Picked Mini Quilt, using scrap fabrics and materials you have on hand. If you would like to see more of my projects and patterns, stop by my blog, website, and/or Instagram – I would love to visit with you and see what you create!