


Hi, this is Gracie and I’m here with a fun and easy background idea for your cards using the brand new Gina K. Designs Holiday line for Therm O Web. Make sure to follow along, because I’m sharing a step by step tutorial below to show you how to put together a background and a card like this one!
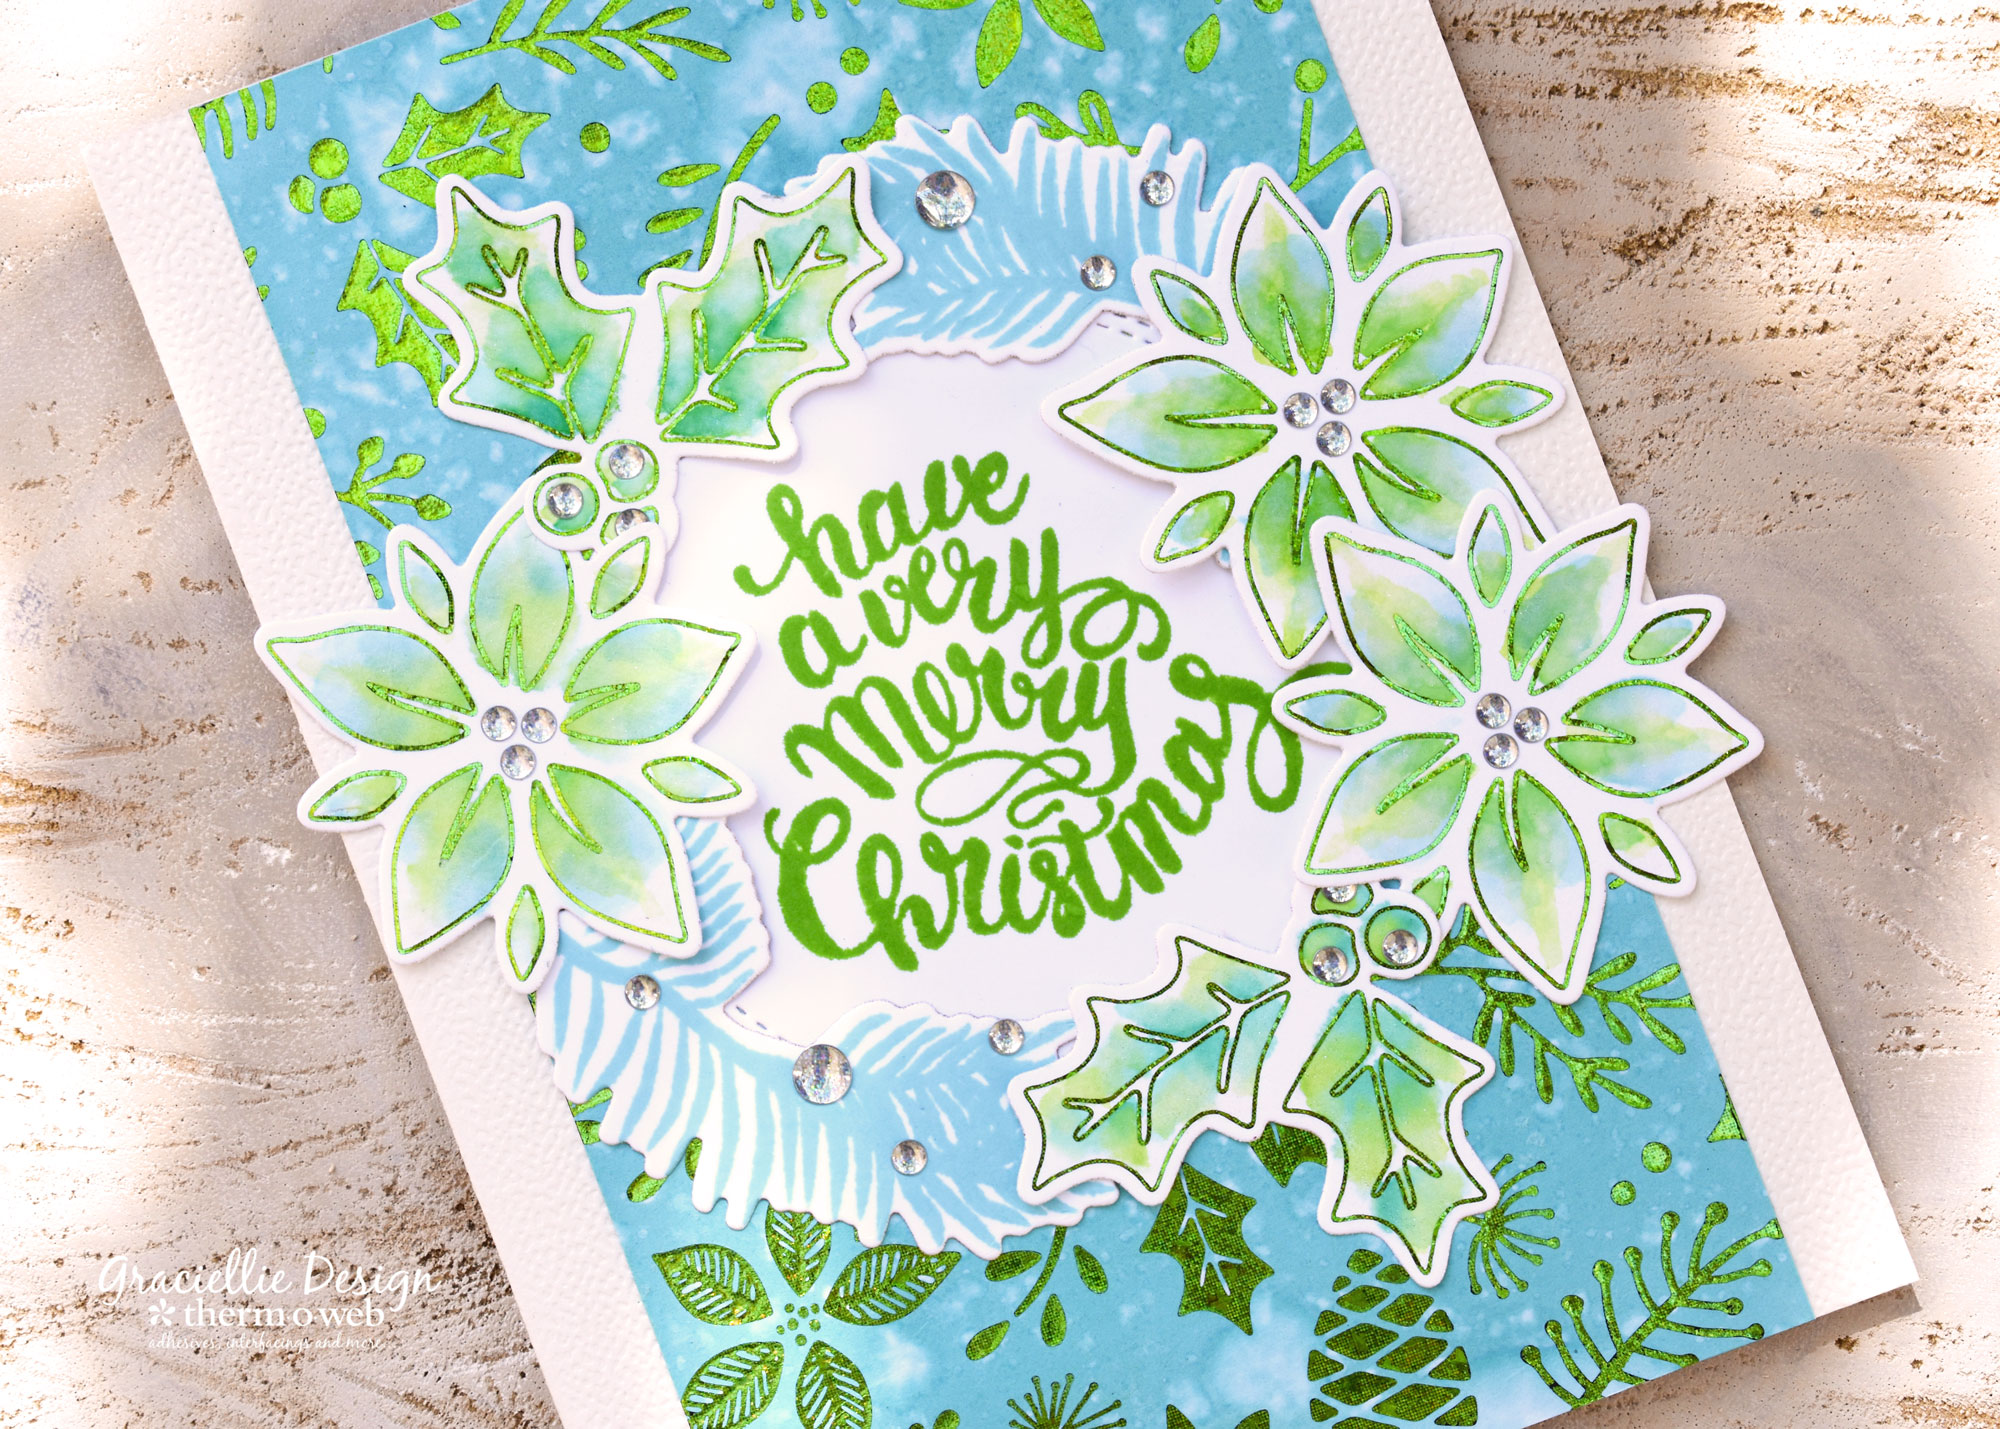
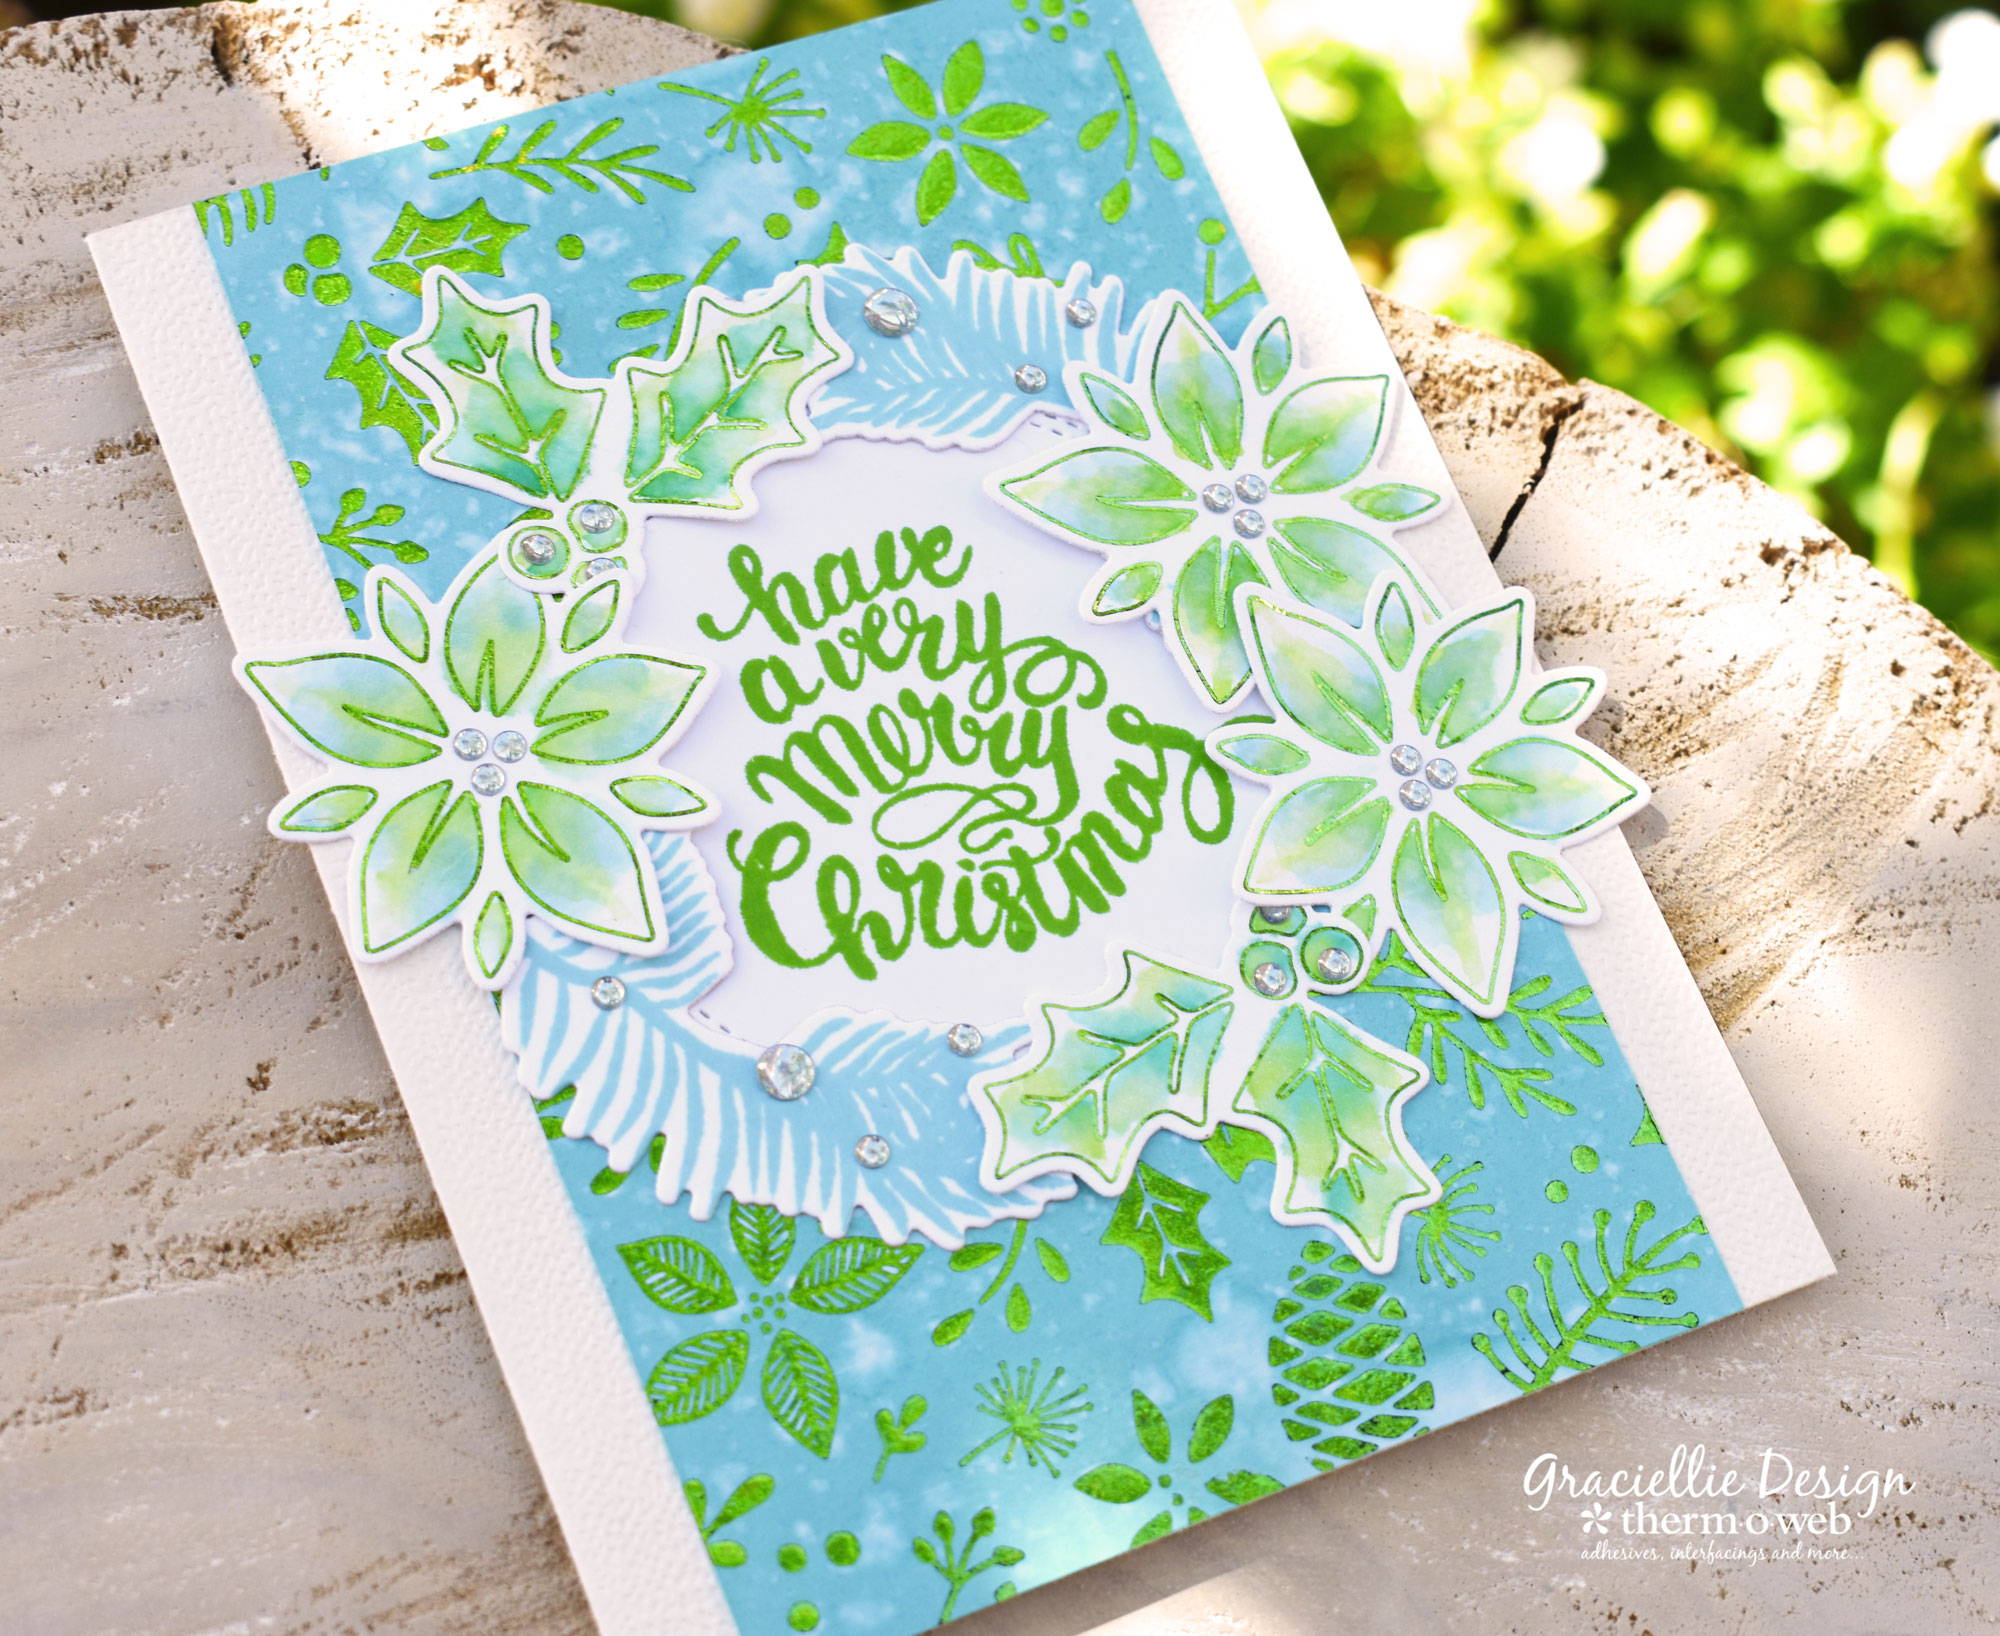
Foiled Christmas Wreath Card with Gina K. Designs
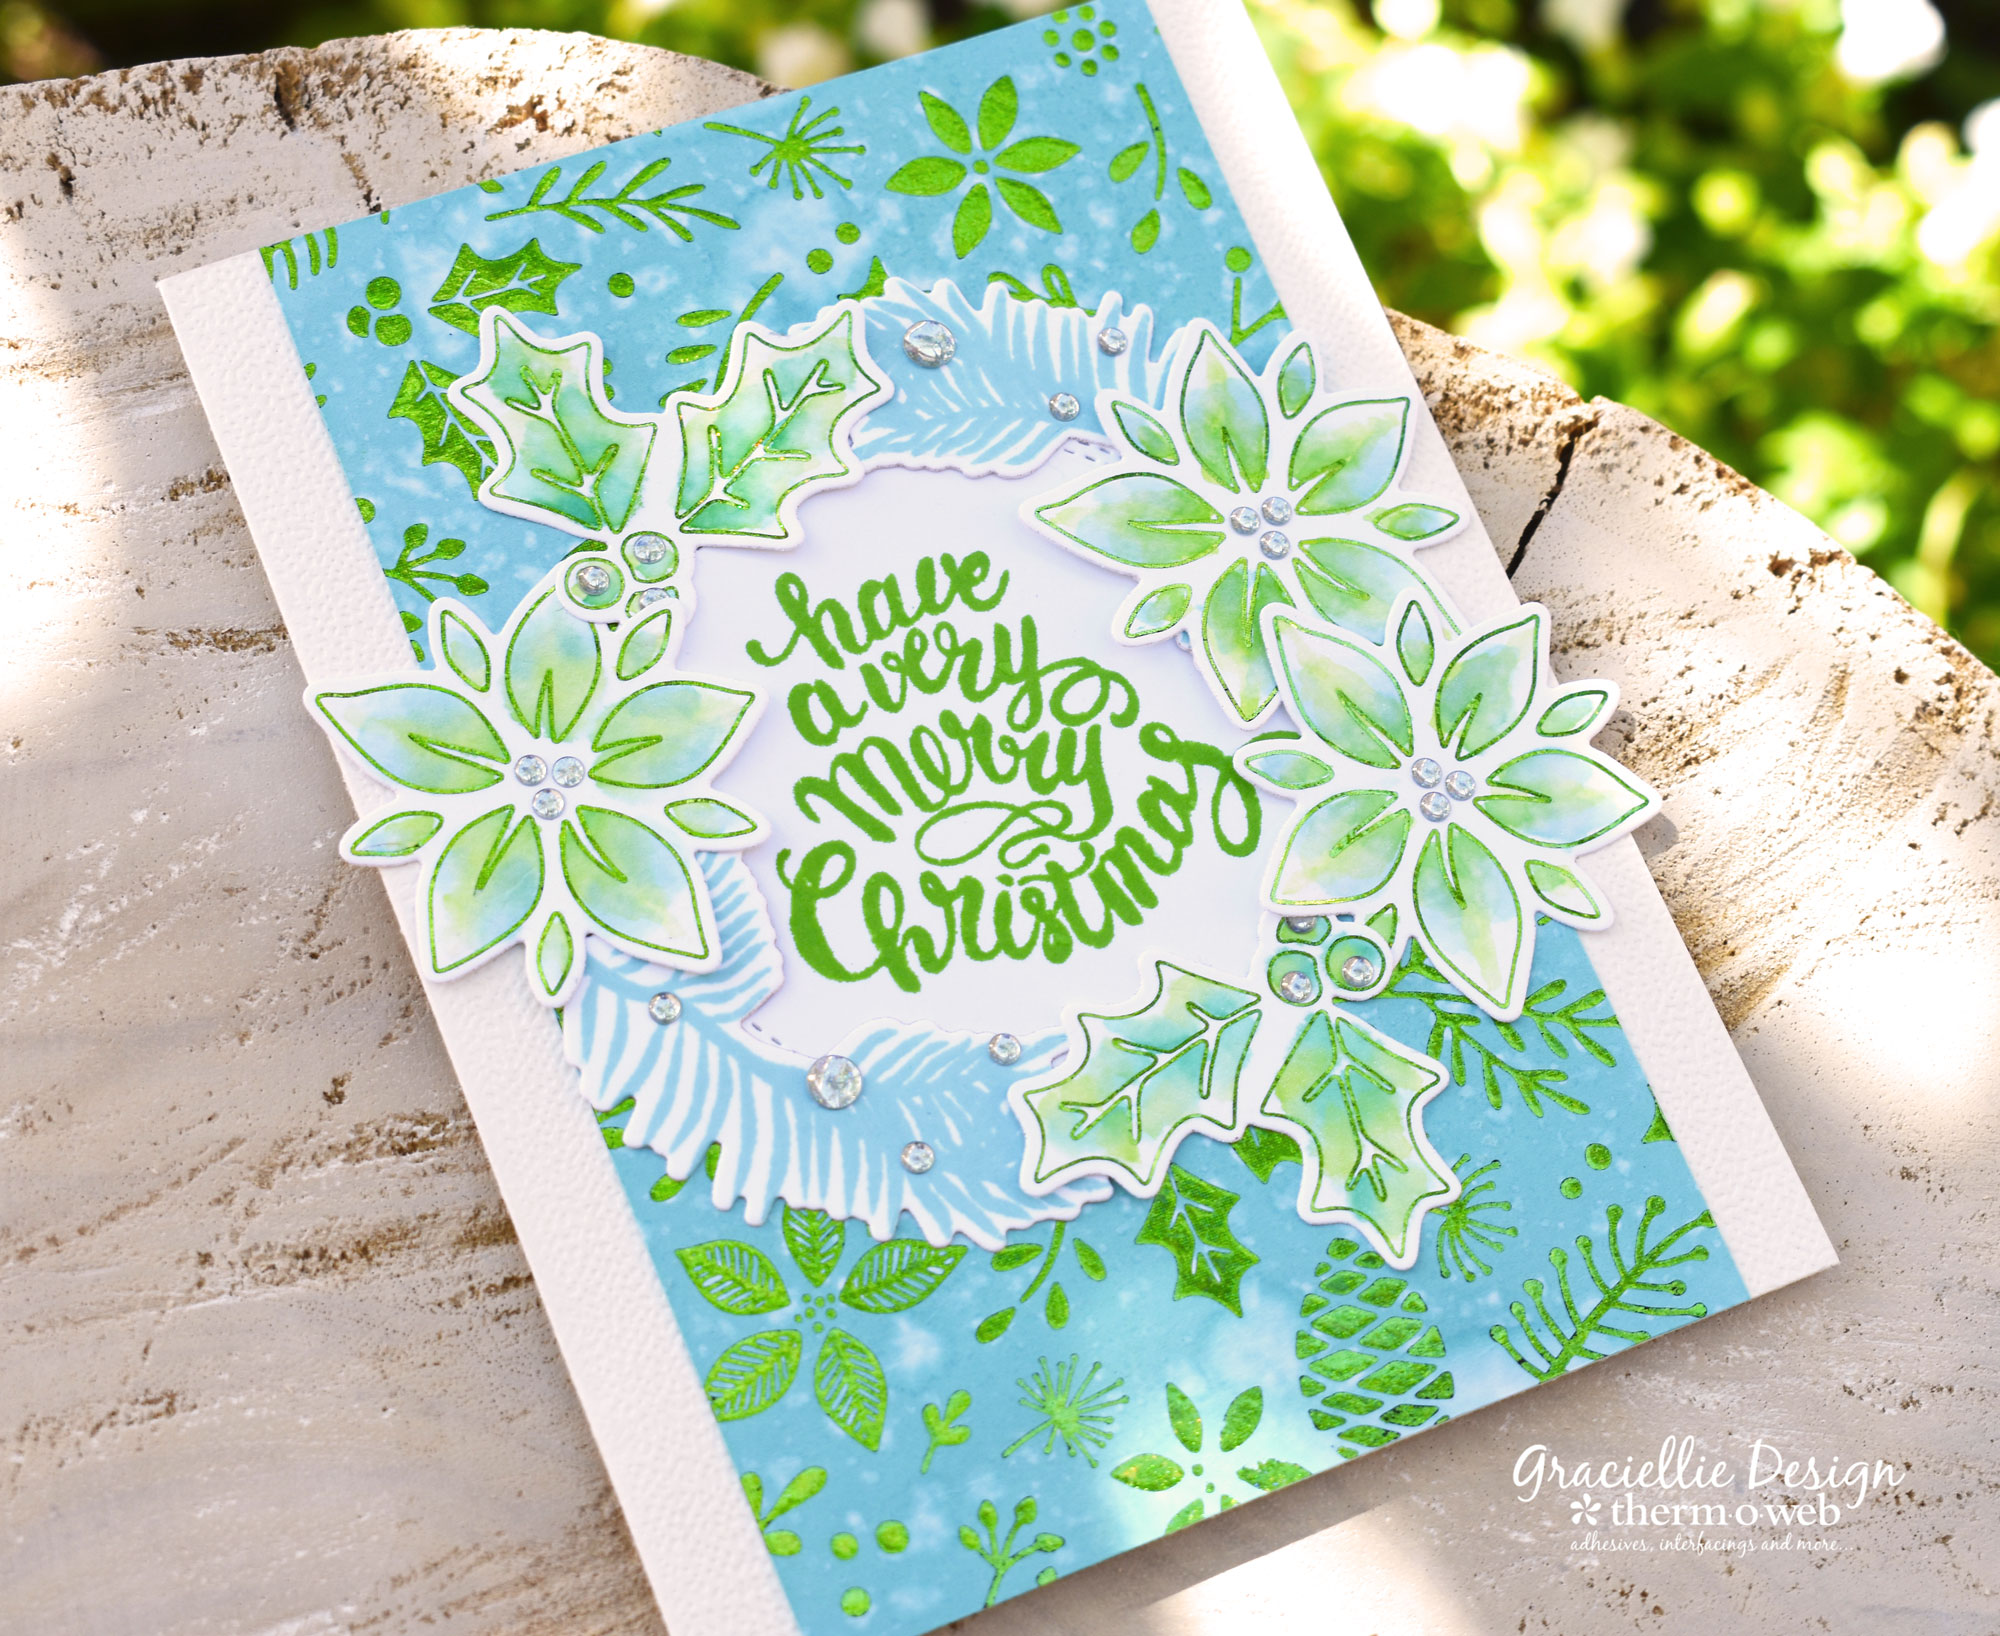
 Foiled Christmas Wreath Card with Gina K. Designs
Therm O Web Supplies:
Gina K. Designs Foil-Mates™ Backgrounds • Ornamental Holiday
Gina K. Designs StampnFoil Stamp Set, Holly Jolly
Gina K. Designs StampnFoil Foil-Mates Detail Sheet, Holly Jolly
Gina K. Designs StampnFoil Die Set, Holly Jolly
Gina K. Designs (3) Nested Circle Dies • Double Stitch Design • Small Set
Gina K. Designs Fancy Foils™ 6″ x 8″ • Glittering Green
Foil Laminator • 12 inch
Other Supplies:
GK Designs Premium Dye Ink in Ocean Mist and Lucky Clover
Watercolor markers
Waterbrush
Water mister
Paper Trimmer
Holographic dot stickers
Foiled Christmas Wreath Card Instructions
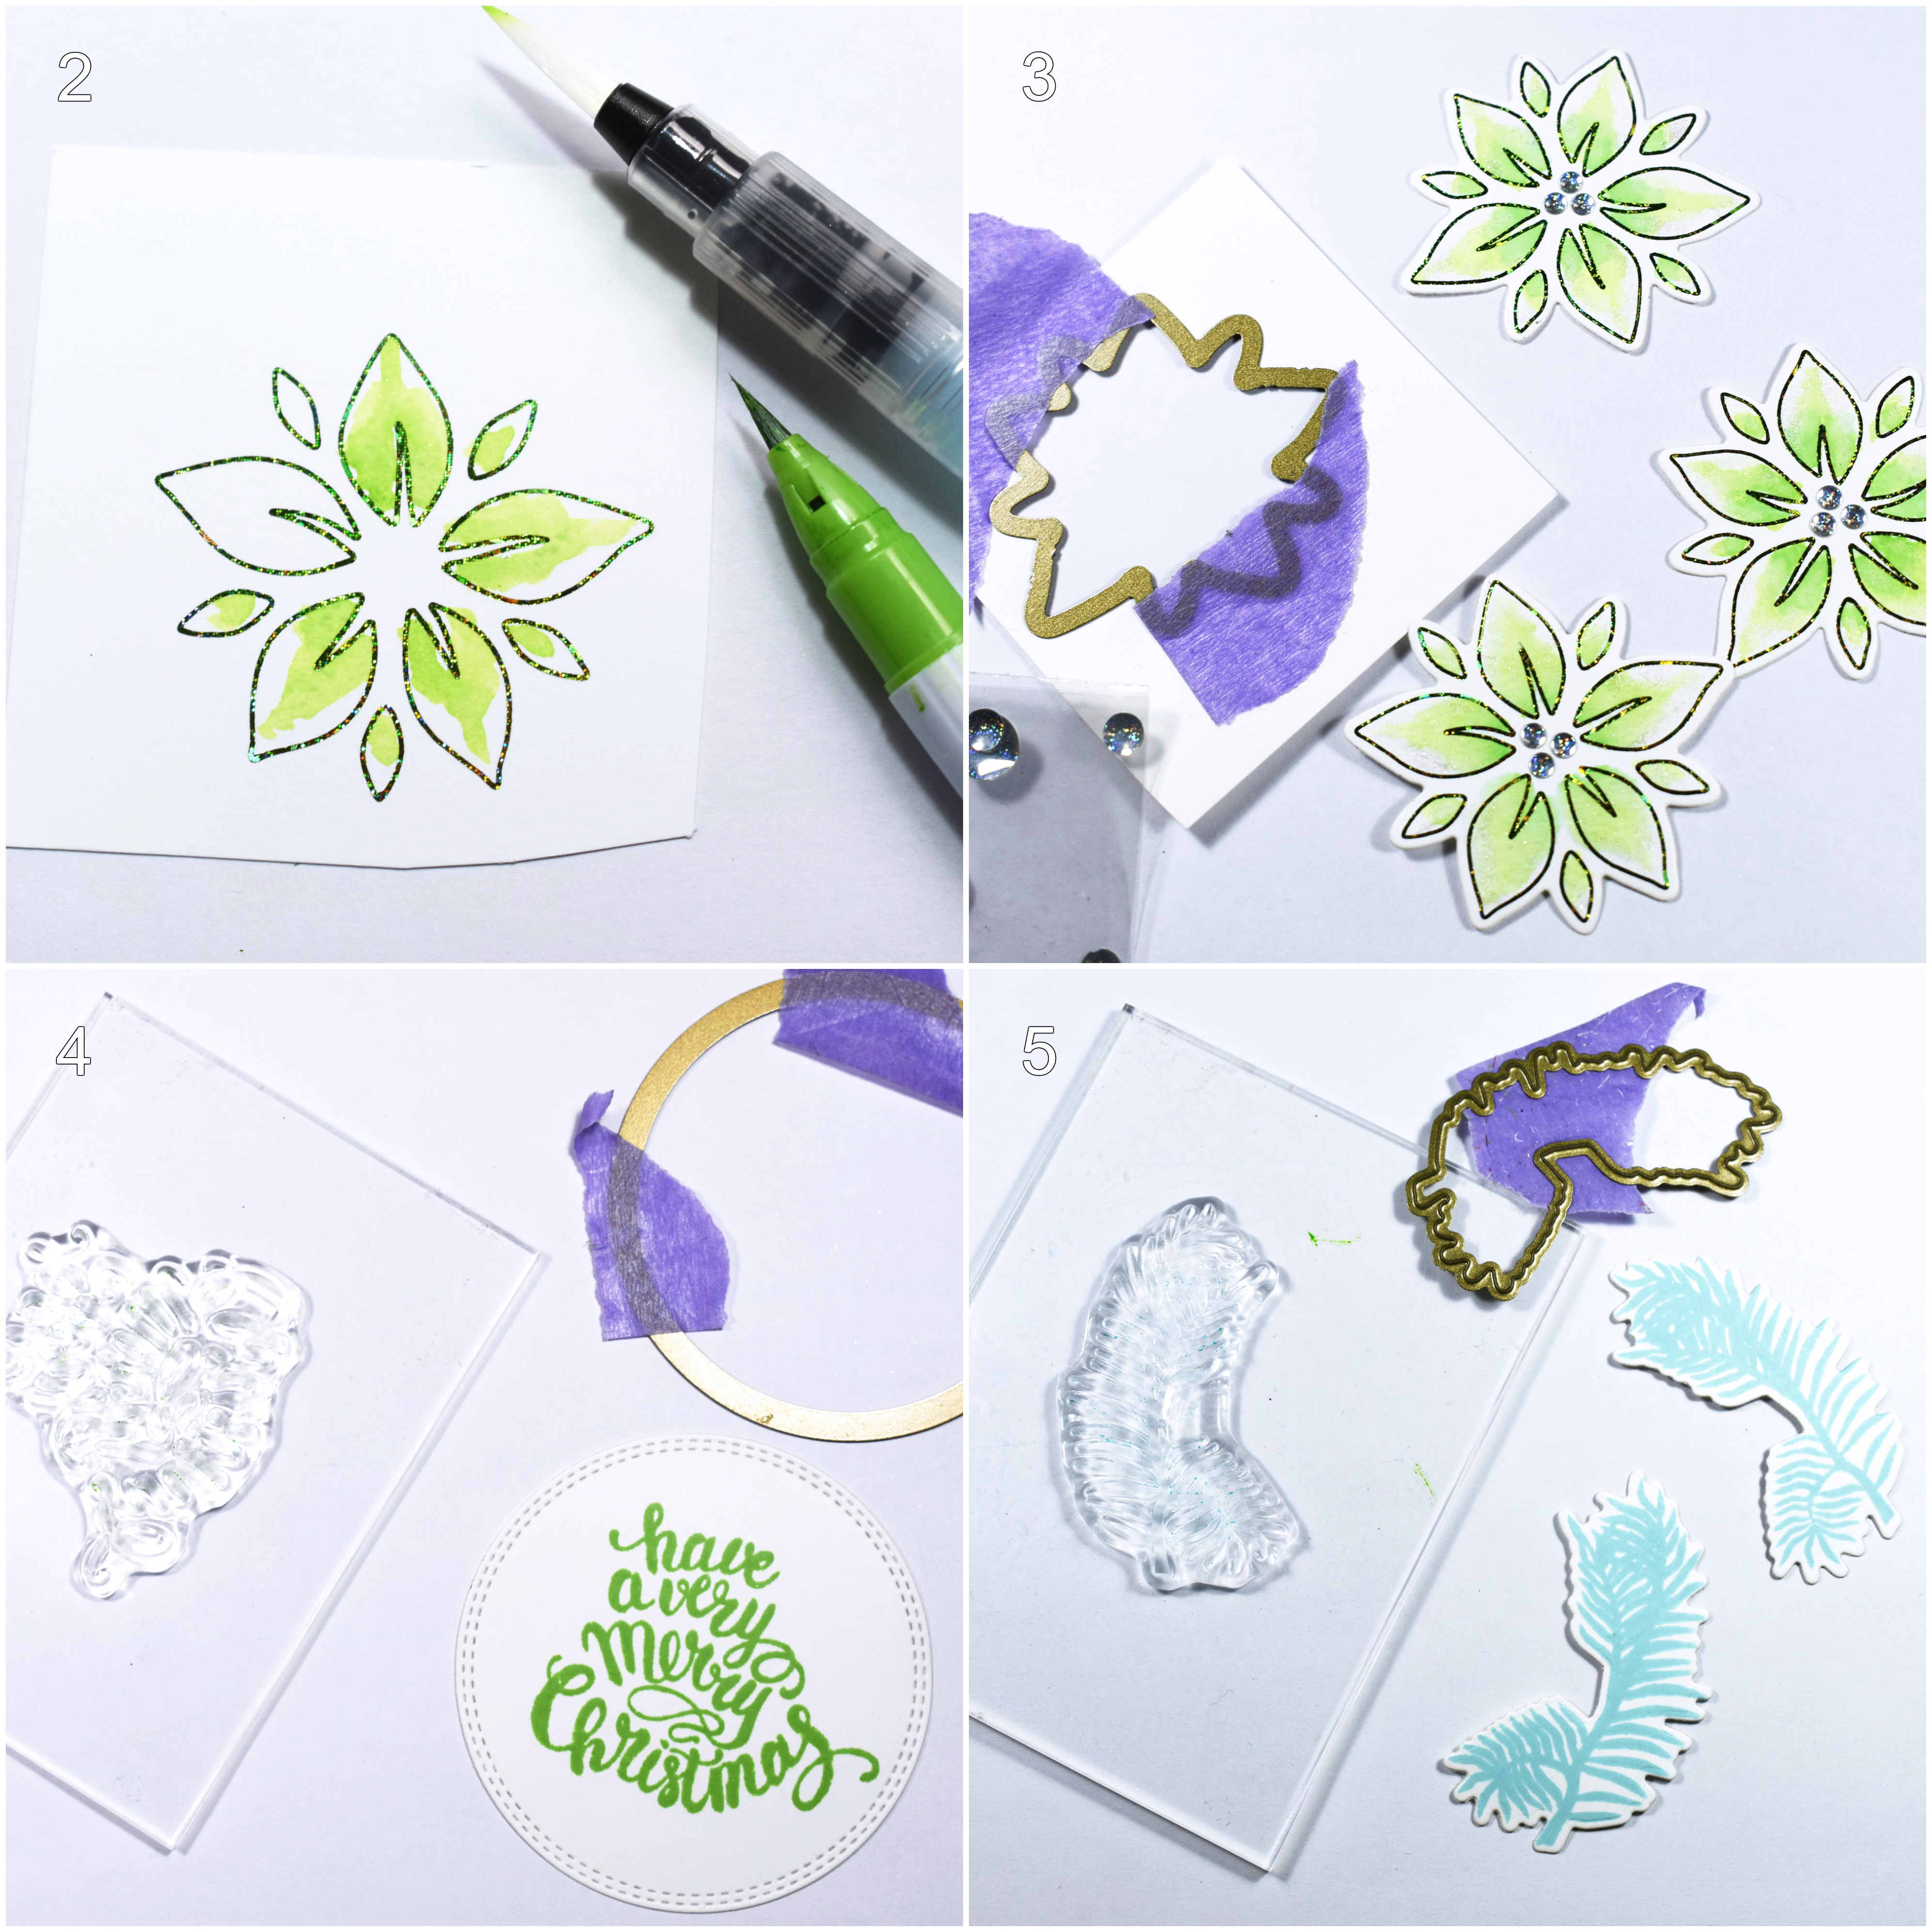
Step 1. First, foil several poinsettias from the StampnFoil Foil-Mates Detail Sheet, Holly Jolly, using the Glittering Green Fancy Foil Transfer Sheet. You can cut the poinsettias from the sheet and foil them individually, covering each of them with the Fancy Foil sheet, wrapping them with Parchment Paper and running them one by one through a preheated laminator. The result is always SO satisfying, especially with this glitter foiled effect!

Step 2. Color each of the poinsettias using a water reactive marker and a little water from a water brush to blend out the color. The paper from the Foil-Mates will hold water well, just be careful not to add too much!
Step 3. Use the coordinating StampnFoil Die Set, Holly Jolly to cut each of the foiled and colored poinsettias.
Step 4. Stamp a sentiment from the StampnFoil Stamp Set, Holly Jolly using Lucky Clover Premium Dye Ink and cut it using the largest circle die from the Nested Circle Dies • Double Stitch Design • Small Set
Step 5. Also, stamp a couple of pine branches from the same set using Ocean Mist Premium Dye Ink.
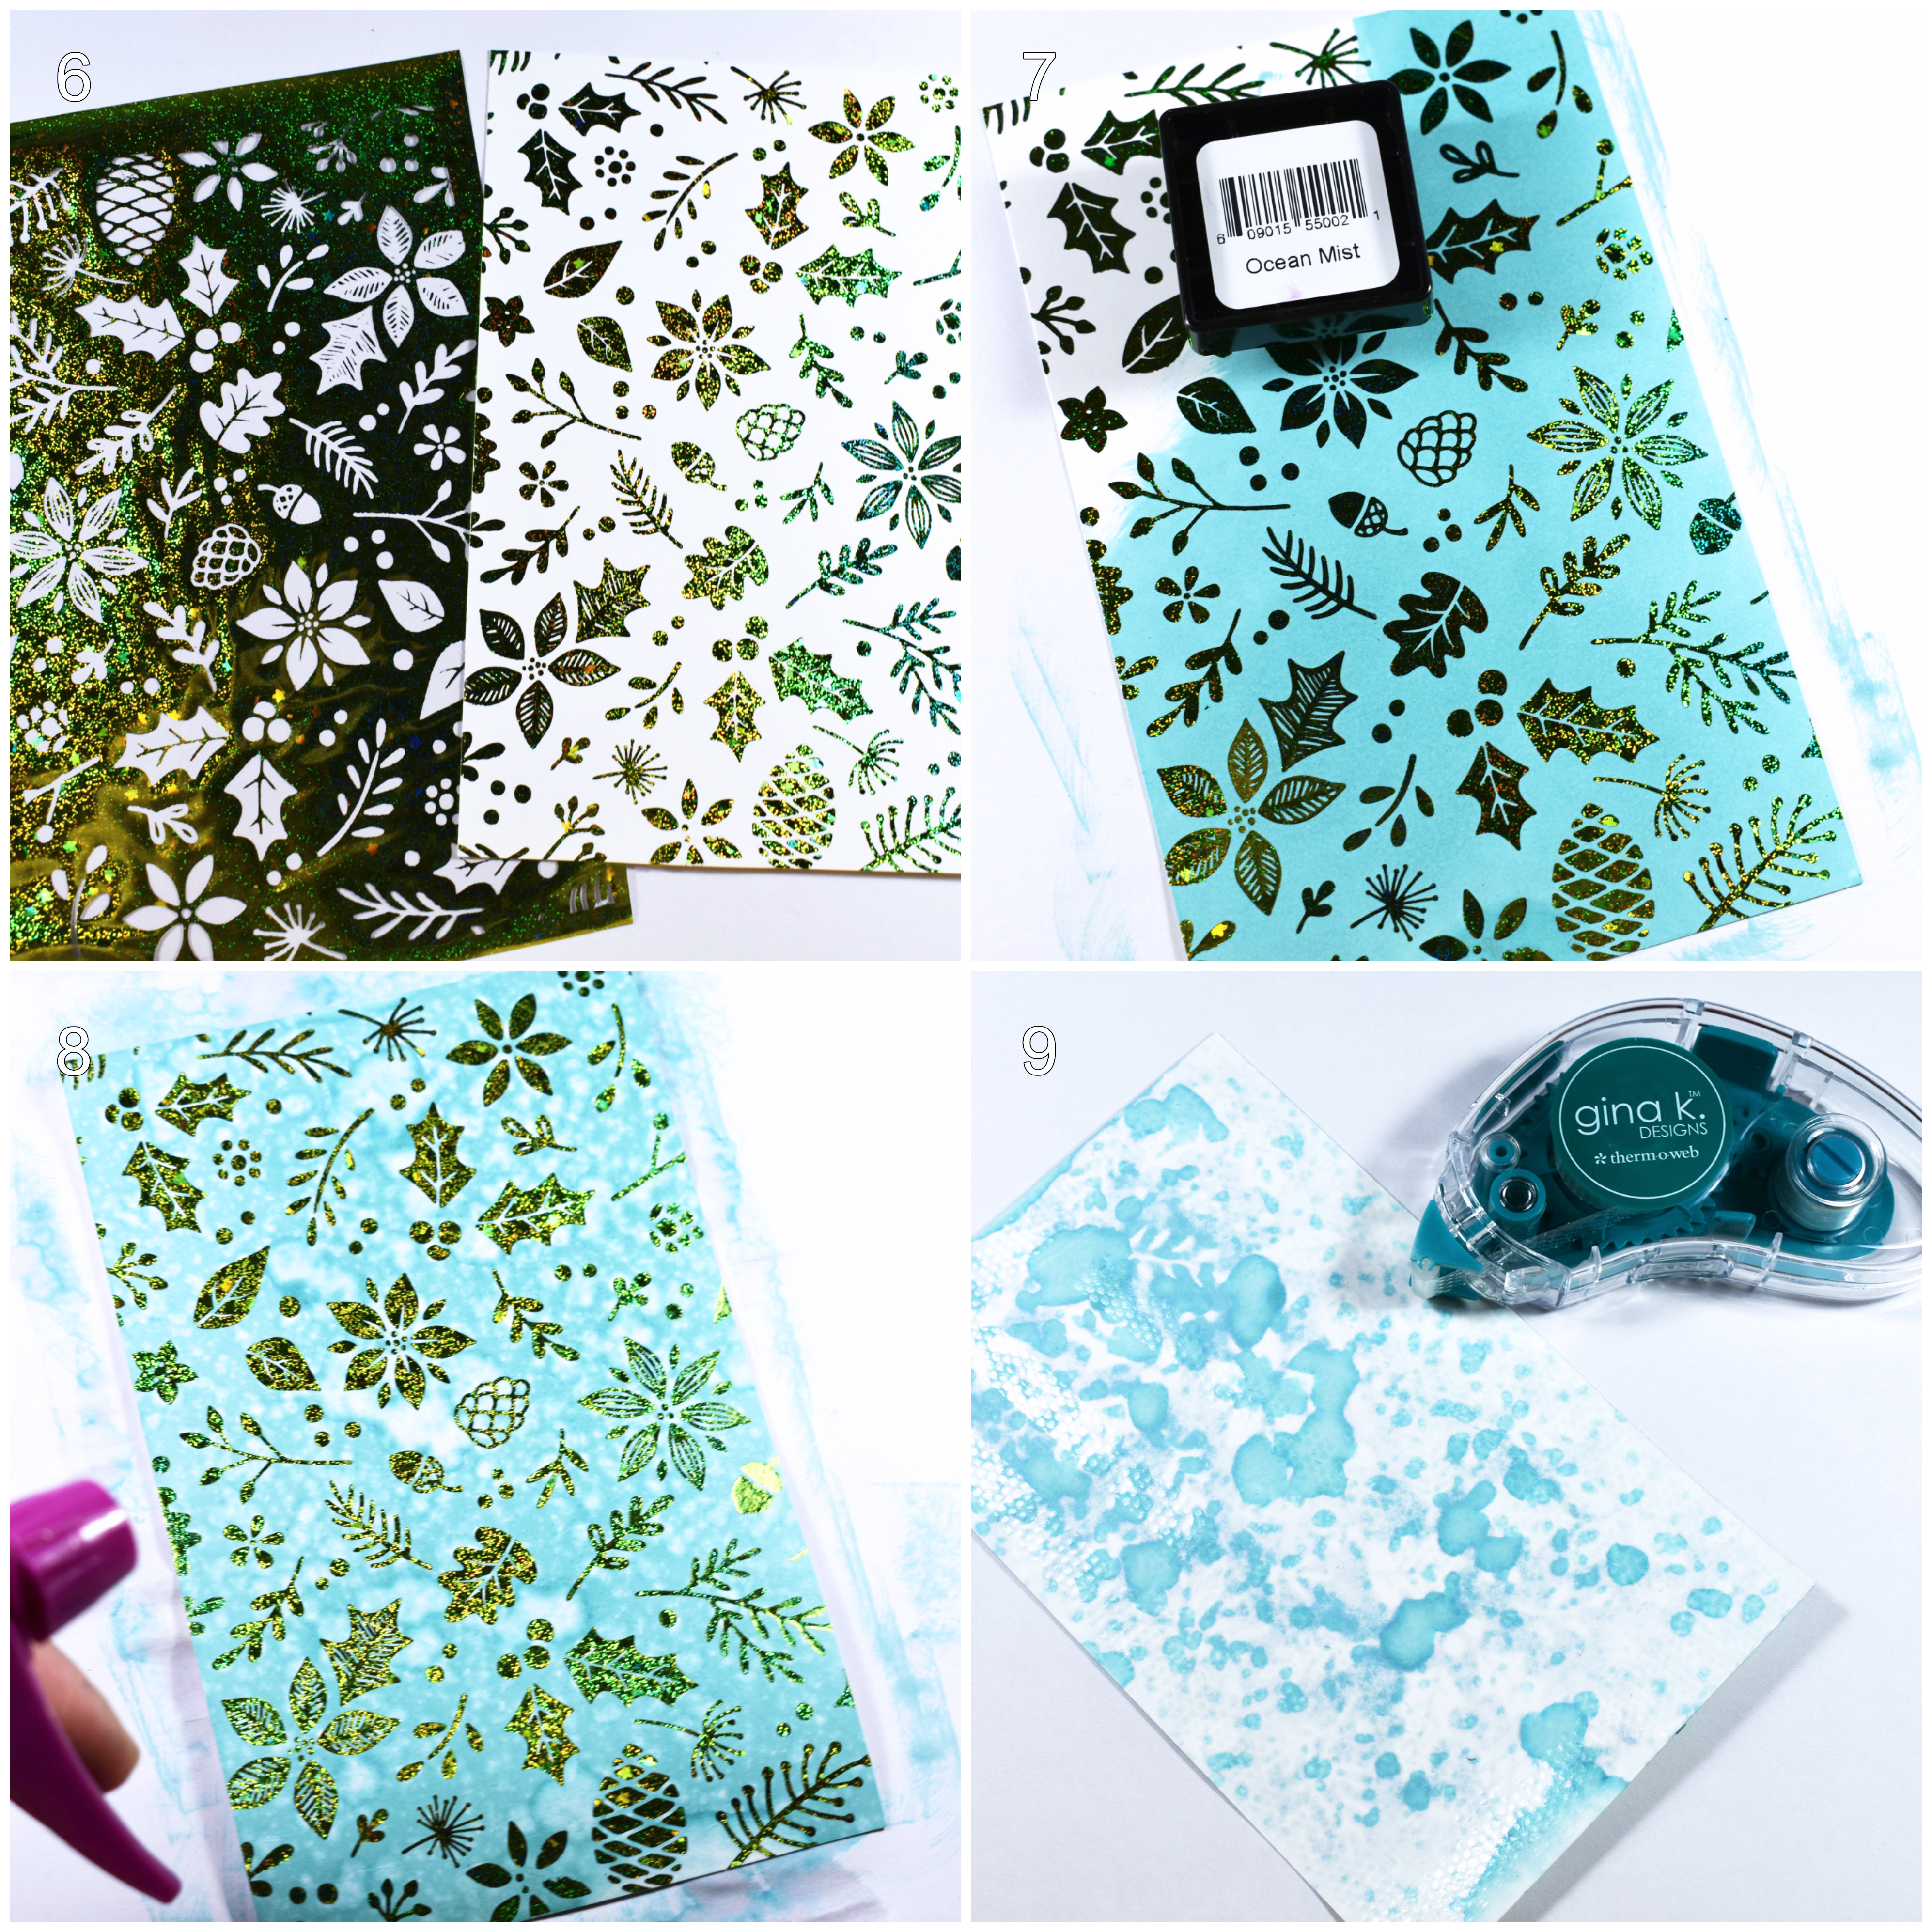
Step 6. Foil a piece of Foil-Mates™ Backgrounds • Ornamental Holiday with Glittering Green Fancy Foil, using a laminator.
Step 7. Ink the background with Ocean Mist Premium Dye Ink.
Step 8. Add splatters to the foiled and inked background with a water mister.
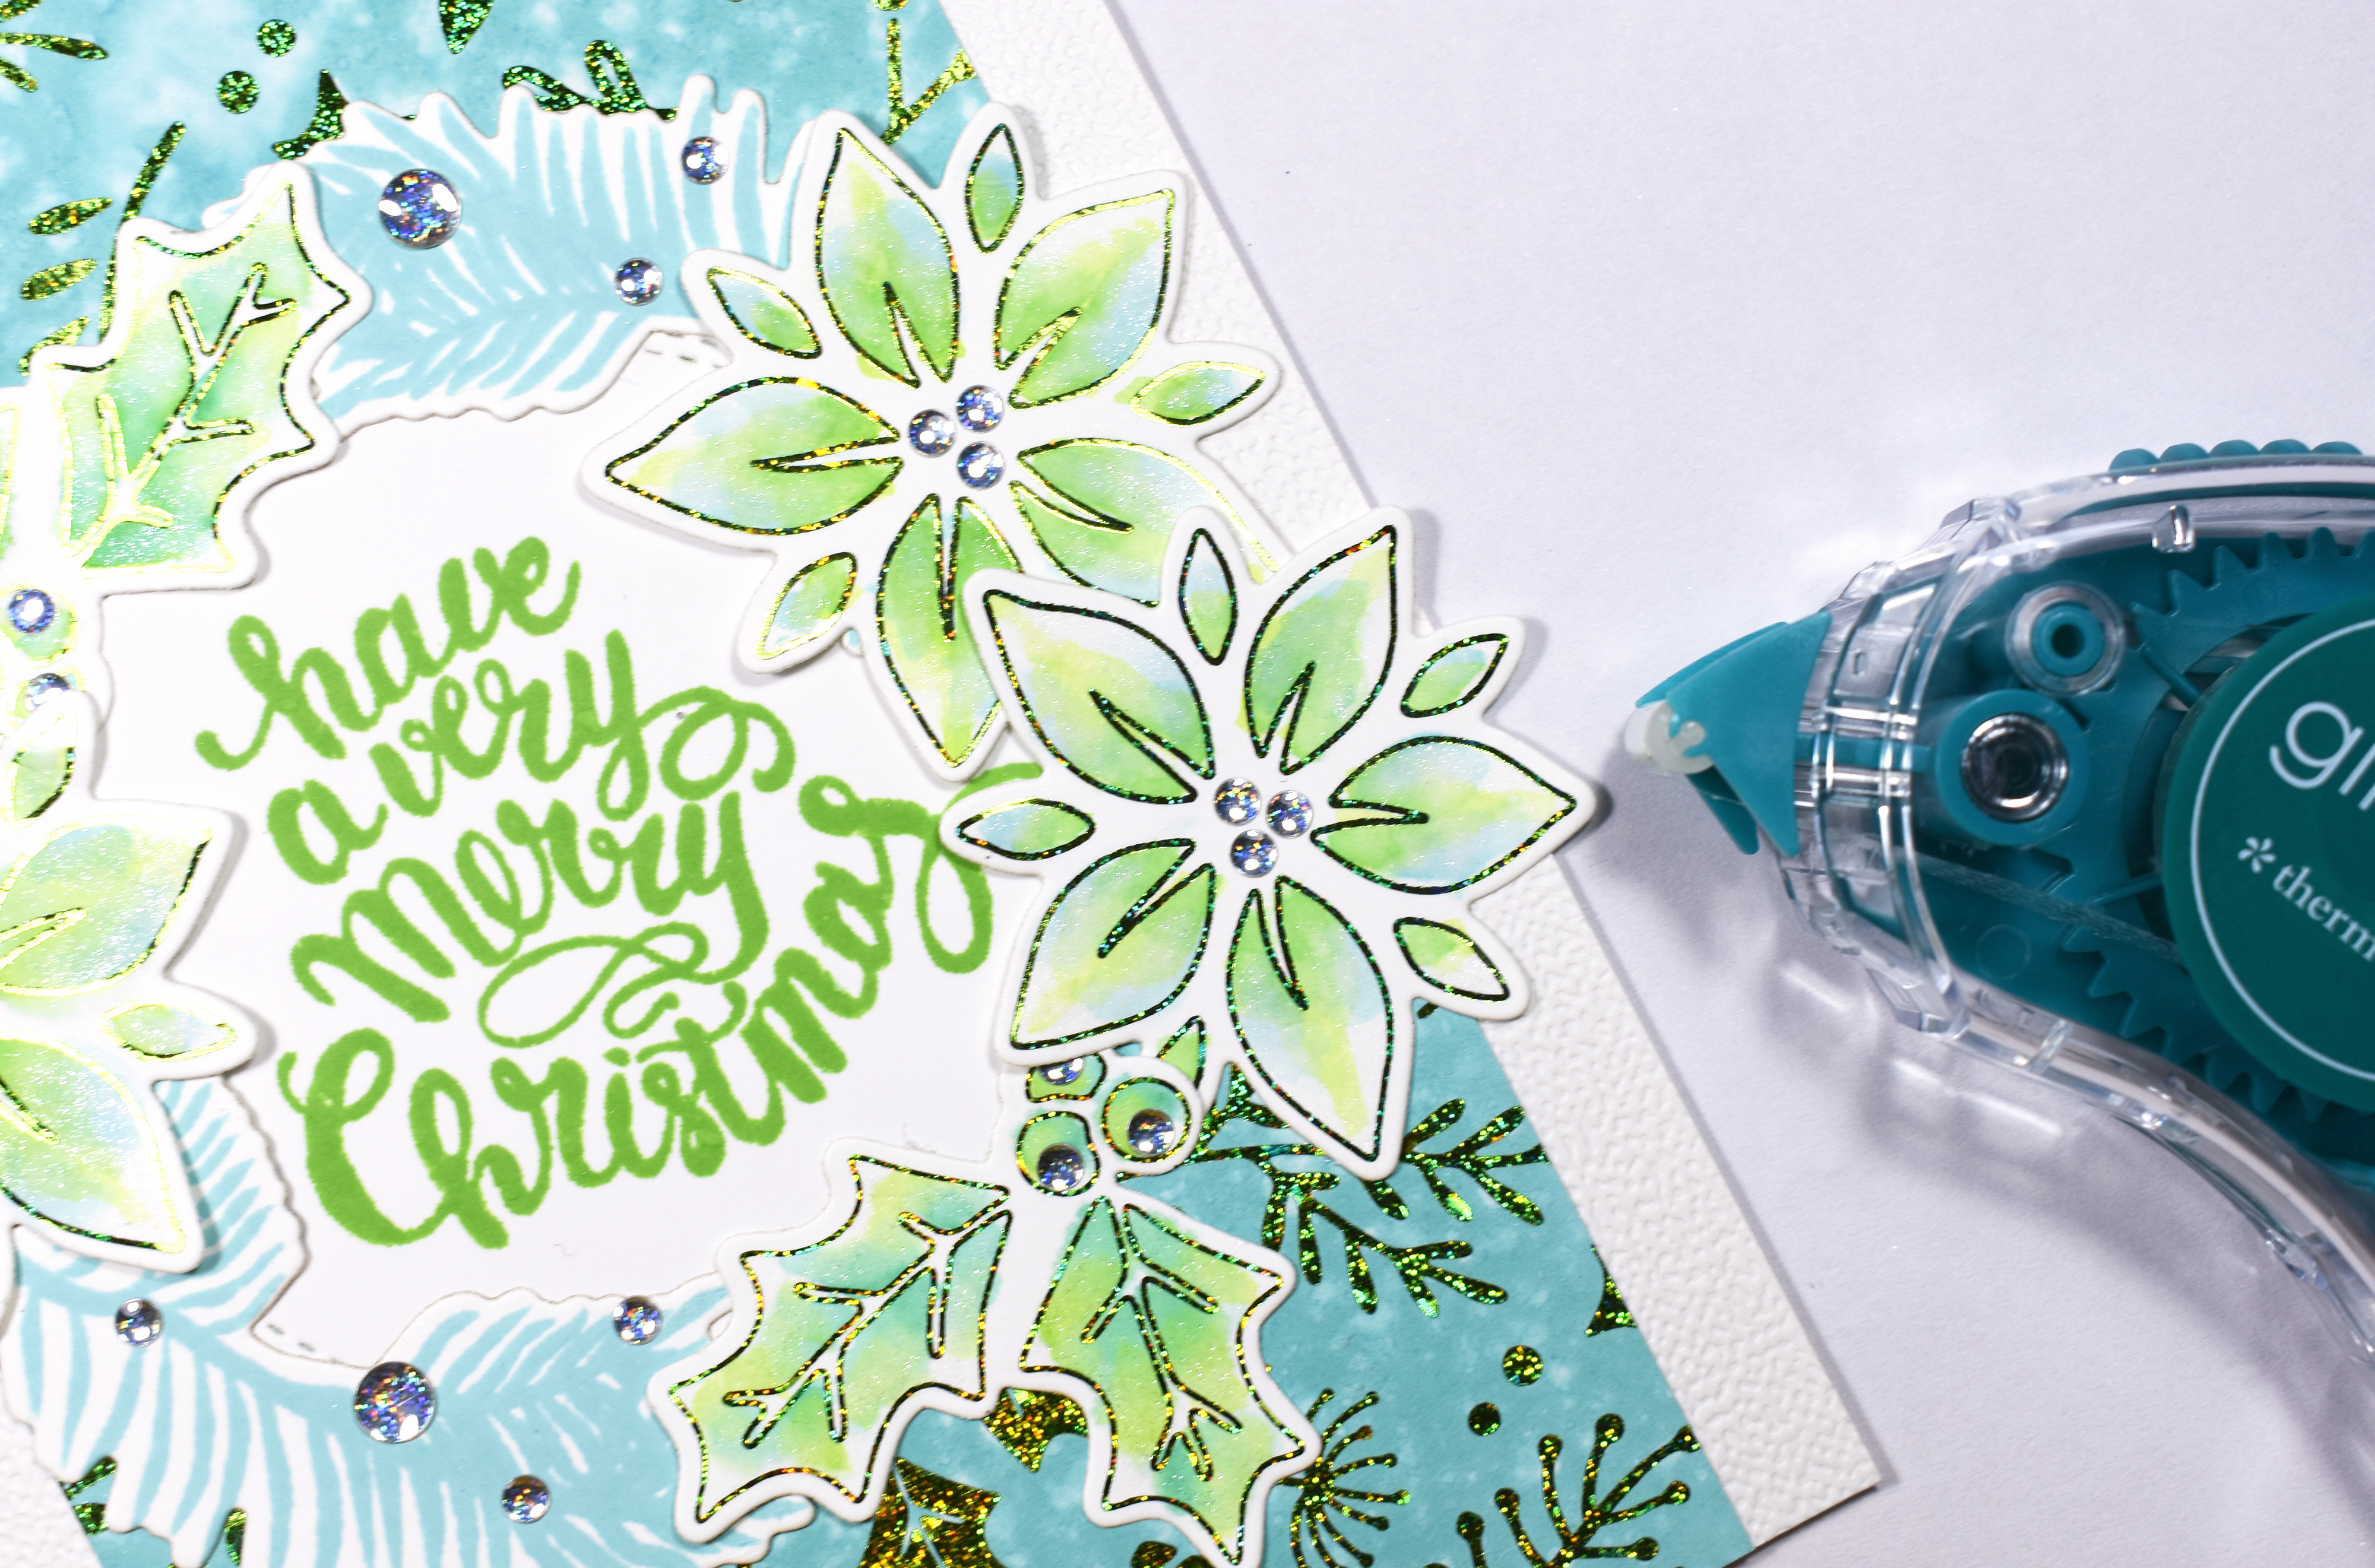
Step 9. Attach the background to a white card base using Gina K. Designs Permanent Adhesive Dot Runner.
Step 10. Attach the rest of the elements to the card front, using the same tape runner, and adding each element in the shape of a wreath around the double stitch circle sentiment.
I hope you enjoyed this tutorial! Love how all the products in Gina K. Holiday Line match! It makes the job easier! That is all for now. Thanks for stopping by. Until next time!
Echo Allison Poe
January 1, 2019 at 4:21 pm (5 years ago)Where can I buy the round holographic dots?
admin
January 2, 2019 at 10:45 am (5 years ago)Hi Alison. We don’t have a direct source for those but do recommend you consider gems, sequins as well and can find those options at Simon Says Stamp.