


Hello friends! It’s Juliana Michaels with you today to share a couple of Foiled Birthday Cards I created using the brand new Gina K Designs Foil-Mates! Foil-Mates, when combined with Fancy Foils, make for some of the most elegant cards ever! They are also super easy to create and are perfect for when you need a quick card that still shows someone just how special they are!
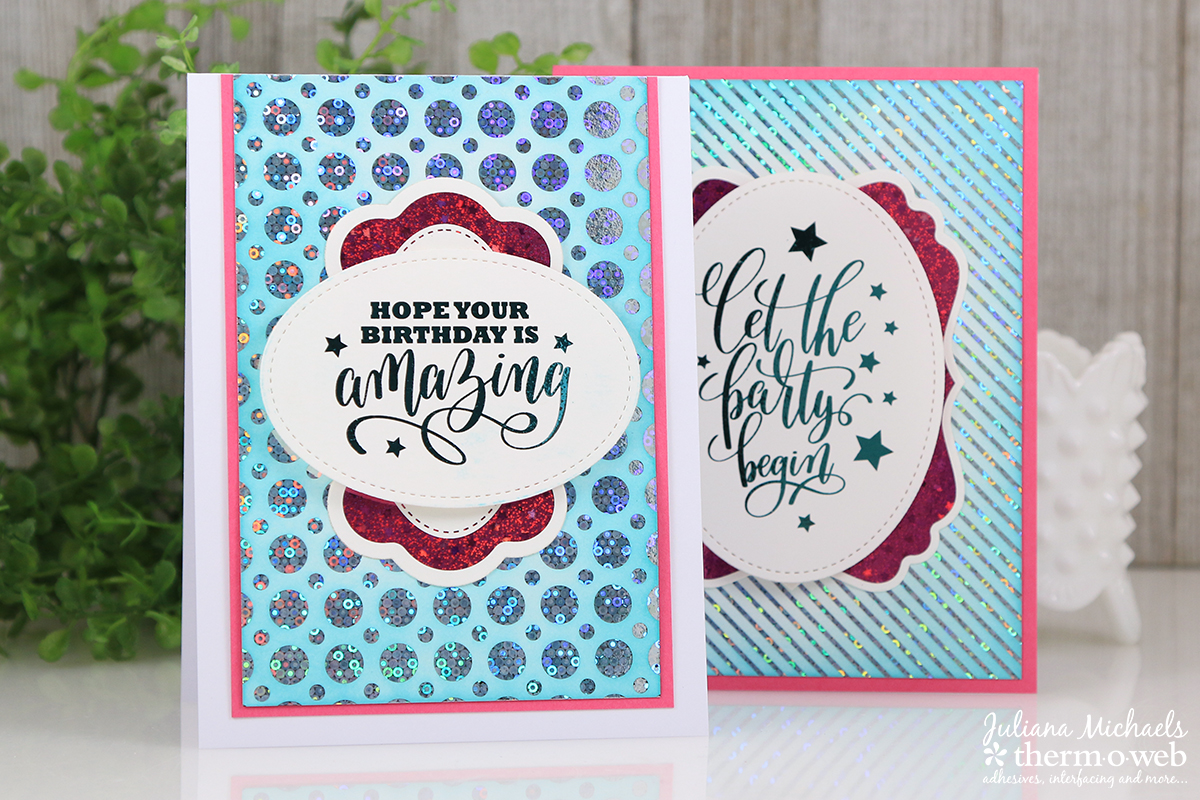
Foiled Birthday Cards with Gina K. Designs
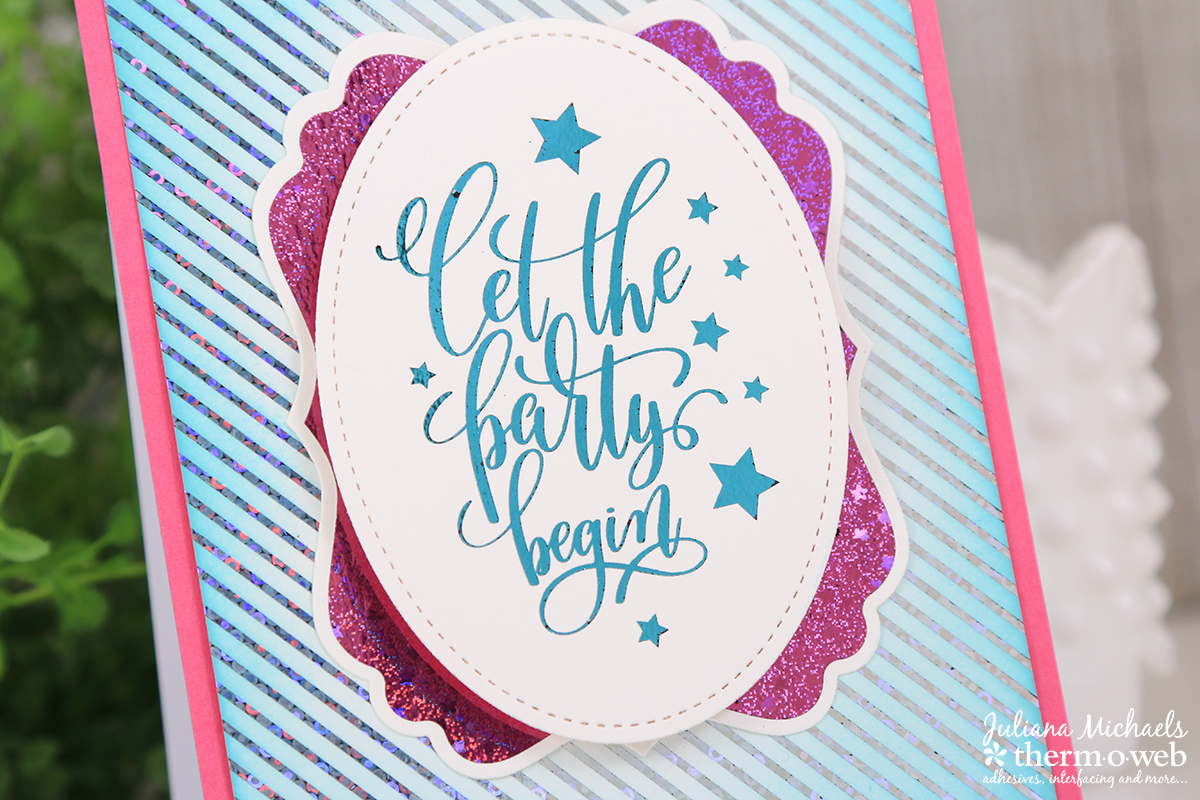
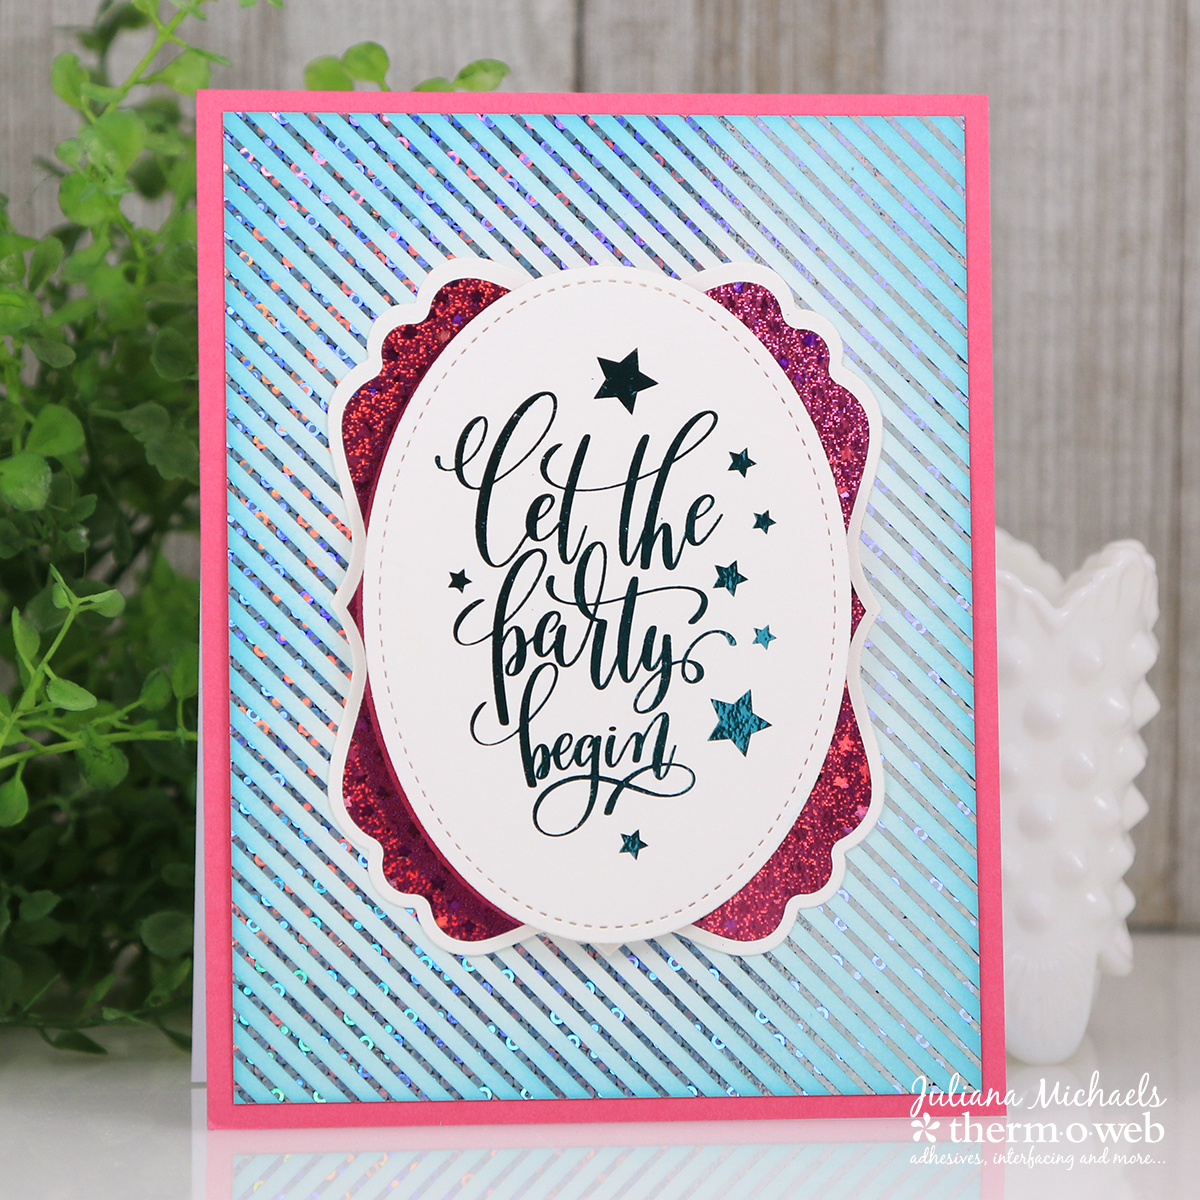
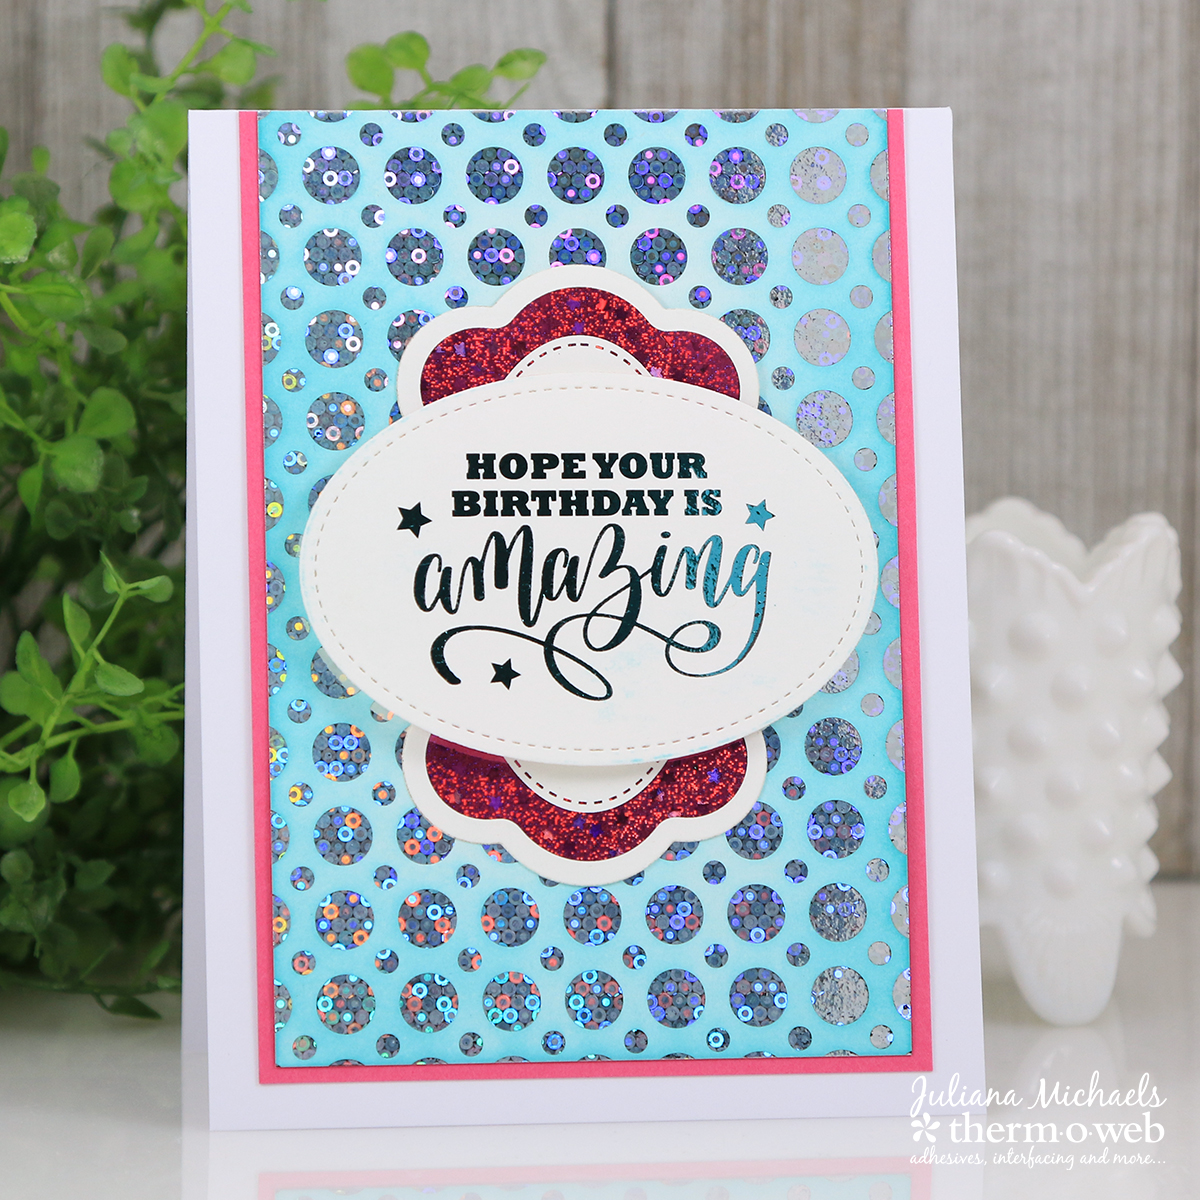
To get started, begin by die cutting the sentiments you want to use on your card. For these cards, I used the new Birthday Bash Foil-Mates™ along with the Label Borders Foil-Mates™. Use Therm O Web Purple Tape to help hold the dies in place as you die cut the sentiments using the Gina K Designs Nested Oval Single Stitch Dies.
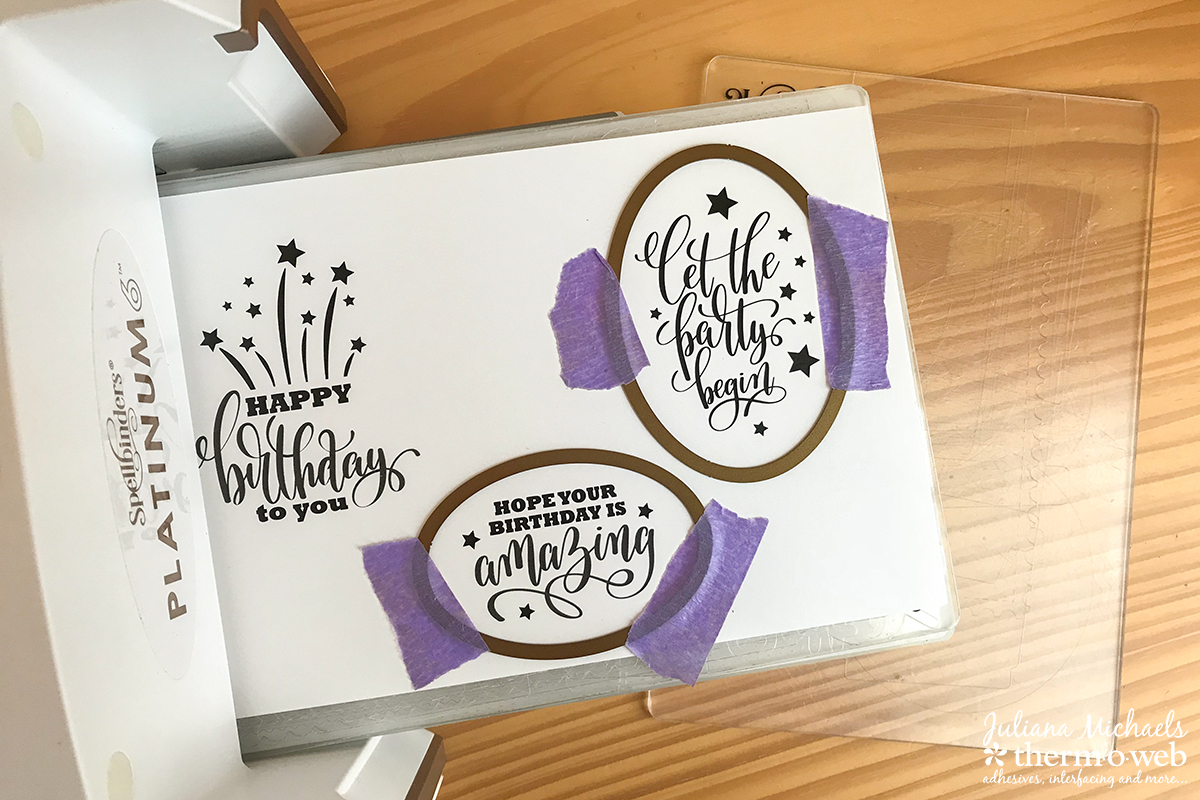
Next, die cut the Label Borders Foil-Mates™ using the coordinating Gina K Designs Nested Label Dies. Again, make sure to use your Purple Tape to help hold the die in place for a perfect cut.
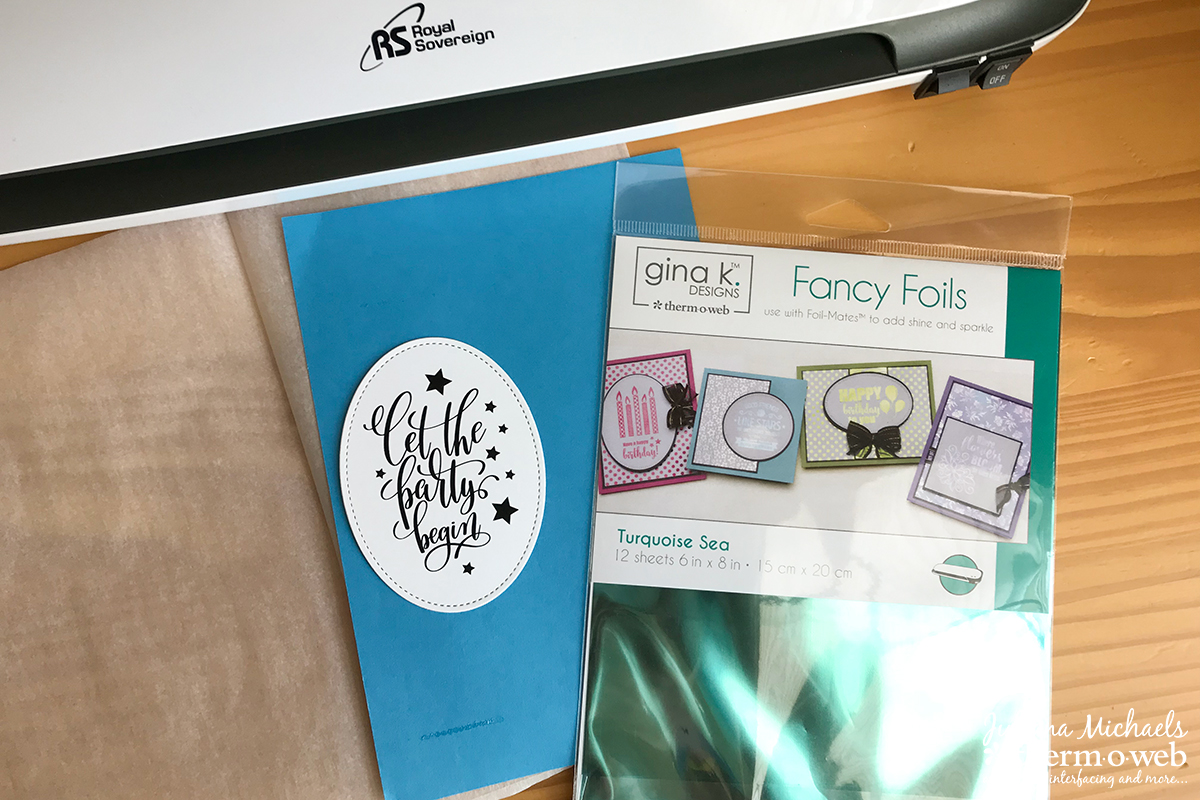
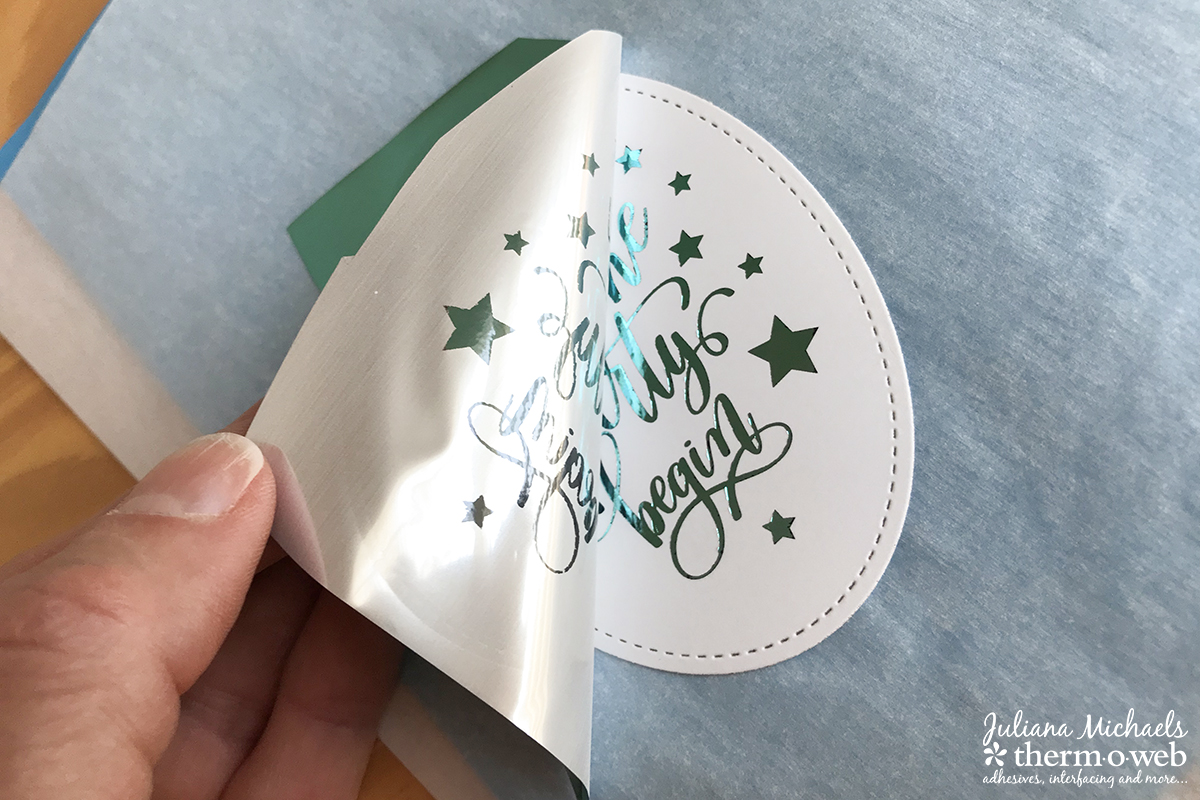
Once the die cutting is complete, it’s time to foil your designs. For the sentiments, use Fancy Foils in Turquoise Sea and for the labels use Twinkling Pink. Before you begin foiling, make sure to allow your laminator to preheat for at least 30 minutes.
Don’t you just love the sparkle and shine from the foil?
After you are finished foiling the sentiments and label pieces it is time to assemble this part of the card. Use 3D Foam Squares to adhere the sentiment to the label. This adds a touch of dimension without a lot of bulk.
Inked and Foiled Backgrounds
To create the background for each card, select a Foil-Mates Background of your choice. For these cards I used Foil-Mates™ Bold Backgrounds. Trim the piece to 4 x 5.25 inches and foil it using Gina K Designs Fancy Foils in Silver Sequins.
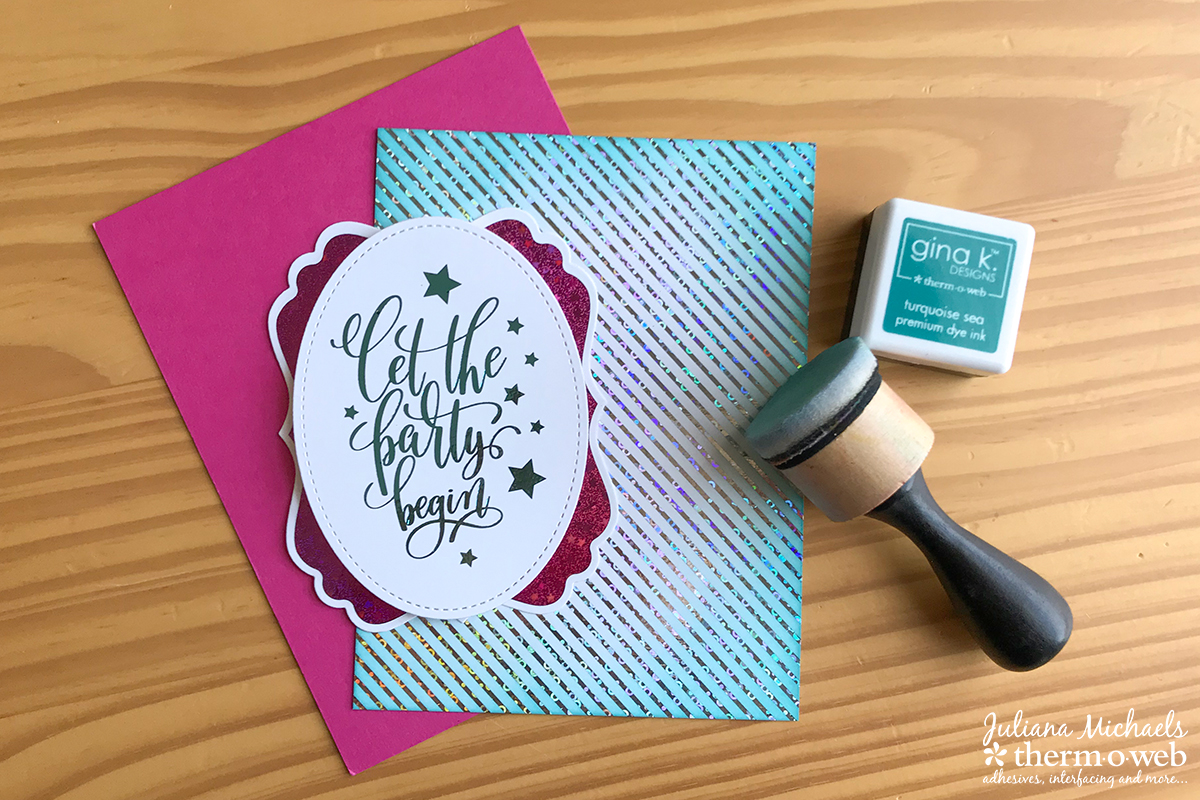
After the foiling is complete, take a foam blending tool and apply Turquoise Sea Ink to the edges of the card. I recommend tapping the excess ink off onto a separate surface before applying it to the paper. This will help avoid ink blotches and give your inking a smoother look. Don’t you just love how the ink ties in the turquoise color from the sentiment?
For the final touch, trim a piece of Gina K Designs Premium Cardstock in Passionate Pink and adhere it to the card base using Therm O Web Memory Tape Runner XL.
On the second card, trim the foiled piece to 3 3/8″ x 5 1/8″. Then cut a piece of Gina K Designs Premium Cardstock in Passionate Pink to 3 6/8″ x 5 1/4″. After you have inked the foiled background, adhere these layer to your card base using Therm O Web Memory Tape Runner XL.
I hope you enjoyed learning how easy it is to create elegant Foiled Birthday Cards using the brand new Gina K Designs Foil-Mates™! What colors would you mix and match for your cards?
We’d love to give you a chance to win some of our NEW Gina K. Designs Foil-Mates!
Don’t forget to use hashtags #ginakdesigns, #thermoweb and #decofoil so we can find you online!
To get yourself entered to win this fun prize…

Sharon Gullikson
June 14, 2018 at 4:41 pm (6 years ago)I really like the polka dots. I’m always partial to dots, and when they are foil ones? Wonderful.
Brian Poteraj
June 14, 2018 at 5:58 pm (6 years ago)I didn’t know that you can ink over the foil. Good to know. It looks cool.
Kirsty Vittetoe
June 15, 2018 at 12:08 am (6 years ago)Such fun and fabulous design!