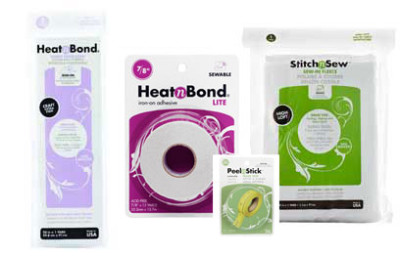
Hi Therm O Web friends! Nicole here from Modern Handcraft with a tutorial for fleece week using my favorite Therm O Web products – StitchnSew™ Sew in Fleece and Heat n Bond®. One of my favorite projects to make for my home and for gifts is always a pillow, and I always use StitchnSew™ Sew-in Fleece or HeatnBond® Fusible Fleece for my pillows when I quilt them or to add a nice layer of thickness for the pillow shape.

For my Floral Applique Pillow I am using a zig zag stitch with clear thread around a floral fabric that I am currently making a quilt with – Alison Glass’ new line Field Day by Andover fabrics. This fabric was a perfect one to use because it was easy to cut around the floral shapes and make petals from the other non floral patterns. Any floral fabric will do as long as you have a larger pattern to cut around.
Materials needed:
- Therm O Web StitchnSew™ Sew in Fleece – piece measuring 19″ x 19″
- Therm O Web SpraynBond® Basting Spray
- Therm O Web Heat n Bond® Lite
- Floral fabric & coordinating solids or patterns for petal shapes
- Coordinating Thread – Clear thread helps hide imperfections in your quilting and works well with a multi colored fabric.
- Fabric for your pillow backing, I used a mustard color canvas. Cut into 3 pieces 19″ x 19″ for pillow front and 2 – 19″ x 13″ rectangles for your envelope backing.
- Bias-tape or two cuts of fabric measuring 19″ x 2.5 for envelope back edging.
- Sewing Machine & notions (rotary cutter, cutting mat, straight pins, iron)
Step 1:

- Secure your 19″ x 19″ piece of fabric to your 19″ x 19″ piece of Sew in Fleece with Basting Spray.

- Iron your floral fabric to your Heat n Bond® lite, when cool cut around your floral pattern and then cut out petal shapes to add around your main floral piece.

- Lay out your main floral piece and your petals on the pillow front where you would like it to be sewn down. Focusing on a corner is nice or get creative and cover the entire pillow with fun floral pieces and petals.

- Once you have the layout you like, carefully peel off your heat n bond paper backing and iron your fabric pieces down.
Step 2:

- At your machine, sew a small zig zag stitch around the outside of your main floral pattern and your petals.

- Trim away the excess fleece from the edges of your pillow front.
Step 3:

- Add bias tape to one edge of each fabric rectangle measuring 19″ x 13″, along the 19″ side. To make your envelope back – lay your pillow top facing up, and your two backing pieces facing down. Pin in place.

- Sew around the perimeter of your pillow with a 1/2″ seam allowance and trim your points.

- To finish up the edges a quick zig zag stitch works well to seal in those raw edges.

- Turn right side out, poke out your corners with a pointed utensil and you are all finished! Go back over your pillow case with an iron, if you used a clear thread take care not to iron over these stitched areas since the iron could melt the material. The finished pillow now measures 18″ x 18″ and works well with a pillow form measuring 18″ x 18″ to 20″ x 20″.


I hope you enjoyed today’s tutorial!
-Nicole

And to get you ready for your next project…enter to win an assortment of our Fleece, HeatnBond® and more!
a Rafflecopter giveaway
6 Comments on Floral Applique Pillow – Fusible Fleece Week
1Pingbacks & Trackbacks on Floral Applique Pillow – Fusible Fleece Week
-
[…] friends! Today over at Therm O Web I have a fun pillow project – Floral Applique Pillow Tutorial – using my favorite products […]

Kathleen
June 27, 2014 at 10:23 am (11 years ago)I have never tried the fusible fleece.
Sondra
June 27, 2014 at 10:37 am (11 years ago)Hello! Would love to try both! Beautiful job by Nicole!
Elaine Riley
June 27, 2014 at 10:41 am (11 years ago)I think I would like the fusible fleece.
Alexis
June 27, 2014 at 5:27 pm (11 years ago)The heat n sew seems quite interesting to play with!
Judy Gratrix
June 27, 2014 at 10:13 pm (11 years ago)This is a project that is right up my alley can’t wait to start.