


Kids Fish Catch Name Game with HeatnBond Lite
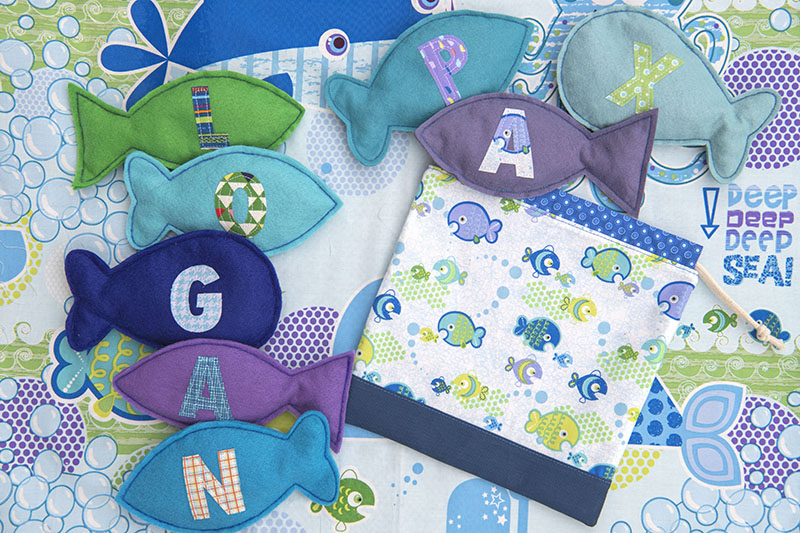
I don’t have any small children left at home. My youngest is soon to be eight. But I do have the cutest nephews in all the land. My nephew Pax is right at that perfect age when anytime he sees a letter that is in his name he gets excited and lets me know. He’s just learning and the newness and excitement are catching.
My sister and I came up with the idea to make fish with the letters of his name. He can get them out and sort them to spell out his name. You can add a paperclip or magnet to the lips of your fish if you want to turn them into a fish-catching game as well. I chose to fill them with beans so he can toss them about.
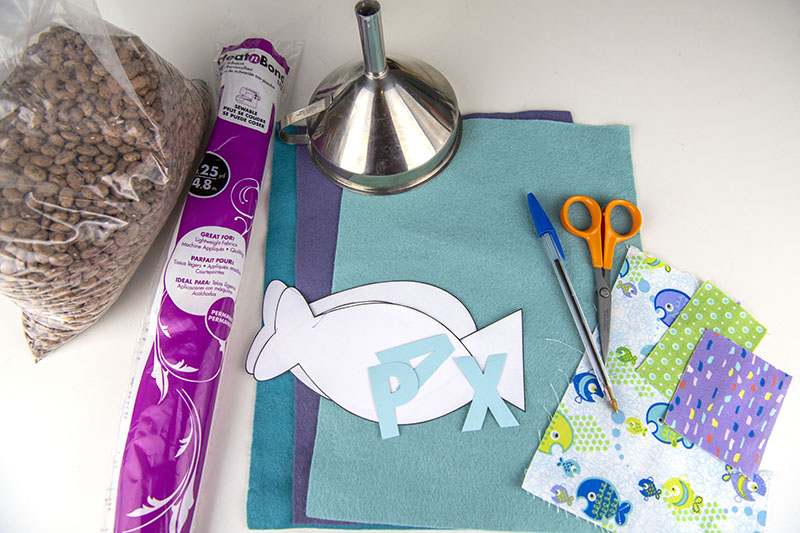
Supplies:
- Fish Pattern (DOWNLOAD HERE)
- Felt (one sheet per fish)
- Fabric scraps
- Heat n Bond Lite Iron-On Adhesive
- Dry Beans
- Funnel
- Pencil or Pen
- Scissors
Print and cut out your pattern.
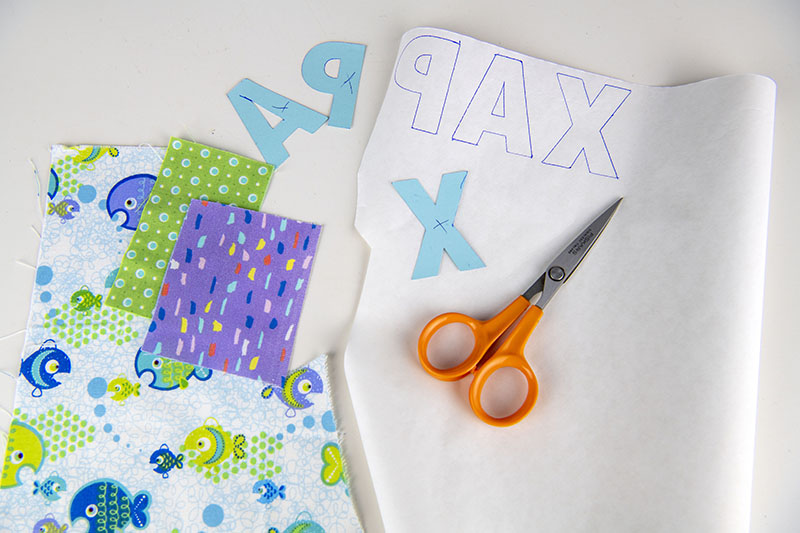
Find a font you like. If you have a Cricut or Silhouette that’s fabulous. Cut out 2” tall letters for the name you’ll be making your fish for. If you don’t have a cutting machine, just pick a font online, print the name out (2” tall letters) and cut them out to use as your pattern. You can always hand draw them as well if you have the skills.
Once you have your letters, grab your Heat n Bond Lite Iron-On Adhesive. Trace your letters on the smooth side of the adhesive paper. You want to turn your letters so they are backward when tracing them so that they are correct when adhered to your fabric.
Iron the Heat n Bond Lite Iron-On Adhesive to your fabric scraps. If you choose to adhere it to felt, make sure to use a barrier cloth so you don’t melt the felt. Cut out your letters.
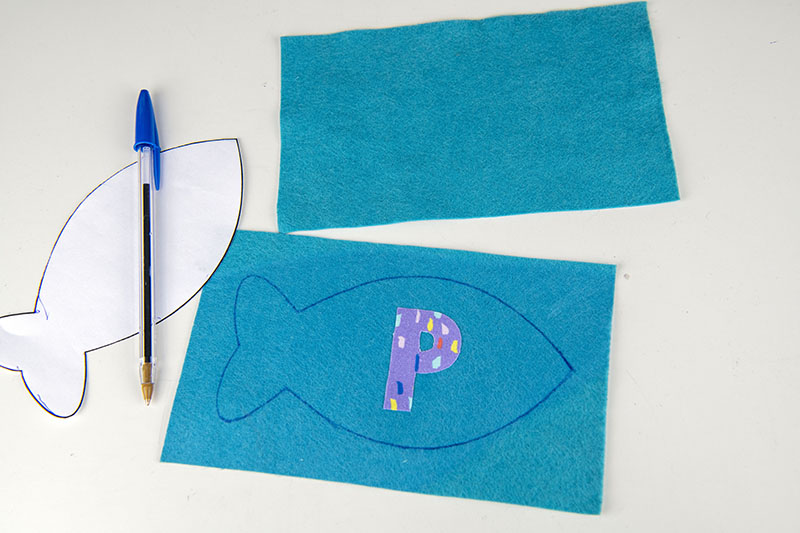
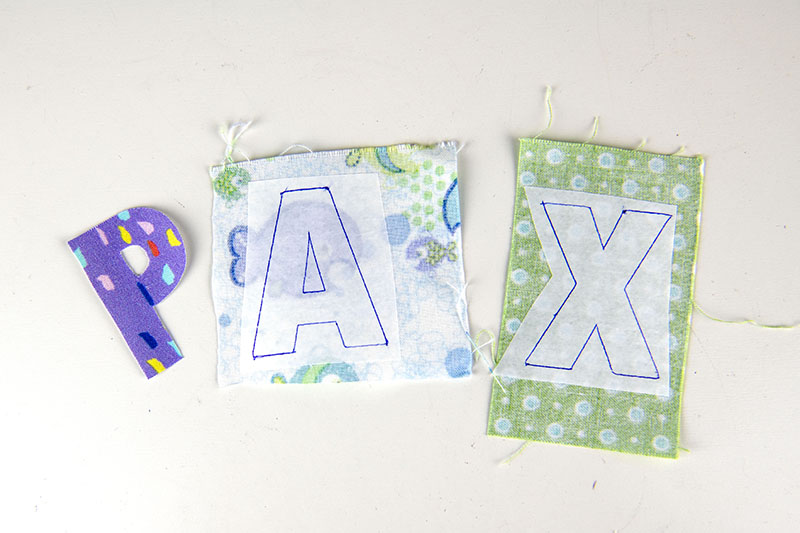
(The instructions from here on are for one fish. You’ll need to repeat for each additional fish needed.) Take your felt and cut out two 7.5”x4.5” rectangles. Choose one of the three fish shapes and lay it on top of one of the felt rectangles. Trace the shape with your Frixion pen. Take one of your letters and place it in the center of the fish shape. Iron in place using a barrier piece of fabric to avoid melting your felt (felt doesn’t love heat).
Take to your sewing machine and sew around the perimeter of the letter. Instead of backstitching, pull your thread tails to the back and tie in a knot.
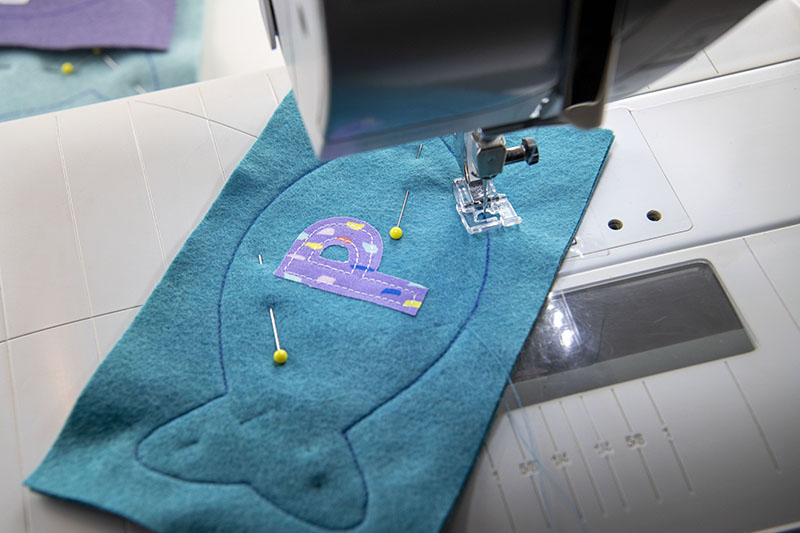
Now grab your second felt rectangle and pin the two layers together. Take to your sewing machine. Sew on the line around your fish shape backstitching at the beginning and end. Start on the bottom and make your way all the way around leaving a one-inch opening for filling.
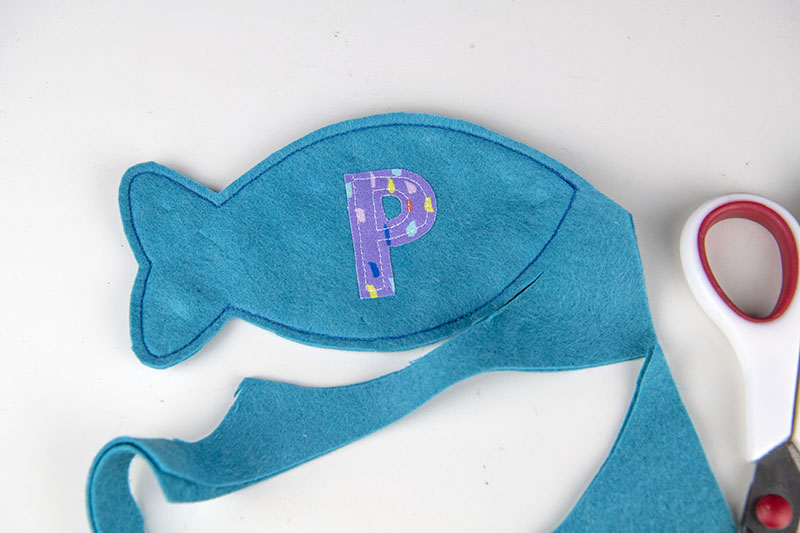
Cut your fish shape out now leaving approximately ⅛” seam allowance around your sewing line as you go.
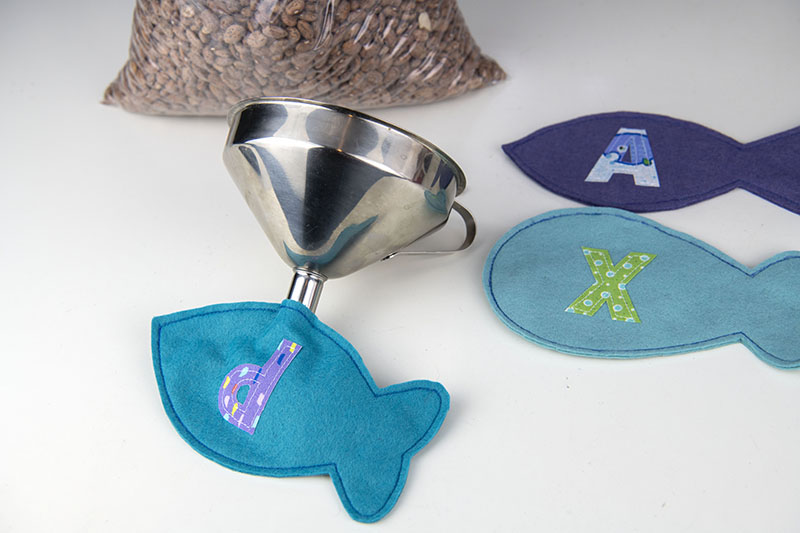
Fill your fish with beans using a funnel. Sew the opening closed.

Repeat with the other fish. I made my nephews a little drawstring bag to keep their fish in. Then they can dump them out and place their fish to spell their names out. Hope you enjoyed this quick and easy project! Happy spelling!