


Hi Crafty Friends, and welcome to Christmas week here on the Therm O Web blog! This week, we have lots of holiday project inspiration to share with you to help you get a head start on your holiday crafting. And today, I have a card and matching gift tag to share with you, made with beautiful Foil-Mates and Fancy Foil from our Gina K Designs collection.
Festive Labels Holiday Gift Set with Gina K Designs
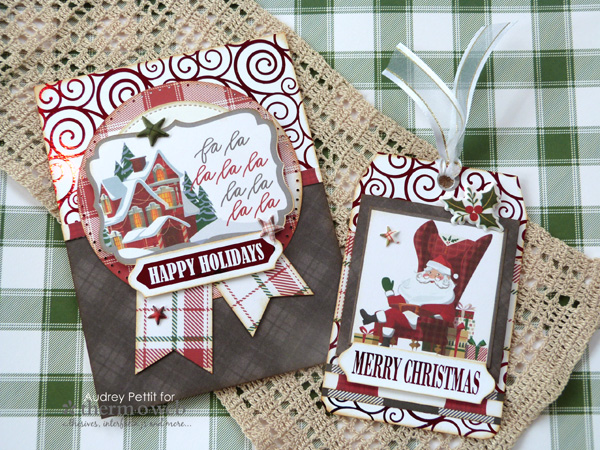
Festive Labels Holiday Gift Set by Designer Audrey Pettit
Supplies:
Therm O Web Gina K Designs Pure Luxury Cardstock: White
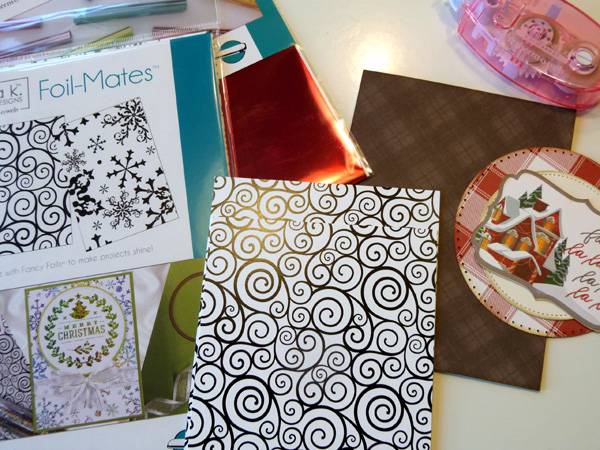
Therm O Web Gina K Designs Foil-Mates: Festive Labels, Blizzard
Therm O Web Gina K Designs Fancy Foil: Red Velvet
Therm O Web Gina K Designs Die Sets: Decorative Label Set, Large Circle Set
Therm O Web Gina K Designs Fancy Ribbon: White Satin
Therm O Web Purple Tape
Therm O Web XL Memory Tape Runner
Therm O Web 3D Adhesive Squares
Royal Sovereign Laminator
Patterned Paper, Die Cuts, Puffy Stickers: Photo Play Paper Mad4Plaid Christmas
Dotted Circle Die: Sizzix
Ink, Ink Blending Tool: Ranger
Corner Rounder Punch: EK Success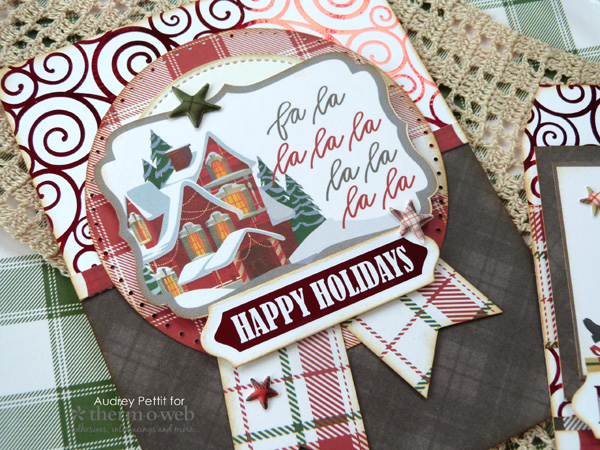
Festive Labels Holiday Gift Set with Gina K Designs Instructions:
Adding shiny foil to your paper crafting projects is so easy with GinaK Designs Foil-Mates designs. To begin, select a background pattern from the Blizzard Foil-Mates set. Cut the sheet in half, and set one of the halves aside for another project. Turn on your laminator and let it come to temperature while you work on the next step.
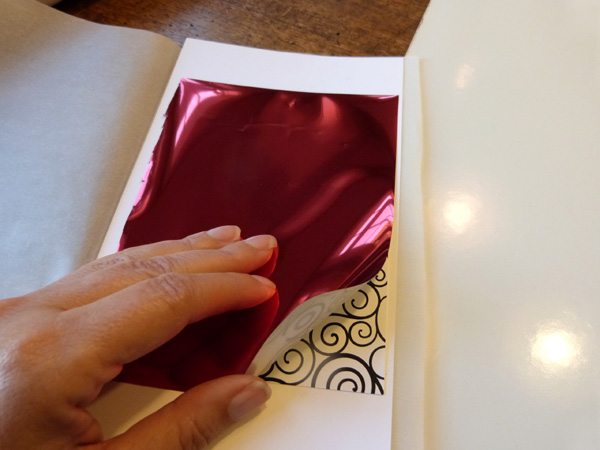
Trim a sheet of Fancy Foil that is slightly larger than the Foil-Mate. I am using Red Velvet Fancy Foil today, and beautiful red color for the holiday season. Fold a large piece of parchment paper in half. Open the parchment, and place a piece of scrap cardstock between the folds. Then place the Foil-Mate panel onto the cardstock, with the toner pattern face up. Finally, lay the Fancy Foil onto the Foil-Mate, with the colored side up and the silver side down. Close the parchment.
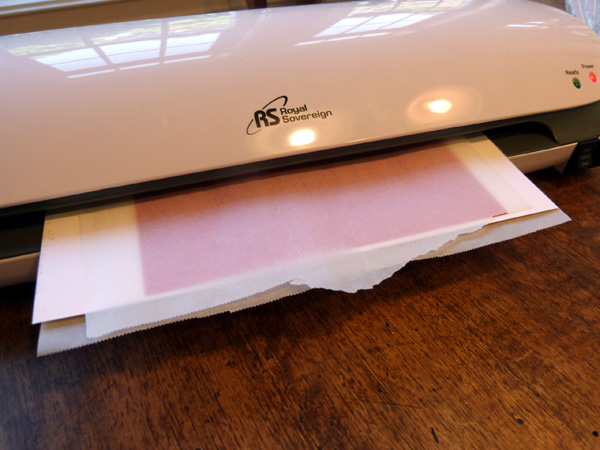
Run this parchment sandwich through your laminator machine.

Then simply peel off the foil to reveal the beautifully foiled design.
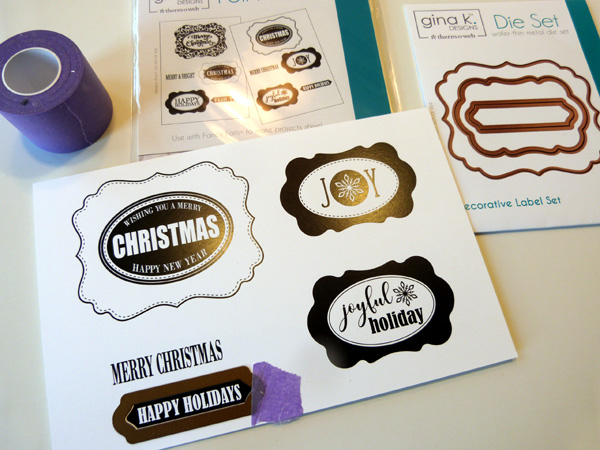
While the laminator machine is still on, let’s go ahead and foil some sentiment labels. I chose the Happy Holidays and Merry Christmas designs from the Festive Labels Foil-Mates set for my card and tag sentiments. Using the matching label die from the Decorative Label Die Set, die cut the sentiments from the sheet. A piece of Therm O Web Purple Tape will hold the die perfectly in place while cutting.
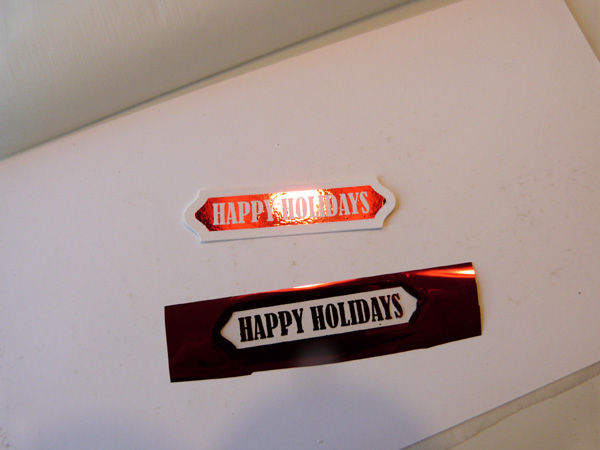
Cover the die cut labels with the Red Velvet Fancy Foil, and run them through your laminator using the same sandwich as above. Repeat the process for the second label.
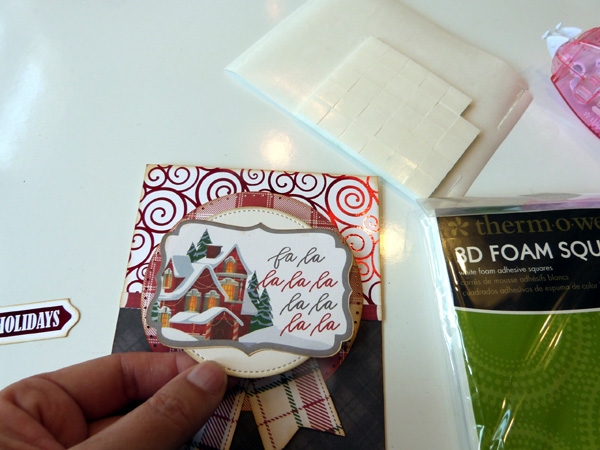
Cut the Blizzard background panel in half. Layer one half of the panel onto a card base, that has been covered in patterned paper. Trim some additional patterned paper strips to use as borders and flag banners, and adhere them to the card. Die cut a pair of circles from patterned paper and Therm O Web/Gina K Designs Luxury White cardstock to use as the focal panel. Edge all the paper pieces with brown ink using an ink blending tool if you like a slightly vintage look like I do. Adhere a die cut accent to the center of the cardstock circle, and pop the circle onto the card using 3D Foam Squares for dimension.
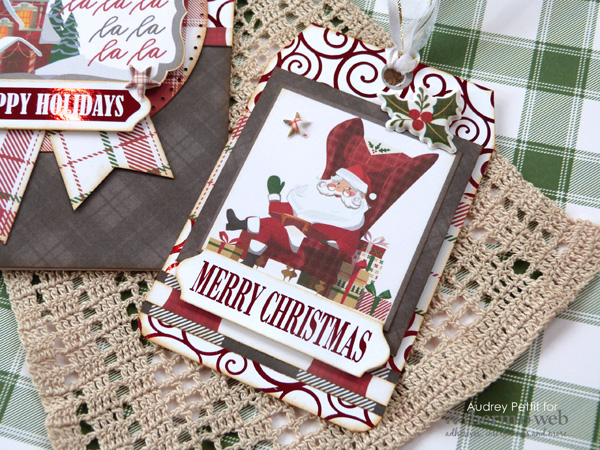
Round the bottom corners of the second half of the Blizzard Foil-Mates to act as a tag base. Snip off the top corners at an angle, and then ink all the edges. Add die cut and sticker accents to the tag, repeating some of the same elements used in the card design. Add the second foiled sentiment label across the bottom of the tag. Punch a hole in the top of the tag, and thread it with a bit of Gina K Designs White Satin Fancy Ribbon.
Enjoy!