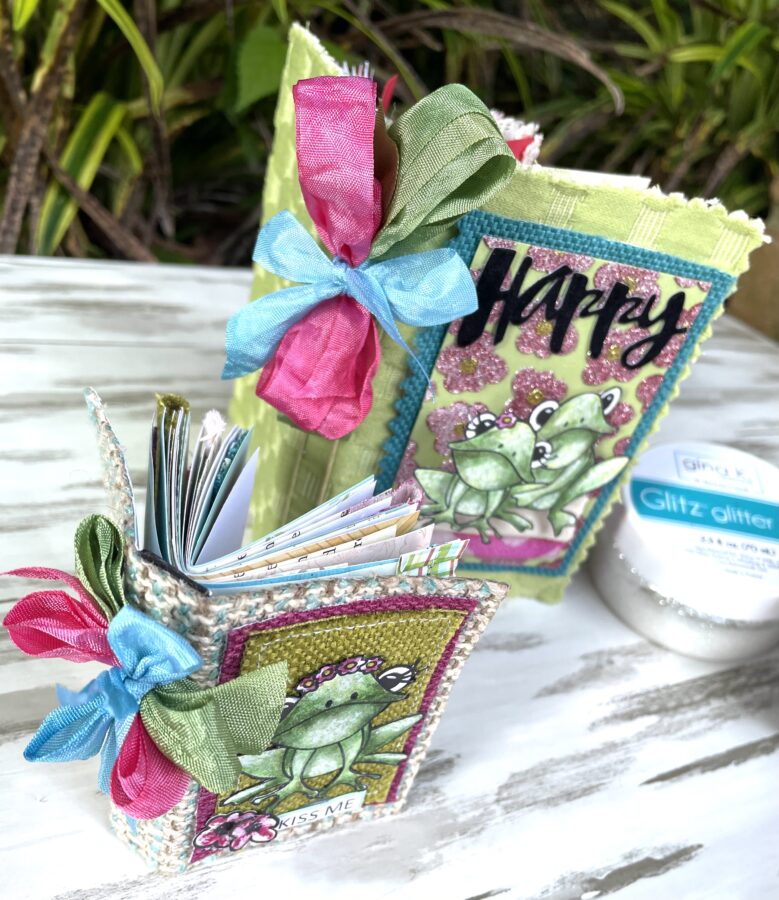
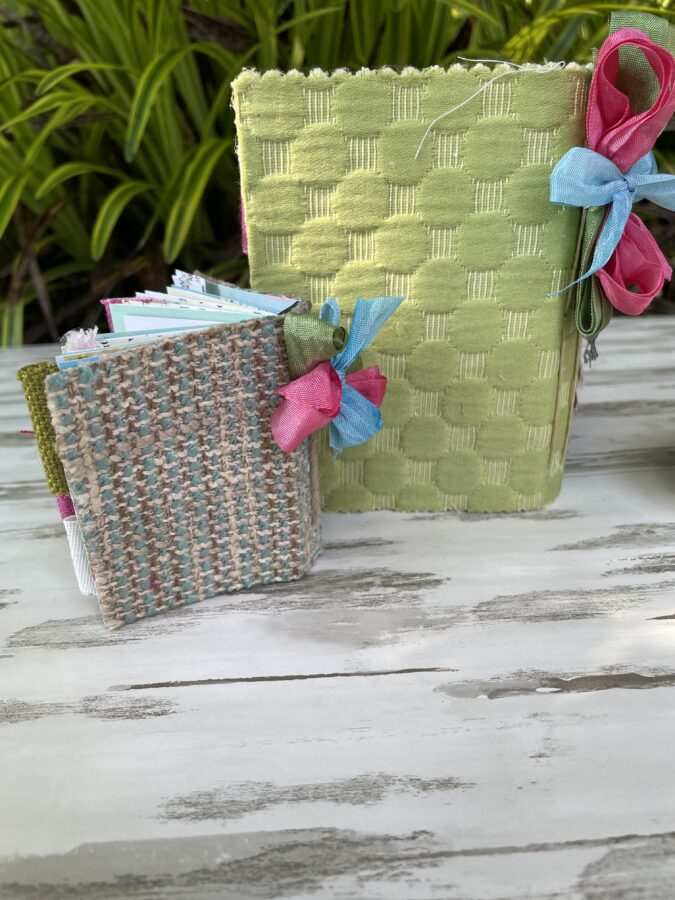
 Fern & Willard Mixed Media Froggy Journals
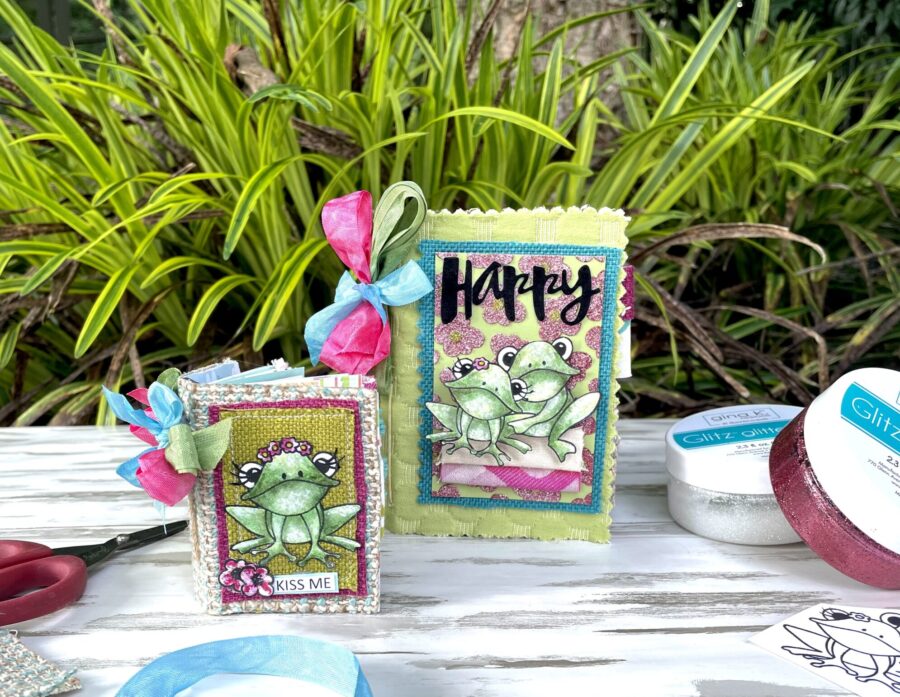
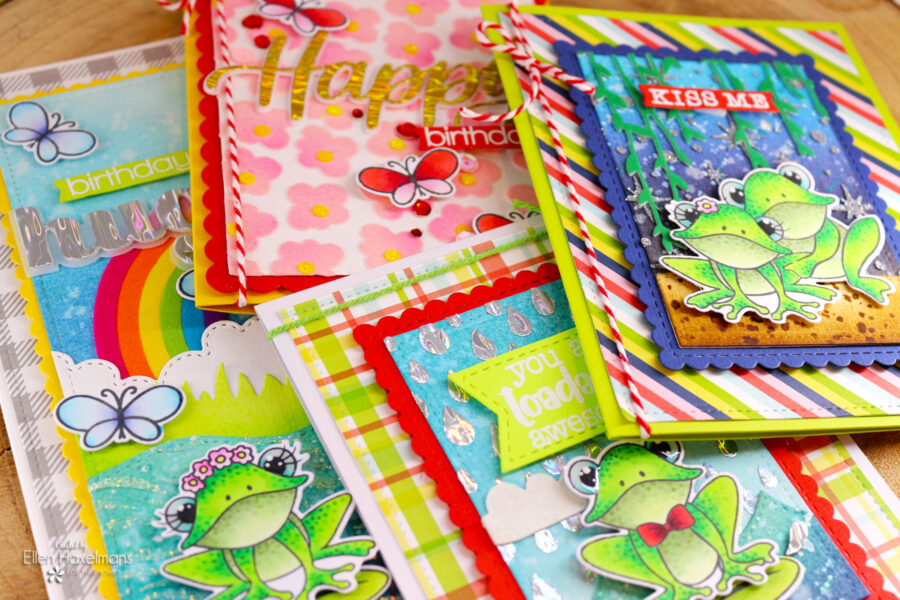
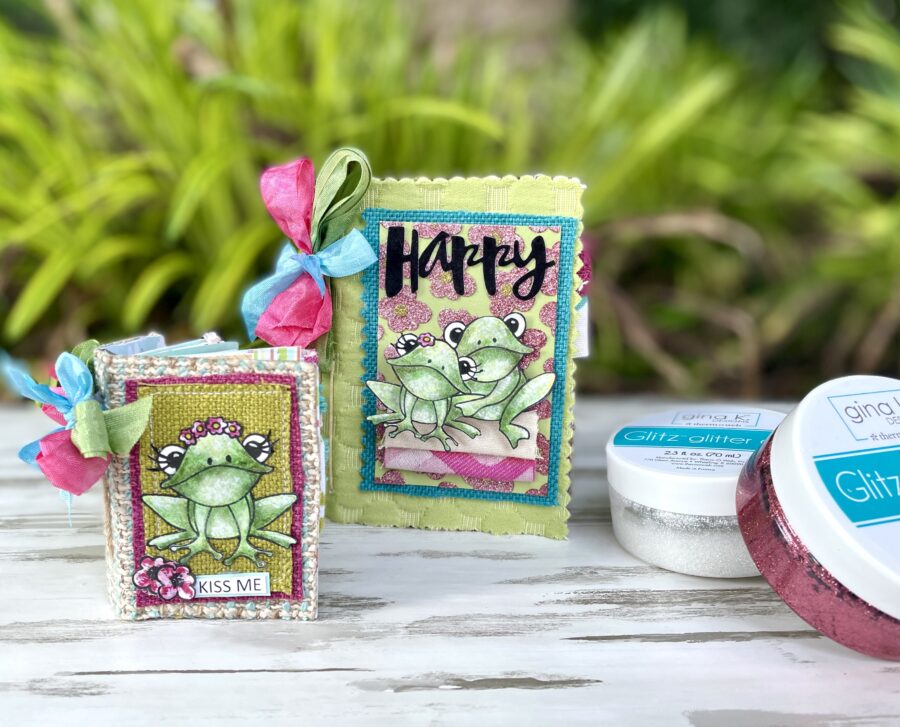
 Hello and welcome to remake week. As you’ve probably already seen in prior posts this week, the design team has been tasked with choosing another designer’s project and remaking it in their own style by putting their own spin on it. I chose Ellen’s Fern & Willard cards because I absolutely fell in love with them! To add my spin, I took elements from all of her cards and turned them into two fabric journals. Follow along below as I show you how to create your own Froggy Journals and point out what I took from Ellen’s cards as my jumping-off point.
Ellen’s Cards:
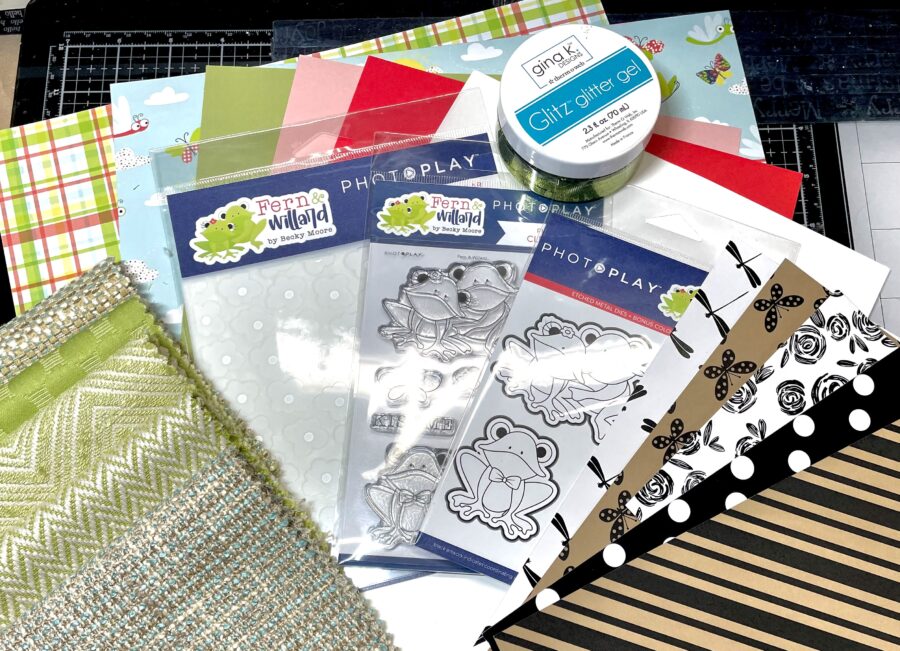
Journal Supplies:
Deco Foil Clear Designer Toner Sheets
Deco Foil Slimline Toner Card Fronts
Deco Foil Transfer Sheets – Enchanted Rose, Lilly Pad and Prince Periwinkle
Deco Foil Flock Transfer Sheets – Black Velvet
iCraft Ultra Bond Liquid Adhesive
Fabric Fuse Quick Bond Fabric Adhesive
Gina K. Designs Glitz Glitter Gel – Bubblegum and White
iCraft SuperTape Adhesive Roll
Gina K Designs Glitz Glitter Gel – Bubblegum and White
HeatNBond Ultra Hold Iron-On Adhesive
Eileen Hull Foam Adhesive Sheets
PhotoPlay Paper, Stencils and Stamps – Fern & Willard
Other Supplies: Fabric, Cardstock, Book Pages and Journal Papers, Eileen Hull Tiny Book Die, a Sentiment Die, and Die-cutting System, Scraps of Lace and Trim, Twine, Ribbon, Paper Piercer, Black Ink, Watercolor Paints, and Brush, Sewing Machine (optional), Scissors, Paper Trimmer and Iron.
Tiny Journal:
Step One
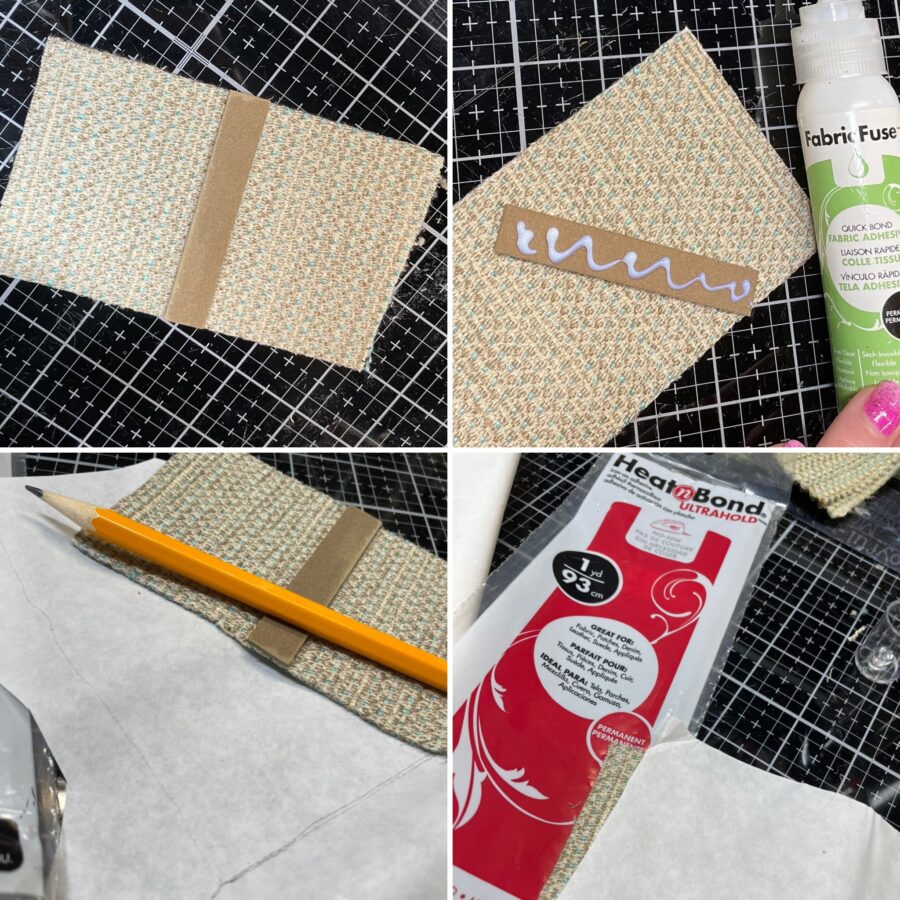
Start by die-cutting the Tiny Book cover from the fabric of your choice. I used upholstery grade fabric because it is heavier. Run the die through a second time but this time cut just the binding piece from chipboard (trim off any excess).
Next, adhere the binding to the inside of the cover using Fabri-Fuse Liquid Adhesive.
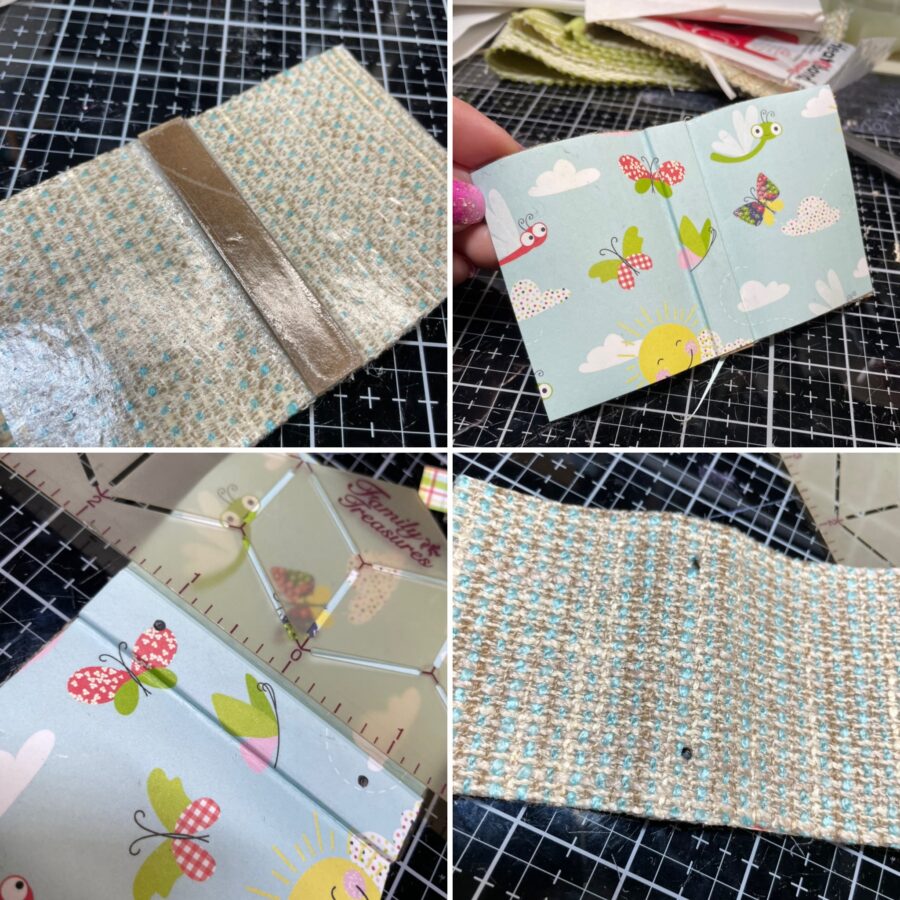
Finally, line your cover with either paper or fabric. I chose to line mine with paper. Cut a piece of HeatNBond the same size as your journal cover and iron the textured side to the inside of the cover pursuant to package instructions. Peel off the paper backing and you will be left with a shiny adhesive film inside the cover (trim off any excess). Lay your paper or fabric lining over the shiny film and press it around the binding piece. Iron carefully so that the lining does not shift while you are heating up the adhesive. Using a paper piercer, pierce two holes into the binding equidistant from each end.
Hint: If you do not have a die-cutting system, use scissors to cut out a cover the size you want. The Tiny Book cover is 3″x5″ with the binding 1/2″. The front cover is 2 1/4″ wide by 3″ tall.
Step Two
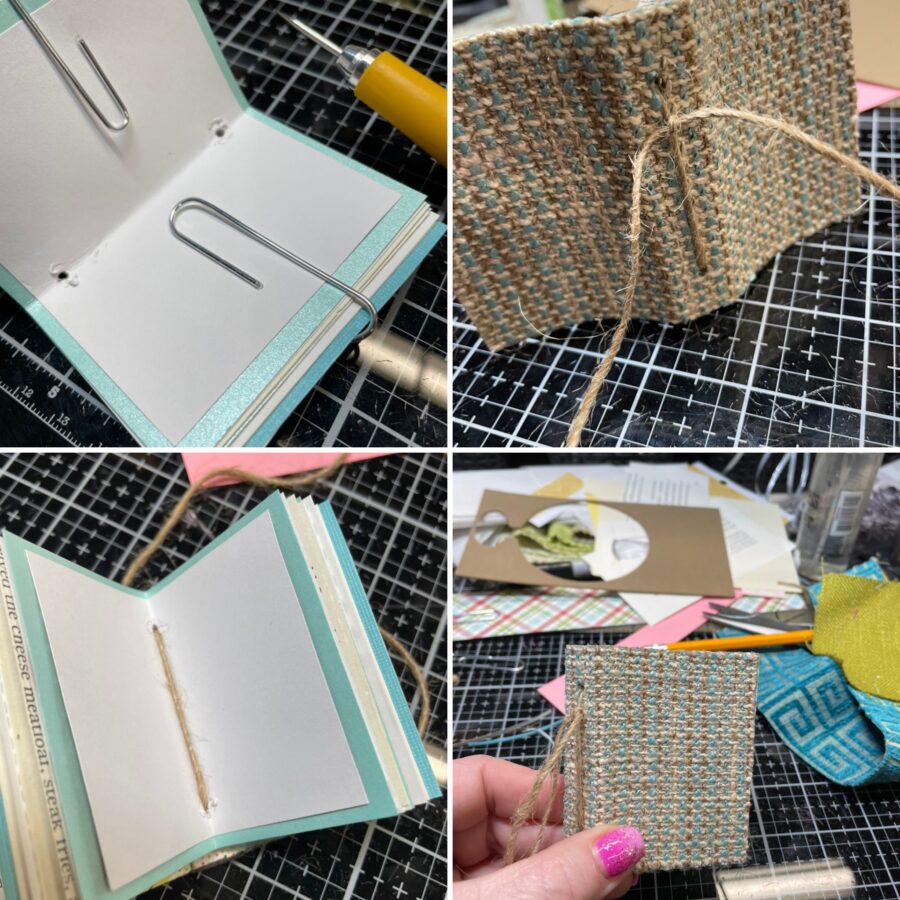
Choose some papers to use for your signature (the inside of your journal), trim them down to sizes, and line them up together. Use paper or binder clips to hold the papers in place while you pierce the holes. Lay the cover over the inside page and mark the holes with a pencil.
Now, line the signature up inside the cover and thread some twine through to hold it in place. Tie the twine on the outside of the binding, pulling it tight so the pages are secure.
Hint: If your twine is too thick to thread a needle (mine was) use a bit of Ultrabond Liquid Adhesive and twist it onto the end to create a point you can “sew” with.
Step Three
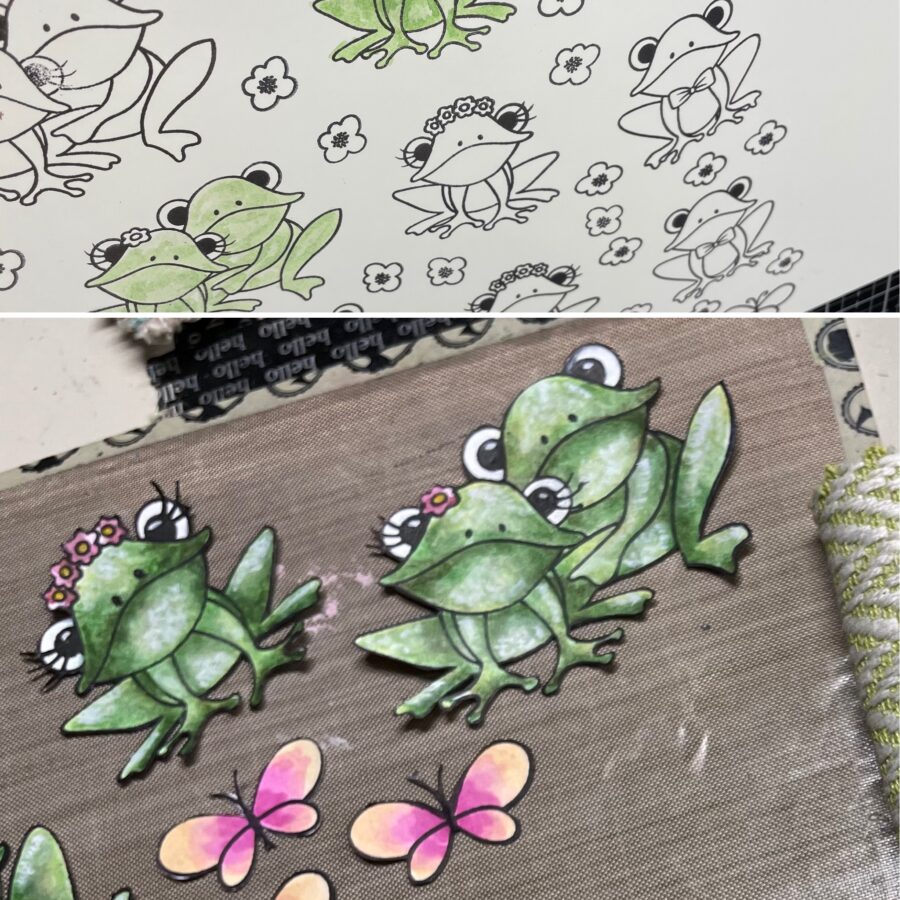
Stamp some Fern & Willard images to use on your journals. Always stamp more than you will use just in case you make a mistake and need another image. I NEVER want to go back and stamp again once I’ve finished. Watercolor your images and cut them out either using the Fern & Willard dies or by fussy cutting. I like to fussy cut mine because I prefer no white halo around the image. Print or stamp the sentiment “Kiss Me.”
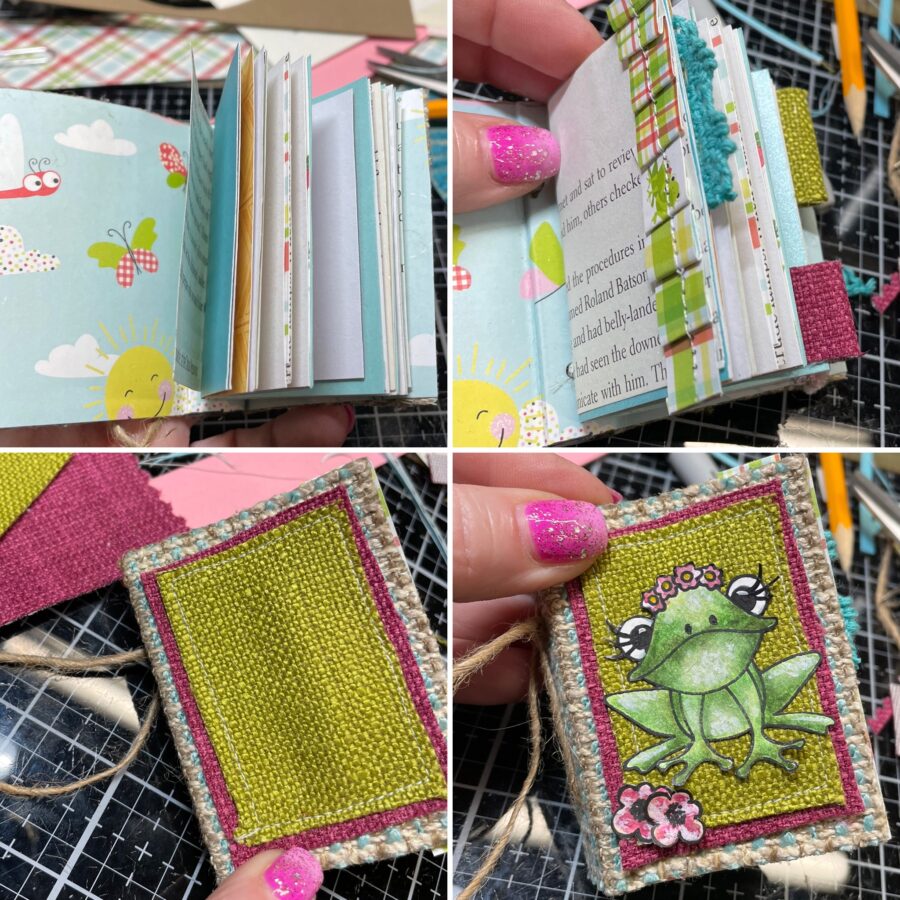
You will see that I took the image from one of Ellen’s cards and the sentiment from another. Instead of plaid cardstock on the cover, I used a patterned fabric to mimic the feel.
Hint: Watercolor in layers to deepen the color and add shadows.
Step Four
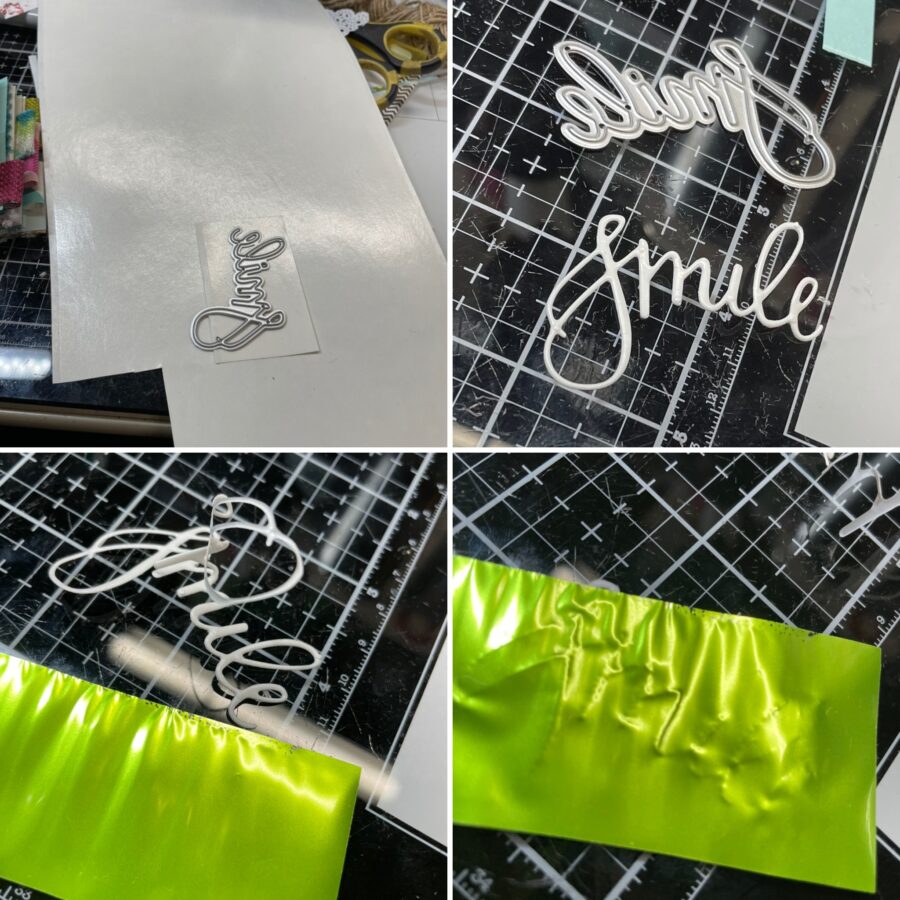
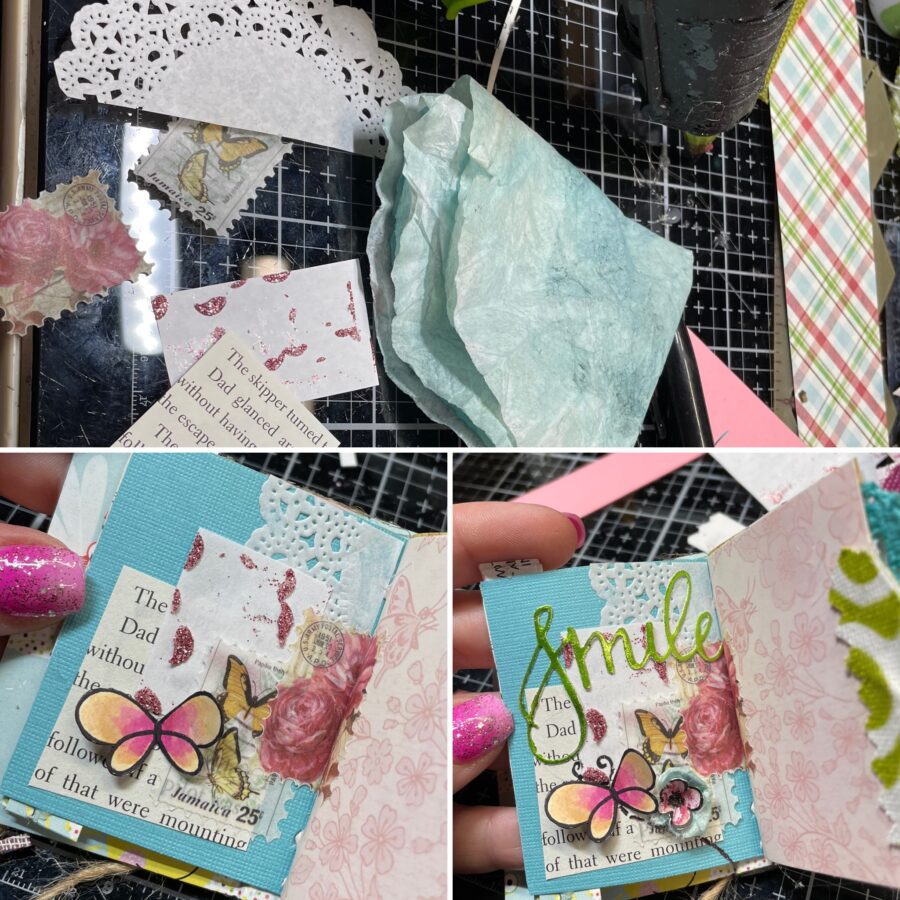
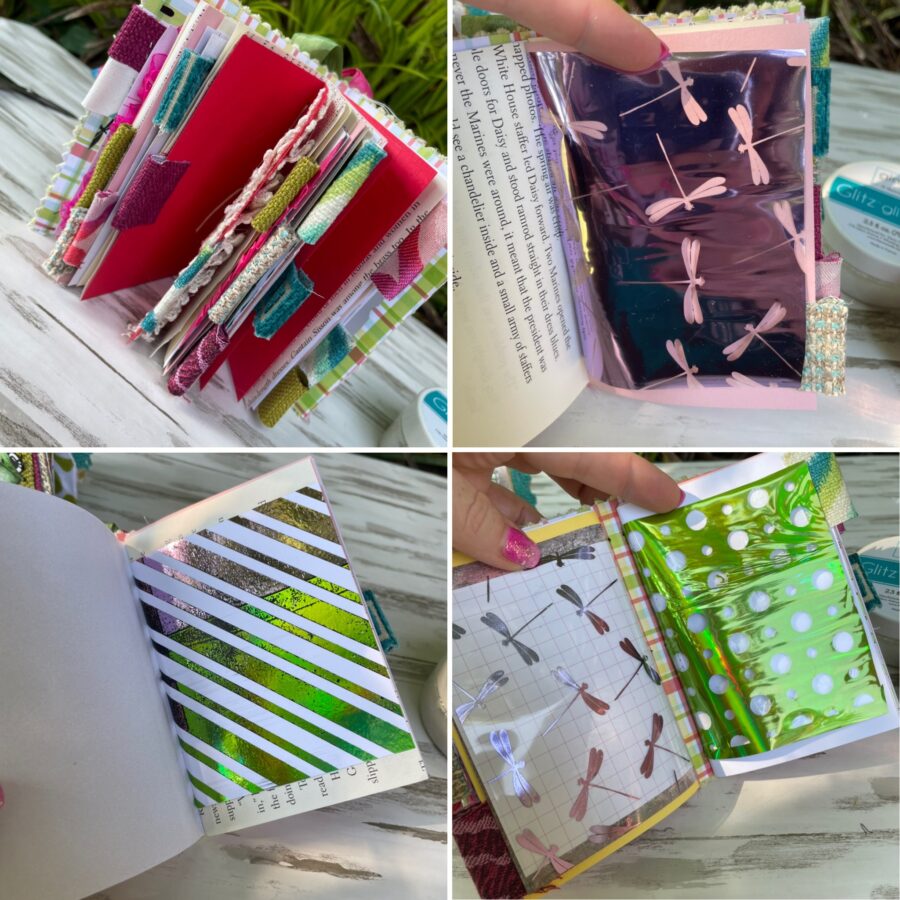
Add bits of trim, lace and paper to the inside pages of your journal. I used fabric scraps to make tabs on my pages. Use ephemera from your stash and a foiled sentiment to create a journal page (image 2).
Finish the cover by creating a background with solid color fabrics and adding your image on top.
Hint: Use iCraft Fabri-Fuse liquid adhesive to adhere the fabric bits to your journal.
Purse Sized Journal:
Step One
To begin, pull together items you think you might use. I used most of what I gathered but changed out a couple of items.
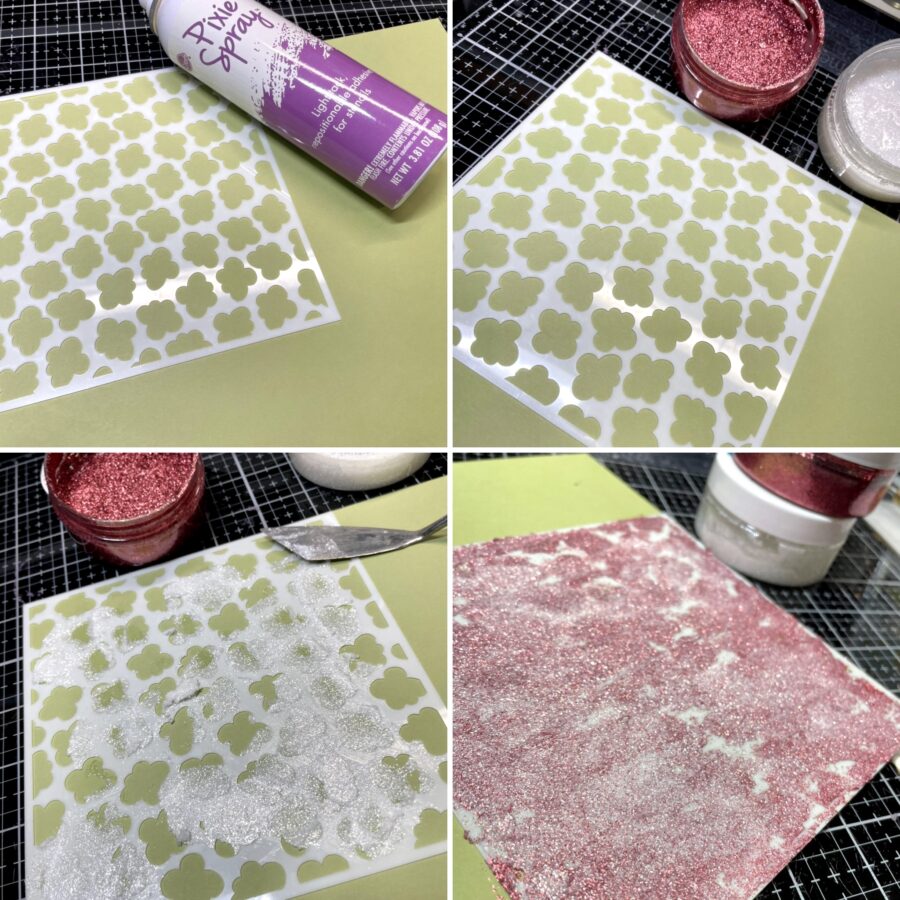
I knew that I wanted to pull the stenciled flowers from Ellen’s cards, so I started with that so they would have time to dry while I put the journal together. The Fern & Willard stencil is two parts; the flowers on one stencil and the centers on another.
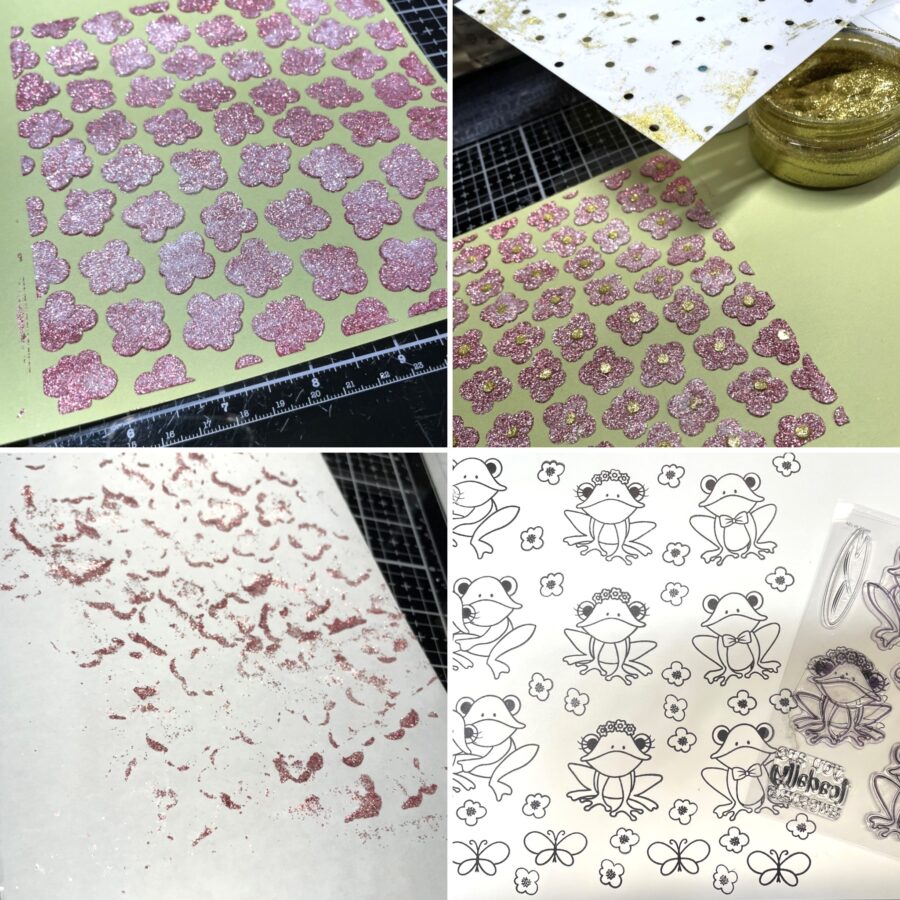
Use Pixie Dust to tack the flower stencil to a piece of cardstock. If you are using one color of Glitz Glitter Gel, the easiest way to apply it is to use the Stencil Pal*. Once the flowers have developed a “skin” on the top (meaning the top layer of Gel has dried), you can gently add the flower centers with the second stencil on top.
*I wanted a little variation in color so I used both Bubblegum and White. Using a spatula, I applied White Glitz Glitter Gel randomly and then added the Bubblegum. I also went back with some White overtop the Bubblegum.
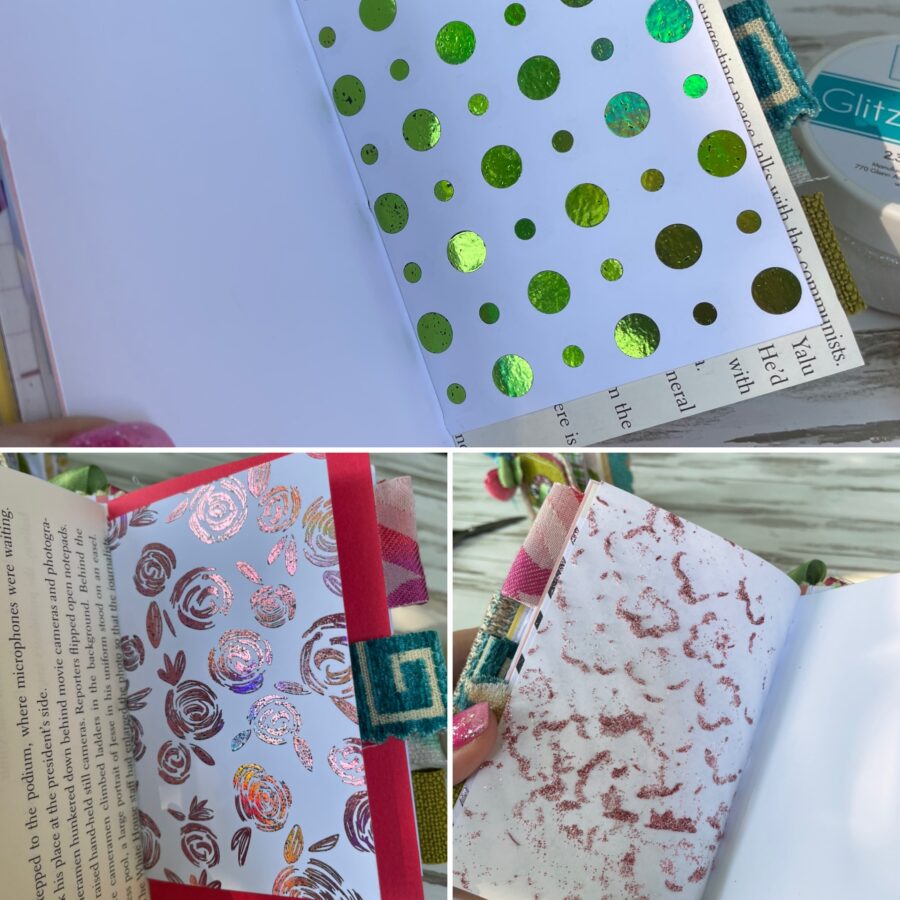
Hint: I saved the piece of paper I used to clean off my flower stencil because I loved the texture. I used it inside my journal.
Step Two
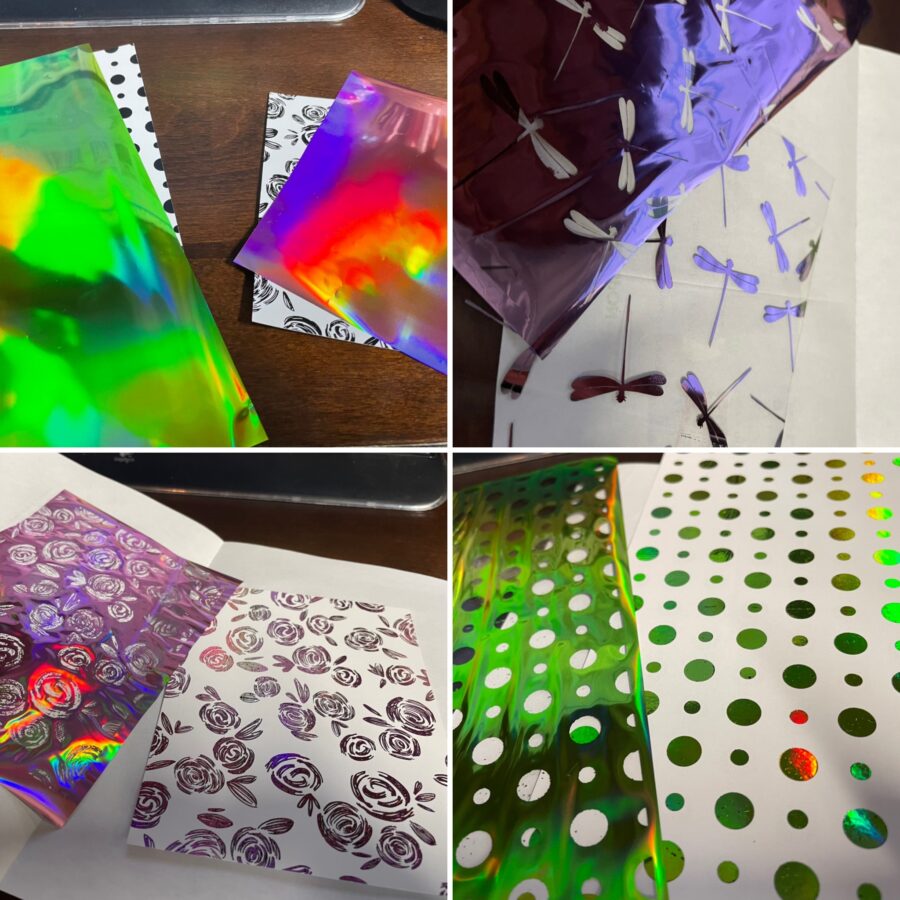
While the stenciled Gel dries, prepare your journal pages. In addition to pattern paper, book pages, and cardstock, use Deco Foil Slimline Toner Card Fronts for pages by folding them in half and trimming them down. Clear toner sheets also make great pages!
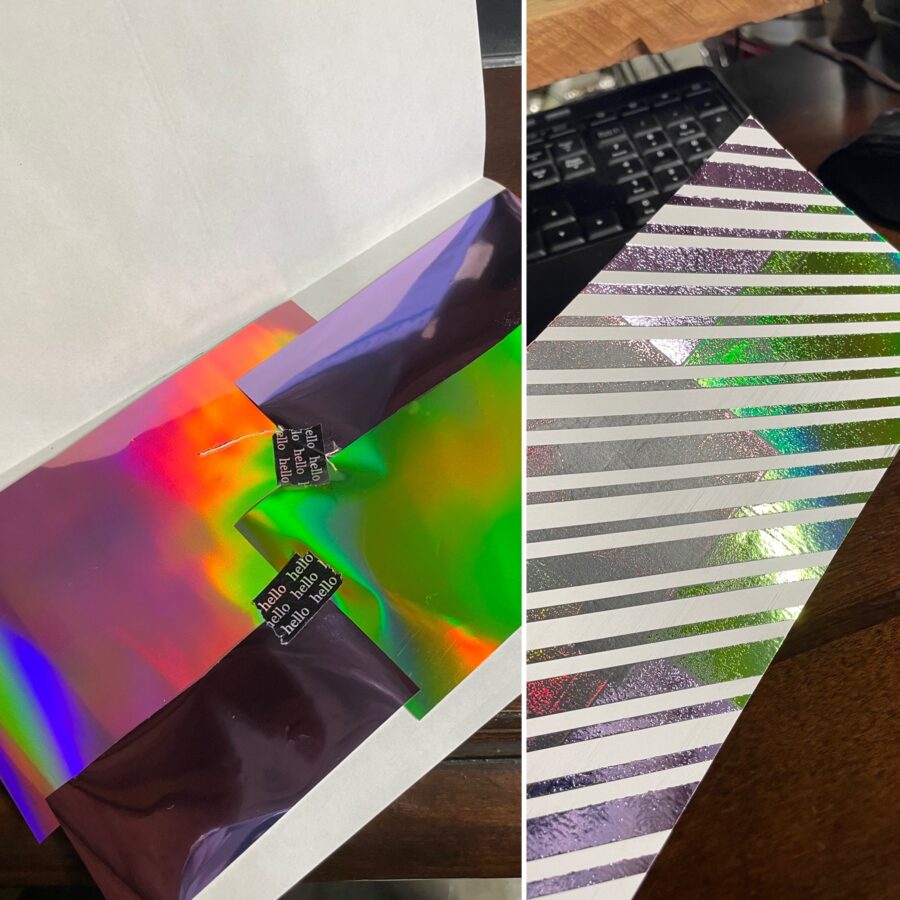
Foil each of these pages by laying a Foil Transfer Sheet over the toner printed area (dull side down) and run them through your laminator or foiling machine according to machine instructions. On the striped Card Front, I used scrap pieces of Foil Transfer Sheets for a patchwork effect. Assemble your journal pages into two signatures.
Hint: Check out the finished project . . . I used the negative Transfer Sheet for pages as well.
Step Three
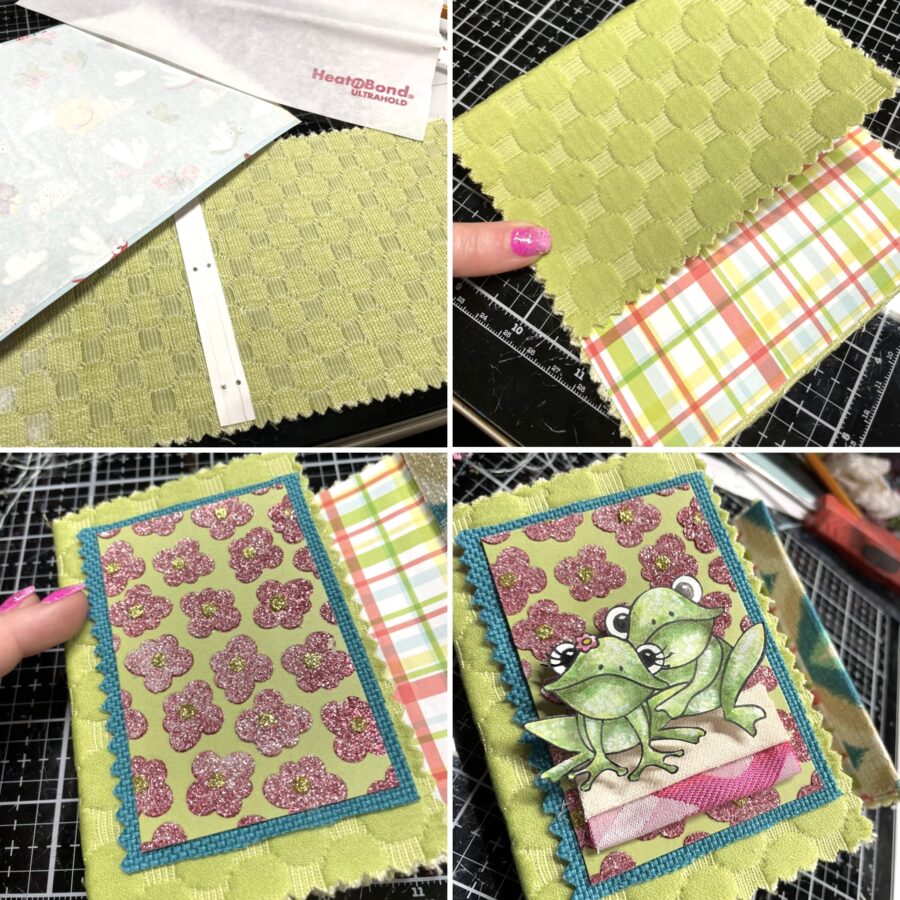
Add a lining to your journal cover the same way you did with the Tiny Book journal, adhering it with HeatNBond. I used the plaid pattern from Ellen’s Card for the inside lining. Originally, I was going to make this a wrap journal but changed my mind (I later cut that extra piece off).
Cut down the stenciled flowers to fit the front of your journal and add a contrasting fabric or paper mat under it. Next, add your Fern & Willard stamped image to the front with some fabric embellishments. Add your signatures to the inside of your journal.
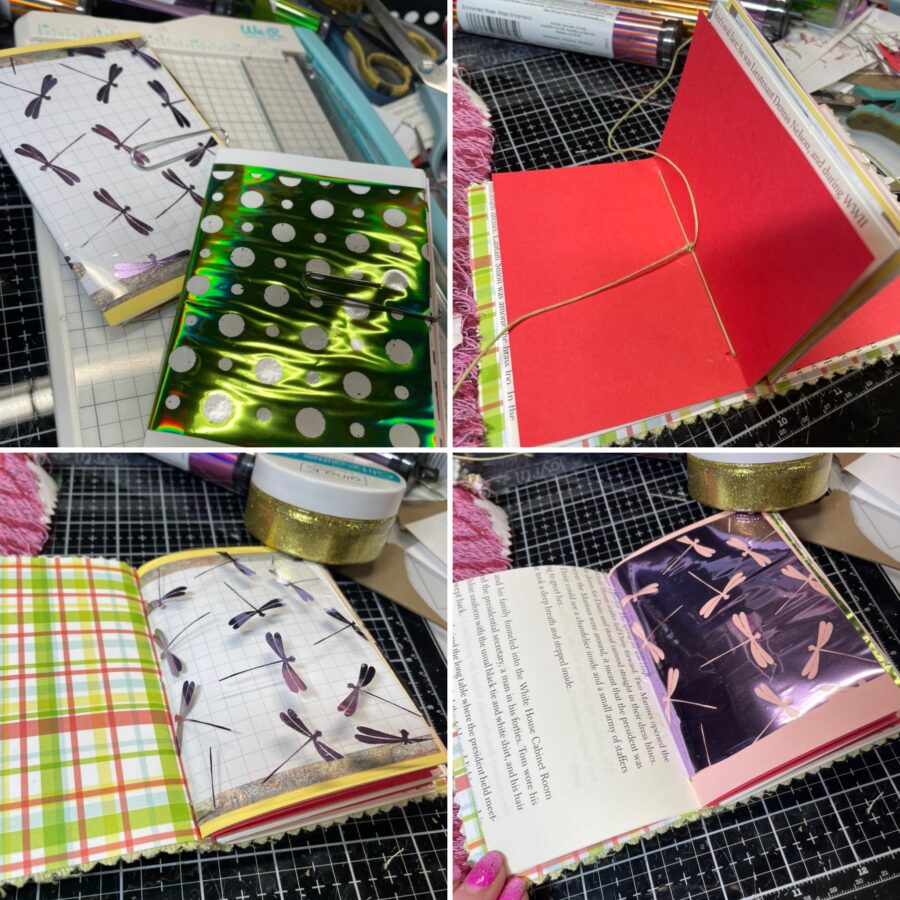
Hint: There are many tutorials on YouTube showing how to sew signatures into a journal. To keep this tutorial from getting too long I am giving only an abbreviated version.
Step Four
Die-cut a sentiment from a Flock Transfer Sheet and adhere it above your stamped image. Add lace, trim and fabric bits to the pages of your journal. Note that I chose to mimic Ellen’s sentiment as well. Use fabric scraps again to create tabs. For a final pop of color, add some ribbon to the spine on each journal.
Hint: Die-cutting the sentiment from Flock gives it dimension you just don’t get with cardstock. You can add even more dimension by adhering the flock to an Adhesive Foam Sheet before die-cutting.
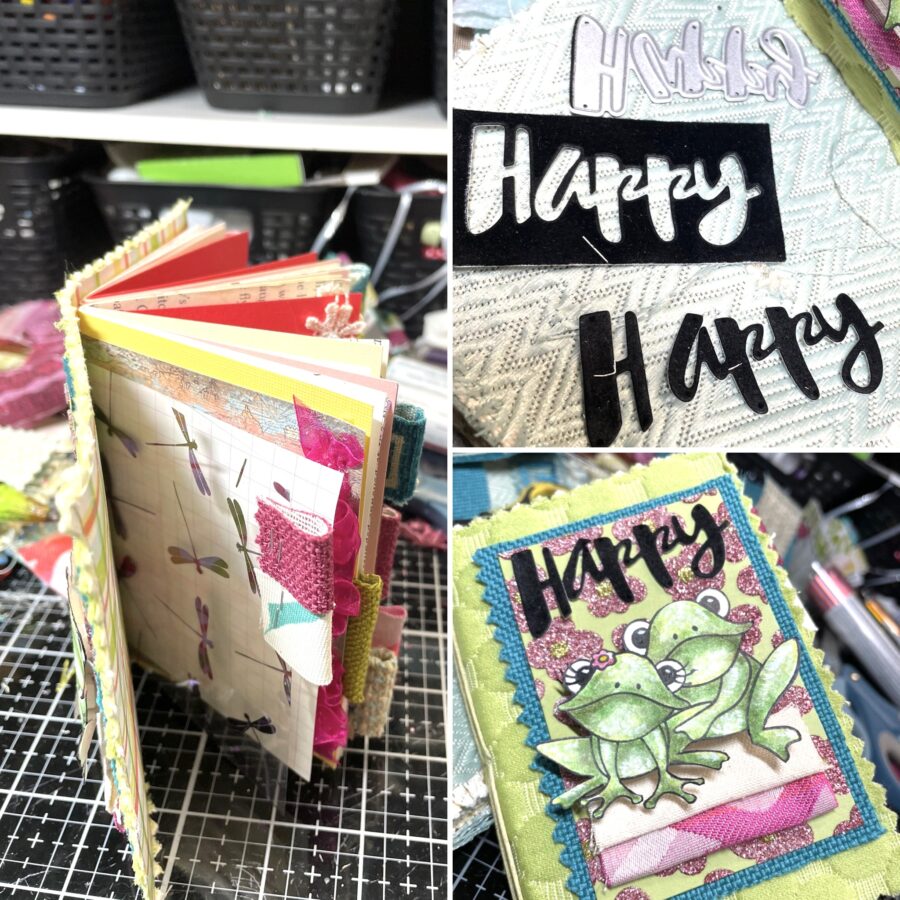
I absolutely love the way the pages came out!! I knew I would like the foiled pages, but the negative Transfer Sheets and the paper with leftover stencil Glitz give it so much more interest.
I had so much fun creating these two journals and while I did not copy Ellen’s cards, I feel like the essence is there. The assignment is a great way to show how you can give two people the same items and get a completely different result.
I hope this encourages you to take inspiration in all of the projects you see on our blog and use them as a jumping-off point to create your own piece of art.
Happy crafting!
