
Fairytale Deco Foil and Watercolor Flowers
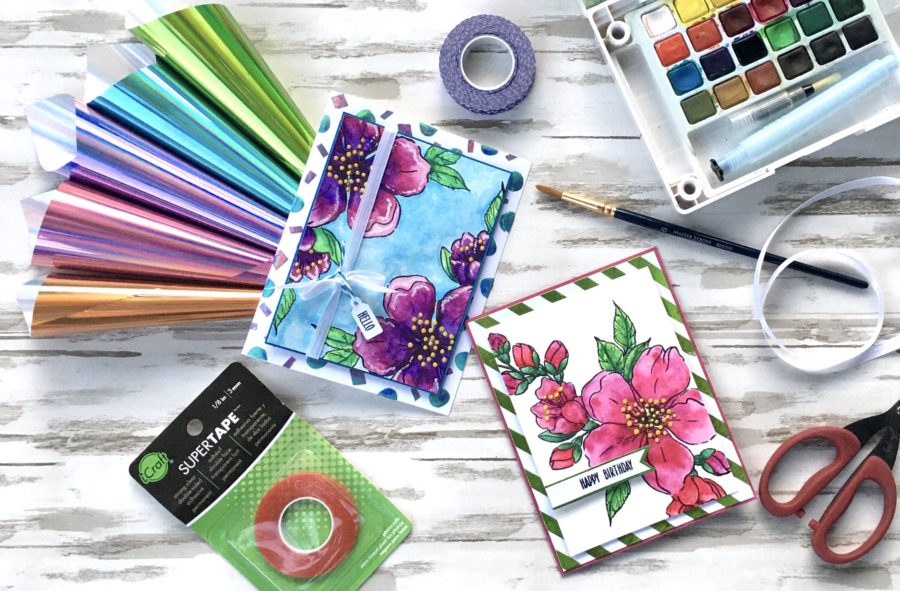
Hello and welcome to Inkon3 week here at Therm O Web where we will be posting some fabulous projects featuring both Therm O Web and Inkon3 products. I am happy to be kicking it off with these fun watercolor cards that highlight the Inkon3 BeYOUtiful stamp set and Therm O web Fairytale foils. Follow along below to see just how I made them.
Fairy Foil and Watercolor Flowers Cards Supplies
Deco Foil Transfer Sheets – Enchanted Rose, Lily Pad, Prince Periwinkle, and Glass Slippper
iCraft Supertape Roll 1/4″ and 1/2″
iCraft Ultra Bond Liquid Adhesive
Deco Foil Foam Adhesive
Purple Tape
Zots Singles – Medium
Inkon3 Clear Stamps – BeYOUtiful
Other Supplies: Cardstock, watercolor paper, watercolor paints, paintbrush, Nuvo Drops, ribbon, black ink pad, stamping platform, scissors, and copy paper.
Fairytale Deco Foil and Watercolor Flowers Tutorial
STEP ONE:
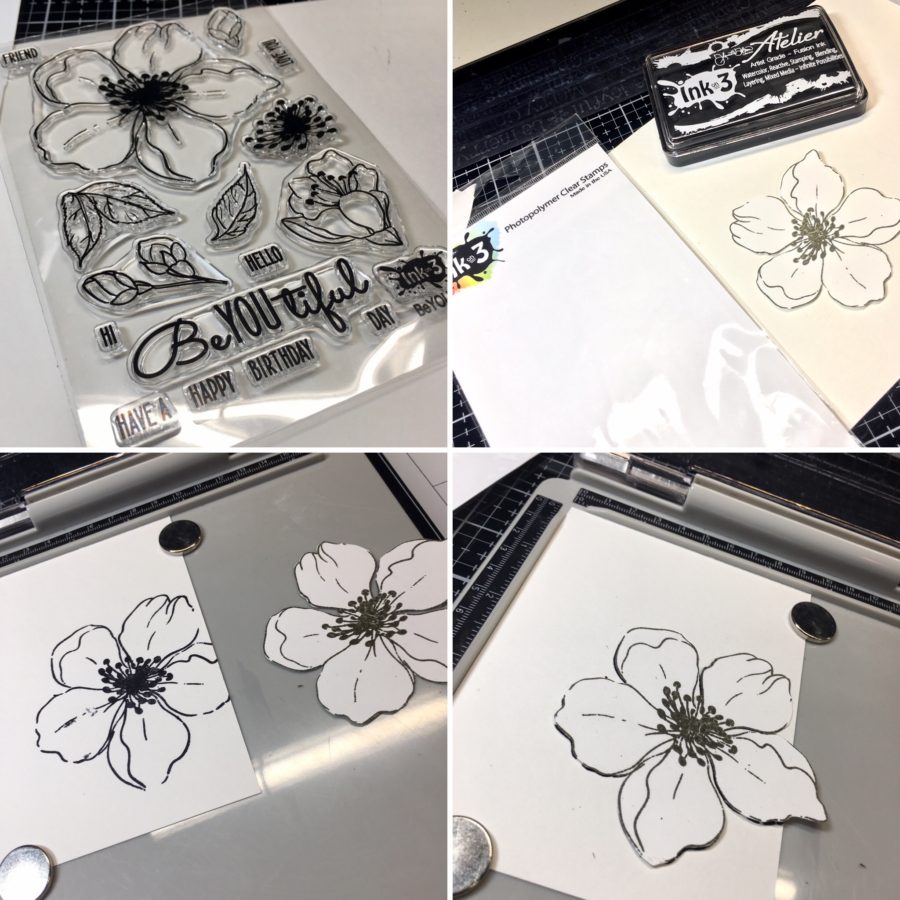
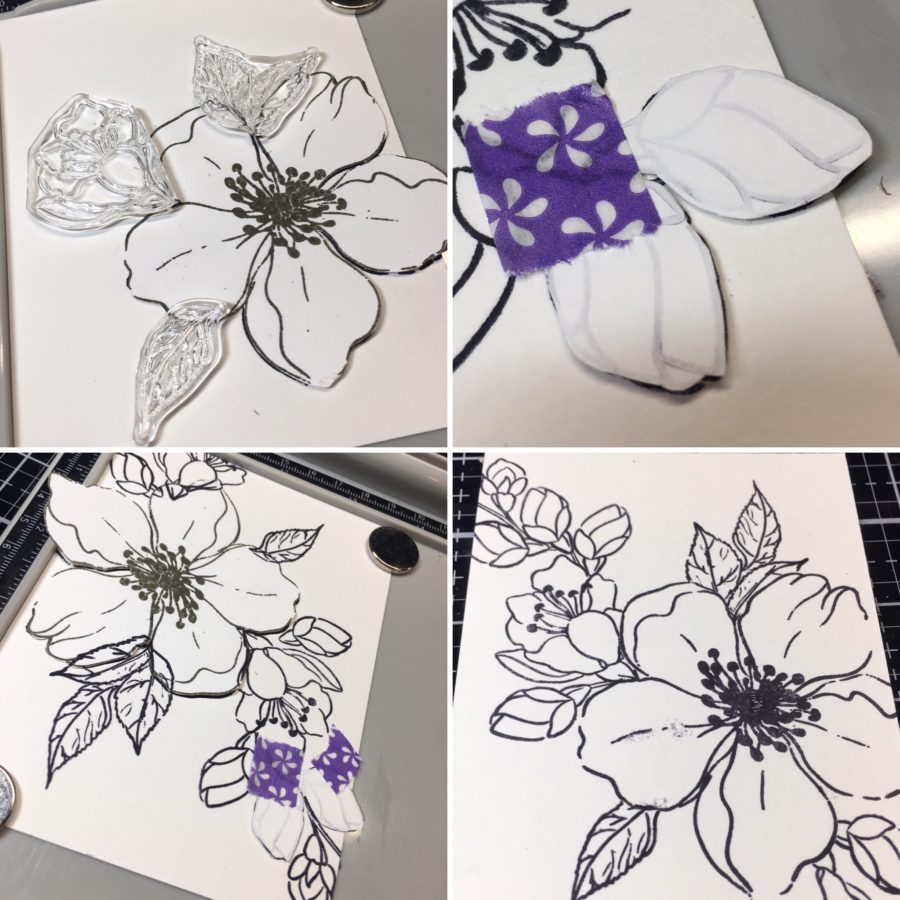
Before you get started on the actual card, create a couple of masks using copy paper. To do this, stamp several of the images on copy paper and cut out. I know many people buy a masking product, but I just don’t see the need. As long as I have my trusty purple tape and some scrap paper, I’m set.
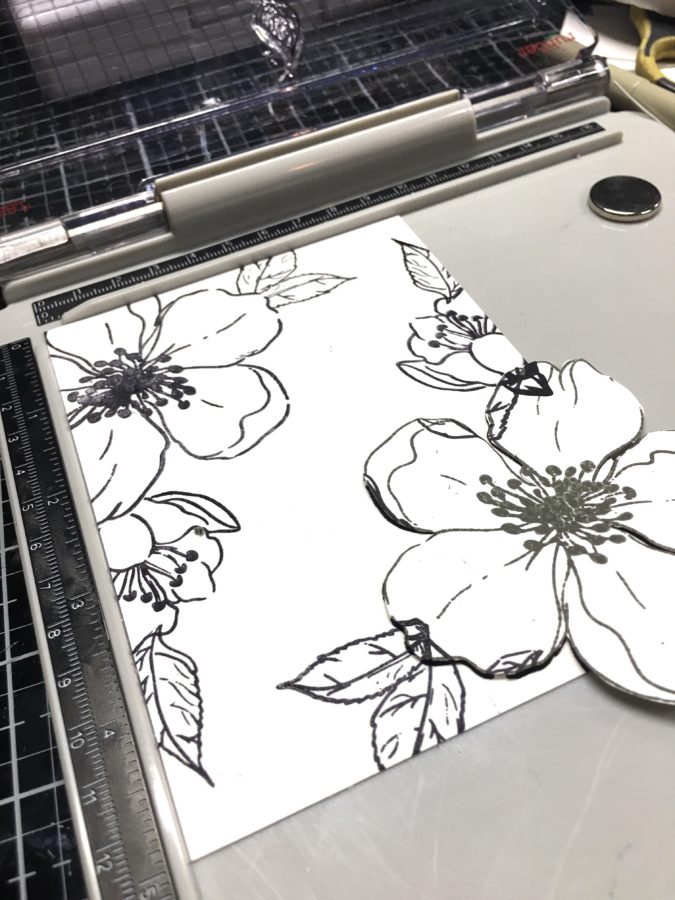
Stamp the large flower (your focal point) on a piece of 3 7/8″ x 5 1/8″ watercolor paper, going off the page just a bit. Using a bit of purple tape (rolled sticky side out and placed on the bottom of the mask image) mask off the flower you just stamped. Now place some of the other stamps overlapping the first stamped image to create a bouquet of sorts. Continue masking and stamping until you have the image. As you can see from the last photo below, because we masked off some of the flowers, it appears as though the leaves and smaller flowers are behind the large flower.
Hint: If you don’t have purple tape, a very light dusting of Pixie Spray on the bottom of your mask will work just as well.
STEP TWO:
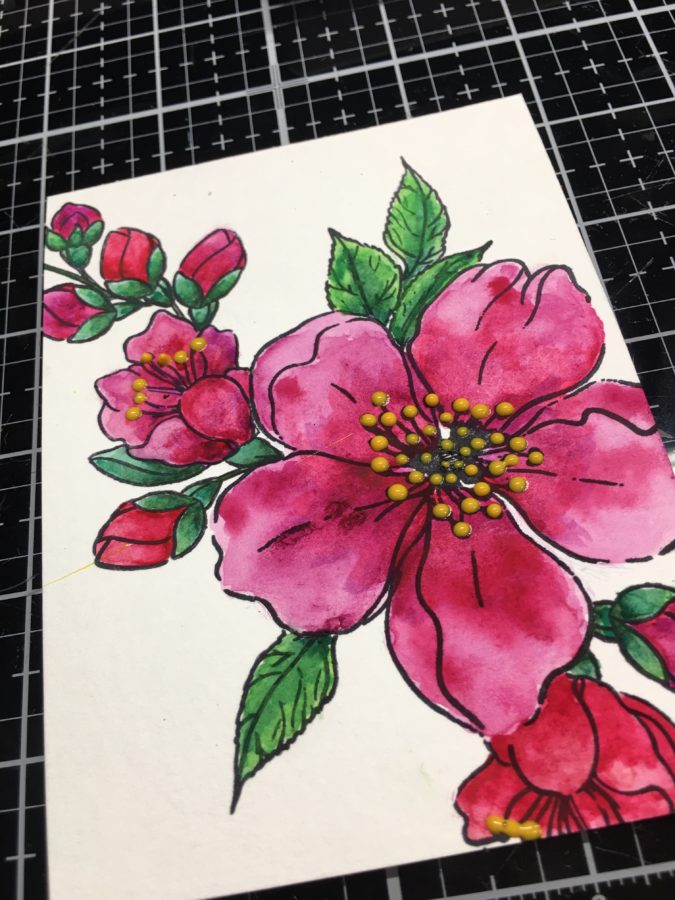
Paint your image using watercolor paints, allow to dry, and then use Nuvo Drops to create the stamen.
Hint: You don’t need expensive watercolors to get a good result (especially when you are starting out and practicing); the paper makes all the difference. Make sure to use watercolor paper and not just white cardstock.
STEP THREE:
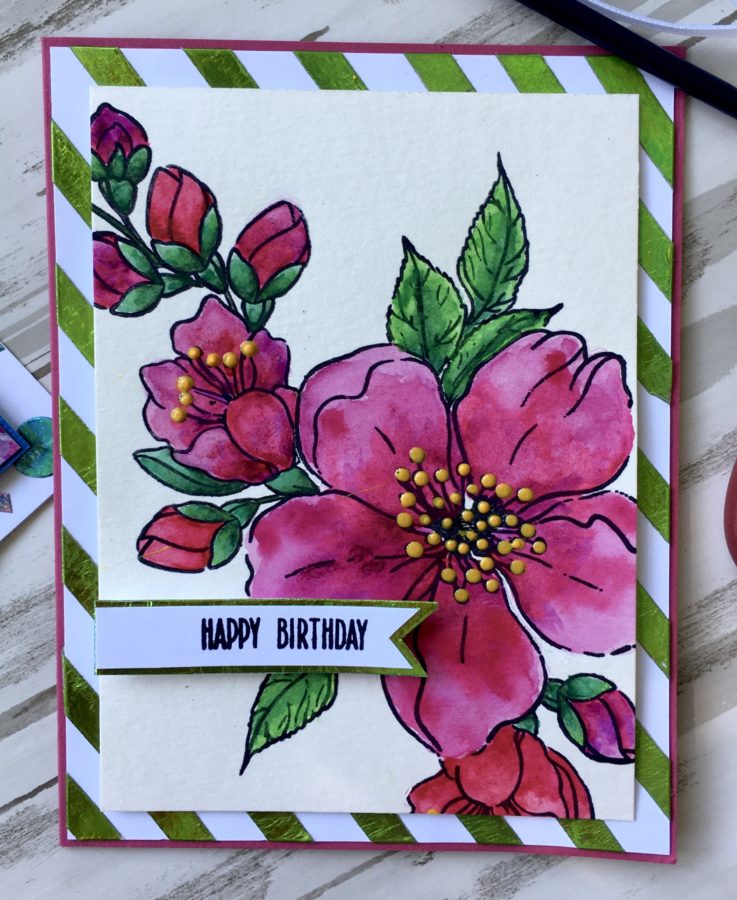
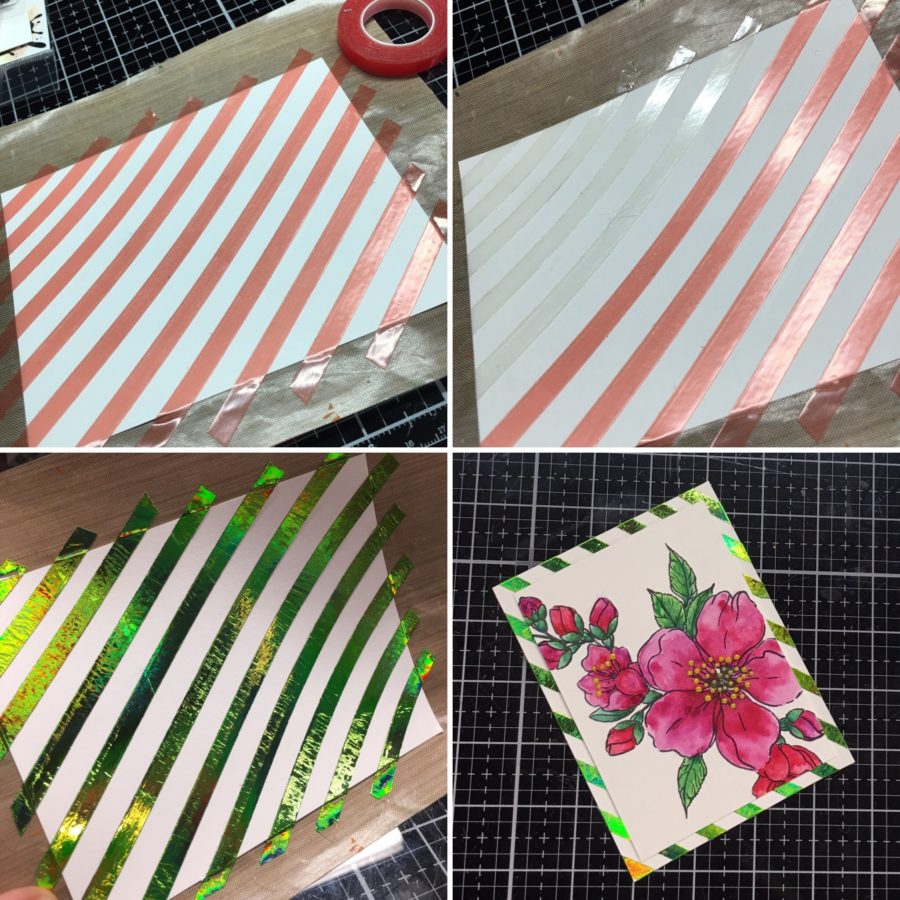
On a piece of white cardstock measuring 4 1/8″ x 5 3/8″ create stripes using 1/4″ Supertape. Peel away the release paper from the tape strips and gently press a piece of Lily Pad Foil (dull side down) over the stripes and burnish gently. Peel away the foil transfer sheet leaving you with fairytale stripes. Trim away any excess and adhere your watercolor image to the striped sheet using Ultra Bond Liquid Adhesive.
Hint: Use a non-stick craft mat under your paper when placing the stripes for easy peel away.
STEP FOUR:
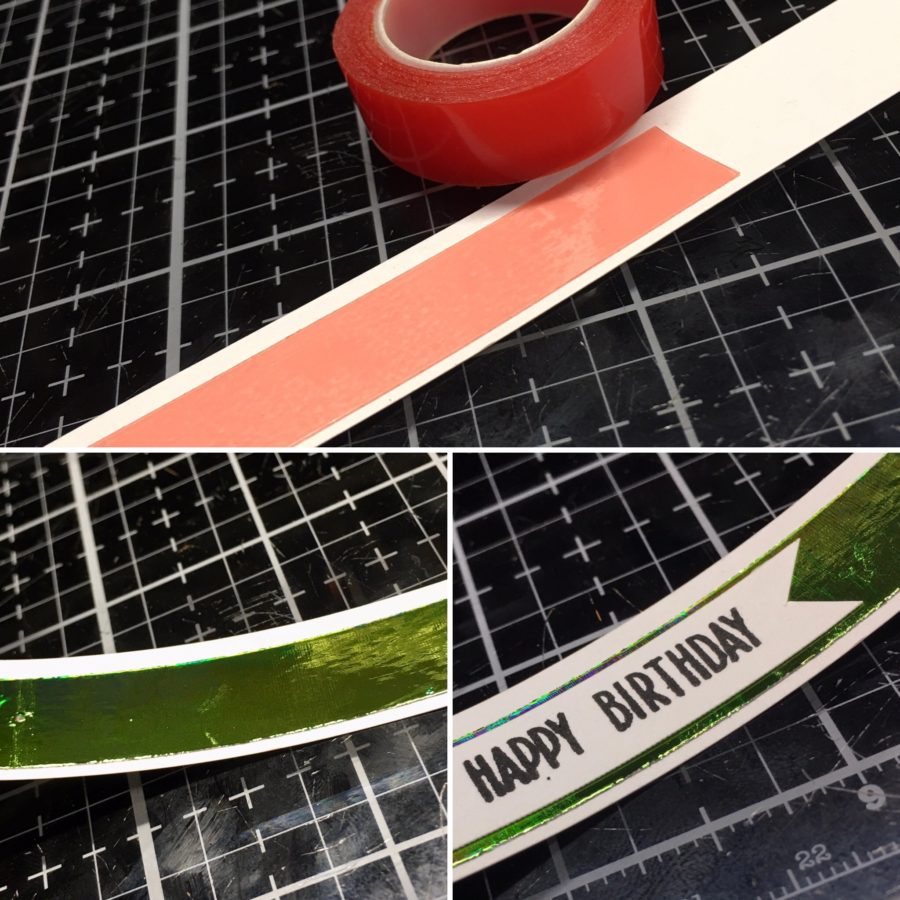
Use a strip of white cardstock and 1/4″ Supertape to create a sentiment strip. Peel away the release paper and press a scrap of Lily Pad foil to the Supertape. Adhere the sentiment to the foiled strip and trim around it. Adhere it to your card front and then adhere the entire piece to your card base.
Hint: Use Therm O Web Foam Strips to adhere the sentiment for dimension.
CARD TWO:
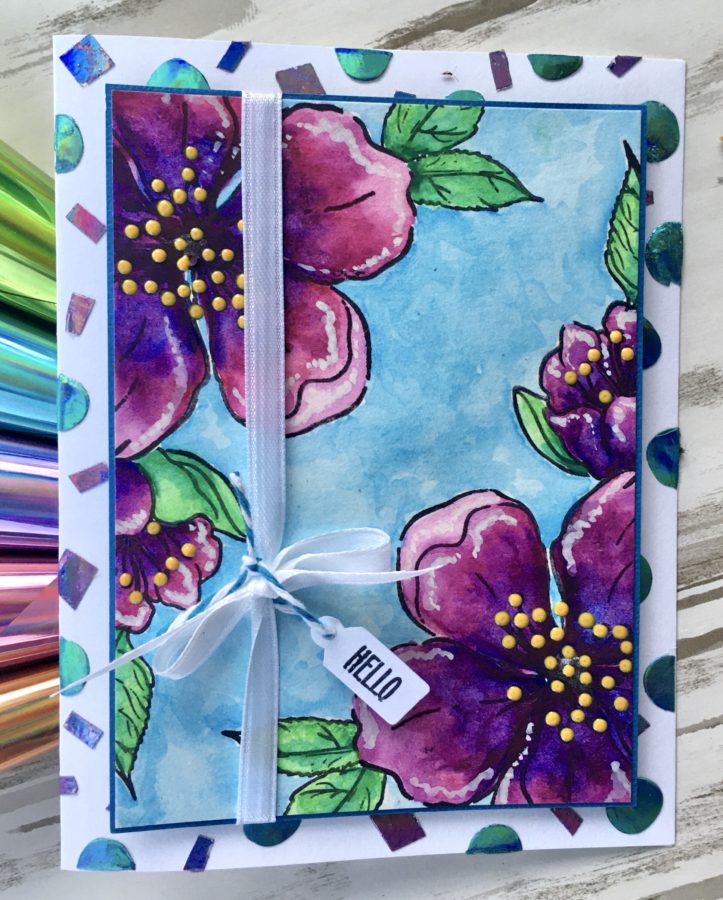
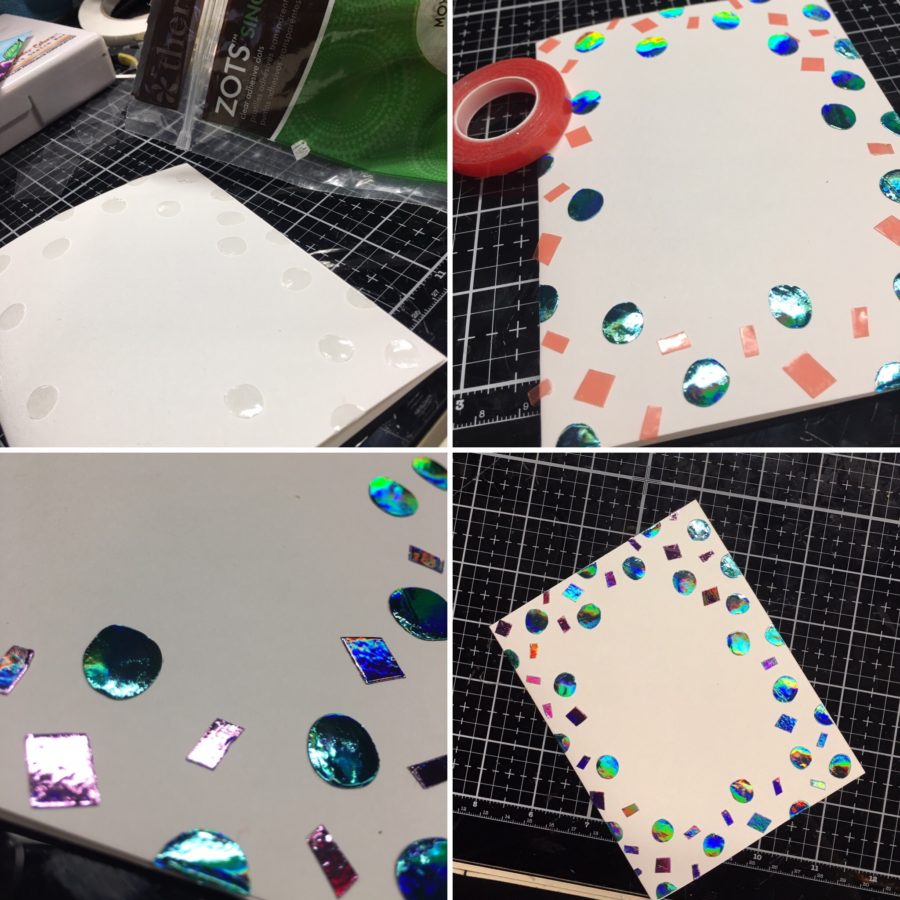
This card can be created similarly to the first, masking the focal point and watercoloring to create a card front. For the card base on this one, however; use Zots and small snippets of Supertape around the outside edges and foil them the same way you did the stripes. For this card, I used the Prince Periwinkle and Glass Slipper foils. Add some ribbon and a sentiment to complete your card.
Hint: Die-cut PeelNStick Adhesive Sheets or Foam Adhesive Sheets to create shapes for your background instead of using Zots. The possibilities are endless.

Thank you so much for stopping by to check out my tutorial. I hope you have as much fun with the new Fairytale Deco Foil colors as I have.
Wendy

Now be sure to visit our friends at Inkon3 to see what their talented team has made with our two company products! And get yourself entered into their giveaway too! Be sure to click HERE to see their designer project today from Cheryl Luu! Don’t forget to visit them on social as well and be sure to follow them there for more inspiration and ideas! One can never have enough!!
14 Comments on Fairy Tale Foils and Watercolor Flowers with Inkon3
1Pingbacks & Trackbacks on Fairy Tale Foils and Watercolor Flowers with Inkon3
-
[…] everyone, it’s Deb here with you today, welcome to Under The Water week here on Therm O Web’s blog! I decided […]

Andre M.
August 10, 2020 at 12:14 pm (5 years ago)Pretty florals, love the DIY foiled background on these cards.
Ummekulsum Kutub
August 10, 2020 at 12:22 pm (5 years ago)Gorgeous cards. Love the foil. Such beautiful colors!!
Mary Holshouser
August 10, 2020 at 2:03 pm (5 years ago)Beautiful flowers. Love how they are
off-center. Great idea.
thanks for sharing
txmlhl(at)yahoo(dot)com
Jen
August 10, 2020 at 3:13 pm (5 years ago)The foils just make the watercolor POP!
Meghan Kennihan
August 10, 2020 at 4:12 pm (5 years ago)What a fun collaboration! I LOVE the gorgeous flowers!
Sarah Jimenez
August 10, 2020 at 4:20 pm (5 years ago)These are beautiful!!
Denise Bryant
August 10, 2020 at 10:20 pm (5 years ago)Love these gorgeous foils! Beautiful colors!
Sarah Jimenez
August 11, 2020 at 8:06 pm (5 years ago)I love that the fouls work with the adhesive. Endless combinations/shapes/backgrounds etc. TFS
Sarah Jimenez
August 13, 2020 at 11:02 pm (5 years ago)*foils
Ginny K.
August 12, 2020 at 5:50 am (5 years ago)LOve the big beautiful flowers on top of that gorgeous foil. What great togetherness just like ink on 3 and thermoweb! ~Gin~
quilterlin
August 12, 2020 at 7:24 am (5 years ago)Your fairy-tale foils are amazing, and the cards today are gorgeous!
Scraporcraft
August 14, 2020 at 5:00 am (5 years ago)Great collab! Nice for some ideas and product use information.
gail
August 15, 2020 at 10:34 am (5 years ago)I love the geometric random foiling.