Hello Friends, it is Jennifer Long from Bee Sew Inspired, back with another fun and happy tutorial! This one is one that is formed out of necessity for me!
I am not sure about you, but the Ipad is a very important part of my sewing and creative daily life! Not only do I use it to view my PDF patterns, reading blogs and tutorials and social media, but I use it for drawing and designing as well – and it definitely needs to be protected in a fun and pretty way!
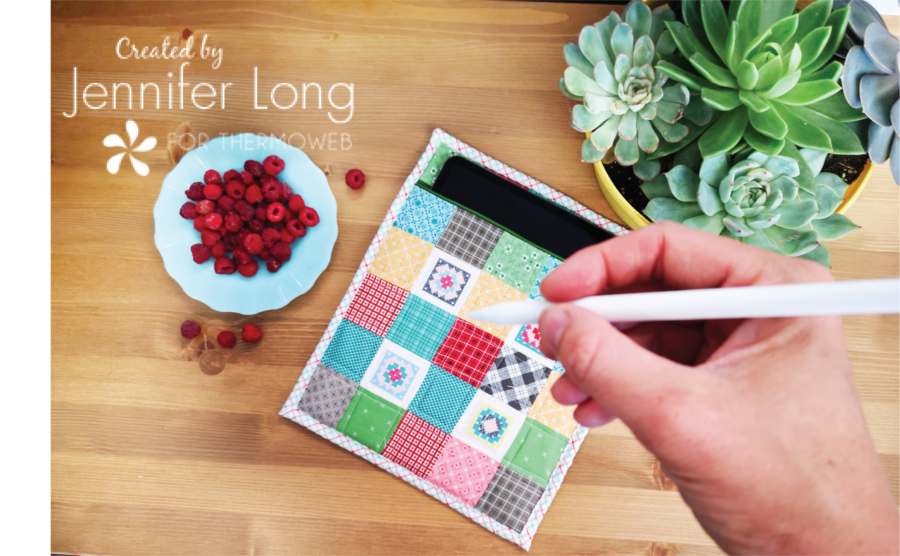
This summer, with all 4 teens and preteens home and going in different directions for work, AAA softball, swim team, beach days and more, I need to stay even more organized and I want to take my Ipad with me so I can draw while I sit by the pool or at the ball diamond.
Let’s get started.
What You Need:

Ipads come in different sizes, so adjust your fabric requirements and sizing as needed. My Ipad is a 12.9″ Pro. — you can easily adjust the size of your Ipad case by adding or subtracting a row of squares. To make this Ipad case, you will need:
-
Fat Quarter of Extra fabric in an accent color for lining
-
1/8 yard of binding fabric
-
12″ zipper or larger
-
Ribbon, zipper pull etc. for added fun
Let’s Get Started:
1. Referring to this Granny Square SAL Putting it All Together post, make the front of the Ipad Cover.
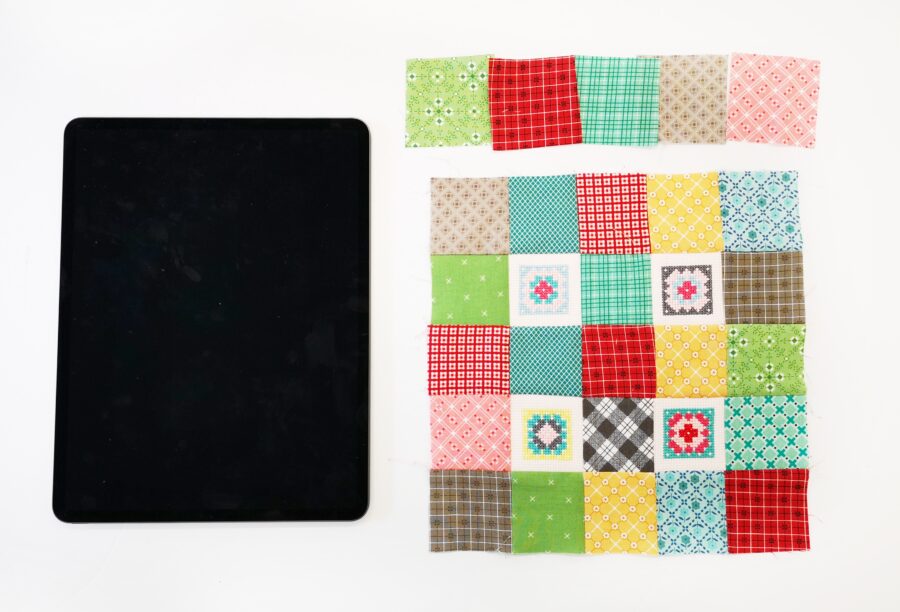
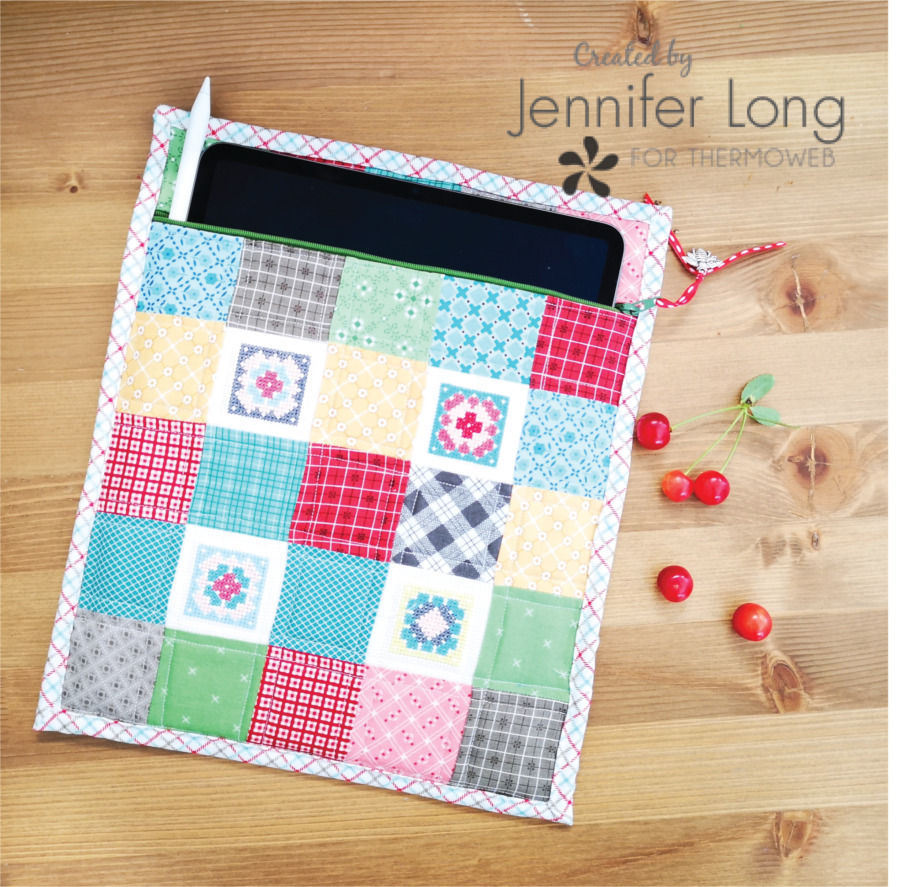
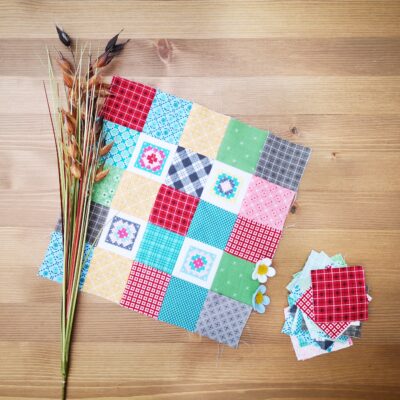
2. Lay your Ipad next to your cover layout, to determine how many 2 1/2″ squares you will need for the size you want to make your cover. I made my bottom base (5) 2 1/2″ squares x (5) 2 1/2″ squares. I made a separate row on top of (1) row of (5) 2 1/2″ squares.

3. Pin and sew together the front sections as shown and repeat for the back section in (1) larger pieces. Mine is (5) 2 1/2″ squares x (6) 2 1/2″ squares. Press seams.
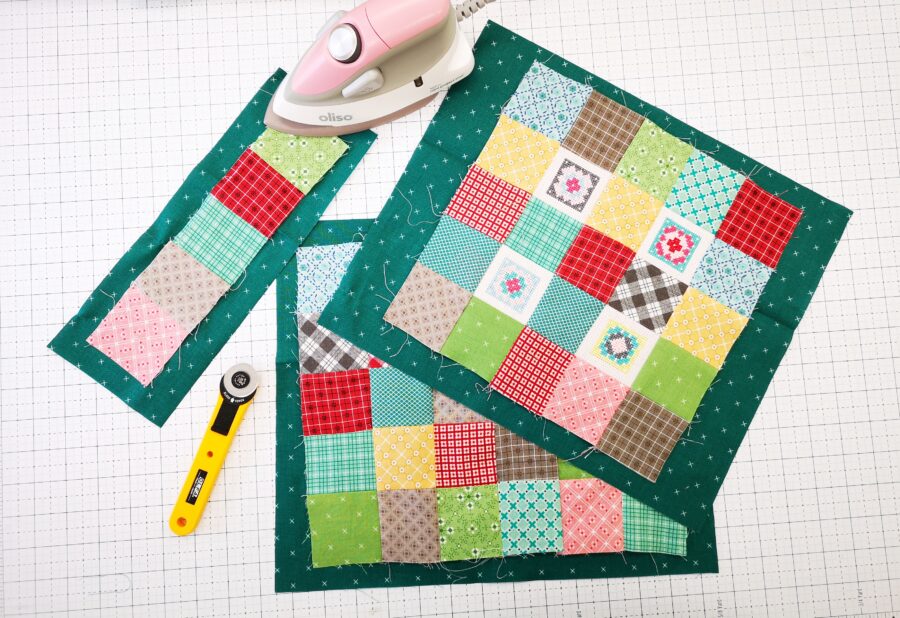
4. Layout the (3) sections on your lining fabric and cut the lining larger than your main outer sections. Repeat cutting the Heat n Bond Fusible Fleece the same size as the lining.
5. Following the manufacturer’s directions, fuse the Heat n Bond Fusible Fleece to the wrong side of the outer sections. pin and press the lining as shown to form a quilt sandwich.
6. Quilt using your domestic sewing machine or by hand, as desired.
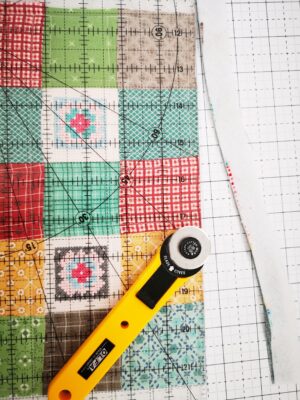
7. Using your rotary cutter, ruler and cutting mat, trim the excess lining fabric and fusible fleece away and square up the (3) Ipad case sections.
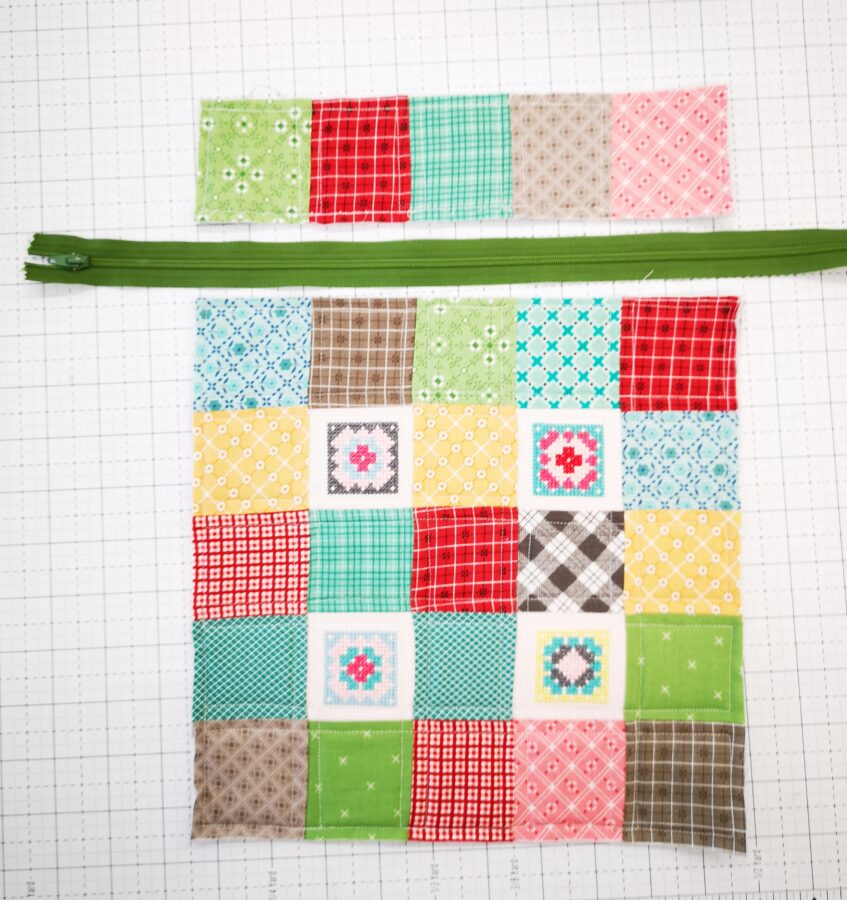
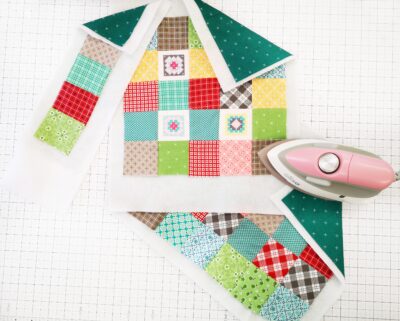
8. Layout the front (2) pieces as shown and the zipper in the direction you want the pull to go.
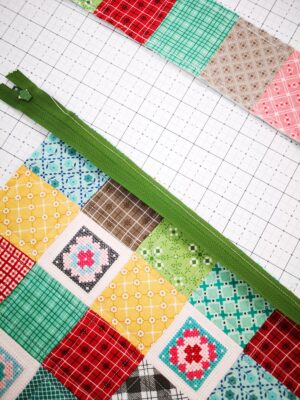
9. Pin and sew the zipper to the top of the main Granny Square Cross Stitch section as shown with RST. Fold the zipper back in place and with cool iron, press the seam. Be careful to not melt your zipper, if using a plastic zipper.
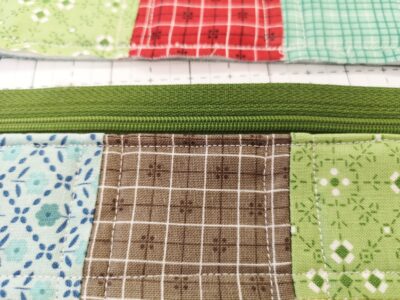
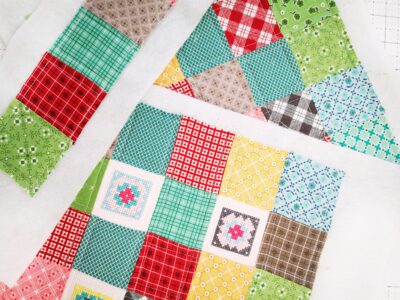
10. Sew a top stitch down to secure the zipper and hold the fabric nice and flat. Repeat this process with the top section of the zipper.
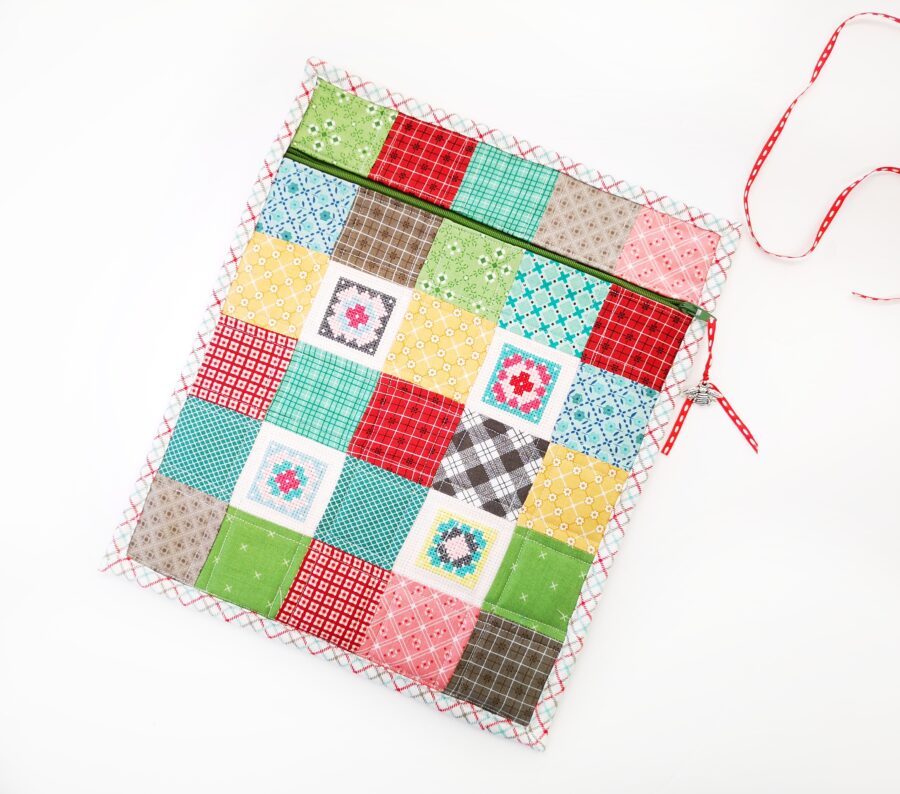
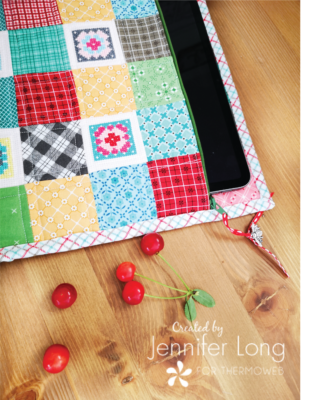
11. Layer the backing and the prepared front as shown. The backing section should be patchwork section face out, and lining facing lining. Pin and top stitch the front and back sections together. Bind the entire perimeter using your favorite binding method. I used a single fold 2 1/4″ binding method.
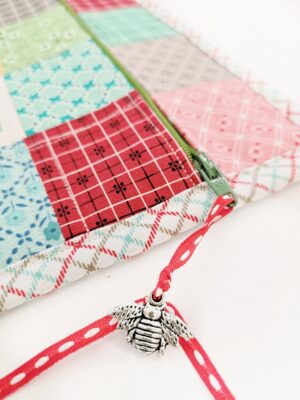
12. Add a ribbon or charm to the end of your zipper for a fun and whimsical element – as well as for ease of opening.
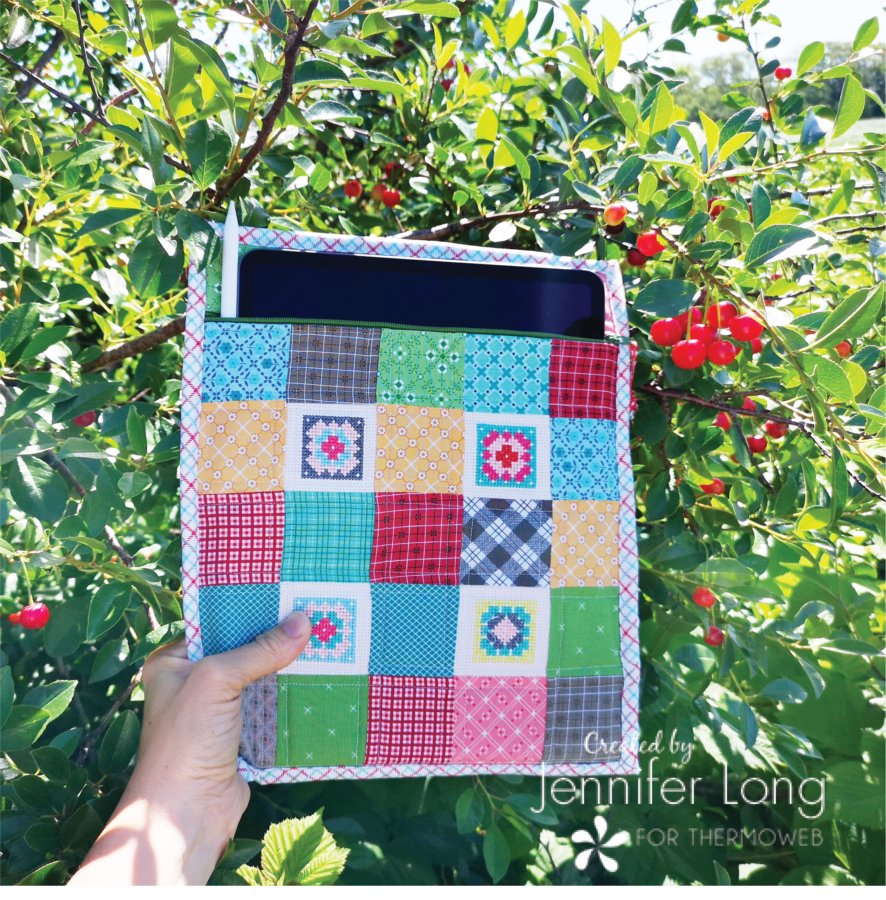
Your Ipad Case is now complete!
I am so excited with my new Ipad case! It makes me feel organized, creative and ready for my next project on the go! I would love it if you follow me @beesewinspired on Instagram for more Organize Along projects and tutorials and don’t forget to sign up for our free, weekly, newsletter HERE.
You can find me on Instagram @beesewinspired and on YouTube, where I share more creative content and project ideas! I hope you’ll try making one of these fun sewing machine covers. If you do, please tag me @beesewinspired so I can share your creativity with all of my amazing maker friends!