


It’s Games Week here on the blog! We’re focusing on games…indoor games, fun prizes, and things to use as rewards and ways to keep kids and us busy and active without phones and video games!
Join us all this week as you’ll find a little something for everyone!
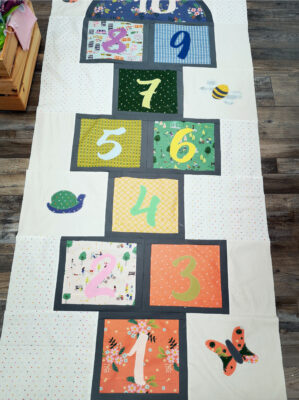
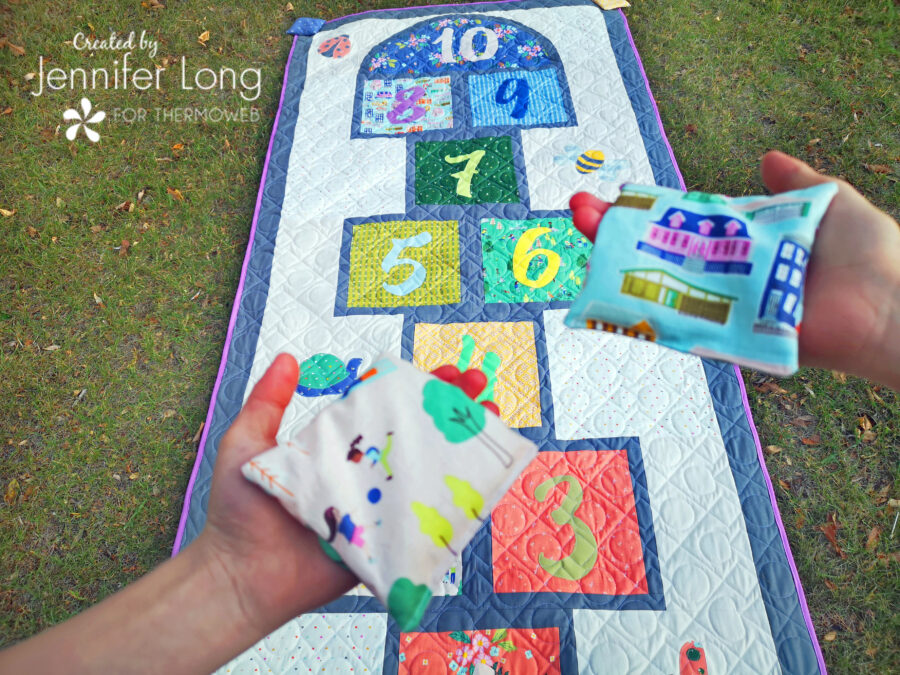
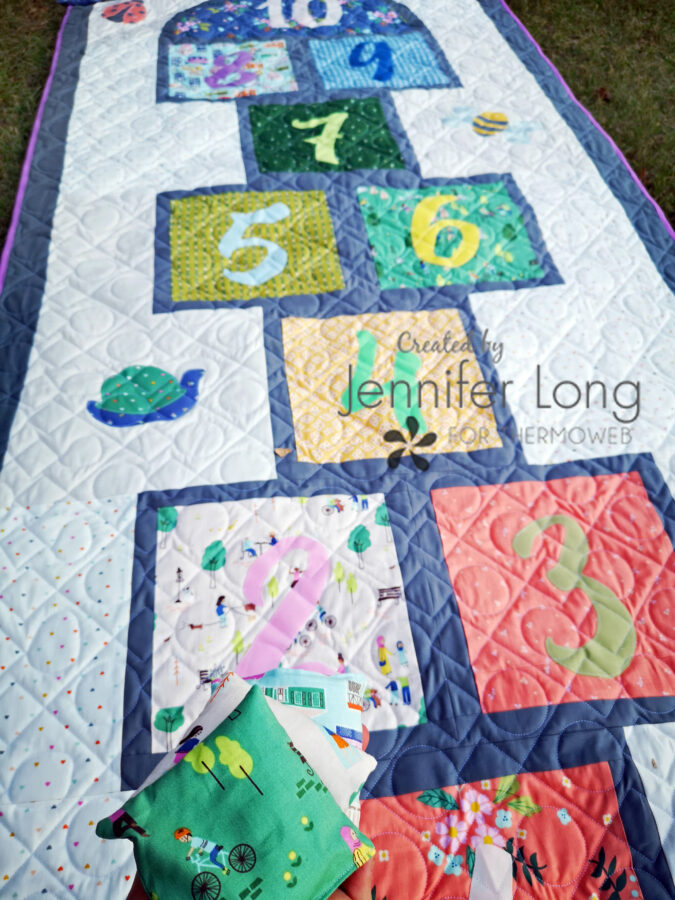
 Fabric Hopscotch Quilt Pattern
Hi friends, this is Jennifer Long from Bee Sew Inspired. I am so excited to be back to share a quick and playful quilting project with you! Winter is coming and we could all use a few tricks around the house for keeping the children active during these cooler months. How about sewing up a quick and functional quilt that doubles as an active game?
Presenting the Hopscotch Quilt Pattern!
Beginner Friendly! This quilt pattern is a quick sew! A few straight seams, an EASY, but beautifully curved seam, and lots of wonderful Fuse Applique make this quilt completely accomplishable in a weekend! (From start to finish).
What You Need:
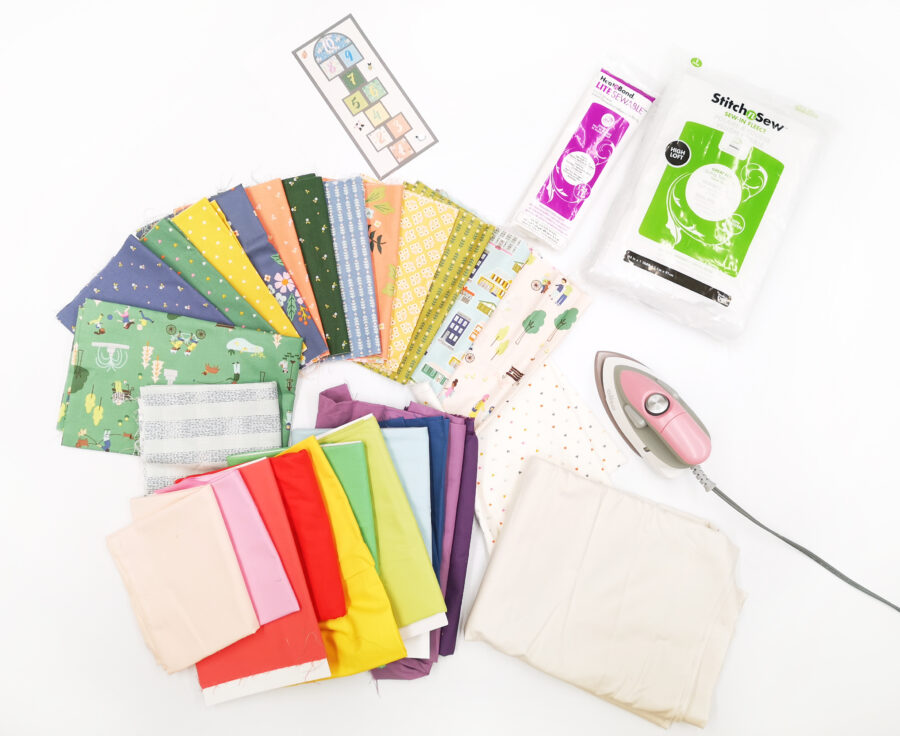
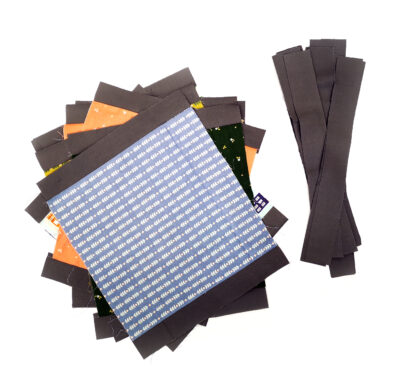
assorted scraps measuring at least 12” x 12”
(assorted rainbow colors as shown in the quilt image)
1 scrap measuring at least 12” x 24”
(curved top of the quilt, shown in blue)
Assorted Low Volume Print or solid scraps totaling 1/2 yard
for Number Applique OR 1/2 yard of 1 Print
Assorted colorful scraps for Insect Applique
Grey Print for Hopscotch Square Borders and Outer
Border: 1 3/8 yards
Light Quilt Background: 1 5/8 yards
Binding: 1/2 yard
Backing: 4 yards
48″ x 96″ piece of StitchnSew Sew in Fleece High Loft
Heat n Bond LITE Sewable Iron-On Adhesive for Applique
Hopscotch Quilt Pattern by Bee Sew Inspired
Number & Bug Templates:
Number & Bug SVG Cut Files: Download them HERE
Let’s Get Started:
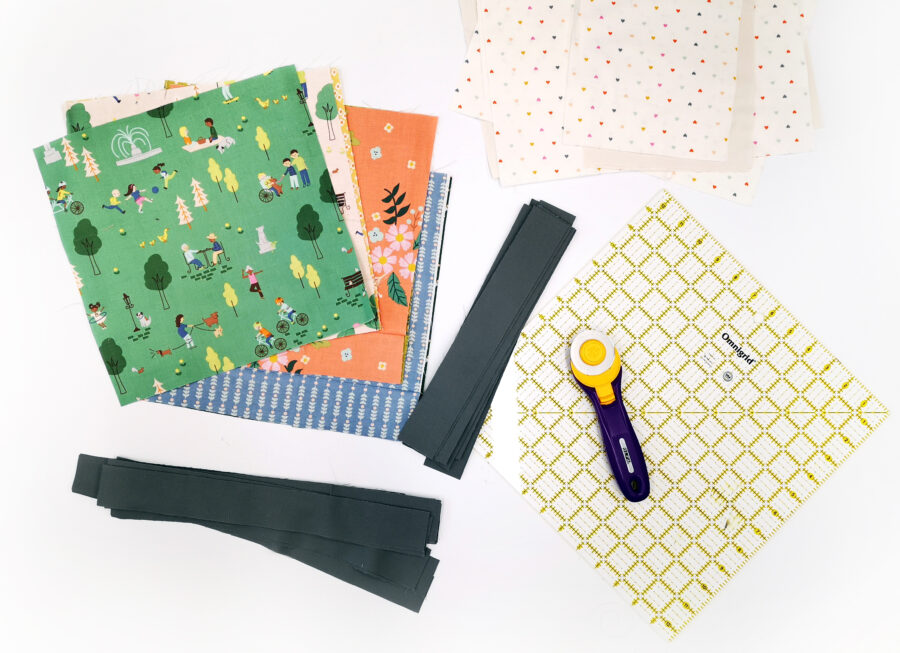
Start by cutting out the Hopscotch squares, background squares, and rectangles and border frames for each quilt block.
First, sew the shorter border strips on either side of the blocks and press seams to the border strips
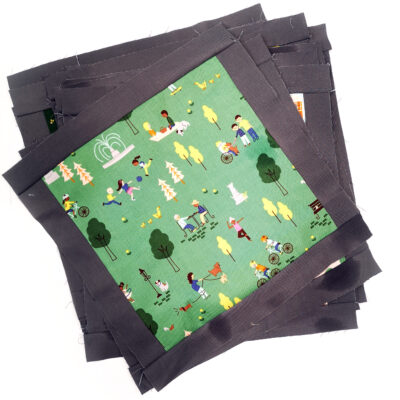
Next, sew the longer strips on either end of the block and press seams towards the border strip. Your blocks should measure 12 1/2″ x 12 1/2″ square.
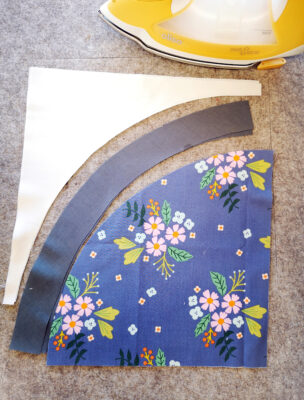
For the curved top piece. Cut the fabric from the template as show and layout and press flat.
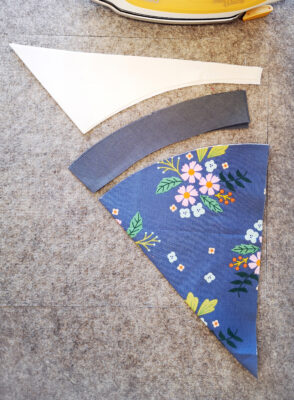
Fold each curved piece in half and press the center seam. This will help line up the curved-pieced block as you pin it in place.
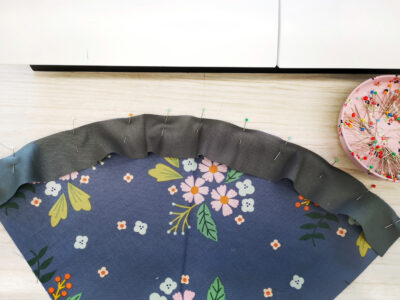
Next, pin at the center crease and both edges. Then fill in the curve with lots of pins. Sew your 1/4″ seam allowance and press seams. Repeat this process for the 2nd curved piece.

Using the FREE templates provided above, Follow the directions on the back of the Lite Sewable HeatnBond, trace the numbers and bug shapes on the paper side. Note, shapes are already reversed. Using a warm iron, press each drawn shape of HeatnBond onto the wrong side of the variety of colored fabrics for both the numbers and the bug shapes. Using a sharp pair of scissors, cut on the traced line on each shape.
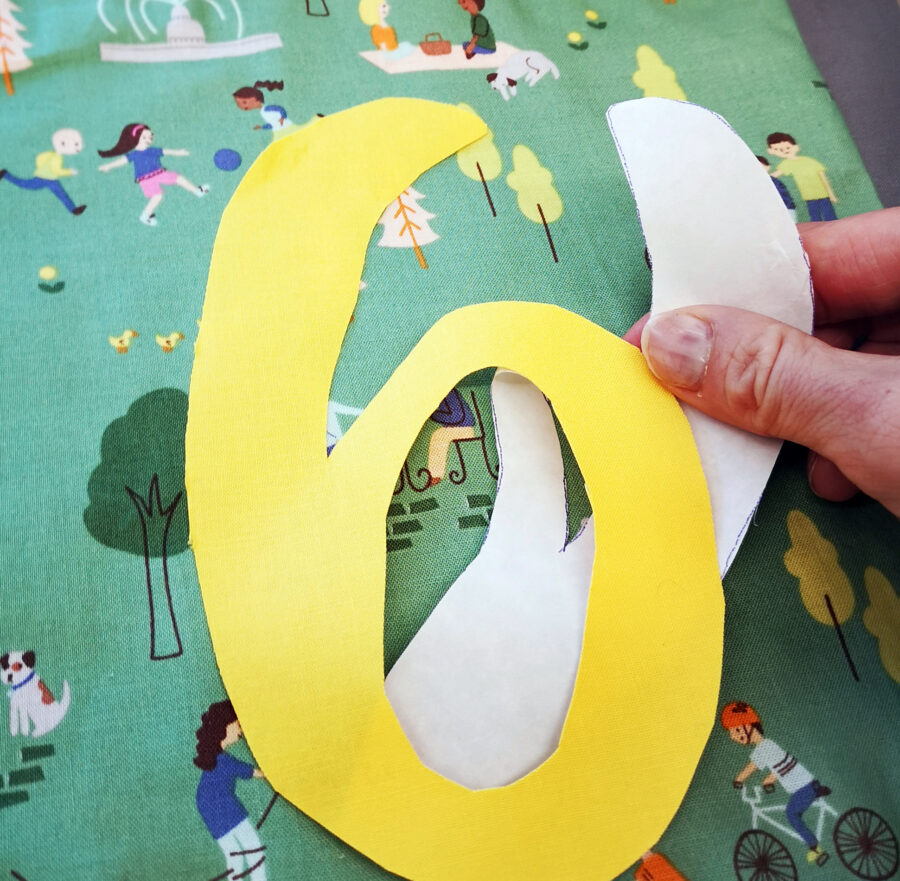
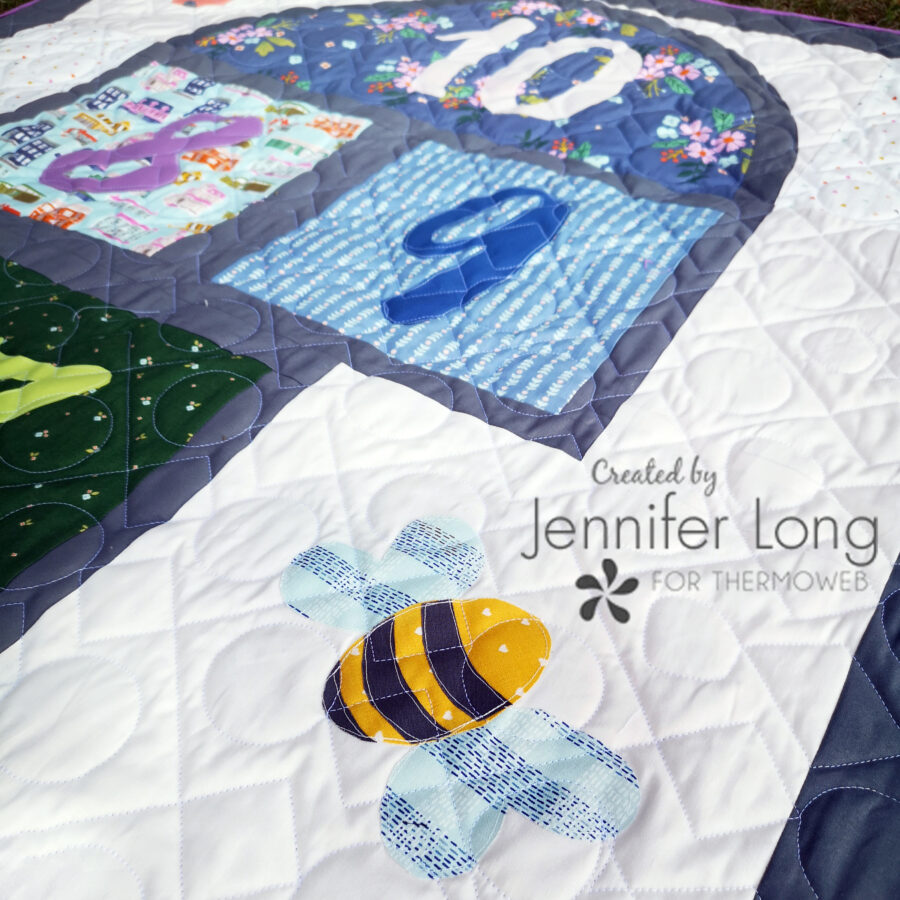
Peel off the paper backing and position on the prepared quilt blocks as shown.
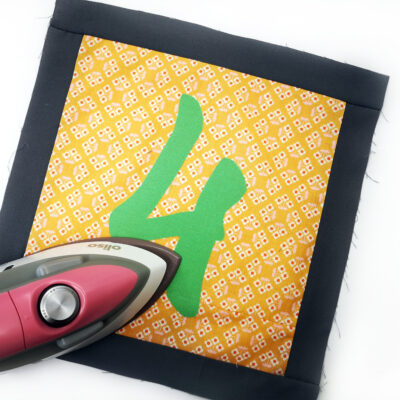
Again, using your warm iron, press the applique shape onto the quilt block to secure in place. Using a straight or zig-zag stitch and a coordinating thread color, sew around the entire perimeter of each shape.
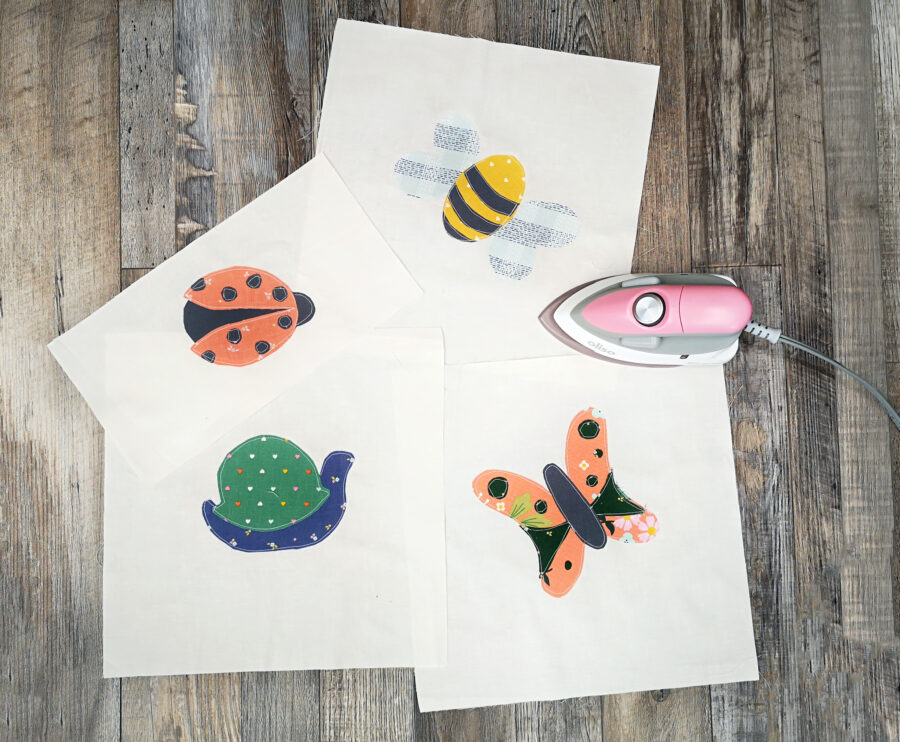
Repeat the raw-edge applique process for each of the Bugs and their parts.
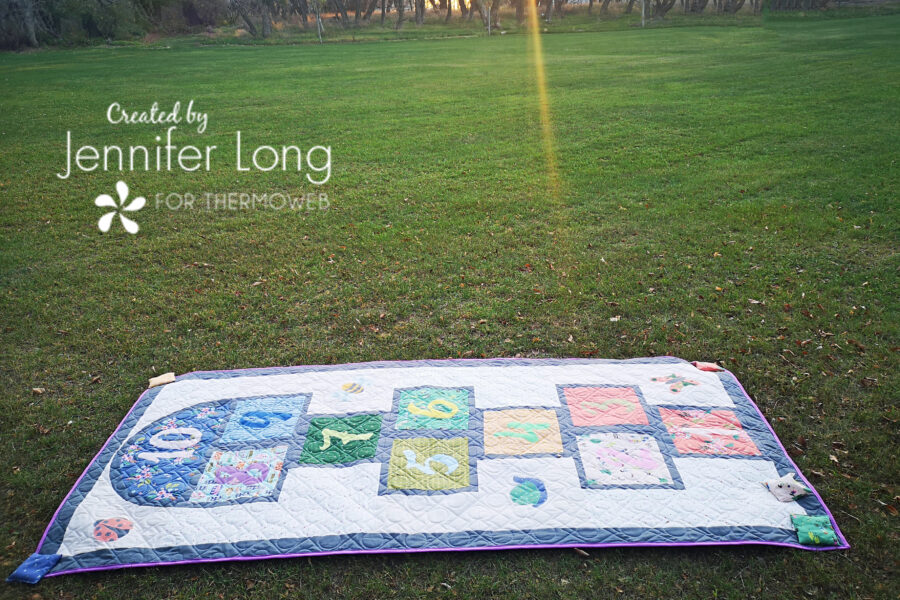
Layout all the prepared and appliqued quilt blocks and sew together as shown. Press seams downward.
Your quilt top is completed!
Layer with the 48″ x 96″ piece of StitchnSew Sew in Fleece High Loft and backing and quilt as desired. Bind the edges with your favorite binding method.
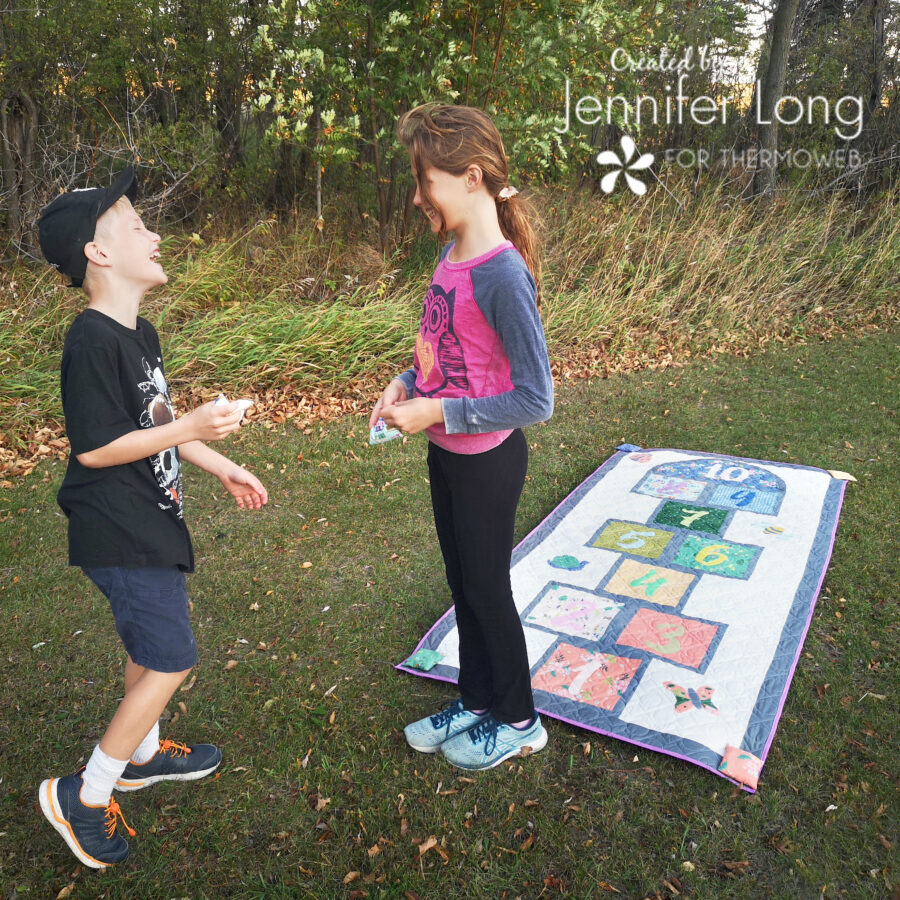
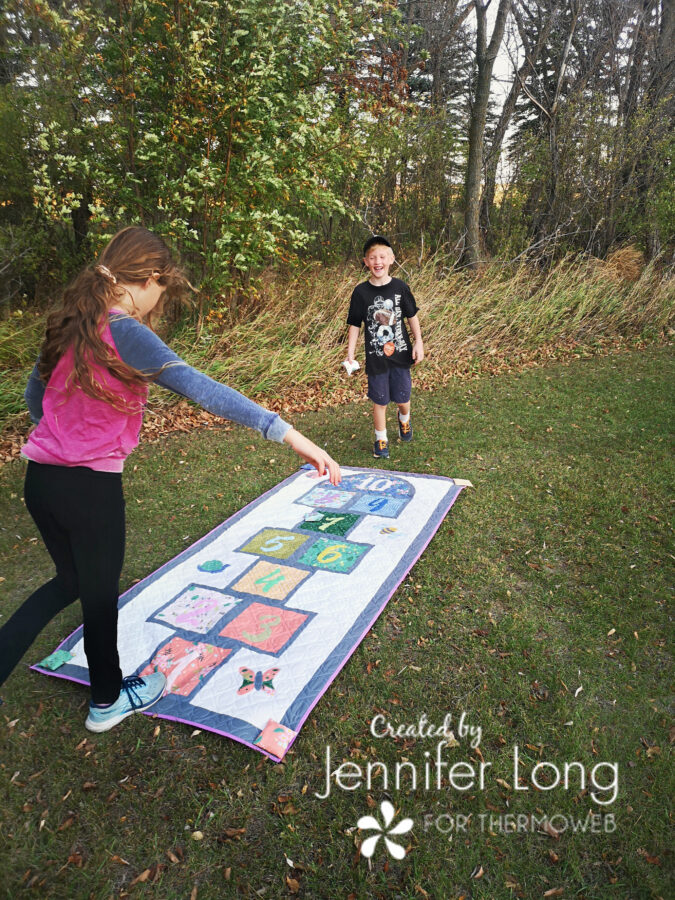
Thank you for joining me today on the ThermoWeb Blog! I can’t wait to see your Hopscotch Quilt! Please tag me @beesewinspired so I can share and tag you back! Have a fun and wonderful day today!
This post contains affiliate links. For more information, see our disclosure HERE.
D Skene
October 11, 2021 at 10:48 am (3 years ago)What a great project! I would never have thought about making this with fabric.