


 Hello sweet travelers, Daryl here from Patchouli Moon Studio, to show you how you can make this adorable and functional Train Case. You don’t need to ride aboard a train to use this bag either!
It can be used to hold all of your cosmetics or whatever else that you need to keep inside this bag during your travels, even if traveling is just local or within your own house.
Fabric Cosmetic Train Case with HeatnBond Interfacing
I used this video from JSDaily to make this DIY Train Case/Travel Cosmetic Pouch. However, as usual, I will give you my tips and suggestions on how I made my Train Case and give you a complete supply list here too. So please read through my written part below and watch the video before beginning so that you will have a better idea of what you are doing.
Even though I watched this video several times and paused it as I was making it, I did discover a couple of things that I did incorrectly and I am here to help clarify some things so that you don’t make those mistakes.
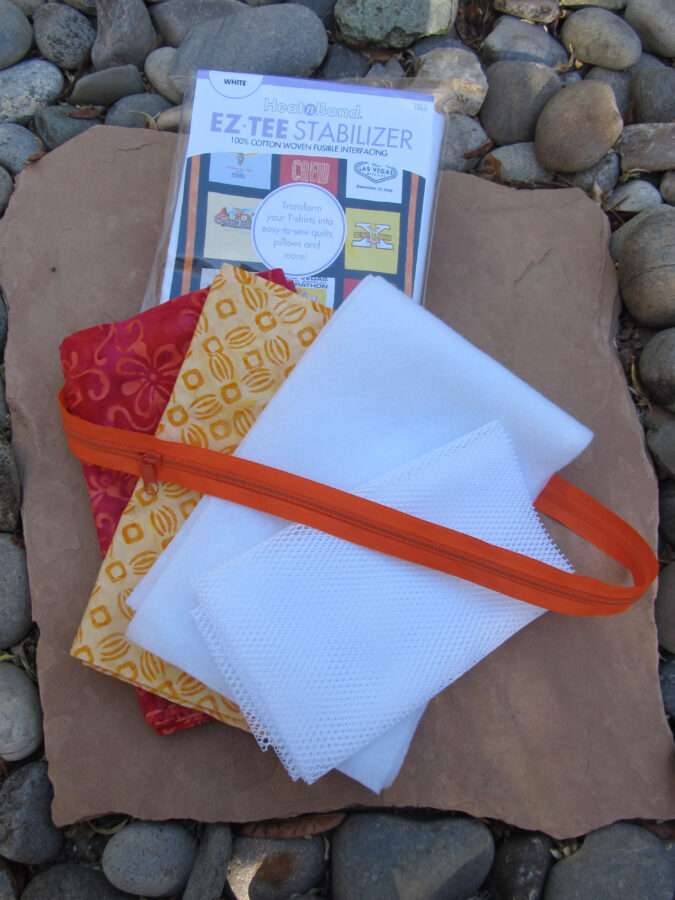
Supply List:
Note: cut Height measurement first which runs parallel to the selvage grain line.
Tip: Do not use directional fabric.
- (2) Exterior fabric pieces: 10 1/4″ W x 7 1/2″ H This is for the Top & Bottom pieces
- (1) Exterior fabric 9 1/2″ W x 4″ H for Handle
- (1) Exterior fabric 26 3/4″ W x 3 5/8″ H for Bottom Gusset. (Tip: if using a #5 zipper, cut height 3 3/4″ H instead)
- (1) Exterior fabric 26 3/4″ W x 2 3/8″ H for Top Gusset. (Tip: if using a #5 zipper cut height 2 1/2″ H instead)
- (1) Exterior fabric 5 1/2″ W x 5 1/2″ H for Exterior Spacer piece. (Tip: if using a #5 zipper, then cut 5 1/2″ W x 6″ H instead)
- (2) Lining fabric 10 1/4″ W x 7 1/2″ H for Top & Bottom pieces
- (1) Lining fabric 26 3/4″ W x 3 5/8″ H for Bottom Gusset. (Tip: if using a #5 zipper, cut cut 3 3/4″ H instead)
- (1) Lining fabric 26 3/4″ W x 2 3/8″ H for Top Gusset. (Tip: if using a #5 zipper cut height 2 1/2″ H instead)
- (1) Lining fabric 5 1/2″ W x 5 1/2″ H for Lining Spacer piece. (Tip: if using a #5 zipper, then cut 5 1/2″ W x 6″ H instead)
- (1) Lining fabric 9 1/8″ W x 5 1/2″ H for Slip Pocket
- (1) Lining fabric 10 1/4″ W x 6 3/8″ H for Elastic Pocket
- Lining Fabric cut on the bias for Bias Binding 2″ W x 63″ long (you will need to sew bias strips together to create the length)
- (1) Mesh material 10 1/4″ W x 5 1/2″ H for (optional) Mesh Pocket instead of elastic sections in the inside lid
- (1) 1/2″ W x 10 1/2″ long Fold Over Elastic for binding (optional) Mesh Pocket
- StitchnSew Craft Firm Non-Woven Sew-in Interfacing: 9″ x 1″ for inside of Handle
- (1) 26 3/4″ long Zipper (measurement is the exact length needed after cutting off any metal bits or cut using zippers by the yard). Use # 3 or #5 zipper and note where I changed the cutting height for some pieces when using #5 zipper as it is wider. You can use one or 2 Zipper pulls, your choice
- Elastic: 1/4″ W x 6 3/8″ long for Elastic Pocket
- Elastic: 3/8″ W x 14 1/4″ long for Divided Section in Lid for cosmetic brushes (or add optional Mesh Pocket instead)
- Elastic: 3/4″ W x 11 7/8″ long for holding Small Bottles inside; or leave off as I did
- (2) HeatnBond Fusible Fleece 9 1/2″ W x 6 3/4″ H for Top & Bottom
- (1) HeatnBond Fusible Fleece 26″ W x 2 3/4″ H for Bottom Gusset
- (1) HeatnBond Fusible Fleece 26″ W x 1 5/8″ H for Top Gusset
- (1) HeatnBond Fusible Fleece 4 3/4″ W x 4 3/4″ H for Exterior Spacer piece
- (1) Package (any size package) of HeatnBond EZ Tee Stabilizer Interfacing
- (2) Rivets (optional) for Handle
Let’s get started on the Cosmetic Train Case!
Press EZ Tee Interfacing to the wrong side of all the pieces, except do not interface the pockets.
-
-
- For a sturdier Train Case, I used EZ Tee Stabilizer interfacing on ALL of the fabric pieces (exterior and lining fabrics), except the Slip Pocket & the Elastic pocket.
- The Seam Allowance is 3/8” throughout, except, if using a #3 zipper, you will sew the zipper in place with a 1/4″ seam (3/8″ seam using a #5 zipper).
- If adding the optional Mesh Pocket, first bind the top using the Fold Over Elastic. (Or you could bind in fabric). Then place pocket 2″ down from the top of the Lining Top Lid piece and baste around in place.
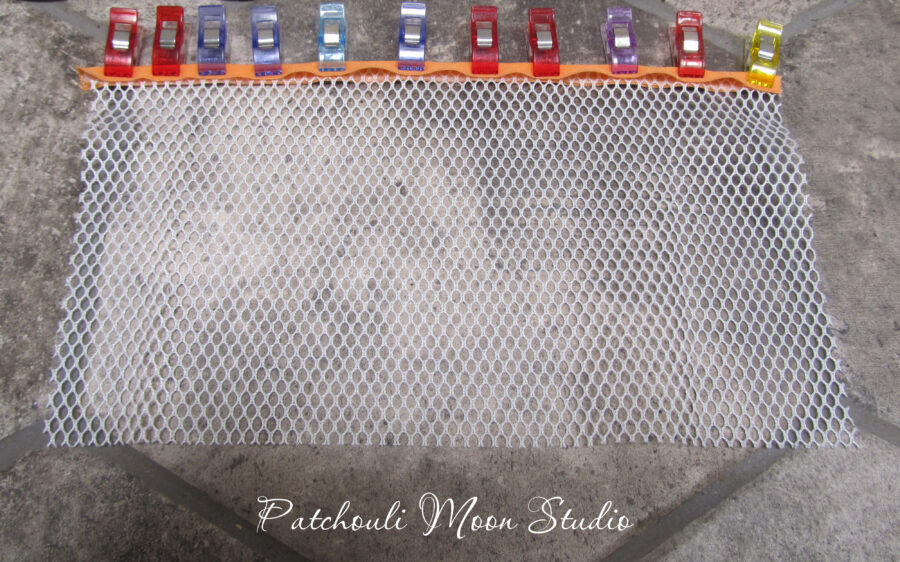 If adding the optional Mesh Pocket, clip the Fold Over Elastic in place using clips. It is easier than using pins.
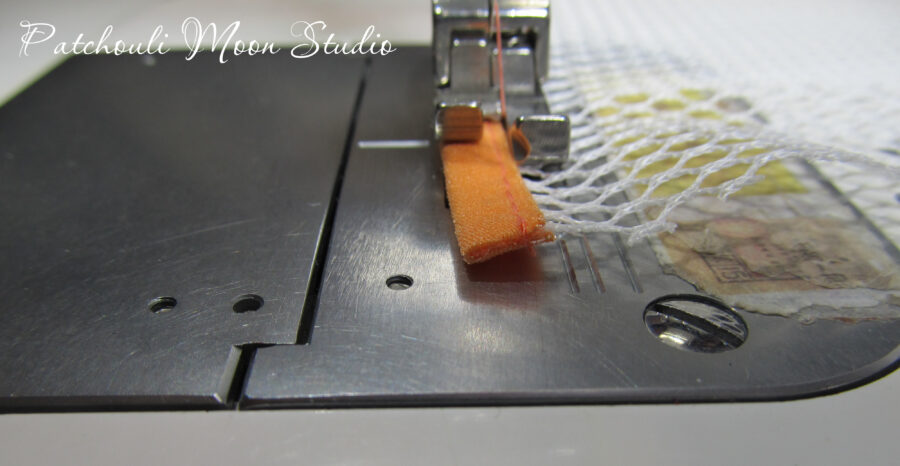 If you have a 1/8″ Compensating presser foot, it works really well for sewing the Fold Over Elastic in place.
 Place Mesh Pocket, if adding, 2″ down from the top, clip in place and baste in place.
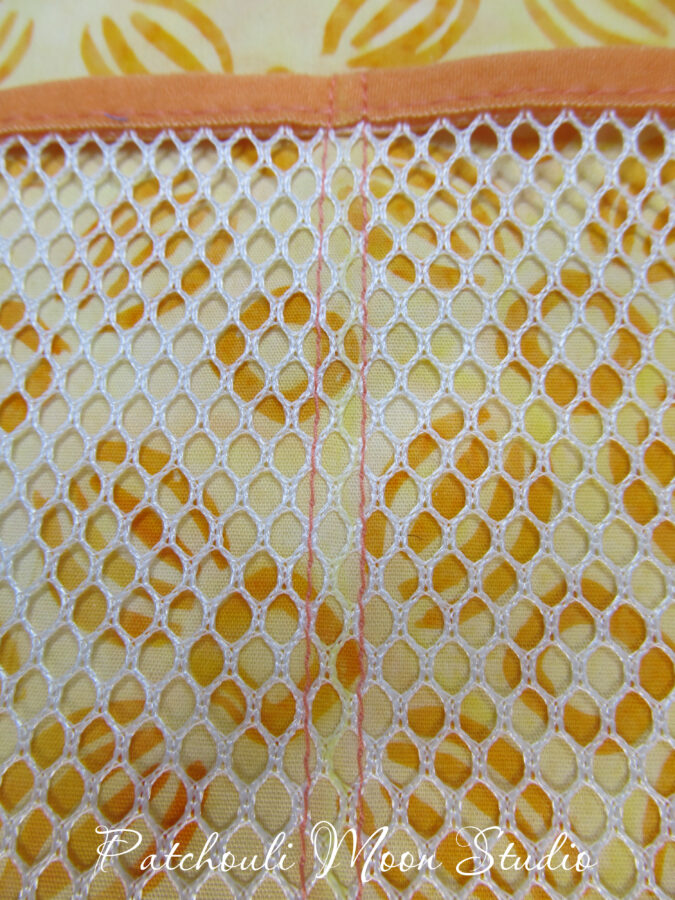 I divided the pocket in half by first drawing a line down the center and starting at the bottom, 1/8″ away from the line, stitching up the pocket, pivoting a couple of stitches, and stitching down the pocket 1/8″ away from the line.
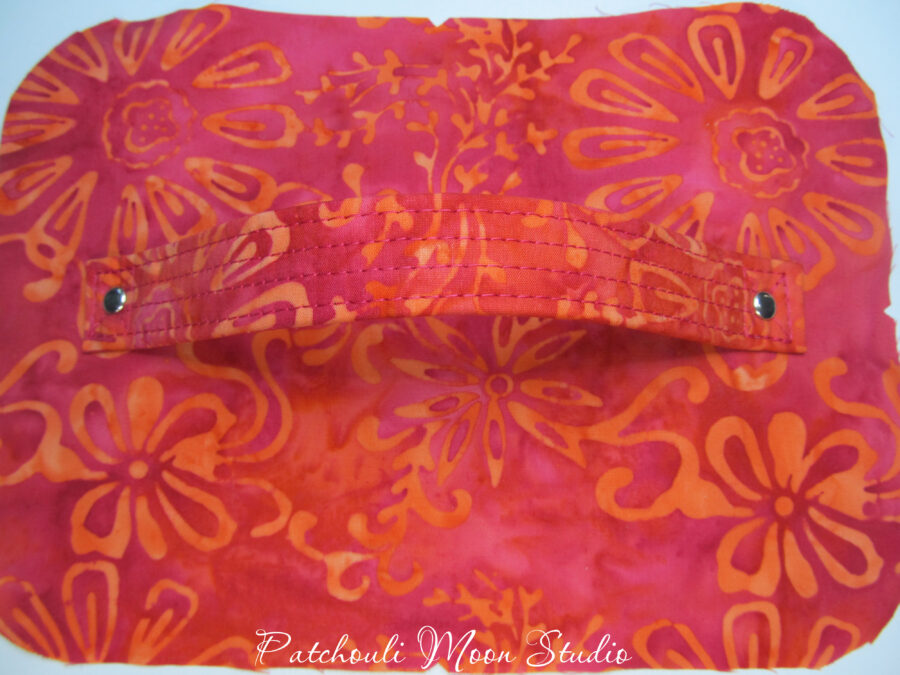 The handle is installed with optional rivets added for extra strength and decoration too.
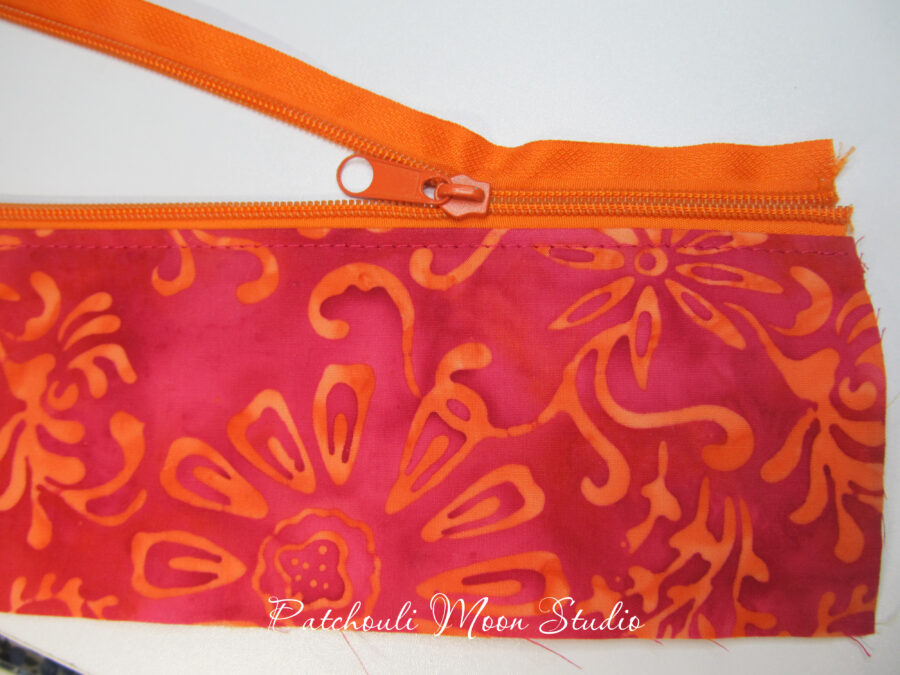 I did not remove the zipper pull when sewing on the zipper. First, I have trouble getting the zipper on evenly, so I left the pull on and just opened the zipper and made sure the end of the zipper was stitched across so the pull wouldn’t come off. I also used one pull. You could use 2 if you prefer as she does in the video, but I found it easier to sew and easier to unzip one pull.
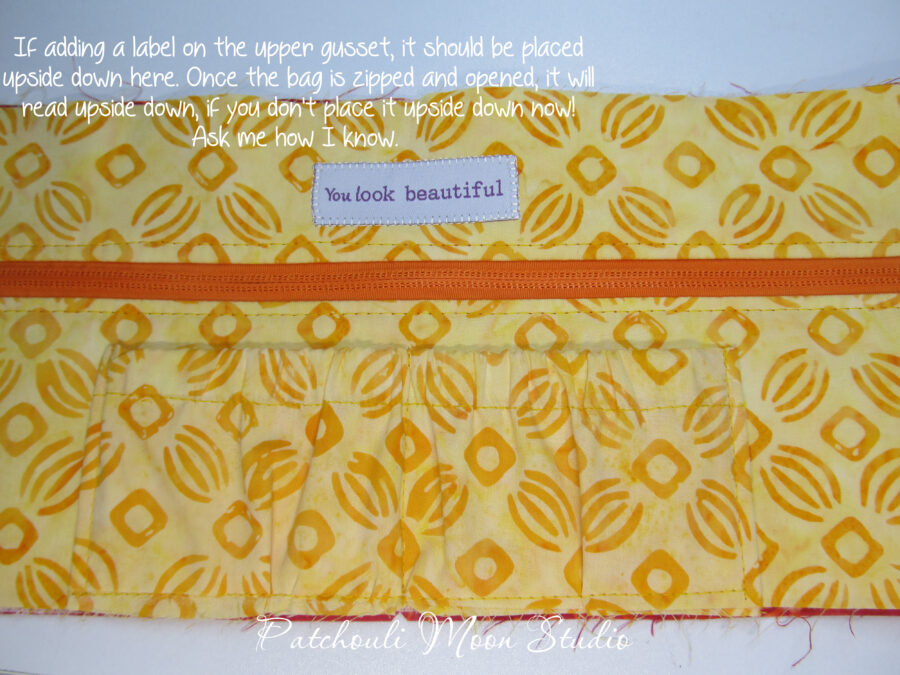 I didn’t even realize when I was sewing this that my label on the top would end up upside down after the bag was made and zipped! So be careful with label placement!
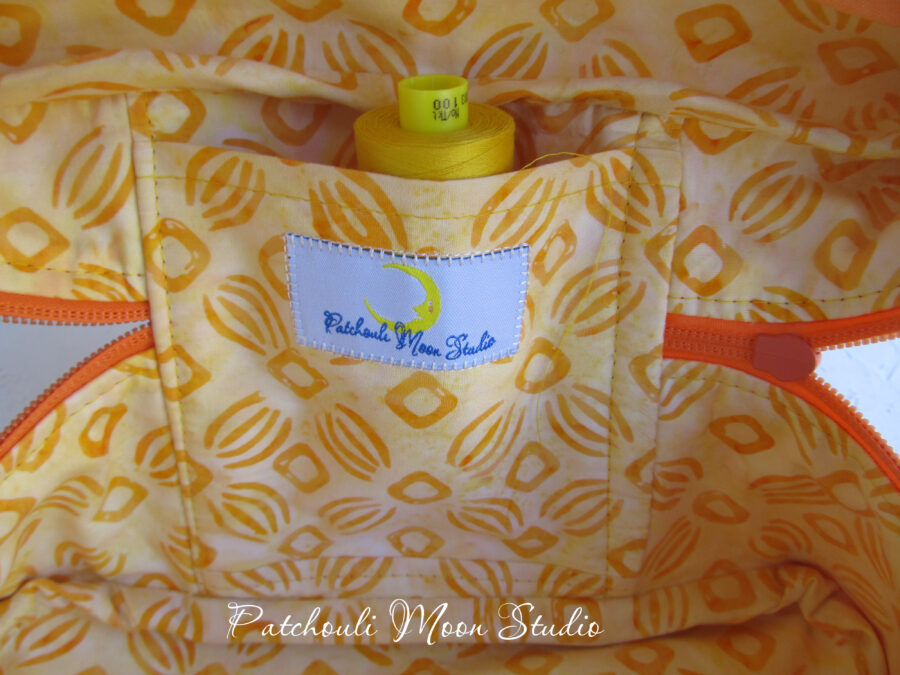 I added another label on the slip pocket inside and did this one correctly!
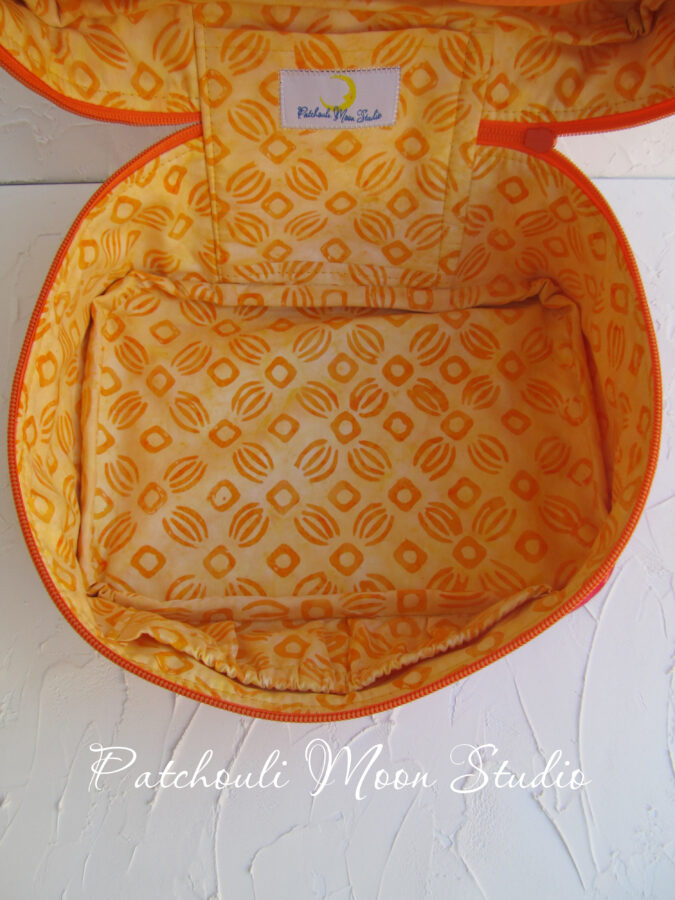 The inside has the slip pocket and the elastic pocket across from it. The bias binding all around the inside covers up the raw edges. I sewed the binding on by machine and then folded the binding over the raw edge and clipped it in place and sewed the remaining on by hand as I found it easier to sew by hand than by machine. So do what works best for you.
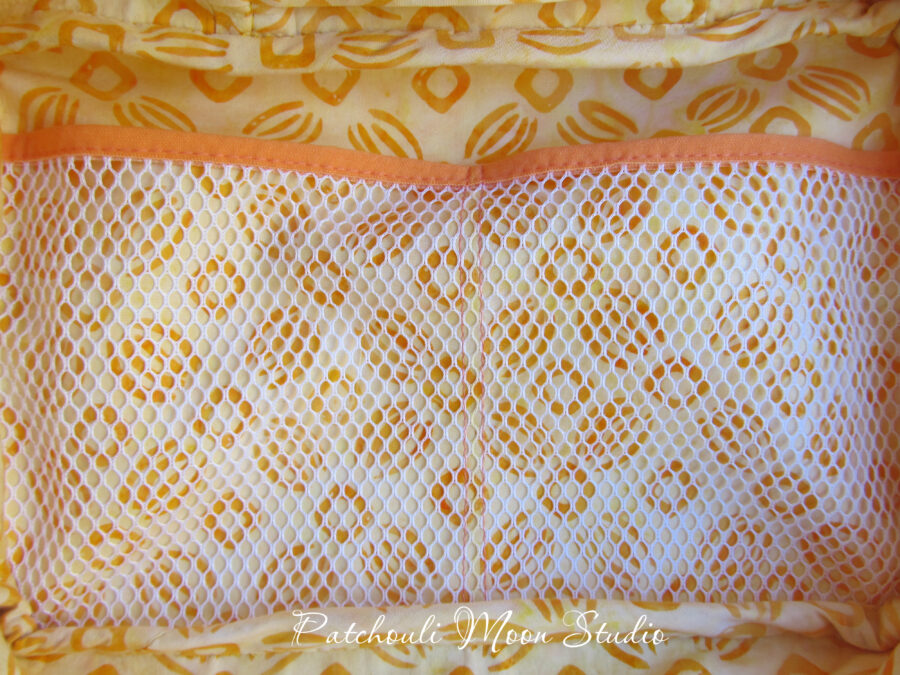
Divided Mesh Pocket. Tip: Be Careful when sewing the Mesh Pocket to the Upper Gusset, so that you orient the pocket correctly and don’t place it upside down! Remember that when the lid is closed and the bag is zipped that the mesh pocket opening should be at the Front of the Top Gusset and lid. Make a mark indicating the front and top of the inner lid and top gusset piece before sewing in place to the gusset. and double-check it is correct.
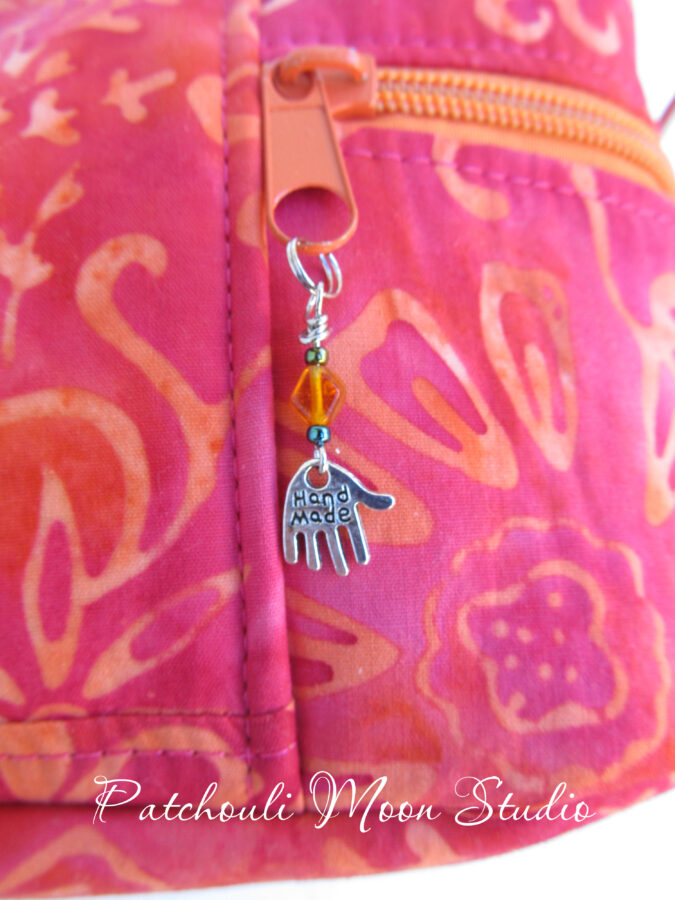 I added some bling by making a zipper pull.
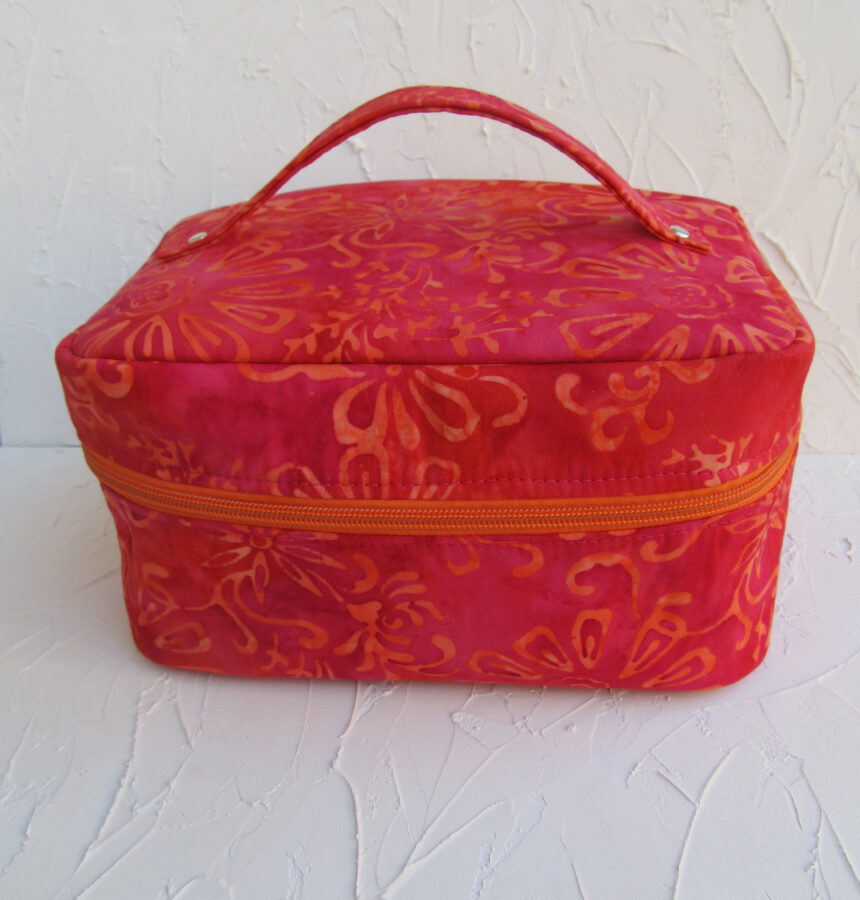 The finished Train Case.
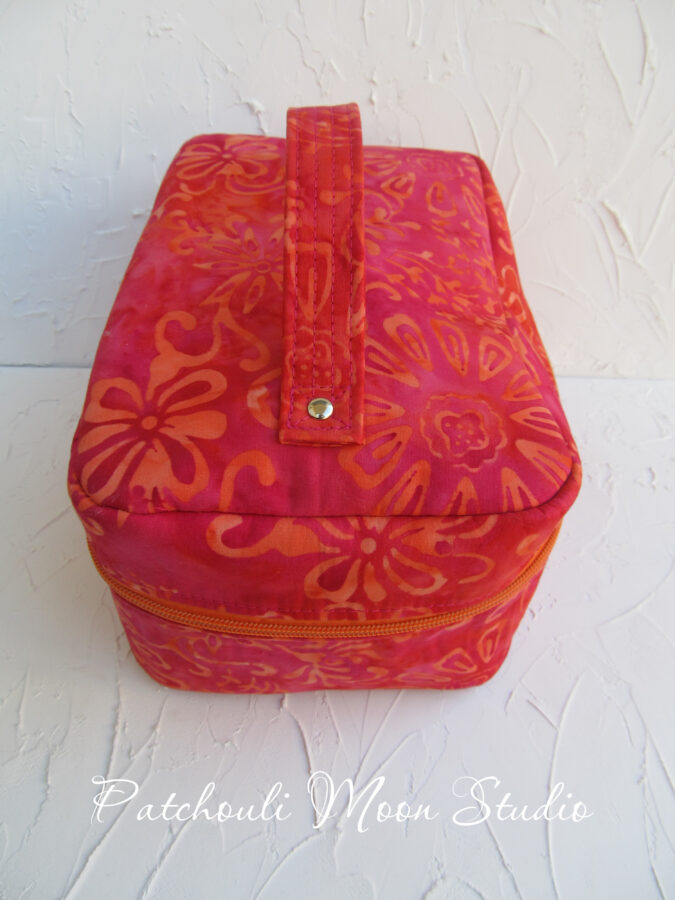 Side View.
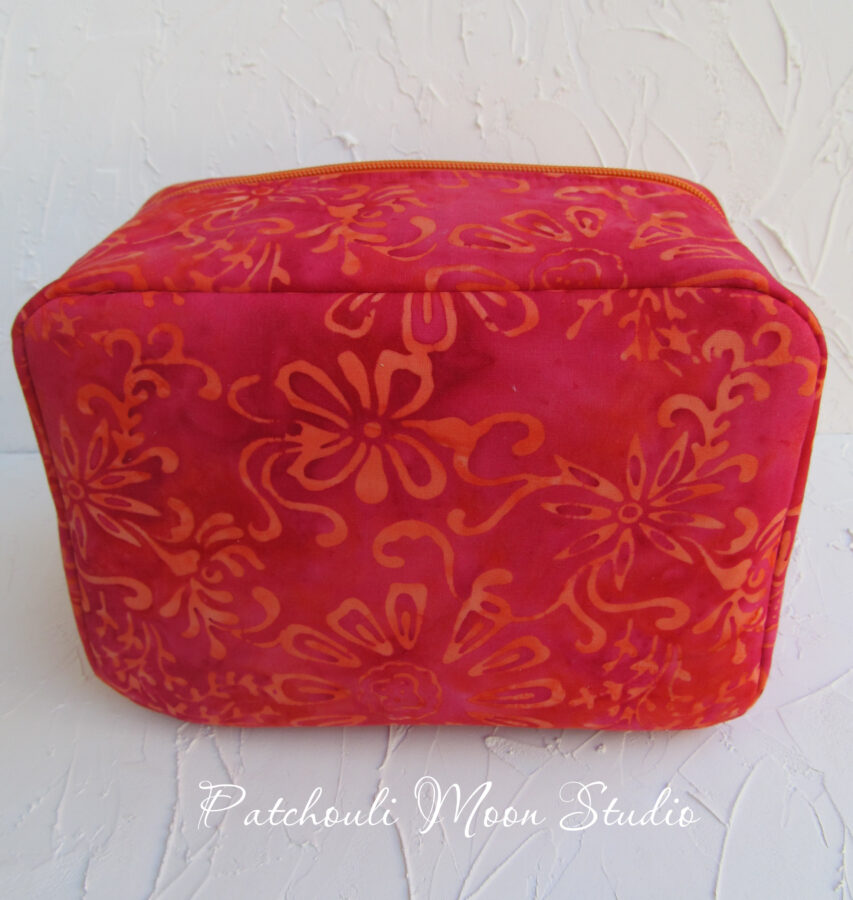 Bottom view.
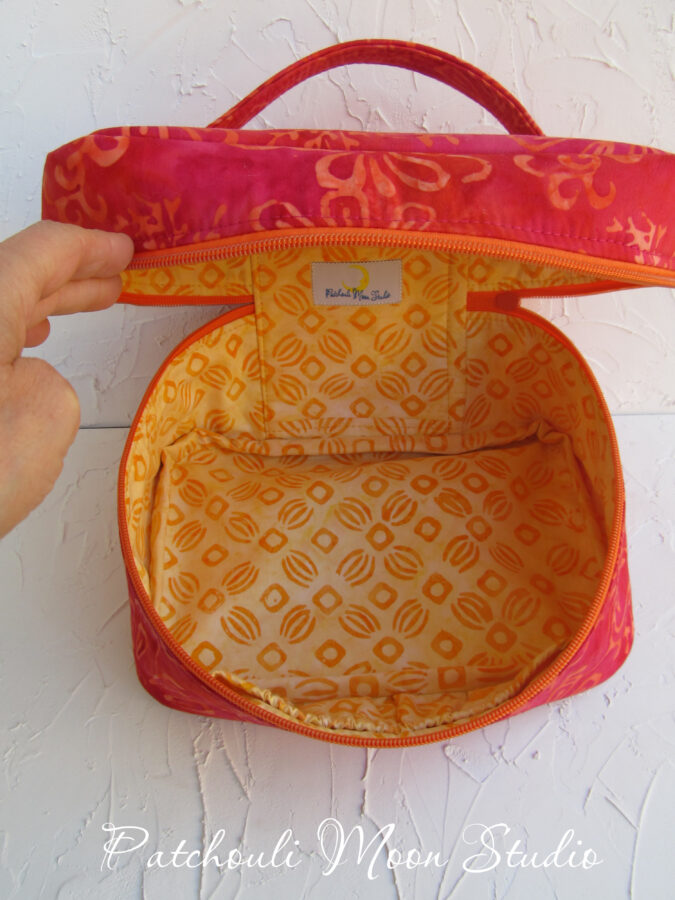 A peek inside.
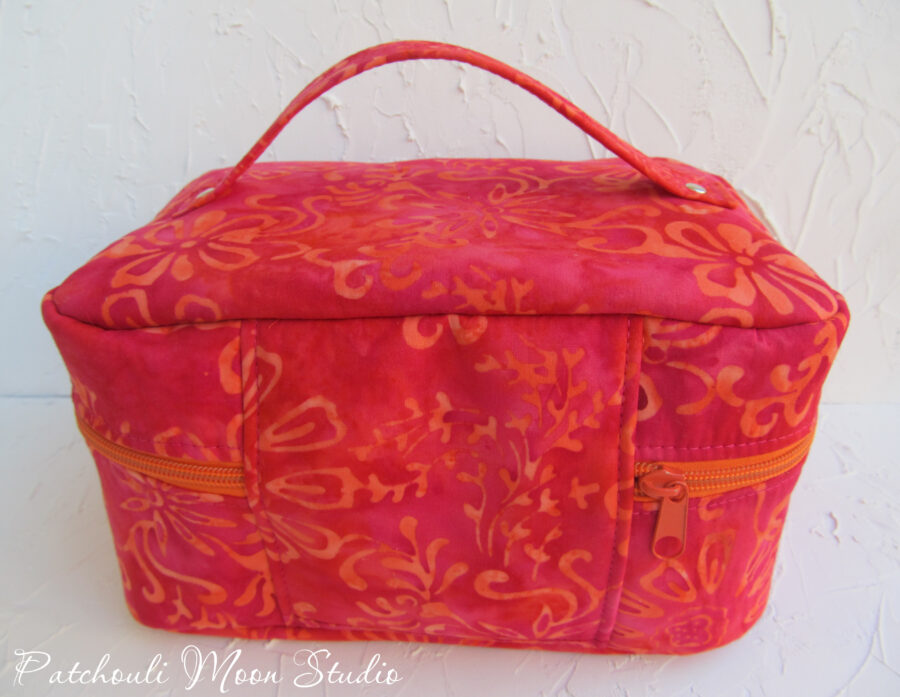 Back view. Here you can see the Spacer piece and the zipper pull.
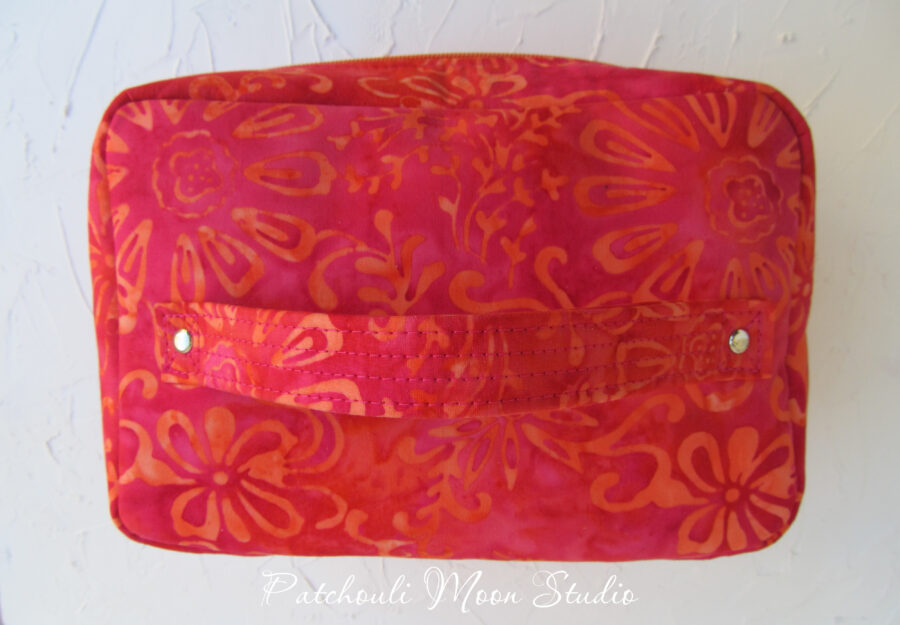 Top View.
Remember to read through this first and watch the video at least once too. She goes fast, so make sure you pause the video as you sew each step.
Happy Train Case Sewing! ~Daryl
-