We hope you’re enjoying our Newton’s Nook Collaboration!
We love all things Halloween, Fall and of course Christmas too! We invite you after visiting our website to stop by Newton’s Nook blog for some more amazing projects and ideas from their talented team!
You’ll find some incredibly stunning ideas we think you’re going to love. Plus you’ll find another chance to win there too!
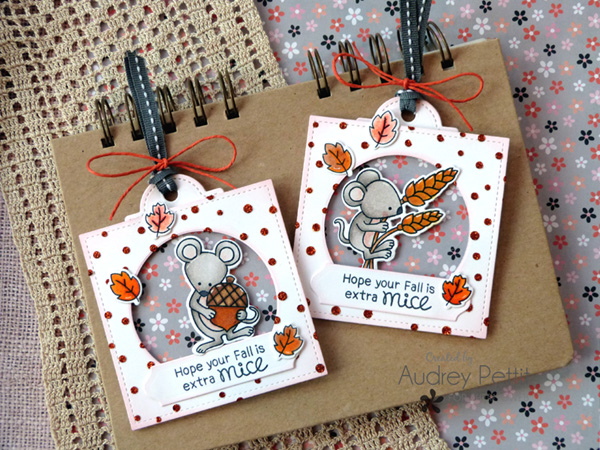
Extra Mice Tag Set
by Designer Audrey Pettit
Therm O Web Supplies:
Gina K Designs Premium Cardstock: Luxury White
Gina K Designs Wafer-Thin Die Sets: Stitched Square Large, Stitched Circle Small, Decorative Tag, Decorative Label
iCraft Pixie Spray
Gina K Designs Glitz Glitter Gel: Pumpkin Spice
iCraft Purple Tape
Deco Foil Stencil Pal
iCraft Mixed Media Adhesive
XL Memory Tape Runner
Gina K Designs Foam Adhesive Tape
Other Supplies:
Newton’s Nook Autumn Mice Stamp and Die Sets
Simple Stories Happy Haunting Patterned Paper
Ranger LetterIt Dancing Dots Stencil
Ink: Memento Tuxedo Black, Ranger Spun Sugar Distress
Trim: Stampin’Up, Maya Road
Copic Markers
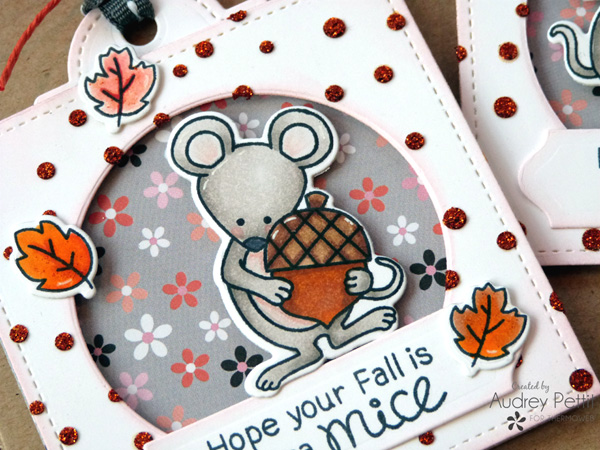
Hi friends! It’s Newton’s Nook week here on the Therm O Web blog! I am always so super excited to get my hands on some of Newton’s adorable critter stamps, especially ones created for my very favorite season of all, Fall. So today, I am sharing a fun gift wrapping project featuring the new Autumn Mice stamps along with one of our new limited edition Glitz Glitter Gels and lots of fabulous basics die set from our Gina K collection. Let’s get started!
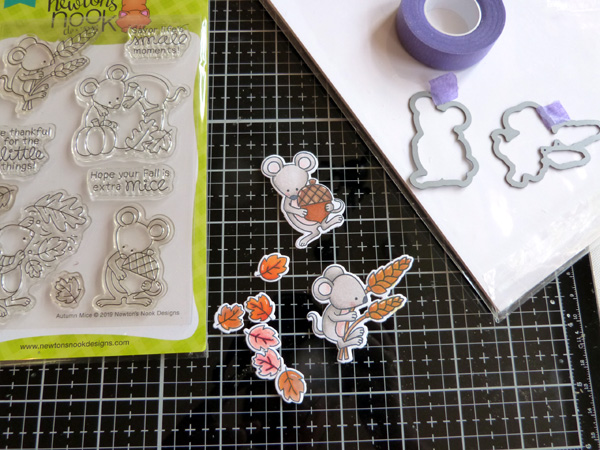
To begin, stamp the images in black ink onto Luxury White cardstock, and then color the images with Copic markers. Die-cut the images with the coordinating dies, using a bit of Purple Tape to perfectly hold the dies in place while die-cutting.
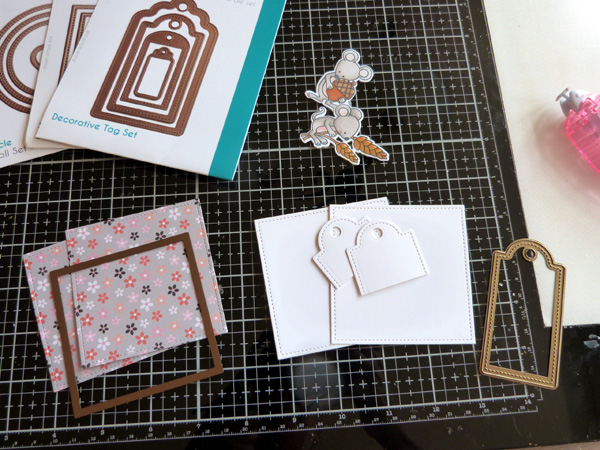
Die-cut the largest square shape from the Stitched Square Large set once from Luxury White cardstock and once from patterned paper. Repeat the process for every tag you wish to create. Partial die cut the top of the second-largest tag from the white cardstock. You only need the top portion of the tag, so I used just a scrap of cardstock to eliminate waste. But you can die cut the entire tag if you wish.
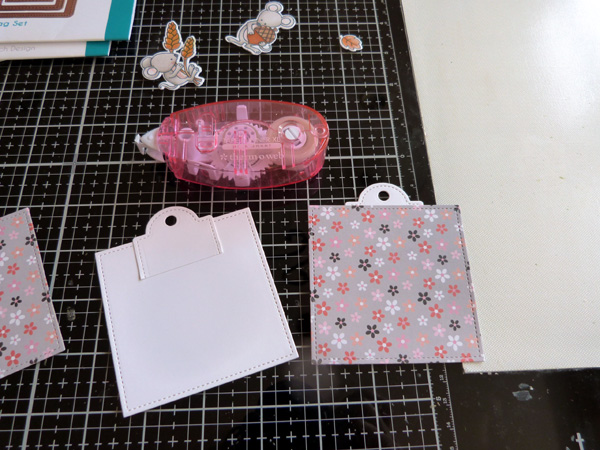
Adhere the tag topper to the top edge of the square die cut using XL Memory Tape runner. Then cover the square with the patterned paper piece.
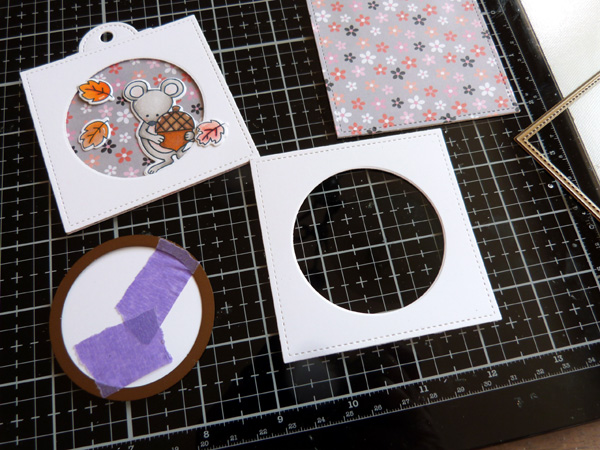
Die-cut the largest square one more time from Luxury White cardstock. Place a circle die (cutting side down) onto the center of the square, and hold it in place with Purple Tape before die-cutting. Remove the center circle, and set it aside for another project.
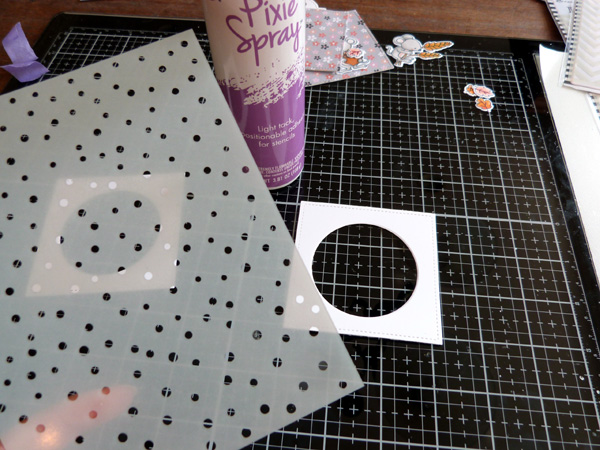
Spray the back of the stencil with Pixie Spray, and set it aside for a few moments to dry until the adhesive becomes tacky to the touch.
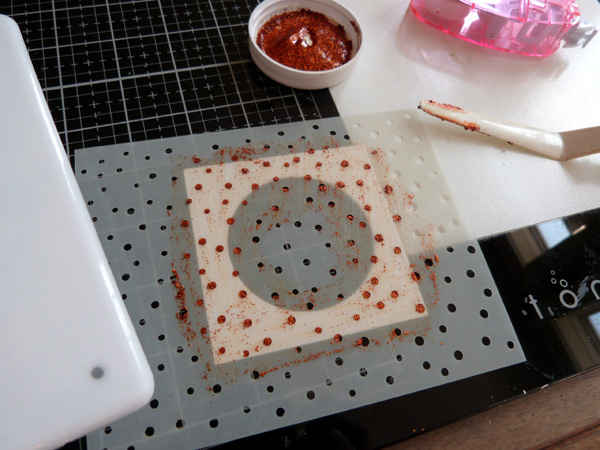
Place the stencil down on to the square frame. Apply Pumpkin Spice Glitz Glitter Gel to the stencil using a palette knife and the Stencil Pal tool. Scrap all excess get back into the container. Peel up the stencil, and wash it and the tools immediately in warm soapy water. Set the paper aside to dry.
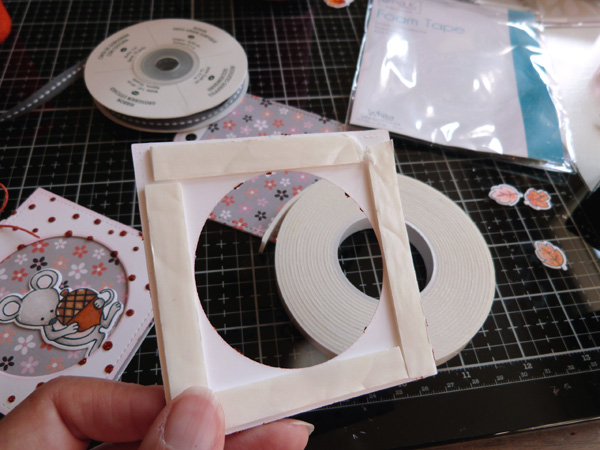
Ink the inside and outside edges of the frames, and the tag toppers, with Spun Sugar Distress Ink. Apply strips of foam adhesive tape to the back of the frames, and the back of the mice images. Adhere the frame to the tag base. Adhere the mice to the inside opening of the frame.
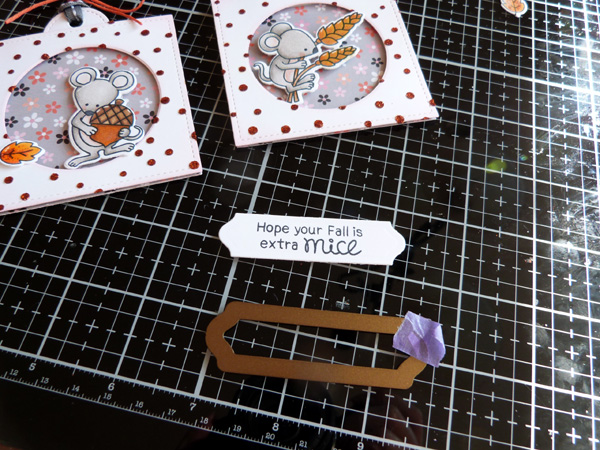
Stamp a sentiment in black ink onto Luxury White cardstock, and then die cut it using the label die.
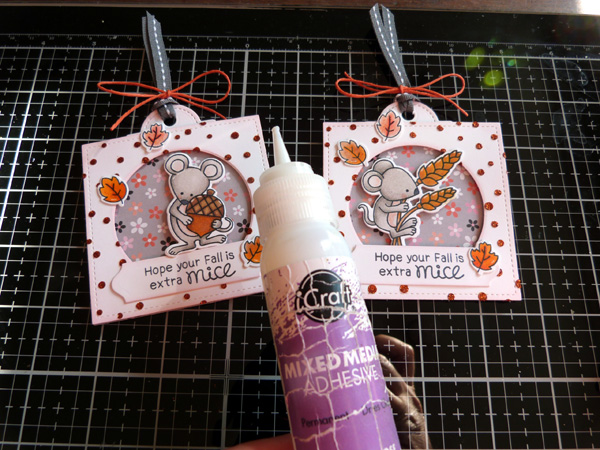
Adhere the greeting label to the bottom of the tags using Mixed Media Adhesive. Adhere the die-cut leaves around the edges using the same liquid adhesive.
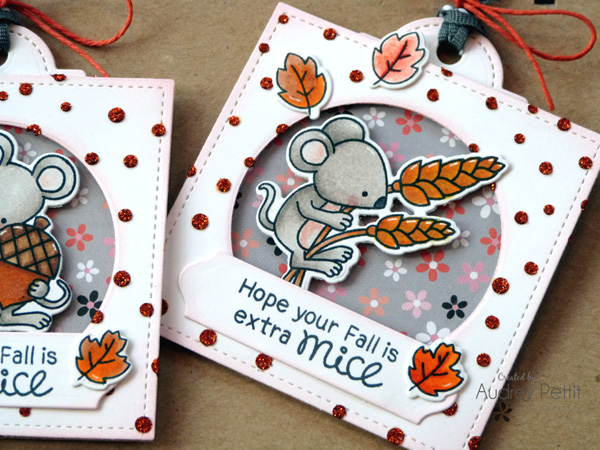
Tie ribbon and twine through the top of the tags.
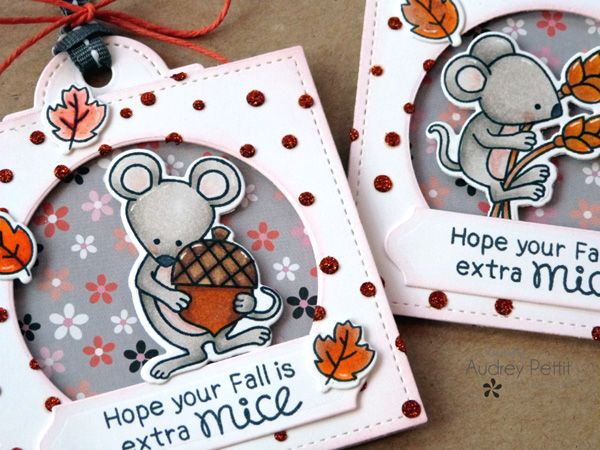
I hope your Fall is extra mice! Enjoy!
We know part of the fun of collaboration is having a giveaway! So this means we’re offering a chance for you to win a $25 Gift Certificate to shop with our friends at Newton’s Nook! You’ll be able to select from their brand new release including the must-have Gingham Stencil! Be sure to go see this! And once you’ve gotten yourself entered here…head over to the Newton’s Nook website AND blog to see their adorable projects and for another chance to win!


Andre M.
September 17, 2019 at 2:16 pm (6 years ago)I have a hate/hate relationship with mice, the only exception is when they grace a card. These are so sweet on these tags.
Mary Holshouser
September 17, 2019 at 2:31 pm (6 years ago)Love to invite cute mice into my home.
these are darling. Wonderful tags.
thanks for sharing
txmlhl(at)yahoo(dot)com
Meghan Kennihan
September 17, 2019 at 4:13 pm (6 years ago)Darling little tags! I love the little glitter dots! TOO CUTE!
Terrie D.
September 17, 2019 at 4:17 pm (6 years ago)These tags are so adorable! I love these sweet little mice and the fun sparkly polka dots. 🙂
Sue D
September 17, 2019 at 6:17 pm (6 years ago)These Fall mice are adorable!
Becca Yahrling
September 17, 2019 at 6:42 pm (6 years ago)Awww, these are just the sweetest! Those mice really are adorable.
Great tags! Love that pretty paper you used as well as the fun polka dots.
Jeanne Beam
September 17, 2019 at 7:58 pm (6 years ago)Absolutely love the mice! Great tags.
Thanks for sharing…
Denise Bryant
September 17, 2019 at 9:12 pm (6 years ago)Love these adorable tags! The mice are just darling! Love that stenciled Glitter Gel in the Pumpkin Spice color!
Andrea Shell
September 19, 2019 at 5:50 pm (6 years ago)These tags are so CUTE! Love the shape!
Jennifer Jackson
September 20, 2019 at 12:03 pm (6 years ago)These are so adorable! I love the colors you used! These little tags would be perfect for dressing up a fall gift!
-Jen {Newton’s Nook Designs}