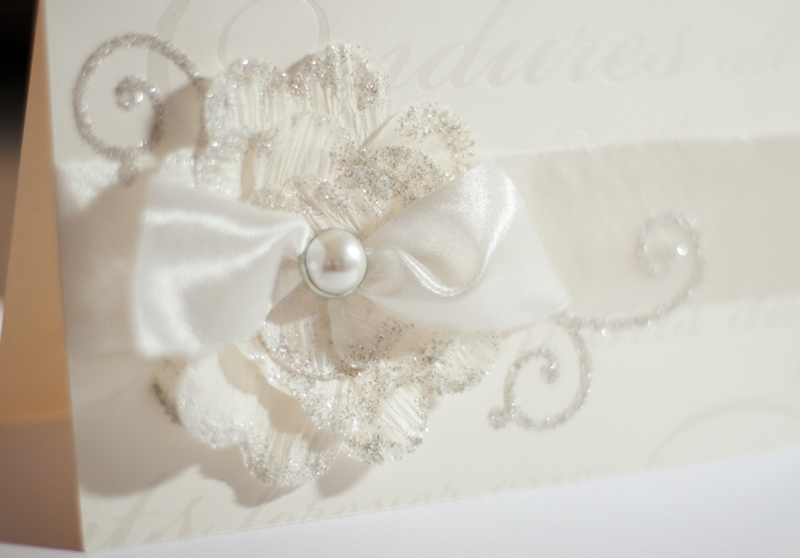
Hi there, Alice with you today to walk you through how I created an elegant flower embellishment for pennies. This would be perfect on a wedding or shower card, but the technique is easy to adapt to any theme or occasion.
It starts with a roll of crepe paper streamers which you can find at any craft or party store for less than $1. You can probably even find these at most grocery stores.
 Fold the streamer back and forth several times to die cut several petals at once. I used a heart shape die, but other shapes would work just as well… or try free hand cutting a petal shape.
In no time at all you will have a big pile of petals. For each flower, I used 9 larger shapes and 5 smaller ones.
Next comes the glitter. I splurged for this gorgeous vintage silver glass glitter… I think the glass makes such a difference… but it is still relatively inexpensive as a little goes a long way. Take care not to cut your fingers by pressing them into the glitter.
I wanted a thin sprinkling of glitter on each petal so I swiped my SuperStik glue stick along the edge of each which creates a nice thin coating.
For this project I just wanted a thin coat of glitter, but you could use a liquid glue if you wanted a more distinct line of glitter on the edge.
 But I really preferred the more subtle effect I got with my SuperStik… I hope you can get a feeling for how it created just a shimmer of sparkle on the edge.
 and before you know it, you’ll have all your petals ready to go.
 Now they are ready to be assembled. Start with a large iCraft dot (by the way, all iCraft adhesives are on sale till the end of the month!)
and place 5 large petals on top.
 and then place another large iCraft dot on top of the petals
 and then add 4 large petals on top of that, pinching them a bit so they sit closer to the center of the flower (don’t worry if the center looks a bit messy at this point, we’ll cover it up later).
 and then add a smaller iCraft dot on top of this layer and finish it off with 5 of the smaller sized petals.
 at this point you have created a flower sticker that is ready to go on your project – simply peel off the backing sheet of the iCraft dot you used as the base and you’re all set.
 I used mine on a wedding card, but felt like it was still missing something. I die cut a few flourishes out of a sheet of iCraft adhesive
 peeled off the backing sheet and adhered it to my card and then peeled off the protective sheet on the front and added a bit more glitter… I like that better, don’t you?
 I hope you enjoyed this tutorial and have fun trying this technique yourself.
Till next time…


sandy :)
July 26, 2012 at 9:06 pm (13 years ago)This is really delicate, love the glitter and so elegant. perfect for the wedding card. Sandy 🙂
Daniela
August 3, 2012 at 8:50 pm (13 years ago)Wow, beautiful!