By Heather Tyler
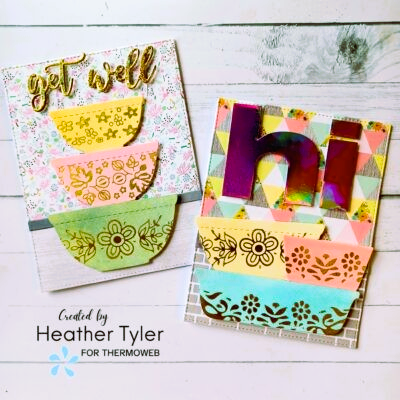
Hello! I hope you all are having a wonderful crafty week! Today, I am showing you a fun and easy way to add beautiful foils to your cards, using both Deco Hot Foil and Deco Foil Toner Sheets! For both of these cards I used Sassy Club’s “Vintage Dish Die Set“ and the coordinating “Vintage Borders Gold Foil Plate“! The plate also comes with coordinating “Vintage Border Dies” too! Let’s get started!
For both of these cards the process is going to be the same! First, I picked out the background and then coordinated the colors of the distress oxides to use on the vintage bowls. Before I start working on my background, I set up my Hot Foil Machine and turned it on. I went ahead and placed the hot foil plate with design facing up while my machine is warming up. Some plates need to be warmed up a lot longer than your machine suggests, getting better results!
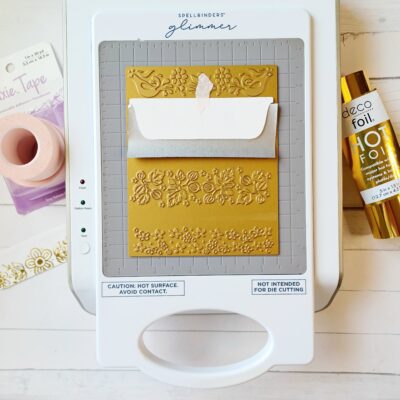
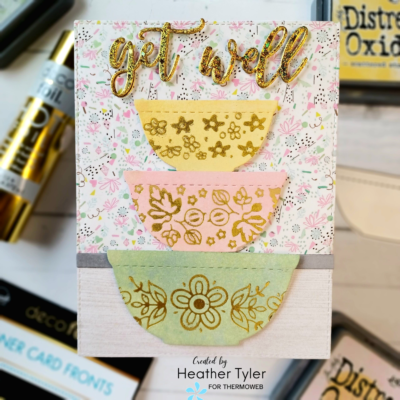
Once my machine is nice and warm, I took a strip of Deco Hot Foil in gold (shiny side always facing down) and placed the front of the bowl on the dull side of the foil. Next, I carefully (the plate will be hot) placed the foil and bowl onto the design strip on the plate. I used ICraft Pixie tape to secure the foil and the bowl to the plate. According to the directions of your hot foil machine, carefully place the shim and coverings over your design plate and press the timer. Once the timer stops blinking, I removed the platform the design plate is on and ran it through my die cutting machine. Depending on your set up you may need to run it through the die cutting machine more than once! I carefully remove the coverings and the foil and bowl. I peeled off the foil and revealed a gold strip of the design imbedded onto the bowl (like the bowl on the left in the above picture).
Next, I used Distress Oxides and blend the color over the bowl. You will notice the foil acts as a resist and after inking, I just wipe off the excess ink from the foil! I continue the process for each bowl!
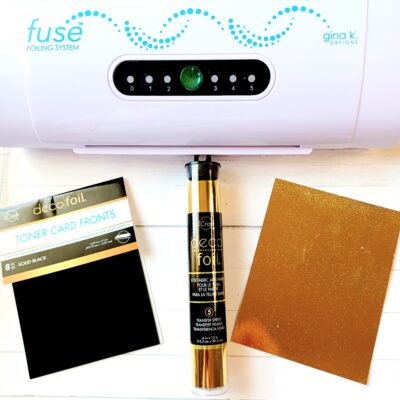
Next, I need to create my sentiments! I wanted both of my sentiments in foil. I picked out Deco Foil Transfer Sheets in Enchanted Rose and Gina K Fancy Foils in Glimmering Gold. I used Deco Foil Black Toner Card Fronts and measure the foil slightly over the toner card front and ran it through The Fuse Foiling System.
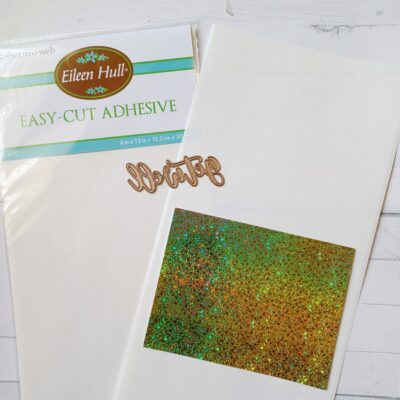
Before I cut the sentiments, I want to put Eileen Hull Easy-cut Adhesive on the back of the foil sheet. After die cutting this allows the sentiments to have a sticky back side, which then I can easily stack the sentiments for dimension!
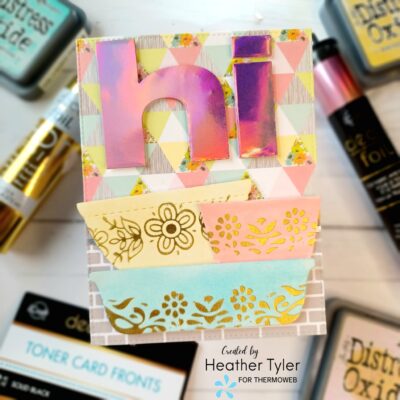
Now, it’s time to assemble the cards! I used ICraft 3D Foam Squares to adhere the bowls to my background panel. I also use ICraft Ultra Bond Liquid Adhesive to securely adhere the background panel to the card base. This glue is amazing especially if you are going to be mailing your cards!
Yay! We now have created two easy, but fancy cards, just by adding foil! I hope I inspired you to add foil to your next card! It’s easy and opens the door to a whole new world of creativity! I hope you have an amazing crafty weekend!
Therm O Web Products:
- Deco Foil Hot Roll 5in x 15ft
- Eileen Hull Easy Cut Adhesive Sheets Clear
- Gina K Fancy Transfer Foil Shimmering Gold
- ICraft 3D Foam Squares 320 white Easy Dispense Box
- ICraft Deco Foil Toner Card Fronts, Black
- ICraft Deco Foil Transfer Sheets, Enchanted Rose
- ICraft UltraBond Permanant Liquid Adhesive, Dries Clear
- ICraft Removable Pixie Tape