


Hello there! Alice here today to share a bit about one of my favorite all-around adhesives for paper crafting. You spend time creating the perfect handmade gift or card and the last thing you need is an adhesive that is difficult to use, or worse, one that doesn’t stick the way it’s supposed to. iCraft® Easy-Tear Adhesives are really easy to use as you can tear off just what you need, yet they are super strong. The 1/8″ tape is the perfect size for tiny areas, such as this mini barn home decor piece and coordinating card.
One of the things that makes Easy-Tear Tape a good choice for more involved paper crafting is that you can apply the adhesive exactly where you need it, but because there is a protective liner over the top of the adhesive, you can still manipulate the project without having parts sticking to each other before you are ready. Once you are happy that pieces are in the right spot, simply remove the liner to expose the sticky side and adhere.
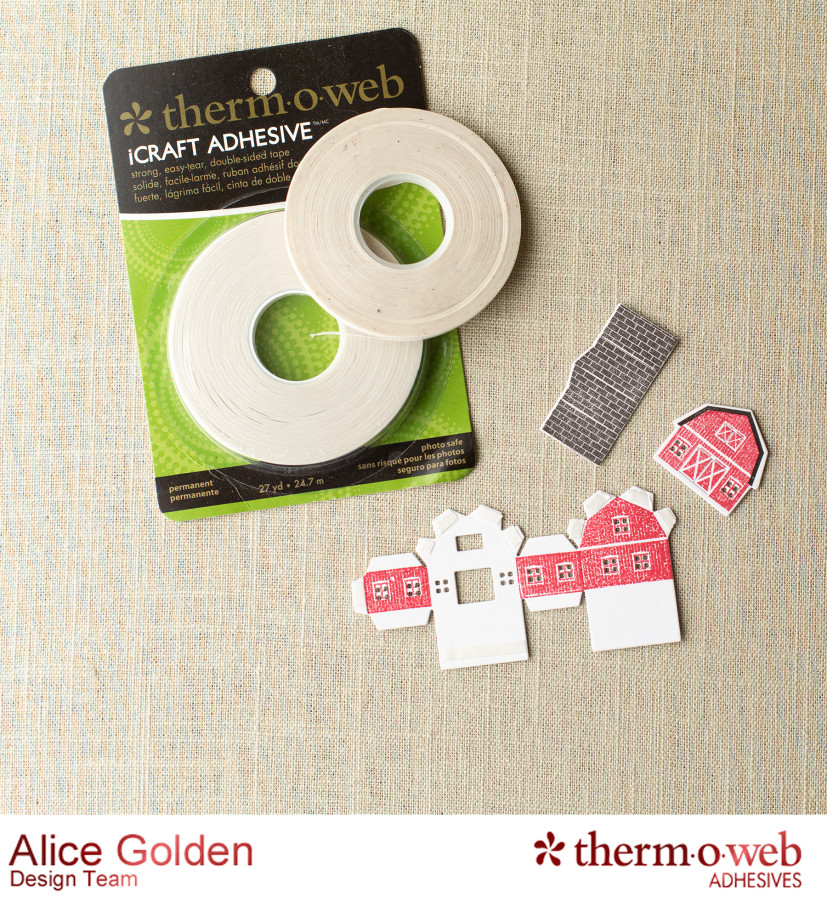
This allows you to adhere tiny areas, such as the sides of this die-cut barn, with more precision.
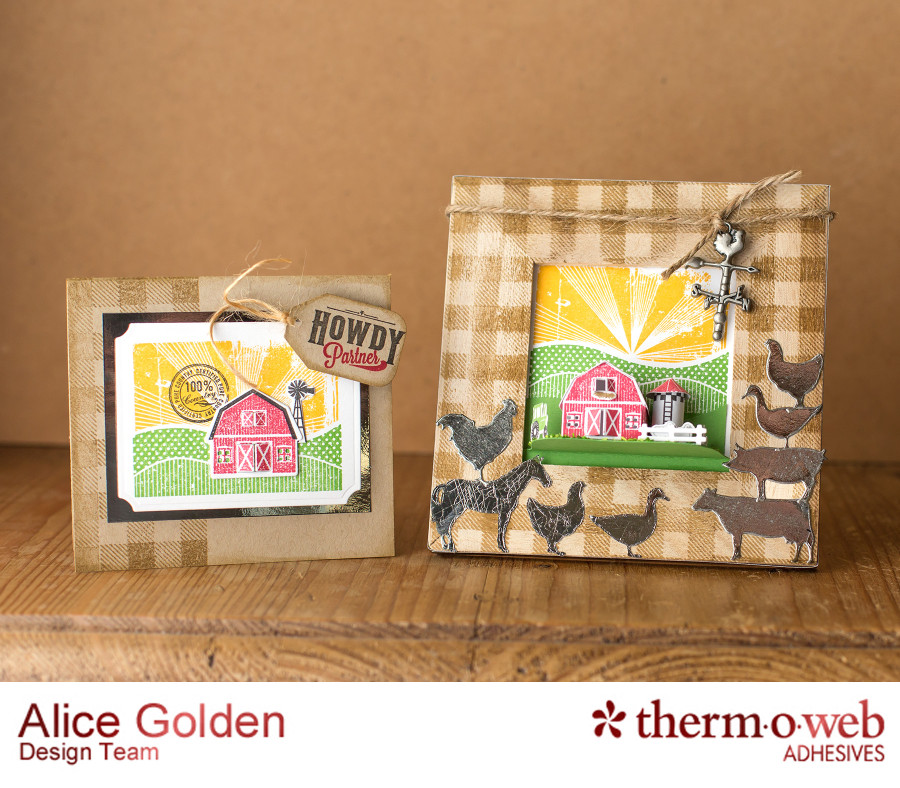
To create the frame, stamp an unfinished wood frame with a gingham patterned stamp using brown ink. Place a piece of NEW Pewter Deco Foil™ on top of a piece of Deco Foil™ PeelnStick adhesive-backed Toner Sheet and run through a laminator to transfer the foil to the toner sheet. Peel off the transfer sheet to reveal the Pewter finish.
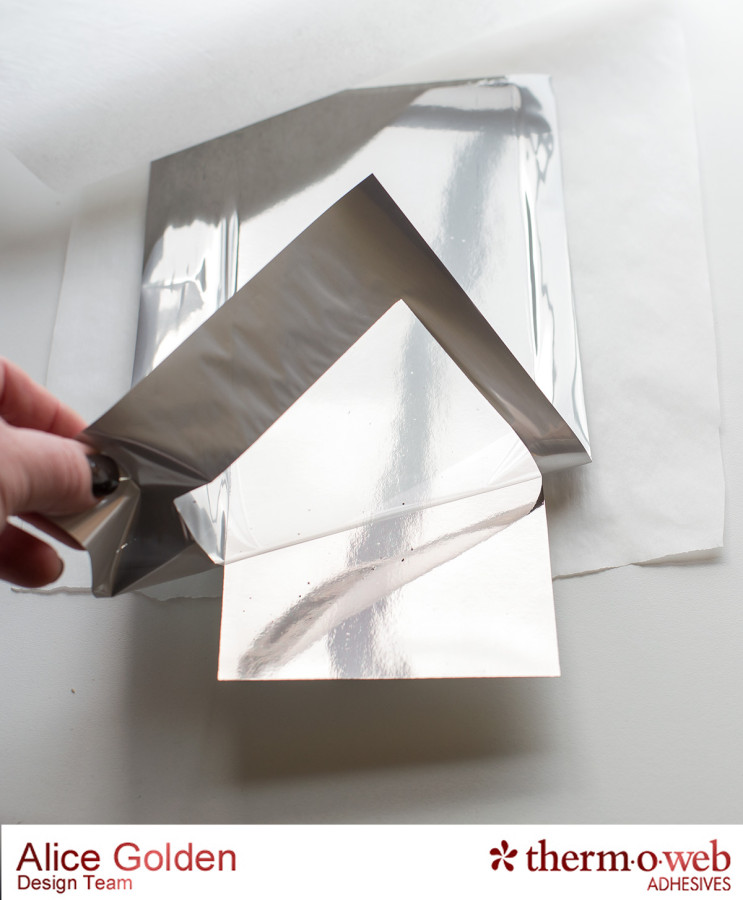
Use this piece to cut strips to adhere around the edges of the frame as well as to die cut animal shapes for the front. Notice how smooth and shiny the finish is when it first comes out of the laminator? I wanted the foil to look like old metal that would be more in keeping with a barnyard scene, so when I die cut the foil I used old cutting plates that left scratches in the foil – just the look I was going for. If you want to keep the smooth finish, use a piece of parchment paper to protect the foiled side (or just use unmarked cutting plates). I couldn’t resist using some twine to add an old weathervane charm I had in my stash, but the frame would be cute with just the twine at the top, too.
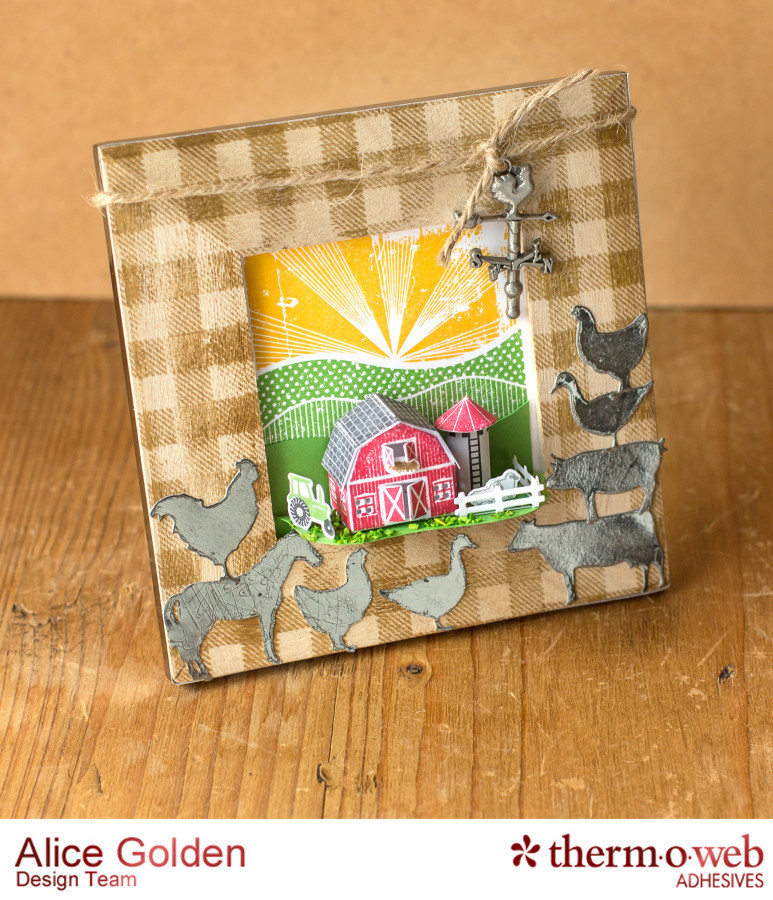
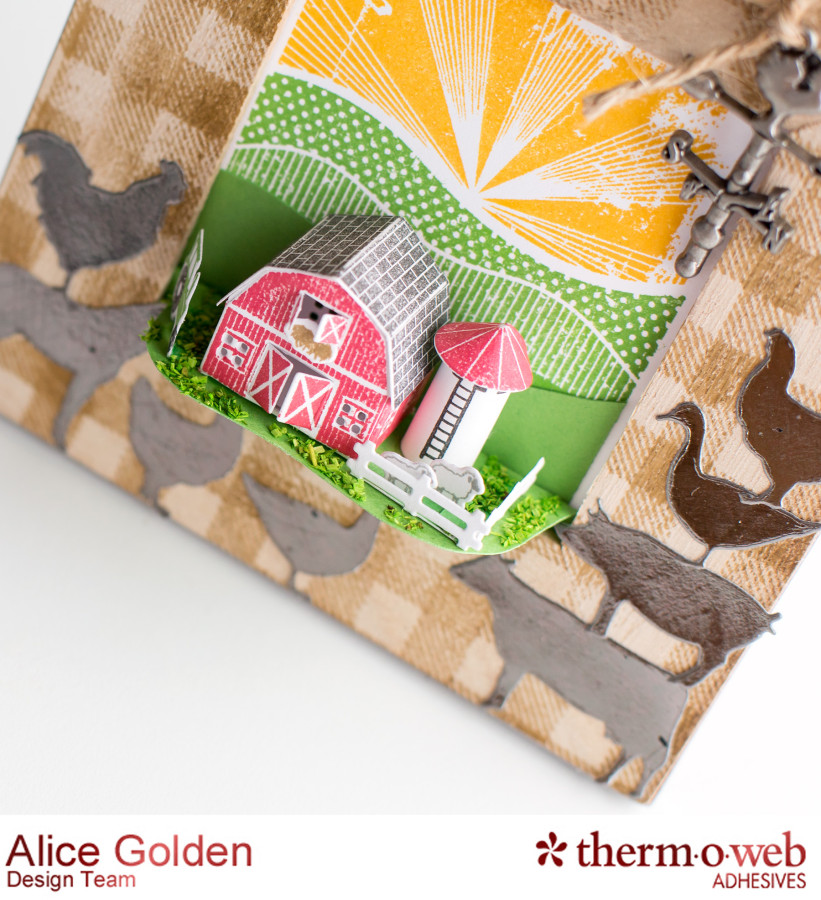
Stamp the background images on white cardstock and cut to fit the frame opening. Score and fold a piece of green cardstock and cut so that one side fits through the frame opening and the other side fits inside the frame. Assemble the barnyard scene on top of the cardstock and adhere to frame opening from the inside. Glue faux grass clippings to base and shake off excess.
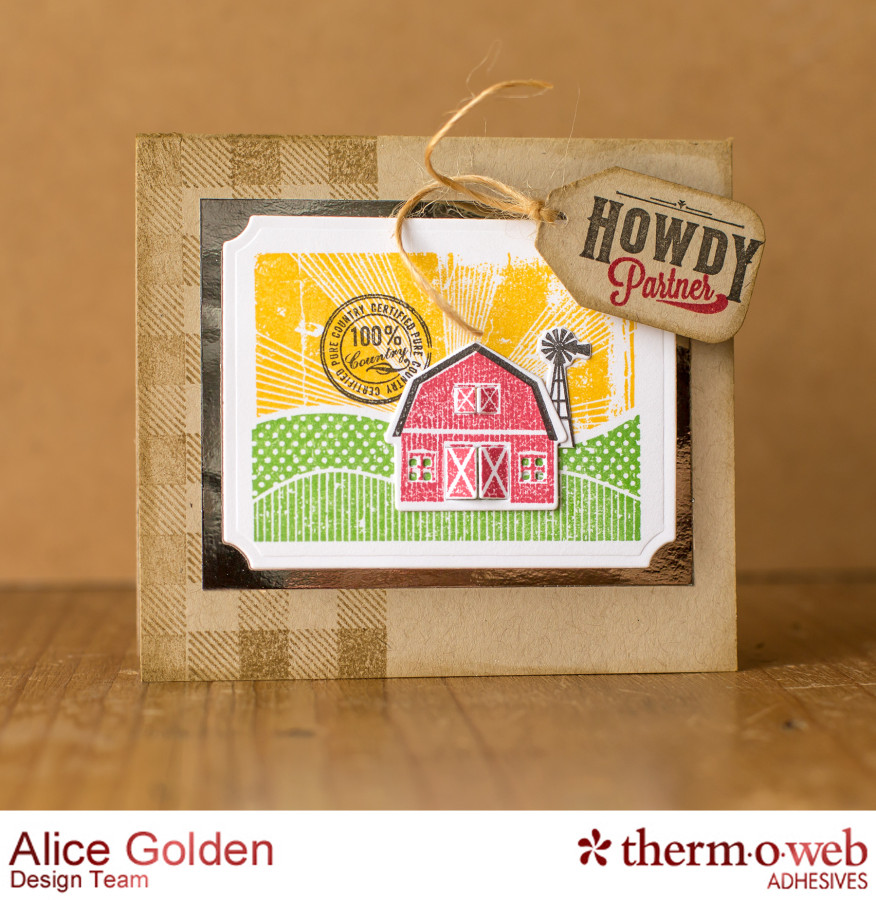
To create card, stamp gingham pattern on khaki cardstock card base, as shown. Stamp the barnyard background on white cardstock, adhere stamped and die cut barn front and windmill, and die cut piece into rectangular frame shape. Stamp sentiment on a scrap of khaki cardstock and cut or punch into tag shape. Thread with twine and ink edges with brown ink. Cut mat from leftover Pewter-Deco Foil™ Toner Sheet you’ve created and adhere to card base. Use 3D Foam Squares to adhere stamped image and tag to card front.
Supplies:
Therm O Web
Pewter Deco Foil™ Transfer Sheet
Deco Foil™ PeelnStick Adhesive Backed Toner Sheet
Other
On the Farm, Barnyard Sentiments, and Petite Places: Barn Stamps and Dies – Papertrey Ink
Background Basics: Gingham – Papertrey Ink
White, Kraft cardstock
Red, green, gold, black ink
Rectangular frame die – Spellbinders