


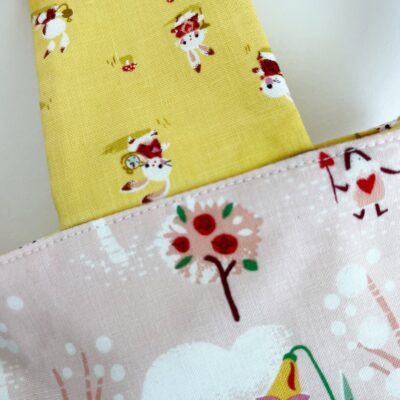
Hello again friends!!! This is Dori with @redfeedsack and its spring tea party time!!! I’ve been sewing with this super fun fabric by Jill Howarth for Riley Blake Designs. When I saw this fabric all I could think of was how adorable it would be in little tea party purses! And if you have any little girls in your life, here is the simplest tutorial for making darling little purses!
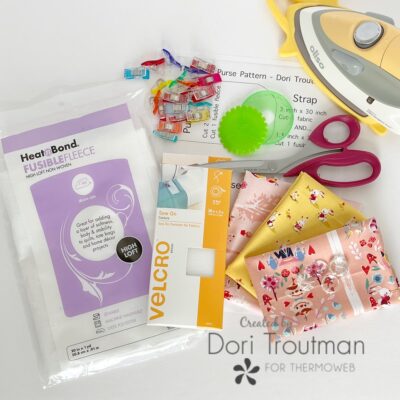
Tea Party Purse Supplies
- Fat quarters or scraps of favorite fabrics (each purse could be made from just one fabric, but I enjoyed using multiple fabrics for each purse I made)
- Purse pattern – download here: Tea Party Purse Pattern
- Scissors
- Wonder Clips
- Iron
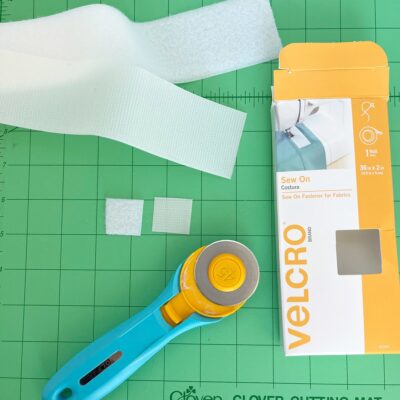
- Velcro (make sure it is the sew on kind, not the glue on)
- Heat n Bond Fusible Fleece
- Optional: Yo Yo Maker and Buttons
Step By Step Instructions
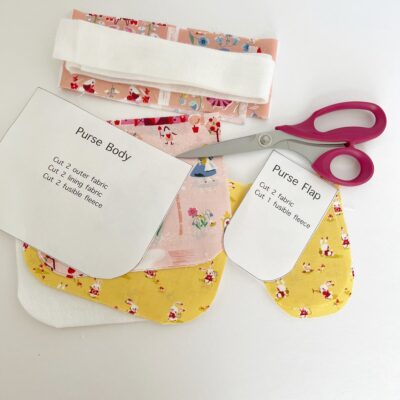
Step One: Print your tea party purse pattern here: Tea Party Purse Pattern. Cut your fabric using the appropriate pattern piece and the dimensions for the strap. Do the same with fusible fleece.
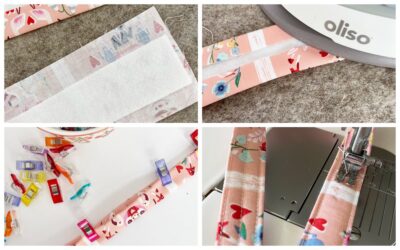
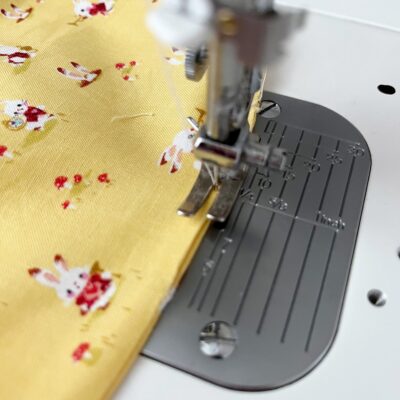
Step Two: Lets start with the purse strap! Fuse your 1.5 inch x 30 inch piece of fusible fleece right down the center of the wrong side of the strap. Fold each long edge of the strap towards the center of the fusible fleece and iron in place. Fold the entire length in half and press in place. Use wonder clips to hold it firmly. Sew 1/8 inch from each long edge and down the middle of the strap. Set aside for now.
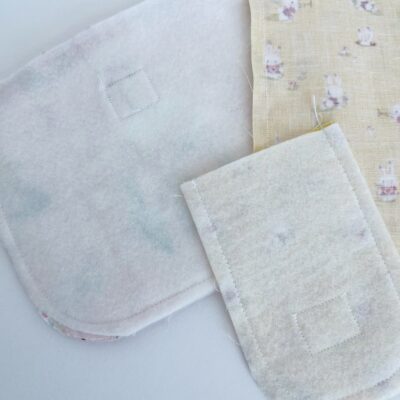
Step Three: From your sew in velcro, cut two little pieces 1 inch x 1 inch (cut one from hook and one from loop part of the velcro). All I hand on hand was the large velcro strip, so I simply cut what I needed.
Note: It is very important to use the sew on velcro as the glue in will cause your needle to gunk up with glue and will not sew properly.
Step Four: On back purse flap piece make a mark centered at one inch from the right side of the BOTTOM of the flap. Place your little velcro piece at the mark and sew around it.
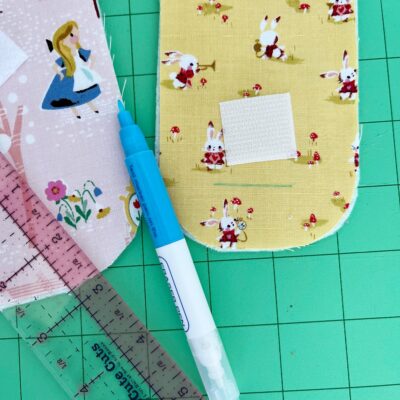
Step Five: On your purse front, make a mark centered at two inches from the TOP of the purse front. Place your little velcro piece at the mark and sew around it.

Step Six: On one of your lining pieces, make two marks a few inches apart at the bottom of the piece.
Step Seven: Place your outer bag pieces, lining pieces and flap pieces right sides together and hold in place with Wonder Clips (or pins).
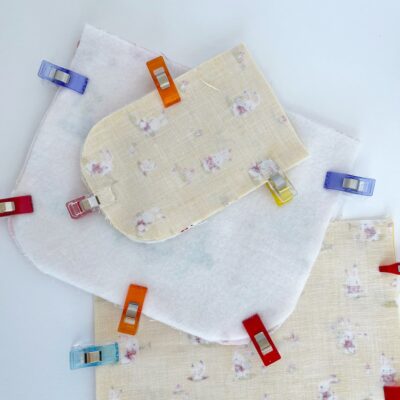
Step Eight: Sew around the sides and bottom of the outer purse and the flap, leaving the top open. Do the same on the lining, except do not sew between the marks that you just placed on the bottom of the lining. You will need this opening for turning the purse right side out.
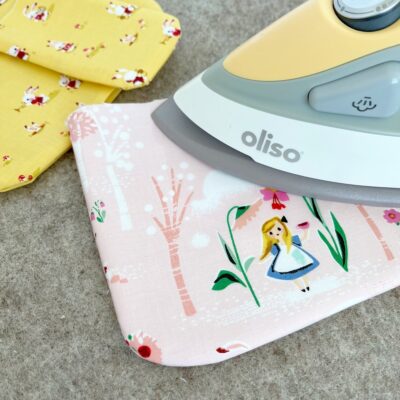
Step Nine: Turn all three pieces right side out, carefully pushing all the rounded corners out. Press with your iron.
Step Ten: Attach the handles to the outside of the purse: Use a Wonder Clip to hold each handle end at the side seam of the purse. Check (and double check!) that your handle is not twisted at the bottom. Sew a scant 1/4 inch to hold in place.
Step Eleven: Center the flap at the back top edge of the purse. Make sure that the front of the flap (the part without the velcro) is facing the back of the purse. (This will ensure that when the flap comes to the forward, the velcro will be where it is supposed to be!) Sew with a scant 1/4 inch to hold in place.
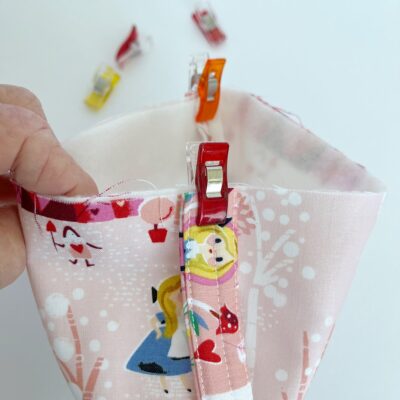
Step Twelve: Place the entire outer purse inside the lining, making sure right sides are together. (To make this easier, you can pull the purse strap through the opening in the lining.) Line up the top edge, matching side seams. Use Wonder Clips to hold in place.

Step Thirteen: Sew a 1/4 inch seam all around the top edge. Turn the bag right side out by pushing through the opening in the bottom of the lining.
Step Fourteen: Press the bottom seam opening and sew closed with a scant 1/4 inch seam.
Step Fifteen: Push the lining to the inside of the bag, pushing out all the corners.
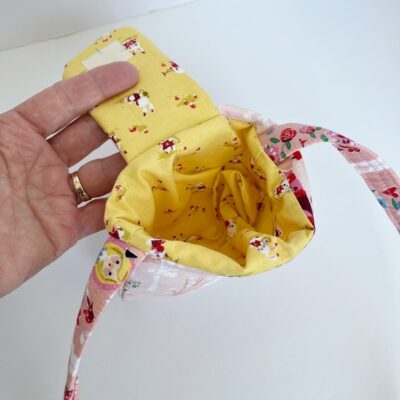
Step Sixteen: Carefully iron the top edge of the bag, ensuring that the seam is smooth. 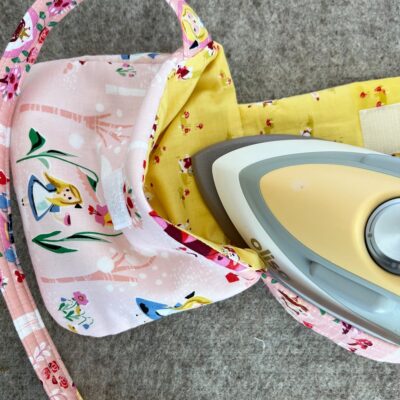
Step Seventeen: Sew a 1/8 inch top stitch around the entire top edge of the bag. This holds it smoothly together! Press the bag until all the wrinkles are out!
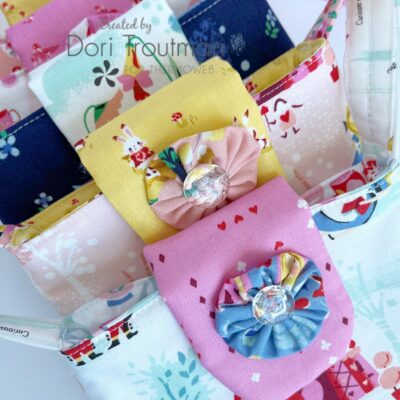
Step Eighteen: You can finish the bag flap with a little fabric yo-yo and a button sewn on the top of that….. or you can leave it plain. It is for decorative purposes only as the bag closes with the velcro!
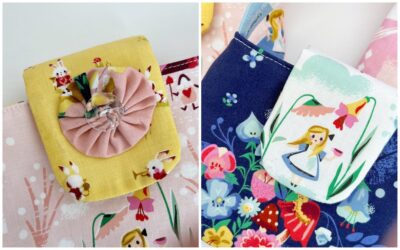
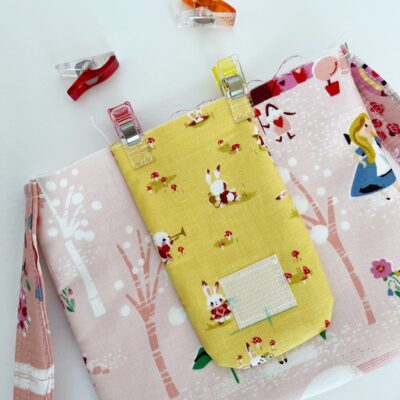
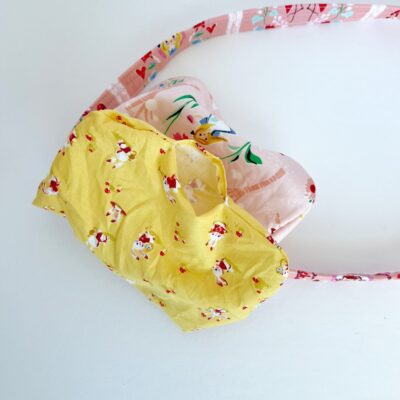
And YAY!!! Your sweet little Tea Party Purse is finished! Don’t you agree that this adorable Down The Rabbit Hole fabric collection is absolute perfection for theses purses???
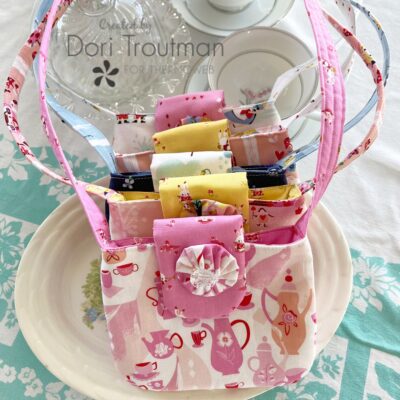
I made five little purses in assembly line style and front start to finish (including cutting time) it took less than 2 hours! They are so easy and absolutely so much fun! The best gift for little girls headed to a tea party!

If you make any little Tea Party Purses, be sure to tag me on IG @redfeedsack so I can see them! I hope you’ve had a wonderful spring and are gearing up for the best summer!
~ Dori ~