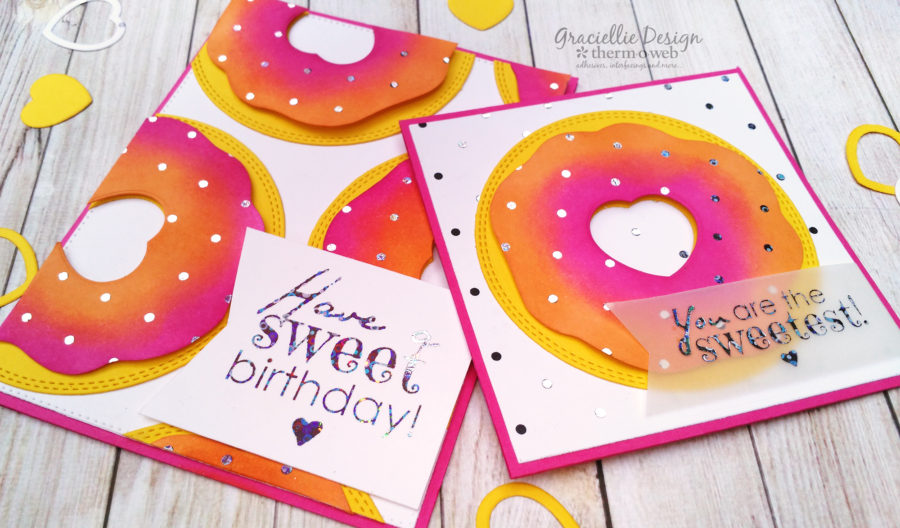
It’s Gracie Chavez. Today I’ll show you how to use the new Gina K. Designs stitched circle dies to make the sweetest birthday cards and I have a free printable file for you to make the task even easier!
Donut Cards with Deco Foil
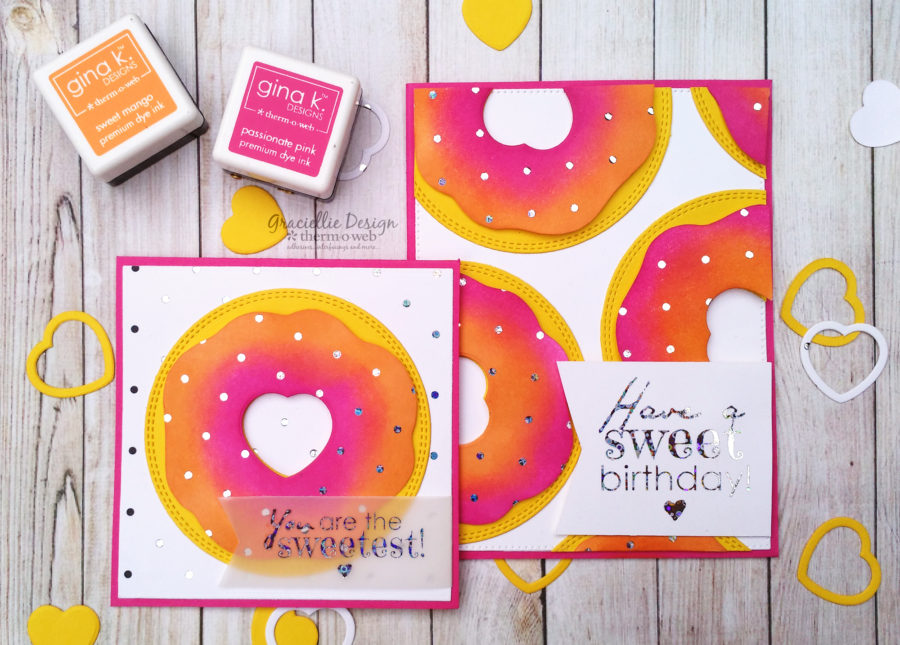

Therm O Web Supplies:
Gina K. Designs (3) Nested Circle Dies • Double Stitch Design • Small Set
Gina K. Designs Foil-Mates™ Backgrounds • Polka Party
Gina K. Designs Fancy Foils™ 6″ x 8″ • Silver Sequins
Gina K. Designs Premium Dye Inkpad Sets 1″ Cube • Island Dream
Gina K. Designs Premium Dye Inkpad Sets 1″ Cube • Prime Time
Gina K. Designs Premium Cardstock 8.5″ x 11″ • White
Gina K. Designs Premium Cardstock 8.5″ x 11″• Prime Time
Gina K. Designs Premium Cardstock 8.5″ x 11″• Island Dream
iCraft Mixed Media Adhesive 2.1 fl oz
Zots™ Roll • 3D
Laminator
Other Supplies:
Donut Glaze Free Printable
Digital Sentiment Stamps
Laser Printer
Pencil
Scissors
Paper Trimmer
Die cutting machine
Sponge dauber
Donut Birthday Cards with Gina K. Designs & Therm O Web
Step 1. Print the free donut glaze file I created to make this project. You can print the images on copy paper. (You can find the download link at the end of this tutorial.)
Step 2. Cut one of the images to create a template and set aside.
Step 3. Cover a sheet of the small polka dot patterned foil-mates with a Silver Sequins transfer Fancy Foil and run it through a laminator. Peel off the foil backing to reveal the foiled pattern.
Step 4. Use the template cut before and trace the image on the foiled background as many times as you like. (You will need one of the foiled donut glaze images per donut you want to create.)
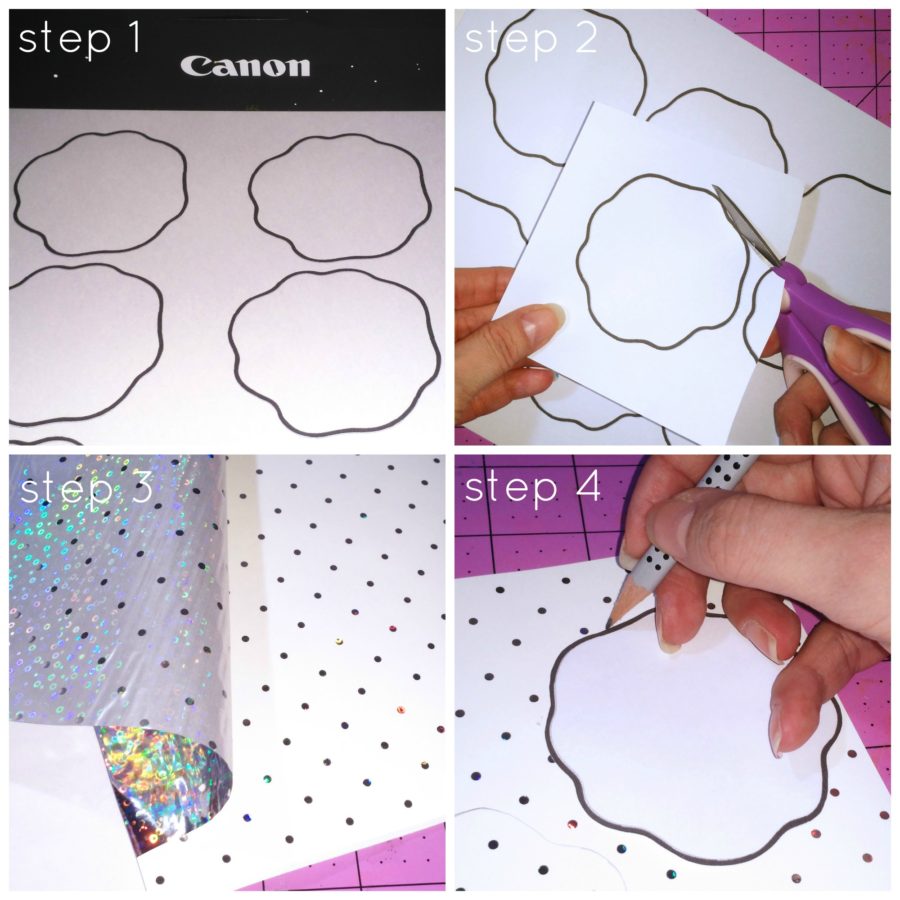
Step 5. Cut the donut glaze images traced and put aside.
Step 6. Cut several circles from Gina K. Designs Wild Dandellion Premium Cardstock, using the largest circle from her Small Double Stitch Circle die set.
Step 7. Place the donut glaze image on top of the yellow stitched circle and then place on top of them the heart die from the same die set in the center. Make sure it doesn’t move and run the pieces through a die cutting machine.
Step 8. Separate all the pieces that were cut to reveal your heart center donut and donut glaze.
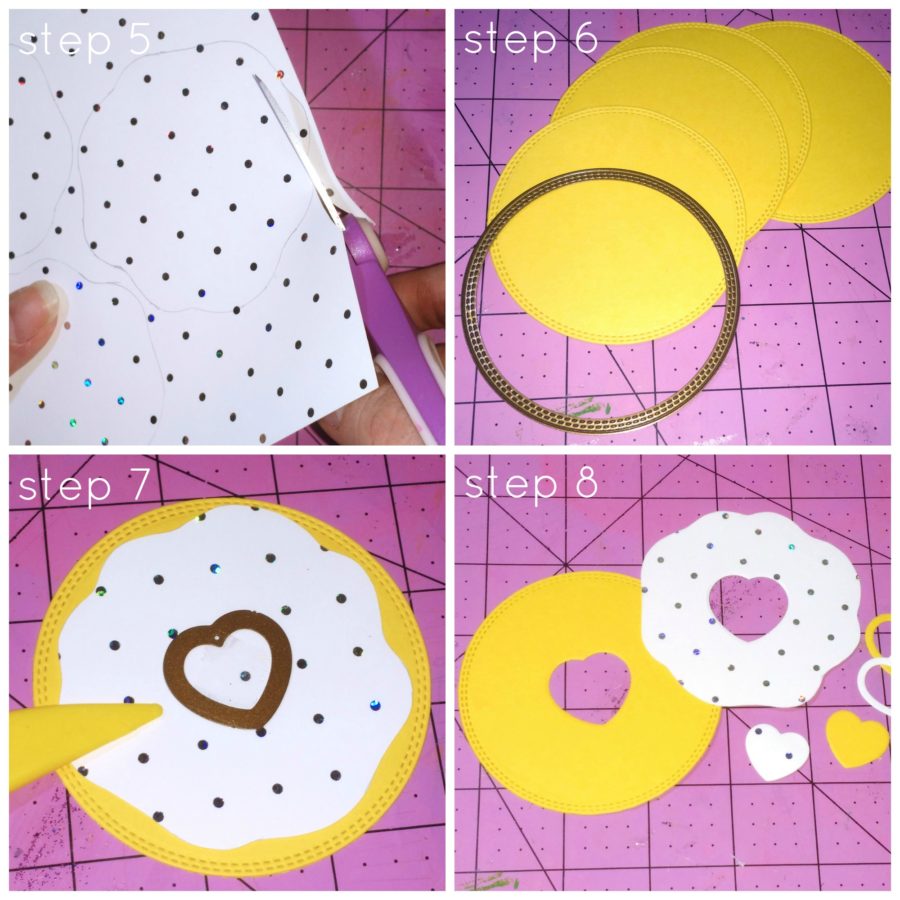
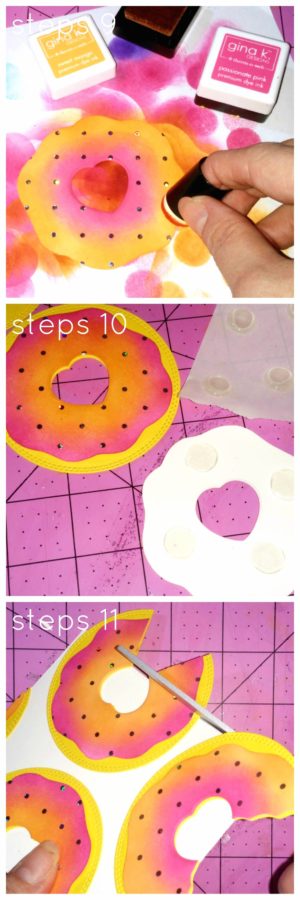
Step 9. Using a sponge dauber color the donut glaze with Wild Dandellion and Passionate Pink Premium Dye Inks, creating a transition between the two colors.
Step 10. Attach the colored donut glaze pieces with 3D Zots to give the donuts dimension.
Step 11. Attach the donuts to an A2 card panel cut from White Premium Cardstock and cut the excess to create a clean pattern.
And this is what your A2 donut card will look like once you attach the card panel to a Passionate Pink Premium Cardstock card base.
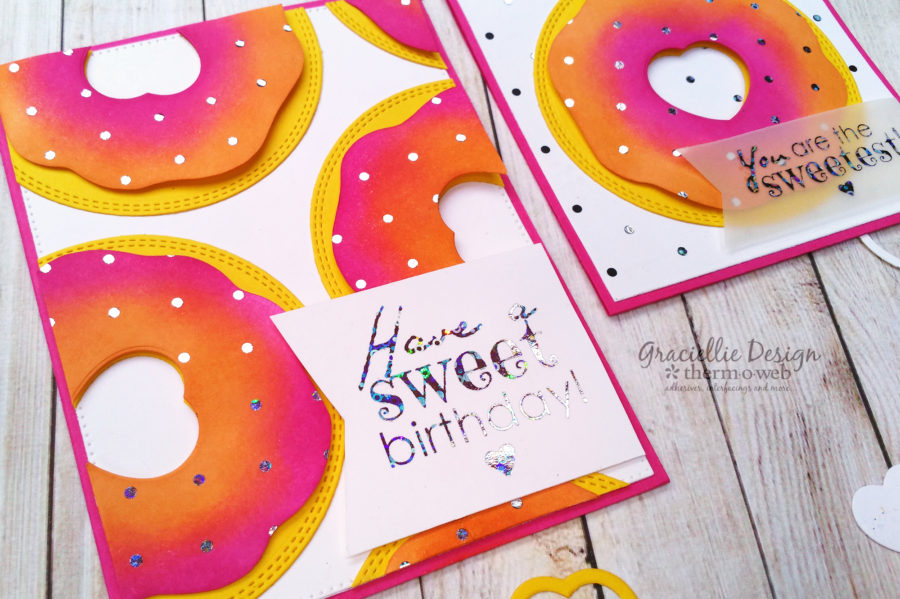
To make the mini note card, use a remaining donut (from the batch we made for the previous card)…
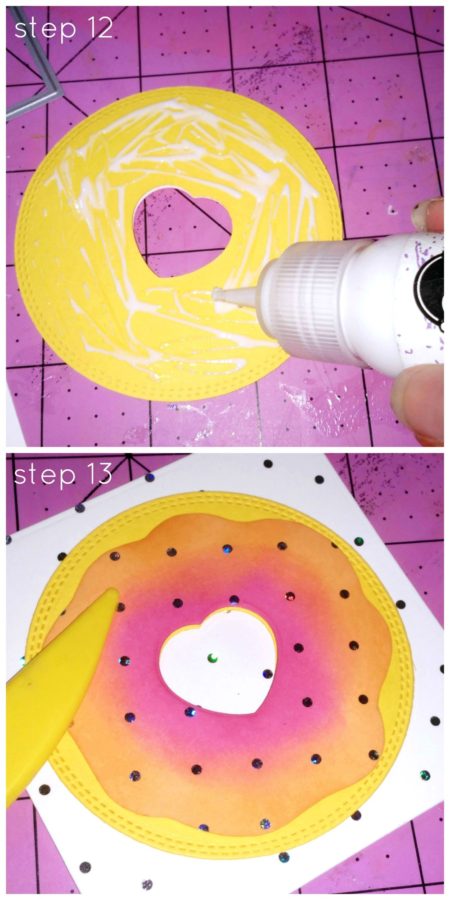
Step 12-13. Use Mixed media adhesive to attach the donut to a 3 3/4″ panel cut from a foiled piece of polka dot Foil-Mates.
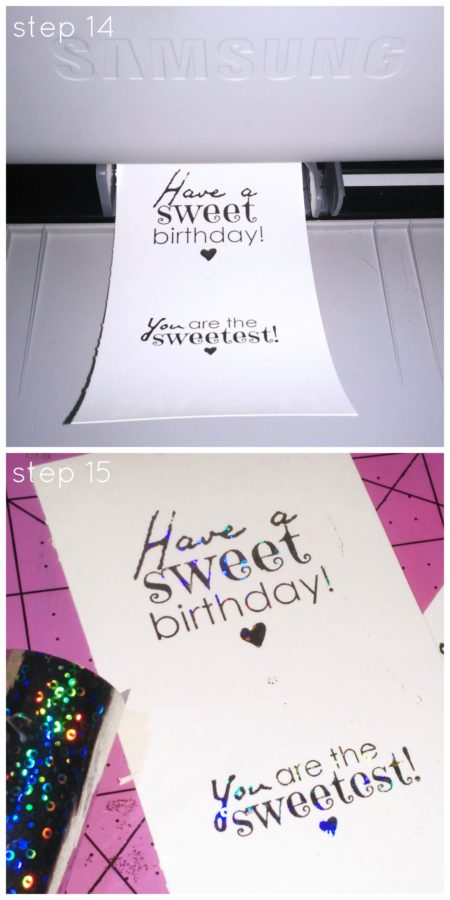
Step 14. To finish off the cards, print 2 digital sentiment stamps on a laser printer.
Step 15. Foil the sentiments with Silver Sequins using a laminator to make them match the polka dots (or sprinkles) on the cards.
Both donut card panels were adhered to a Passionate Pink Premium Cardstock card base. The smallest card ends up being around 4″, which makes it perfect for gifts!
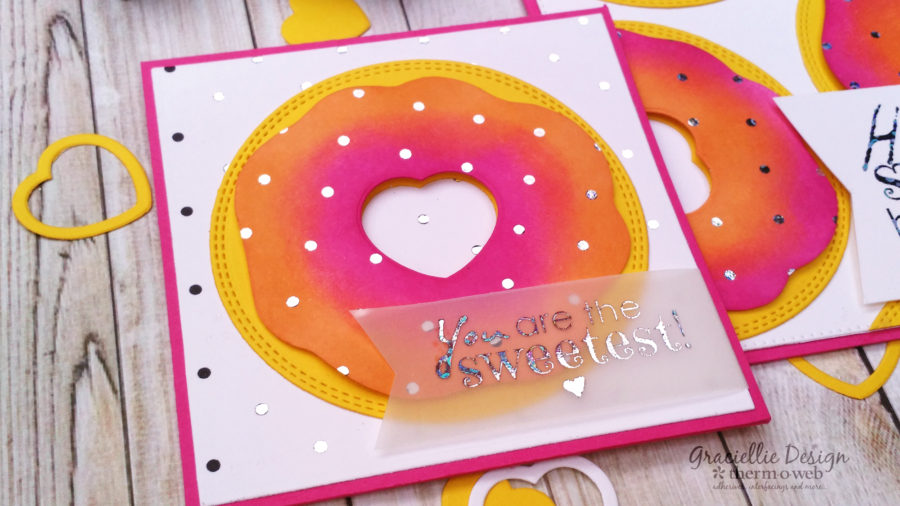
I hope you enjoyed today’s tutorial! Gina K. Designs inks and papers coordinate so well, and that plus all the complimentary products in Therm O Web’s line make this project very easy to make!
DOWNLOAD THE FREE PRINTABLE
If you want to make these donuts make sure you save the template I used to cut the donut glaze from the foiled polka dot Foil-Mates! Find the file for download HERE.
