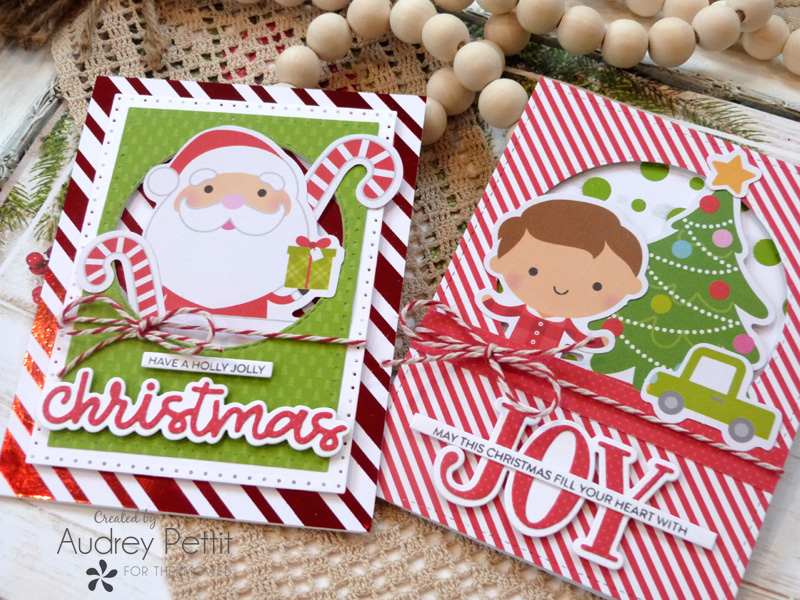

Christmas Joy card Set
by Designer Audrey Pettit
Therm O Web Supplies:
Deco Foil Toner Card Fronts: Lots of Dots, Candy Stripe
iCraft Deco Foil Transfer Sheets: Red, Lime
Mixed Media Adhesive
Foam Tape Roll
Purple Tape
Memory Tape Runner XL
Other Supplies:
PhotoPlay Paper White Cardstock
Doodlebug Designs Night Before Christmas: 6×6 Paper Pad, Odds & Ends Die Cuts
Dies: Sizzix Rectangles, Dotted; Lawn Fawn Stitched Rectangles Large; My Creative Time Bunch of Fun Circles; PhotoPlay Paper Peace & Joy, Merry Christmas, and Sentiment Strips Stamps: PhotoPlay Paper Peace & Joy, Merry Christmas
Ranger Watering Can Archival Ink
Maya Road Twine
Royal Sovereign Laminator

 It’s Christmas card week here on the Therm O Web blog, and we are so excited to kick off the festive season with some creative project ideas using our fabulous array of Deco Foil colors and designer toner sheets. Today I have two peek-a-boo window designs to share with you featuring my favorite Toner Card Fronts sheets in stripes and dots. These windows would work so well with any paper collection and holiday icons, or just about any holiday or occasion, too. Let’s take a closer look.

To begin, select your Deco Foil Transfer Sheet colors and Toner Card Fronts. Turn on your laminator to the 3 mm setting, and allow it to heat up. Cut the foil transfer sheets slightly bigger than the Card Fronts.

Place the Toner Card Front toner side up between the sheets of a folded piece of parchment paper. Place the foil transfer sheet down onto the Card Front so that the colored side is up and the shiny silver side is down. Run this sandwich through your laminator machine.

Adhere the foiled card fronts to standard A2 card bases. Cut window panels from cardstock and/or patterned paper using rectangular dies and circle dies. You can see that I cut one A2-sized stitched rectangle from candy-striped paper, and cut one smaller nested panel from a combination of white cardstock and patterned paper. Purple Tape helps hold the circle dies perfectly in place. Remove the center circle die cuts and set them aside for another project.

Back the window die cuts with strips of foam tape and add holiday die cuts to the window openings. Secure the die cuts in place with foam tape, too. Tie twine around the window panel, and then adhere the windows to the card bases.

Continue to add die cuts to the window scenes with Mixed Media Adhesive used to hold smaller images or icons. Cut a small slit in the side of the card base with the candy-striped window, and thread twine through the slit, tying it into a bow on the left side.

Stamp and die-cut sentiments for each card. Use Mixed Media Adhesive to add thin strips to the center of large die-cut words. Add small pieces of foam tape behind the greetings, and attach them to the bottom of the cards.

Enjoy!


Cynthia Johnson
August 4, 2021 at 2:17 pm (3 years ago)Such cute cards! I’m also from the heart of NC.
Greta H
August 4, 2021 at 3:34 pm (3 years ago)Wonderful inspiration!