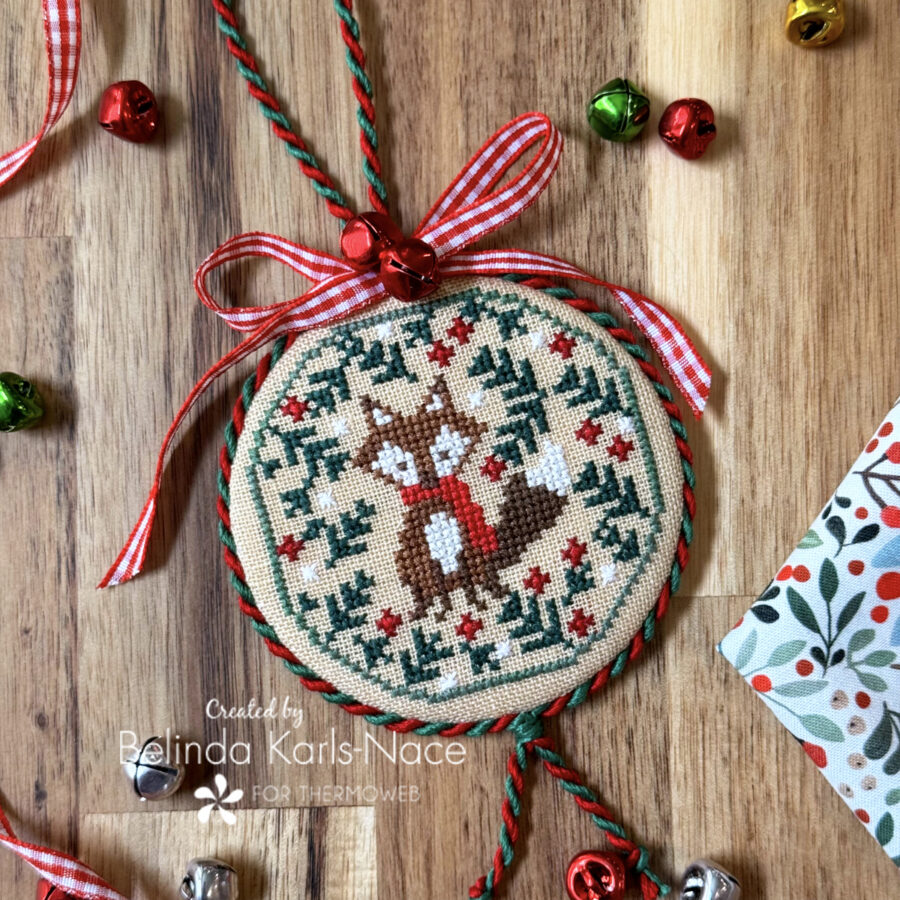
Cross Stitch Ornament Finishing
Greetings! It’s Belinda Karls-Nace from Blue Ribbon Designs, here with a brand new project tutorial featuring some of my most used HeatnBond/SpraynBond products. You may know that I have been a cross stitch pattern designer for over 20 years, and needlework finishing is my specialty. Today, I am excited to share a cross stitch ornament finishing tutorial with you.
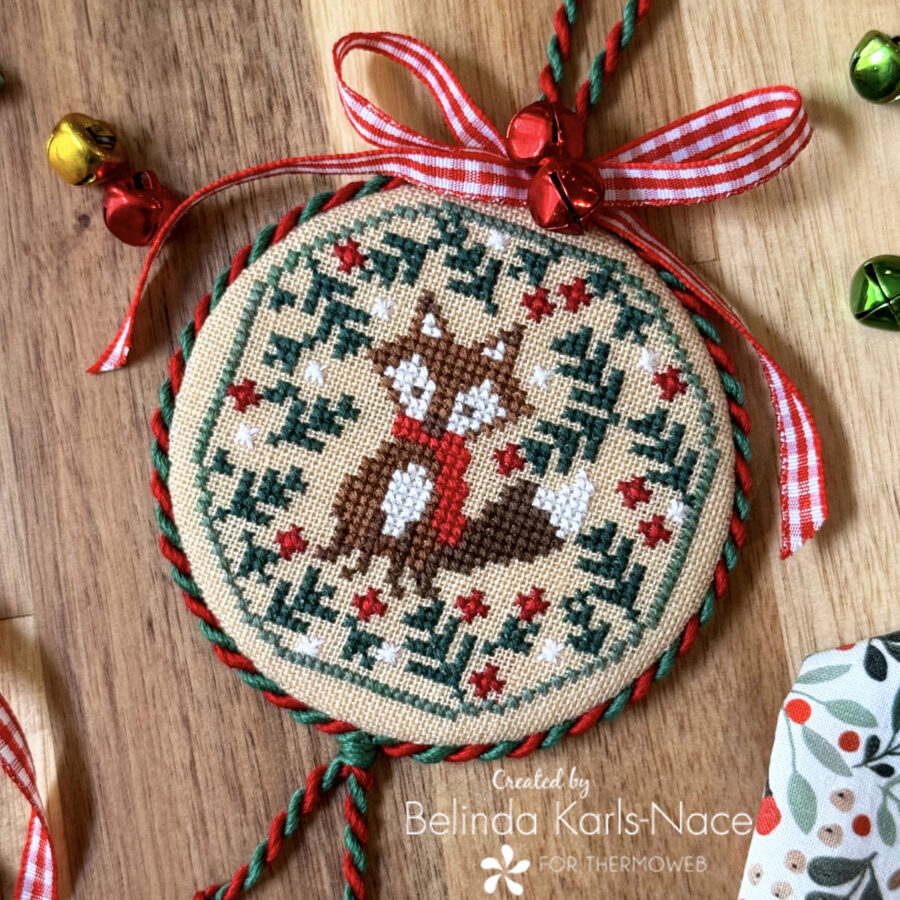
I know that cross stitch finishing can be a bit daunting for some, but I hope this tutorial will provide you with some helpful tips and tricks to make you feel more comfortable with the finishing process. Today’s project is my 2024 Cross Stitch Christmas Ornament titled “Festive Fox.” The chart for this ornament is available for free, simply visit my blog for all the details: Festive Fox Cross Stitch Christmas Ornament. This tutorial is all about finishing a piece of cross stitch into an ornament; if you need assistance with learning to cross stitch, take a class, check out a book on the subject, or search the Internet to learn the fundamentals.
Now that you have some details, let’s get started! Simply gather the materials/supplies listed below, then download the PDF templates.
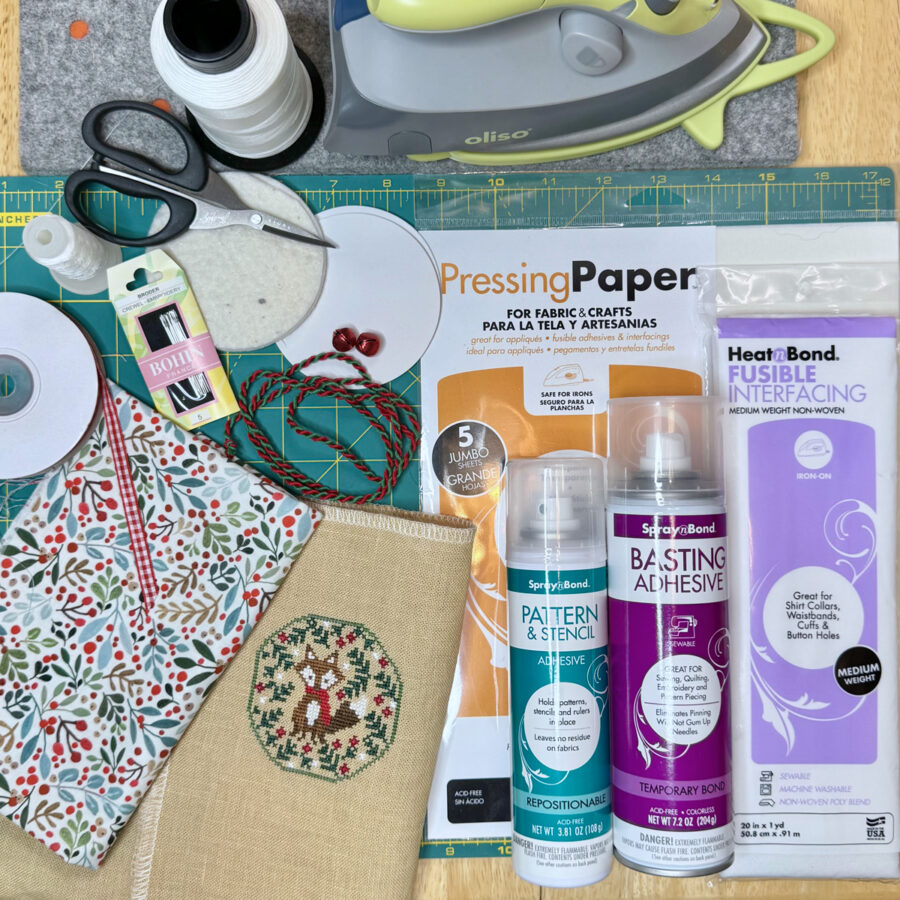
What you need to finish one cross stitch ornament:
- SpraynBond Pattern & Stencil Spray
- SpraynBond Basting Adhesive Fabric Spray
- HeatnBond Medium Weight Non-Woven Fusible Interfacing
- 2 – 6” x 6”
- Pressing Paper Fabric and Craft Sheets
- 1 – sheet
- Optional: HeatnBond Fabric Fuse Liquid Adhesive
- Cotton Fabric (for backing): I am using 12 Days of Christmas by Sharon Montgomery for Northcott Fabrics – choose your favorite fabric.
- 1 – 6” x 6”
- Cotton Quilt Batting
- 2 – 5” x 5”
- Comic Book Board or Light Cardboard or Cereal Box
- 2 – 5” x 5”
- Strong Lacing Thread – Nymo Beading Thread or Unwaxed Dental Floss
- Transparent Nylon Thread
- Sharp Hand Sewing Needle – I use a #5 Crewel Embroidery Needle
- Twisted Cord: I make my own twisted cord using DMC floss and a Kreinik Custom Corder, you can make your own twisted cord or purchase premade cording.
- Approximately 22”
- Red and White Gingham Ribbon
- 12” length
- ½” Jingle Bells
- 2 (red)
- Oliso Iron
- Olfa Cutting Tools (cutting mat, rotary cutter)
- Basic Supplies/Tools (small sharp scissors, wonder clips, appliqué pins, rulers, pencil, etc.)
How to Finish a Cross Stitch Ornament
(3 ½” Round Plus Hanger)
1. Download and print the Cross Stitch Finishing Templates.
Cross Stitch Ornament Finishing – A Tutorial for the Therm O Web Blog
Print actual size – do NOT “fit to page” or “shrink to fit.” Print on regular printer paper.
2. Complete all cross stitching (including back stitching and/or specialty stitches).
The complimentary pattern for “Festive Fox”, my 2024 Cross Stitch Christmas Ornament can be found on my blog: Festive Fox Cross Stitch Christmas Ornament. This tutorial and templates are for cross stitching the ornament, as directed on 32-count linen or 16-count Aida cloth.
3. Prepare mounting materials.
-
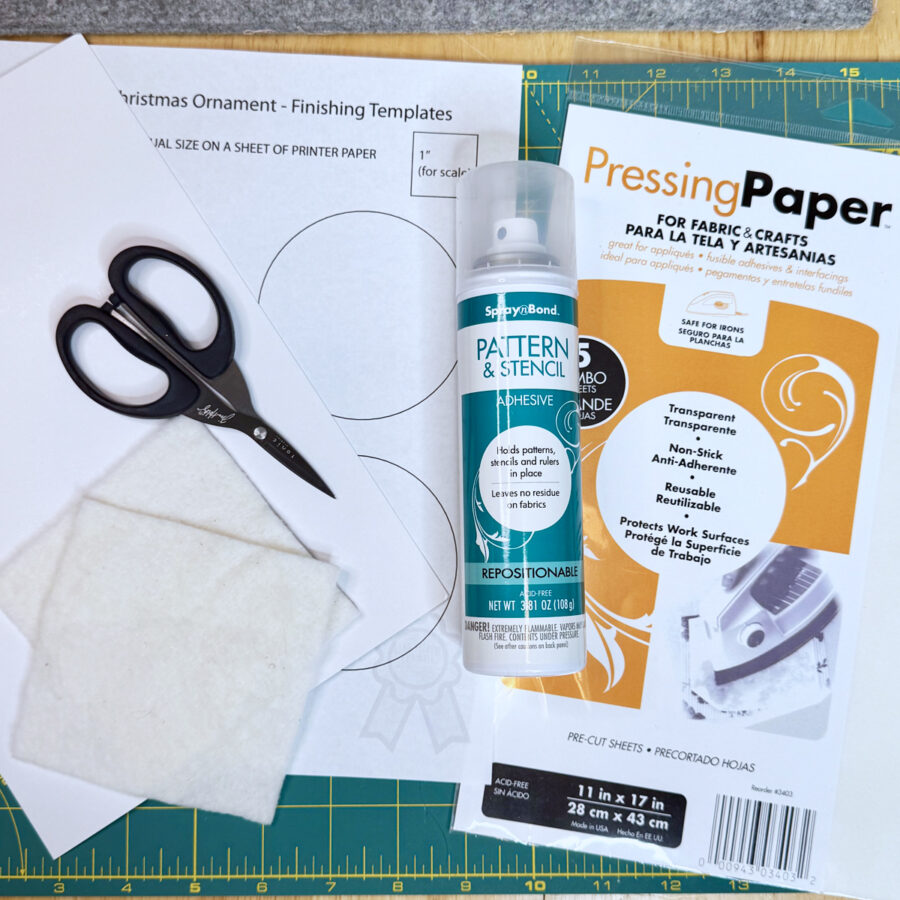
- Using your favorite method or the templates provided, cut two 3 ¼” diameter circles from lightweight cardboard and two 3 ¼” diameter circles from cotton quilt batting.
- To use the templates and SpraynBond Pattern & Stencil Spray:
-
Protect work surface with a Pressing Paper Fabric and craft Sheet.
-
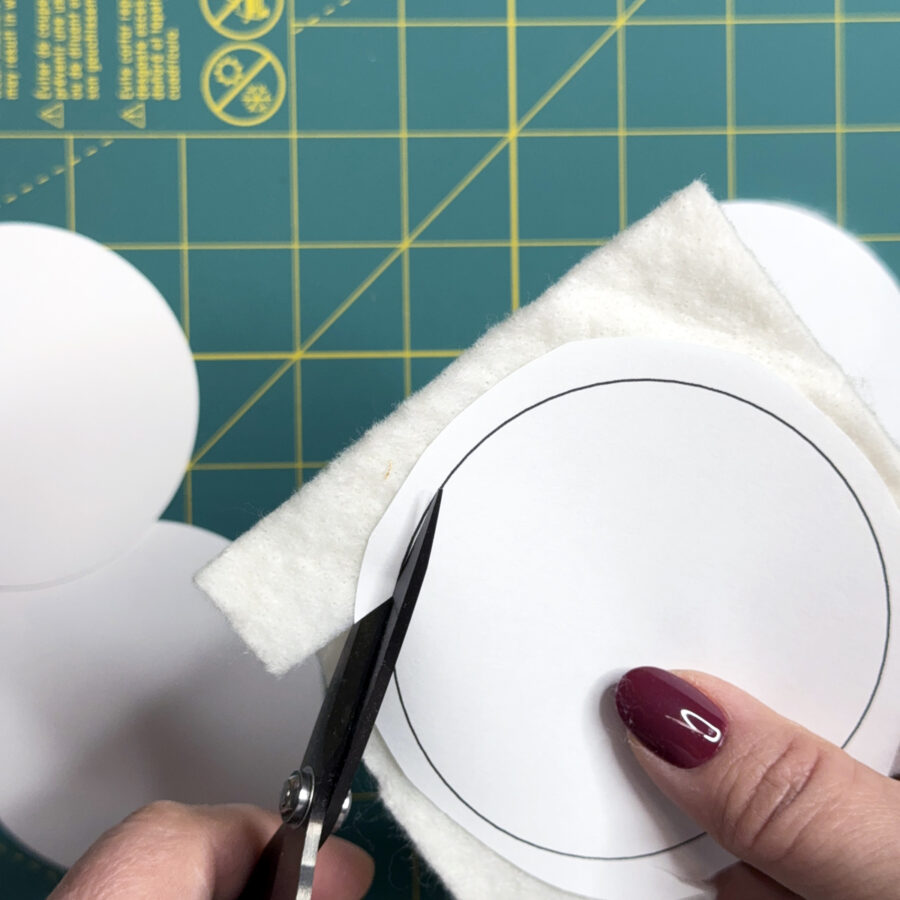
Loosely cut the paper templates apart and place the wrong side up on protective paper.
-
Shake can of SpraynBond Pattern & Stencil Spray well.
-
Hold can upright about 12-inches from the paper templates. Press nozzle and apply adhesive to the wrong sized using a sweeping motion to lightly cover the backs of the paper templates.
-
Let dry for one minute, then press the templates to the 5” squares of comic book board and cotton quilt batting.
-
Cut out the template circles on the solid lines.
-
Remove paper templates.
-
-
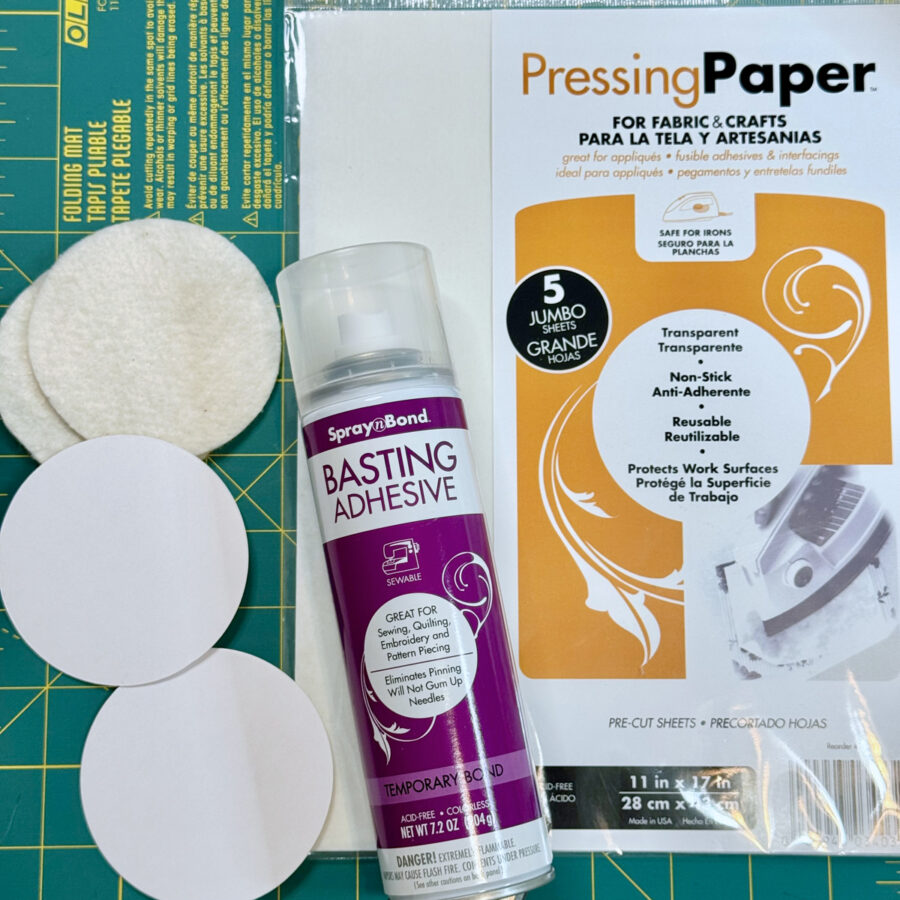
- Using SpraynBond Basting Adhesive Fabric Spray, attach one circle of quilt batting to each circle of lightweight cardboard.
-
Protect work surface with a Pressing Paper Fabric and craft Sheet.
-
Shake can well before use.
-
Hold can upright, 12 inches from batting circles. Press nozzle and apply adhesive using a sweeping motion to light cover surface.
-
Press cotton batting on lightweight cardboard while still tacky. Reposition as needed.
-
- Using SpraynBond Basting Adhesive Fabric Spray, attach one circle of quilt batting to each circle of lightweight cardboard.
4. Prepare cross stitch and backing fabric.
-
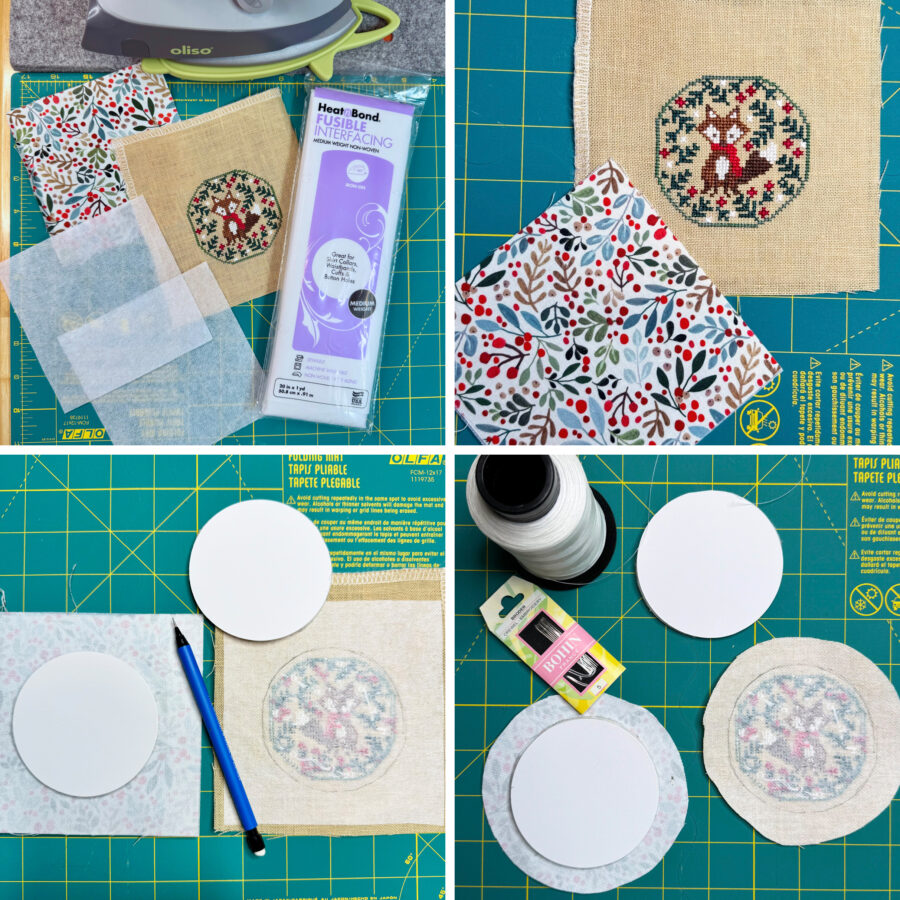
- Press your stitched piece. Press face down on a fluffy towel with a hot iron. Make sure your stitching is round and straight. Center and fuse the 6” x 6” piece of medium weight interfacing to the wrong side of the stitched piece using the package instructions.
-
Pre-heat iron to cotton setting (high heat), no steam.
-
Place the rough side of the Fusible Interfacing onto the back (wrong side) of the cross stitch design.
-
Cover with a lightweight, dry pressing cloth. Press and hold iron with medium pressure for 10-15 seconds. Repeat by lifting the iron to a new area and pressing, slightly overlapping previous area until the entire surface is bonded.
-
Allow piece to cool.
-
- Using the same instructions, fuse a 6” x 6” piece of medium weight interfacing to the wrong side of the backing fabric.
- Trim your cross stitch piece approximately 1” out from the stitched design. Trim it in a circle. To do this easily, place the lightweight cardboard circle on the wrong side of the stitched piece and hold it up to the light (or use a light box/pad), center it, then use a pencil to trace around the circle – cut approximately ¾” – 1” out from the drawn line.
- Trim the backing fabric in the same fashion.
- Press your stitched piece. Press face down on a fluffy towel with a hot iron. Make sure your stitching is round and straight. Center and fuse the 6” x 6” piece of medium weight interfacing to the wrong side of the stitched piece using the package instructions.
5. Mount cross stitch and backing fabric.
-
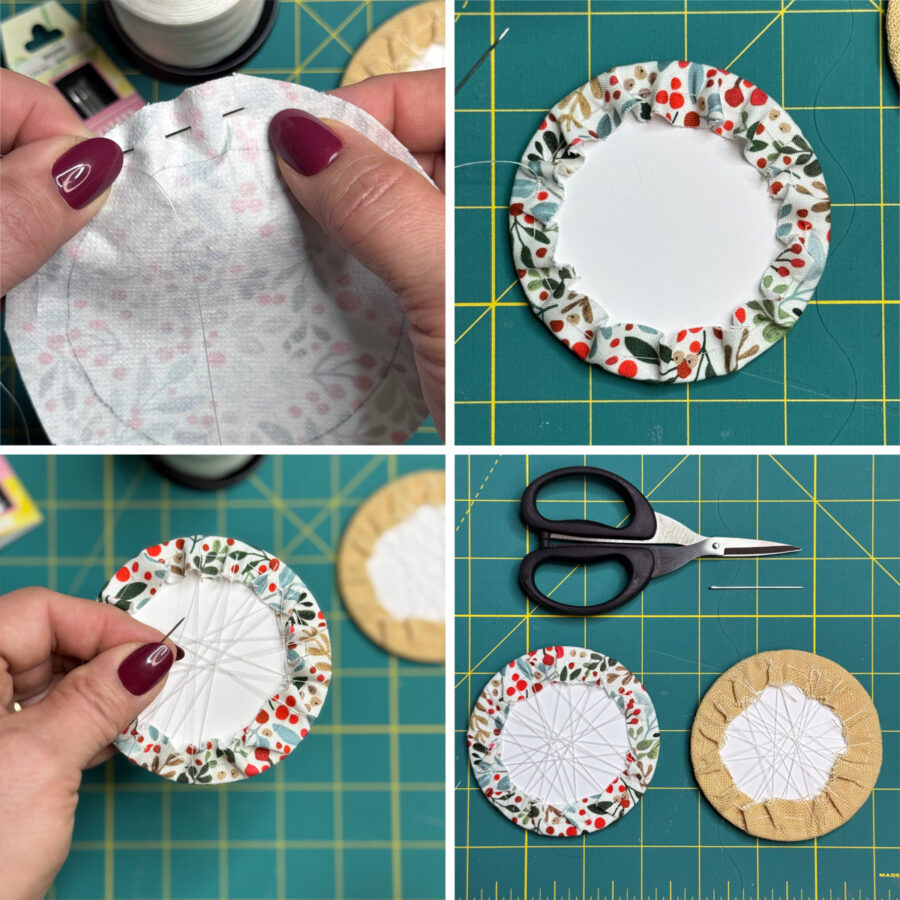
- Center one piece of lightweight cardboard with the quilt batting against the wrong side of your stitched piece. Fold the seam allowance over the lightweight cardboard.
-
- Thread your needle with one strand of strong sewing thread (Nymo beading thread works well) – use a long length to make it all the way around the piece. Knot the end of your working thread. Use a sharp needle – a crewel embroidery or quilting needle works well. Anchor the working thread knot in the seam allowance on the right side of the stitched piece about a ¼” from the edge. Use a large Running (Gathering) Stitch around the entire perimeter. Stop once you reach the knot and have your working thread on the right side of your stitching (same side as the knot).
- Keeping the stitching centered over the batting and cardboard circle, pull the working thread and the knot together to gather the linen around the cardboard circle. Pull both threads at the same time. Once the stitched piece is tightly centered over the batting/cardboard, knot and tie off. TIP: To make the stitched piece have fewer puckers and lie smooth across the batting/cardboard, lace the linen seam allowance that covers the carboard until you are pleased with the look of the front. Lace back and forth in a star pattern, working your way around the seam allowance.
- Repeat previous steps, using the circle of cotton backing fabric and the remaining lightweight cardboard circle with batting.
6. Complete the ornament.
-
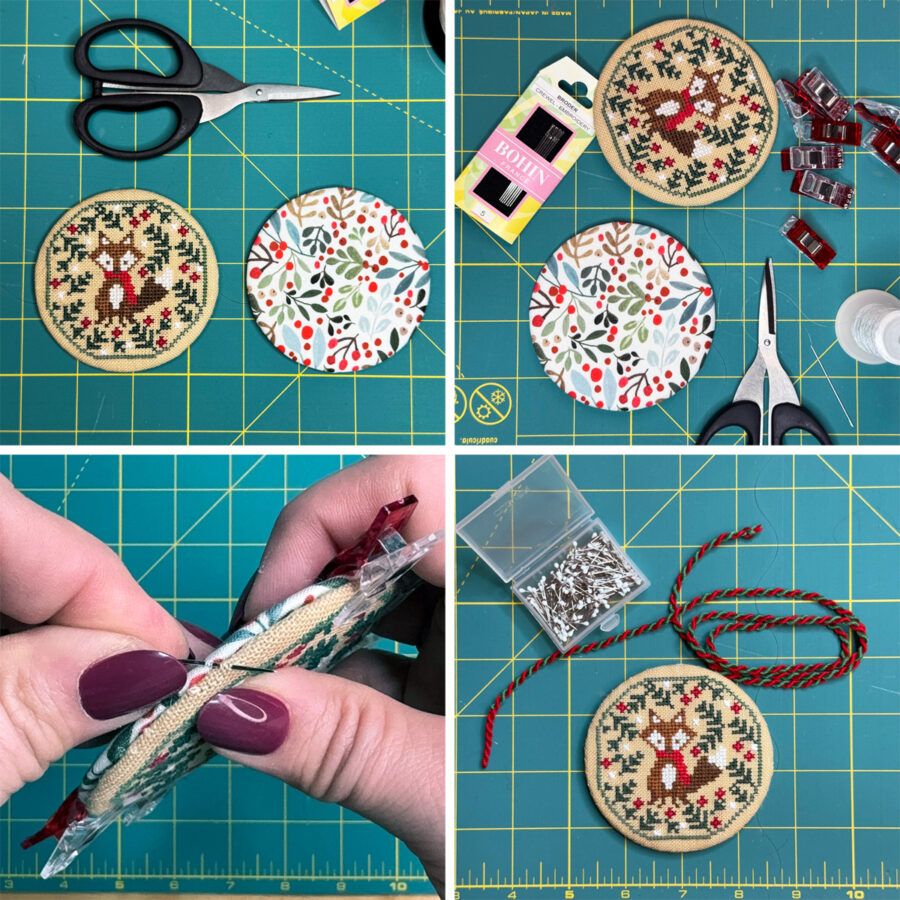
- Place your two disks wrong sides together – stitching and backing fabric facing out and lightweight cardboard sandwiched between. Wonder Clips work great to hold the two disks together. Use transparent nylon thread to Whip Stitch the edges together, going through the perimeter edges of the fabrics. Use tiny Whip Stitches. You may use HeatnBond Fabric Fuse Liquid Adhesive (glue) to adhere the front and back together for this step, if that is your preference. You should now have a finished disk – stitching centered on the front – cotton fabric on the back.
-
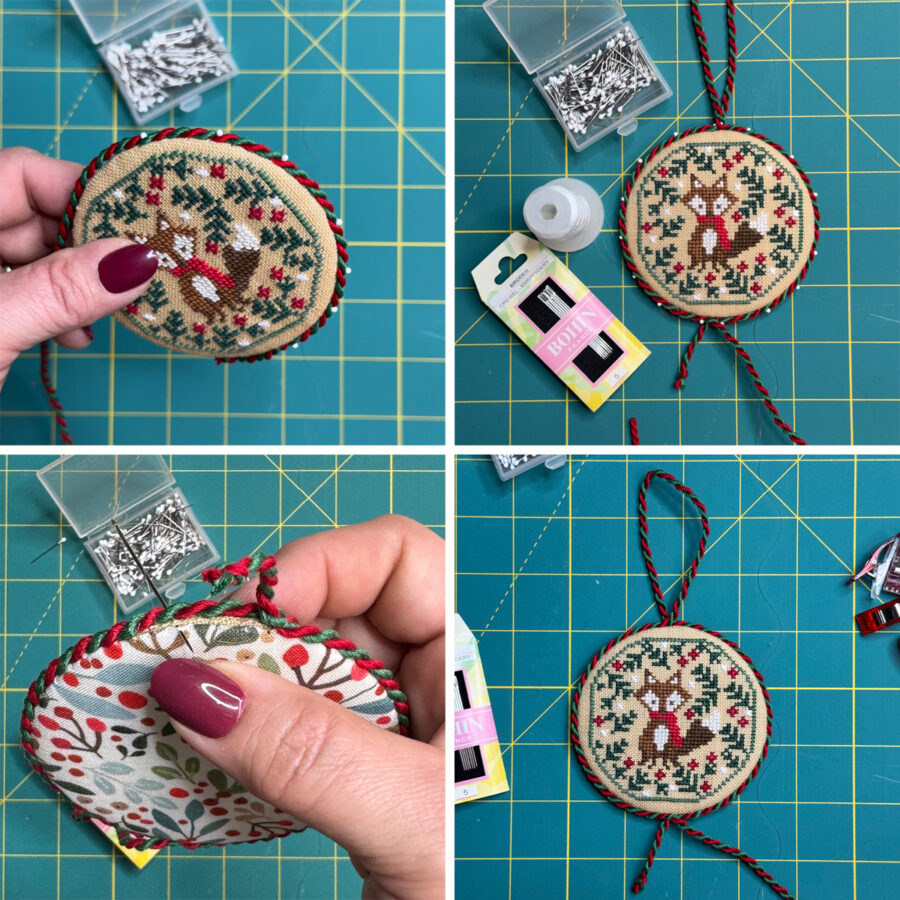
- Pin twisted cord in place around the perimeter of the ornament, making a 3” loop (6” of cord) at the top center for hanging. You may choose to leave the two knotted ends as a tassel at the bottom of your ornament, as I have done or bury the knotted ends in the disk between the front and back of the ornament. Use transparent nylon thread and a sharp needle to stitch the twisted cord in place. Again, you may choose to use HeatnBond Fabric Fuse Liquid Adhesive (glue) to adhere the twisted cord, if that is your preference.
- If you leave the tassel cord ends at the bottom of your ornament, trim the loose ends to equal lengths – making sure to knot your cord at the ends, so it does not unravel. I wrapped the cord at the base of the loop and base of the two loose ends with several strands of a complementary color of floss – this was my personal preference (you can tie knots instead).
-
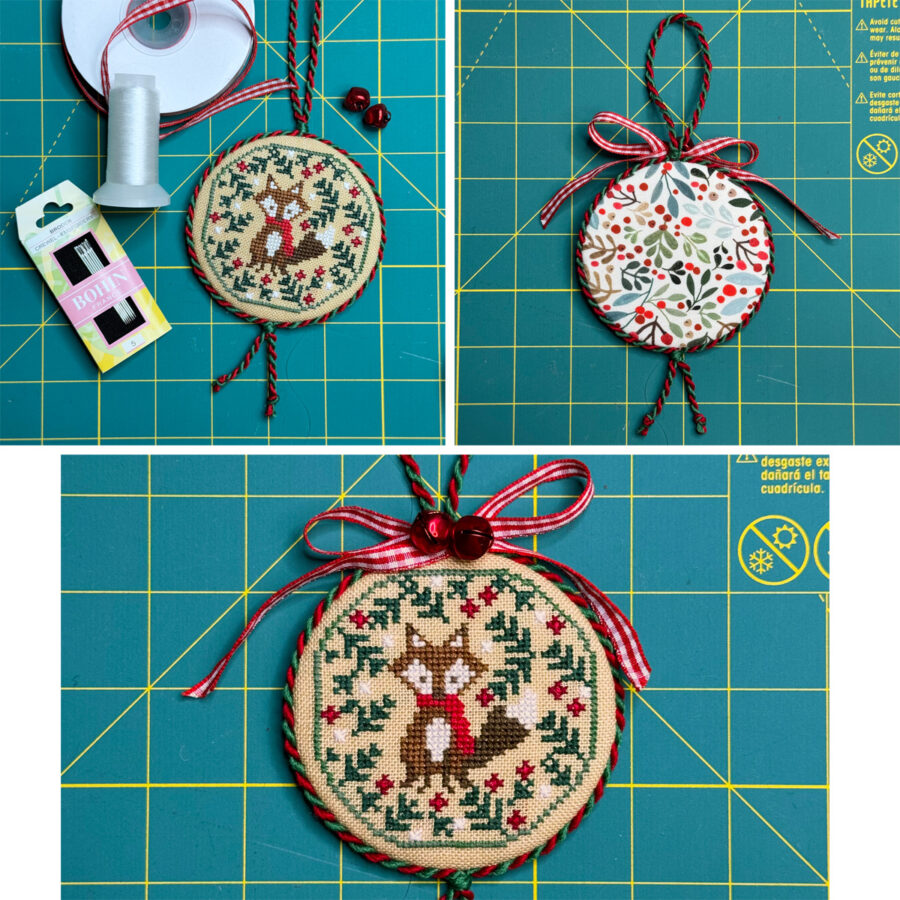
- Use transparent nylon thread to attach the gingham bow and two jingle bells at the base of the hanging loop, if desired or add your favorite embellishments.
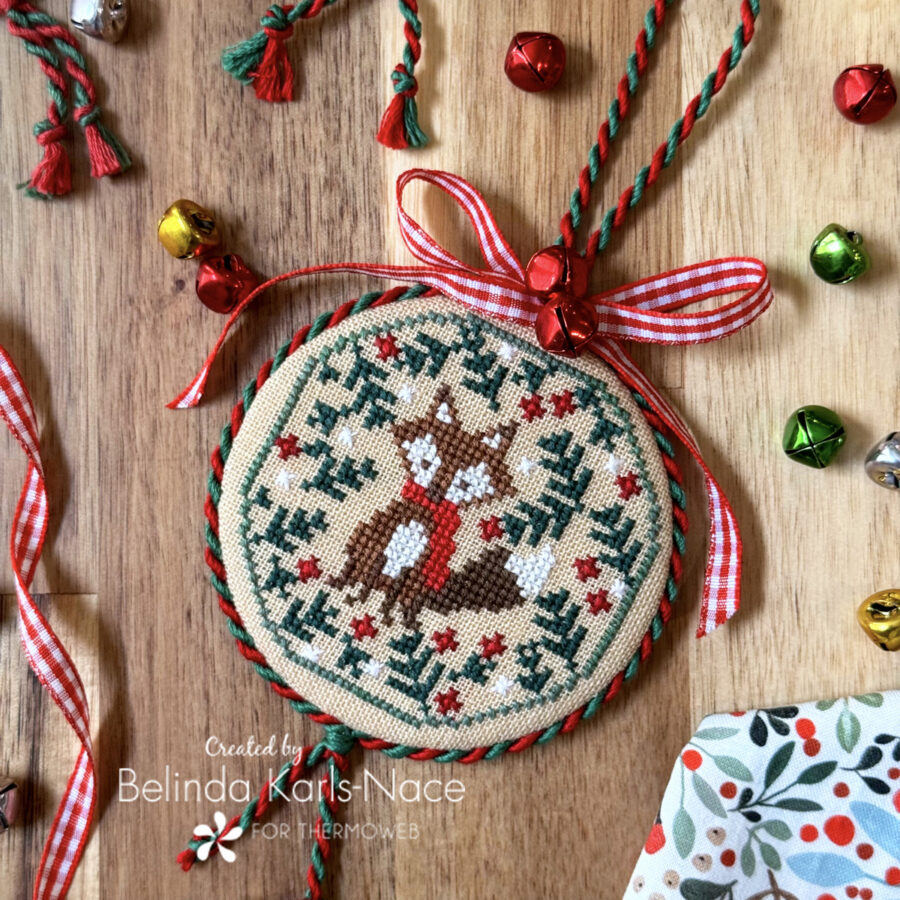
7. Your Cross Stitch Christmas Ornament is now complete. Enjoy!
Thank you for joining me today for my Therm O Web blog tutorial. I hope this post gives you the confidence to try finishing your own cross stitch pieces into hanging ornaments. To see more of my projects, stop by my blog, website, Instagram, and/or YouTube channel – I would love to visit with you and see what you create!
