


 Hi, hi!! It’s Katrina from Paper, Scissors, Glue and Hybrid Too today sharing a way to create an easy flocked accent using the Deco Foil Flock Transfer Sheets on your paper projects! And with all the colors of Deco Foil Flock you should be able to find a color that works with your project.
Flock Accents
Therm O Web Supplies Used
Memory Runner XL
Memory Runner XL Refill
3D Foam Squares – Combo Pack
NEW 3D FOAM SQUARES BOX
NEW 3D FOAM TAPE ROLL 1/16
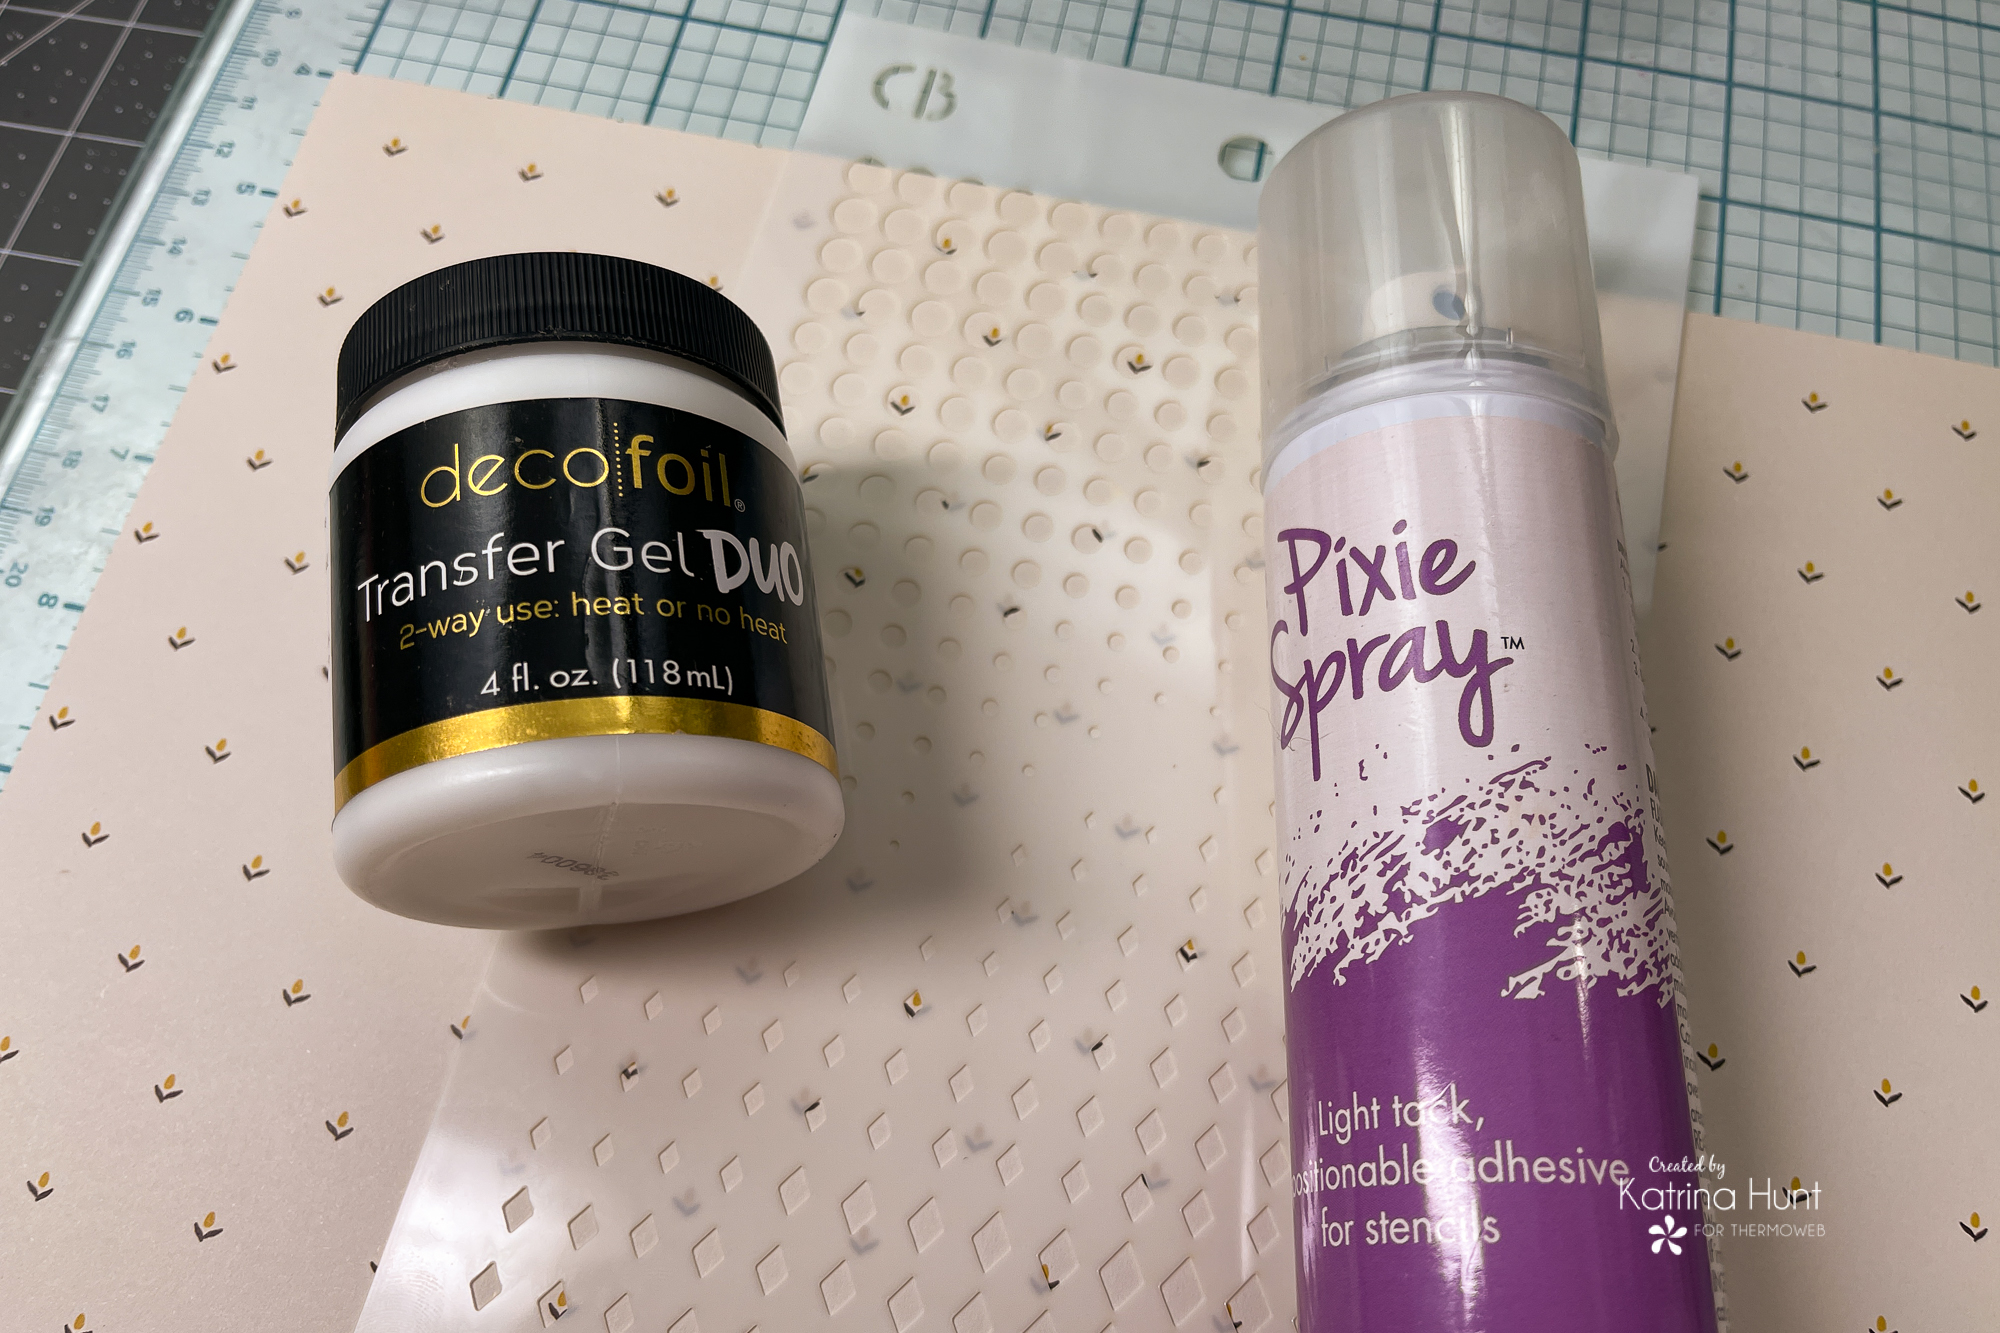
Deco Foil Transfer Gel DUO
Deco Foil Flock Transfer Sheets-Tuscan Gold
iCraft Pixie Spray
iCraft Purple Tape
Ultra Bond Liquid Adhesive
NEW ULTRA BOND LIQUID ADHESIVE PEN
Other Supplies Used
Amy Tangerine Late Afternoon Collection (use code Katrina for 20% off)
Ciao Bella Stencil (use code Katrina for 20% off)
Scraplift Sunday Layout inspiration from Paper Issues Friends and Fan Facebook Group
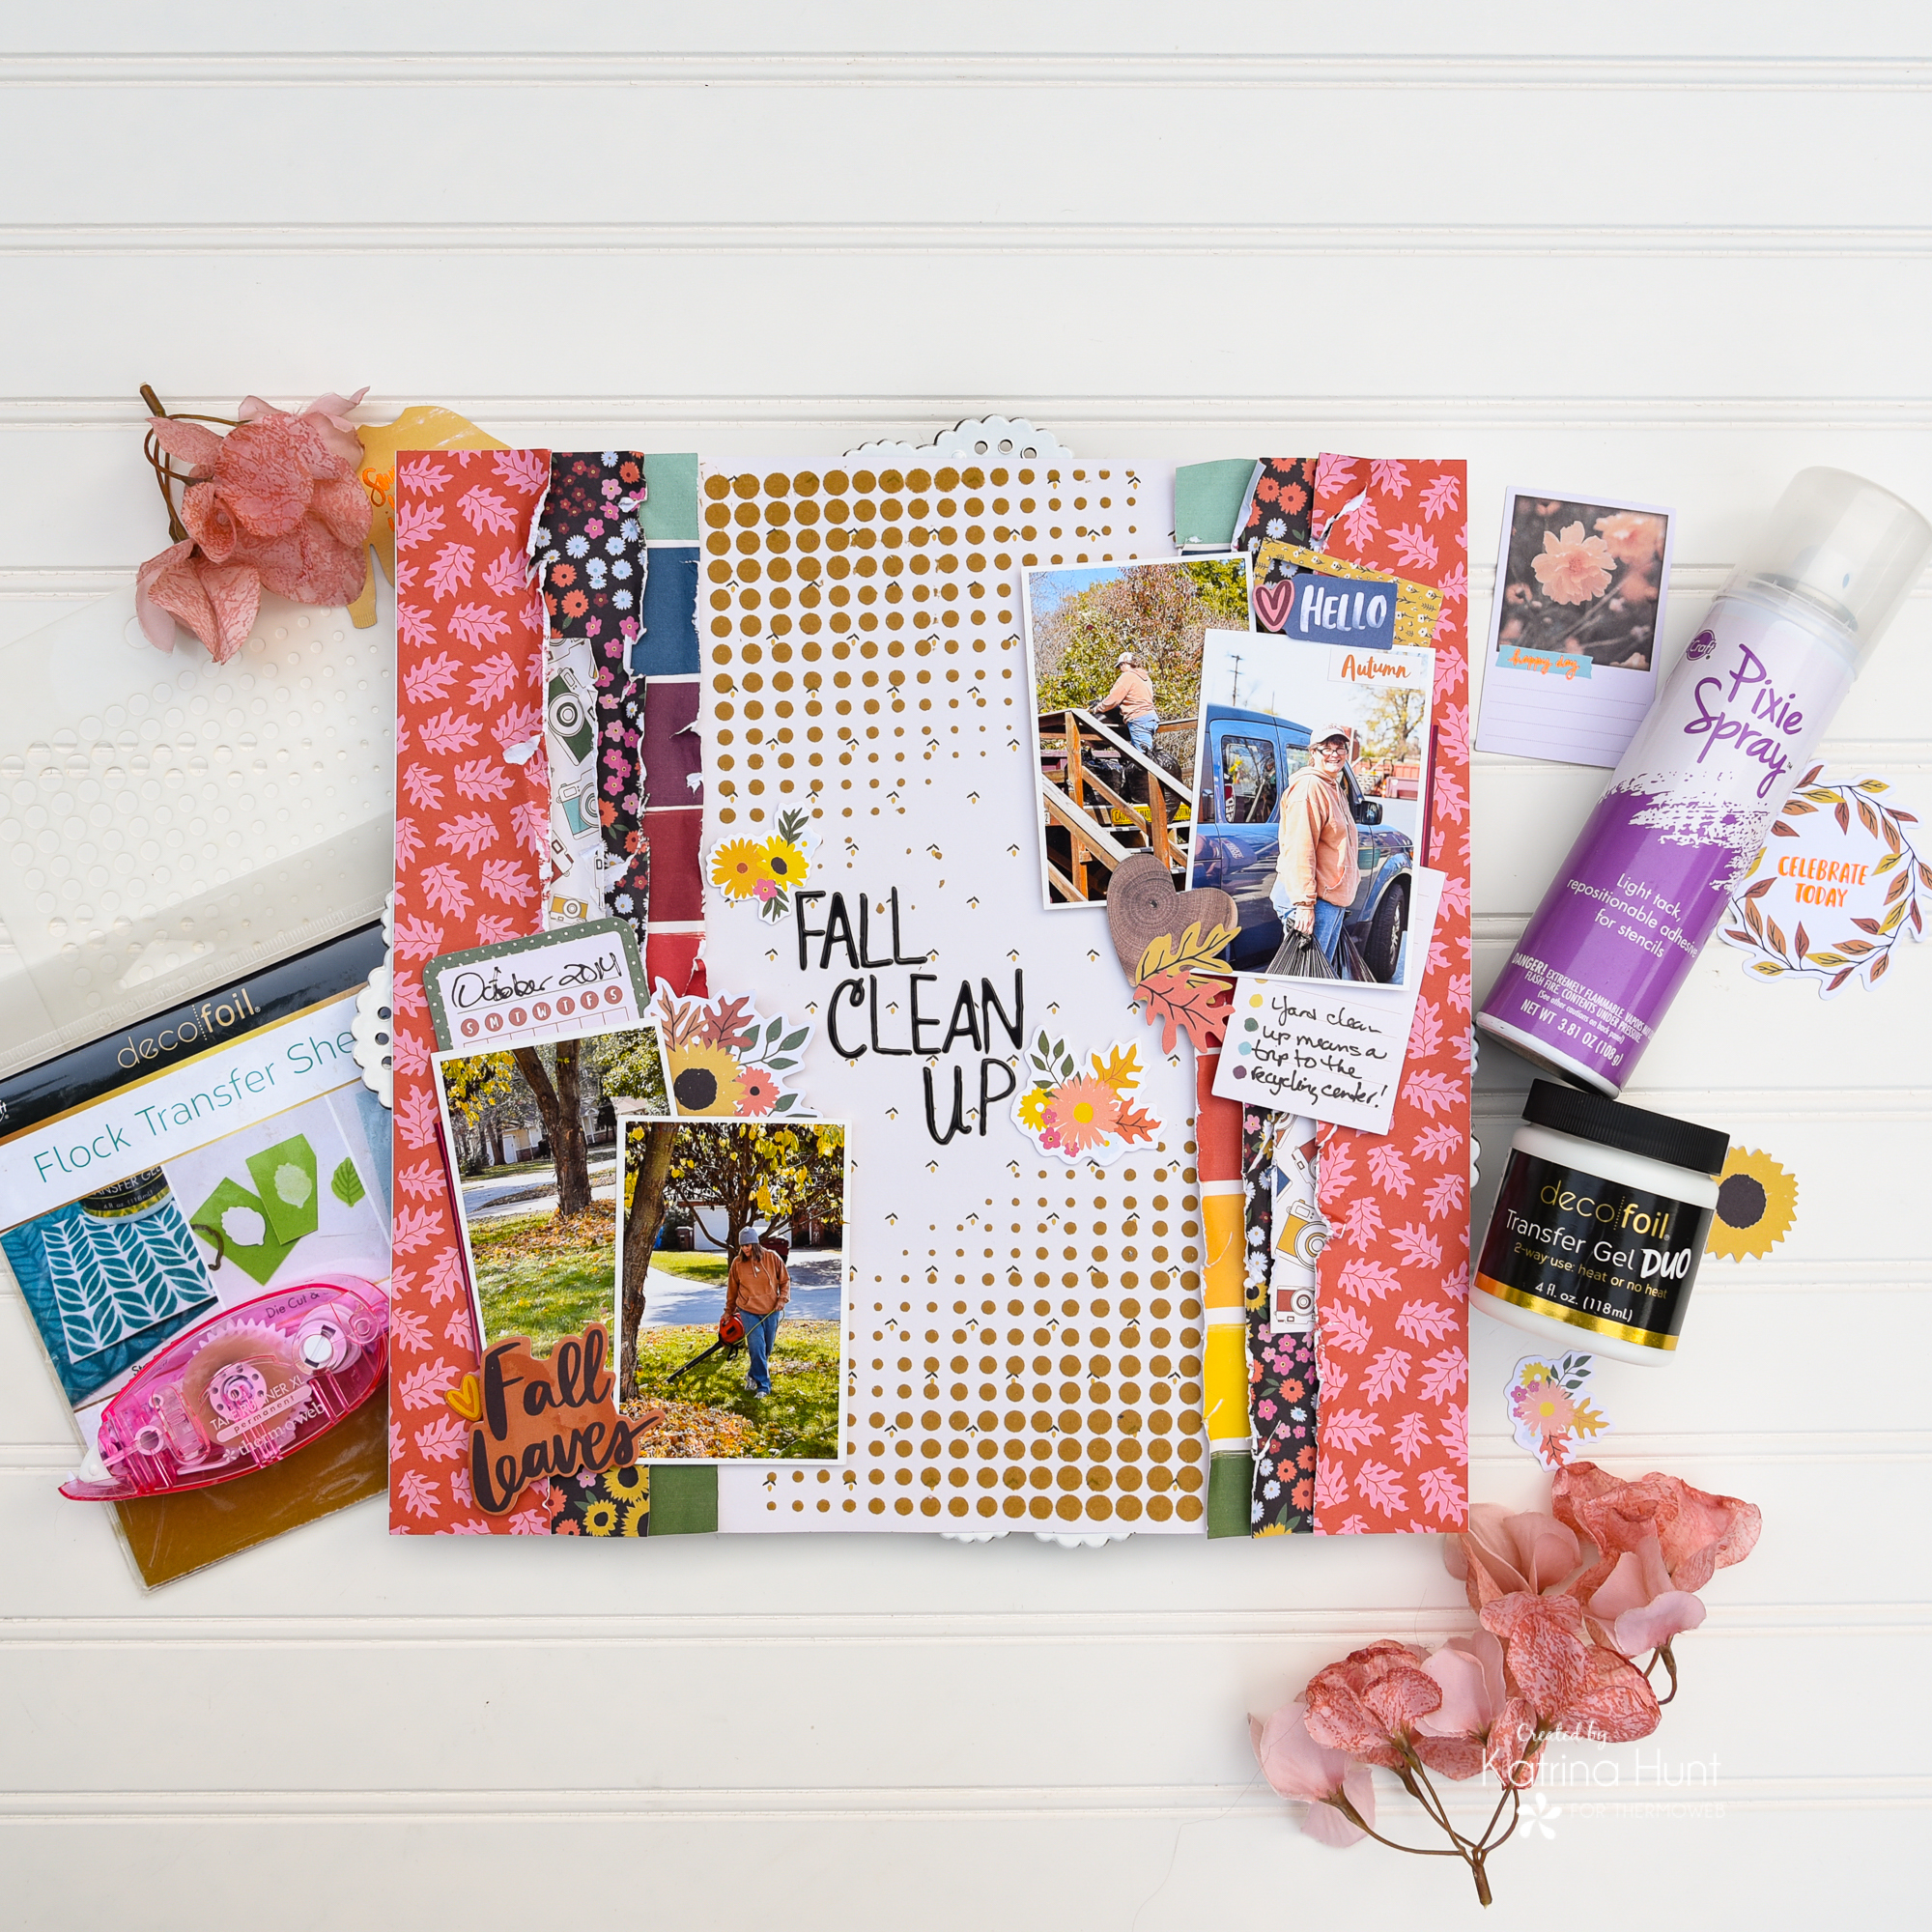
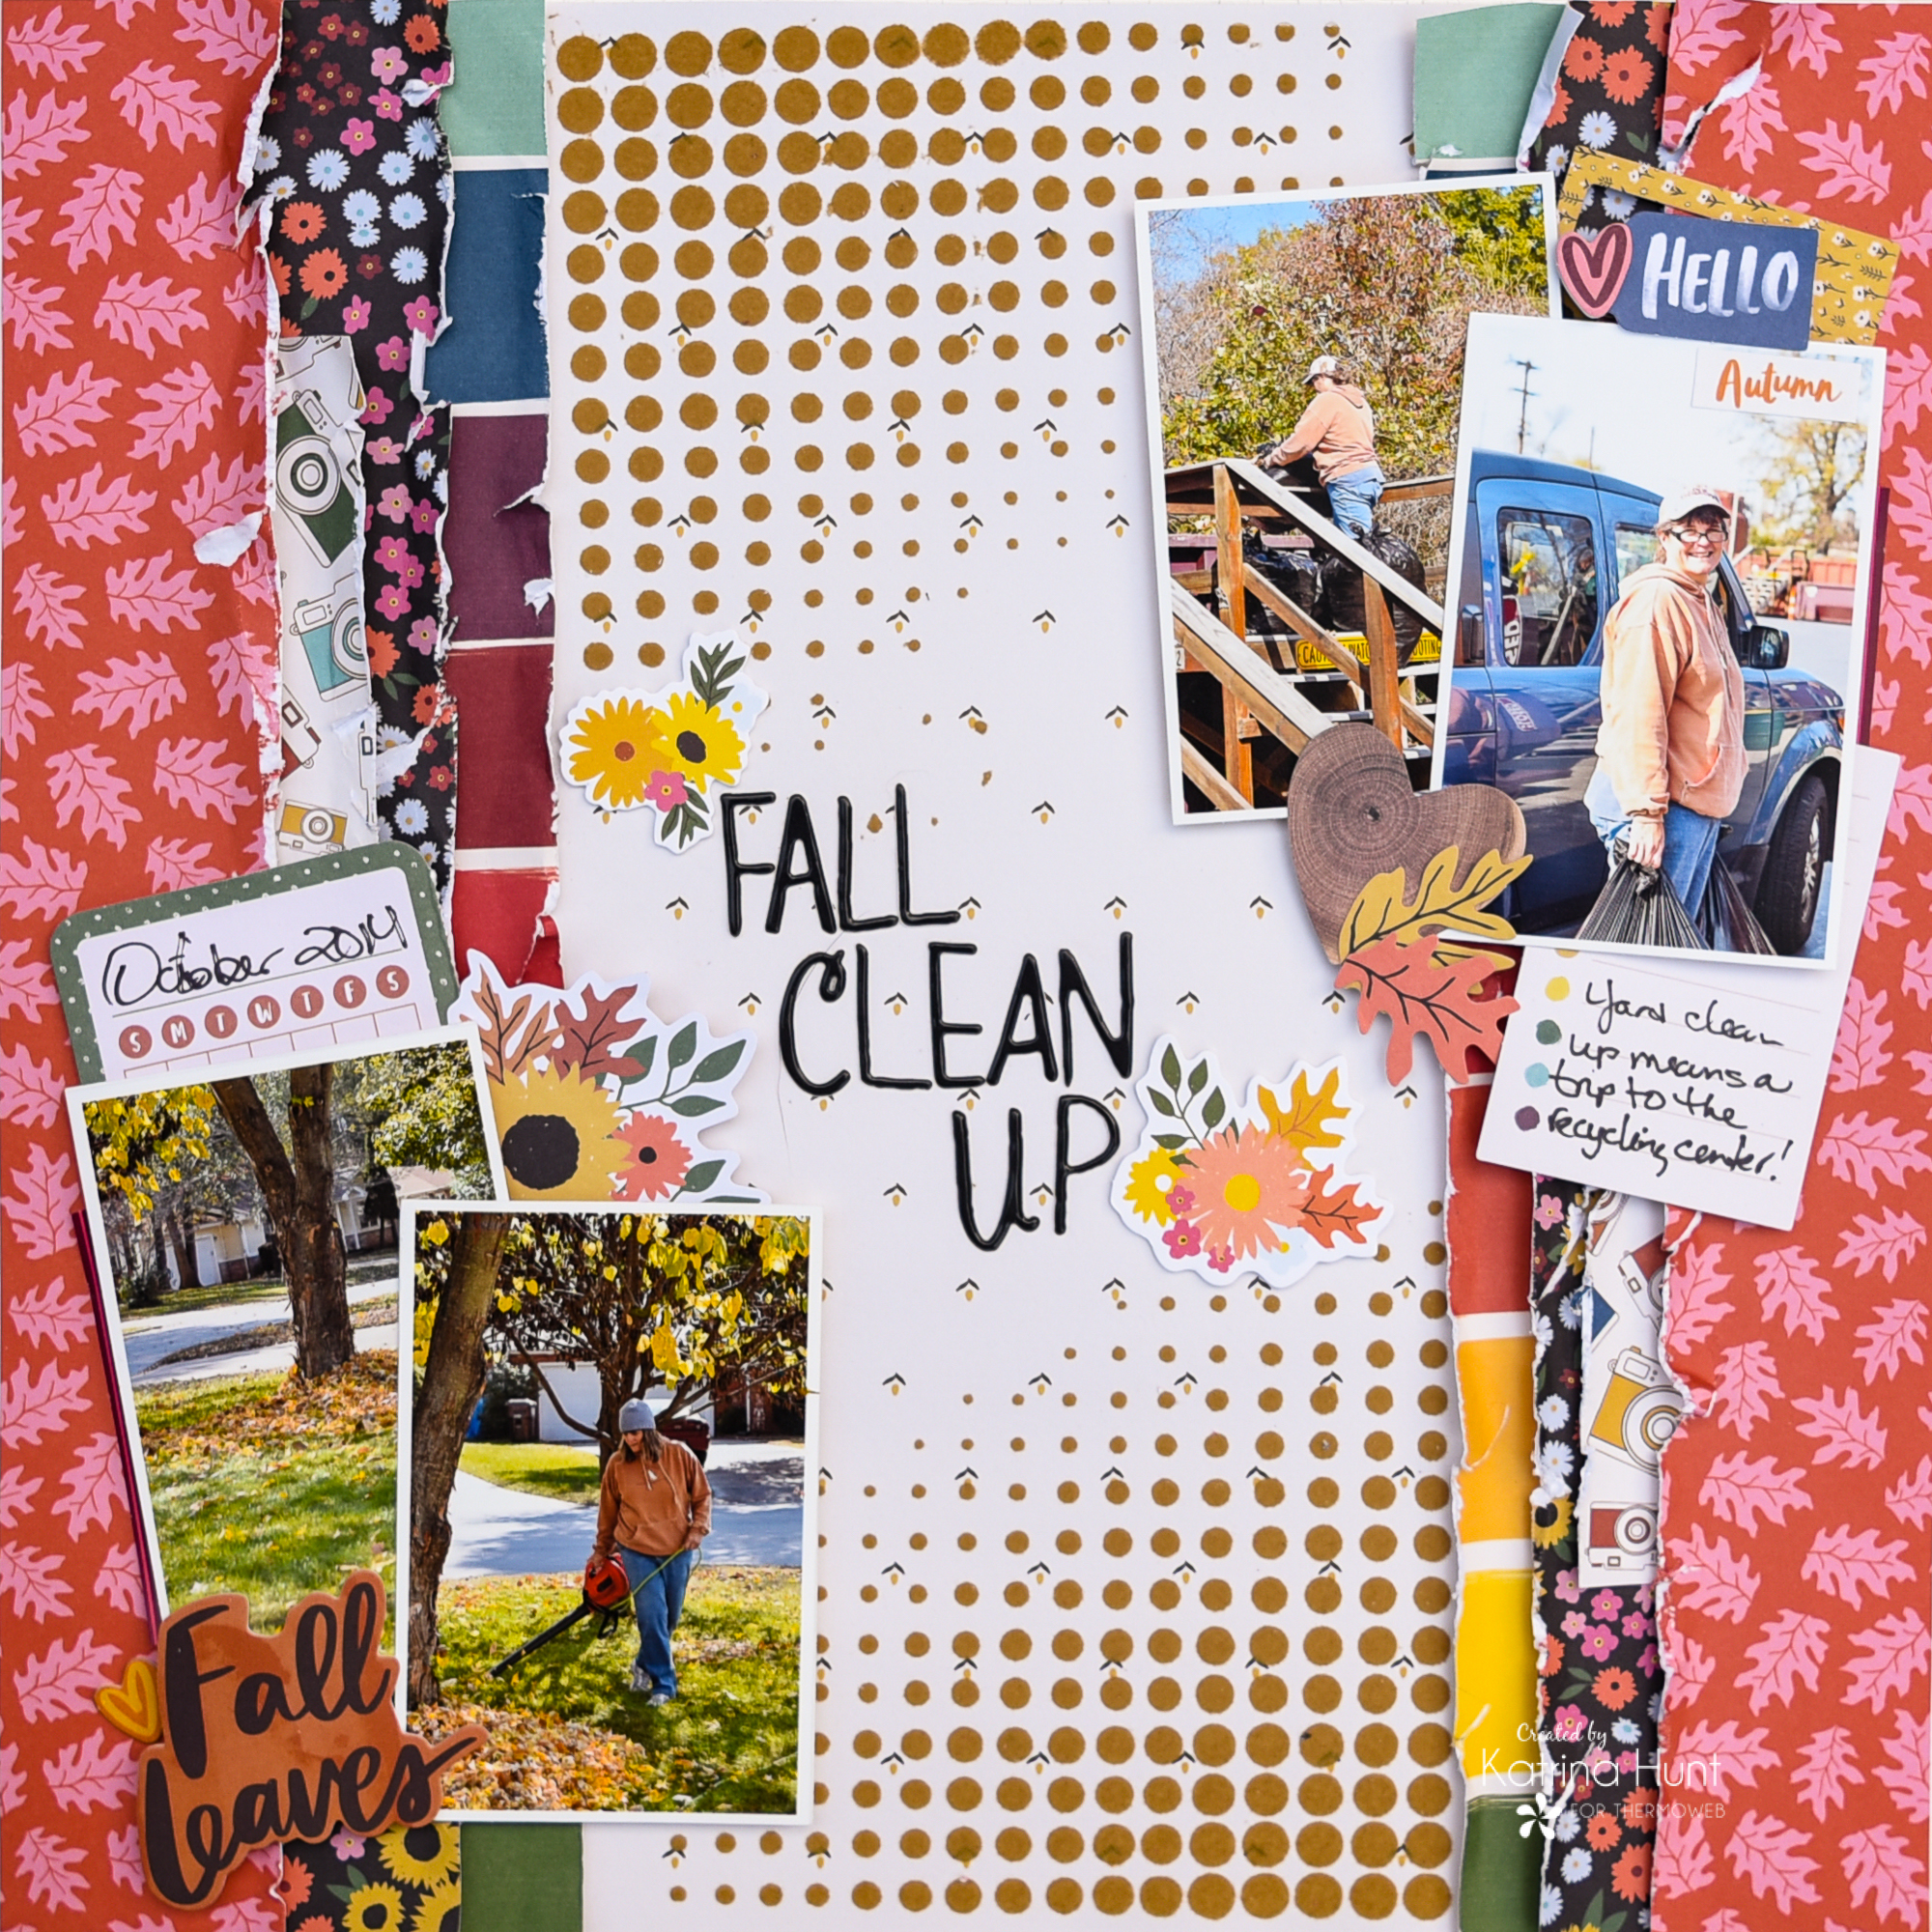
LAYOUT DETAILS
So, you want to try Deco Foil Flock on your layout but you aren’t quite sure what to do?! I am here to show you an easy way to add just a touch to make your layout pop. It’s best to have a laminator that will fit a 12×12 piece of cardstock. If you don’t, you could burnish (rub) the flock to transfer it, but you will get a slightly different result.
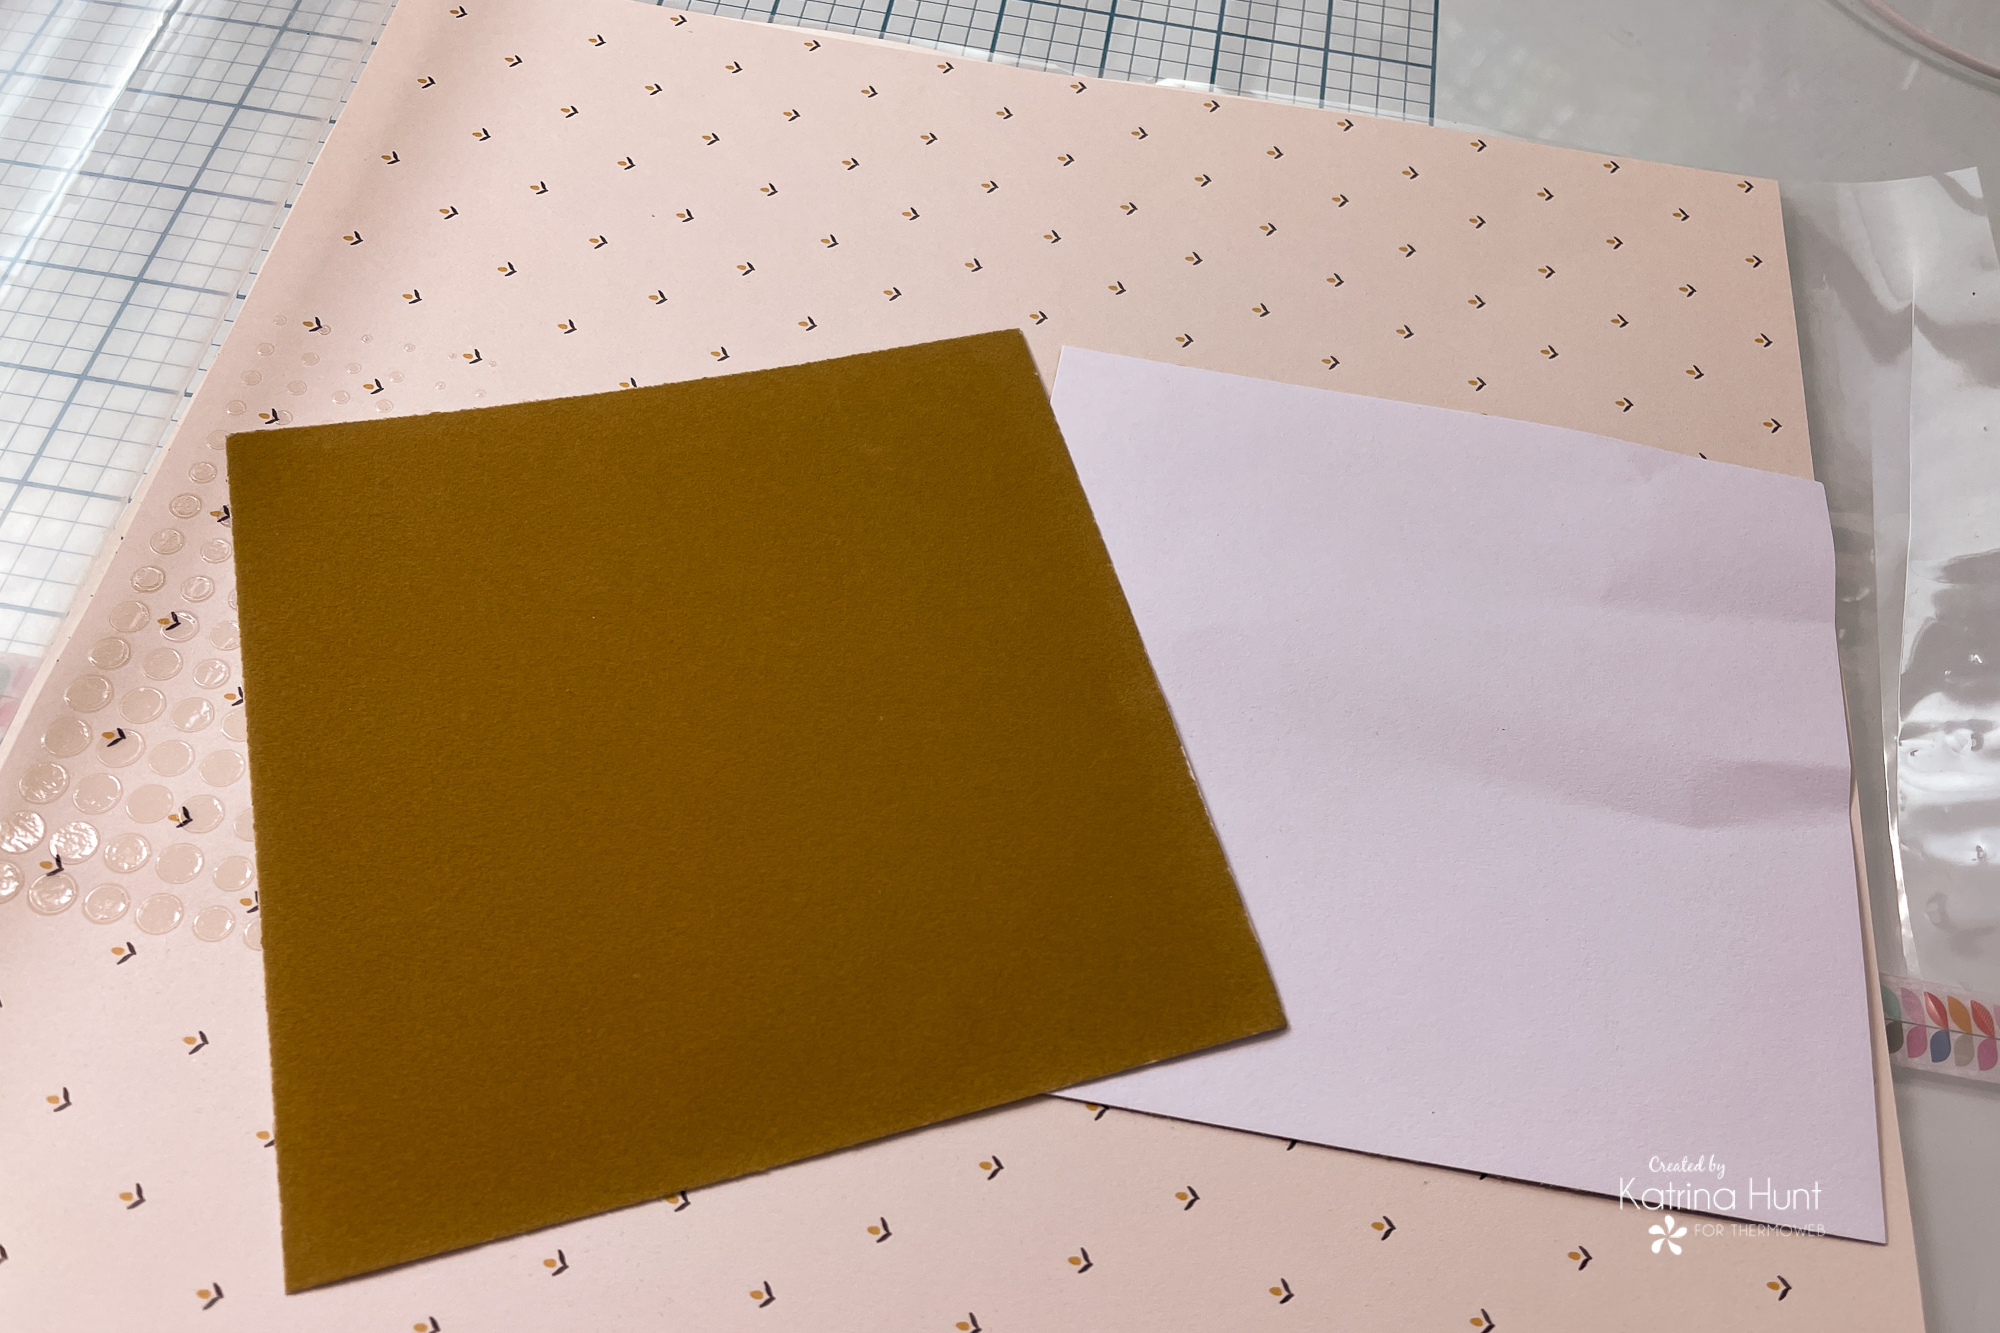
First, you want to figure out where you want the flock accent(s) to be. I choose the middle of my layout because there was the most space there. I could have easily done the sides on the leaf paper, it’s all about what you want to do! Once you have your area pick out, grab your stencil and lightly spray Pixie Spray on the back of it and let it dry for about 30 seconds. You can also use Purple Tape, instead of the spray to hold the stencil down.
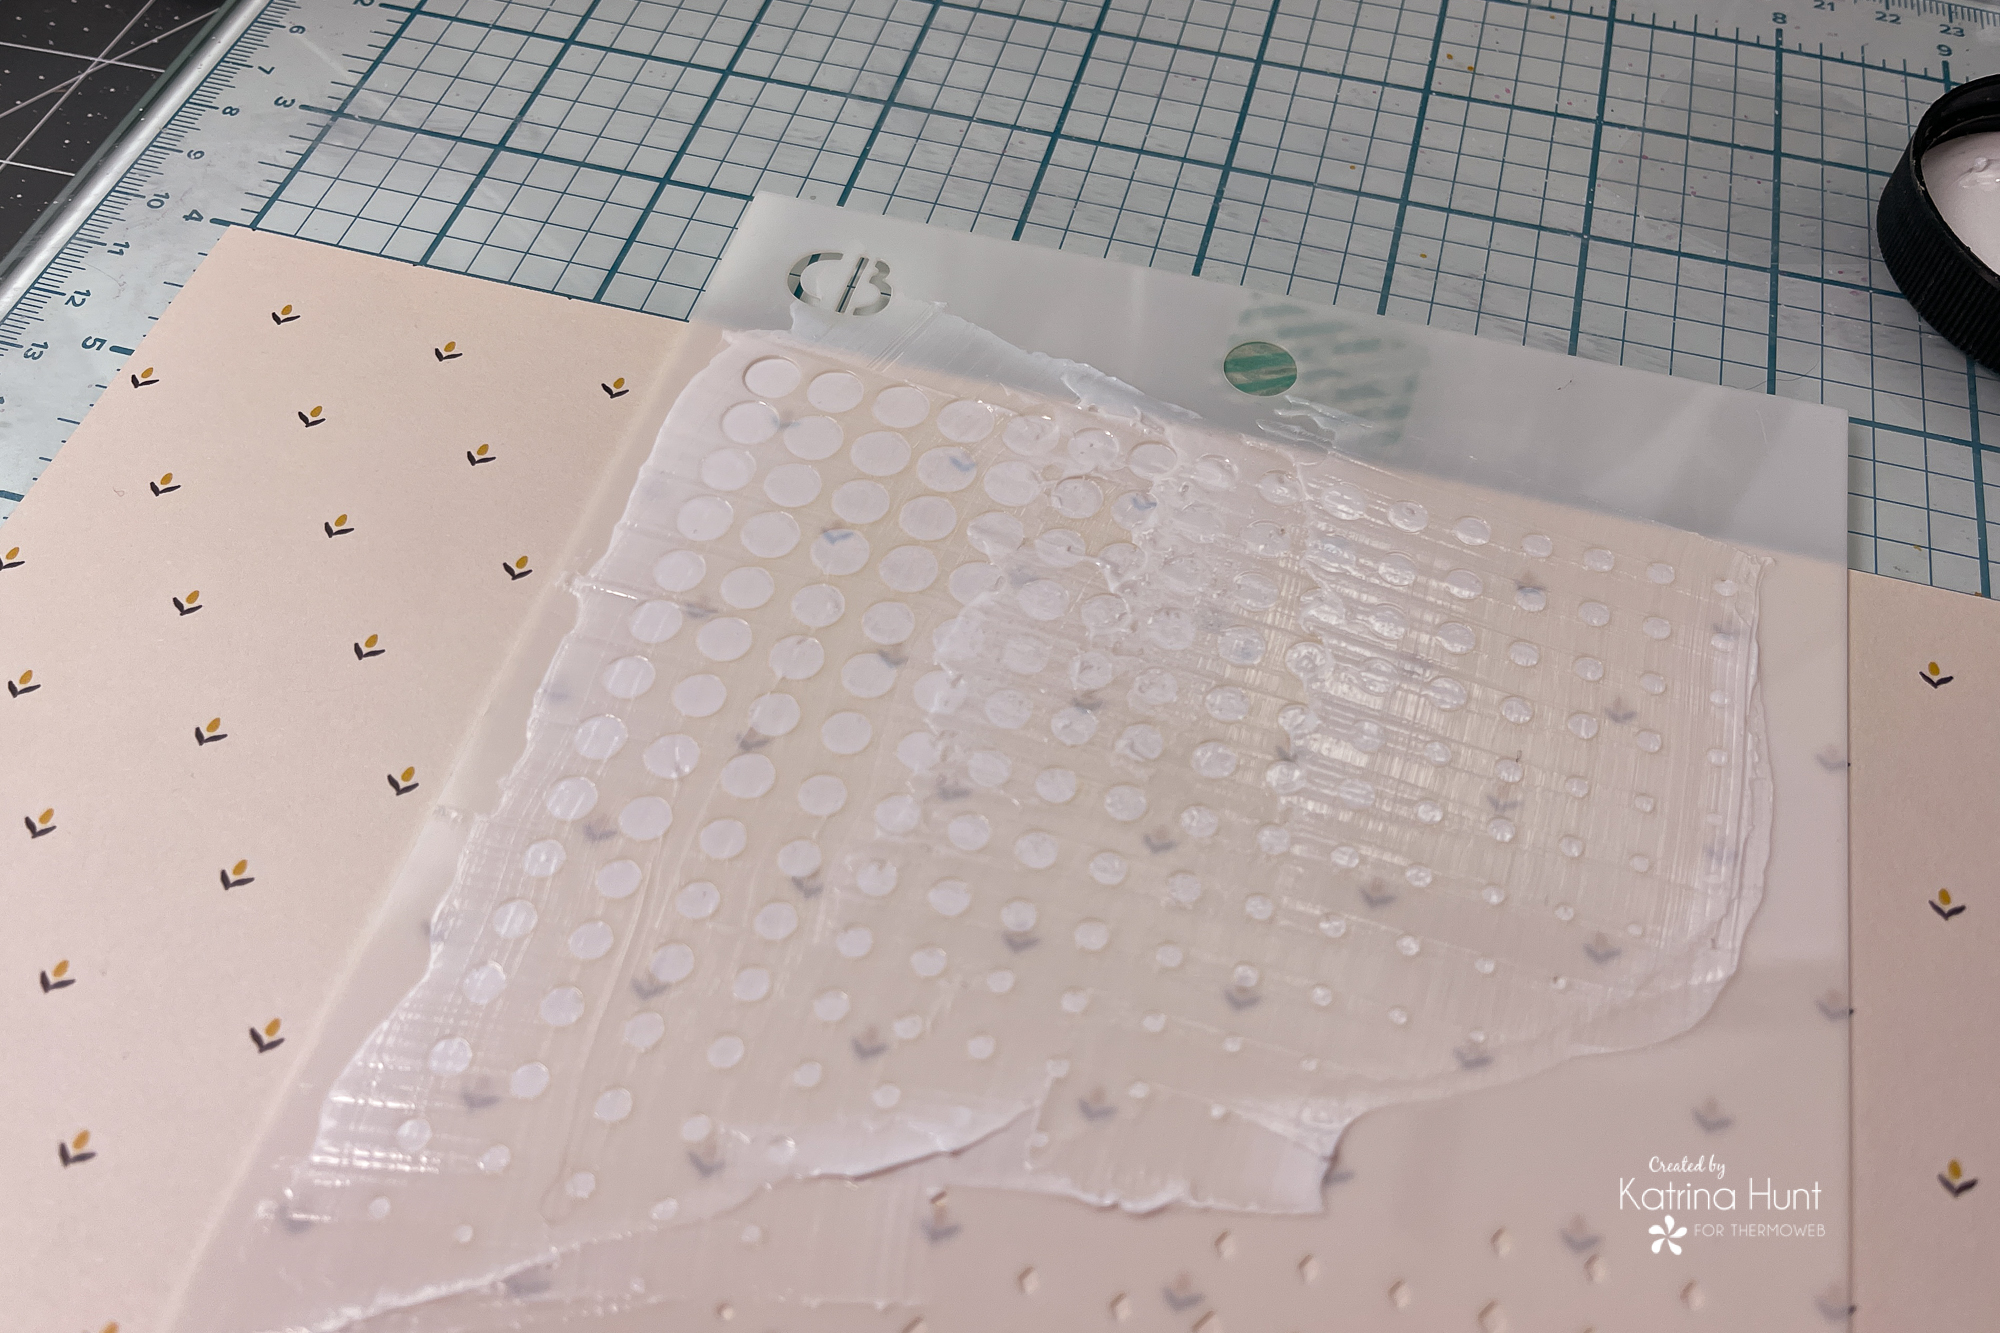
Next, carefully spread your Transfer Gel Duo over the stencil area using a Stencil Pal or something similar. You want a good layer of coverage, not so thin you can see thru, but thick enough to fill the open areas of the stencil. This will give your flocked area a little dimension. Once you are done, carefully remove the stencil and set it aside to dry. I actually let mine dry overnight, because I did it right before I went to bed!
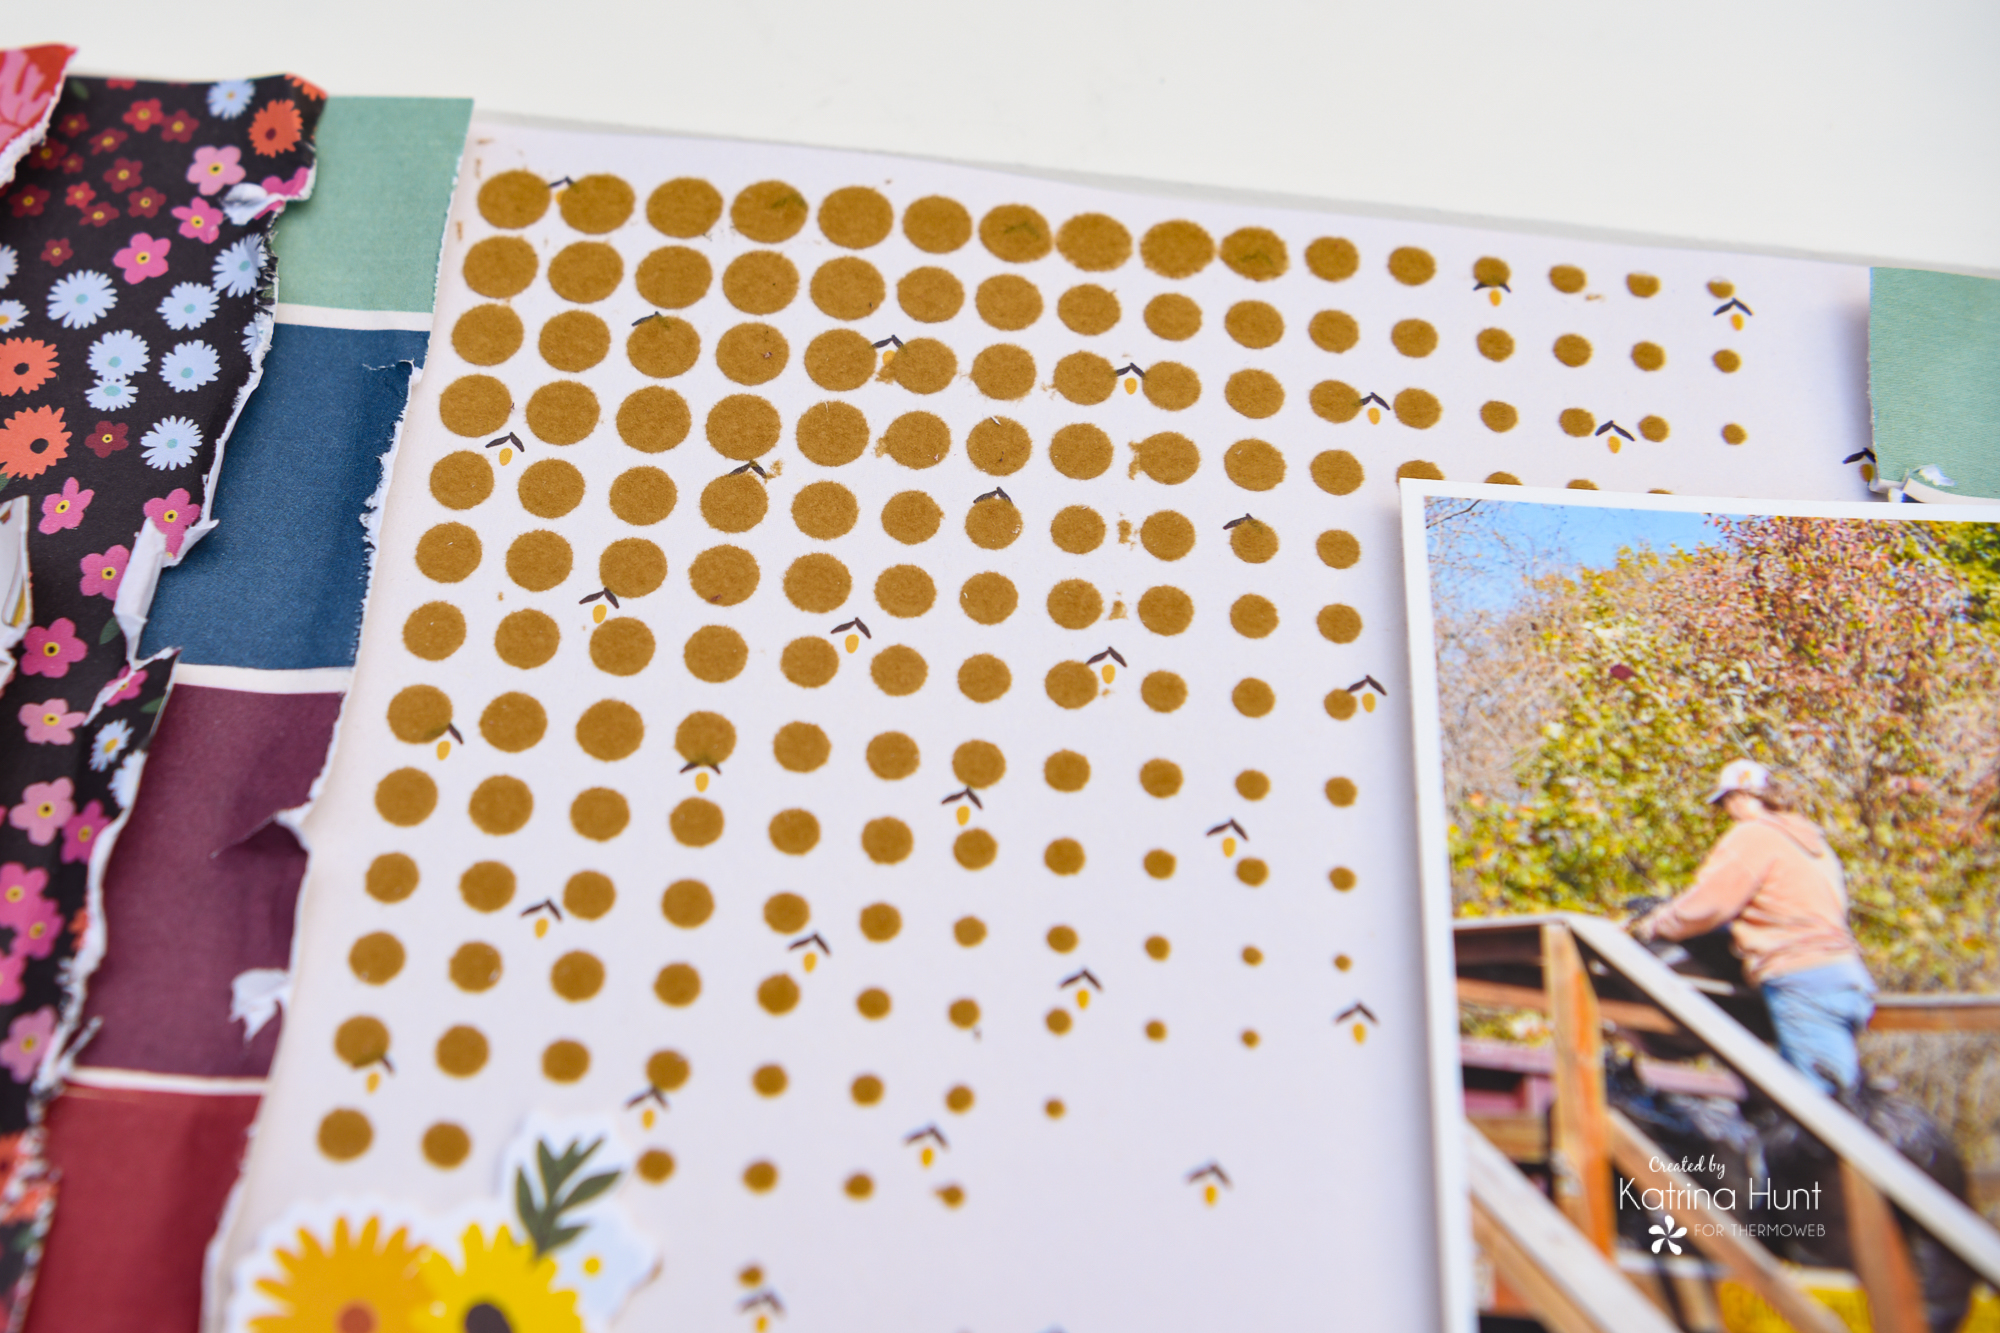
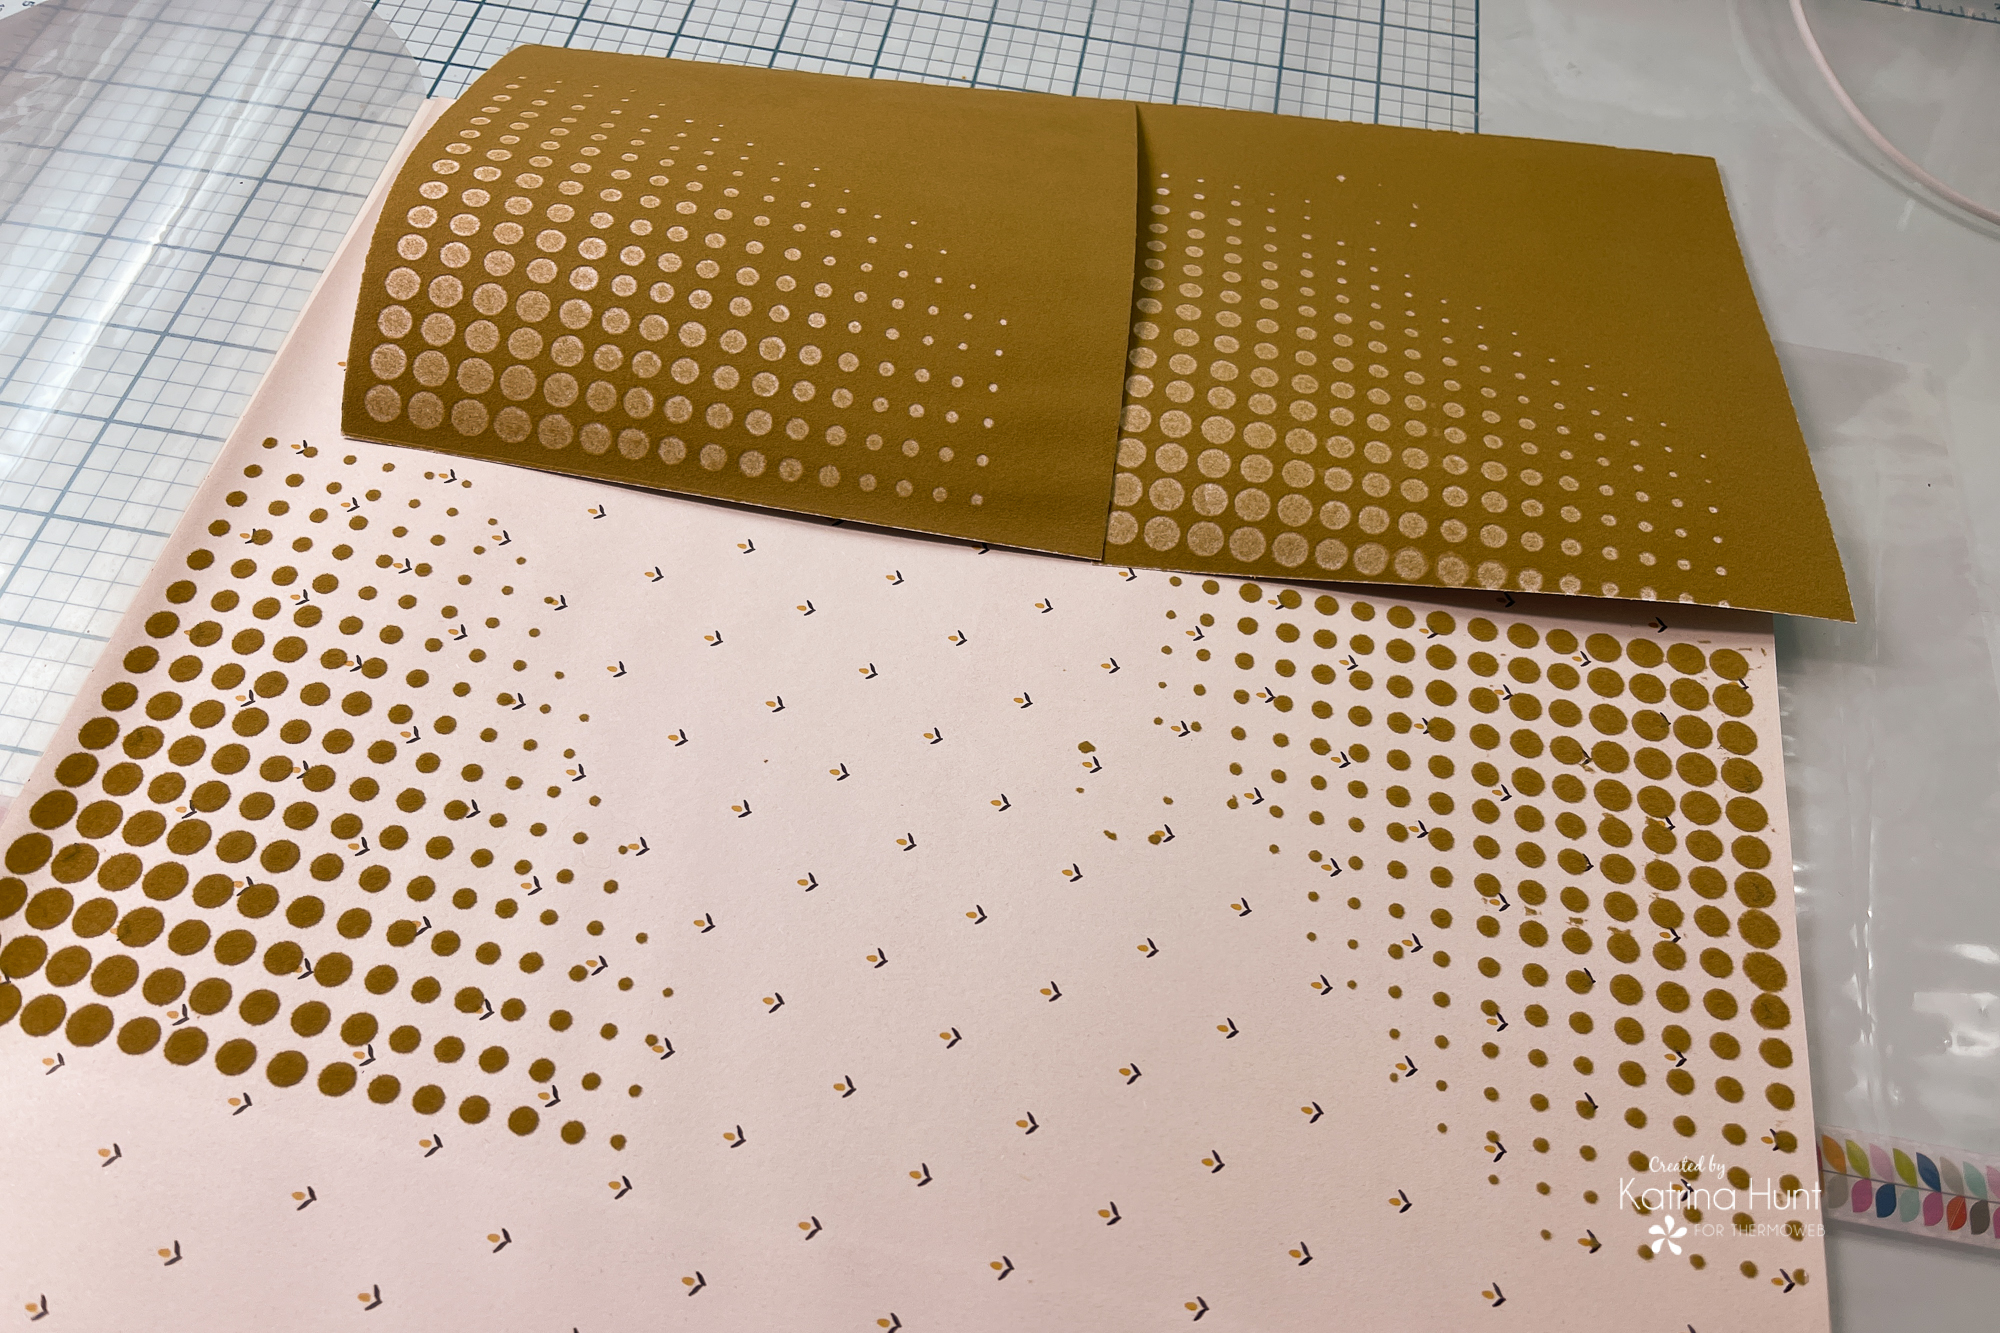
After your Transfer Gel Duo has dried completely, it will appear clear. You can see this in the picture below, left-hand corner. Now it’s time to apply the flock transfer sheet. Place the transfer sheet flock side down on top of the Transfer Gel Duo. I always rub lightly, but I don’t know if that is necessary or just a thing I do! Now you will run the stenciled background with the Flock Transfer Sheet thru the laminator. You can use a laminating pouch or parchment paper to do this.
When running thru the laminator, I always run mine thru twice. Once topside up and then I flip it over and run it thru topside down. After you are done running the piece thru the laminator, carefully remove the flock transfer sheet to reveal your stenciled area.
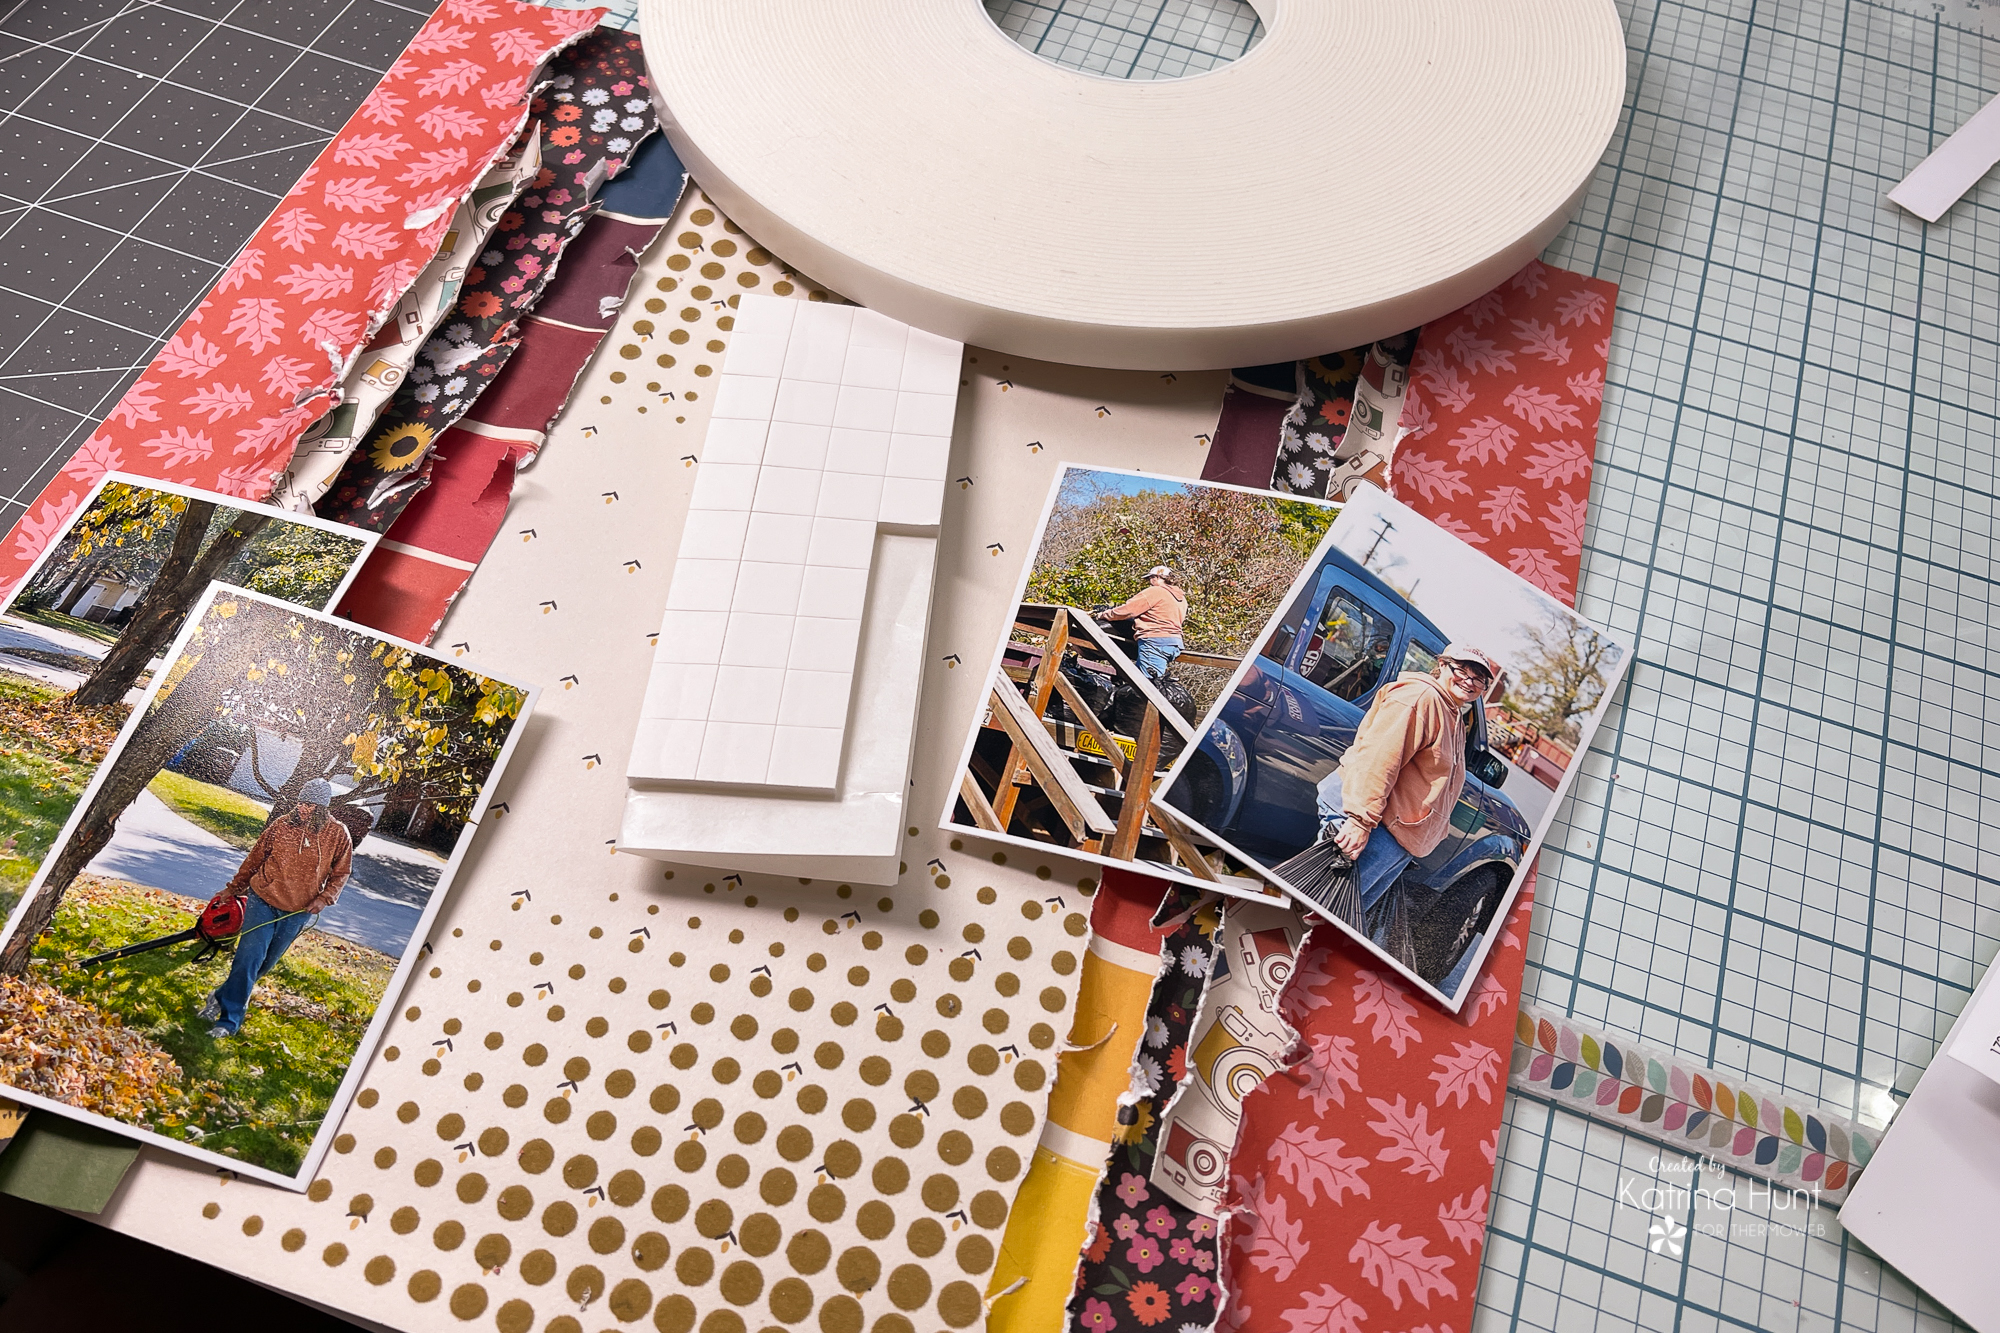
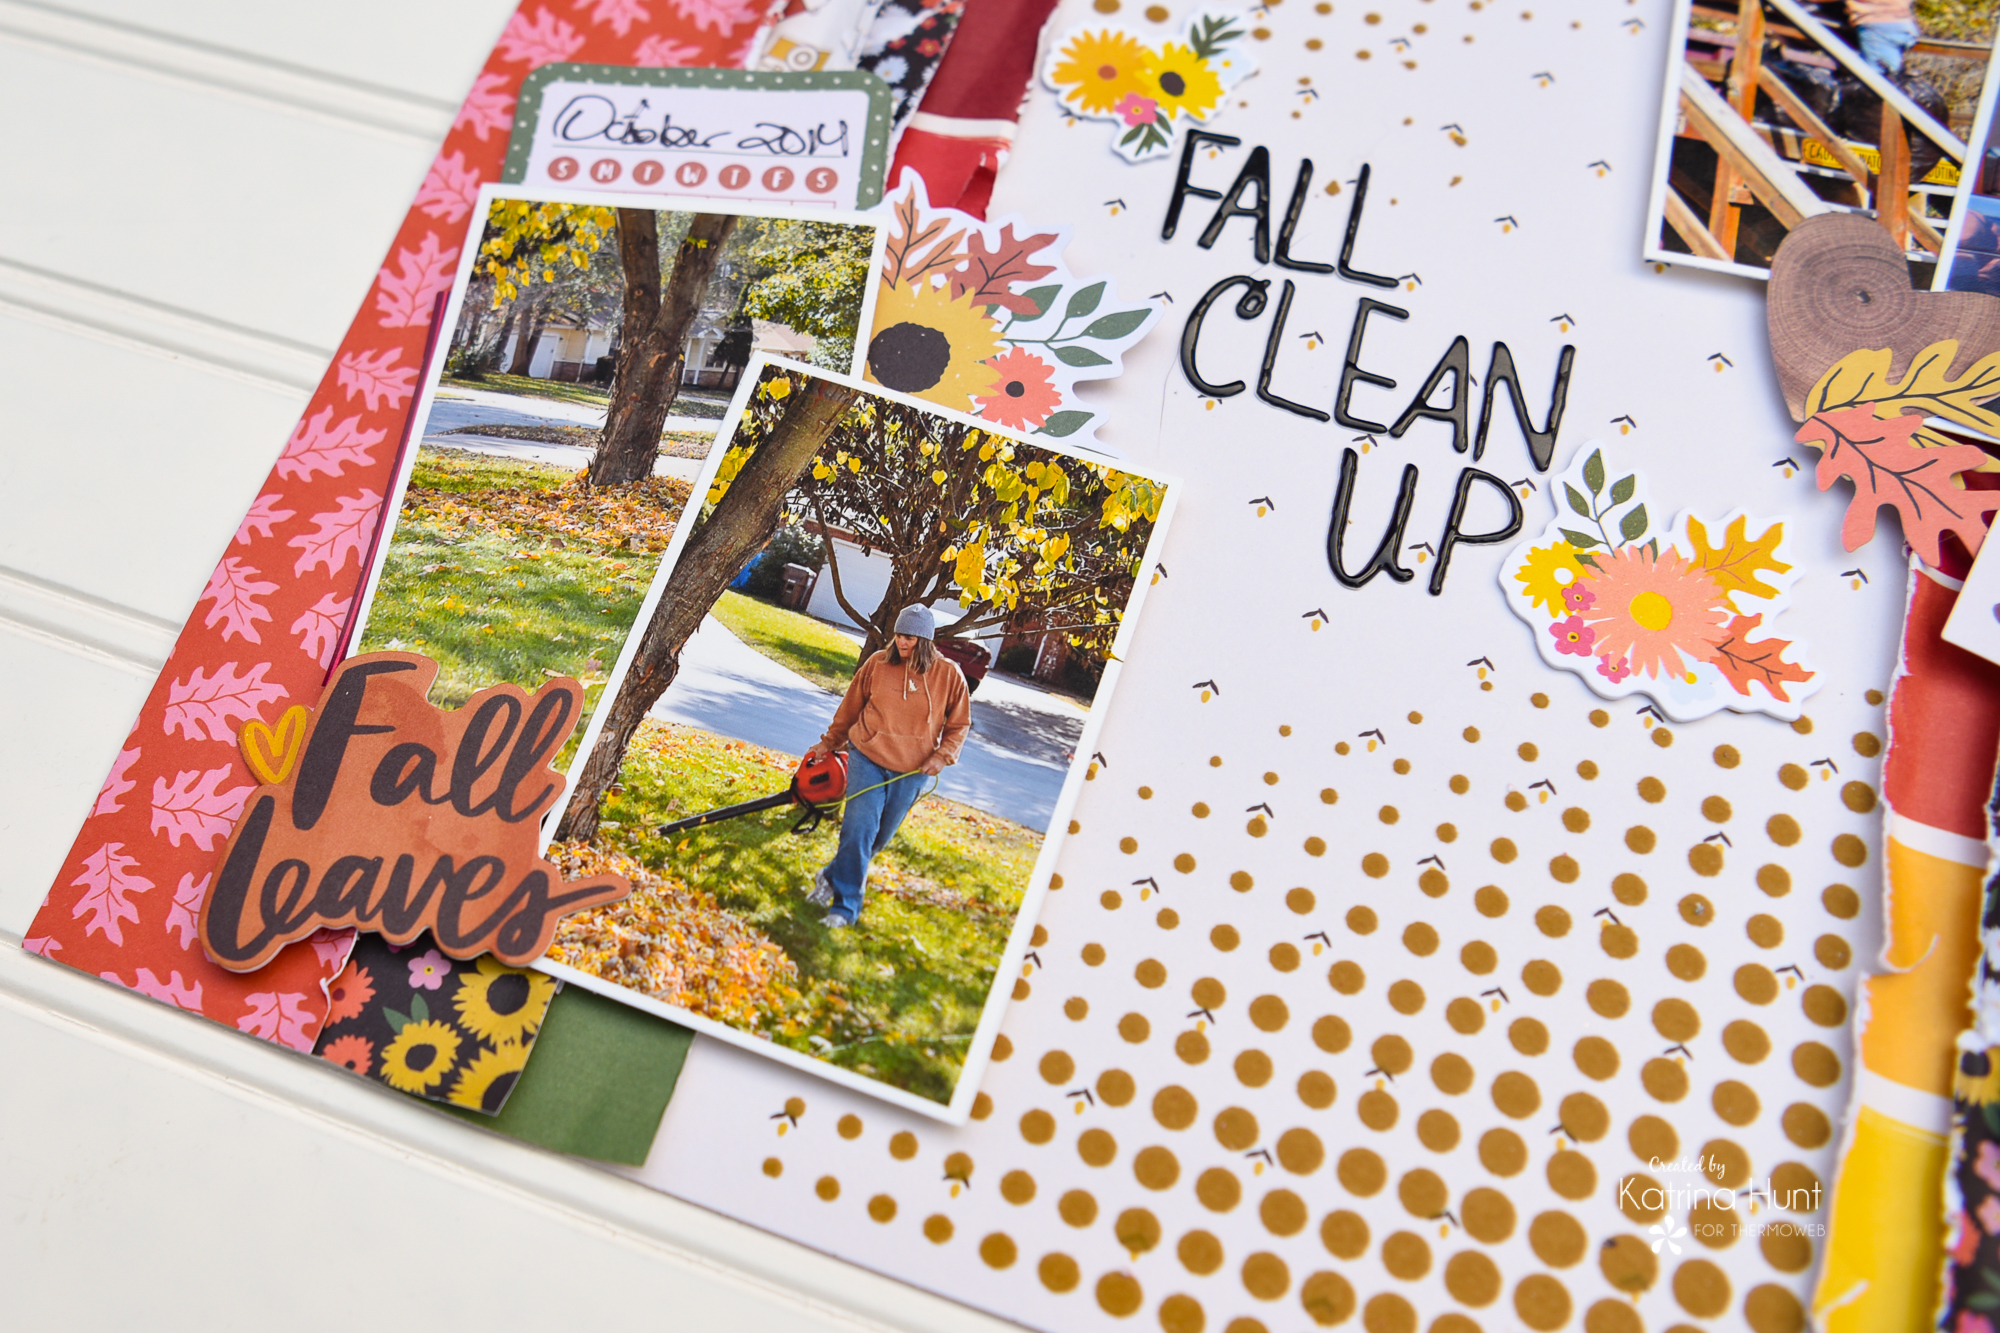 After I was done flocking the background paper, it was time to start building the rest of my layout. Next, I cut strips of pattern papers and layered them from the middle of my layout outward. Before adhering them down, I distressed the edges of my papers to add some dimension and give them a fall feel. I adhered them with my Memory Runner XL.

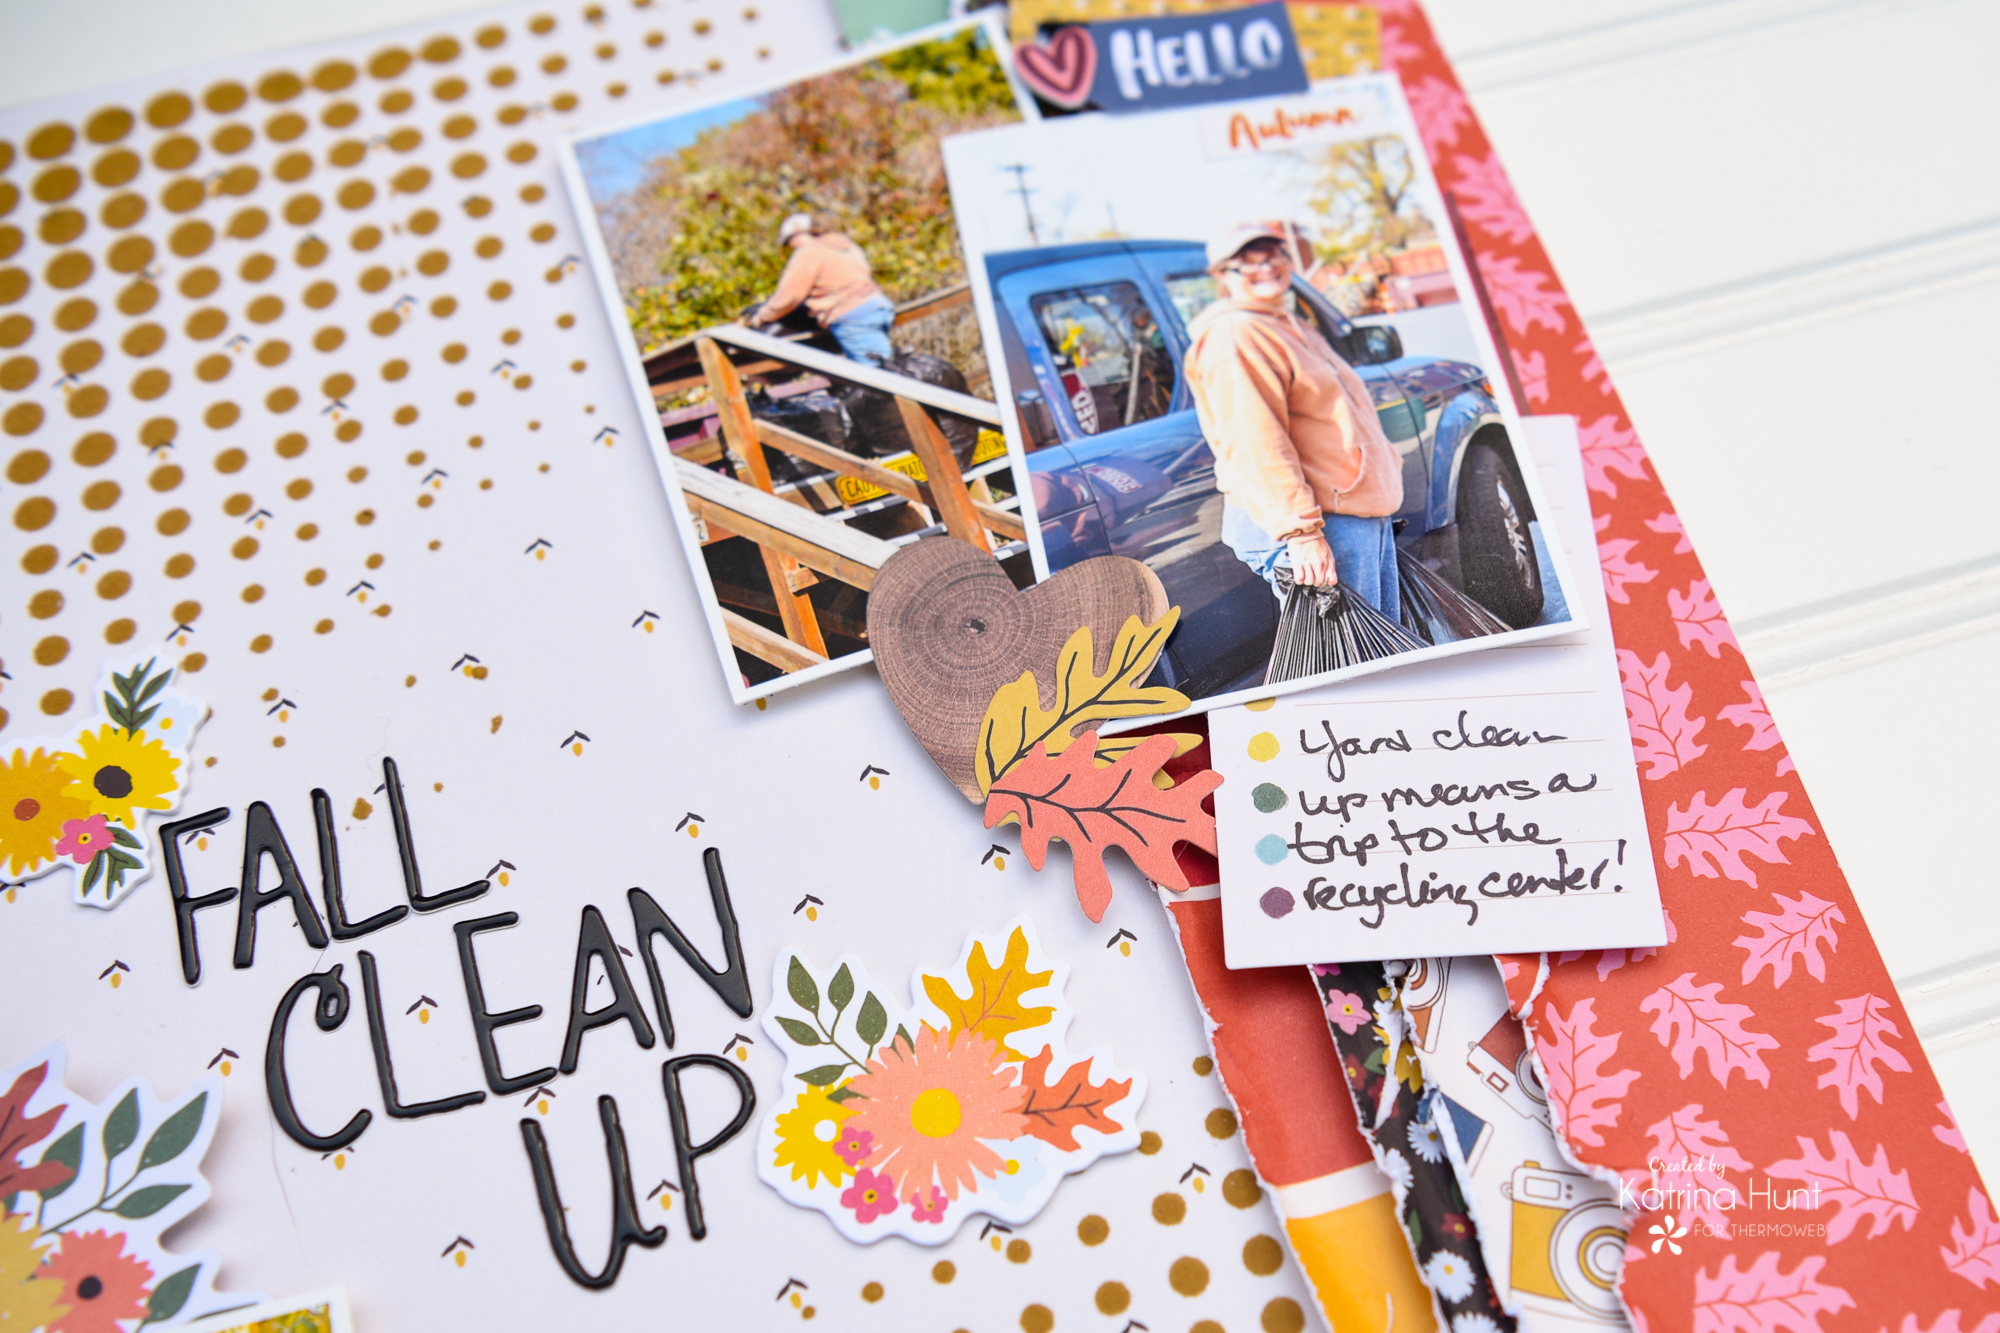
Once I had my strips placed, then the pictures and embellishments followed! I used the 3D Foam Squares and 3D Foam Tape Roll to adhere my embellishments and pictures.
Once I had everything completed, I had a layout finished from October 2014 about the fall clean-up in the yard! I love how the Tuscan Gold Flock just added the little extra to the layout that it needed!
Thanks for stopping by the blog today!!!! And yes, I am excited that fall is on the way!! Happy Crafting!
This post contains affiliate links. For more information, see our disclosure HERE.
Greta H
August 11, 2021 at 10:07 am (3 years ago)Thank you for the clear instructions on how to use the flocking. Love your layout!