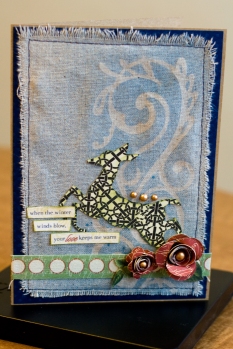
Take your scrapbooking to the next level by creating your own spray mask with Therm O Web Iron-On Vinyl. The process is surprisingly easy and the results are fabulous! Create custom flourishes, shapes, and even titles with this technique.
- Therm O Web Iron-On Vinyl
- Die cut machine or scissors
- Fabric or paper
- Press Cloth
- Iron
- Spray mist ink
1. Die cut the Iron-On Vinyl with the design of your choice. You can use digital cutters, manual cutters, or even scissors to create your design. When finished the shiny side of the Iron-On Vinyl is the side that will show on a project. Detailed and intricate designs will pose a challenge when peeling off the backing and placing on the project. Chunky and block designs will be easier to work with.
2. Peel off the Iron-On Vinyl backing paper and place the die cut shape onto your fabric or paper of choice in the desired spot. Cover with a press cloth or scrap cloth. Iron following the directions on the Iron-On Vinyl package.
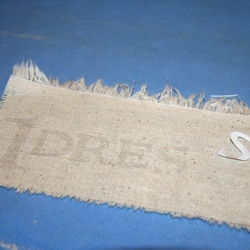
3. Spray the piece with a mist spray to highlight the Iron-On Vinyl design. Dab off any excess mist from the vinyl. Use on your project.
All the patterned papers used in the “1 Dress” layout are from Basic Grey’s Piccadilly Collection.
0 comment on Create A Mask With Iron On Vinyl
1Pingbacks & Trackbacks on Create A Mask With Iron On Vinyl
-
[…] Check out my recent Therm O Web blog post to see how I used Therm O Web Iron-On Vinyl to create my own spray masks: http://thermoweb.wordpress.com/2011/11/03/create-a-mask-with-iron-on-vinyl/ […]


Alice Golden
November 5, 2011 at 4:19 pm (14 years ago)would never have thought of that! how clever!
rebecca keppel
November 8, 2011 at 3:04 pm (14 years ago)what a great idea! thanks for the awesome tutorial!