


We hope you enjoyed last week and our projects made with Art Impressions Stamps and dies! We recommend you take a moment to visit their website and blog as their team is sharing projects made with our products!! Our team loved working with their fun stamps and dies and we have one more to share that we think you’re going to love!

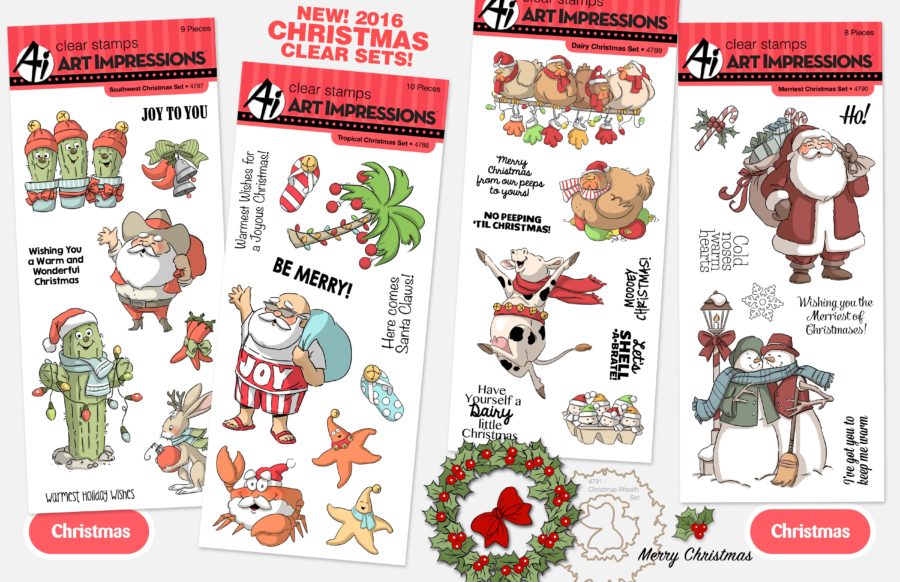
Today talented Designer Chrissie Tobas has a fun cards to share with you showcasing Art Impressions newest holiday stamps.
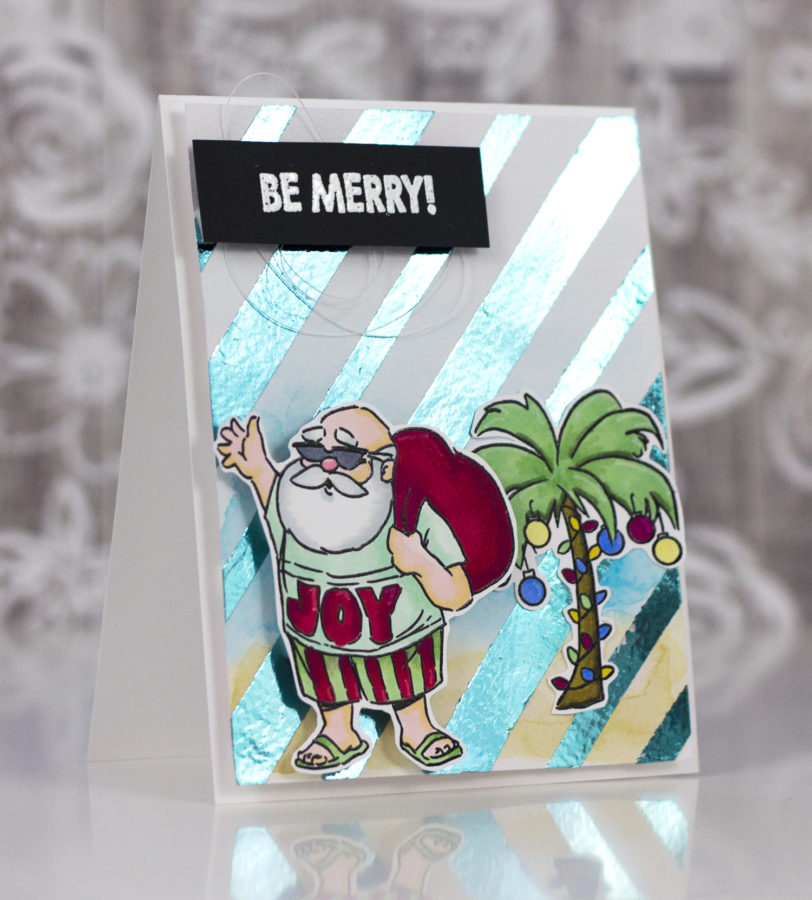
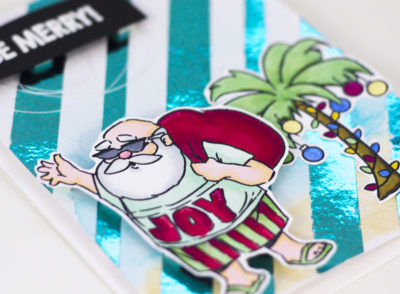
On Monday I shared a fun card showing you how to (simply) add foil to a boring old piece of watercolor cardstock to make a professional-looking background for your cards, tags or layouts!That’s it! Now, I will show you how I created the background again, for a second Christmas card, also using Art Impressions stamps, but with a totally different feel!
Therm O Web Supplies (Beachy Santa Card):
DECO FOIL™ TRANSFER SHEETS • AQUA
ICRAFT Easy-Tear ADHESIVE™ TAPE • 1/2 IN
ICRAFT Easy-Tear ADHESIVE™ TAPE • 1/4 IN
MEMORY TAPE RUNNER XL™
Other Supplies (Beachy Santa Card):
Art Impressions Tropical Christmas Stamp Set
Waterbrush
Watercolor Cardstock
Spectrum Noir Colorista Markers: Leaf Green, Forest Green, Lipstick, Rose Red, Pistachio, Pale Mint, Maple, Umber, Canary, Denim
Spectrum Noir Markers: LG4, LG5, FS6, FS9, CR4, IG2, IG5, Blender
Spectrum Aqua (watercolor) Markers: Kingfisher, Topaz, Desert
White Embossing Powder
Heat Gun
Versamark Ink
Black Cardstock
White Cardstock
Pentel Touch White Pen
White Thread
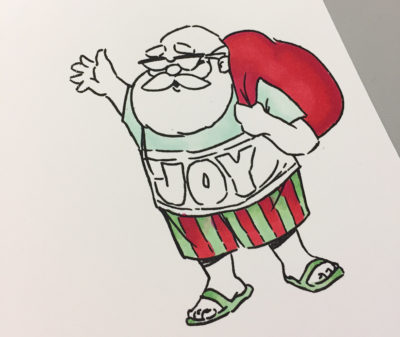
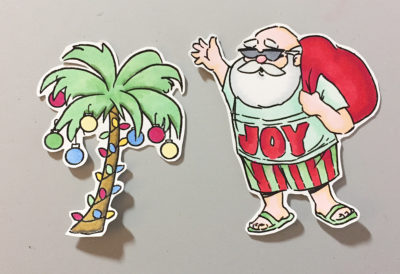
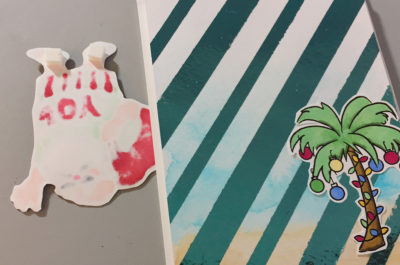
First, stamp the images onto white cardstock.
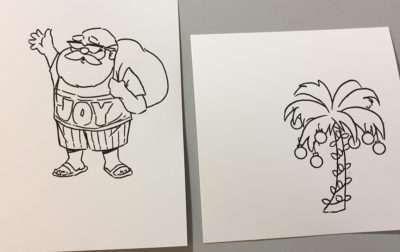
Color them in (using any preferred medium) and trim out.
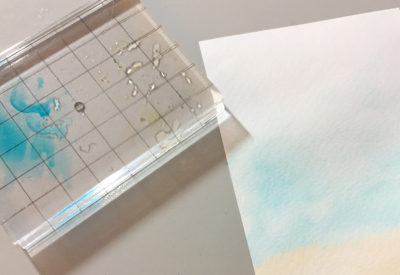
Trim a piece of watercolor cardstock for the background. Add color using Spectrum Aquas and a waterbrush.
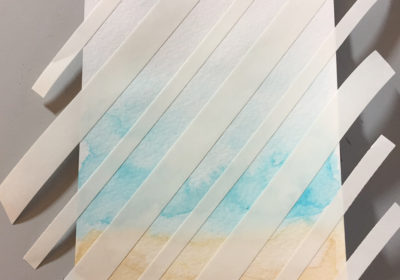
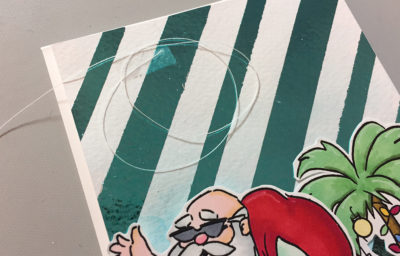
Add Easy Tear Tape again, diagonally. Vary the sizes as needed.
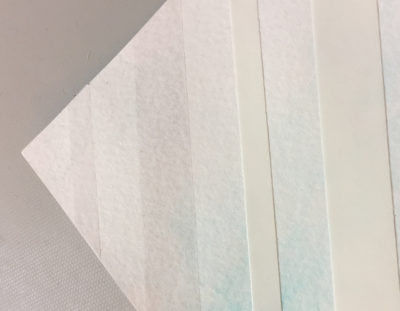
Gently peel off the release tape and press down (silver side) onto the Aqua DecoFoil.
Adhere panel to a standard card base. Add palm tree using a Tape Runner. Add the Santa using 3D Foam Squares.
Trim off a piece of white thread and add to the front of the card. Heat emboss the sentiment and add over the thread using 3D Foam Squares.
Simple right?! Remember, this is a quick and easy technique to use to create a custom background with stunning results!
We want to see your DecoFoil projects! Don’t forget to use hashtags #thermoweb and #decofoil!
BunnyD
October 31, 2016 at 8:59 am (7 years ago)This looks really cheerful and what a unique card for the holidays!
Helen Gullett
October 31, 2016 at 12:48 pm (7 years ago)One cool Santa! Awesomr background with DecoFoil!
patty williams
October 31, 2016 at 3:19 pm (7 years ago)I love all their stamps! So cute and some are so funny!
Cathi Thorpe
October 31, 2016 at 11:06 pm (7 years ago)I love be this idea! And learned something new on how to use foil!
amyrmccue
November 3, 2016 at 5:55 am (7 years ago)Wow! That foil looks so cool. I always forget you can use that tape with the foil!
Denise Bryant
November 4, 2016 at 10:52 am (7 years ago)Fun card! Love the Santa and the foil striped background!