Hello Therm O Web friends, Nicole here from Modern Handcraft and I am so happy to share my very first tutorial with you all. This tutorial will add a little Springtime to your decor – The Confetti Pillow!
This was inspired by the Pantone spring fashion trend report for 2014 that I have seen online all this week.  I tried my very best with what solids I had on hand to re-create the spring color choices – and what better way to celebrate the start of spring with some confetti!
Materials needed:
- Solids closely matching the above shades – cut a strip of each measuring 2″ x 17″
- Heat N Bond® lite if you are quilting -or- Heat N Bond® Non-Woven Lightweight Fusible if you are not quilting, cut a strip measuring 2″ x 17″ for each color used (10 strips total)
- Solid white fabric for pillow measuring 19″ x 41″ and two strips measuring 2.5″ x 19″
- Heat N Bond® Fusible Fleece measuring 19″ x 41″
- Straight pins, rotary blade, cutting mat, iron, old towel, coordinating thread,pencil or pen, a roll of thread or other template for your circles (under 2″ diameter)
Step 1:
- Cut fabric and Heat N Bond® into strips measuring 2″ x 17″
- Following the directions (Medium heat & no steam) iron your Heat N Bond® sticky side down onto your fabric. It helps to lay an old towel on your ironing board to keep any unwanted residue from ending up there.
- Taking your roll of thread of other template (under 2″) draw circles on the paper backing of the Heat N Bond®, closely together to get the most out of each strip.
- Cut out your circles or confetti as we will call it now.
Step 2:
- Back at your iron you will now take your white fabric piece measuring 19″ x 41″ and lay it on your ironing board. Remove the paper backing from your confetti and randomly place on your white cloth – iron down. Spread your confetti out lighter on top and heavier at the bottom.
- Once you are finished you can now iron your pillow cover onto your HeatnBond® Fusible Fleece – backing of pillow top to sticky side of fleece. Iron on as directions note.
Step 3:
- If you used the Heat N Bond® no sew you can skip this quilting step – I went with the lite and did a straight line stitch making a grid pattern. Free motion quilting loops or circles would look great on this as well!
- At your cutting mat – trim up your edges and square.
Step 5:
- You will now add binding to the short ends of your pillow, this will finish off the ends for your envelope back. Take your two strips of 2.5″ x 19″ fabric and iron in half lengthwise. Matching raw ends of binding to the raw edge of pillow pin in place. Stitch along edge with a 1/4″ seam allowance.
- Fold over the edge making sure to pass your stitch line and pin.
- Flip over and stitch along the side of your binding to secure in place.
Step 6:
- With your pillow facing right side up – fold over each side 11″ inches like shown. This will make your envelope back. You will be sewing this wrong side out.
- Pin along open sides – placing a pin at the points where your envelope fold will meet. Make sure to back stitch a few times at these points to secure the pillow opening.
- Sew along each side with a 1/4″ seam allowance. When finished a simple zig-zag stitch will seal your ends nicely.
- Turn your pillow inside out and poke out the corners with a chopstick or knitting needle and you are done!
Time to celebrate Spring!!!
I am a huge fan of the HeatnBond® products because of their versatility and ease of use. You can make this pillow your own by changing the sizes or shapes of your confetti to make it truly your own!
**Don’t miss another project from Nicole..this an adorable Easter Egg Wall Hanging on the Timeless Treasures Blog! It’s perfect for Easter!
Join us as we continue celebrating National Craft Month! That means savings for you and chances to win prizes from some of your favorite companies and your favorite products of ours all month long!
This is our final week of National Craft Month Sales! This week is the perfect time for your to try our Glitter Dust™ Sprays and our Sew-In Interfacings!!


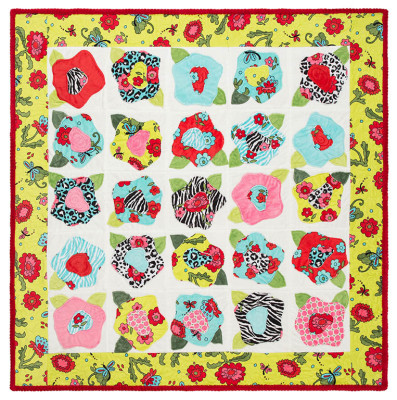
Just a reminder…we have this fantastic giveaway for this beautiful Floral Frenzy Cuddle Quilt Kit from our friends at Shannon Fabrics!

a Rafflecopter giveaway
Plus you can STILL enter to win the Oliso Iron and our Adhesive giveaway as well! Don’t miss out! a Rafflecopter giveawaya Rafflecopter giveawayAnd to finish off National Craft Month we have one more giveaway for our NEW HeatnBond® EZ Print Sheets and Pressing Paper! Enter to win an assortment of them! You’ll love them..that we know! a Rafflecopter giveaway
7 Comments on Create A Confetti Pillow with Fusible Fleece
1Pingbacks & Trackbacks on Create A Confetti Pillow with Fusible Fleece
-
[…] those fused circles without you having to actually stitch around the edges of all the circles. Go to Therm O Web to find her […]


Janis in ID
March 24, 2014 at 11:39 am (10 years ago)I don’t know for sure if I have ever used your fusible interfacings or other products. I’ll have to keep an eye out for them at the store.
Thanks for the chance to win some wonderful products this month!!!
<3 J
jwoolbright at gmail dot com
HerPeacefulGarden.blogspot.com
Sarah
March 24, 2014 at 10:40 pm (10 years ago)I have never tried it, but it looks fantastic! thanks for the giveaway.
[email protected]
Heather Thompson
March 25, 2014 at 3:24 pm (10 years ago)I think I need to get my sewing machine out and try this one. Very very cute!!
Lori Morton
March 26, 2014 at 10:14 pm (10 years ago)I have only used Heat N Bond Lite before…
Lori Morton
March 26, 2014 at 10:22 pm (10 years ago)Not for sure, but don’ think I have used any icraft or fusibles yet…
Laurie
March 27, 2014 at 9:35 am (10 years ago)Whever I have a project that requires using fusible web the ONLY product to use, as far as I’m concerned is Heatnbond – therm0web. It is a consistently excellent product. Love it – and would love to win!